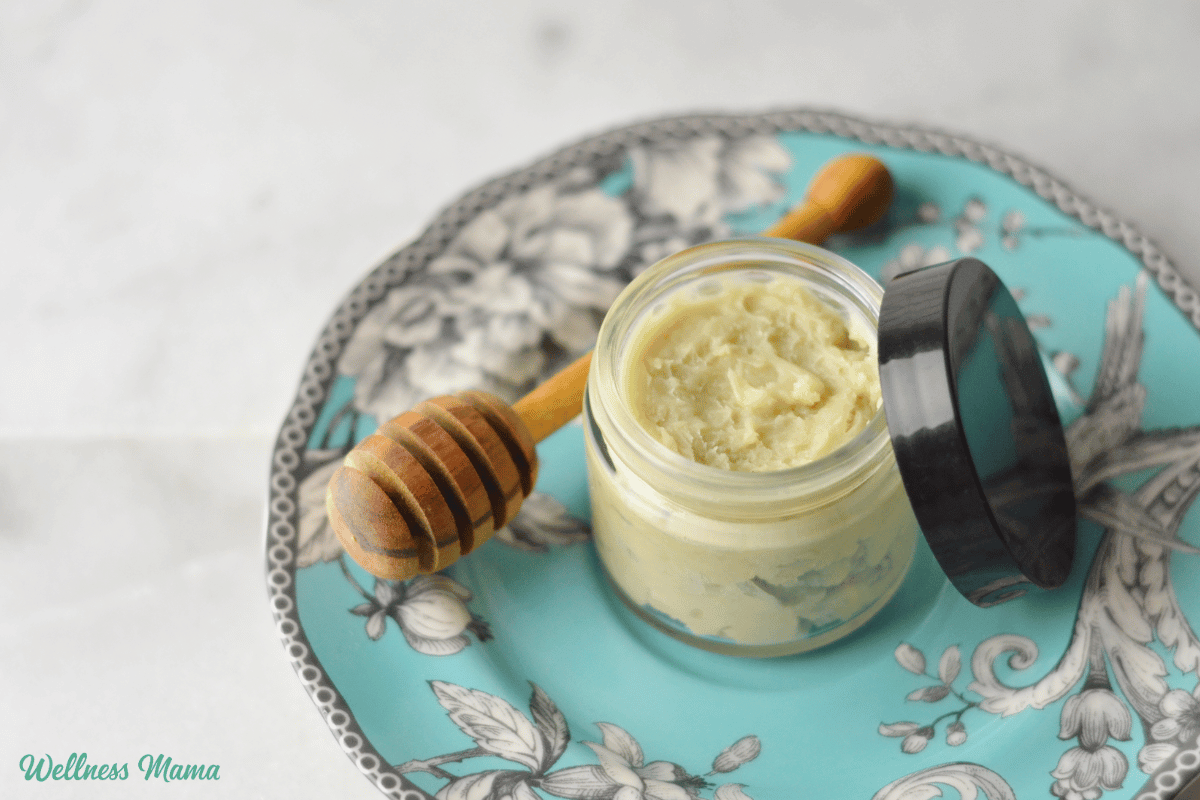
honey tallow balm

Clarifying Honey Tallow Balm

I’ve been researching and using tallow more in recent years, and it turns out so have many of you. My whipped tallow balm is a fan favorite because it feels so silky on skin. One of the questions I get asked most often though is how to add honey to the recipe. This honey tallow balm does just that. 

I’ve also added other ingredients that are great for clearing up skin and diminishing blemishes. 

When it comes to skincare, I’ve found that sometimes the simplest ingredients are the most effective. While there are countless products designed to target blemishes and support clearer skin, many of them can be harsh, drying, or filled with ingredients I’d rather not use. Traditional ingredients that have been used for generations though are worth reaching for. 

Honey Tallow Balm Ingredients

This honey tallow balm combines several skin-loving ingredients into one simple formula. It nourishes the skin barrier while also supporting a clearer complexion. Instead of stripping skin or trying to force it into compliance, this balm focuses on giving skin what it needs. Tallow honey balm not only moisturizes, but gives skin beneficial compounds so it can function as designed. 

Tallow

One of the star ingredients in this balm is grass-fed beef tallow. Tallow has a unique fatty acid profile that closely resembles the natural oils in our skin. This means it sinks right into skin and helps restore our natural moisture barrier. 

Raw Honey

Another favorite ingredient that has a long history in natural skincare. Honey is rich in beneficial compounds that keep skin looking healthy and smooth. It also acts as a humectant, attracting and retaining moisture. This is especially helpful for skin that feels irritated, dry, or out of balance. I also love raw honey for acne and blemishes since it’s naturally antimicrobial. 

Beeswax

Beeswax helps to thicken the balm and creates a breathable protective layer on the skin. Some creams use petroleum jelly as an occlusive to trap moisture. These don’t feed skin though and can feel heavy or greasy. Rather than sealing the skin completely, beeswax helps lock in moisture while still allowing the skin to breathe.

Tamanu Oil

In my classic tallow balm recipe I use olive oil as the carrier oil. It’s full of healthy fats and anti-inflammatory Omega-3s. In this version though I opted for tamanu oil.

Skincare experts note how tamanu helps support skin healing and recovery. It’s often used in products for improving the appearance of blemished and damaged skin. Research shows it can help reduce redness and inflammation while improving marks left from acne damage. It’s one of my favorite oils to use in skincare for damaged or blemish-prone skin.

Essential Oils

These are optional, but really helpful to add more skin benefits. Plus they can add a nice scent. I like using tea tree essential oil for blemish or acne prone skin. It’s an effective but gentle anti-fungal and is well known for it’s skin cleansing properties. 

Sweet or wild orange is another favorite. It has a bright, uplifting scent and can also help improve skin’s appearance. Lavender, geranium, frankincense, and cedarwood are also great skin-friendly options. 

Benefits of Honey Tallow Balm

Anything that can address several skincare concerns at once is a win in my book. Instead of focusing solely on blemishes, honey tallow balm supports overall skin health.

Many people unknowingly damage their skin barrier through over-cleansing, harsh treatments, or excessive exfoliation. When the skin barrier becomes compromised, it can sometimes lead to more irritation, dryness, and breakouts. Ingredients like tallow, honey, and tamanu oil help nourish and support the skin while maintaining moisture balance.

This balm can help soothe redness, boost healing from blemishes, and keep skin feeling soft and moisturized. Because it contains nutrient-rich fats, it’s also useful for skin that feels rough, dry, or irritated. Overall, honey tallow balm helps the skin to balance out.

How to Use Honey Tallow Balm

A little goes a long way with this balm. I like to apply a small amount to clean skin and rub a thin layer over my face. If you’re using it as part of your skincare routine, then do it after cleansing and toning. Your body heat softens the balm so it easily glides over skin. 

I use this on my face to moisturize or other areas that need a little extra love. You can also use it as a spot treatment for blemishes and red skin. If your skin feels greasy or looks oily afterwards, then you used too much! 

How To Render Tallow and FAQ

I explain how to render tallow so you don’t smell like a walking hamburger here. I also cover a lot of tallow balm making questions and tips in that post. Be sure to check it out for more info.

Honey Tallow Balm

This simple honey tallow balm uses clean ingredients for a nourishing and hydrating lotion. Helps skin feel smoother and reduces blemishes.

Prep Time3 minutes

Active Time13 minutes

Cooling Time15 minutes

Total Time31 minutes

Yield: 5 ounces

Author: Katie Wells

  • Add tallow and beeswax to the top of a double boiler and melt over low heat.

  • Once it’s completely liquid add the tamanu or other carrier oil, essential oils, and honey and stir.

  • Pour the tallow balm into a mixing bowl and let it cool in the fridge until it’s hardened some, but not rock hard.

  • Use a mixer to cream the tallow balm until it’s smoothed and whipped looking.

  • Transfer the tallow balm into glass jars to store.

  • Store the honey tallow balm in a cool, dry place.
  • The honey may want to separate as the product cools. Stirring as it cools and mixing well helps prevent this. 

A Simple Approach to Skincare

Healthy skincare often comes down to the simple things and clean ingredients. Supporting the skin barrier and using quality ingredients goes a long way toward helping skin look and feel its best.

This honey tallow balm is one of those simple recipes that combines traditional ingredients with modern skincare insights. It’s easy to make, uses just a handful of ingredients, and can be a great addition to a natural skincare routine for anyone looking to support clearer, healthier-looking skin.

It’s clean, easy, and has earned a permanent spot on my countertop. 

Have you used tallow before? Leave a comment and share below!
Tags: , , ,
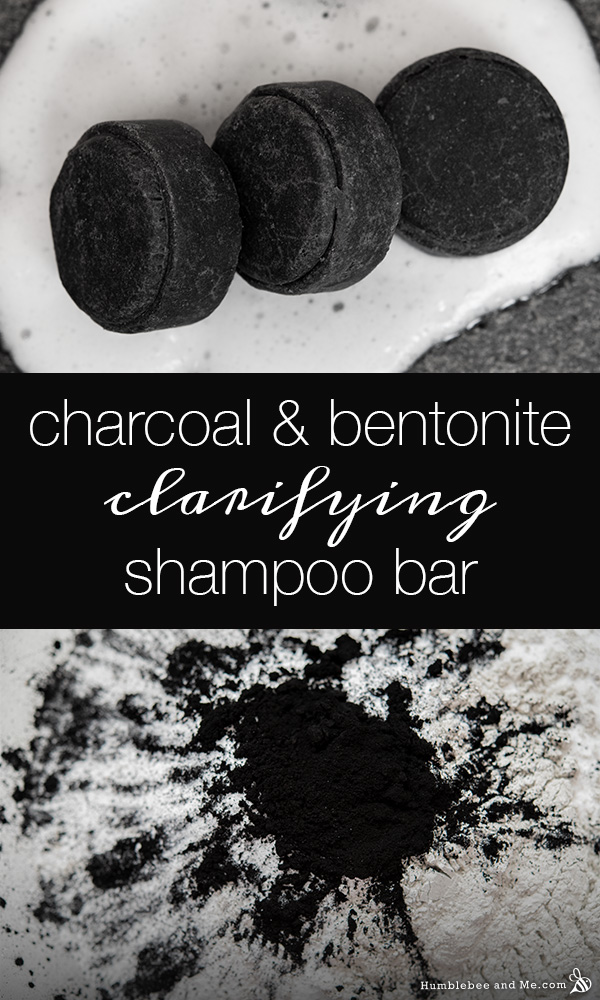
Charcoal & Bentonite Clarifying Shampoo Bar

Charcoal & Bentonite Clarifying Shampoo Bar

Today I’m sharing a formulation for some intriguingly dark, rock-hard shampoo bars that star two natural ingredients that are long-time favourites in the DIY space: activated charcoal and bentonite clay. I’ve had tons of requests to use these ingredients in a shampoo bar over the years, and since both are super popular in detox-type DIYs, I thought a clarifying sulphate-free shampoo bar was a perfect fit! These bars are fast & easy to make, don’t require any fancy equipment, and make amazing gifts.

Want to watch this project instead of read it?

Watch Now

What is a “clarifying” shampoo?

Clarifying shampoos are designed to “reset” your hair, removing product build up and excess oil. If your hair is feeling limp or looking dull, it could be time for a clarifying wash. I try to clarify regularly (every 3-ish weeks), or whenever my waves just aren’t styling and cooperating the way they usually do.

In order to “reset” the hair, clarifying shampoos need to be really effective cleansers, so they tend to be stronger than “regular” shampoos and shouldn’t be used for every wash. It’s common to find stronger surfactants in them, like sulphates, as well as lower levels of re-fatting ingredients.

When formulating a clarifying shampoo, the challenge is in making sure it does a great job of cleansing without leaving the hair stripped and feeling like straw—and I find this bar does that really well!

The dry phase

Most of the cleansing in this bar comes from a blend of two of my favourite sulphate-free surfactants; this pair creates gorgeous dense, velvety lather, that cleanses effectively, but gently.

The other two ingredients in the dry phase work with those gentle surfactants to really make this bar clarifying: bentonite clay and activated charcoal. If you’ve made shampoo bars with me before you’ll know I’ve used SCI and SLSa in lots of “every day” type shampoo bar formulations—the bentonite and charcoal make a big difference in the clarifying power of this formulation, even at low levels.

Bentonite clay

Bentonite is a really unique clay; compared to kaolin and French clays, it’s much heavier, and when combined with water it turns into more of a gel than a creamy paste. It’s also very absorbent, explaining its cleansing-boosting powers.

Learn more: Bentonite Clay and DIY Beauty, an interview with Ian Hutcheon, Professor Emeritus in Geochemistry

Activated charcoal is what gives these bars their inky colour. What make activated charcoal “activated” (and not just smashed up drawing charcoal) is its surface area—it has a TON of it! That’s what make it super duper absorbent. In fact, it’s so absorbent that it’s used to refine raw shea butter!

Learn more: Activated Charcoal in Skincare: The Science from Lab Muffin

Now, there isn’t evidence that activated charcoal does anything super special in skincare or haircare products—Lab Muffin explains it could theoretically work, but it’s not proven. Evidence or not, though, brands like Living Proof, K18, and Briogeo all sell highly rated (and expensive!) clarifying shampoos that include activated charcoal, and I do think it makes a difference in this formulation.

The wet phase

The wet phase is a blend of ingredients designed to prevent that overly clean, straw-hair feel as well as get the pH of these bars to land in a hair-friendly zone.

Cocamidopropyl Betaine, a gentle amphoteric surfactant, helps boost lather and make the overall bar milder. Vegetable glycerin and hydrolyzed rice protein counter the drying effects of cleansing, and the protein also helps structure the hair.

Jojoba oil provides much needed re-fatting, which is essential to ensuring your hair doesn’t feel disgusting after shampooing. This is more oil than I thought I’d need in this bar, but after testing it I didn’t want to go any lower as my hair was very clean and I didn’t want to stray into “straw” territory. If you don’t have jojoba oil you can definitely use a different liquid oil your hair loves.

To preserve the bars I’m using Geogard® ECT; an all-natural preservative that’s also very acidic. That acidity works in our favour here as bentonite clay is quite basic, so we need to pull the pH of the bars down to a good-for-the-hair mildly acidic level. As I developed this formulation I found the preservative alone wasn’t enough to get the pH where it needed to be, so I also included some citric acid (it dissolves easily in all the water in the Cocamidopropyl Betaine).

And lastly, to scent the bars, some fragrance! You’ve got room to play on the scent front. What do you think a lump of coal should smell like? Surely not like actual coal, ha. Something else that’s black—like anise/liquorice? Vanilla and anise? Something warm and deep? I’m using Cheirosa 40 from Bulk Apothecary—their version of the Sol de Janeiro scent of the same name. It’s not the famous Sol de Janeiro “bum bum” scent, but if you love that one, I’m pretty confident you’ll love this one, too. It’s similarly deep, rich, sweet, and intoxicating. Swoon!

Make ’em

Turning these ingredients into bars is simple; just stir together the powders, add the wet ingredients, and then mix and knead until you have a smooth, uniform dough. Shape that dough into bars, leave them to dry for a few days, and you’re off to the races!

I used a small hand press from YellowBee to shape three of the bars, and then leaned into the “lumps of coal” theme that inspired this formulation and shaped the last two into coal-y lumps that I’ll drop into some stockings

Want to watch this project instead of read it?

Watch Now

Charcoal & Bentonite Clarifying Shampoo Bar

Dry phase
160g | 40% Sodium Lauryl Sulfoacetate (SLSa) (USA / Canada)
104g | 26% Sodium Cocoyl Isethionate (SCI) (USA / Canada)
20g | 5% Bentonite clay
2g | 0.5% Activated charcoal

Wet phase
4g | 1% Geogard® ECT (USA / Canada / UK / Germany / Aus / NZ)
52.4g | 13.1% Cocamidopropyl Betaine (USA / Canada)
0.4g | 0.1% citric acid (USA / Canada)
8g | 2% vegetable glycerine (USA / Canada)
3.2g | 0.8% fragrance
8g | 2% hydrolyzed rice protein (USA / Canada)
38g | 9.5% jojoba oil (USA / Canada)

Put on your dust mask (USA / Canada) and weigh the dry phase into a bowl. Stir until uniform.

Add the wet phase to the dry phase. Put on a pair of nitrile gloves and blend thoroughly with your hands. Once the mixture is uniform, you’ll be left with a stiff, easily-mouldable dough.

If your dough is too sticky, you’ll need to add more clay. If your dough is too dry, you’ll need to add a little bit more distilled water.

Now it’s time to shape or press the bar! I used a small hand press from YellowBee, lining the top and bottom with rounds of parchment paper. Please watch the video to see this in action.

You can also use a powered press like The Bath Bomb Press, a hard-sided cavity mould (a measuring cup works nicely!), or simply hand shape the bars.

Carefully un-mold the bars, tidy them up if needed, and leave them to dry for at least 3–5 days before using.

To use, massage the bar into soaking wet hair to work up a rich lather, work through the entire length of your hair, and rinse thoroughly. Follow up with a rich hair conditioner or rinse-out mask to replenish your freshly clarified hair. Enjoy!

When made as written, the pH of these shampoo bars comes out to around 5, which is great.

Shelf Life & Storage

Because these shampoo bars will regularly come into contact with water, I recommend including a broad-spectrum preservative to ward off microbial growth. These bars should easily last 6 months in the shower; I’ve never had a shampoo bar spoil on me, and I’ve had several live in my shower for over a year.

Substitutions

As always, be aware that making substitutions will change the final product. While these swaps won’t break the formulation, you will get a different final product than I did.

  • As I’ve provided this formulation in percentages as well as grams you can easily calculate it to any size using a simple spreadsheet as I’ve explained in this post. As written in grams, this formulation will make 400g. You can divide this into as many bars as you want; I made five 80g bars.
  • To learn more about the ingredients used in this formulation, including why they’re included and what you can substitute them with, please visit the Humblebee & Me Encyclopedia. It doesn’t have everything in it yet, but there’s lots of good information there! If I have not given a specific substitution suggestion in this list please look up the ingredient in the encyclopedia before asking.
  • The wet/dry balance of this formula is really important; if you change anything (especially any of the three ingredients in the dry phase) you may need to re-develop the formulation to get a workable dough.
  • If you change any of the ingredients—though especially the surfactants—this will change the pH of the bar. This means you should start with a 20g batch. Test the pH, see where it lands, incorporate more (or less) citric acid, and make a new 20g batch. Once the pH is right you can scale the formulation up and make a larger batch.
  • Do not substitute the bentonite clay or activated charcoal. If you don’t want to use them, follow one of the many shampoo bar formulations I’ve shared that do not use these ingredients.
  • If you’d like to learn more about the surfactants used and compare them to ones you might already have so you can make substitutions, check out this page and read this FAQ.
  • You can substitute the jojoba oil with a different liquid oil your hair loves.
  • You can try a different liquid amphoteric surfactant or a non-ionic surfactant instead of Cocamidopropyl Betaine.
  • If you’re like to use a different preservative, please review this FAQ and this chart. This bar is pretty easy to preserve, so I’d feel pretty comfortable using a different preservative assuming it doesn’t have any direct conflicts with the formulation.
  • If you’d like to incorporate an essential oil, please read this.
  • You can use a different fragrance oil or essential oil if you want to, just be sure its usage rate for IFRA category 7A formulations is 0.8% (the amount used in this formulation) or higher.
  • You can use a different acid to adjust the pH, but this will require re-formulation.
  • You can use a different liquid hydrolyzed protein, like Hydrolyzed Oat Protein or Hydrolyzed Quinoa Protein.
Tags: , , , ,
Best oLive
Privacy Overview

This website uses cookies so that we can provide you with the best user experience possible. Cookie information is stored in your browser and performs functions such as recognising you when you return to our website and helping our team to understand which sections of the website you find most interesting and useful.
