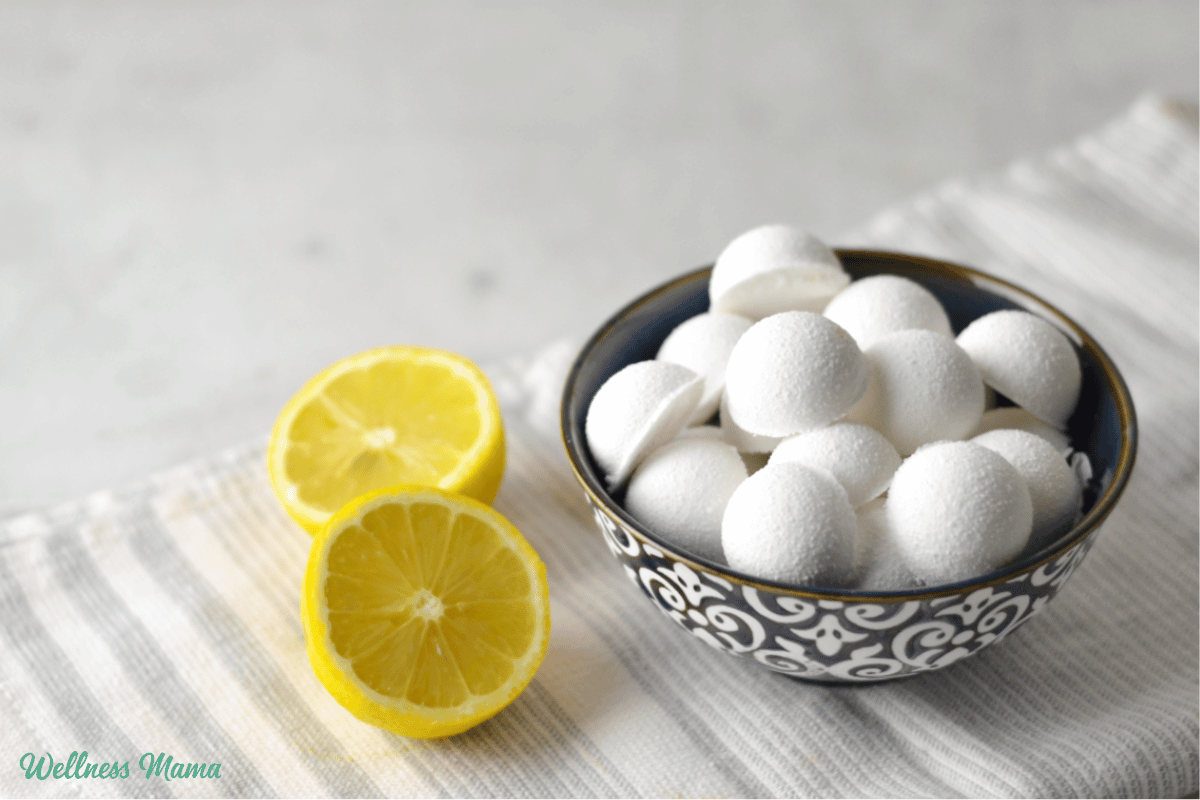
fizzy toilet tablets

Natural Toilet Bowl Cleaner Tablets

I accidentally discovered this recipe for DIY toilet bowl cleaner tablets thanks to one of my children. Anyone else have kids who throw everything in the toilet?? And while it might have been unintentional, this happy accident has saved me a whole lot of scrubbing over the years. 

How I (Accidentally) Discovered DIY Toilet Cleaning Tablets

Once upon a time, I made a giant batch of my regular sea salt bath fizzies and postpartum bath fizzies. I had some friends expecting babies and wanted to give them as gifts.

I kept a few of the broken ones when I removed them from the molds and was planning to use them myself. I had them in a bag by my bathtub and my then one year old got into them (in true one-year old fashion). She was going through a phase of putting everything in the toilet, and these were no exception.

My first reaction was to stifle my annoyance for yet another thing being thrown in the toilet. And then I was angry that I wouldn’t get to use the bath fizzies myself.

I didn’t want to flush the toilet until they finished fizzing since I wasn’t sure that would be good for the pipes. As I stood there watching them fizz and mourning the loss of my relaxing bath, I noticed that the toilet seemed to be getting cleaner as they fizzed.

I used the toilet brush to make sure they had all dissolved and when I flushed the toilet, I was shocked how clean it was. I realized that the bath fizzies had a lot of ingredients that were naturally detoxing, and that these ingredients also worked great for detoxing and cleaning toilettes.

An Effective Toilet Bowl Cleaner

I played with the recipe to make it a little more potent since it doesn’t need to be gentle enough for skin. The result is an inexpensive, easy-to-make, highly effective toilet cleaning tablet. The best part? The little kids loved using these because they’re fun, so my toilets were cleaned frequently. 

These toilet bowl cleaner tablets freshen the bathroom and leave the toilet sparkling. I store them in an air-tight glass jar in the bathroom and use them as needed. I’ve found that if stored correctly, they keep for months.

Baking soda is great for gently scrubbing messes and deodorizing. Citric acid is naturally found in citrus fruits and helps dissolve mineral deposits. Together, they make an effective, natural toilet bowl cleaner. 

And while I don’t make homemade cleaners as much anymore now that I’ve found healthy versions, I still enjoy pulling them out on occasion. 

Natural Toilet Cleaning

If you’re still using the “call poison control if you drink, inhale or look at this wrong” type cleaners, try these instead. All of the ingredients are food grade and can technically be used in cooking. Though I definitely wouldn’t eat them because of the concentration of baking soda and citric acid.

I give some more toilet (and bathroom) cleaning options in this post. And if you don’t feel like DIYing it, there are some really good pre-made options now. One of my favorite natural cleaners, Branch Basics, also works for toilet bowls. And you can add some of their Oxygen Boost powder if you need something a little stronger. 

Note: I haven’t tried flushing the toilet before this has fully dissolved, but I wouldn’t suggest trying it. I’m thinking that kind of pressure in pipes isn’t the best idea! The toilet bowl cleaner tablet also needs a little time to work and clean the bowl. 

These are not the kind of toilet tablets that go in the toilet tank, in case you were wondering. They go directly into the bowl to clean as needed.

Natural Toilet Bowl Cleaner Tablets Recipe

Make natural toilet cleaner using food grade ingredients such as baking soda, citric acid, and essential oils.

Prep Time15 minutes

Drying Time8 hours

Total Time8 hours 15 minutes

Yield: 40 toilet tablets

Author: Katie Wells

  • In a glass bowl, mix together the baking soda and citric acid in a glass bowl. I suggest wearing a mask and some latex gloves for this to protect your skin and eyes.

  • Slowly mist the dry powder with water, mixing as you go. You want to barely wet the powder to get it to stick together in the mold. I used a small, fine mist spray bottle and about 8 sprays. Too much will cause fizzing.

  • Add the essential oils and continue mixing.

  • Using a 1 teaspoon measure (or larger), scoop out spoonfuls and place them on a piece of parchment paper until dry. You could also use a silicone mold for this step.

  • Let the toilet tablets dry overnight and carefully place in an airtight container to use as needed.

  • I haven’t tried flushing the toilet before this has fully dissolved, but I would not suggest trying it (I’m thinking that kind of pressure in pipes isn’t the best idea!)
  • I usually use a 1 teaspoon measuring spoon for these, but I’ve also used a 1/2 Tablespoon. You’ll get fewer toilet tablets, but stronger cleaning power with a bigger scoop. 

Tips For Making Toilet Bowl Cleaner Tablets

The number one mistake people make with bath bombs and similar recipes like this is adding too much water. The mixture should feel like damp sand when you squish it together. Too much water will cause the citric acid to prematurely react and fizz.  

I use water, but some people use a mix of alcohol and water. The alcohol adds some moisture to help the powders stick together, without making it too wet. If it’s a really humid day or you live in an area with more moist air it can also affect the recipe.  

If your toilet bowl tablets break apart after drying, the pieces still work for cleaning!

More Cleaning Recipes

Want some more natural cleaner recipes? Here are some DIY’s I’ve used for the bathroom over the years.

What do you use to clean your bathroom? Leave a comment and share below!
Tags: , , , ,
spring garden

Spring Garden Checklist For An Easier Garden Season

Every spring one of the things I look forward to most is getting back in the garden and yard. Living in a warmer climate I’m able to do a lot outside, but there are certain tasks that need done in the spring. Here’s what’s on my garden to-do list this spring to prep everything for the summer and beyond. 

My gardening approach may look different than someone in a colder climate. Wherever you live though, there are certain gardening tasks that are helpful to do before warm weather planting. The yard may need cleaning up, garden equipment replaced, and soil prep done. 

Spring Gardening Planning

I’ve had a garden for years and our family has grown a wide variety of vegetables. I’m also an avid beekeeper and we’ve more recently taken on ducks and chickens. Then there are the herbs and flowers scattered across the yard. 

While what I’ve grown has certainly changed over the years, you’ll always find me growing something. 

What’s the first step to gardening? Planning.  

You can find your USDA plant hardiness zone here. It will tell you the last and first frost dates. If you live in a really warm climate (like me) it’s possible to have multiple growing seasons throughout the year. Someone who lives in more of a true four seasons location typically will have spring through fall available for gardening. Really cold climates just have a few months in summer. 

Whatever climate you live in, be sure to check your last frost date and work backwards from there. 

A Garden Planner

A garden journal or planner is really helpful. This can be an app on your phone, a computer program, or old-fashioned pencil and paper. Go over the garden plans and notes from last year. What worked, what didn’t? What do you want to change or add? Decide what you’re planting and where in the garden. 

It can be fun to plan big, but also keep in mind what will actually work in your area and what you’re realistically able to do. It doesn’t make sense to grow 20 tomato plants if you only have 3 garden beds! Research how much space each plant needs so it has adequate room to grow. This is my favorite garden planning app.

This is a good way to plan for crop rotation to prevent soil depletion. I also do companion planting when I garden to boost plant and soil health. Once you know which plants you’re growing, mark down when to start the seeds and transplant outside. 

Seed Starting

Once you know what you want to plant where (and when), it’s time to start the seeds. Some plants need fully warm weather to survive and need a late spring or early summer planting, depending on your area. Other plants tolerate cool weather well, like peas, lettuce, spinach, and root veggies. 

Some plants can be direct seeded in the soil, like lettuce and carrots. Others work best if they’re started indoors and then transplanted. You can find my detailed seed starting guide here. 

Soil Testing

This step isn’t always necessary, but it can be very helpful. Soil testing lets you know what nutrients are low or missing so amendments can be made. Local university extension offices are usually a good resource for this. 

Soil testing looks at the ratios of sand, silt, clay, and the basic soil makeup. It will also show the pH and available nutrient levels. Certain plants grow best in certain soil pH levels, so it can be the difference between having a thriving garden and little or no growth. 

Crop rotation, companion planting, and regenerative practices (like not doing large areas of mono-crops) help with this. 

Add Compost

Once you know what’s going on under the surface, spring is a good time to add in compost. I like to add an extra boost of nutrients via compost as I’m planting my veggies, herbs, and flowers. However, you can also help improve the overall soil quality by amending with compost in the spring. 

In early spring spread a layer of compost about 2-4 inches thick over the area. If the soil is clay rich and hard, then break it up first. Next, till and work the compost into the soil. You can do this with a hoe, garden rake, or even your hands if it’s a smaller area. Learn how to start composting here and how to make compost tea here. 

Snip, Snip, Trim

If you didn’t already trim bushes, trees, and plants in the fall, now is the time. I like to prune bushes, trees, and anything else I need to.This gets rid of the dead waste so the plant can focus on new growth. 

Here are things that can be pruned in spring:

  • Dead or damaged branches
  • Flowering shrubs (just the tops, before new growth starts)
  • Overgrown shrubs and hedges

Trim dead growth from last year on perennials. Clean out old leaves, twigs, and dead plant material and compost them. Avoid pruning or trimming spring flowering plants like forsythia or lavender. 

Organize and tidy up the garden shed and potting bench. Restock any supplies that you’re going to need. Where are your watering can, garden hose, and gardening tools? Are they where you need them once you start gardening? Clean, sharpen, and oil any tools as needed. Get rid of and replace as needed. 

This is another area where it can be tempting to go out and buy all of the things. Ask yourself what you actually use and what kind of garden you have. If you only have a few raised beds on your back porch, you don’t need a large soil tiller.

If you have a rain barrel (or want one!), then this can be set up in late spring. Be sure to clean out the gutters and make sure the downspout and any necessary attachments are in working order.  

Weed and Mulch

Many of the plants people call weeds are actually beneficial and medicinal plants, like dandelion and plantain. However, I also don’t want a bed full of dandelions taking up the space where I planted other veggies. Spring is the perfect time to get a headstart on the weeds. Just be sure to save plenty in the yard for the pollinators!

I like to clear out the garden beds when the soil is damp and roots are easy to pull out. They’re much easier to remove in their early growing stages than later on. They’re also less likely to go to seed and make more weeds. 

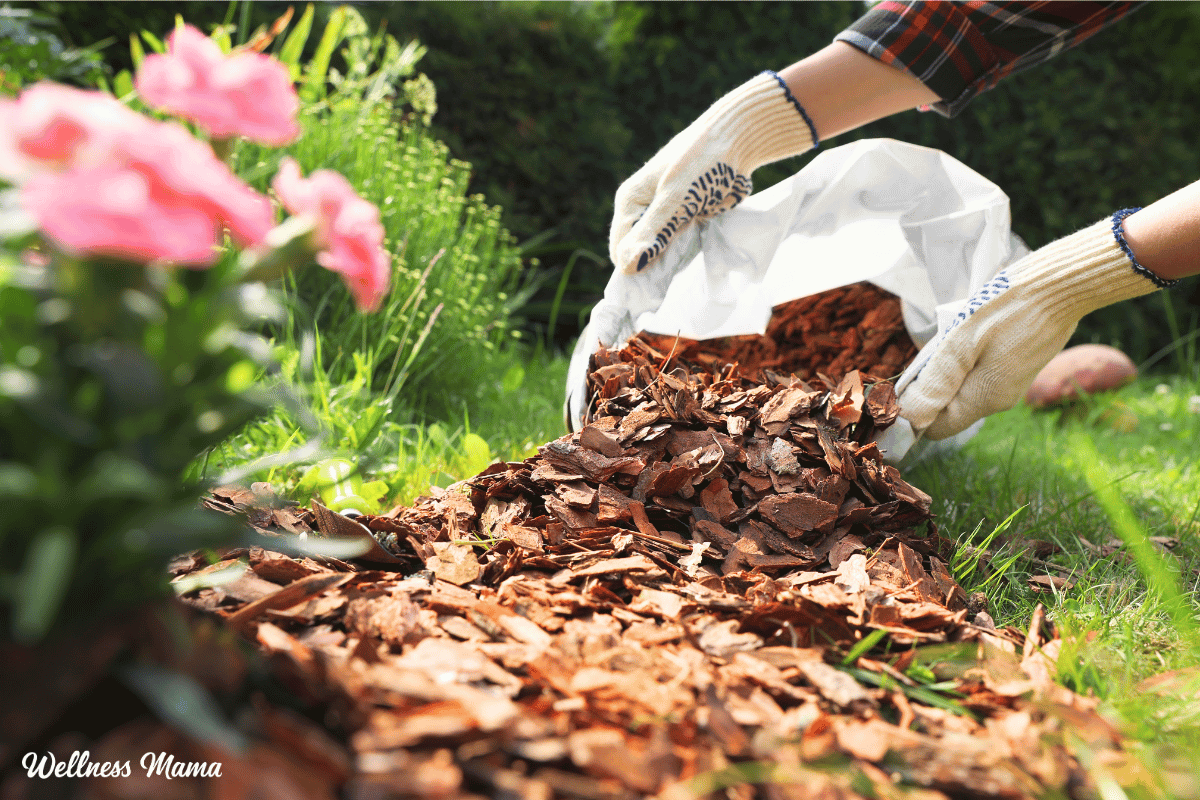
You can cover the beds with a thick layer of mulch to deter future weed growth. However, it can be easier to plant smaller transplants first, then mulch around them. 

Hold Up on Cleanup

It’s best to wait until warmer weather to clean up leaf litter and do yard cleanup tasks. Pollinators and beneficial insects rely on their protection during the winter and into spring. According to the Xerces Society for Invertebrate Conservation:

Meanwhile, last year’s leaf litter is still providing protection for both plants and invertebrates against late-season frosts. And butterflies’ chrysalides still cling to dried stems and twigs, waiting for the right time to emerge as adults. – Xerces Society

The perfect time to start yard and garden bed cleanup depends on your area. Ideally it’s late spring or even early summer.

Maintaining Garden Areas

It’s not just the dirt and garden beds that need some loving care. Check on your garden pathways and areas surrounding the beds for any maintenance needs. 

Are there any pavers that are cracked/broken and need to be replaced? Do any weeds need to be removed from walkways? Are there any spots that need replenished with more mulch or gravel? 

If you have raised garden beds, pots, or other planters, check for any repairs that need to be made to these. If you want to extend the growing season, you can also add cold frames or row covers to insulate the plants. 

Perennials and Cuttings

Spring is the ideal time to divide perennials and replant as needed. When a flowering perennial has grown in the same place for a while its growth can stagnate or even stop. Splitting it into several plants during early spring growth not only strengthens the plants, but can increase the flowers. 

Bare root cuttings, like elderberry, are also good to start now. Here’s a guide for gathering elderberry cuttings to plant for summer. If you’re planting any trees, fruit trees, bushes, or shrubs, once the ground is no longer frozen in spring is a good time to do it. 

Helping the Garden Friends

A garden wouldn’t be what it is without friendly bugs and pollinators. While many agriculturalists wage war with the natural world, bugs, birds, and bees are essential to a healthy eco-system. 

I’ve already mentioned I have beehives in the backyard, but there are plenty of ways to support pollinators and other garden helpers. Try making a simple bee hotel. Take stock of any bird houses or bird feeders. Dust them off and pull them out of the garage, and see what needs to be replaced or repaired. 

Hang and refill bird feeders, and clean out and refill the bird bath. Check your bat house if you have one, and if not, here’s why I recommend them! You can even plan and plant a butterfly garden. 

Preparing For a Spring Garden

I know I mentioned a lot in this spring garden checklist, but don’t feel the need to tackle everything at once (or at all). As the seasons of my life have changed, so has my garden and what I’ve done with it. At times I’ve had a huge vegetable garden, other times I’ve pulled back and focused more on herbs and flowers. 

Do what feels good (and doable) for you during this season. I hope that these gardening tips will help you feel more prepared for your gardening season. Whatever that looks like for you!

How do you prepare your garden during the spring? Anything you would add or I missed? Leave a comment and share below!

Tags: , , , ,
grow microgreens

How to Grow Microgreens at Home (the Easy Way)

Maybe you’ve seen microgreens at your local farmer’s market or farm to table restaurant. These little green plants are similar to sprouts, and just as packed with nutrients. Growing microgreens at home is really easy and offers so many health benefits!

What are Microgreens?

Microgreens are miniature plants of greens, herbs, or other vegetables. Like sprouts, they’re a concentrated nutrient source and packed with beneficial enzymes thanks to their rapid growth. While sprouts are grown without soil and are sprouted seeds, microgreens rely on soil or another growing medium. 

Microgreens are popular at gourmet restaurants because of their distinct flavor and presentation. You don’t have to go to a fancy restaurant though to eat microgreens! Our local health food stores sell them, but I’ll often grow my own microgreens because it’s much cheaper. 

They’re simple enough to grow that you can easily have a fresh plant source in your kitchen year round. One downside to sprouts is their potential to grow bacteria (which is rare) because they’re grown in the air and not soil. With microgreens you’re eating the stem and leaves, not the seed and root. 

Are Microgreens Good For You?

In a word, yes. Research shows that microgreens have 4-40% more micronutrients compared to full grown herbs and veggies. Microgreen benefits include getting fiber, minerals, and vitamins our cells need to thrive. And the benefits of microgreens don’t stop there. You’ll also find antioxidants to fight free radical damage. 

Types of Microgreens to Grow

The most commonly used plants for growing microgreens are:

  • Lettuce
  • Kale
  • Spinach
  • Radish
  • Beet
  • Watercress
  • Herbs
  • Greens
  • Cabbage
  • Mustard
  • Chia
  • Sunflower
  • Buckwheat
  • Clover
  • Kholorabi
  • Peas

Any edible plant that is entirely edible (root to leaves) can technically be used, but the ones above are the most common and taste the best. If you’re looking for the best microgreens for beginners, broccoli and radish stand out. 

Can I Grow Microgreens in Potting Soil?

Yes, potting soil works well with microgreens, but it can get a little messy. I prefer organic potting soil to avoid unwanted pesticide residue. Potting soil usually has some fertilizer mixed in for faster grow time. Just be sure when you’re trimming off the microgreens not to get the dirt along with it.

Another option is coconut coir or coco coir. Made from fibrous coconut hulls, it holds up to ten times its weight in water and is naturally resistant to fungus. It does not have a lot of nutrition in it so you can mix in a little fertilizer or use a 50/50 blend of soil and coco coir. 

If you want to grow microgreens at home without soil (hydroponically), then a hemp mat is a great option. You can grow microgreens in water with a hemp mat and sow the microgreen seeds directly onto that. For this tutorial though I’m focusing on growing seeds in soil (which can impart more nutrients). 

How to Grow Microgreens in a Mason Jar

You can grow seed sprouts in a jar, but you can also grow microgreens that way. Simply follow the same steps as below, but instead of using a shallow container, use a wide mouth jar. The downside to using a jar is that depending on the jar’s size you might not get many greens and they can be harder to harvest.

How to Grow Microgreens in a Tray

This is my preferred method. You just need a shallow, sturdy tray. Some people use plastic microgreen trays, but you can also use glass or compostable ones. 

Here’s how to grow your own microgreens!

What You Need to Grow Microgreens at Home

How to Grow Microgreens:

  1. Find a south-facing window with plenty of sunlight or install a growlight. I’ve found that a growlight mounted under kitchen cabinets works perfectly for growing greens on the counter if you have the space to do it. In warmer months, these can also be easily grown outside.
  2. Place an inch of organic potting mix in the bottom of a shallow tray or planter. You can also use a 50/50 mix of soil and coco coir. Smooth the soil out evenly. 
  3. Thickly scatter seeds evenly over the soil surface. 
  4. Cover the seeds with a thin layer of soil and spray the surface with clean, filtered water. I use a glass spray bottle.
  5. Place on the warming mat, if using, and under the grow light or near a sunny window.
  6. Mist the seeds a few times a day to keep the soil evenly moist while waiting for the seeds to germinate. You can also put a small fan on them to give them a gentle breeze, deter mold, and improve growth. 
  7. Greens are usually ready to harvest in 2-4 weeks, depending on the type of seed used.
  8. To grow another crop, either remove the roots and replant or dump the entire tray in the compost and fill with more soil mix to replant. If you dump in the compost, some straggler seeds usually volunteer and make a crop of their own a few weeks later.
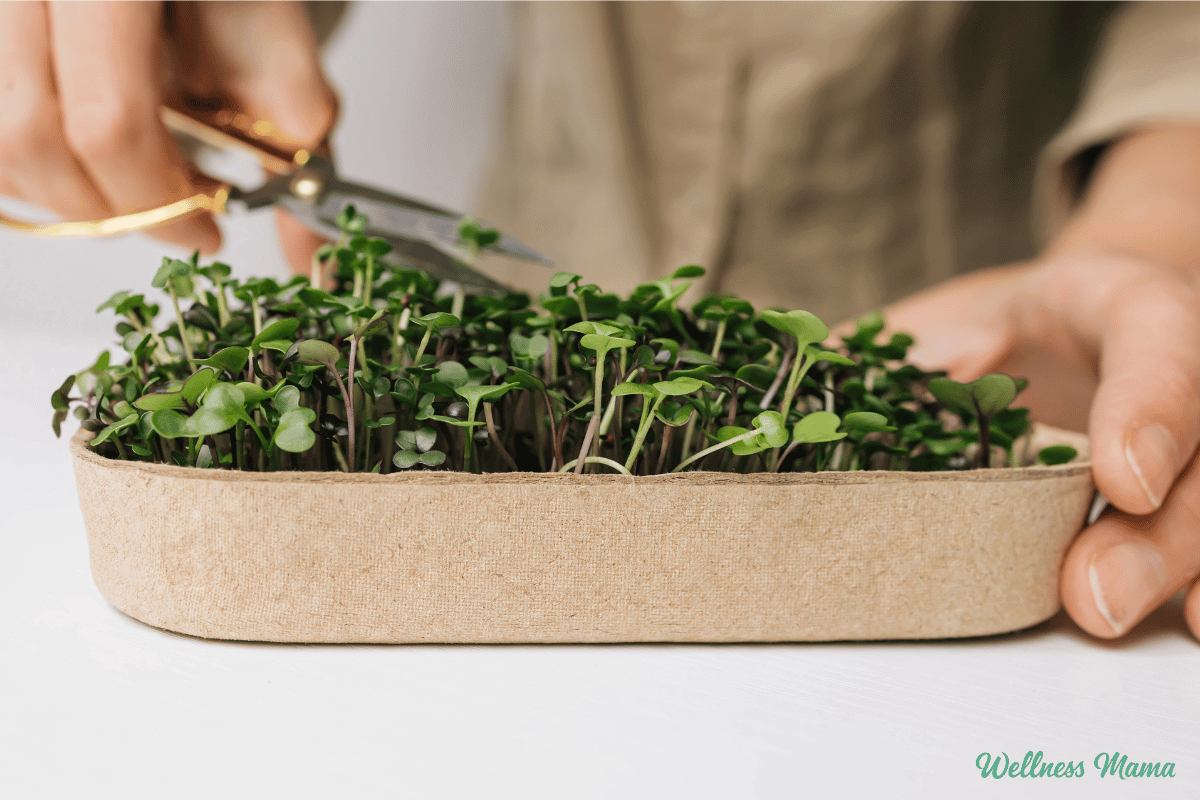
  9. Cut microgreens right above soil level with kitchen shears. Store in the fridge and rinse right before use. 

TIP: Soaking the seeds overnight will speed sprouting time, but make it more difficult to scatter them.

You’ll spread more seeds than you would if just planting the seeds to grow to full size. Since they’ll only get 1-2 inches tall and you want to harvest as many as possible from each tray.

Troubleshooting Common Microgreen Growing Problems

My seeds won’t sprout – They may not be getting enough light or it may not be the right temperature. Microgreens are versatile, but the ideal soil temperature for seed germination is 60-75 degrees. The air around the soil should ideally be between 60-70 degrees. Microgreens take 7-21 days before they’re ready to harvest. Or your seeds may be too old to germinate.

Why are my sprouts fuzzy? – The seed roots are often naturally fuzzy, this doesn’t necessarily mean it’s mold. If it’s slimy, doesn’t wash off, and is growing on the greens, then it’s mold. 

There’s mold growing on the soil – If you do have a mold problem, this can be due to too much water or a drainage issue. Your microgreen trays also need good airflow to deter fungal growth. Mixing some coco coir into the potting soil helps improve drainage too.  

Do I need plant growing lights? – You don’t need them, but they can be helpful, especially on darker winter days. If you don’t have a plant light, pick a very sunny windowsill. 

My microgreens are tall and falling over – If you’re using a light source that’s too far above the microgreens or poor quality, it can cause them to get “leggy.” The stalks have to stretch too high to reach the plant growing light. 

Do Microgreens Regrow After Cutting?

Certain seeds might give you a little bit of a crop after harvesting, but not much. It’s best to compost the soil medium after you harvest and start fresh. Experts generally recommend not reusing the same soil for microgreens because of disease risk and lower yields. If you have a compost pile going in the backyard though, then you can incorporate some of your finished compost into your microgreen soil mix. 

How to Eat Microgreens

You don’t need any special microgreens recipes to use them. They work well on top of any kind of salad and most dishes. Try them on top of some grain-free eggs benedict, a burger bowl, or garnish for some soup. Microgreens can work on top of almost any savory dish!

Have you ever grown your own herbs or plants inside? What are your favorite ways to use microgreens? Leave a comment and let us know!

Tags: , , ,
christmas gifts for men

Christmas Gifts For Men He’ll Love (+Stocking Stuffers)

Between friends, family, and employees, I’ve come up with a lot of gift ideas over the years. Christmas gifts for men are some of the trickiest to come up with, but I’ve managed to find plenty of great ones that meet my standards. The following thoughtful gifts are ones he’ll actually use and enjoy!

Best Christmas Gifts For Men

This gift guide includes some of the best gifts for the men in your life. Most of them would also work for Father’s Day or a birthday gift too. I love creating DIY gifts, but sometimes it’s nice to buy them. Some things, like an EMF protective phone case or a portable water filter, are harder to make yourself.

Whether you’re buying for your husband, boyfriend, dad, brother, or that one cousin on your mom’s side, I’m sure you’ll find something on this list to pique their interest. All without having to resort to a gift card (although they do make great stocking stuffers).

I also like giving gifts that are high quality and will last. This helps keep items out of the landfill and reduces waste. And they need to be as eco-friendly and natural as possible! The following Christmas gifts for men meet my standards, and are useful, but still fun to have around.

45+ Gifts For Men (That He’ll Actually Use!)

Food and Drink

Perfect for any guy who likes to grill, cook, or just eat. 

  • Wine Aerator – Pour wine through this to improve flavor. Great for the foodie in your life.
  • Heat Proof BBQ Gloves – For the man who likes to grill, these gloves will protect his hands.
  • Pizza Oven – These pizza ovens make amazing tasting pizzas and can also be used to give a unique flavor to other foods.
  • ButcherBox – Is your man the grill master? Give the gift of 100% grass-fed beef, free-range organic chicken, pork raised crate-free, and wild-caught seafood. We have a monthly subscription and enjoy their filets and ground beef.
  • Kasadrinos Olive Oil – I use olive oil a lot between cooking, using on salads, and anywhere in between. Kasadrinos is the only olive oil that I trust and anyone with a love of cooking (and eating!) will taste the difference.
  • Wine Subscription – If your guy is a wine drinker, he’ll love this wine subscription box of organic biodynamic wines.
  • YETI Rambler – This heavy-duty stainless steel and vacuum sealed large mug keeps things cold or warm for hours.
  • Hydro Flask Insulated Water Bottle – An insulated water bottle that keeps water cold for days.
  • Whiskey Glasses – A gift set that includes whiskey glasses, a wooden storage and gift box, granite cubes to chill, and cocktail cards. The perfect holiday gift for the guy who likes his whiskey on the rocks.
  • Purity Coffee – If you’re looking for a perfect cup of joe, look no further. Team this up with a coffee maker and you have a perfect gift.
  • Salt Block for Cooking – He can grill (or bake) fish, meat, and veggies on a salt block for amazing flavor.

Wellness

Various products for overall health and wellness.

  • Cold Plunge – Definitely more of a splurge, but one of my favorite ways to get the benefits of cold therapy. Alternate with sauna use for even more health benefits! Here’s an 88 gallon budget friendly version.
  • Defender Phone Case or Laptop Shield – Protect him from EMFs when using electronics. The Heat Shield is perfect for those who frequently use their laptops on their lap and need a layer of protection.
  • Red Light Cap – Looks like a baseball hat, but has red light inside for hair growth and scalp health.
  • Higher Dose – Their infrared PEMF mat combines infrared therapy and pulsed electromagnetic fields for better recovery, more energy, and relaxation.
  • Sauna Blanket – An easy and convenient way to get all of the health benefits of sauna.
  • CBD Products – If he’s on the move and needs more calm, energy, or muscle support, then give him one of these CBD infused products. Use code WELLNESSMAMA for a discount.
  • Blue Light Glasses – Get him some blue light glasses for after dark

Outdoors and Travel

Does he like traveling, camping, hiking, or even just spending time out on the back porch? 

  • Buffalo Leather Toiletry Bag – This is a great gift for the guy that loves to travel and can use a fancy way to organize his toiletries.
  • 60-day Lantern for Camping – A really long-lasting lantern for the outdoorsman who loves to camp.
  • Mystery Tackle Box – Does he love fishing? This variety pack of surprise fishing gear comes with supplies for freshwater bass (smallmouth and largemouth) and a mini fishing magazine.
  • Rumpl Outdoor Blanket – Speaking of camping, my family has Rumpl blankets for our outdoor events. They’re waterproof, washable, and warm on these fall and winter nights. Can be used indoors, too! They’re made from 100% recycled materials and recycle over 5 million discarded plastic bottles every year.
  • ENO Hammock – Portable hammock that fits in a small bag and is great for travel and camping.
  • Tactical Backpack – For the outdoorsman, this bag is a practical gift to hold everything he could need from gadgets to a toolset, to a hoodie.
  • Fire Starter Kit – Useful tool from our favorite outdoor brand to start fires. This all-in-one tool does it without matches or a lighter.
  • Solo Stove Tabletop Fire Pit – Crisp evenings are always better with a fire pit and this one is great for smaller areas or if you just don’t want to deal with the bigger ones.
  • Surefire Flashlight – High quality and super bright pocket flashlight.
  • Tactical Pen – More than just a pen, it works in all conditions and can break a car window if a person is trapped.

Skincare

Most guys aren’t big into skincare routines, but these simple products make the cut.

  • A new razor – Alitura is one of our favorite brands for skincare. Their high-quality razor shaves perfectly and is great for sensitive skin.
  • Beard Oil– Great option for the bearded man in your life. The organic oils from Toups and Co make this feel like a luxury gift! 
  • OneSkin – All of their skincare products are backed by clinical studies, safe for sensitive skin, and free from harmful ingredients. They also have a minimalistic look many guys prefer.
  • Essential Oil Skincare – Plant Therapy has a range of men’s products including beard balm, beard oil, and essential oil roller blends.

Fitness 

For guys who like to workout or are on the move… or just need some relaxation and sore muscle relief.

  • Smart Wool Socks – Warm but not sweaty and they keep feet dry. Great for hiking or everyday use.
  • NFL Sports Coasters – These stainless steel coasters are a great gift for that sports guy that has everything. They also make the perfect addition to a man cave.
  • Myobuddy – A percussive heated massager that targets muscle and fascia. A lot of people use this for cellulite, I just use it for relaxation and fascia massage. It has a wider massage platform than some other popular options, like Theragun. Use code wellnessmama for a discount.
  • Oura Ring – This is the fashionable ring that does it all: tracks your sleep, HRV, and tells you how ready you are to start the day. Does your guy like to know all his stats and wants to track his health metrics? This tech gift is perfect for that!
  • Rumble Roller – Deep tissue massage with foam rollers. 
  • Kettle Bells – If he loves working out, Kettle Bell Kings offers all sorts of weights and other workout gear. 
  • Kion – Get a delicious aminos drink and supplements for recovery after activity. Save 10-20% at the link. 
  • Rapid Release – Like a chiropractor and a massage therapist built into one. This device is designed to release muscle tension and it works. I love this thing.
  • Portable Red Light – This red light therapy device from Joovv is compact for on the go and less cumbersome than larger red light panels. Perfect for sore muscles. Or try this flexible, wearable red light.

Sentimental

Tell him you love him with one of these heartfelt gifts. 

  • Photo Book – Gather all of your favorite moments together and add them into a special book for him.
  • T-Shirt Quilt – This easy, DIY unique gift is the perfect gift for a guy who has a lot of sentimental old T-shirts lying around. It took me about 8 hours to make this personalized gift from start to finish.
  • Star Registration – If you’re looking for that unique, sentimental gift, this is the one for you! You can name a visible star and you’ll receive a certificate with the name and location.

Just Because

These gift ideas don’t fit neatly into the above categories, but they still make great gifts for men!

  • Comfy Slippers – My brother loves these slippers he got a couple of years ago.
  • Pooping Pooch Calendar – Yep, it’s exactly what you picture… perfect (or awful?!) for the dog lover in your family!
  • Saddleback Leather Wallet – This wallet has a 100-year warranty (yes, really!). They also have really high quality boots, satchels, and other leather products.
  • Sleep Mask – These futuristic looking sleep masks boast 100% blackout and zero eye pressure.
  • Magnetic Wrist Band – Holds nails and screws for the handyman.
  • Merino Wool Slippers – These felted wool slippers keep feet warm while wicking away sweat and neutralizing odor. Plus they’re fair trade and ethically sourced.

Stocking Stuffer Ideas For Men

  • Trailside Utensil – For those who love to spend time outdoors and camp, this lightweight spoon and fork combo is ideal for any campfire meal. The multitool also has a bottle opener on it.
  • Spices for Meat (and anything else!)– Many of you know Laila Ali (daughter of the great Muhammad Ali) has handcrafted an amazing line of spice blends. The GOAT seasoning was inspired by the way the legendary boxer preferred his favorite cheeseburger and is a favorite in our kitchen. Have you listened to our podcast interview?
  • Four Sigmatic Coffee – Between the individual coffee packets or the 24 oz. bag, your guy will be ready to go for the day. My favorite? The coffee with Lion’s Mane and Chaga.
  • mellö Magnesium – These magnesium packets come in several flavors and include L-theanine and GABA for relaxation, brain support, and calm.
  • Paleovalley Beef Sticks – Almost every man loves a good beef stick! And you can be confident that they’re eating the healthiest version of them.
  • Lifestraw or Sawyer Water Filter – Survival water filter that fits in your pocket.
  • LMNT Electrolyte Packets – Replacing our electrolytes when we workout, use the sauna, or when we fast is super important. LMNT offers multiple flavors (watermelon and raspberry are at the top of my list) and only sources clean ingredients. 
  • Ice Shaker Bottles – Co-founded by NFL player Rob Gronkowski, these bottles are some of my most used when I’m on the go.
  • Essential Oil Skincare – Plant Therapy has a range of men’s products including beard balm, beard oil, and essential oil roller blends that fit perfectly in a stocking.
  • Books – Some that I highly recommend are Atomic Habits, Greenlights, 201 Relationship Questions: The Couple’s Guide to Building Trust and Emotional Intimacy, and The Power of Now.

What are some of the best gifts you’ve ever given for the men in your life? Anything you would add to this list? Leave a comment and let us know!

Tags: , , , , , ,
DIY Homemade Face Packs to Keep Your Skin Glowing This Winter

DIY Homemade Face Packs to Keep Your Skin Glowing This Winter

When the winter chill sets in, our skin often bears the brunt — turning dry, dull, and lifeless. The lack of humidity and harsh winds strip away natural oils, leaving skin craving hydration. While store-bought products promise quick fixes, nothing works quite like homemade face packs made from natural ingredients. These easy, nourishing recipes help restore moisture, radiance, and softness — all from the comfort of your kitchen.

Here are six simple, effective DIY winter face packs that will pamper your skin and bring back that healthy glow.

1. Honey & Aloe Vera Hydrating Pack

Best for: Dry, dull, or sensitive skin

If your skin feels tight or flaky, this soothing blend is the perfect fix. Honey acts as a natural humectant, locking in moisture, while aloe vera cools and heals irritation.

Ingredients:

  • 1 tablespoon aloe vera gel
  • 1 tablespoon raw honey

Method:

Mix the two ingredients into a smooth paste. Apply evenly over your face and neck, and let it sit for 15–20 minutes before rinsing off with lukewarm water.

Result: Soft, supple, and deeply hydrated skin that glows naturally.

2. Milk Cream & Turmeric Glow Pack

Best for: Normal to dry skin

Fresh milk cream (malai) is one of nature’s best moisturizers. Combined with a pinch of turmeric, it helps brighten your complexion while keeping the skin nourished and smooth.

Ingredients:

  • 1 tablespoon fresh milk cream
  • A pinch of turmeric

Method:

Blend both ingredients well and apply to your face. Leave on for 15 minutes and rinse with lukewarm water.

Result: A natural, golden glow with baby-soft skin.

3. Banana & Honey Moisture Boost Pack

Best for: Extremely dry or flaky skin

Bananas are rich in potassium and antioxidants that help repair and hydrate rough winter skin. When paired with honey, they create a moisture powerhouse.

Ingredients:

  • ½ ripe banana (mashed)
  • 1 tablespoon honey

Method:

Mash the banana and mix in honey. Apply to clean skin and let it sit for 20 minutes. Rinse with cool water.

Result: Smooth, plump, and deeply nourished skin.

4. Oatmeal & Yogurt Exfoliating Pack

Best for: Combination to dry skin

Exfoliation is essential in winter to remove dead cells that block moisture absorption. Oats gently scrub without stripping the skin, while yogurt hydrates and brightens.

Ingredients:

  • 1 tablespoon oatmeal powder
  • 1 tablespoon yogurt
  • 1 teaspoon honey (optional)

Method:

Mix all ingredients into a creamy paste. Apply gently in circular motions and leave for 10–15 minutes before rinsing.

Result: Soft, radiant skin that feels clean and rejuvenated.

5. Coconut Oil & Cocoa Butter Repair Mask

Best for: Very dry, cracked, or mature skin

Winter can be harsh on mature or sensitive skin. This rich mask combines coconut oil and cocoa butter to provide intense nourishment and repair.

Ingredients:

  • 1 teaspoon coconut oil
  • 1 teaspoon melted cocoa butter
  • ½ teaspoon honey

Method:

Blend the ingredients and apply while slightly warm. Leave on for 15 minutes, then wipe off with a warm, damp cloth.

Result: Velvety, hydrated skin with a natural sheen.

6. Avocado & Olive Oil Nourishing Pack

Best for: Dry and aging skin

Avocado’s healthy fats and vitamin E make it a winter skincare hero. Mixed with olive oil, it deeply nourishes and improves skin elasticity.

Ingredients:

  • ½ ripe avocado
  • 1 teaspoon olive oil

Method:

Mash the avocado and mix in olive oil. Apply generously and leave for 20 minutes before rinsing.

Result: Soft, youthful, and radiant skin even on the coldest days.

Winter Skincare Tip:

Always follow up your face pack routine with a mild moisturizer or face oil to lock in hydration. And remember — consistency is key. Using these natural masks 2–3 times a week will keep your skin glowing all season long.

This winter, skip the chemical-laden creams and rediscover the beauty of natural skincare. With these DIY face packs, your skin will stay hydrated, healthy, and beautifully radiant — no matter how chilly it gets outside.

Tags: , , , , , ,
Best oLive
Privacy Overview

This website uses cookies so that we can provide you with the best user experience possible. Cookie information is stored in your browser and performs functions such as recognising you when you return to our website and helping our team to understand which sections of the website you find most interesting and useful.