Homestead Blog Hop - Homestead tips, ideas, animal care, and recipes every Wednesday

Simple Life Inspiration and DIY Ideas

Welcome to the Homestead Blog Hop. It is a weekly gathering for homesteaders and simple living enthusiasts. We all share DIY projects, from-scratch recipes, and creative inspiration from our homes to yours.

This week’s hop features yummy foods. It also offers practical ideas that celebrate handmade living and self-sufficiency. Explore ideas that fit a thoughtful, sustainable lifestyle.

Whether you’re looking for seasonal crafts, homemade treats, or encouragement on your homesteading journey, you’ll find plenty of inspiration to carry into the upcoming seasons.

Grab a cup of tea, explore the featured posts, and join us in sharing your own homestead creations.

Meet Your Homesteading Hosts

We’re Kelly from Simple Life Mom, Liz from The Cape Coop, Natasha from Houseful of Nicholes, and Laurie from Ridgehaven Homestead. We’re about from-scratch living, simple ingredients, frugal habits, and intentional, sustainable living. We share recipes, tips, and ideas to support home cooks and makers.

We’re delighted to host the Homestead Blog Hop. You can find fresh inspiration each week for DIY projects, homemade recipes, and practical living ideas. Join us for new ideas and a growing community. Together, we celebrate everyday craftsmanship and thoughtful living.

Follow Us for More Homestead Inspiration

Natasha – Houseful of Nicholes
Facebook | Pinterest | X | Instagram

Laurie – Ridge Haven Homestead
Facebook | Pinterest | Instagram

Liz – The Cape Coop
Facebook | Pinterest | X | Instagram

Kelly – Simple Life Mom
Facebook | Pinterest | X | Instagram

FEATURED POSTS from the Last Homestead Blog Hop

Each week, we take turns selecting three featured posts from the Homestead Blog Hop. These features are shared across all of our social media platforms. They spotlight the creativity and hard work of our fellow homesteaders.

Here are the featured posts from last week’s hop:

1. How I Process Potatoes to Reduce Waste from Scratch Made Food

2. Lemonade Concentrate from Flour on My Face

3. Peach And Arugula Salad with Burrata and Prosciutto Recipe from Drugstore Divas

Congrats! Feel free to grab the featured on button for your post.

Just right click and ‘save image as…‘

Guidelines for the Homestead Blog Hop

  1. Click the “Add Your Link” button below and upload a clear, eye-catching image from your project or recipe. Please link directly to the family-friendly post itself, not your blog’s homepage.
  2. You may link up up to three posts each week.
  3. Take time to visit a few other blogs in the hop and leave a thoughtful comment to let them know you stopped by. Community support makes this hop special!
  4. Please include a link back to the Homestead Blog Hop in your post. Posts without a backlink are not eligible to be featured. All featured posts are shared across all hosts’ social media channels.
  5. Share posts that haven’t been linked to the hop before. Older posts are welcome as long as they are new to the hop.
  6. By joining the Homestead Blog Hop, you grant the hosts permission to use one image from your post, with a link back to your site, if your post is selected as a feature next week.
  7. This is a family-friendly link-up designed to encourage, inspire, and support the homesteader in all of us.

Let the Party Begin!

Which project are you excited to try this week? Leave a comment below.

Join Our Homestead Blog Hop Pinterest Board

Follow all of your hosts on Pinterest and send a message if you’d like to be added to our Homestead Blog Hop group board. This board is a great place to share your DIY projects, crafts, and from-scratch recipes with the homesteading community.

Guideline: Only pin posts that you’ve linked up to the Homestead Blog Hop.

Tags: , , , ,
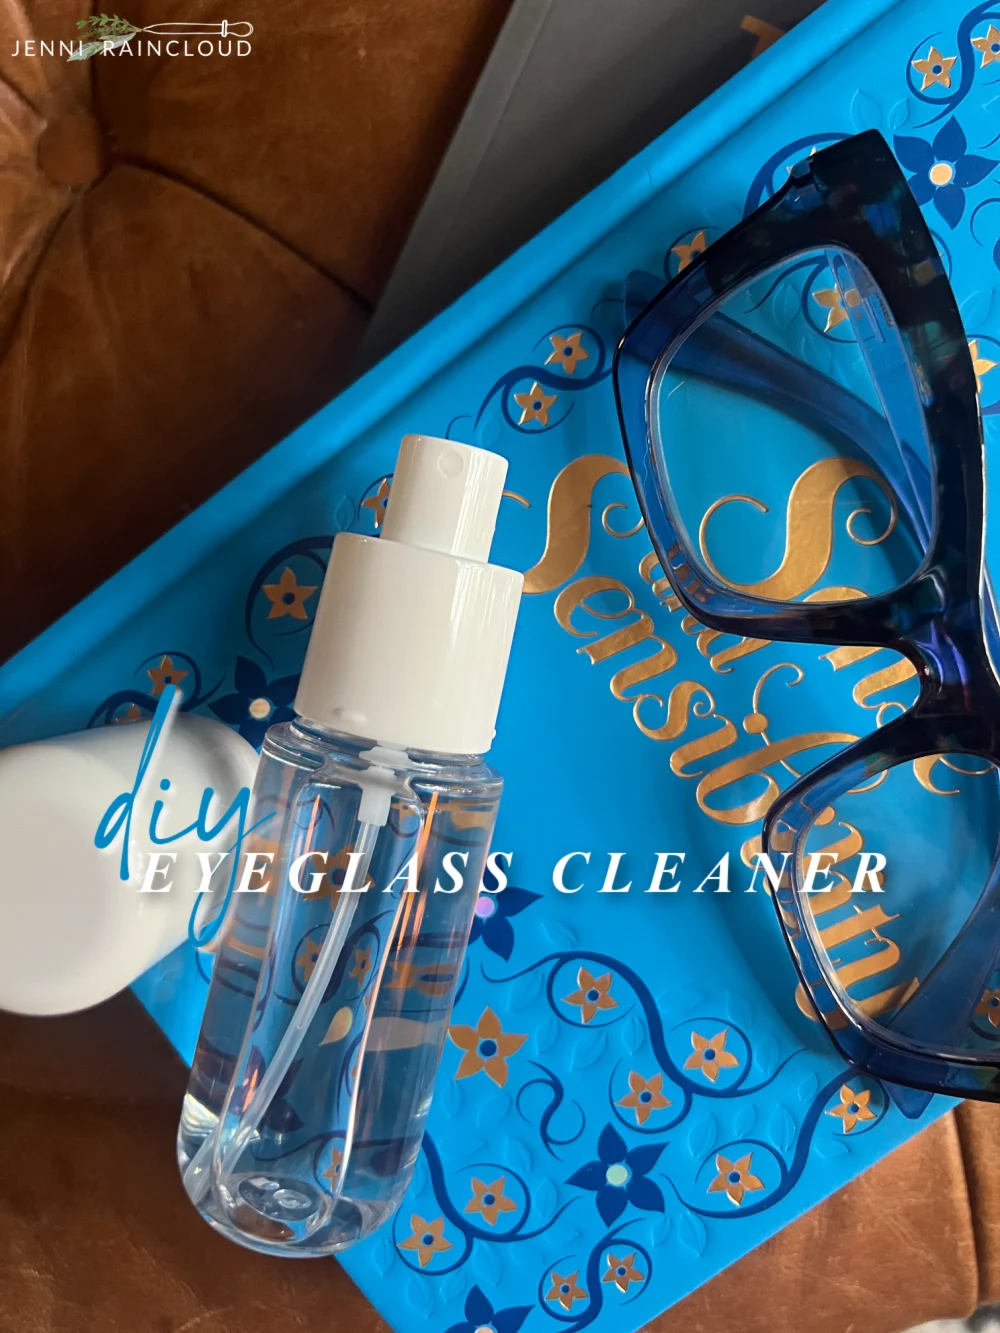
DIY Eyeglass Cleaner - Jenni Raincloud

DIY Eyeglass Cleaner – Jenni Raincloud

I’ve officially entered into the world of readers. Readers are everywhere-I have at least 4 pairs in different places including the top of my head! I haven’t worn glasses since the 1980s so keeping up with them is a bit of a chore! What’s even a bigger chore is keeping them clean! I mean, we wear glasses to correct the blurriness and more often than not I’m trying to see through smudges on my glasses! I realized that good ole vinegar does not fix smudges well so I started experimenting with a few concoctions to find the best glasses cleaner. I’ve landed on a good recipe and I thought I’d share in case you are in need of a DIY eyeglass cleaner! 

This is a simple recipe that involves water, alcohol and Castile soap. It’s cheap and you can make it in seconds. The most expensive thing about it is finding a spray bottle!

DIY Eyeglass Cleaner Recipe:

  • Fill a spray bottle 3/4th full with alcohol.
  • Add 2-3 drops of Castile soap. (you can use Dawn dish soap if you do not have Castile soap)
  • Top off with distilled water. 
  • Spray Bottle

This recipe isn’t limited to just glasses! You can use either recipe to clean:

  • Eyeglasses
  • Sunglasses
  • Cell phone screens
  • Laptop and tablet screens
  • Camera lenses

For a really deep clean I do use my ultrasonic jewelry cleaner every 1 or 2 weeks. I will say, this little cleaner works amazing on anything you can fit in it. It’s nice to have on hand for jewelry and glasses. However, picking up a book to read or working a puzzle requires immediate clear vision and this DIY eyeglass spray comes in extremely handy and is something I will make over and over again. 

As per usual, I blog about what is relevant in my world. I needed to figure out a solution for my grimy glasses so I thought I’d share! Hope you enjoyed this super easy DIY! 

xx, Jenni

Jennifer Phillips

Jennifer Phillips worked as a licensed aesthetician for over 8 years before creating the DIY skincare blog, Jenni Raincloud and her natural skin care line, J. Raincloud Organics. Jennifer has been blogging full time for 16 years and loves to gain and share knowledge on how to achieve beautiful skin the natural way.

Find me on: Instagram | Facebook

Tags: , , , ,
tinted lip sunscreen

DIY Natural Tinted Lip Sunscreen

For many years now I’ve preached about the benefits of safe sun exposure. The keyword here is safe! And while it has a lot of benefits, sometimes on occasion, I’ll pull out the homemade sunscreen. Many of you have asked for a lip sunscreen with SPF, so I finally got to work in the kitchen and came up with one. 

Why You Should Not (and Should) Use Lip Sunscreen

I’m not usually a fan of sunscreen for several reasons. We need the sun to make the hormone vitamin D, have a strong immune system, regulate hormones, and so much more. Even something as seemingly simple as sunglasses can interfere with that signalling by blocking light receptors in the eyes. 

Most of the time I’ll either seek shade or cover up once my body has had enough sun for the day. While I think the science is clear on the sun’s benefits, it’s also clear that sunburns are damaging! However, if you live in a really sunny climate and you’re outside a lot, out on the boat, surfing, etc., then sunscreen can be helpful sometimes. 

My homemade sunscreen recipe is a fan favorite, but many of you have asked if it can be used on lips. Technically yes, but it might leave a white cast, be hard to apply, and taste kind of funky. Even if you’re not eating it (the ingredients are clean though), small amounts of lip balm still end up in the mouth. But we probably all knew that one kid in grade school who liked eating Chapstick…

Mineral Lip Balm With Sunscreen Ingredients

A lot of the store-bought brands use a whole slew of synthetic ingredients I really don’t want in my mouth (or in my kids’!). Certain UV-blocking ingredients go smoothly onto skin and absorb quickly, which sounds great. However, these sunscreen ingredients like oxybenzone and avobenzone are also toxic to coral reefs, which are essential to ocean life and life on Earth. Not to mention what they do to us once they’re absorbed. 

This lip sunscreen instead uses non-nano and uncoated zinc oxide. It creates a skin barrier and sits on top of skin/lips, reflecting UV rays. It’s one of the safest UV barriers out there. In fact, it’s one of only two that the FDA considers safe and effective for sunscreen. I don’t always agree with the FDA, but I’m with them on this one. The zinc oxide is at 20%, which translates to roughly 10 SPF when you add up all of the ingredients. 10 SPF may not sound like much, but it blocks about 90% of UV rays.

I’ve also added red raspberry seed oil. It has a slight SPF and it’s full of antioxidants that protect the lips from sun damage. You’ll also find this ingredient in my homemade sunscreen recipe. Shea butter is smooth and creamy, nourishes lips, and helps firm up the lip balm. Beeswax provides a protective layer over the lips. 

Lastly, avocado oil provides the bulk of the lip balm and supports collagen to prevent weakened skin cells. Avocado oil also helps calm inflammation, regenerate skin cells, and protect the skin barrier. It’s also rich in carotenoids that offer some UV ray protection. 

Tinted Sunscreen Lip Balm

My original sunscreen recipe is white due to the zinc oxide. Some people are ok with a white cast on their lips, but there’s an easy fix. You can add iron oxide and/or mica to give it a bit of color. Mica reflects light so it will give it a little sparkle.

Iron oxides are nature-identical pigments that lend a rich, burgundy red color. Oxides that naturally come straight from the soil also come with lead and other heavy metal contaminants. Things I don’t want in a lip balm! That’s why iron oxides are now made in a lab to be nature-identical. 

If you don’t have iron oxide on hand, rose kaolin clay offers a similar effect.

DIY Natural Lip Sunscreen

This smooth and creamy lip sunscreen helps protect lips from UV damage.

Prep Time5 minutes

Active Time12 minutes

Cooling Time2 hours

Total Time2 hours 17 minutes

Yield: 1.7 ounces

Author: Katie Wells

  • Add the beeswax, shea butter, and avocado oil to the top of the double boiler or glass bowl. Stir occasionally until melted.

  • Turn off the heat and add the raspberry seed oil and essential oils.

  • Whisk in the powders: zinc oxide, iron oxide, and mica.

  • Remove from heat and stir occasionally as it cools. The powders will want to sink to the bottom so they’ll need to stay mixed in.

  • Once the lip sunscreen is mostly cooled, but still soft enough to pour, pour the mixture into your containers.

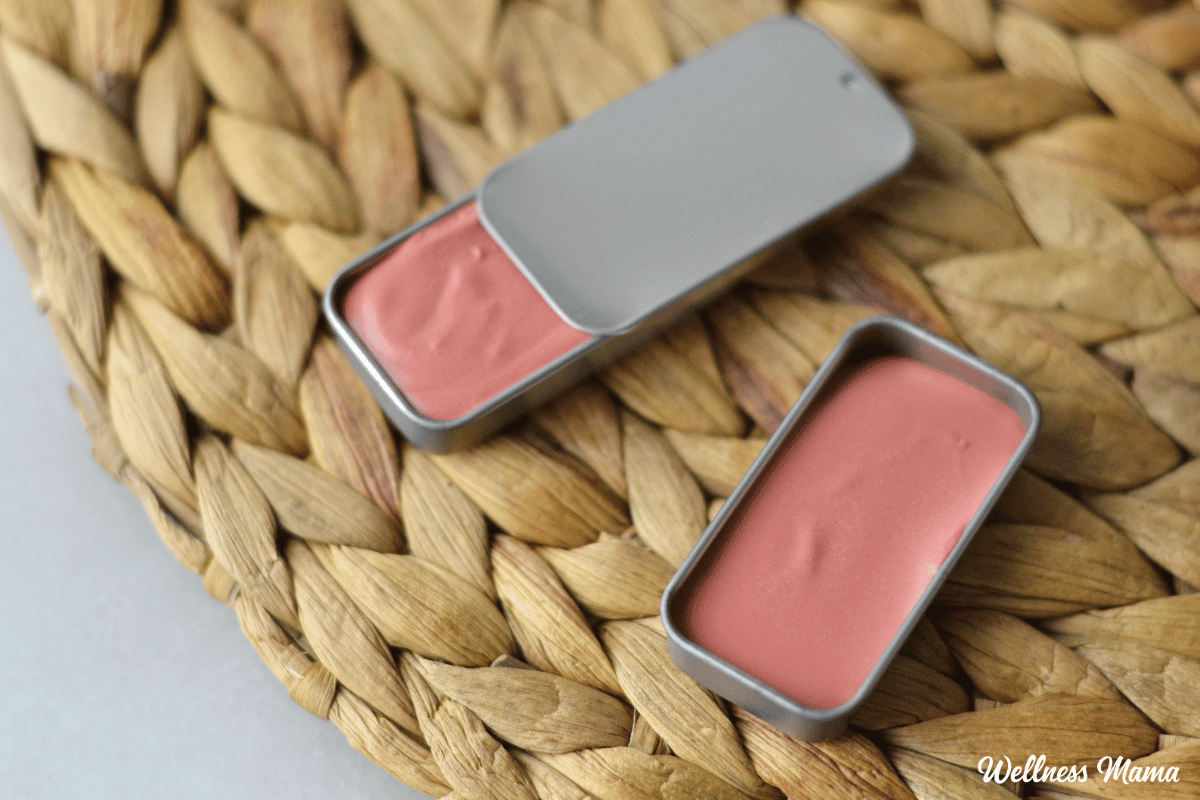
The iron oxide adds a pink color and the mica adds a little sparkle. You can use both or neither, but it will have a white cast without any iron oxide. 

Important Note on Photoxic Essential Oils

Certain essential oils can increase the risk of sunburn and skin damage. Needless to say, they should not be used in lip balms! Photoxic essential oils include bergamot, lime, lemon, and grapefruit. Learn more about this topic here.

More Sun Protection

Here are some more DIY sunscreen recipes, plus info on sunscreen pros and cons.

What’s your approach to sun exposure? Leave a comment and let us know!

Tags: , , , ,
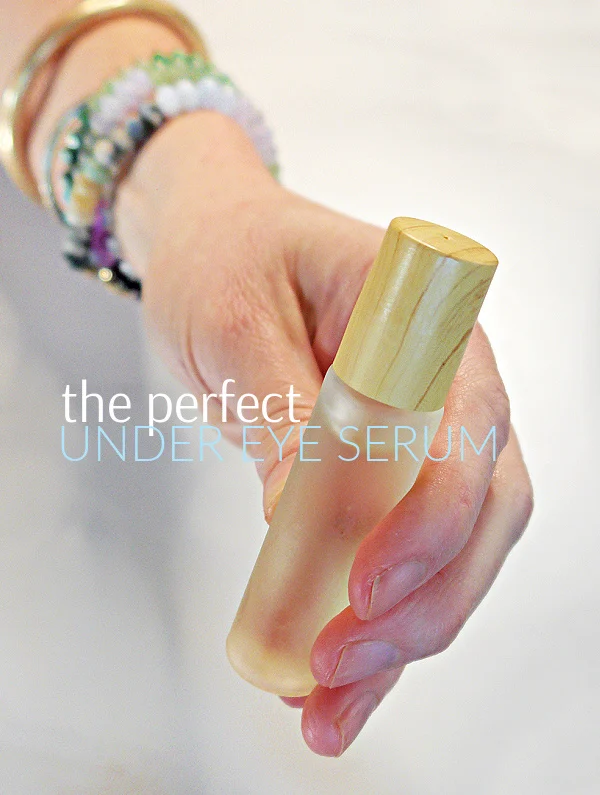
Hand holding a glass roll on bottle with DIY Castor Oil Eye Serum

DIY Castor Oil Eye Serum Roll On

Castor oil is a powerhouse of a natural oil. I have posted about castor oil when it comes to it’s cleansing powers in oil cleansers and it’s hair growth abilities in hair serums but not until recently have I heard how beneficial it actually is for the skin in general. I’ve been seeing so many natural skin care companies selling an eye serum that contains only castor oil and frankincense essential oil so it’s intrigued me to do a little digging to find out why. I’m impressed with what I found and had to share. I think you’ll want to make yourself a DIY castor oil eye serum roll on ASAP!

This DIY eye serum will be the easiest one you’ll ever make. It may actually be the most effective as well. I made this serum for myself a week ago so I can’t speak on whether it has plumped me up under the eyes but I can say that it has thoroughly moisturized under my eyes and smoothed wrinkles. I even think it is reducing my under eye bags which is one of my biggest eye concerns. Let’s get right into why castor oil makes a great anti aging eye serum tool…

What is Castor Oil?

Castor oil is a vegetable oil derived from the castor bean. It contains ricinoleic, linoleic, stearic and oleic fatty acids which are all beneficial to the skin. These fatty acids have powerful anti-inflammatory properties as well as antimicrobial properties. Because it is both hydrophilic (water loving) and lipophilic (oil loving) it penetrates the skin better than most oils. 

Castor oil has been known to actually stimulate the skin’s own collagen which is so easily lost around the eyes. 

Castor oil is also non-comedogenic which means it will not clog pores. 

Why You Should Use Castor Oil Under Your Eyes:

  • Reduces puffiness by encouraging lymphatic drainage.
  • Treats dark circles-There’s actually a PubMed study on this!
  • Reduces wrinkles-The same study linked above showed women seeing an improvement in wrinkles as well as dark circles.
  • Treats swollen eyes–According to a study, applying castor oil around the eyes including the eyelid reduced swelling caused by blepharitis (a condition that causes inflammation and swelling of the eyelids). 
  • Provides deep nourishment thanks to it’s rich fatty acid profile.
  • May plump thin skin-I have heard many claims that castor oil plumps up the skin directly under the eyes were volume loss tends to occur with age due to less collagen production. 
  • Conditions the lashes and brows and possible growth stimulation. If you haven’t tried my DIY lash serum and DIY brow serum you should. Skip store bought lash/brow enhancers-they have side effects you don’t want. 

Why Add Frankincense?

Adding frankincense essential oil to this DIY eye serum is highly recommended. Frankincense is one of my favorite oils to use around the eyes. It helps regenerate cells and stimulates collagen. It also reduces inflammation and is a powerful antioxidant. Plus, it is one of the gentlest oils so using it around your eyes makes sense. It works well with all of castor oils attributes to really pack a punch! 

Why Add Vitamin E?

Vitamin E is a powerful antioxidant and it’s great to add it to any and all oil based skincare products. It will neutralize free radical damage, lock in moisture and encourage cell renewal. Plus, it can help prolong the shelf life of your product. 

Castor Oil & Frankincense DIY Eye Serum Recipe:

Direction:

  1. Add Frankincense to your roll on bottle.
  2. Add Vitamin E if you are using it. 
  3. Top off the bottle with castor oil. 

How to Use:

  1. Roll serum all around the eyes. 
  2. Use at bedtime

Not All Castor Oils Are The Same:

You must look for castor 100% pure, organic and cold pressed. You want to look for the words “hexane free” and it should come in a glass bottle. There are many castor oils on the market that have cheap filler oils in them or are not sourced properly. Don’t waste your money and time. Be sure to get a good quality castor oil like THIS one. 


This is an extremely easy DIY and you really have nothing to lose. Give it a try and report back and I’ll do the same!

xx, Jenni

Jennifer Phillips

Jennifer Phillips worked as a licensed aesthetician for over 8 years before creating the DIY skincare blog, Jenni Raincloud and her natural skin care line, J. Raincloud Organics. Jennifer has been blogging full time for 16 years and loves to gain and share knowledge on how to achieve beautiful skin the natural way.

Find me on: Instagram | Facebook

Tags: , , , , ,
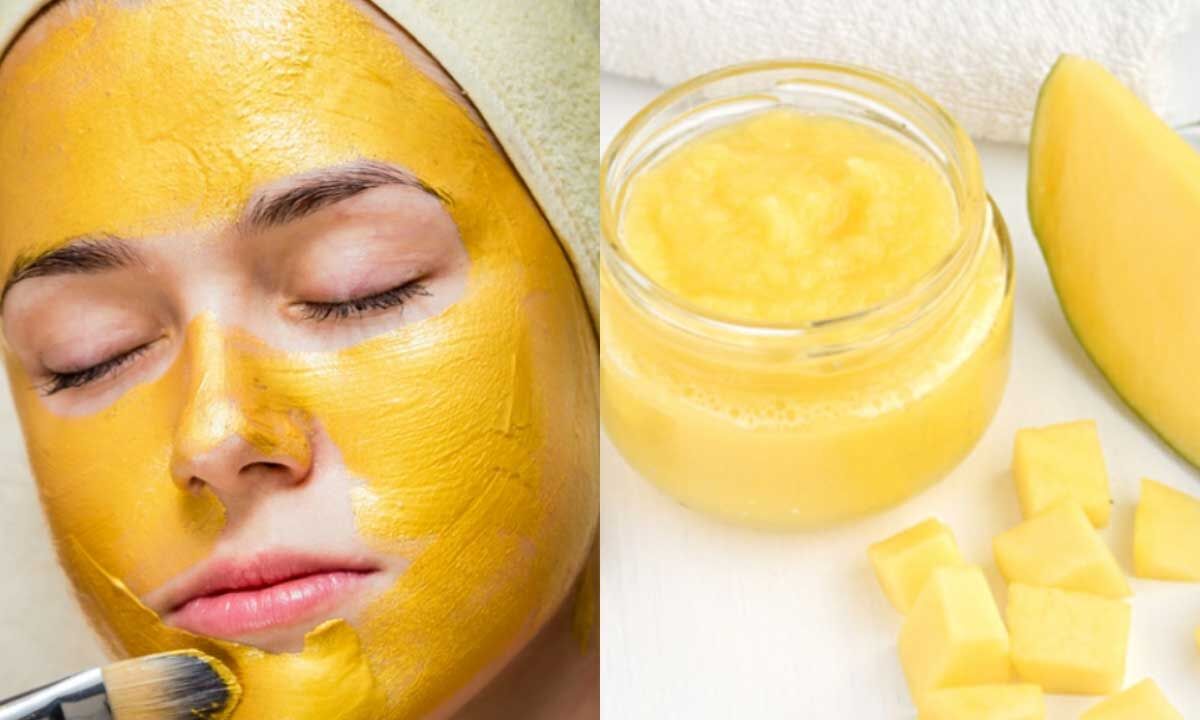
DIY Mango-Sandalwood Face Mask for Glowing Summer Skin

DIY Mango-Sandalwood Face Mask for Glowing Summer Skin

Mangoes are widely loved as a seasonal fruit, but they are also gaining attention in natural skincare routines. Rich in vitamins and antioxidants, mango-based DIY treatments are being explored for their potential to support soft, hydrated, and refreshed-looking skin during the harsh summer months.

The fruit contains vitamin C, which plays a role in supporting collagen production. Collagen is an important protein that helps maintain skin elasticity and firmness. With regular use in skincare formulations, vitamin C-rich ingredients are often associated with a more radiant and youthful-looking complexion.

Mangoes also contain vitamin A and beta-carotene, both of which are commonly linked with skin nourishment and repair. These nutrients are often used in home remedies aimed at reducing dryness and improving overall skin texture. Their natural composition makes mangoes especially appealing for people dealing with dullness or uneven skin tone.

Because mango pulp is mildly acidic, it may also provide a gentle exfoliating effect. This can help lift away dead skin cells and contribute to a smoother surface appearance over time, making the skin feel cleaner and more refreshed.

DIY Mango-Sandalwood Face Mask Recipe

A homemade mango-sandalwood face mask has become a popular natural skincare option for those looking to incorporate fruit-based ingredients into their beauty routine. This blend combines nourishing butters, oils, and herbal powders designed to moisturize and calm the skin.

Ingredients Needed

To prepare this mask, the following ingredients are commonly used:

  • 1½ tablespoons melted shea butter
  • 1 tablespoon mango seed butter (softened from the inner seed of a ripe mango)
  • 1 tablespoon raw honey
  • 1 teaspoon pure coconut oil
  • ½ teaspoon fine sandalwood powder

Each ingredient contributes a different benefit. Shea butter and mango seed butter are known for their deep moisturizing properties, while honey is often used for its natural humectant qualities, helping the skin retain moisture. Coconut oil adds nourishment, and sandalwood powder is traditionally used in skincare for its calming and cooling effect.

Preparation Method

The preparation of this mask is simple and can be done at home with minimal tools. The process begins by gently melting shea butter and mango seed butter together until the mixture becomes smooth and warm, but not overheated.

Once melted, raw honey is added and blended thoroughly until the mixture turns creamy and uniform. After this, coconut oil is stirred in to ensure even distribution throughout the mask.

Finally, sandalwood powder is slowly incorporated into the mixture. It is important to mix well to avoid lumps and achieve a consistent paste-like texture suitable for application.

Application and Usage

Before applying the mask, the face should be cleansed and dried properly. A thin to medium layer of the mixture can then be applied evenly across the face, including delicate areas while avoiding direct contact with the lash line.

The mask is typically left on the skin for around 20 minutes, allowing the natural ingredients to absorb and interact with the skin surface. During this time, a cooling sensation may be experienced due to the sandalwood and coconut oil content.

After the waiting period, the mask can be removed by rinsing with cold water. Some prefer using ice-cold water or gently pressing cooled ice cubes against the skin before washing to enhance the refreshing effect.

Once the mask is fully removed, the skin can be gently patted dry. A light moisturizer may be applied afterward if needed, depending on individual skin type and hydration levels.

A Natural Addition to Summer Skincare

This mango-sandalwood face mask reflects a growing interest in natural, ingredient-based skincare routines. With its combination of fruit extracts, plant-based butters, and traditional herbal powders, it offers a simple at-home option for those looking to maintain soft, nourished skin during the summer season.

Tags: , , , , , ,
DIY Ayurvedic Shampoo for Strong, Healthy Hair

DIY Ayurvedic Shampoo for Strong, Healthy Hair

My journey to creating homemade shampoo involved a lot of trial and error. There were countless mixtures of liquid castile soap, coconut milk, essential oils, and the occasional splash of olive oil – all of which left my scalp and hair a confused mix of dry, oily, and limp.

Eventually I created this pure coconut oil shampoo bar, which worked beautifully for many years.

Until it didn’t.

Why My Hair Routine Needed a Reset

Over the past year or so, my scalp started changing in ways I didn’t expect. Hormonal shifts during perimenopause can make the scalp more reactive and sensitive, and almost overnight my old routine – which I had used for many years without issue – suddenly started making my scalp itch.

Nothing seemed to help – not my shampoo bar, not the non-toxic, professionally formulated shampoos I tried, and not changing how frequently I washed.

So I started experimenting again.

That eventually led me to the Ayurvedic hair mask recipes I shared recently → you can find them here.

They soothed my scalp and left my hair feeling soft and light, but they also had a couple of drawbacks: they could be a little messy to apply (and sometimes left me rinsing the shower afterward), and they took a bit of time to wash out completely. If I rushed it, I’d sometimes find a little dried mask in my hair later.

So I began experimenting with a simplified version that could be used more like shampoo.

The result is the recipe below.

It takes a little preparation, but it’s still very simple overall and rinses out easily, with no extra cleanup needed.

Is This Really Shampoo?

Sometimes when I share a recipe, like this gluten-free “cornbread,” I’ll get a few comments saying “but that doesn’t have any corn in it!” And it’s true.

I love corn, but it doesn’t love me back, so I developed the recipe to get as close to the taste and texture of cornbread as possible without actually using corn. That’s what the quotation marks are for: it’s cornbread-ish, but not technically cornbread.

So . . . is this really shampoo?

Oddly enough, yes.

In fact, some variation of this recipe is very close to the original shampoo.

The earliest forms of shampoo were likely developed in ancient India – sometime during the Indus Valley Civilization – by boiling herbs such as soapberries (reetha), shikakai – which literally translates to “fruit for hair” – and Indian gooseberry (amla), all ingredients that appear in this recipe.

The word shampoo itself comes from the Hindi word chāmpo, meaning “to massage” or “to press.” British traders encountered the practice of hair washing and scalp massage in India and eventually brought “champing” to Europe in the 1700s.

A Simple Herbal “Hair Tea”

This recipe doesn’t have the thick, goopy texture of commercial shampoo – some people even describe it as a “hair tea.”

However, the herbs in this blend are well known for helping to cleanse, moisturize, and volumize hair.

Several contain saponins, which are natural plant compounds that act as mild surfactants – gently lifting away dirt and oil. That’s why this recipe creates suds – but not the dramatic foam that commercial detergents produce.

So while it may feel unusual compared with modern shampoo and doesn’t lather the way most of us are used to, it actually resembles the original versions much more closely.

And in my experience, it cleans hair just as well – better, in fact. My hair feels light, soft, and shiny, without the buildup that many modern shampoos can leave behind.

And unlike some DIY shampoo formulas, this recipe is completely beginner-friendly.

No complicated formulation.
No soapmaking skills required.

Just herbs, hot water, and something to strain with.

A Quick Note About Hair Color

Amla and shikakai have traditionally been used as natural pigment enhancers, meaning they may gradually deepen hair color over time.

I naturally have very dark hair and haven’t noticed any change in color.

However, if you have lighter hair (and want to keep it that way), you may want to:

  • omit the amla powder
  • reduce the shikakai slightly
  • increase the reetha powder a bit

One thing to keep in mind, though, is that reetha contains more natural saponins than shikakai and provides stronger cleansing, so too much can feel slightly drying.

Experiment and Find What Works for You

Everyone’s hair is a little different, so think of this recipe as a starting point rather than a rigid formula.

It’s what works best for my hair after a lot of trial and error, but you should feel completely free to adjust it based on what your hair needs.

If your hair tends to feel dry, try adding a little more aloe or amla. If it leans oily, you can increase the reetha slightly.

A little experimenting goes a long way, so feel free to play with the ratios and see what your hair loves most.

About the Ingredients

Here’s a quick look at what each ingredient brings to the recipe.

Shikakai Powder
Shikakai (Acacia concinna) has been used in Ayurvedic hair care for centuries as a gentle cleanser and conditioner. It contains natural saponins that help remove light buildup without stripping the scalp’s natural oils, and may help create the conditions that allow your natural hair growth cycle to function more optimally.

Many people find it leaves hair soft, smooth, and easy to detangle. It’s also a traditional Ayurvedic remedy for dandruff. One important note: avoid getting shikakai in your eyes, as it can be very irritating.

Reetha (Soapnuts)
Also called soapberry or soapnut, reetha is one of nature’s richest sources of saponins. In traditional hair care it’s often paired with shikakai to balance cleansing with conditioning.

Flax Seeds or Fenugreek Seeds
These seeds release a natural gel when steeped in hot water. That gel adds slip and conditioning to the shampoo, making it easier to spread through the hair. I prefer flax seeds in this recipe, but fenugreek also has a long history in Ayurvedic hair care for supporting scalp health and helping hair feel stronger.

Aloe Vera Powder
Aloe adds hydration and conditioning while helping soothe irritated scalps. It can also add a little shine and smoothness to the hair.

Amla Powder
Amla (Indian gooseberry) is rich in antioxidants and is traditionally used in Ayurvedic hair care to support scalp health and enhance shine.

Two Ways To Make This Herbal Shampoo

You can make this shampoo two different ways depending on how strong or thick you want it to be.

Method 1 is the simplest version. It uses boiling water to extract the beneficial compounds from the herbs and works well for most people.

Method 2 simmers the herbs on the stovetop, which pulls out more of the natural saponins and the moisturizing gel-like compounds released by the seeds. The result is a slightly thicker, more “activated” shampoo that some people find provides a little more cleansing or conditioning power.

DIY Natural Shampoo Recipe

Here’s how to make your own shampoo with Ayurvedic herbs and hot water.

Prep Time 5 minutes Cook Time 20 minutes Cooling time 30 minutes Total Time 55 minutes

Author Heather Dessinger, FDN-P

Method 1: Quick Infusion (No Stovetop)

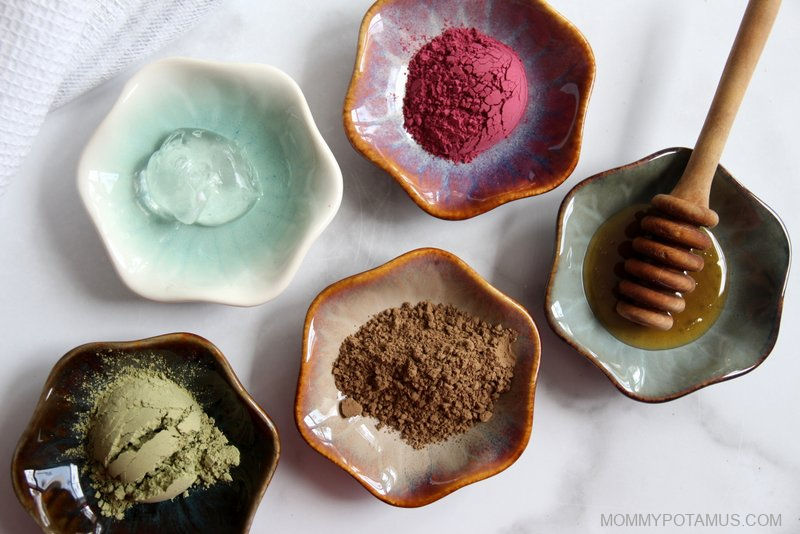
  • Line a mason jar or measuring cup with a nut milk bag. If you don’t have one, you can use a mesh strainer and cheesecloth to strain it after infusion.

  • Place the shikakai powder, reetha powder, and flax seeds inside the nut milk bag.

  • Bring 1¼ cups water to a boil, then pour it over the herbs and stir to combine.

  • Allow the mixture to cool for about 20 minutes, then stir in the aloe vera powder and amla powder if using.

  • Let the mixture infuse for another 10 minutes.

  • Strain through the nut milk bag. If you don’t have one, you can also strain by pouring the mixture over bowl that contains a mesh strainer lined with cheesecloth.

  • Once it has fully cooled, your shampoo is ready to use.

Method 2: Simmered Herbal Shampoo (Stovetop)

  • Place the shikakai powder, reetha powder, and flax seeds in medium pot. Add 1.5 cups water and stir to combine.

  • Bring mixture to a boil, then reduce heat and simmer for 20 minutes.

  • While the mixture is simmering, line a mason jar or measuring cup with a nut milk bag. If you don’t have one, you can use a mesh strainer and cheesecloth to strain it after infusion.

  • Remove the mixture from heat and pour it into the nut milk bag, using a spoon transfer any herbs that have settled at the bottom. If you don’t have a nut milk bag, you can pour the mixture into a mason jar.

  • Allow the mixture to cool for about 20 minutes, then stir in the aloe vera powder and amla powder if using.

  • Let the mixture infuse for another 10 minutes.

  • Strain through the nut milk bag. The mixture becomes thicker as it cools, so I recommend straining while it’s warm yet comfortable to touch. If you don’t have a nut milk bag, you can also strain by pouring the mixture over bowl that contains a mesh strainer lined with cheesecloth.

  • Your shampoo is ready to use.

Some people apply variations of this recipe to dry hair. Personally, I prefer to wet my hair first, then wring it out until it’s damp.

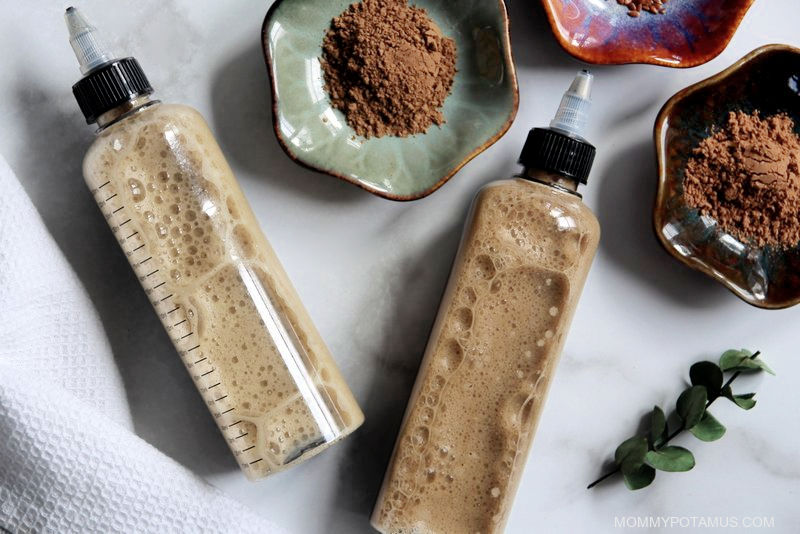
I shake the bottle a little, then apply about 3/4 of the shampoo to my scalp and roots – focusing mostly on the scalp. After application, I massage gently and let it sit for a few minutes. I have found that an application bottle (like this one made with PET plastic) helps distribute the shampoo more evenly, but you can use a measuring cup or something similar if you’d like.

Then I rinse while continuing to massage my scalp.

After that, I add some water to the remaining shampoo in the bottle and shake it to get a lot of suds going. I apply that all over my scalp and hair, let it sit for a couple minutes, and then rinse.

I typically use this recipe 1-3 times per week.

Is this good for all hair types?

Generally yes, although you may need to adjust the ratios.

For example, if your hair tends to be dry, adding aloe or amla can help increase conditioning.

If your hair tends to be oily, slightly increasing the reetha may help.

One thing to keep in mind: if you currently use products that coat the hair with silicones or dimethicone, your hair may go through a short transition period while that buildup gradually washes away.

What is the shelf life?

This recipe doesn’t contain preservatives, so I usually make it fresh.

However, once you’ve confirmed the recipe works well for your hair, you can freeze small batches and thaw them as needed.

Do I need to follow this with an apple cider vinegar rinse?

Not necessarily.

Unlike shampoo bars, which are alkaline and often require an acidic rinse to rebalance hair pH, this recipe is already within a hair-friendly pH range.

That said, some people enjoy following shikakai-based cleansers with a diluted ACV rinse. If that’s something you already like, feel free to experiment.

Do I need to use conditioner?

I don’t usually, but I do use the herbs above – plus a few more – in different ratios to whip up a moisturizing hair mask every week or two as needed.

In the summer, when I spend a lot of time in the sun/saltwater at my local beach, my ends will get a little dry. When that happens, I apply the shampoo recipe above and then dip my ends in a little coconut milk (guar gum-free) while I’m letting it sit. That adds a little moisture without weighing my hair down. This leave-in conditioner recipe also works really well for dry ends.

More Body & Hair Care Recipes To Try

Hair Gel – Tame flyaway frizz, keep curls in check, or style short hair with a non-toxic version of your favorite store-bought stuff. Many of the styling gels on store shelves contain hormone disrupting fragrances and formaldehyde releasers, but you can make natural hair gel with just 1-3 simple ingredients.

Body Wash – The rich, bubbly lather of this homemade body wash recipe cleanses while moisturizing. You probably have everything you need to make it in your pantry right now.

Bakuchiol Skincare Serum – If you’re looking for a gentle, effective way to support skin elasticity and firmness, even out skin tone and protect your skin barrier, bakuchiol is a bioactive compound worth getting excited about. Often called a natural alternative to retinol, it works with your skin’s natural regenerative processes to create change over time.

Share with a friend! 👇

Tags: , , , , ,
Easy DIY Face Masks For Naturally Glowing Skin

Easy DIY Face Masks For Naturally Glowing Skin

In a world filled with complicated skincare routines and expensive beauty products, sometimes the best solutions are sitting right in your kitchen. Natural ingredients not only nourish the skin but also minimise exposure to harsh chemicals. If you’re looking for simple, budget-friendly ways to pamper your skin at home, these easy DIY face masks can help you achieve a healthy, radiant glow.

Honey And Lemon For Instant Brightness

If your skin looks dull and tired, a honey and lemon mask can provide a quick refresh. Honey works as a natural humectant, locking in moisture and keeping the skin hydrated. Lemon juice, rich in vitamin C, helps gently exfoliate and brighten the complexion. Together, they can leave your skin feeling soft, fresh, and visibly radiant. However, use lemon sparingly and always apply sunscreen afterward, as it can make skin sensitive to sunlight.

Oatmeal And Yogurt For Soothing Care

For irritated or sensitive skin, oatmeal and yogurt make a calming combination. Ground oatmeal helps remove dead skin cells while soothing inflammation. Yogurt, packed with probiotics and lactic acid, hydrates and gently exfoliates the skin. This mask is especially helpful for those dealing with redness or dryness, offering a smooth and nourished finish after just one use.

Turmeric And Milk For A Natural Glow

Turmeric has long been celebrated in traditional skincare for its anti-inflammatory and antibacterial properties. When blended with milk, it creates a mask that can reduce redness and promote an even skin tone. Milk adds hydration while helping brighten the complexion. A small pinch of turmeric is enough to reap its benefits, and regular use may enhance your skin’s natural glow.

Banana And Honey For Deep Hydration

Dry and flaky skin can benefit greatly from a banana and honey mask. Ripe bananas are rich in vitamins and natural oils that help soften and replenish the skin. Adding honey boosts hydration and leaves the face feeling supple. This nourishing blend works well during colder months when skin tends to lose moisture more quickly.

Aloe Vera And Cucumber For Cooling Relief

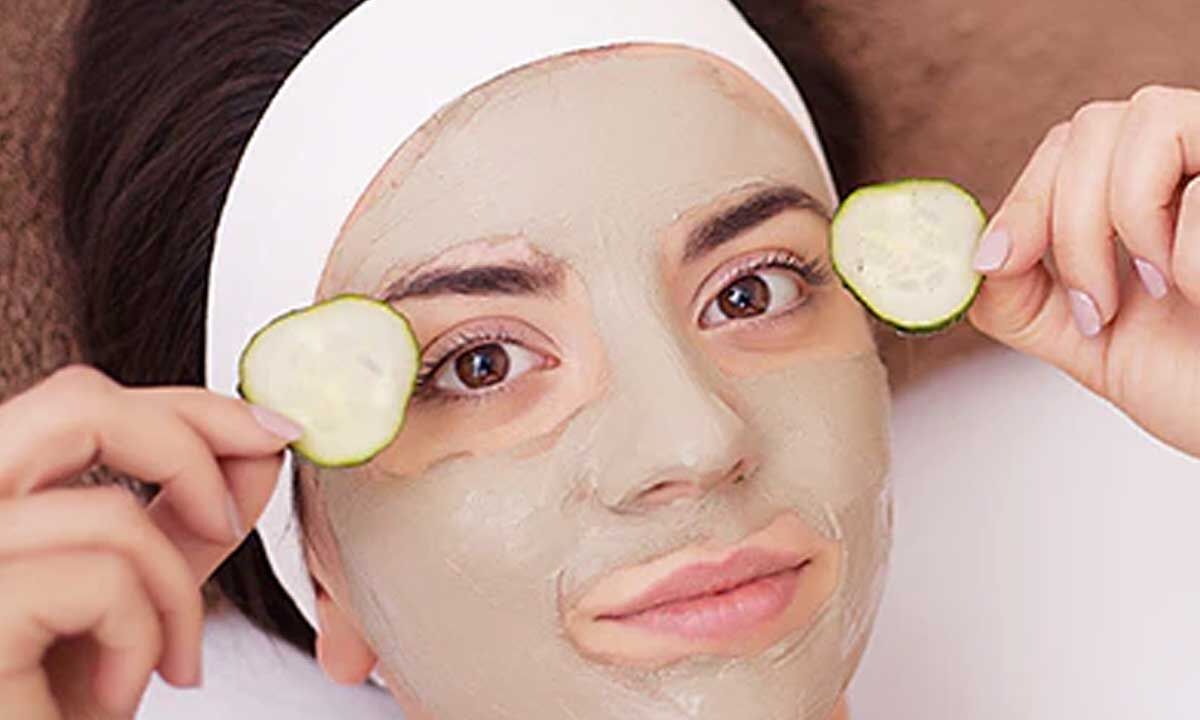
When your skin feels irritated or puffy, aloe vera and cucumber can offer instant relief. Aloe vera is known for its soothing and healing properties, making it ideal for calming sun-exposed or sensitive skin. Cucumber adds a cooling effect while helping reduce puffiness. This refreshing mask is perfect after a long day outdoors or whenever your skin needs a hydrating boost.

Coffee And Coconut Oil For Gentle Exfoliation

If you’re looking to revive tired-looking skin, try mixing coffee grounds with coconut oil. Coffee acts as a natural exfoliant, helping remove dead skin cells and stimulate circulation. Coconut oil deeply moisturizes, leaving the skin smooth and nourished. The result is a brighter, more energized appearance with improved texture.

Avocado And Yogurt For Nourishing Repair

Avocado is packed with healthy fats and essential nutrients that support skin elasticity and hydration. When combined with yogurt, it forms a rich, creamy mask that deeply conditions the skin. This blend is especially beneficial for mature or dehydrated skin, helping restore softness and suppleness.

Strawberry And Honey For Gentle Brightening

Fresh strawberries contain natural acids that lightly exfoliate and cleanse the skin. Paired with honey, they create a brightening mask that also maintains moisture balance. This fruity combination can help refresh the complexion, leaving it looking clearer and more vibrant.

A Simple Reminder Before You Begin

While these DIY masks use natural ingredients, it’s always wise to perform a patch test before applying anything new to your face. Natural doesn’t always mean irritation-free, especially for sensitive skin. With a little care and consistency, these kitchen remedies can become a relaxing part of your self-care routine—proving that glowing skin doesn’t have to come with a hefty price tag.

Tags: , , , , , ,
Homestead Blog Hop - Homestead tips, ideas, animal care, and recipes every Wednesday

Homestead Blog Hop 587 – DIY Restorations and Cold Weather Projects

Welcome to Homestead Blog Hop, a weekly gathering for homesteaders and simple living enthusiasts to share DIY projects, from-scratch recipes, and creative inspiration. This week’s hop features cozy homesteading tips, along with practical ideas that celebrate handmade living and self-sufficiency.

Whether you’re looking for seasonal crafts, homemade treats, or encouragement on your homesteading journey, you’ll find plenty of inspiration to carry into the new year. Grab a cup of tea, explore the featured posts, and join us in sharing your own homestead creations.

Meet Your Homesteading Hosts

We’re Kelly from Simple Life Mom, Liz from The Cape Coop, Natasha from Houseful of Nicholes, and Laurie from Ridgehaven Homestead. Together, we’re passionate about from-scratch living, simple ingredients, frugal habits, and intentional homesteading. We’re delighted to host the Homestead Blog Hop, where you can find fresh inspiration each week for DIY projects, homemade recipes, and practical simple living ideas.

Follow Us for More Homestead Inspiration

Natasha – Houseful of Nicholes
Facebook | Pinterest | X | Instagram

Laurie – Ridge Haven Homestead
Facebook | Pinterest | Instagram

Liz – The Cape Coop
Facebook | Pinterest | X | Instagram

Kelly – Simple Life Mom
Facebook | Pinterest | X | Instagram

FEATURED POSTS from the Last Homestead Blog Hop

Each week, we take turns selecting three featured posts from the Homestead Blog Hop. These features are shared across all of our social media platforms, helping spotlight the creativity and hard work of our fellow homesteaders. Here are the featured posts from last week’s hop:

1. Paint And Antique a Wood Bed from Petticoat Junktion

2. Chicken Parm Meatballs & Spaghetti from Homemade on a Weeknight

3. What to Actually Work On When It’s Too Cold to “Do Projects” from Once and Future Homestead

Congrats! Feel free to grab the featured on button for your post.

Just right click and ‘save image as…‘

Guidelines for the Homestead Blog Hop

  1. Click the “Add Your Link” button below and upload a clear, eye-catching image from your project or recipe. Please link directly to the family-friendly post itself, not your blog’s homepage.
  2. You may link up up to three posts each week.
  3. Take time to visit a few other blogs in the hop and leave a thoughtful comment to let them know you stopped by. Community support makes this hop special!
  4. Please include a link back to the Homestead Blog Hop in your post. Posts without a backlink are not eligible to be featured. All featured posts are shared across all hosts’ social media channels.
  5. Share posts that haven’t been linked to the hop before. Older posts are welcome as long as they are new to the hop.
  6. By joining the Homestead Blog Hop, you grant the hosts permission to use one image from your post, with a link back to your site, if your post is selected as a feature next week.
  7. This is a family-friendly link-up designed to encourage, inspire, and support the homesteader in all of us.

Let the Party Begin!

Which project are you excited to try this week? Leave a comment below.

Join Our Homestead Blog Hop Pinterest Board

Follow all of your hosts on Pinterest and send a message if you’d like to be added to our Homestead Blog Hop group board. This board is a great place to share your DIY projects, crafts, and from-scratch recipes with the homesteading community.

Guideline: Only pin posts that you’ve linked up to the Homestead Blog Hop.

Tags: , , , , , , ,
DIY Shikakai Hair Mask for Stronger, Shinier Hair

DIY Shikakai Hair Mask for Stronger, Shinier Hair

When I was a tween – which wasn’t actually a word back then – my best friend and I regularly ransacked her kitchen to make all the “magical hair mask” recipes that magazines promised would give us shiny, flowing locks.

Mashed bananas. Avocados. Kiwi.

They never delivered the results, but we kept trying. Now I wish we’d just eaten the bananas.

As you can imagine, when I first heard about a plant that literally translates to “fruit for hair,” I was skeptical. It sounded like mashed-banana-hair-mask 2.0.

I’m so glad I was wrong.

Shikakai powder has become a regular part of my natural hair care routine because it does something very rare in the world of DIY “fruit for hair” recipes.

It actually works – leaving my hair soft and shiny while nourishing my scalp.

Let’s talk about what it is, what it actually does (with research), and how to use it in a way that works for your hair type.

What Is Shikakai Powder?

Shikakai (Acacia concinna) is a climbing shrub native to India and parts of Southeast Asia. In Ayurveda – India’s traditional system of medicine – it’s been used for centuries as a natural hair cleanser and conditioner.

Shikakai comes from two Tamil words – sigai means “hair” or “tresses” and kaay means “fruit.” So, hair fruit.

The powder is made from dried shikakai pods, which are ground into a fine powder. When mixed with water, yogurt, or aloe vera, it forms a paste that can be massaged into the scalp and hair.

Shikakai Is unique because it cleanses AND conditions simultaneously. That dual action is the foundation of its traditional use – and one of the many reasons it’s still so popular today.

Benefits of Shikakai Powder for Hair

1. Natural Cleanser

Shikakai cleanses without aggressively stripping the scalp’s natural oils. It contains saponins – which are plant compounds that help lift away light buildup and debris – which are more gentle than the detergents found in conventional shampoo (and even the surfactants used in non-toxic options). (1)

It leaves hair soft, balanced and refreshed – clean, but not stripped.

That said, it’s designed for gentle cleansing, not heavy-duty clarifying. If you regularly use silicones, thick styling waxes, or heavy oil treatments, you may need a stronger cleanser to remove that type of buildup.

2. Hair Strength & Fullness

In Ayurvedic tradition, shikakai powder is highly valued for its ability to support strong, thick, resilient hair over time. While I haven’t found clinical research showing that it directly stimulates new hair growth or increases follicle density, it does contain antioxidant compounds that may help protect both the scalp and existing strands from oxidative stress.

What that can look like in real life is hair that appears fuller – not because new follicles suddenly pop up, but because the hair you already have is better supported and less prone to breakage or shedding.

In other words, it’s association with reduced hair fall and more overall fullness might be because of:

  • Reduced scalp irritation, which supports a healthier growth environment
  • Improved oil balance, which keeps follicles from becoming clogged
  • Gentle cleansing that minimizes dryness and breakage
  • Antioxidant activity that helps buffer environmental stressors

So, it’not a miracle “growth booster” – but it can help create the conditions that allow your natural growth cycle to function more optimally.

3. Dandruff Reduction & Scalp Support

Shikakai powder is a traditional Ayurvedic remedy for flaky, itchy scalps, and modern research gives us a hint as to why it has been used this way. Phytochemical analyses show that Acacia concinna extracts contain compounds with antimicrobial and antifungal activity, including saponins, flavonoids, tannins, and other plant bioactives that have been shown to inhibit the growth of various bacterial and fungal species in petri dish (in vitro) lab tests. (2) (3)

Since dandruff is often linked to an overgrowth of Malassezia yeast on the scalp, this antifungal potential offers a plausible explanation for why so many people find shikakai soothing. (4)

That said, most of the research has been conducted in lab environments rather than large human trials, and shikakai hasn’t been definitively shown to eliminate Malassezia on its own. So while it may help support a balanced, comfortable scalp – especially in mild cases – it’s best thought of as a supportive option rather than a stand-alone solution.

4. General Scalp Support

Hormonal shifts (like perimenopause) can make the scalp more reactive and sensitive, and over the past year my old routine – which I had used for many years without issue – suddenly started making my scalp itch. When I swapped in shikakai, the irritation resolved almost immediately.

Over time, as I’ve continued using shikakai alongside other herbs, I’ve noticed that my hair feels a little fuller AND my scalp remains healthy and irritation-free. Win/win.

5. Softness & Shine

When pure shikakai powder is mixed with water, it has a slightly gritty texture. The first time I applied it, I remember thinking, “Exactly how is this supposed to be moisturizing?”

My expectations didn’t improve after I rinsed it out, either. While wet, my hair didn’t feel deeply conditioned or dramatically different in any way.

That’s why I was so surprised once it dried.

It was noticeably smoother, shinier, and softer than I expected.

The shine probably has something to do with the way shikakai gently cleanses without over-stripping and its naturally slightly acidic pH, which can help the hair cuticle lie flatter. When the cuticle is smoother, each strand reflects light better – and that’s what gives hair a glossy look.

Whatever the exact mechanism, it’s one of my favorite benefits.

One of the best things about DIY hair care is that you can customize your blend to fit your needs. Below is a quick guide to the most common ingredients mixed with shikakai – and what each one brings to the blend.

Liquid Bases

Warm Water
Helps activate saponins and creates a smoother paste. Warm water typically creates a better consistency than cold, but temperature doesn’t significantly change cleansing ability.

Yogurt
Adds lactic acid (for clarifying), fats for moisture, and protein for temporary strengthening. Good for dry or frizz-prone hair.

Aloe Vera Gel
Adds hydration and slip. Soothes irritated scalps.

Dry Add-Ins

Aloe Vera Powder
Powdered aloe vera works like the gel form, but you only need about 1/3 of the amount.

Amla (Indian Gooseberry) Powder
Traditionally used to enhance shine and conditioning. Contains vitamin C and antioxidants.

Reetha (Soap Nuts) Powder
Boosts cleansing and foaming. Ideal if hair feels oily.

Neem Powder
Traditionally used for scalp conditions. Has antimicrobial properties.

Brahmi (Bacopa monnieri) Powder
Used in Ayurveda to support scalp health and hair thickness.

Fenugreek Seeds or Powder (Soaked & Blended)

When fenugreek seeds are soaked in water overnight and then blended, they create a gel-like substance that improves the spreadability of the hair mask, increases the conditioning properties, and adds slip for detangling. For curly or dry hair, this can make shikakai significantly more user-friendly. Fenugreek is also sold in powdered form. It can be used the same way as the seeds, but you can stir it instead of blending.

Hibiscus Powder
Traditionally used to enhance shine and softness. Also said to help hair keep its color longer reducing oxidative stress on the scalp.

Oxidative stress on the scalp is a primary factor in premature greying. It happens when free radicals (reactive oxygen species) accumulate in the hair follicle, damaging the pigment-producing cells (melanocytes).

Bhringraj (Eclipta alba) Powder
Traditionally used in Ayurveda to support hair vitality and overall scalp health. It’s often included in herbal blends aimed at strengthening hair roots and reducing shedding. While much of the evidence comes from traditional use and animal studies rather than large human trials, bhringraj is widely valued in Ayurvedic hair care for promoting thicker-looking, more resilient hair over time.

In the recipes below, you’ll notice that the amounts are usually given as a range – for example, 2–4 tablespoons. These measurements are meant to be a starting point, since the exact amount you’ll need depends on your hair’s length, thickness, and texture.

After a batch or two, you’ll quickly get a feel for what works best for you and can adjust accordingly.

Before you get started, here are some tips and guidelines:

  • Shikakai hair mask may feel drying if used alone on moisture-depleted or brittle hair → In those cases, consider adding yogurt, aloe, or fenugreek.
  • Shikakai can irritate eyes → Rinse carefully.
  • Always patch test first → I recommend this for all DIY skin and hair care recipes including backuchiol serum, magnesium oil, and butterfly pea witch hazel toner. For the recipes below, a patch test might look like this:
    • Blend a small amount of your recipe together.
    • Apply a dab to your inner wrist or just behind your ear. Wait 24 hours and check for any redness, itching, or irritation.
    • Once you’re in the clear, it’s time to treat your hair to something special.

🌸 Basic Shikakai Hair Mask

Shikakai + Water
Best for normal to oily scalps / hair.

Ingredients

  • 2-4 tablespoons shikakai powder
  • Enough warm water to create a yogurt-like texture

Instructions

Mix ingredients together until they form a yogurt-like texture. To apply, work into wet hair from your scalp to the ends of your hair.

Apply to wet hair, working from your scalp to the ends of your hair.
Leave on 10–15 minutes.
Rinse thoroughly.

Note: It will not lather like commercial shampoo. That’s normal.

🫧 Cleansing Hair Mask

Shikakai + Reetha
Best for oily scalps, moderate buildup, post-workout hair, or when your roots feel weighed down.

Ingredients

This recipe adds reetha – also known as soapberry or soap nut – for cleansing oomph. Yes, that’s the technical term. 🙂

  • 1-2 tbsp shikakai powder
  • 1-2 tbsp reetha powder
  • Warm water

Instructions

Mix the ingredients together until they form a smooth, yogurt-like paste.

Apply to wet hair, starting at the scalp and gently massaging into the hair roots to support a thorough cleanse. Then work the mixture down through the lengths of your hair to the ends.

Leave on for 10–15 minutes.

Rinse thoroughly, making sure no residue remains at the roots.

Note: This blend may create slightly more lather than shikakai alone because of the reetha, but it still won’t foam like commercial shampoo – and that’s completely normal.

🌺 Conditioning Hair Mask

Amla + Shikakai
For hair that feels dry, dull, frizz-prone, or rough.

Ingredients

  • 1-2 tbsp shikakai powder
  • 1-2 tbsp amla powder
  • Optional: 2-4 tbsp yogurt or aloe vera gel (or 2-4 tsp aloe vera powder)
  • Optional: 1-2 tsp fenugreek powder (You can make your own by grinding fenugreek seeds in a coffee grinder.)
  • Warm water

If you’re adding fenugreek and starting with the whole seeds, make sure to grind them very finely, or you may find that you have trouble rinsing seed pieces out of your hair. (I use a coffee grinder.)

In a small bowl, combine the shikakai and amla powders. Add yogurt or aloe vera gel (or aloe powder + water) and stir until you reach a smooth, slightly runny yogurt-like consistency.

If you’re adding fenugreek powder, place it in a small separate bowl and mix it with a little bit of warm water.

Let the mixtures sit for about 5 minutes to thicken slightly, then combine them.

Apply to wet hair, starting at the scalp and gently working it into the hair roots. Then smooth it down through the lengths to the ends, making sure everything is evenly coated.

Leave on for 20–30 minutes.

Rinse thoroughly, taking a little extra care to remove any herbal residue at the roots.

🌿 Hair Mask for Fewer Flakes

Shikakai + Neem + Hibiscus + Aloe
For itchy, reactive, flake-prone scalps.

Ingredients

  • 1–2 tbsp shikakai powder
  • 1 tsp–1 tbsp neem powder (start lower if sensitive)
  • Optional: 2-3 tsp hibiscus powder
  • Optional: 1-2 tbsp aloe vera gel
  • Optional: 1–2 tsp honey
  • Warm water

Instructions

In a small bowl, combine the powders.

Add aloe vera gel and honey (if using), then add a little bit of warm water. Stir and add small amounts of water as needed until a smooth, yogurt-like paste forms.

Apply to wet hair, starting at the scalp. Gently massage into the scalp and hair roots, then smooth through to the ends.

Leave on for 15–20 minutes.

Rinse thoroughly, taking extra care around the roots.

Note: Neem can have a strong scent. If you’re new to it, start with a smaller amount and increase gradually.

🌺 Shine + Conditioning Boost Hair Mask

Amla + Shikakai + Hibiscus + Yogurt or Aloe
For dull hair that needs softness and light-reflecting shine.

Ingredients

  • 1–2 tbsp shikakai powder
  • 1–2 tbsp amla powder
  • 1 tbsp hibiscus powder
  • 1-2 tbsp yogurt or aloe vera gel
  • Optional: 1–2 tsp honey
  • Warm water

Instructions

In a bowl, combine shikakai, amla, and hibiscus powders.

Add yogurt/aloe vera gel and a small amount of warm water. Stir and keep adding water in 1 teaspoon increments until the mixture is smooth and creamy.

Apply to wet hair, working first into the scalp and hair roots, then smoothing through the lengths to the ends.

Leave on for 20–30 minutes.

Rinse thoroughly.

Note: If your hair tends toward dryness, yogurt may provide more conditioning than aloe alone.

🌾 Deep Strength + Roots Hair Mask

Bhringraj + Shikakai + Fenugreek + Water/Aloe
For hair that feels fragile, sheds more than usual, or needs extra support at the roots.

Ingredients

  • 1–2 tbsp shikakai powder
  • 1–2 tbsp c powder
  • Optional: 1–2 tsp fenugreek powder
  • Water or aloe vera gel (enough to create a yogurt-like paste)
  • Optional 1-2 tbsp brahmi powder

Instructions

If you’re adding fenugreek and starting with the whole seeds, umake sure to grind them very finely, or you may find that you have trouble rinsing seed pieces out of your hair. (I use a coffee grinder.)

In a bowl, combine shikakai and Bhringraj powder (and brahmi powder, if using)

Add water or aloe vera gel until you reach a smooth, slightly runny but spreadable consistency.

If you’re adding fenugreek powder, place it in a small separate bowl and mix it with a little bit of warm water.

Let the mixtures sit for about 5–10 minutes to thicken slightly, then combine them.

Apply to wet hair, gently massaging into the scalp and hair roots first. Work through the lengths to the ends.

Leave on for 20–30 minutes.

Rinse thoroughly, ensuring all herbal residue is removed at the roots.

Note: Fenugreek adds slip and makes this blend significantly easier to apply — especially for thicker or curly hair.

Not Sure Which One to Choose?

  • If your scalp feels greasy → 🫧 Cleansing Mask
  • If your scalp feels itchy or reactive → 🌿 Scalp Soothing Mask
  • If your hair feels dry or frizzy → 🌺 Shine + Conditioning Boost
  • If your hair feels fragile or sheds easily → 🌾 Deep Strength + Roots
  • If you just want simple and gentle → 🧴 Basic Mask

More Hair Care Recipes To Try

Herbal Detangler – If there are tears over tangles in your house, here are three homemade hair detangler recipes that are inexpensive and simple to make.

Natural Hair Gel – Want to tame flyaway frizz, keep curls in check, or style short hair with a non-toxic version of your favorite store-bought stuff?

Many of the styling gels on store shelves contain hormone disrupting fragrances and formaldehyde releasers, but you can make natural hair gel with just 1-3 simple ingredients.

Sources

  1. Almeida, C., Silva, A., Ferreira, I., & Teixeira, A. (2023) Natural alternatives to synthetic surfactants for hair care: A review. National Center for Biotechnology Information, U.S. National Library of Medicine.
  2. Wuthi-udomlert, M. (2011). In vitro Effectiveness of Acacia concinna Extract against Dermatophytic Pathogens. Journal of Mycology and Pathology
  3. Sang, S.-H., Akowuah, G. A., Liew, K. B., et. al. (2023). Natural Alternatives from Your Garden for Hair Care: Revisiting the Benefits of Tropical Herbs. National Center for Biotechnology Information.
  4. Batra, R., Boekhout, T., Guého, E., Cabañes, et. al. (2005). Malassezia Baillon, emerging clinical yeasts. FEMS Yeast Research

Share with a friend! 👇

Tags: , , , , ,
Best oLive
Privacy Overview

This website uses cookies so that we can provide you with the best user experience possible. Cookie information is stored in your browser and performs functions such as recognising you when you return to our website and helping our team to understand which sections of the website you find most interesting and useful.