When I was a tween – which wasn’t actually a word back then – my best friend and I regularly ransacked her kitchen to make all the “magical hair mask” recipes that magazines promised would give us shiny, flowing locks.
Mashed bananas. Avocados. Kiwi.
They never delivered the results, but we kept trying. Now I wish we’d just eaten the bananas.
As you can imagine, when I first heard about a plant that literally translates to “fruit for hair,” I was skeptical. It sounded like mashed-banana-hair-mask 2.0.
I’m so glad I was wrong.
Shikakai powder has become a regular part of my natural hair care routine because it does something very rare in the world of DIY “fruit for hair” recipes.
It actually works – leaving my hair soft and shiny while nourishing my scalp.
Let’s talk about what it is, what it actually does (with research), and how to use it in a way that works for your hair type.
What Is Shikakai Powder?
Shikakai (Acacia concinna) is a climbing shrub native to India and parts of Southeast Asia. In Ayurveda – India’s traditional system of medicine – it’s been used for centuries as a natural hair cleanser and conditioner.
Shikakai comes from two Tamil words – sigai means “hair” or “tresses” and kaay means “fruit.” So, hair fruit.
The powder is made from dried shikakai pods, which are ground into a fine powder. When mixed with water, yogurt, or aloe vera, it forms a paste that can be massaged into the scalp and hair.
Shikakai Is unique because it cleanses AND conditions simultaneously. That dual action is the foundation of its traditional use – and one of the many reasons it’s still so popular today.
Benefits of Shikakai Powder for Hair
1. Natural Cleanser
Shikakai cleanses without aggressively stripping the scalp’s natural oils. It contains saponins – which are plant compounds that help lift away light buildup and debris – which are more gentle than the detergents found in conventional shampoo (and even the surfactants used in non-toxic options). (1)
It leaves hair soft, balanced and refreshed – clean, but not stripped.
That said, it’s designed for gentle cleansing, not heavy-duty clarifying. If you regularly use silicones, thick styling waxes, or heavy oil treatments, you may need a stronger cleanser to remove that type of buildup.
2. Hair Strength & Fullness
In Ayurvedic tradition, shikakai powder is highly valued for its ability to support strong, thick, resilient hair over time. While I haven’t found clinical research showing that it directly stimulates new hair growth or increases follicle density, it does contain antioxidant compounds that may help protect both the scalp and existing strands from oxidative stress.
What that can look like in real life is hair that appears fuller – not because new follicles suddenly pop up, but because the hair you already have is better supported and less prone to breakage or shedding.
In other words, it’s association with reduced hair fall and more overall fullness might be because of:
- Reduced scalp irritation, which supports a healthier growth environment
- Improved oil balance, which keeps follicles from becoming clogged
- Gentle cleansing that minimizes dryness and breakage
- Antioxidant activity that helps buffer environmental stressors
So, it’not a miracle “growth booster” – but it can help create the conditions that allow your natural growth cycle to function more optimally.
3. Dandruff Reduction & Scalp Support
Shikakai powder is a traditional Ayurvedic remedy for flaky, itchy scalps, and modern research gives us a hint as to why it has been used this way. Phytochemical analyses show that Acacia concinna extracts contain compounds with antimicrobial and antifungal activity, including saponins, flavonoids, tannins, and other plant bioactives that have been shown to inhibit the growth of various bacterial and fungal species in petri dish (in vitro) lab tests. (2) (3)
Since dandruff is often linked to an overgrowth of Malassezia yeast on the scalp, this antifungal potential offers a plausible explanation for why so many people find shikakai soothing. (4)
That said, most of the research has been conducted in lab environments rather than large human trials, and shikakai hasn’t been definitively shown to eliminate Malassezia on its own. So while it may help support a balanced, comfortable scalp – especially in mild cases – it’s best thought of as a supportive option rather than a stand-alone solution.
4. General Scalp Support
Hormonal shifts (like perimenopause) can make the scalp more reactive and sensitive, and over the past year my old routine – which I had used for many years without issue – suddenly started making my scalp itch. When I swapped in shikakai, the irritation resolved almost immediately.
Over time, as I’ve continued using shikakai alongside other herbs, I’ve noticed that my hair feels a little fuller AND my scalp remains healthy and irritation-free. Win/win.
5. Softness & Shine
When pure shikakai powder is mixed with water, it has a slightly gritty texture. The first time I applied it, I remember thinking, “Exactly how is this supposed to be moisturizing?”
My expectations didn’t improve after I rinsed it out, either. While wet, my hair didn’t feel deeply conditioned or dramatically different in any way.
That’s why I was so surprised once it dried.
It was noticeably smoother, shinier, and softer than I expected.
The shine probably has something to do with the way shikakai gently cleanses without over-stripping and its naturally slightly acidic pH, which can help the hair cuticle lie flatter. When the cuticle is smoother, each strand reflects light better – and that’s what gives hair a glossy look.
Whatever the exact mechanism, it’s one of my favorite benefits.
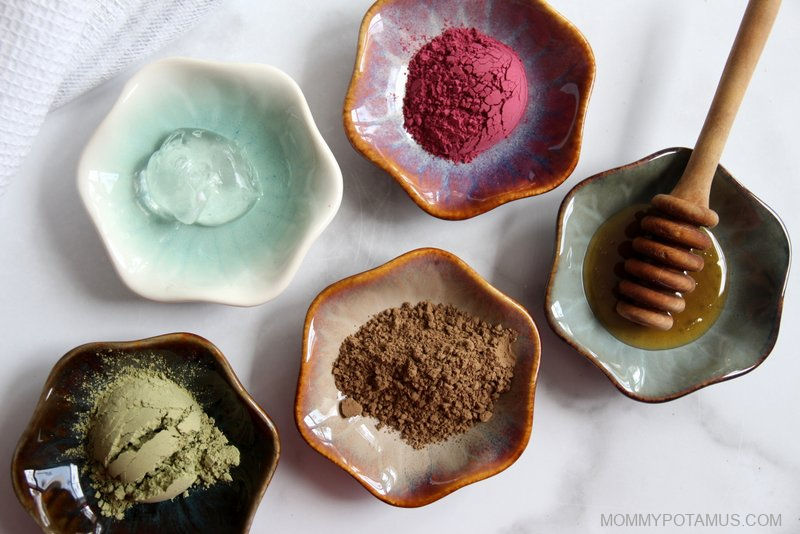
One of the best things about DIY hair care is that you can customize your blend to fit your needs. Below is a quick guide to the most common ingredients mixed with shikakai – and what each one brings to the blend.
Liquid Bases
Warm Water
Helps activate saponins and creates a smoother paste. Warm water typically creates a better consistency than cold, but temperature doesn’t significantly change cleansing ability.
Yogurt
Adds lactic acid (for clarifying), fats for moisture, and protein for temporary strengthening. Good for dry or frizz-prone hair.
Aloe Vera Gel
Adds hydration and slip. Soothes irritated scalps.
Dry Add-Ins
Aloe Vera Powder
Powdered aloe vera works like the gel form, but you only need about 1/3 of the amount.
Amla (Indian Gooseberry) Powder
Traditionally used to enhance shine and conditioning. Contains vitamin C and antioxidants.
Reetha (Soap Nuts) Powder
Boosts cleansing and foaming. Ideal if hair feels oily.
Neem Powder
Traditionally used for scalp conditions. Has antimicrobial properties.
Brahmi (Bacopa monnieri) Powder
Used in Ayurveda to support scalp health and hair thickness.
Fenugreek Seeds or Powder (Soaked & Blended)
When fenugreek seeds are soaked in water overnight and then blended, they create a gel-like substance that improves the spreadability of the hair mask, increases the conditioning properties, and adds slip for detangling. For curly or dry hair, this can make shikakai significantly more user-friendly. Fenugreek is also sold in powdered form. It can be used the same way as the seeds, but you can stir it instead of blending.
Hibiscus Powder
Traditionally used to enhance shine and softness. Also said to help hair keep its color longer reducing oxidative stress on the scalp.
Oxidative stress on the scalp is a primary factor in premature greying. It happens when free radicals (reactive oxygen species) accumulate in the hair follicle, damaging the pigment-producing cells (melanocytes).
Bhringraj (Eclipta alba) Powder
Traditionally used in Ayurveda to support hair vitality and overall scalp health. It’s often included in herbal blends aimed at strengthening hair roots and reducing shedding. While much of the evidence comes from traditional use and animal studies rather than large human trials, bhringraj is widely valued in Ayurvedic hair care for promoting thicker-looking, more resilient hair over time.
In the recipes below, you’ll notice that the amounts are usually given as a range – for example, 2–4 tablespoons. These measurements are meant to be a starting point, since the exact amount you’ll need depends on your hair’s length, thickness, and texture.
After a batch or two, you’ll quickly get a feel for what works best for you and can adjust accordingly.
Before you get started, here are some tips and guidelines:
- Shikakai hair mask may feel drying if used alone on moisture-depleted or brittle hair → In those cases, consider adding yogurt, aloe, or fenugreek.
- Shikakai can irritate eyes → Rinse carefully.
- Always patch test first → I recommend this for all DIY skin and hair care recipes including backuchiol serum, magnesium oil, and butterfly pea witch hazel toner. For the recipes below, a patch test might look like this:
- Blend a small amount of your recipe together.
- Apply a dab to your inner wrist or just behind your ear. Wait 24 hours and check for any redness, itching, or irritation.
- Once you’re in the clear, it’s time to treat your hair to something special.
🌸 Basic Shikakai Hair Mask
Shikakai + Water
Best for normal to oily scalps / hair.
Ingredients
- 2-4 tablespoons shikakai powder
- Enough warm water to create a yogurt-like texture
Instructions
Mix ingredients together until they form a yogurt-like texture. To apply, work into wet hair from your scalp to the ends of your hair.
Apply to wet hair, working from your scalp to the ends of your hair.
Leave on 10–15 minutes.
Rinse thoroughly.
Note: It will not lather like commercial shampoo. That’s normal.
🫧 Cleansing Hair Mask
Shikakai + Reetha
Best for oily scalps, moderate buildup, post-workout hair, or when your roots feel weighed down.
Ingredients
This recipe adds reetha – also known as soapberry or soap nut – for cleansing oomph. Yes, that’s the technical term. 🙂
- 1-2 tbsp shikakai powder
- 1-2 tbsp reetha powder
- Warm water
Instructions
Mix the ingredients together until they form a smooth, yogurt-like paste.
Apply to wet hair, starting at the scalp and gently massaging into the hair roots to support a thorough cleanse. Then work the mixture down through the lengths of your hair to the ends.
Leave on for 10–15 minutes.
Rinse thoroughly, making sure no residue remains at the roots.
Note: This blend may create slightly more lather than shikakai alone because of the reetha, but it still won’t foam like commercial shampoo – and that’s completely normal.
🌺 Conditioning Hair Mask
Amla + Shikakai
For hair that feels dry, dull, frizz-prone, or rough.
Ingredients
- 1-2 tbsp shikakai powder
- 1-2 tbsp amla powder
- Optional: 2-4 tbsp yogurt or aloe vera gel (or 2-4 tsp aloe vera powder)
- Optional: 1-2 tsp fenugreek powder (You can make your own by grinding fenugreek seeds in a coffee grinder.)
- Warm water
If you’re adding fenugreek and starting with the whole seeds, make sure to grind them very finely, or you may find that you have trouble rinsing seed pieces out of your hair. (I use a coffee grinder.)
In a small bowl, combine the shikakai and amla powders. Add yogurt or aloe vera gel (or aloe powder + water) and stir until you reach a smooth, slightly runny yogurt-like consistency.
If you’re adding fenugreek powder, place it in a small separate bowl and mix it with a little bit of warm water.
Let the mixtures sit for about 5 minutes to thicken slightly, then combine them.
Apply to wet hair, starting at the scalp and gently working it into the hair roots. Then smooth it down through the lengths to the ends, making sure everything is evenly coated.
Leave on for 20–30 minutes.
Rinse thoroughly, taking a little extra care to remove any herbal residue at the roots.
🌿 Hair Mask for Fewer Flakes
Shikakai + Neem + Hibiscus + Aloe
For itchy, reactive, flake-prone scalps.
Ingredients
- 1–2 tbsp shikakai powder
- 1 tsp–1 tbsp neem powder (start lower if sensitive)
- Optional: 2-3 tsp hibiscus powder
- Optional: 1-2 tbsp aloe vera gel
- Optional: 1–2 tsp honey
- Warm water
Instructions
In a small bowl, combine the powders.
Add aloe vera gel and honey (if using), then add a little bit of warm water. Stir and add small amounts of water as needed until a smooth, yogurt-like paste forms.
Apply to wet hair, starting at the scalp. Gently massage into the scalp and hair roots, then smooth through to the ends.
Leave on for 15–20 minutes.
Rinse thoroughly, taking extra care around the roots.
Note: Neem can have a strong scent. If you’re new to it, start with a smaller amount and increase gradually.
🌺 Shine + Conditioning Boost Hair Mask
Amla + Shikakai + Hibiscus + Yogurt or Aloe
For dull hair that needs softness and light-reflecting shine.
Ingredients
- 1–2 tbsp shikakai powder
- 1–2 tbsp amla powder
- 1 tbsp hibiscus powder
- 1-2 tbsp yogurt or aloe vera gel
- Optional: 1–2 tsp honey
- Warm water
Instructions
In a bowl, combine shikakai, amla, and hibiscus powders.
Add yogurt/aloe vera gel and a small amount of warm water. Stir and keep adding water in 1 teaspoon increments until the mixture is smooth and creamy.
Apply to wet hair, working first into the scalp and hair roots, then smoothing through the lengths to the ends.
Leave on for 20–30 minutes.
Rinse thoroughly.
Note: If your hair tends toward dryness, yogurt may provide more conditioning than aloe alone.
🌾 Deep Strength + Roots Hair Mask
Bhringraj + Shikakai + Fenugreek + Water/Aloe
For hair that feels fragile, sheds more than usual, or needs extra support at the roots.
Ingredients
- 1–2 tbsp shikakai powder
- 1–2 tbsp c powder
- Optional: 1–2 tsp fenugreek powder
- Water or aloe vera gel (enough to create a yogurt-like paste)
- Optional 1-2 tbsp brahmi powder
Instructions
If you’re adding fenugreek and starting with the whole seeds, umake sure to grind them very finely, or you may find that you have trouble rinsing seed pieces out of your hair. (I use a coffee grinder.)
In a bowl, combine shikakai and Bhringraj powder (and brahmi powder, if using)
Add water or aloe vera gel until you reach a smooth, slightly runny but spreadable consistency.
If you’re adding fenugreek powder, place it in a small separate bowl and mix it with a little bit of warm water.
Let the mixtures sit for about 5–10 minutes to thicken slightly, then combine them.
Apply to wet hair, gently massaging into the scalp and hair roots first. Work through the lengths to the ends.
Leave on for 20–30 minutes.
Rinse thoroughly, ensuring all herbal residue is removed at the roots.
Note: Fenugreek adds slip and makes this blend significantly easier to apply — especially for thicker or curly hair.
Not Sure Which One to Choose?
- If your scalp feels greasy → 🫧 Cleansing Mask
- If your scalp feels itchy or reactive → 🌿 Scalp Soothing Mask
- If your hair feels dry or frizzy → 🌺 Shine + Conditioning Boost
- If your hair feels fragile or sheds easily → 🌾 Deep Strength + Roots
- If you just want simple and gentle → 🧴 Basic Mask
More Hair Care Recipes To Try
Herbal Detangler – If there are tears over tangles in your house, here are three homemade hair detangler recipes that are inexpensive and simple to make.
Natural Hair Gel – Want to tame flyaway frizz, keep curls in check, or style short hair with a non-toxic version of your favorite store-bought stuff?
Many of the styling gels on store shelves contain hormone disrupting fragrances and formaldehyde releasers, but you can make natural hair gel with just 1-3 simple ingredients.
Sources
- Almeida, C., Silva, A., Ferreira, I., & Teixeira, A. (2023) Natural alternatives to synthetic surfactants for hair care: A review. National Center for Biotechnology Information, U.S. National Library of Medicine.
- Wuthi-udomlert, M. (2011). In vitro Effectiveness of Acacia concinna Extract against Dermatophytic Pathogens. Journal of Mycology and Pathology
- Sang, S.-H., Akowuah, G. A., Liew, K. B., et. al. (2023). Natural Alternatives from Your Garden for Hair Care: Revisiting the Benefits of Tropical Herbs. National Center for Biotechnology Information.
- Batra, R., Boekhout, T., Guého, E., Cabañes, et. al. (2005). Malassezia Baillon, emerging clinical yeasts. FEMS Yeast Research
Share with a friend! 👇