Easy ways to stop stinging, itching and pigmentation

Easy ways to stop stinging, itching and pigmentation

We’re constantly told to protect our skin barrier but sometimes, even with the greatest of care, things get compromised. Maybe you’re back from your holidays with stinging sunburn or had an adverse reaction to a new product in your skincare routine. It happens and when it does, quite frankly, it hurts! Luckily, getting your skin barrier back to normal isn’t difficult, but it will take a slight shakeup to your usual routine to get things back on track. So much of the skin barrier advice out there is based in lighter skin tones, from signs that it is in fact damaged to how to treat it, and it varies between skin tones and types.

Signs of a damaged skin barrier in darker skin

The first step is understanding whether your skin barrier is damaged, and getting to grips with what that looks or feels like for you.

For darker skin tones, the often spoken about signs of a damaged skin barrier, for example red, inflamed skin, can look slightly different. Dermatica dermatologist Dr Shendy Engelina says “inflammation from a damaged skin barrier doesn’t always look red on darker skin tones, and instead it often appears as a subtle purplish or hyperpigmented shadow.”

The best and most reliable way to check for a damaged skin barrier is to touch and feel your skin (with clean hands of course). “If your skin feels unusually warm, tight, or irritated, your barrier is likely compromised,” Dr Shendy says. “Other key signs to watch out for include persistent itchiness, rough or flaky patches, and a sudden sensitivity to products that you previously tolerated well.”

If symptoms persist, it might be time to consult your GP, as they could be signs that personalised medical advice and treatment is needed.

Sunburn vs irritation vs post-inflammatory hyperpigmentation

Sunburn, irritation and post-inflammatory hyperpigmentation are all interconnected terms and refer to different types or stages of skin barrier trauma. They all damage the skin barrier in different ways, making it tricky to actually understand what’s going on and how best to treat it.

So, let’s break it all down. Dr Shendy explains that sunburn is “acute damage” caused by UV radiation from the sun. “This compromises the skin barrier and triggers an inflammatory response.”

A damaged skin barrier – which could be caused by lifestyle habits, harsh skincare routines, and environmental factors like UV radiation – means the skin’s protective outer layer has been weakened and made vulnerable. Irritation is the physical symptom of this damage, characterised by stinging, itching, or warmth.

Post-inflammatory hyperpigmentation refers to the light or dark brown marks left behind after the initial inflammation has subsided. This happens because the inflammation triggers excess melanin production in the affected areas.

What to ingredients to start and what to stop

STOP: Active ingredients and exfoliants

When dealing with a compromised skin barrier, you’ll want to strip your routine back to the absolute basics. Dr Shendy recommends pausing all active ingredients – yes, that includes the vitamin C too – to allow your skin time to recover. Don’t worry, this is just temporary but it does mean stepping away from exfoliating acids (like AHAs and BHAs), retinoids, and harsh physical scrubs for a while, “as these will only exacerbate the inflammation and delay the healing process.”

START: Replenishing moisturisers and anti-inflammatory ingredients

“In the meantime, your routine should focus on replenishing products, choosing moisturisers formulated with ceramides, cholesterol and free fatty acids,” Dr Malvina Cunningham, Renew + Me’s consultant dermatologist, says.

“Pairing these lipid-dense creams with hydrating humectants like glycerin and soothing anti-inflammatory ingredients like niacinamide, panthenol or centella asiatica helps further repair and prevents water loss and post inflammatory hyperpigmentation.”

Dermatica Caring Squalane Cream Cleanser
Skin 1004 Madagascar Centella Ampoule Foam 125ml
The Ordinary Niacinamide 10% + Zinc 1%
Renew+Me Nightly-Active-Treatment
Dr Jart+ Cicapair Intensive Soothing Tiger Grass Repair Cream 50ml

Now 20% Off

How to use sunscreen during skin barrier recovery

SPF shouldn’t solely be a staple in your summertime skincare routine – this is a year-round must have to protect your skin barrier from UV exposure, yes even in the colder months.

“Using sunscreen during barrier recovery is important especially for skin of colour, where UV exposure on compromised skin rapidly worsens post-inflammatory hyperpigmentation,” Dr Malvina advises. Opt for a 100% mineral (physical) sunscreen containing zinc oxide or titanium dioxide as these will be more gentle on your skin as it heals. Mineral sunscreens don’t often have the best rep as they tend to leave a white cast on deep skin tones, but you can go for a new-gen tinted formula (see below) during this step if you have medium deep skin.

Alternatively, look for products formulated for sensitive or eczema prone skin which are fragrance-free and alcohol-free formulas and incorporate soothing base ingredients like squalane or glycerin.

Tatcha The Silk Sunscreen SPF50
Caudalie Vinosun Very High Protection Cream Spf50
Naked Sundays BeautyScreen Peptide Foundation Tint 30ml

Now 20% Off

Beauty of Joseon Daily Tinted Fluid Sunscreen Broad Spectrum SPF30

“Focus your daily routine on a non-stripping, fragrance-free cleanser, a barrier-repairing cream and a broad-spectrum sunscreen for sensitive skin or a mineral sunscreen with an SPF to protect vulnerable skin from darkening while it heals,” Dr Malvina says.

Apply an ultra-gentle, non-foaming cleanser with lukewarm water. Then follow with a rich ceramide-based moisturiser. Use this on slightly damp skin directly after cleansing to seal the hydration in and finish with a broad-spectrum, mineral sunscreen.

Lauren Gordon is a contributor for Cosmopolitan’s Black Beauty Hub and the Emerging Audiences Editor at The Mirror, where she leads the Under-35s team and serves as the creator-curator of The Gulp, a weekly lifestyle and culture newsletter.

With nearly a decade of experience across leading newsrooms and digital platforms, Lauren’s career in lifestyle and beauty journalism flourished after earning her journalism degree from the University of the Arts London.


Tags: , , , , ,
egg bake

Broccoli Cheddar Egg Bake (Easy High-Protein)

I love having simple breakfast recipes I can make ahead for busy mornings. While smoothies and overnight oats have their place, I also try to prioritize protein in the mornings. This broccoli  cheddar egg bake is a great way to do that. It’s one of those recipes that’s almost effortless to throw together but everyone in my family is a fan. 

The best part is that it only takes a few minutes to mix everything together before the oven does the rest of the work. I can prep it while I’m making coffee, then let it bake while I dive into my morning routine. It also reheats beautifully. I’ll often make dishes like this on the weekend and enjoy leftovers for breakfast or lunch throughout the week.

Why I Love This Broccoli Cheddar Egg Bake

Egg casseroles have always been one of my favorite ways to meal prep because they’re incredibly versatile. This version combines eggs with cottage cheese for an extra boost of protein and a creamy texture without needing heavy cream. The shredded cheddar adds plenty of flavor, while the broccoli brings color, fiber, and nutrients.

I also appreciate that this recipe uses simple ingredients I almost always have on hand. Frozen broccoli works just as well if that’s what you have, making it easy to pull together without a special grocery trip. The seasonings are simple too, allowing the cheese and broccoli to really shine.

This breakfast casserole is naturally gluten-free and works well for everything from weekday breakfasts to weekend brunches. I also like serving it with fresh fruit, sliced avocado, or roasted potatoes for a more complete meal. Since it makes several servings, it’s an easy option when I’m feeding a crowd (like my kids!) or simply trying to get ahead on meal prep.

Tips for the Best Egg Casserole

Thankfully, this recipe is pretty forgiving. Whisking the cottage cheese into the eggs helps create a smooth, fluffy texture, and the broccoli cooks perfectly right in the casserole without getting mushy. Letting the bake rest for a few minutes before slicing also helps everything set, making it easier to serve neat portions.

Leftovers store well in the refrigerator for several days, making this one of my favorite make-ahead breakfasts. I simply warm up a slice in the oven, toaster oven, or air fryer for a quick meal that tastes almost as good as when it was freshly baked.

Whether you’re meal prepping for the week, hosting brunch, or just looking for a nourishing breakfast that doesn’t require standing over the stove, this broccoli cheddar egg bake is a recipe worth keeping on repeat. It’s simple, filling, and made with wholesome ingredients that help make busy mornings a little easier.

Broccoli Cheddar Egg Bake

This delicious egg bake is fully of cheesy broccoli flavor. An easy breakfast that’s dump and go!

  • Preheat the oven to 350°F and grease a 9×13-inch baking dish.

  • In a large bowl, whisk together the eggs, cottage cheese, salt, pepper, garlic powder, and onion powder until smooth.

  • Stir in the broccoli and cheddar cheese.

  • Pour the mixture into the prepared baking dish and spread evenly.

  • Bake for 40–45 minutes, or until the center is set and a knife inserted in the middle comes out clean.

Nutrition Facts

Broccoli Cheddar Egg Bake

Amount Per Serving (1 serving)

Calories 383
Calories from Fat 234

% Daily Value*

Fat 26g40%

Saturated Fat 12g75%

Trans Fat 0.04g

Polyunsaturated Fat 3g

Monounsaturated Fat 7g

Cholesterol 420mg140%

Sodium 889mg39%

Potassium 372mg11%

Carbohydrates 7g2%

Fiber 1g4%

Sugar 3g3%

Protein 30g60%

Vitamin A 1308IU26%

Vitamin C 39mg47%

Calcium 421mg42%

Iron 2mg11%

* Percent Daily Values are based on a 2000 calorie diet.

  • Let rest for 5 minutes before slicing and serving.
  • Refrigerate leftovers in an airtight container for up to 4 days.

Are you an egg casserole fan? What are some of your favorite ingredients to include? Share below!

Tags: , , , , ,
Teen Vogue

4 Easy Makeup Routines in Under 30 Mins for Busy Mornings, Approved by Experts

Early morning makeup routines may feel frivolous. Whether it’s a chaotic dash out the door, coffee in one hand and backpack in the other, or you’ve somehow mastered the elusive art of actually having time for a full routine – school mornings still have a way of feeling like a total blur. Some days you’re working with a precious five minutes, and other days you might get a luxurious thirty.

The truth is, your morning makeup doesn’t have to feel like an uphill battle, and it can actually be one of the easiest parts of your day – that’s if you have your routines down pat.

Five minutes and go? We can make it work. And if you have ten minutes, or even thirty? Easy! There are truly simple and quick makeup routines for everyone and every timeframe! Here are your time-saving beauty routines by the experts broken down by how much time you have, so take notes.

What’s in this article:

AccordionItemContainerButton

The Two-Minute Morning Skin Care Routine

Whether you wear makeup or not, skin care is one thing you might not want to skip. It can actually be the focal point of your getting-ready routine.

“We’re all about skin-first confidence, and your routine should work with you and your skin, not against it,” says Gaia Carminati, Head of Product Development at Indu Beauty. “Start with clean, calm skin and a few easy steps that let your natural skin be its best. Think cleanser, SPF, a multi-use tinted glow, brushed-up brows, and you are good to go.”

Neutrogena

Ultra Sheer Invisible Gel Face Sunscreen SPF 40

Cetaphil DermaControl Oil Absorbing Moisturizer SPF 30

The Five-Minute Morning Routine

Rise and shine! When you’re running on “zero sleep” and only have five minutes, the goal is to look awake and put together without trying too hard. Most MUAs agree on one key strategy: focusing on high-impact, multi-use products. Celebrity makeup artist, Janice Daoud, who works with the likes of Miley Cyrus and Isabela Merced, calls it the “skin, lash, [and] lip trifecta.”

Tags: , , , , , , ,
5 easy skincare tips using fruits you already have at home

5 easy skincare tips using fruits you already have at home

We’ve all been there. Staring at the mirror, wondering if that complicated 10-step Korean skincare routine is actually doing anything, or if we just enjoy buying tiny, aesthetic glass bottles. The beauty industry has us convinced that glowing skin requires importing rare ingredients from across the globe. But what if the ultimate skincare hack has been sitting quietly in our local markets all along?

Desi berries are having a major moment in the wellness world right now, and for good reason. While you might drop upwards of ₹3,500 (INR) on a tiny vial of imported antioxidant serum, a hearty haul of these indigenous super-berries will barely dent your wallet at around ₹100 to ₹250 (INR) from the local vendor. They are potent, totally natural, and work from the inside out. If you are looking to upgrade your skin health this season, here are five Indian berries you need to add to your daily diet.

Tags: , , , ,
Jalapeno salt recipe, how to make jalapeno salt, homemade jalapeno salt Jalapeno salt seasoning, for margaritas, smoked jalapeno salt

Homemade Jalapeño Salt (Easy Mineral-Rich Spicy Seasoning)

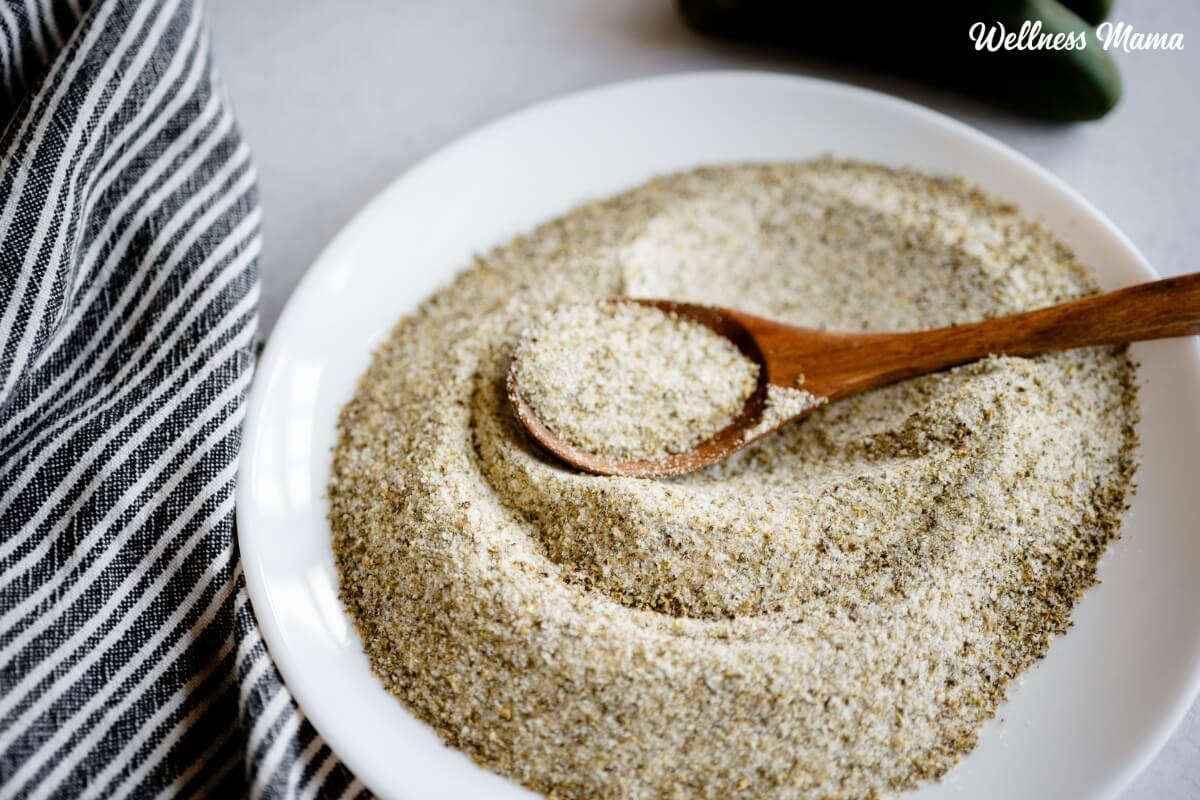
Sometimes you just need to spice things up a little. This jalapeno salt recipe will do just that. With simple ingredients it’s full of healthy minerals and the perfect seasoning for meats, veggies, or even fruit.

You can easily control the spice level here and either use a little or a lot on your foods. Even my older kids like sprinkling some on their meals.

How to Make Jalapeno Salt

This homemade jalapeno salt is exactly what it sounds like: mineral-rich salt blended with dried jalapeños for a simple but flavorful seasoning. It’s one of those small kitchen upgrades that makes everyday meals feel special without adding extra work.

The process is surprisingly straightforward. Slice the peppers, dry them completely until they’re brittle, then blend with salt until finely ground. That’s it. The salt pulls the flavor from the jalapenos and also helps keep the peppers dry. 

Homemade Jalapeno Salt Seasoning

Jalapeno seasoning is like an all-purpose finishing salt with a kick. I love it sprinkled over grilled chicken, roasted vegetables, scrambled eggs, or sliced avocado. It’s also delicious on fresh fruit like mango or watermelon if you like that sweet-and-spicy combination.

You can try it for margaritas too. If you’re the type who likes margaritas, it makes a great rim salt before serving. You can also stir a small amount into soups or taco meat for an easy flavor boost without needing multiple spices. 

The nice thing about homemade jalapeno salt is that it’s easy to be in control. For a milder blend, remove the seeds and membranes before drying the peppers. If you prefer more heat, keep them in. 

And if you’re sensitive to spice, wear a mask while blending since the fine jalapeño dust can be surprisingly strong. I also recommend wearing gloves when cutting up the peppers! The oils from the hot peppers can quickly start to burn your hands. Also, don’t touch your eyes when cutting. That’s never a fun thing to experience!

If you’re using Celtic sea salt, keep in mind that it’s naturally more moist than other mineral salts. If it feels damp, spread it on a baking sheet to air dry for several hours or warm it gently in the oven on the lowest setting for 10–15 minutes before blending. Excess moisture can lead to clumping and shorten shelf life.

Jalapeno salt is an easy and delicious way to turn up the heat on your favorite foods!

Jalapeno Salt

Jalapeno salt is a delicious spicy seasoning that adds a flavorful kick to meat, veggies, and even fruits like watermelon and mango.

  • Wash and dice fresh jalapeños. Spread evenly on dehydrator trays and dehydrate at 125°F for 6–10 hours, until fully dry and brittle.

  • Add dried jalapeños to a food processor and pulse 2–3 times to break them into smaller pieces. (Skip if you prefer a very fine salt.)

  • Add mineral salt to the processor.

  • Pulse until fully combined and the texture is to your liking. Less blending keeps it chunky; more blending creates a finer seasoning.

  • Transfer to an airtight container and store in a cool, dark place.

Nutrition Facts

Jalapeno Salt

Amount Per Serving (0.5 tsp)

Calories 0.4

% Daily Value*

Fat 0.004g0%

Polyunsaturated Fat 0.002g

Sodium 786mg34%

Potassium 3mg0%

Carbohydrates 0.1g0%

Fiber 0.01g0%

Sugar 0.1g0%

Protein 0.02g0%

Vitamin A 9IU0%

Vitamin C 1mg1%

Calcium 1mg0%

Iron 0.02mg0%

* Percent Daily Values are based on a 2000 calorie diet.

  • If you’re starting with already dehydrated jalapenos, then use 1/2 cup. 
  • This recipe yields about 1 and 1/2 cups of jalapeno salt.

Flavor Twist Options

Once you know how to make jalapeno salt, it’s easy to customize. Here are some more flavor options to try. 

  • Smoked jalapeno salt –  To make smoky jalapeno salt, lightly roast the jalapeños at 250°F for 20–30 minutes before dehydrating for deeper flavor.
  • Garlic jalapeno salt – Add 1–2 teaspoons of garlic powder after blending.
  • Citrus jalapeno salt –  Mix in 1 teaspoon of fully dried lemon or lime zest for brightness
  • Herbal jalapeno salt – Mix in ½–1 teaspoon dried oregano or cilantro

Storage and Shelf Life 

Store the finished salt in an airtight container in a cool, dark cupboard. Thanks to salt’s natural preserving qualities, it keeps well for over a year when stored properly.

What are your favorite seasonings to use on food? Leave a comment and let us know!

Tags: , , , , , ,
Easy DIY Face Masks For Naturally Glowing Skin

Easy DIY Face Masks For Naturally Glowing Skin

In a world filled with complicated skincare routines and expensive beauty products, sometimes the best solutions are sitting right in your kitchen. Natural ingredients not only nourish the skin but also minimise exposure to harsh chemicals. If you’re looking for simple, budget-friendly ways to pamper your skin at home, these easy DIY face masks can help you achieve a healthy, radiant glow.

Honey And Lemon For Instant Brightness

If your skin looks dull and tired, a honey and lemon mask can provide a quick refresh. Honey works as a natural humectant, locking in moisture and keeping the skin hydrated. Lemon juice, rich in vitamin C, helps gently exfoliate and brighten the complexion. Together, they can leave your skin feeling soft, fresh, and visibly radiant. However, use lemon sparingly and always apply sunscreen afterward, as it can make skin sensitive to sunlight.

Oatmeal And Yogurt For Soothing Care

For irritated or sensitive skin, oatmeal and yogurt make a calming combination. Ground oatmeal helps remove dead skin cells while soothing inflammation. Yogurt, packed with probiotics and lactic acid, hydrates and gently exfoliates the skin. This mask is especially helpful for those dealing with redness or dryness, offering a smooth and nourished finish after just one use.

Turmeric And Milk For A Natural Glow

Turmeric has long been celebrated in traditional skincare for its anti-inflammatory and antibacterial properties. When blended with milk, it creates a mask that can reduce redness and promote an even skin tone. Milk adds hydration while helping brighten the complexion. A small pinch of turmeric is enough to reap its benefits, and regular use may enhance your skin’s natural glow.

Banana And Honey For Deep Hydration

Dry and flaky skin can benefit greatly from a banana and honey mask. Ripe bananas are rich in vitamins and natural oils that help soften and replenish the skin. Adding honey boosts hydration and leaves the face feeling supple. This nourishing blend works well during colder months when skin tends to lose moisture more quickly.

Aloe Vera And Cucumber For Cooling Relief

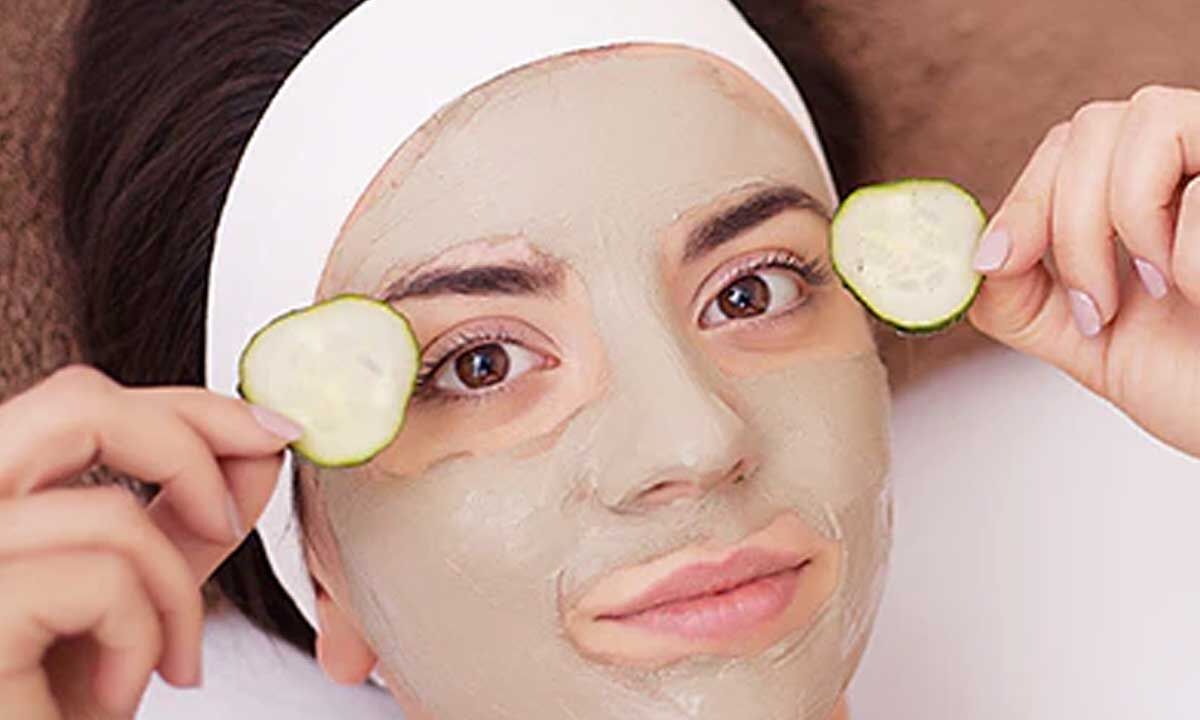
When your skin feels irritated or puffy, aloe vera and cucumber can offer instant relief. Aloe vera is known for its soothing and healing properties, making it ideal for calming sun-exposed or sensitive skin. Cucumber adds a cooling effect while helping reduce puffiness. This refreshing mask is perfect after a long day outdoors or whenever your skin needs a hydrating boost.

Coffee And Coconut Oil For Gentle Exfoliation

If you’re looking to revive tired-looking skin, try mixing coffee grounds with coconut oil. Coffee acts as a natural exfoliant, helping remove dead skin cells and stimulate circulation. Coconut oil deeply moisturizes, leaving the skin smooth and nourished. The result is a brighter, more energized appearance with improved texture.

Avocado And Yogurt For Nourishing Repair

Avocado is packed with healthy fats and essential nutrients that support skin elasticity and hydration. When combined with yogurt, it forms a rich, creamy mask that deeply conditions the skin. This blend is especially beneficial for mature or dehydrated skin, helping restore softness and suppleness.

Strawberry And Honey For Gentle Brightening

Fresh strawberries contain natural acids that lightly exfoliate and cleanse the skin. Paired with honey, they create a brightening mask that also maintains moisture balance. This fruity combination can help refresh the complexion, leaving it looking clearer and more vibrant.

A Simple Reminder Before You Begin

While these DIY masks use natural ingredients, it’s always wise to perform a patch test before applying anything new to your face. Natural doesn’t always mean irritation-free, especially for sensitive skin. With a little care and consistency, these kitchen remedies can become a relaxing part of your self-care routine—proving that glowing skin doesn’t have to come with a hefty price tag.

Tags: , , , , , ,
Easy Potato Face Packs for Healthy, Radiant Skin

Easy Potato Face Packs for Healthy, Radiant Skin

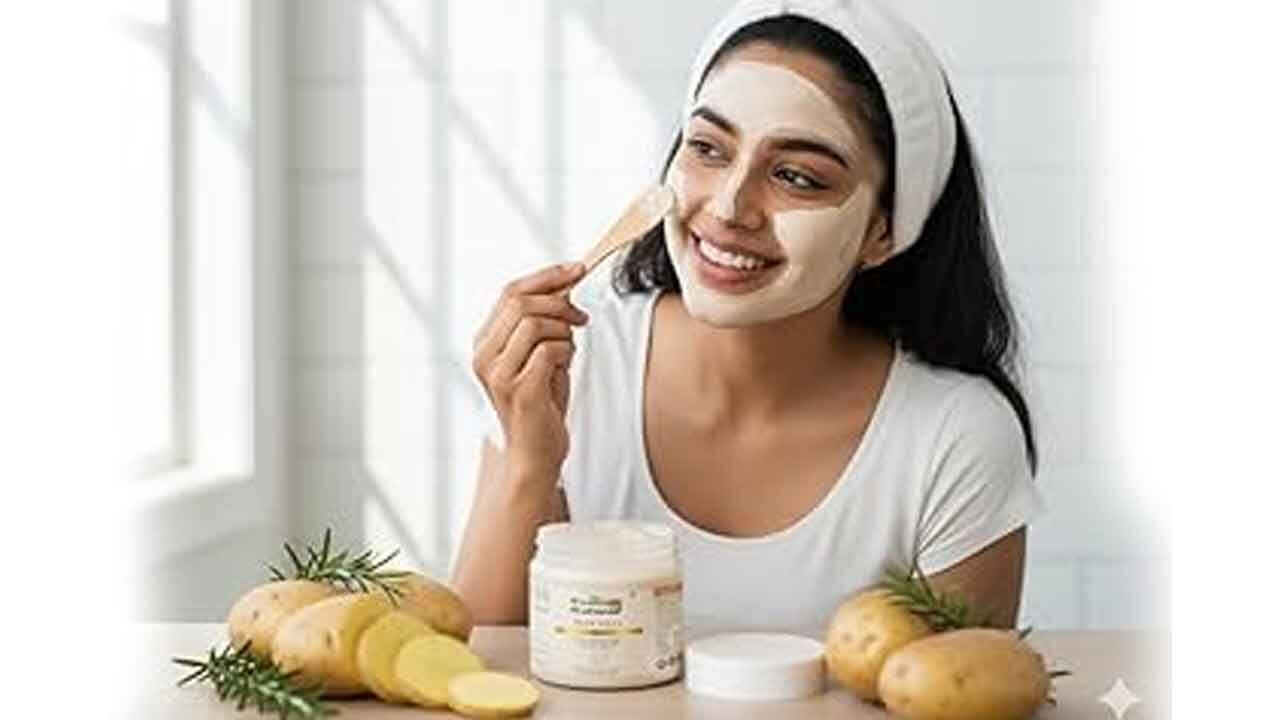
In the world of skincare, not every solution has to come from an expensive jar or bottle. Sometimes, the most effective remedies are sitting quietly in your kitchen. Potatoes, often overlooked as just a cooking staple, are packed with nutrients that can do wonders for your skin. Rich in vitamins, antioxidants, and natural bleaching properties, potatoes have long been used in traditional beauty routines to brighten, calm, and refresh tired-looking skin.

Easy to prepare and gentle when used correctly, potato-based face packs can help tackle common concerns like pigmentation, tanning, dark spots, and uneven texture. If you enjoy simple, homemade skincare, these potato blends are worth adding to your routine.

Potato and Honey for Soft, Supple Skin

When your skin feels dry or lifeless, combining potato juice with honey can provide much-needed hydration. Potato helps brighten and cleanse, while honey locks in moisture and keeps the skin smooth.

To prepare, grate a raw potato and extract its juice, then mix it with a spoonful of honey. Apply evenly and leave it on for about 15 minutes before rinsing. This pack helps restore softness and leaves your skin looking naturally fresh and nourished.

Potato and Yogurt for Gentle Brightening

Yogurt is known for its mild exfoliating effect due to lactic acid, which removes dead skin cells and improves texture. Pairing it with potato enhances the brightening benefits.

This combination works well for dull or uneven skin. The yogurt smooths rough patches, while the potato helps lighten dark spots and tanning. Used once or twice a week, this pack can give your skin a healthy, even-toned glow over time.

Potato and Lemon for Tan Removal

If sun exposure has left your skin looking darker or patchy, a potato and lemon mix can help. Both ingredients are known for their natural lightening properties.

Add a few drops of lemon juice to fresh potato juice and apply carefully. Since lemon can be strong, keep the application brief and avoid sensitive areas. Follow up with a moisturizer. This remedy is best used occasionally to gently reduce tan and brighten the complexion.

Potato and Aloe Vera for Soothing Care

For those with sensitive or irritated skin, aloe vera is a trusted ingredient. It cools, hydrates, and calms redness, making it a perfect partner for potato.

Mix potato juice with fresh aloe gel to create a light, soothing mask. This blend refreshes the skin while helping reduce puffiness and minor inflammation. After washing it off, your skin may feel calm, relaxed, and visibly healthier.

Potato and Gram Flour for Deep Cleansing

Gram flour, also known as besan, is a traditional favorite for removing excess oil and impurities. When combined with potato juice, it forms a thick paste that works as a gentle cleansing mask.

This pack is ideal for oily or acne-prone skin. It helps absorb extra sebum, unclog pores, and improve texture. Regular use can leave your face feeling clean, matte, and refreshed without stripping away natural moisture.

Potato and Rose Water for Toning

Rose water adds a cooling and toning effect to any skincare routine. When mixed with potato juice, it creates a simple yet effective pack that tightens pores and revives dull skin.

This lightweight blend is perfect for days when your skin feels tired. It refreshes instantly and gives a subtle glow, making your face look brighter and more awake.

Potato and Turmeric for Clearer Complexion

Turmeric has been used for centuries for its antibacterial and anti-inflammatory properties. Adding a small pinch to potato juice can help combat blemishes and improve overall clarity.

This mask supports a more even complexion and healthy glow. Because turmeric is potent, use it sparingly and always patch test first to avoid staining or irritation.

A Gentle Reminder

While potato face packs are natural and affordable, everyone’s skin reacts differently. Always test a small area first and avoid overuse. With patience and consistency, these easy kitchen remedies can help you achieve fresh, glowing skin the simple way — naturally.

Tags: , , , , , ,
grow microgreens

How to Grow Microgreens at Home (the Easy Way)

Maybe you’ve seen microgreens at your local farmer’s market or farm to table restaurant. These little green plants are similar to sprouts, and just as packed with nutrients. Growing microgreens at home is really easy and offers so many health benefits!

What are Microgreens?

Microgreens are miniature plants of greens, herbs, or other vegetables. Like sprouts, they’re a concentrated nutrient source and packed with beneficial enzymes thanks to their rapid growth. While sprouts are grown without soil and are sprouted seeds, microgreens rely on soil or another growing medium. 

Microgreens are popular at gourmet restaurants because of their distinct flavor and presentation. You don’t have to go to a fancy restaurant though to eat microgreens! Our local health food stores sell them, but I’ll often grow my own microgreens because it’s much cheaper. 

They’re simple enough to grow that you can easily have a fresh plant source in your kitchen year round. One downside to sprouts is their potential to grow bacteria (which is rare) because they’re grown in the air and not soil. With microgreens you’re eating the stem and leaves, not the seed and root. 

Are Microgreens Good For You?

In a word, yes. Research shows that microgreens have 4-40% more micronutrients compared to full grown herbs and veggies. Microgreen benefits include getting fiber, minerals, and vitamins our cells need to thrive. And the benefits of microgreens don’t stop there. You’ll also find antioxidants to fight free radical damage. 

Types of Microgreens to Grow

The most commonly used plants for growing microgreens are:

  • Lettuce
  • Kale
  • Spinach
  • Radish
  • Beet
  • Watercress
  • Herbs
  • Greens
  • Cabbage
  • Mustard
  • Chia
  • Sunflower
  • Buckwheat
  • Clover
  • Kholorabi
  • Peas

Any edible plant that is entirely edible (root to leaves) can technically be used, but the ones above are the most common and taste the best. If you’re looking for the best microgreens for beginners, broccoli and radish stand out. 

Can I Grow Microgreens in Potting Soil?

Yes, potting soil works well with microgreens, but it can get a little messy. I prefer organic potting soil to avoid unwanted pesticide residue. Potting soil usually has some fertilizer mixed in for faster grow time. Just be sure when you’re trimming off the microgreens not to get the dirt along with it.

Another option is coconut coir or coco coir. Made from fibrous coconut hulls, it holds up to ten times its weight in water and is naturally resistant to fungus. It does not have a lot of nutrition in it so you can mix in a little fertilizer or use a 50/50 blend of soil and coco coir. 

If you want to grow microgreens at home without soil (hydroponically), then a hemp mat is a great option. You can grow microgreens in water with a hemp mat and sow the microgreen seeds directly onto that. For this tutorial though I’m focusing on growing seeds in soil (which can impart more nutrients). 

How to Grow Microgreens in a Mason Jar

You can grow seed sprouts in a jar, but you can also grow microgreens that way. Simply follow the same steps as below, but instead of using a shallow container, use a wide mouth jar. The downside to using a jar is that depending on the jar’s size you might not get many greens and they can be harder to harvest.

How to Grow Microgreens in a Tray

This is my preferred method. You just need a shallow, sturdy tray. Some people use plastic microgreen trays, but you can also use glass or compostable ones. 

Here’s how to grow your own microgreens!

What You Need to Grow Microgreens at Home

How to Grow Microgreens:

  1. Find a south-facing window with plenty of sunlight or install a growlight. I’ve found that a growlight mounted under kitchen cabinets works perfectly for growing greens on the counter if you have the space to do it. In warmer months, these can also be easily grown outside.
  2. Place an inch of organic potting mix in the bottom of a shallow tray or planter. You can also use a 50/50 mix of soil and coco coir. Smooth the soil out evenly. 
  3. Thickly scatter seeds evenly over the soil surface. 
  4. Cover the seeds with a thin layer of soil and spray the surface with clean, filtered water. I use a glass spray bottle.
  5. Place on the warming mat, if using, and under the grow light or near a sunny window.
  6. Mist the seeds a few times a day to keep the soil evenly moist while waiting for the seeds to germinate. You can also put a small fan on them to give them a gentle breeze, deter mold, and improve growth. 
  7. Greens are usually ready to harvest in 2-4 weeks, depending on the type of seed used.
  8. To grow another crop, either remove the roots and replant or dump the entire tray in the compost and fill with more soil mix to replant. If you dump in the compost, some straggler seeds usually volunteer and make a crop of their own a few weeks later.
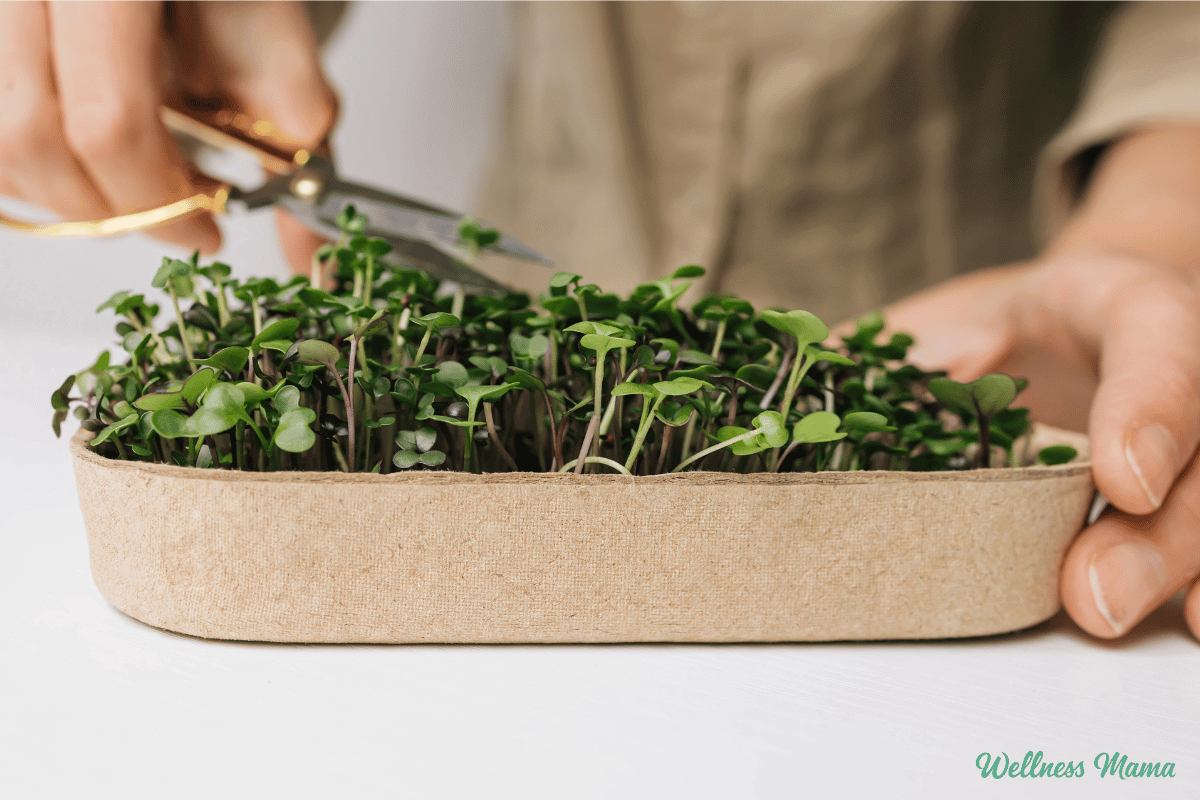
  9. Cut microgreens right above soil level with kitchen shears. Store in the fridge and rinse right before use. 

TIP: Soaking the seeds overnight will speed sprouting time, but make it more difficult to scatter them.

You’ll spread more seeds than you would if just planting the seeds to grow to full size. Since they’ll only get 1-2 inches tall and you want to harvest as many as possible from each tray.

Troubleshooting Common Microgreen Growing Problems

My seeds won’t sprout – They may not be getting enough light or it may not be the right temperature. Microgreens are versatile, but the ideal soil temperature for seed germination is 60-75 degrees. The air around the soil should ideally be between 60-70 degrees. Microgreens take 7-21 days before they’re ready to harvest. Or your seeds may be too old to germinate.

Why are my sprouts fuzzy? – The seed roots are often naturally fuzzy, this doesn’t necessarily mean it’s mold. If it’s slimy, doesn’t wash off, and is growing on the greens, then it’s mold. 

There’s mold growing on the soil – If you do have a mold problem, this can be due to too much water or a drainage issue. Your microgreen trays also need good airflow to deter fungal growth. Mixing some coco coir into the potting soil helps improve drainage too.  

Do I need plant growing lights? – You don’t need them, but they can be helpful, especially on darker winter days. If you don’t have a plant light, pick a very sunny windowsill. 

My microgreens are tall and falling over – If you’re using a light source that’s too far above the microgreens or poor quality, it can cause them to get “leggy.” The stalks have to stretch too high to reach the plant growing light. 

Do Microgreens Regrow After Cutting?

Certain seeds might give you a little bit of a crop after harvesting, but not much. It’s best to compost the soil medium after you harvest and start fresh. Experts generally recommend not reusing the same soil for microgreens because of disease risk and lower yields. If you have a compost pile going in the backyard though, then you can incorporate some of your finished compost into your microgreen soil mix. 

How to Eat Microgreens

You don’t need any special microgreens recipes to use them. They work well on top of any kind of salad and most dishes. Try them on top of some grain-free eggs benedict, a burger bowl, or garnish for some soup. Microgreens can work on top of almost any savory dish!

Have you ever grown your own herbs or plants inside? What are your favorite ways to use microgreens? Leave a comment and let us know!

Tags: , , ,
Crockpot_Chicken_Tacos

Easy Crockpot Chicken Tacos Recipe

There are seasons when life feels (extra) full. Meals still need to happen, kids still get hungry (often earlier than expected), and having a plan for dinner can make the whole day feel more grounded. That’s where dependable recipes like crockpot chicken tacos can be a lifesaver.

These crock pot chicken tacos are simple, flexible, and made with real ingredients you probably already have on hand. They’re the kind of dinner that works just as well for a busy Tuesday as it does for feeding a crowd on the weekend—and the leftovers somehow taste even better the next day.

Why Crockpot Shredded Chicken Tacos Work So Well

One reason crockpot shredded chicken tacos are so popular is that slow cooking does all the hard work. The chicken is tender enough to easily shred, and it soaks up the spices and juices without drying out. This means no babysitting the stove and no last-minute scrambling.

Another bonus is how forgiving this recipe is. You can use chicken breasts or thighs, adjust the spices to your family’s heat tolerance, and choose your own toppings. Unlike my easy salsa chicken recipe, these are crockpot chicken tacos without salsa. Instead I rely on diced tomatoes, onion, garlic, and spices for flavor. It’s a great option if you’re avoiding added sugars or just prefer a cleaner ingredient list.

How to Make Crockpot Chicken Tacos

Years ago I actually took a look at the taco seasoning packets and was shocked by what I saw. I’ve since made my own taco seasoning that’s quick and easy. The spice blend here is simple but effective—chili powder, cumin, smoked paprika, and oregano create that classic taco flavor without needing a packet. Smoked paprika adds depth, while optional chipotle in adobo gives a subtle smoky heat if you want it.

You can swap out the spices in these Crockpot chicken tacos for homemade taco seasoning though if preferred. 

I also add bell peppers and onions near the end of the cooking time. This keeps them from turning to mush and makes it more of a fajita-style filling. A squeeze of fresh lime at the end brightens everything and makes the flavors pop.

Practical Tips for Real Life

This is one of those recipes that works whether you’re home all day or out running errands. Cook it on low if you’re gone most of the day, or on high if you’re starting later. It also adapts well to the Instant Pot when time is especially tight.

For serving, set out tortillas and a few toppings and let everyone build their own tacos. Avocado, cilantro, shredded cheese, or a simple taco slaw all work well. We love adding homemade guacamole and pico, and sometimes a sprinkle of homemade Tajín for extra flavor.

While we don’t always have dinner at home, it is a priority in our home to share a healthy meal together. This one checks all the boxes. It’s protein-rich, customizable, and incredibly low effort. Crockpot chicken tacos are a delicious way to get dinner on the table without adding more stress!

Crockpot Chicken Tacos

These delicous Crockpot chicken tacos are easy to make and great for busy nights. Customize them with your favorite toppings!

  • Add chicken, diced tomatoes, onion, garlic, and all spices to the crockpot. Stir gently.

  • Cover and cook on low for 6–7 hours or on high for 3–4 hours, until chicken is tender.

  • Optional Fajita Vegetables: Add sliced peppers and onion during the last 30–40 minutes of cooking.

  • Remove chicken and shred with two forks. Return to the crock pot and stir.

  • Squeeze fresh lime juice over the top and serve in tortillas with desired toppings.

Nutrition Facts

Crockpot Chicken Tacos

Amount Per Serving (1 serving)

Calories 262
Calories from Fat 45

% Daily Value*

Fat 5g8%

Saturated Fat 1g6%

Trans Fat 0.02g

Polyunsaturated Fat 1g

Monounsaturated Fat 1g

Cholesterol 116mg39%

Sodium 568mg25%

Potassium 1034mg30%

Carbohydrates 13g4%

Fiber 3g13%

Sugar 5g6%

Protein 41g82%

Vitamin A 1273IU25%

Vitamin C 91mg110%

Calcium 66mg7%

Iron 2mg11%

* Percent Daily Values are based on a 2000 calorie diet.

  • Try topping your chicken tacos with avocado, cilantro, shredded cheese, salsa, Greek yogurt, or slaw. 


Instant Pot Instructions

If you want to make these in the Instant Pot instead, here’s an easy way to do it. This recipe version takes less than 30 minutes for when you need dinner on the table fast!

  1. Add all ingredients except the fajita vegetables and lime to the Instant Pot.
  2. Seal the lid and cook on High Pressure for 12 minutes.
  3. Allow a natural pressure release for 10 minutes, then manually release remaining pressure.
  4. Shred chicken and stir back into the sauce.
  5. Add sliced peppers and onions if using. Turn on sauté mode and cook 3–5 minutes, just until tender.
  6. Finish with fresh lime juice if desired and serve.

What are your favorite taco night toppings? Leave a comment and let us know!

Tags: , , , ,
Best oLive
Privacy Overview

This website uses cookies so that we can provide you with the best user experience possible. Cookie information is stored in your browser and performs functions such as recognising you when you return to our website and helping our team to understand which sections of the website you find most interesting and useful.