Lymph Love Tea Recipe

Lymph Love Tea Recipe

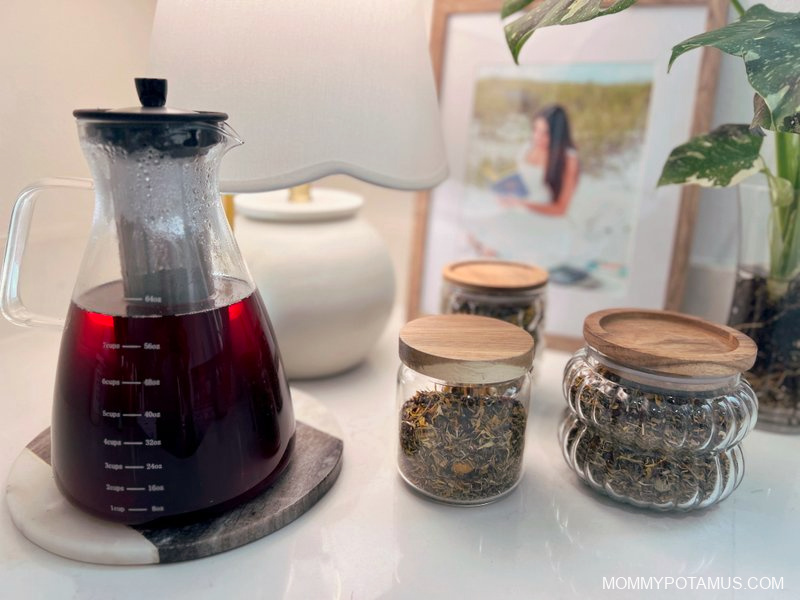
I’ve been keeping a big batch of this tea on the counter lately, and it’s become one of my favorite ways to show my lymphatic system a little love.

Midlife has a way of making fluid balance much more noticeable. Hormonal shifts can influence how fluid moves and is retained in the body, which is one reason I’ve become more interested in the everyday things that support healthy lymph flow.

I’m not a fan of intense “detoxes” or 37-step routines, but I do value simple things that fit naturally into normal life.

This tea is one of them.

The base is a blend of cleavers and calendula, two herbs traditionally used for lymphatic support, along with dandelion leaf for fluid balance and mineral-rich nettle. From there, I change the flavor depending on what sounds good – peppermint when I want something fresh, ginger when I want a little warmth, and hibiscus when I’m in the mood for something bright and tart.

I usually make a large batch and keep it nearby so I can pour a cup whenever I want one. It’s gentle, nourishing, and easy to fit into my day. I hope it is for you, too.

As always, this recipe is not medical advice and is not intended to diagnose or treat any condition. None of these statements have been evaluated by the FDA.

Why I Chose These Herbs

When herbs are used individually, herbal references often recommend several teaspoons of a single herb per cup. In a blend, though, the herbs share the cup. Each one contributes something different while keeping the total amount of herbs reasonable.

Here’s what each one brings:

Cleavers

Cleavers is the herb I built this blend around. It’s one of the best-known lymphatic herbs in Western herbalism and has traditionally been used to support healthy lymphatic flow.

In Medical Herbalism, David Hoffmann describes it as “perhaps the best tonic available for the lymphatic system.” (1)

Its mild, grassy flavor also blends well with the other herbs rather than taking over the cup.

Calendula

These cheerful orange petals are probably better known for showing up in calendula oil and healing salves, but calendula also has a long history of internal use as a gentle lymphatic herb.

It adds flavonoids and other plant compounds with antioxidant and anti-inflammatory activity.

Dandelion Leaf

Dandelion leaf brings fluid-balance support to the mix. It has a long history of use as a mild diuretic, but unlike many substances that increase urinary output, dandelion leaf is naturally rich in potassium – an electrolyte that can be lost when fluid output increases.

It’s also rich in antioxidants and compounds that are traditionally used to support healthy digestion. I explain more about the different parts of the plant in my guide to dandelion.

Nettle

Nettle (Urtica dioica) rounds out the blend with steady nutritional support. It contains a wide range of minerals, including calcium, magnesium, iron, zinc, potassium, manganese, copper, selenium, and silica, along with antioxidants like quercetin and carotenoids.

Herbalists have traditionally used it as a general tonic, which is one reason I like using it in everyday teas. I share more about its traditional uses and research in my guide to nettle tea.

Peppermint, Ginger, or Hibiscus

The last ingredient is mostly about what kind of cup you’re in the mood for.

Peppermint adds a cool, fresh flavor that lifts the grassier notes of cleavers, dandelion, and nettle and makes the whole cup more delicious (a highly technical herbal term).

Ginger takes the blend in a warmer, spicier direction. It’s especially enjoyable during cooler months or anytime you want something with a little more heat. Ginger also brings its own therapeutic actions to the mix, including research supporting a healthy inflammatory response along with some interesting evidence related to thermogenesis and peripheral circulation.

Hibiscus makes the tea brighter and more tart, with a gorgeous ruby color and a fruitier flavor. It also brings anthocyanins and other polyphenols to the blend – antioxidant compounds that have been studied for their effects on oxidative stress and cardiovascular health. (2)

I rotate between all three depending on my mood. Aside from keeping the flavor interesting, it means this tea never starts feeling like something I’m drinking simply because I “should.”

Easy Ways To Change Up The Flavor

The base of this tea is intentionally mild, so it’s easy to nudge it in different directions depending on what sounds good.

For the peppermint version, try adding a strip of lemon or orange peel while it steeps, or a few fresh mint leaves if you want a brighter, fresher cup. A squeeze of lemon after steeping is nice, too.

For the ginger version, add a few thin slices of fresh ginger for more heat. A small piece of cinnamon stick, a strip of orange peel, or a little honey also works well with the warmer flavor.

For the hibiscus version, orange peel and cinnamon are especially good together. You can also add a thin slice of apple, a splash of fresh orange juice after steeping, or a little honey to round out the tartness.

And of course, any of the versions can be served over ice with citrus for a more refreshing summer tea.

Lymph Love Tea Recipe

This refreshing herbal blend combines traditional lymphatic herbs with dandelion leaf and nettle to support healthy lymph flow, fluid balance, and everyday nourishment.It uses a simple 2:1:1:1:2 ratio, with cleavers making up the largest portion of the blend.Tip: If this is your first time making the tea, I recommend starting with a small batch so you can try the different flavor variations before committing to a full jar. To make a test batch, combine 2 tablespoons cleavers, 1 tablespoon each calendula, dandelion leaf, and nettle, and 2 tablespoons peppermint, ginger, or hibiscus.

Prep Time 5 minutes Total Time 5 minutes

Author Heather Dessinger, FDN-P

To Make The Blend

  • If your calendula petals are long and thin, pulse them a few times in a clean coffee or spice grinder to break them into smaller pieces. This helps them disperse more evenly throughout the blend instead of collecting toward the top.

  • Add the calendula and remaining herbs to a bowl and gently toss until evenly combined.

  • Transfer to an airtight jar and store in a cool, dry place away from direct sunlight.

  • Because dried herbs can have very different shapes and weights, give the jar a gentle shake or stir before measuring out each serving.

To Make One Cup

  • Add 1 tablespoon of Lymph Love Tea to a mug or tea infuser.

  • Pour 8 ounces of just-boiled water over the herbs, cover, and steep for 10–15 minutes.

  • Strain and enjoy warm or chilled.

Nutrition information isn’t available for this recipe because standard nutrition databases don’t include all of the herbs used in the blend. Ingredients such as nettle and ginger may be listed, but others are not typically categorized as foods and therefore can’t be accurately calculated.

How Much Can I Drink?

For this blend, 1 tablespoon per 8 ounces of water makes one serving.

I’d start with one cup and see how it feels for you. If desired, up to three cups can be enjoyed throughout the day.

Because the herbs share the cup, each serving contains much less of the individual herbs than you’d typically use when brewing them on their own. Even at three cups per day, the amounts of cleavers, calendula, dandelion leaf, and nettle remain below the standalone daily preparations described in the herbal references I use.

You don’t need to drink three cups for the tea to be worthwhile, though. One cup is perfectly fine if that’s what fits naturally into your day.

A Few Safety Notes

The herbs in this blend are generally considered gentle when used appropriately, but that doesn’t mean every herb is appropriate for every person.

Cleavers, dandelion leaf, and nettle can all influence fluid balance, so people taking diuretics or medications that affect fluid or electrolyte balance should check with their healthcare provider before using medicinal amounts.

Calendula belongs to the Asteraceae family, so people with known sensitivities to plants such as ragweed, chamomile, or echinacea may want to use extra caution.

According to the Botanical Safety Handbook, ginger may increase the antiplatelet effects of nifedipine, and it’s recommended that people with active gallstone disease use it under the supervision of a qualified healthcare practitioner. (3)

And as with any medicinal herb blend, talk with your healthcare provider before using it if you’re pregnant, breastfeeding, taking medication, or managing a health condition.

More Ways To Support Healthy Lymph Flow

Tea is one way to support your lymphatic system, but it’s definitely not the only one.

Healthy lymph flow is supported by the things we do consistently – movement, hydration, breathing, and other everyday habits.

In the next article, I’ll walk through some of my favorite everyday ways to encourage healthy lymph flow – with simple practices that fit naturally into daily life.

And if you want to understand why perimenopause can sometimes make fluid balance feel so different in the first place, start with my guide to hormones, fluid balance, and the lymphatic system during perimenopause.

Sources

  1. Hoffmann, D. (2003). Medical Herbalism: The Science and Practice of Herbal Medicine. Healing Arts Press.
  2. Da-Costa-Rocha, I., Bonnlaender, B., Sievers, H., Pischel, I., & Heinrich, M. (2014). Hibiscus sabdariffa L. – A phytochemical and pharmacological review. Food Chemistry.
  3. Gardner, Z., & McGuffin, M. (Eds.). (2013). American Herbal Products Association’s Botanical Safety Handbook (2nd ed.). CRC Press.
Share with a friend! 👇

Tags: , , ,
Homestead Blog Hop - Homestead tips, ideas, animal care, and recipes every Wednesday

Homestead Blog Hop 611 – Blackberry Cobbler Recipe and Free Printables

Welcome to Homestead Blog Hop, a weekly gathering for homesteaders and simple living enthusiasts to share DIY projects, from-scratch recipes, and creative inspiration. This week’s hop features cozy homesteading tips, along with practical ideas that celebrate handmade living and self-sufficiency.

Whether you’re looking for seasonal crafts, homemade treats, or encouragement on your homesteading journey, you’ll find plenty of inspiration to carry into the new year. Grab a cup of tea, explore the featured posts, and join us in sharing your own homestead creations.

Meet Your Homesteading Hosts

We’re Kelly from Simple Life Mom, Liz from The Cape Coop, Natasha from Houseful of Nicholes, and Laurie from Ridgehaven Homestead. Together, we’re passionate about from-scratch living, simple ingredients, frugal habits, and intentional homesteading. We’re delighted to host the Homestead Blog Hop, where you can find fresh inspiration each week for DIY projects, homemade recipes, and practical simple living ideas.

Follow Us for More Homestead Inspiration

Natasha – Houseful of Nicholes
Facebook | Pinterest | X | Instagram

Laurie – Ridge Haven Homestead
Facebook | Pinterest | Instagram

Liz – The Cape Coop
Facebook | Pinterest | X | Instagram

Kelly – Simple Life Mom
Facebook | Pinterest | X | Instagram

FEATURED POSTS from the Last Homestead Blog Hop

Each week, we take turns selecting three featured posts from the Homestead Blog Hop. These features are shared across all of our social media platforms, helping spotlight the creativity and hard work of our fellow homesteaders. Here are the featured posts from last week’s hop:

1. Keeping A Nature Notebook from The Once and Future Homestead

2. Free First Day of School Printable Signs (2026-2027 School Year) from Press Print Party

3. Easy Blackberry Cobbler Recipe from Organized Island

Congrats! Feel free to grab the featured on button for your post.

Just right click and ‘save image as…‘

Guidelines for the Homestead Blog Hop

  1. Click the “Add Your Link” button below and upload a clear, eye-catching image from your project or recipe. Please link directly to the family-friendly post itself, not your blog’s homepage.
  2. You may link up up to three posts each week.
  3. Take time to visit a few other blogs in the hop and leave a thoughtful comment to let them know you stopped by. Community support makes this hop special!
  4. Please include a link back to the Homestead Blog Hop in your post. Posts without a backlink are not eligible to be featured. All featured posts are shared across all hosts’ social media channels.
  5. Share posts that haven’t been linked to the hop before. Older posts are welcome as long as they are new to the hop.
  6. By joining the Homestead Blog Hop, you grant the hosts permission to use one image from your post, with a link back to your site, if your post is selected as a feature next week.
  7. This is a family-friendly link-up designed to encourage, inspire, and support the homesteader in all of us.

Let the Party Begin!

Which project are you excited to try this week? Leave a comment below.

Join Our Homestead Blog Hop Pinterest Board

Follow all of your hosts on Pinterest and send a message if you’d like to be added to our Homestead Blog Hop group board. This board is a great place to share your DIY projects, crafts, and from-scratch recipes with the homesteading community.

Guideline: Only pin posts that you’ve linked up to the Homestead Blog Hop.

Tags: , , , , , , ,
Cottage Cheese Ice Cream Recipe (High Protein)

Cottage Cheese Ice Cream Recipe (High Protein)

Since you clicked on this article, I’m going to assume one of two things:

  • You’re curious if the recipe title is serious. (It is.)
  • You’re open to the idea that veggies can belong in meatballs and cottage cheese can belong in ice cream.

Whether it’s one or both, welcome. The idea of cottage cheese in dessert might sound a little weird at first, but don’t worry – it becomes a rich, creamy base that lets the sweet tropical mango flavor take the lead.

If you’re wondering, “But WHY does cottage cheese belong in ice cream,” you’re asking the right question. Traditional ice cream relies on a carefully balanced combination of fat, sugar, milk solids, and air to create its creamy texture.

If you try to, say, increase the protein because you’re in midlife and it’s suddenly your favorite macronutrient, chances are you’ll accidentally change that crucial balance and end up banging your spoon against an icy brick.

That’s where cottage cheese comes in. When blended until completely smooth, it allows you to change the ratios while keeping the creaminess and structure that makes ice cream scoopable and satisfying.

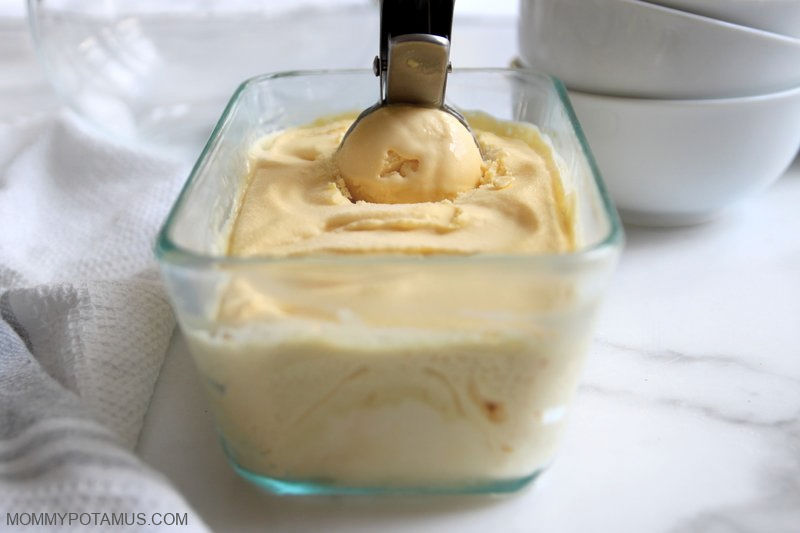
This mango version is lower in sugar and higher in protein than traditional ice cream, yet still silky smooth, sweet, and well worth the five-ish minutes of hands-on prep time.

Cottage Cheese Ice Cream Recipe

This mango ice cream is silky smooth, sweet, and well worth the five-ish minutes of hands-on prep time.Makes approximately 3.5 – 4 cups

Prep Time 5 minutes Churing time 20 minutes

Author Heather Dessinger, FDN-P

  • 2 cups whole milk cottage cheese I recommend 4% milkfat
  • 2 cups frozen mango chunks
  • 25-30 grams unflavored or vanilla protein powder Optional – I used 2 scoops Heart & Soil Whey
  • 1½ tsp vanilla extract Start with 1 tsp if using vanilla protein powder and add more to taste
  • 3 tbsp maple syrup

Ice Cream Maker Method

  • Blend in a high powered blender until very smooth.

  • Pour the mixture into your ice cream maker and churn according to your manufacturer’s instructions.

  • When the ice cream is ready it should have a soft serve consistency. You can eat it right away, or if you prefer a firmer consistency transfer it into an airtight container and place in the freezer for 2-4 hours. I like to use a glass loaf pan with a lid.
  • To Serve: If you decide to freeze the ice cream for a firmer texture, you’ll get the creamiest results by letting it soften a bit before serving. I like to think of it more as “well chilled” than deeply frozen.Because cottage cheese-based ice cream can become a little icy when frozen solid, letting it rest on the counter allows it to soften into a smoother, creamier texture that tastes more like traditional ice cream. Depending on the size and depth of your container, this can take anywhere from 10 to 20 minutes.

No Ice Cream Maker Method

  • Blend the ingredients in a high-powered blender until very smooth.

  • Transfer the mixture to a freezer-safe container and place it in the freezer. To help keep the texture creamy, give it a good fold with a spatula every 30 minutes or so. This helps break up ice crystals as they form.

  • Once the mixture becomes too firm to fold easily, just leave it alone and continue chilling until it reaches your desired consistency, about 3–4 hours total.

  • To Serve:Because cottage cheese-based ice cream can become a little icy when frozen solid, letting it rest on the counter allows it to soften into a smoother, creamier texture that tastes more like traditional ice cream. Depending on the size and depth of your container, this usually takes about 10–20 minutes.

Nutrition estimate based on Good Culture 4% and 2 scoops of Heart & Soil Whey. 

Serving: 0.5c | Calories: 111kcal | Carbohydrates: 13g | Protein: 10g | Fat: 3g | Saturated Fat: 2g | Polyunsaturated Fat: 0.03g | Monounsaturated Fat: 0.1g | Cholesterol: 16mg | Sodium: 20mg | Potassium: 142mg | Fiber: 1g | Sugar: 11g | Vitamin A: 446IU | Vitamin C: 15mg | Calcium: 61mg | Iron: 0.1mg

A Note About Ice Cream Makers

When I bought my current ice cream maker years ago, the product description listed only stainless steel and plastic. After it arrived, I discovered that the freezing bowl was actually made from anodized aluminum. It’s not my first choice in terms of material, but at the time I couldn’t find a compressor-style machine with a stainless steel bowl, so I decided to keep it for occasional use.

There are better options available now. If I were buying one today, I’d probably choose the Whynter Ice Cream Maker. It has a built-in compressor, so you can make ice cream, gelato, or sorbet whenever you want without freezing a bowl overnight. It also uses a stainless steel mixing bowl and a BPA-free plastic paddle.

If budget weren’t a factor, my top pick would be the Lello 4080 Musso Lussino Ice Cream Maker. The bowl and paddle are made with stainless steel, and it has a 4.6 star rating and over 1,000 reviews.

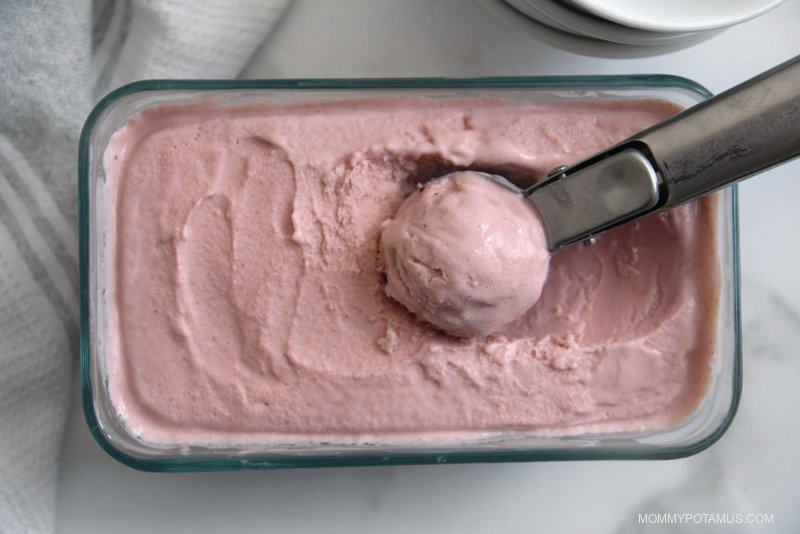
Also, if you enjoy this recipe, you might also like my Strawberry Cottage Cheese Ice Cream.

Share with a friend! 👇

Tags: , , , , , ,
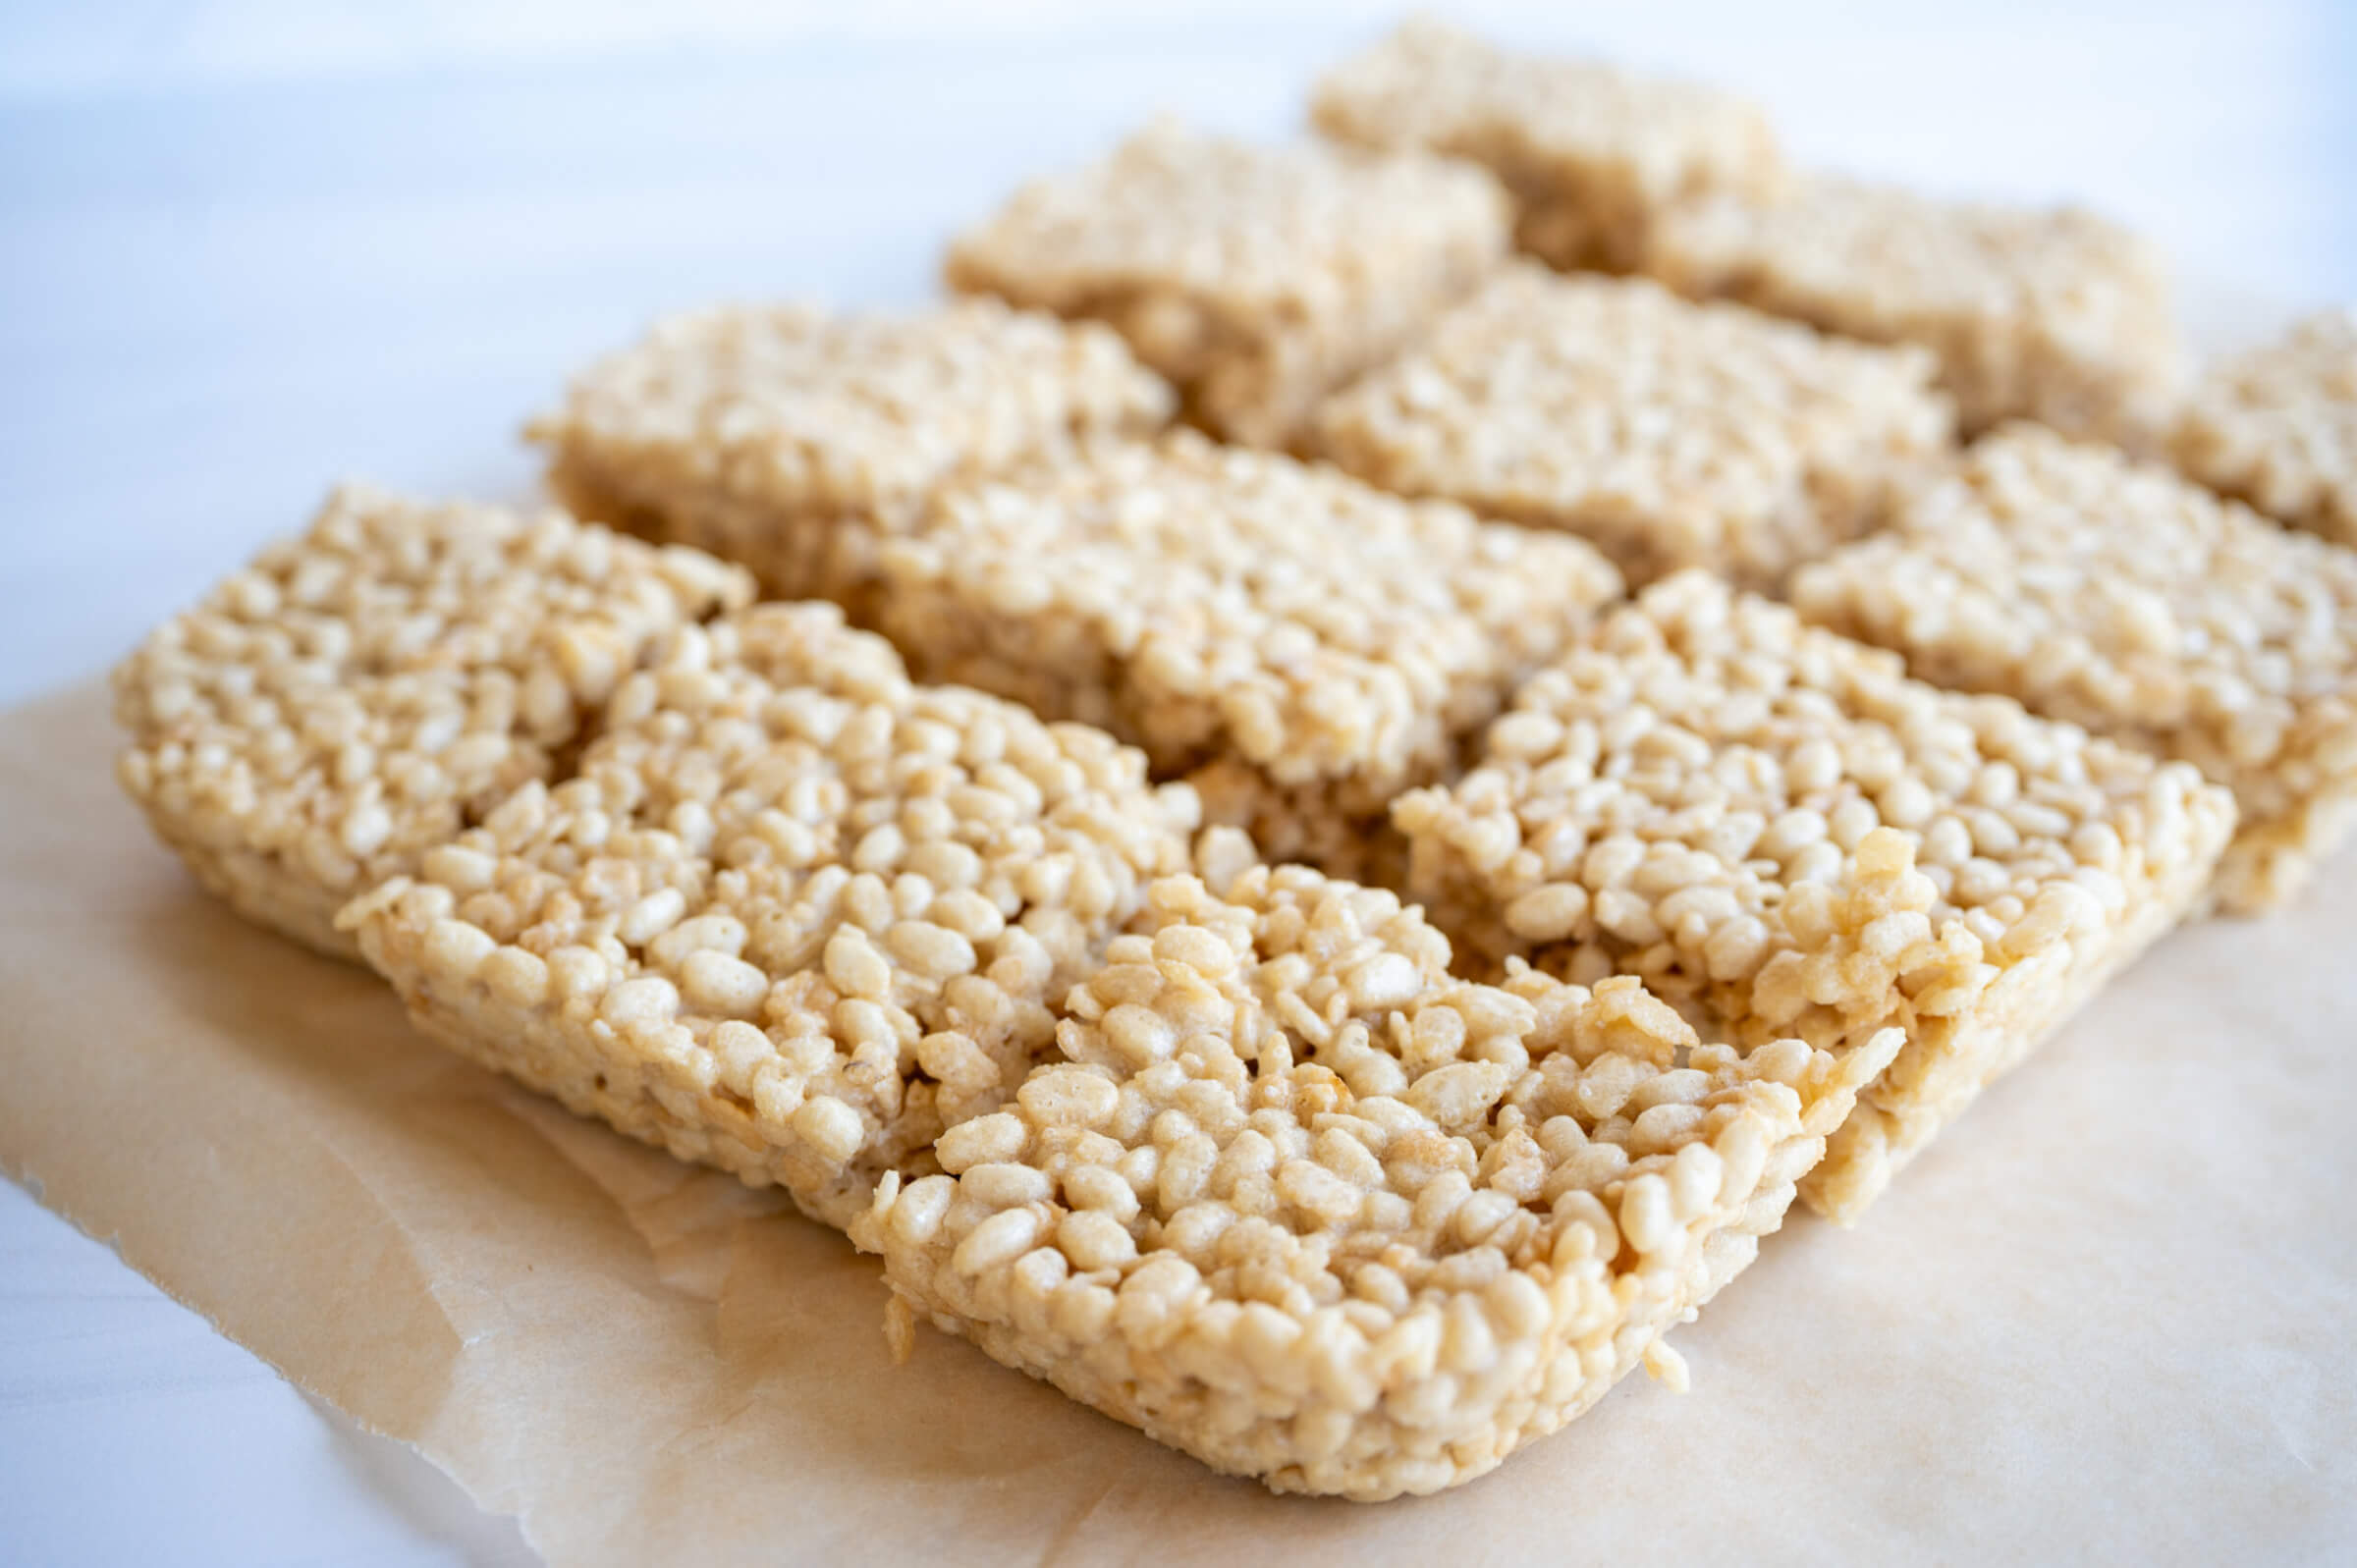
rice krispie treats recipe

Rice Krispie Treats Recipe (With Homemade Marshmallow)

There’s something just so nostalgic about biting into a gooey Rice Krispie treat. And while I remember them from my childhood, they’re not something that I’ve had in many years. Until now that is. This homemade, healthy Rice Krispie treat recipe is a new favorite in our house. 

The Rice Krispie treats from the store are usually a little hard and not so fresh tasting. You’ll find ingredients like corn syrup, GMO soybean oil, artificial flavors, and acetylated monoglycerides… whatever that is. And many of the homemade Rice Krispies treats, while they taste good, aren’t much healthier. 

An Upgraded Rice Krispies Treat Recipe 

One of the questions I get all the time is how to use my homemade marshmallows recipe to make Rice Krispie treats. And honestly that’s not something I’d ever tried. For years my family avoided grains as I was in a healing phase. Now that grains are back in my diet on occasion, that means I’ve been experimenting with more grain-based recipes. 

Of course, this doesn’t mean I’m eating glyphosate covered, artificially fortified white flour all the time. It’s about balance, but I still choose healthier options when I can. So for this recipe that means the name brand (or store brand) rice crispy cereal is out. Instead I used sprouted brown rice cereal. 

Yes, it’s still cereal and not as nutritious as a grass-fed steak, but I’m ok with it for the occasional treat. Sprouted grains are easier for our body to digest. This cereal is organic, non-GMO, and sweetened with just a touch of coconut sugar. I’ve linked to the kind I used in the recipe below, but you can also use organic rice cereal from your local store if that’s all they have. 

Homemade Marshmallows

My marshmallow recipe base is sweetened with honey instead of sugar. They feature gut healthy, grass-fed gelatin and real marshmallow root for more gut soothing benefits. I’ve experimented over the years with variations like elderberry, matcha, and even hibiscus rose marshmallows. 

The marshmallow portion of the Rice Krispie treats recipe is very similar, but you don’t have to press them into a pan and let them set first. After whipping up the marshmallow mixture, simply add it to melted butter and stir in the cereal. 

Homemade Rice Krispie Treat Variations

The kids and I love this recipe as is. In fact, the first time I made a batch the kids devoured them within minutes! However, you can also add some ingredients if you want a different flavor. 

Try sprinkling some flaky sea salt on the top for a salty, sweet treat. Or drizzle the top with melted dark chocolate (and then sprinkle with salt!). Sometimes I’ll gently press mini chocolate chips onto the top before they’ve really hardened. Work quickly with this one though or you’ll just end up with melted chocolate all over your hand! I haven’t tried it here, but some people like adding ¼ cup of creamy peanut butter when stirring in the marshmallows to the butter. 

For another depth of flavor, try browning the butter first before adding the marshmallows. It gives it a caramel-like taste! I give more details on how to brown butter in this pistachio chocolate chunk cookie recipe. 

Here’s how to make healthier, naturally sweetened rice treats with homemade marshmallow!

Rice Krispie Treats Recipe (With Homemade Marshmallow)

This healthier, naturally sweetened version of rice krispie treats is a kid (and parent!) favorite.

Homemade Marshmallow Base

  • Line a 9×13-inch baking dish with parchment paper and set aside.

  • Pour ½ cup of the cold water into the bowl of a stand mixer. Sprinkle the gelatin evenly over the water and let it sit while you prepare the honey syrup.

  • In a small saucepan, combine the remaining ½ cup of water, honey, and sea salt.

  • Bring the mixture to a gentle boil over medium heat. Simmer for 7-8 minutes, until slightly thickened.

  • Turn the mixer on low speed. Carefully and slowrly pour the hot honey syrup into the gelatin mixture.

  • Gradually increase the mixer speed to high. Whip for 8-10 minutes, until thick, glossy, fluffy, and marshmallow-like. Add the vanilla extract during the last minute of mixing.

  • While the marshmallow is whipping, melt the butter in a large pot over low heat.

  • Add the whipped marshmallow mixture to the melted butter and stir until combined.

  • Fold in the crispy rice cereal until evenly coated.

  • Transfer the mixture to the prepared baking dish. Using lightly buttered hands or a piece of parchment paper, gently press into an even layer.

  • Sprinkle with flaky sea salt if desired. Let cool for about 30 minutes before slicing into squares and serving.

Nutrition Facts

Rice Krispie Treats Recipe (With Homemade Marshmallow)

Amount Per Serving (1 square)

Calories 135
Calories from Fat 27

% Daily Value*

Fat 3g5%

Saturated Fat 2g13%

Trans Fat 0.1g

Polyunsaturated Fat 0.2g

Monounsaturated Fat 1g

Cholesterol 8mg3%

Sodium 118mg5%

Potassium 26mg1%

Carbohydrates 26g9%

Fiber 0.1g0%

Sugar 18g20%

Protein 2g4%

Vitamin A 786IU16%

Vitamin C 7mg8%

Calcium 4mg0%

Iron 3mg17%

* Percent Daily Values are based on a 2000 calorie diet.

  • The optional flaky sea salt turns this into an amazing salty sweet treat. 
  • Try drizzling the top with some melted dark chocolate for a more decadent dessert.

How to Store Homemade Rice Krispie Treats

Homemade Rice Krispie treats store best at room temperature. Keep them in an airtight container and enjoy within 4-5 days. However, if your house is like mine, they won’t last long!

What are your favorite Rice Krispie treat flavors? Ever made them before? Leave a comment and share below!

Tags: , , , , ,
Strawberry Cottage Cheese Ice Cream Recipe (High Protein)

Strawberry Cottage Cheese Ice Cream Recipe (High Protein)

Yesterday my husband walked into our bedroom carrying a plate of freshly-baked kale chips in one hand and his phone – hoisted high above his head like a boom box while blasting a love song from the neon-and-hairspray era – in the other.

That’s midlife, right?

We get to be our quirkiest selves, but we also have to make sure we use all the vegetables in the fridge before the next grocery run.

And eat protein, of course.

Because even if – like me – you never bought into the whole “training for your summer body” idea, you’re probably reading this because you’re training for a different kind of body: one with strong muscles, dense bones, healthy blood sugar, good balance, and the ability to carry your own groceries, travel, and stay fully engaged in life for decades to come.

Protein plays a role in all of those things. It provides the building blocks for muscle tissue, enzymes, hormones, immune molecules, and countless repair processes throughout the body. And because we naturally lose muscle mass as we age, getting enough protein becomes increasingly important for maintaining strength, stability, and resilience.

Skeletal muscle is one of the body’s most metabolically active tissues. It helps regulate blood sugar, influences inflammation, supports healthy immune function, and produces signaling molecules that affect everything from metabolism to brain health.

That’s why I’ve been experimenting with high-protein ice cream.

Not because I’m training for bikini season.

I’m training for my old-lady era.

And while I’m willing to put scrambled eggs in my smoothie on occasion, I also believe food should bring joy. I eat fewer desserts these days, but I enjoy them more, especially when they help me hit my protein goals.

Why Protein Ice Cream Is Tricky

Protein ice cream sounds simple enough: take a healthy ice cream base, add protein powder, freeze, and enjoy.

In reality, getting the right texture is a little more complicated than it sounds.

Traditional ice cream gets its creamy, scoopable texture from a careful balance of fat, sugar, solids, and air. When you reduce the sugar, lower the fat, and add more protein, the texture can shift pretty quickly from “creamy dessert” to “icy brick.”

That’s one reason the Ninja Creami has become so popular for protein ice cream. It can take a frozen solid base and re-spin it into something creamy, even when the recipe is lower in sugar or fat.

A regular ice cream maker works differently. It churns while the base freezes, which is wonderful for traditional ice cream, but lower-sugar, higher-protein mixtures can freeze too hard too quickly around the edges before the center has a chance to churn properly. The result is often icy, crystallized, or just not worth the effort.

I wanted a creamy texture without having to buy another piece of equipment or adding weird thickeners, so I started experimenting with cottage cheese.

When blended until completely smooth, it does a lot of the work that sugar and stabilizers usually do. It adds protein, creaminess, body, and enough structure to give it an ice cream texture.

Does it taste exactly like traditional ice cream? No – it has a bit of a tang that gives it more of a “cream cheese” note, so I leaned into that. I also kept the overall sugar content lower than traditional ice cream, so I figured this recipe would be safe from the not-so-tiny humans in my house.

I was wrong – they polished off the first test batch less than a day after I made it.

One thing to be aware of, though, it that some brands use more salt than others, and that can affect the final flavor. I tried a few and the one I liked best is Good Culture 4%. On its own, leaned a bit salty, so I added a cup of strawberries. Some of my family members liked it, but I personally didn’t and added a second cup. My recommendation is to start with one, taste your mixture after blending, and add more strawberries if needed.

So, how much protein is in this recipe?

The exact amount will vary depending on a few factors, including which protein powder you choose, and even how much air gets incorporated during churning.

In other words, your numbers may not match mine exactly.

To give you a ballpark, using two scoops of Heart & Soil Whey yields about 10 grams of protein per ½-cup serving. That’s a lot more protein than traditional ice cream – enough to make meaningful progress toward daily protein goals, one delicious spoonful at a time.

Strawberry Cream Cheese Protein Ice Cream Recipe

This recipe makes approximately 3.75 – 4 cups.

Prep Time 5 minutes Churning time 20 minutes

Author Heather Dessinger, FDN-P

  • 2 cups whole milk cottage cheese (I recommend 4% milkfat)
  • 1 tbsp vanilla extract (If using vanilla protein powder, start with 1 teaspoon and increase to taste)
  • ¼ cup maple syrup
  • 2 cups chopped strawberries
  • 25-30 grams unflavored or vanilla protein powder (Optional – I used 2 scoops Heart & Soil Whey)

Ice Cream Maker Method

  • Blend in a high powered blender until very smooth.

  • Pour the mixture into your ice cream maker and churn according to your manufacturer’s instructions.

  • When the ice cream is ready it should have a soft serve consistency. You can eat it right away, or if you prefer a firmer consistency transfer it into an airtight container and place in the freezer for 2-4 hours. I like to use a glass loaf pan with a lid.
  • To Serve:If you decide to freeze the ice cream for a firmer texture, you’ll get the creamiest results by letting it soften a bit before serving. I like to think of it more as “well chilled” than deeply frozen. Because cottage cheese-based ice cream can become a little icy when frozen solid, letting it rest on the counter allows it to soften into a smoother, creamier texture that tastes more like traditional ice cream. Depending on the size and depth of your container, this can take anywhere from 10 to 20 minutes.

No Ice Cream Maker Method

  • Blend the ingredients in a high-powered blender until very smooth.

  • Transfer the mixture to a freezer-safe container and place it in the freezer. To help keep the texture creamy, give it a good fold with a spatula every 30 minutes or so. This helps break up ice crystals as they form.

  • Once the mixture becomes too firm to fold easily, just leave it alone and continue chilling until it reaches your desired consistency, about 3–4 hours total.

  • To Serve:Because cottage cheese-based ice cream can become a little icy when frozen solid, letting it rest on the counter allows it to soften into a smoother, creamier texture that tastes more like traditional ice cream. Depending on the size and depth of your container, this usually takes about 10–20 minutes.

Nutrition facts based on Good Culture 4%, 2 scoops of Heart & Soil Whey, and 2 cups of chopped strawberries. 

Serving: 0.5cup | Calories: 107kcal | Carbohydrates: 11g | Protein: 10g | Fat: 2g | Saturated Fat: 2g | Polyunsaturated Fat: 0.1g | Monounsaturated Fat: 0.01g | Cholesterol: 16mg | Sodium: 210mg | Potassium: 135mg | Fiber: 1g | Sugar: 9g | Vitamin A: 4IU | Vitamin C: 21mg | Calcium: 65mg | Iron: 0.2mg

A Note On Ice Cream Makers

When I bought this ice cream maker many years ago, the only materials listed on the product description were stainless steel and plastic. I discovered after it arrived that the inner tub is actually made with anodized aluminum, which is not ideal. Back then, I couldn’t find a truly stainless steel option so I kept it to use on occasion.

Truly stainless steel options are available now, so I’m thinking about replacing mine with the Whynter Ice Cream Maker. It comes in two sizes and uses a powerful built-in compressor freezer that allows you to make ice cream, gelato or sorbet anytime (without needing to pre-freeze the inner canister). The inner bowl is stainless steel and the churn blade is BPA-free plastic.

If budget were not a consideration, I’d go for the Lello 4080 Musso Lussino 1.5-Quart Ice Cream Maker. The bowl and paddle are made with stainless steel, and has a 4.6 star rating and over 1,000 reviews.

Share with a friend! 👇

Tags: , , , , , , ,
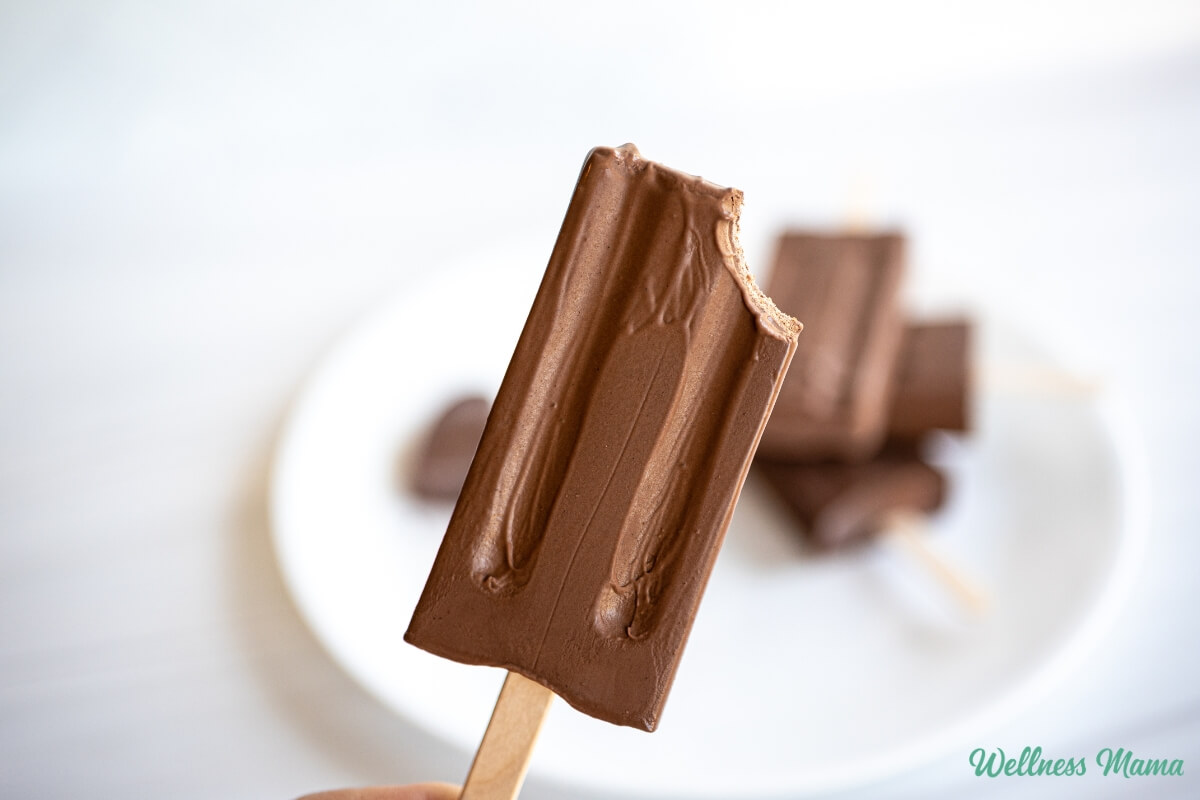
Healthy_Homemade_Fudgsicles

Homemade Fudgesicles Recipe (Clean Ingredients)

Growing up in the south, summer days meant swimming in the pool, late nights, and frozen treats. And while you won’t find me reaching for the frozen fudgesicles at the local store, these homemade fudge pops are the perfect healthy solution. 

I have plenty of popsicle recipes and they’re a big hit around our home. Fudgesicles are creamier and richer with their frozen chocolate fudge taste. I like mine only mildly sweet, but you can adjust the sweetness with raw honey and the kind of chocolate used. 

Homemade Fudgesicles

Real food just tastes better. Like many kids, I was a fan of fudge pops growing up. However, once I switched to whole foods I realized the junk food just didn’t taste as good. 

Homemade fudgesicles not only taste better, but they’re simple to pull together and healthier. You can even make several batches at once to freeze for later. My kids love these! And I’ll keep treats like this stashed in the freezer to pull out when the neighbor kids stop by to play (which is constantly!). 

Fudge Pop Ingredients

A lot of the recipes I saw used things like prepackaged instant pudding mix. Just read the ingredients list on the back of the box and you’ll see why I’d rather skip that. These fudgesicles instead use real chocolate, both chocolate chips and cocoa powder. 

I also used raw whole milk and full-fat canned coconut milk for that rich, creamy taste. If you want yours even creamier, use coconut cream instead of coconut milk. Whole milk is higher in healthy fats for that creamy mouth feel. However, you can use your favorite dairy-free milk if you need a dairy-free version. 

Sweet, Sweet Chocolate

Chocolate has some pretty impressive health benefits… when it’s not drowning in sugar. Semi-sweet or bittersweet chocolate both work well in this recipe. Choose a chocolate you enjoy eating on its own since the flavor really shines through. I prefer really dark chocolate, but you may like something a little sweeter. 

For a sweeter version, add honey a little at a time until it reaches your preferred sweetness. One to two tablespoons works well if you want to add honey. 

Homemade Fudgesicles Recipe

  • Combine the coconut milk, milk, cocoa powder, and sea salt to a small saucepan. Whisk until the cocoa is fully incorporated and no lumps remain.

  • Heat over medium-low heat until the mixture is steaming and just beginning to bubble around the edges. There’s no need to boil it.

  • Remove the pan from the heat and stir in the chopped chocolate. Continue whisking until the chocolate melts completely and the mixture is silky smooth.

  • Taste and add honey if desired, stirring until dissolved.

  • Fill the popsicle molds. Allow the mixture to cool slightly before pouring it into popsicle molds. This helps it thicken slightly and prevents separation.

  • Insert sticks and freeze until completely firm, about 6 hours or overnight.

Nutrition Facts

Homemade Fudgesicles Recipe

Amount Per Serving (1 fudgesicle)

Calories 310
Calories from Fat 225

% Daily Value*

Fat 25g38%

Saturated Fat 18g113%

Trans Fat 0.01g

Polyunsaturated Fat 1g

Monounsaturated Fat 4g

Cholesterol 4mg1%

Sodium 27mg1%

Potassium 397mg11%

Carbohydrates 20g7%

Fiber 5g21%

Sugar 12g13%

Protein 4g8%

Vitamin A 48IU1%

Vitamin C 1mg1%

Calcium 59mg6%

Iron 4mg22%

* Percent Daily Values are based on a 2000 calorie diet.

To release the fudgsicles, briefly run warm water over the outside of the molds. Gently pull on the sticks and serve immediately.

Shelf Life and Storage

Since they’re a frozen treat, you’ll obviously want to keep them in the freezer. They’ll stay fresh for several weeks when stored in an airtight container. You can even make several batches at once and freeze them for later.

More Popsicle Recipes

Here are some more of our family’s favorite sweet treats on hot days!

What are some of your favorite treats for hot days? Leave a comment and let us know!

Tags: , , , ,
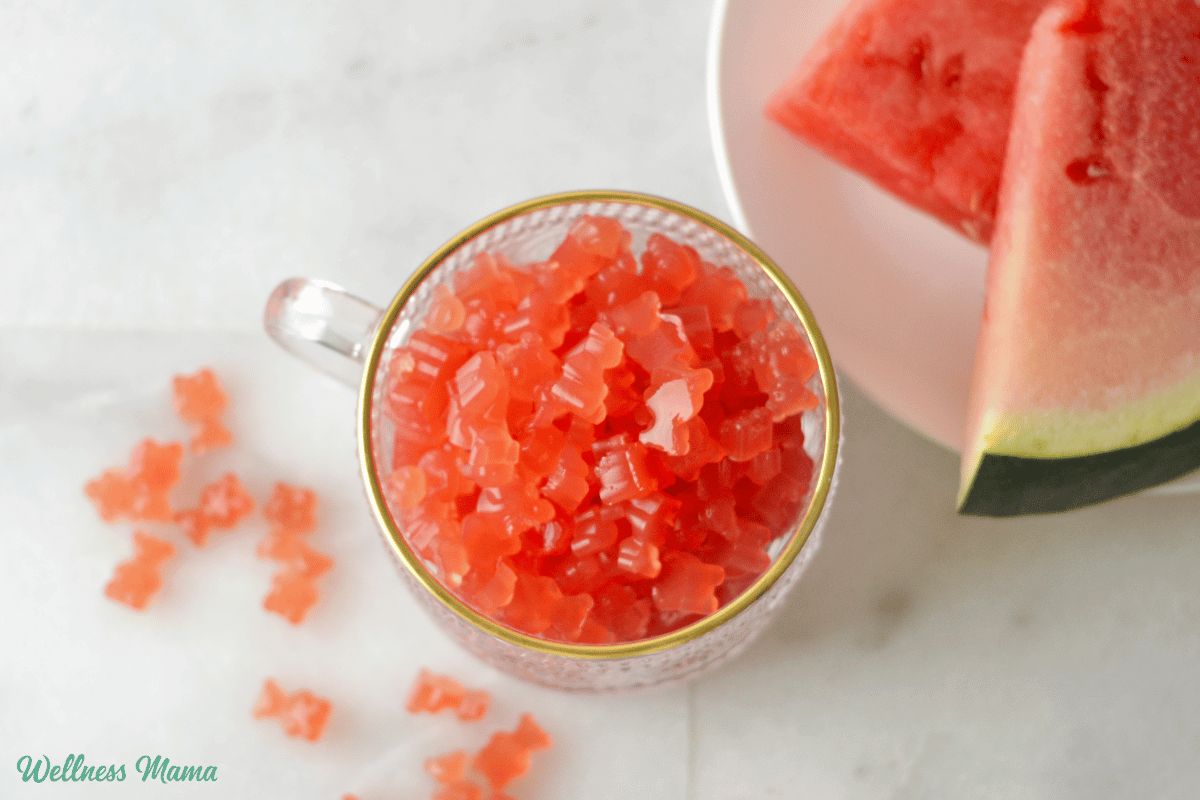
watermelon electrolyte gummies

Homemade Electrolyte Gummies Recipe

My kids love homemade gummies and I’m quite the fan myself. They’re a fun way to get gummy candy without the processed ingredients and refined sugar. This version has a delicious fruity flavor and adds electrolytes for better hydration.

Electrolyte Gummy Benefits

In the past few years it seems like there’s a gummy version of almost everything. You can get gummy multivitamins, gummy ACV, and gummy beets. And while people love their gummies, they often contain processed sugars and fillers I’d rather avoid. 

I’ve made a lot of gummies to target a variety of health complaints or just for general wellness. (See the bottom for a full list!). I wanted to try something a little different this time though and incorporate electrolytes like potassium, magnesium, and sodium. We need these all of the time, but we can especially get depleted during hotter months. And if you’re really active or use a sauna, these health habits can deplete electrolytes even more. 

We need electrolytes to power our cells, have energy, and do basically everything in the body. I’ve come to the realization that we are electrical beings first and biomechanical second! So the more that I can do to support that, the better. 

Electrolyte Gummy Ingredients

This ingredient list focuses on nutrient dense, whole food ingredients that taste delicious.

  • Watermelon – Has vitamin A, potassium, magnesium, and antioxidants like vitamin C, carotenoids, lycopene, and cucurbitacin E. It’s really hydrating and there’s some evidence it’s antioxidants help with cancer prevention.
  • Coconut water – Loaded with potassium and has some magnesium and sodium too. You’ll also find phosphorus, vitamin C, and calcium.
  • Electrolyte powder – My favorite is LMNT. It offers a concentrated and balanced blend of magnesium, sodium, and potassium. Most brands don’t have the levels our body actually needs to hydrate.  
  • Raw Honey – Adds a touch of sweetness, antioxidants, and antimicrobial benefits. 
  • Gelatin – Grass-fed gelatin offers naturally occurring collagen for healthier skin, hair, nails, and gut function. 

How To Make Electrolyte Gummies

There are a few different ways to make these. Option 1 is to use watermelon that’s been blended and strained. This creates a thin juice for a more traditional gelatin gummy. Or you can not strain the pulp out to create a higher fiber version. The texture is obviously different, but either way works. 

Tips For Using Gelatin

It’s also important to let the gelatin “bloom” first. This way it dissolves into the liquid instead of getting clumpy and grainy. Just sprinkle the gelatin on top of the juice and wait until it’s absorbed and looks like a wrinkly layer on top. Another tip when making gummies is to not stir too vigorously after adding the gelatin. You want to combine the ingredients, but overwhisking can make it really foamy. 

Some readers ask about a vegan version and I’ve heard agar agar powder works, though I haven’t personally tried it. I’m a big fan of grass-fed gelatin for its health benefits so that’s what I use and recommend. 

Fruity Electrolyte Gummies

These delicious electrolyte gummies are a fun way to get more hydration. Featuring vitamins, minerals, antioxidants, and electrolytes for maximum nourishment!

  • Blend the watermelon until smooth. Pour through a strainer to remove the larger pieces of pulp. You can also leave the fiber in if preferred.

  • Add the fruit juice, coconut water, electrolytes, and honey to a pot and stir to combine. It’s ok if the honey doesn’t fully mix in yet.

  • Evenly sprinkle the gelatin over the top. Allow it to bloom for a minute or until it looks absorbed into the liquid.

  • Gently heat the mixture over low heat, whisking until dissolved.

  • Pour the liquid into your molds and let harden in the fridge for several hours, or until firm.

Nutrition Facts

Fruity Electrolyte Gummies

Amount Per Serving (2 TBSP)

Calories 19
Calories from Fat 1

% Daily Value*

Fat 0.1g0%

Saturated Fat 0.02g0%

Polyunsaturated Fat 0.01g

Monounsaturated Fat 0.01g

Sodium 56mg2%

Potassium 4755mg136%

Carbohydrates 3g1%

Fiber 0.2g1%

Sugar 3g3%

Protein 2g4%

Vitamin A 108IU2%

Vitamin C 2mg2%

Calcium 5mg1%

Iron 0.1mg1%

* Percent Daily Values are based on a 2000 calorie diet.

  • If you don’t have a silicone mold, then grease a glass baking dish and use that instead. Cut the gummies into squares before serving.
  • This recipe makes a little over 3 cups of liquid. The exact amount of gummies depends on the size of your molds. 

The Best Electrolyte Powder

I use LMNT because it uses research backed, balanced amounts of potassium, magnesium, and sodium. They have some delicious flavors or you can use their unflavored “raw” version. Another option is to make your own with their recipe here.

For this recipe I used their Watermelon Salt flavor, but the Lime Salt would taste really good too.

More Gummy Recipes

Here are some more gummy recipes to try. Some are for specific health complaints, but many are just for overall nutrition. 

Do you prioritize getting enough electrolytes? What are some ways you’ve found to do that? Leave a comment and share below!

Tags: , , ,
Italian chopped salad

Italian Chopped Chicken Salad Recipe

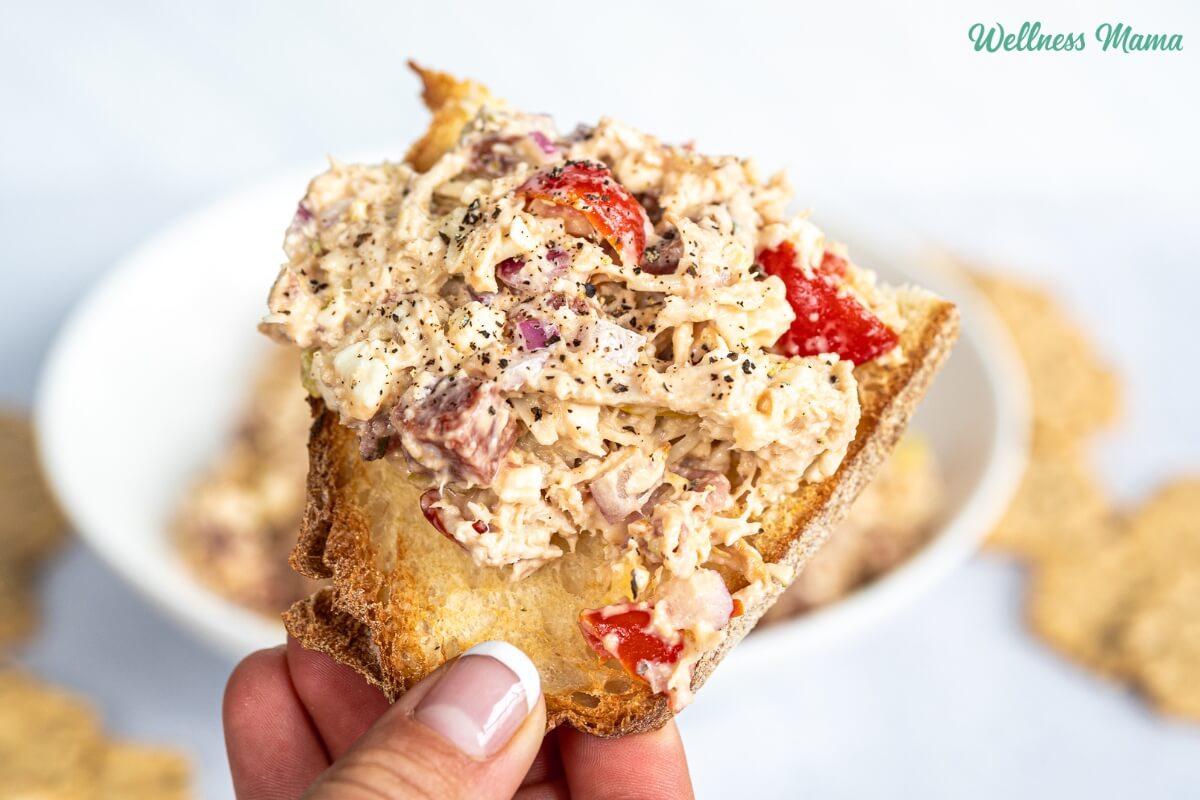
I eat a lot of salads this time of year. Actually, I eat salads for most of the seasons! This Italian chopped salad skips the lettuce and adds Italian grinder flavors to chicken instead. It’s high in protein and my family can’t get enough!

Italian Grinder Chopped Salad

If you’ve ever been to a sub shop or Italian restaurant you’ve probably had an Italian grinder sandwich. They’re known for their salty, tangy flavor with satisfying fats and lots of crunch from veggies. And while I do eat some grains now, anytime I can load up on veggies or protein instead I’m all in.

An Italian chopped salad recipe is like all of the flavors of the sub sandwich, but without the bread. Some of the recipes I’ve seen add the meat, banana peppers, and dressing to chopped lettuce. While I’m all for veggies and eat lots of salads, I wanted to try something a little different. 

The result is this spin on chicken salad. It still has a mayo base, but it has Italian flavors instead. 

Making Italian Chopped Chicken Salad

At first glance the ingredients list might look a little long, but truly, this recipe comes together quickly. It does require a little knife work (it’s called chopped after all!), but this helps combine the flavors better. You’re not getting a big chunk of anything, but a variety of flavors packed throughout. 

The shredded chicken absorbs the chicken really well to give this more of that classic chopped grinder texture. 

Tweak to Taste

If you’re like me you might love pickled things and tangy tastes. Feel free to add an extra splash of banna pepper juice or red wine vinegar if you want more tang here. And if you don’t have salami, any similar meat will work. Ham, prosciutto, or spicy pepperoni are all great ideas. 

I’ve also included two different types of cheeses. I recommend using both the feta and provolone because they offer subtly different flavors and textures that add to the overall flavor bomb here. Or you can just use one of the two and double the amount if preferred. 

I also like to use freshly cracked black pepper for this. When peppercorns are freshly cracked they release their fragrance volatile oils that give dishes a major flavor boost. Sometimes I’ll also finish with Maldon flaky sea salt for more texture and enhanced flavor. 

How to Serve Italian Chopped Salad 

You could eat this by the forkful (it’s SO good!). However, it also works as a filling or dip. Serve it over chopped leafy greens or even iceberg lettuce for maximum crunch. It also works well as filling in a lettuce wrap or in a sandwich with sourdough bread. 

Or just use it as a dip with some healthy crackers or fresh veggies like sliced cucumbers, bell peppers, carrots, or celery sticks. 

Here’s how to make it!

Italian Grinder Chopped Chicken Salad

This tastes just like an Italian grinder sandwich but without the bread! High in protein and full of flavor.

  • 2 cups shredded cooked chicken
  • ¼ lb salami or soppressata (diced)
  • ¼ lb pepperoni (diced)
  • ¼ cup provolone cheese (thick-sliced and diced)
  • ¼ cup crumbled feta cheese
  • ⅔ cup grape tomatoes (diced)
  • ⅓ cup banana peppers (diced)
  • ½ red onion (thinly sliced or diced)
  • In a small bowl or glass measuring cup, whisk together all dressing ingredients until smooth.

  • Taste and adjust as needed. The dressing should have a tangy kick.

  • In a large bowl, combine the chicken, salami, pepperoni, provolone, feta, tomatoes, banana peppers, and red onion.

  • Pour most of the dressing over the salad and toss well to evenly coat. Add the remaining dressing if needed.

  • Serve immediately or store in an airtight container in the refrigerator for up to 4 days.

Nutrition Facts

Italian Grinder Chopped Chicken Salad

Amount Per Serving (1 serving)

Calories 442
Calories from Fat 324

% Daily Value*

Fat 36g55%

Saturated Fat 11g69%

Trans Fat 0.3g

Polyunsaturated Fat 11g

Monounsaturated Fat 12g

Cholesterol 88mg29%

Sodium 1157mg50%

Potassium 332mg9%

Carbohydrates 4g1%

Fiber 1g4%

Sugar 1g1%

Protein 24g48%

Vitamin A 306IU6%

Vitamin C 9mg11%

Calcium 146mg15%

Iron 1mg6%

* Percent Daily Values are based on a 2000 calorie diet.

Shelf Life and Storage

The salad absorbs dressing as it sits. Stir and add a little extra dressing before serving if needed. It will last up to 4 days in an airtight container in the fridge.

More Chicken Salad Variations

What are some of your favorite recipes that reinvent classic foods? Share in the comments!

Tags: , , , ,
lemonade popsicles

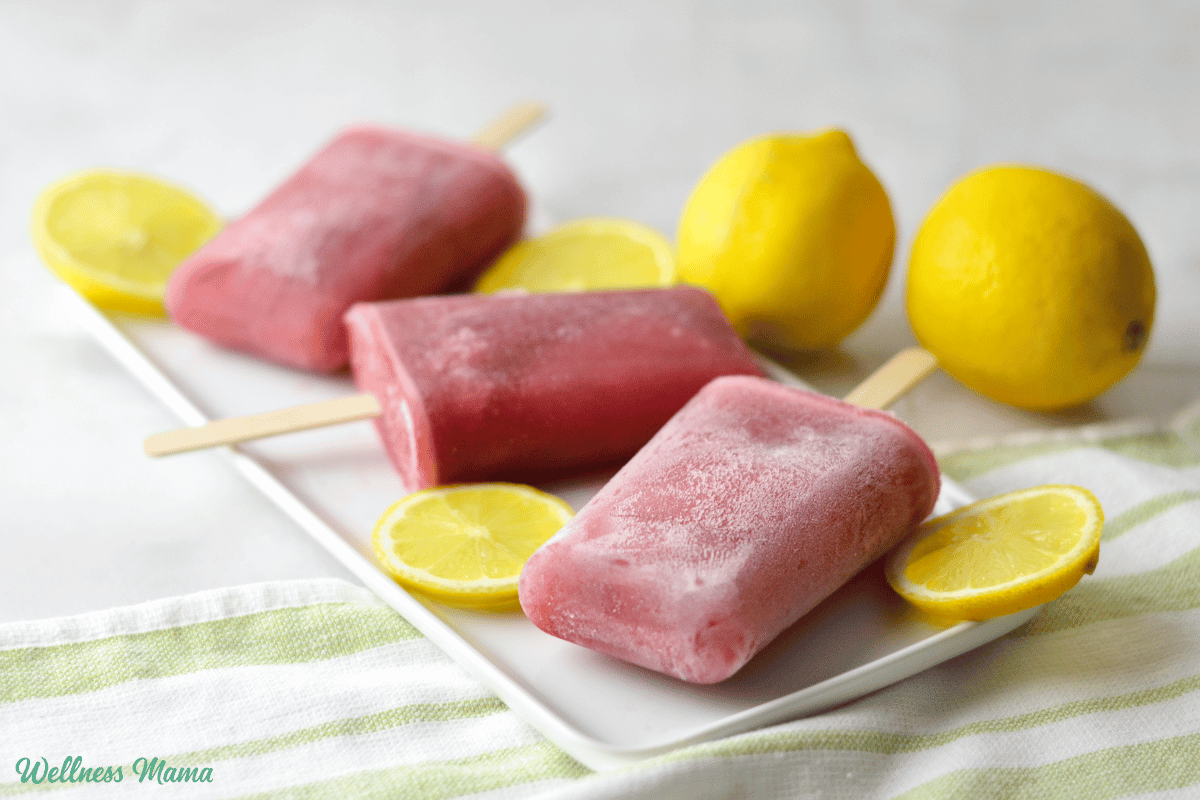
Hibiscus Lemonade Popsicles Recipe

What’s better than an ice cold popsicle on a hot day? A nutrient-dense popsicle made with whole foods and healthy herbs! A few months ago I made mango golden milk popsicles, and recently I tried these hibiscus lemonade popsicles. 

They’re high in vitamin C and antioxidants, perfect for keeping the immune system strong. 

Immune System Support

Not so fun fact… according to Cleveland Clinic enteroviruses sicken more than 15 million Americans every year. And these types of viruses are much more common in the summer months. Public swimming pools, running around with the neighborhood kids, everyone touching the same baseball. There are plenty of reasons why kids still need immune system support all year long. And adults too! 

During cold and flu season I’ll sometimes make these elderberry popsicles. Really, they’re delicious all year round. But there’s something special and classic about an icy pitcher of lemonade in the summertime. These hibiscus lemonade popsicles have the same flavor, but with a fruity twist and in popsicle form. 

Lemon Benefits

Obviously, we need lemons to make lemonade popsicles. They’re naturally rich in vitamin C and flavonoids that are linked with various health benefits. The citric acid can increase urine pH and discourage kidney stones from forming. One study found those who ate more flavonoids had less risk of heart failure, ischemic heart disease, and stroke. 

Nutrient Rich Hibiscus

Hibiscus flowers are gorgeous with their huge, vibrant blooms. They’re also really good for you. They’ve been used traditionally for thousands of years to help cool the body and support the cardiovascular system. In some areas they’ve been used for coughs, sore throats, and upper respiratory congestion.

Hibiscus also helps with digestion and insomnia. Thanks to its high vitamin C and antioxidant levels it helps the immune system and overall cell health. Plus, hibiscus can help prevent urinary tract infections (UTIs) and may inhibit candida and fungal overgrowth. 

Cooling Rosehips

Rosehips are another herb I reach for when I need something high in vitamin C. They’re rich in flavonoid antioxidants and help nourish the body. Rosehips have a cooling and toning action on the body’s tissues, which is perfect for warm summer days. 

These herbal lemonade popsicles are a great way to cool off and stay healthy during the warmer months. But they taste delicious all year long. Here’s how to make them!

Hibiscus Lemonade Popsicles Recipe

  • Boil 3/4 cup of the water and steep the hibiscus and rosehips for 10 minutes. Strain and let cool to room temperature.

  • Add in the rest of the water, honey, and lemon juice and stir well to combine.

  • Pour the lemonade popsicle mixture into your popsicle molds and freeze for several hours or overnight until firm.

Nutrition Facts

Hibiscus Lemonade Popsicles Recipe

Amount Per Serving (1 popsicle)

Calories 49

% Daily Value*

Fat 0.03g0%

Saturated Fat 0.003g0%

Polyunsaturated Fat 0.002g

Sodium 4mg0%

Potassium 29mg1%

Carbohydrates 13g4%

Fiber 1g4%

Sugar 12g13%

Protein 0.1g0%

Vitamin A 122IU2%

Vitamin C 14mg17%

Calcium 8mg1%

Iron 0.1mg1%

* Percent Daily Values are based on a 2000 calorie diet.

  • Run some hot water over the outside of the mold for a few seconds to easily remove the popsicle.
  • The exact amount of popsicles you’ll get depends on the size of your popsicle molds.
  • If you like your popsicles more tart, then go for 5 Tablespoons of lemon juice.

What are some of your favorite ways to get more nutrition into your diet in fun ways? Leave a comment and let us know!

Tags: , , ,
ginger dressing

Carrot Ginger Dressing Recipe

Our family goes through a lot of salads during the spring and summer months. It’s a great way to use random garden veggies and get more nutrition in. If you’re tired of the typical vinaigrette and ranch dressing, then try this sesame ginger dressing on your next salad.

You’ll often see a version of this at Japanese restaurants. Japanese ginger dressing basically has the same ingredients as my recipe, but with added soy sauce or miso. 

Carrot Ginger Salad Dressing

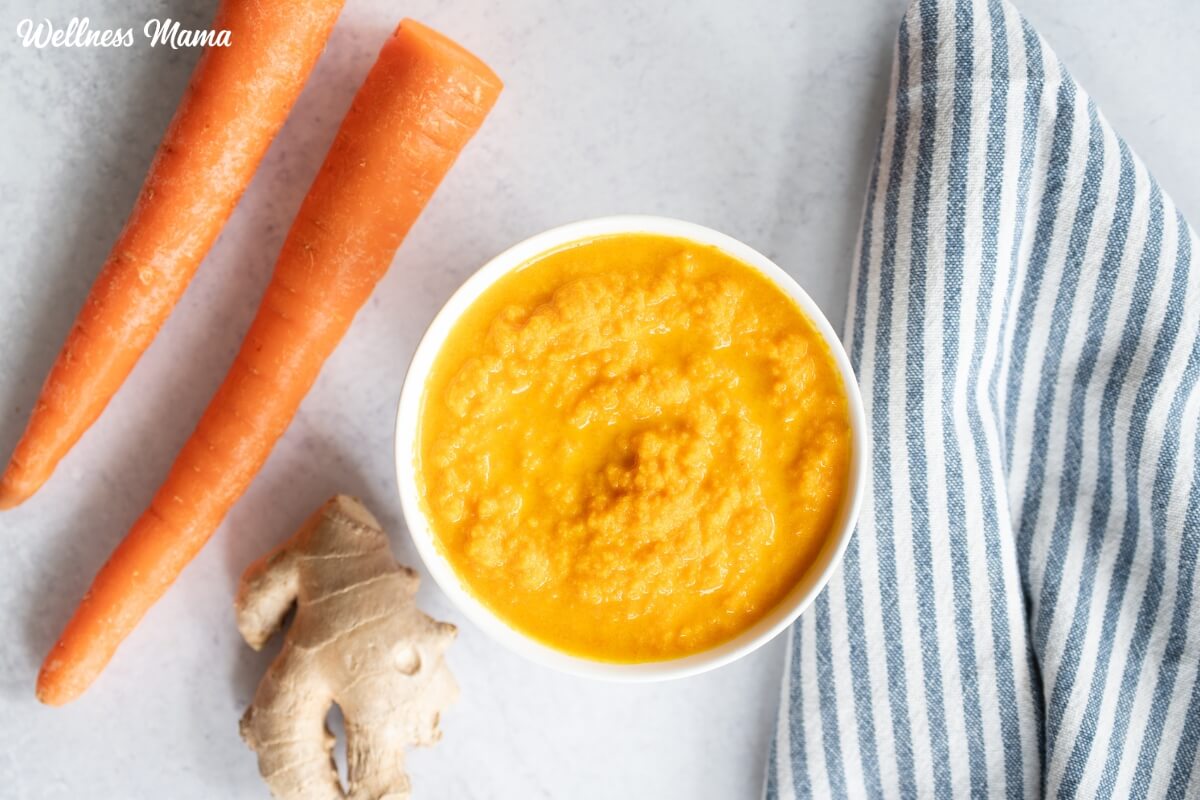
I’ve eaten plenty of carrots in my salad before, but actually putting them in the salad dressing wasn’t something I tried until more recently. It adds thickness and flavor in a different way. This dressing tastes fresh and bright thanks to the carrots and lime juice. The fresh ginger adds a bit of spice, the vinegar adds tang, the oil smooths it all together, and the honey adds a touch of sweetness.

Some recipes call for just olive oil or vegetable oil, but I opted to add some toasted sesame oil here. It has a more pronounced, rich, nutty flavor that combines well with the other Asian flavors of the dressing. 

More Than Just a Tasty Topping

This ginger salad dressing is more than just a great way to eat salad. Here are some of the health benefits you’ll get from the ingredients.

  • Carrots – Rich in beta-carotene, the precursor to vitamin A, fiber, potassium, and antioxidants. They also help flush excess estrogen for hormone balance and may balance candida overgrowth. 
  • Ginger – Reduces inflammation, eases nausea, improves digestion, and so much more. Adding ginger not only adds flavor, but helps the body better absorb the other dressing and salad nutrients. 
  • Lime juice – Nice and tangy, lime juice features vitamin C and small amounts of other minerals, like potassium and magnesium
  • Olive oil – Real olive oil is thick, dark, and flavorful. It adds healthy fats for hormone support and a healthy brain boost. 
  • Sesame oil – High in antioxidants and anti-inflammatory compounds. It does have some Omega-6 oils which are balanced out with the Omega-3 fatty acids from the olive oil. 
  • Rice vinegar – I usually use apple cider vinegar in recipes, but rice vinegar has a different flavor profile that goes well in ginger dressing. It’s naturally fermented and may help with immunity, blood pressure regulation, and detox. 

How to Use Carrot Ginger Salad Dressing

You can use this on any salad, but it’s typically served over roughly chopped iceberg lettuce and carrot strands. It also tastes surprisingly good on meat and fish. Try it on roasted veggies or as a dipping sauce for spring rolls. It also tastes really good on salad with some miso marinated eggs!

Here are some more salad recipes to pair your new ginger dressing with:

Tips For Making Ginger Dressing

This dressing is very forgiving. Add more ginger for extra kick or more honey if you prefer it sweeter. If your blender isn’t high-powered, chop the carrots and ginger smaller for a smoother result. I’ll taste it after its blended and usually add a little more salt to taste.

If you have any leftovers then store them in an airtight container in the fridge for up to a week. Some people recommend a max of four days, but we’ve always eaten it pretty quickly. 

And here’s how to make it!

Carrot Ginger Salad Dressing

A delicious, fresh dressing recipe like you’d find at Japanese restaurants. Great on a variety of salads or even as a dip for spring rolls.

  • Add all dressing ingredients to a high-speed blender and blend on high until smooth and creamy. The carrots should fully break down.

  • Add more salt if needed. If it tastes too tangy, add a little more honey to balance.

  • Store in a glass jar in the fridge for up to a week.

Nutrition Facts

Carrot Ginger Salad Dressing

Amount Per Serving (2 TBSP)

Calories 105
Calories from Fat 90

% Daily Value*

Fat 10g15%

Saturated Fat 1g6%

Polyunsaturated Fat 1g

Monounsaturated Fat 7g

Sodium 81mg4%

Potassium 48mg1%

Carbohydrates 5g2%

Fiber 0.4g2%

Sugar 3g3%

Protein 0.2g0%

Vitamin A 1784IU36%

Vitamin C 2mg2%

Calcium 5mg1%

Iron 0.1mg1%

* Percent Daily Values are based on a 2000 calorie diet.

Toss with fresh greens and your favorite toppings, or use as a dip or marinade.

Other Salad Dressing Recipes

Here are some more salad dressing recipes to add to your rotation. I like to keep a few jars of homemade dressing in the fridge to grab as needed during the week. They’re easy to whip up and whole food nutrition!

What are some of your favorite ingredients to use in salads? Leave a comment and let us know!

Tags: , , ,
Best oLive
Privacy Overview

This website uses cookies so that we can provide you with the best user experience possible. Cookie information is stored in your browser and performs functions such as recognising you when you return to our website and helping our team to understand which sections of the website you find most interesting and useful.