Adobo_Seasoning

Adobo Seasoning Recipe

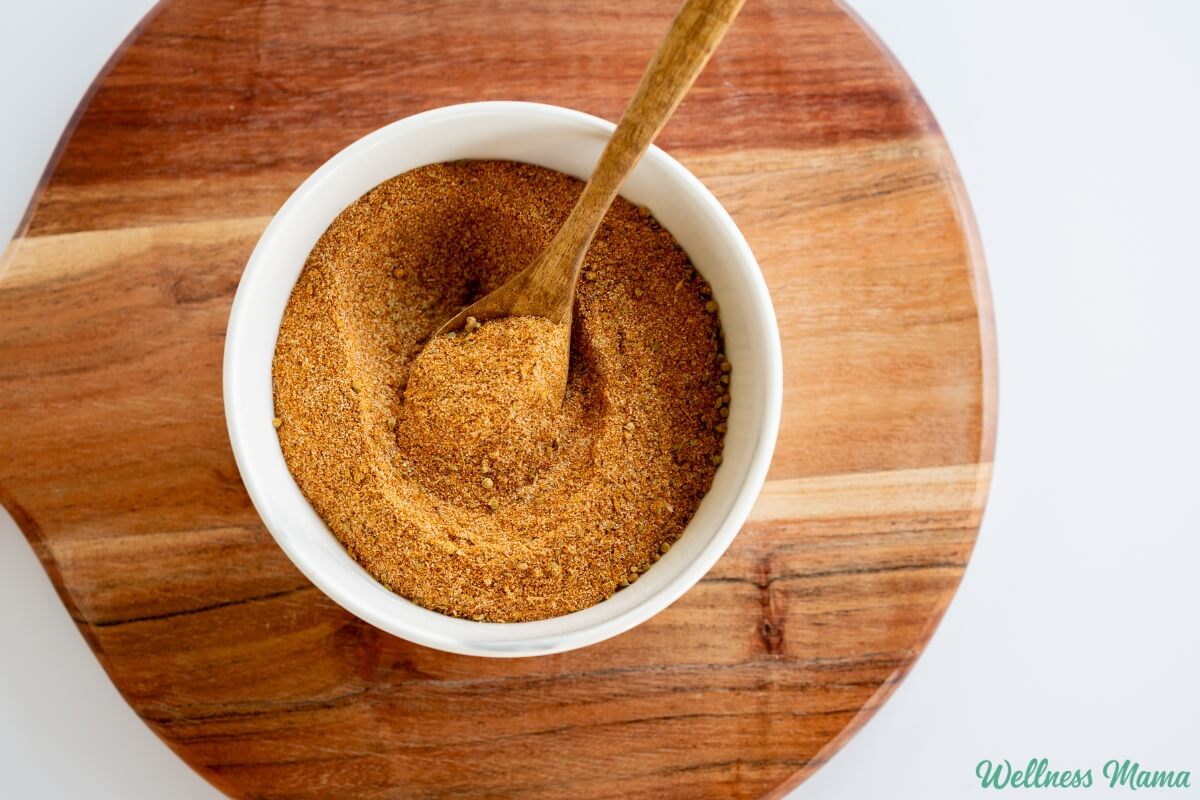
I regularly make homemade mayo and I’ll often make different flavors, like sriracha or mayo with adobo seasoning. I use so much adobo seasoning that I started making it in bulk at home. It’s delicious on everything from meats to veggies to dips. 

What is Adobo Seasoning?

Adobo seasoning is a mixture of garlic, oregano, pepper and other spices. It’s traditionally used in Latin American, Caribbean, and Filipino cooking to flavor everything from meats to veggies and soups. Adobo usually doesn’t have really heavy, pungent flavors so it’s versatile to use.

In my kitchen, it’s a general all-purpose seasoning that I add to meats, soups, seafood, eggs, roasted vegetables, and many other dishes.

The word adobo stems from the Spanish word “adobar” meaning “to marinate.” There are many variations of this seasoning, including liquid sauce versions that often include vinegar. The base ingredients are garlic, black pepper, turmeric, and oregano, though other spices can be added (I add several others to my variation).

How to Use Adobo Seasoning

This combination of spices adds depth to dishes without overpowering them, and is versatile enough to use on practically everything. You can mix it in while cooking, or use it as a dry rub on meats. It also makes a delicious marinade when mixed with oil, orange juice, lime juice, or vinegar. Just add enough liquid to make a paste and rub it on beef, poultry, fish, etc. 

Here are some other ways I use Adobo seasoning: 

  • In marinades for meats or chicken
  • As an all-purpose seasoning on seafood
  • On grilled meats and vegetables
  • In soups of all kinds
  • In omelets, quiches, or other egg dishes
  • In guacamole
  • Stirred into homemade mayo for a flavor twist

Tips For Making Adobo Seasoning

Adobo seasoning blends include salt so they’re an all in one seasoning when cooking. If you prefer you can leave the salt out or reduce the amount. This makes it easier to control the amount of salt added when cooking, especially if you’re using this with other salty flavors. 

The recipe calls for black or white pepper. They each have a unique flavor, but either will work in adobo seasoning. I prefer to use a blend of both when making this. 

Adobo Seasoning Recipe

Our family loves this adobo seasoning on meats, seafood, guacamole, soups, roasted vegetables, and practically any other dish. I always have some on hand and use it nearly every day!

  • Add all ingredients to a small glass jar or bowl.

  • Stir or shake well until fully combined.

  • Store in an airtight container away from heat and sunlight.

Nutrition Facts

Adobo Seasoning Recipe

Amount Per Serving (1 TBSP)

Calories 22
Calories from Fat 4

% Daily Value*

Fat 0.4g1%

Saturated Fat 0.1g1%

Polyunsaturated Fat 0.1g

Monounsaturated Fat 0.1g

Sodium 880mg38%

Potassium 107mg3%

Carbohydrates 5g2%

Fiber 1g4%

Sugar 0.3g0%

Protein 1g2%

Vitamin A 385IU8%

Vitamin C 1mg1%

Calcium 31mg3%

Iron 1mg6%

* Percent Daily Values are based on a 2000 calorie diet.

If you prefer, you can omit the salt from this recipe and just add it as desired while cooking. 

Shelf Life and Storage

Like any spice, this tastes best when stored in a cool, dark place away from direct light and heat. Right above the stove is not the best place! When stored properly it will stay fresh for about 6 months. Feel free to double the batch if your family loves it as much as we do!

Other Homemade Spices to Try

Like this recipe? I recommend ordering herbs and spices in bulk and making your own spice blends at home. It’s a great way to avoid unwanted additives found in many commercial spice blends, and an easy way to save money. I order most of my herbs and spices in bulk online and make many of my own blends, including:

What’s your favorite type of seasoning? Do you ever make your own? Leave a comment and let us know!

Tags: , ,
Spicy Asian Cucumber Salad Recipe

Spicy Asian Cucumber Salad Recipe

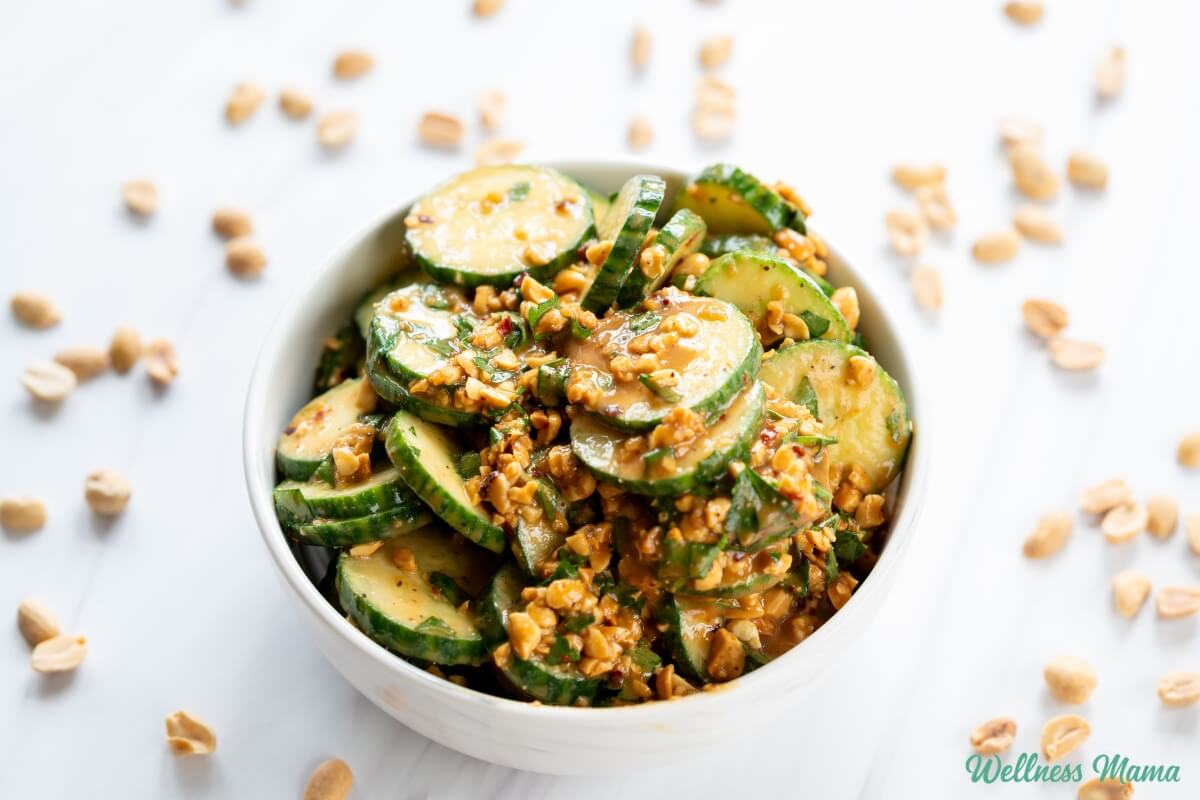
I’ve had a garden for many years now and every Spring I look forward to getting my hands back in the dirt! One of the easy vegetables you’ll often find growing in my backyard are cucumbers. They’re the perfect, refreshing side dish on warmer days, especially when they’re in this Asian cucumber salad. 

Veggies don’t have to be boring when they’re covered in a flavorful (and healthy!) sauce. Some of my kids favorite sauces to dip vegetables in include homemade ranch dressing or French onion dip. This recipe offers another option to get kids (and adults) more excited to eat their veggies. 

Spicy Cucumber Salad Recipe

The ingredients are pretty simple and the recipe only requires about 10 minutes of hands on time total. You might have seen the viral 3 ingredient spicy cucumber salad, but this version has more complex flavors. Even so, it takes just a couple minutes to mix up the sauce. 

Coconut aminos or soy sauce adds a nice umami flavor, raw honey adds sweetness and minerals, and the chopped peanuts add an addictive crunch. The rice vinegar helps cut through the earthy flavors and sweetness of the honey to really balance out the blend. Plus there’s the added flavors of the parsley, garlic, and black pepper. 

The spice in this spicy cucumber salad comes from red chili flakes which add a nice heat. If your family doesn’t like it as spicy (or at all), then reduce or omit them. Like it really spicy? Feel free to add more! Just be sure to taste it first before adding more and adjust to taste. 

Prepping the Cucumbers

I usually just chop my veggies in the food processor and call it a day, but this Asian cucumber salad has an additional step. By sprinkling the slices with some salt first and then patting them dry it reduces some of the extra moisture. Cucumbers are mostly water and when they’re added to a salad like this it can get really watery. It’s a simple step that allows the cucumbers to really soak up all of that delicious sauce. 

Here’s how to make it!

Spicy Asian Cucumber Salad Recipe

This delicious Asian cucumber salad recipe is a spicy, salty, and refreshing side dish. Full of flavor and nutrition it’s a summer staple!

  • Lay the sliced cucumbers in a single layer on a clean kitchen towel or paper towels. Sprinkle evenly with ½ teaspoon salt and let sit for 10 minutes to draw out excess moisture.

  • Rinse the salted cucumber slices under cool water, then pat thoroughly dry with paper towels. This step keeps the sauce from getting watery and ensures the best flavor absorption.

  • In a medium bowl, whisk together coconut aminos, rice vinegar, natural peanut butter, raw honey, garlic, dried red chili flakes, ground black pepper, and fresh parsley until smooth and fully combined.

  • Add the dried cucumber slices to the peanut sauce and toss until every slice is well coated. Transfer to a serving plate and garnish with chopped peanuts.

  • Serve immediately or chill for up to 1 hour.

Nutrition Facts

Spicy Asian Cucumber Salad Recipe

Amount Per Serving (1 serving)

Calories 204
Calories from Fat 117

% Daily Value*

Fat 13g20%

Saturated Fat 2g13%

Polyunsaturated Fat 4g

Monounsaturated Fat 6g

Sodium 479mg21%

Potassium 434mg12%

Carbohydrates 17g6%

Fiber 3g13%

Sugar 8g9%

Protein 8g16%

Vitamin A 476IU10%

Vitamin C 7mg8%

Calcium 56mg6%

Iron 2mg11%

* Percent Daily Values are based on a 2000 calorie diet.

Adjust the spice level to your preference by adding more or less chili flakes

Shelf Life and Storage

This is one of those recipes that tastes even better if you wait a bit. You can eat this recipe right away or you can let the sauce soak into the cucumbers for an hour first to marry the flavors. Keep any leftovers in a covered container in the refrigerator for up to 1 week. 

Unless you like soft peanuts, save these as a garnish for right before serving. 

More Addictive Salad Recipes

Here are some more of my veggie packed salad recipes I love eating when the weather starts to warm up. 

What are some of your favorite easy and healthy side dishes? Leave a comment and let us know!
Tags: , , , ,
dit da jow

Dit Da Jow Recipe | Wellness Mama

Years ago our whole family started taking Jujutsu for a season. We all enjoyed it, but the rolls, throws and climbing definitely came more easily to the kids! Any activity that involves wooden swords and rolling will inevitably create some bumps and bruises along the way.

After one class that left us particularly sore, the Sensei (teacher) shared a traditional herbal remedy. It’s been used in Asian countries for pain relief and rapid healing for years. Dit Da Jow (literally translated “hit wine medicine”) is essentially an herbal tincture or liniment packed with healing herbs.

What is Dit Da Jow?

Dit Da Jow is an analgesic liniment traditionally preferred by martial artists. Often a martial arts master blends his unique mixture of many aromatic herbs like myrrh, ginseng, and traditional TCM herbs. The combination helps stimulate circulation, reduce pain and swelling, and improve injuries and speed wound healing.

The tradition became known as “hit medicine”. Many people have also found this liquid analgesic useful for reducing muscle aches, arthritis, and rheumatism discomfort.

Dit Da Jow Recipes

I researched traditional Dit Da Jow recipes and while it was hard to find many of them (most are considered secret family recipes), I finally found a mixture that works really well for us. Traditional Dit Da Jow uses a long list of herbs that are native to Asia, many of which are hard to find in the US.

The version I came up with has the same benefits, but many of the herbs are found in the US. While this wouldn’t be considered true Dit Da Jow, it’s been very effective for our bumps and bruises. It also helps speed recovery of non-martial arts related injuries so I keep it stocked in our natural medicine cabinet. 

You can also find more traditional Dit Da Jow here if you want to try it.

The Benefits of Dit Da Jow

Overall Dit Da Jow helps reduce swelling and speed healing from bumps and sprains. Since the recipes are all so different, I’ll just give a quick overview of the benefits of the herbs I chose. 

  • Arnica – Often used for strains, sprains, and bruising.
  • Plantain leaf – A go-to herb for soothing and healing minor wounds, cuts, and irritated skin. Plantain also helps reduce inflammation and supports recovery from skin damage. 
  • Comfrey leaf – Nicknamed “boneknit,” comfrey rapidly heals skin and supports bone healing.
  • Frankincense – This resin helps calm inflammation and promote tissue repair. It’s a favorite for soothing sore muscles, joints, and damaged skin topically.
  • Myrrh – Known for its antimicrobial and anti-inflammatory properties, myrrh supports wound healing. It also reduces swelling and eases pain in bruised or strained tissues.
  • Fennel – Fennel offers gentle warming and anti-inflammatory support to help relieve muscle tension. It also promotes circulation for faster recovery.
  • Angelica Root – This warming root helps ease pain and inflammation in muscles and joints while supporting circulation for faster healing times. 
  • Calendula – A gentle herb that promotes rapid healing of cuts, scrapes, and irritated skin. It’s also soothing and reduces inflammation for overall tissue repair.
  • Dandelion root – Rich in minerals, dandelion root supports detox and lessens inflammation. It’s used to help reduce swelling in sore muscles and joints.
  • Horsetail – High in silica, horsetail strengthens connective tissues and supports bone and ligament repair for better resilience after injury.
  • Nettle leaf – Packed with minerals and micronutrients, nettle nourishes tissues, reduces inflammation, and helps ease muscle and joint pain.
  • Clove – Clove is a warming analgesic that eases deep muscle pain and supports circulation for faster recovery.
  • Turmeric – This powerful anti-inflammatory herb helps reduce swelling and pain in muscles, joints, and ligaments while supporting the body’s natural healing process.

How Does Herbal Liniment Work?

The alcohol extracts the beneficial properties from the herbs. When applied topically alcohol quickly absorbs into our skin and works quickly. You may be familiar with making herbal tinctures to take internally, this is just a topical version. This recipe is for external use only, it’s not the kind of tincture you take internally.

Yes, the recipe does call for a lot of herbs, but I’ve seen it get rid of bruises and pain overnight! This Dit Da Jow recipe has been really effective for our family and others I’ve shared it with.

Dit Da Jow Muscle Liniment Recipe

Prep Time5 minutes

Steeping Time42 days

Total Time42 days 5 minutes

Author: Katie Wells

  • Place all of the herbs in a 16 ounce glass mason jar.

  • Fill the rest of the jar with food-grade, 80-proof or higher alcohol and stir with a clean spoon.

  • Put the lid on the jar. Store the jar in a cool/dry place, shaking daily, for at least three weeks and up to 1 year. I usually leave the herbs for six weeks.

  • Strain through cheesecloth and compost the herbs. Store the tincture in colored dropper bottles or clean glass jars.

Use on skin as needed to help with bruises, sore muscles and pain. Do not use on cut or broken skin.

As with any natural remedies consult with a natural healthcare practitioner before using, especially if you’re pregnant, nursing, or have medical conditions. 

Shelf Life and Storage

Traditionally Dit Da Jow is brewed for months, if not years. Some research has shown that a batch steeped for 5 years had significantly more benefits than one steeped for 1 year. You probably don’t want to wait that long before using your liniment though. I’ve found that even 6 weeks is enough to get herbal benefits. Plus, the traditional recipes are often made with Chinese root herbs that are tougher than plantain, calendula, etc.

You can keep the herbs in the jar and strain the liquid out as needed. Just be sure the herbs stay completely covered in alcohol. Once you’ve used more of the liquid, just strain the herbs out. Store your Dit Da Jow in a cool, dark place, away from direct light and heat. 

What are your favorite herbal remedies for muscle aches and pains? Share below!

Tags: , , , ,
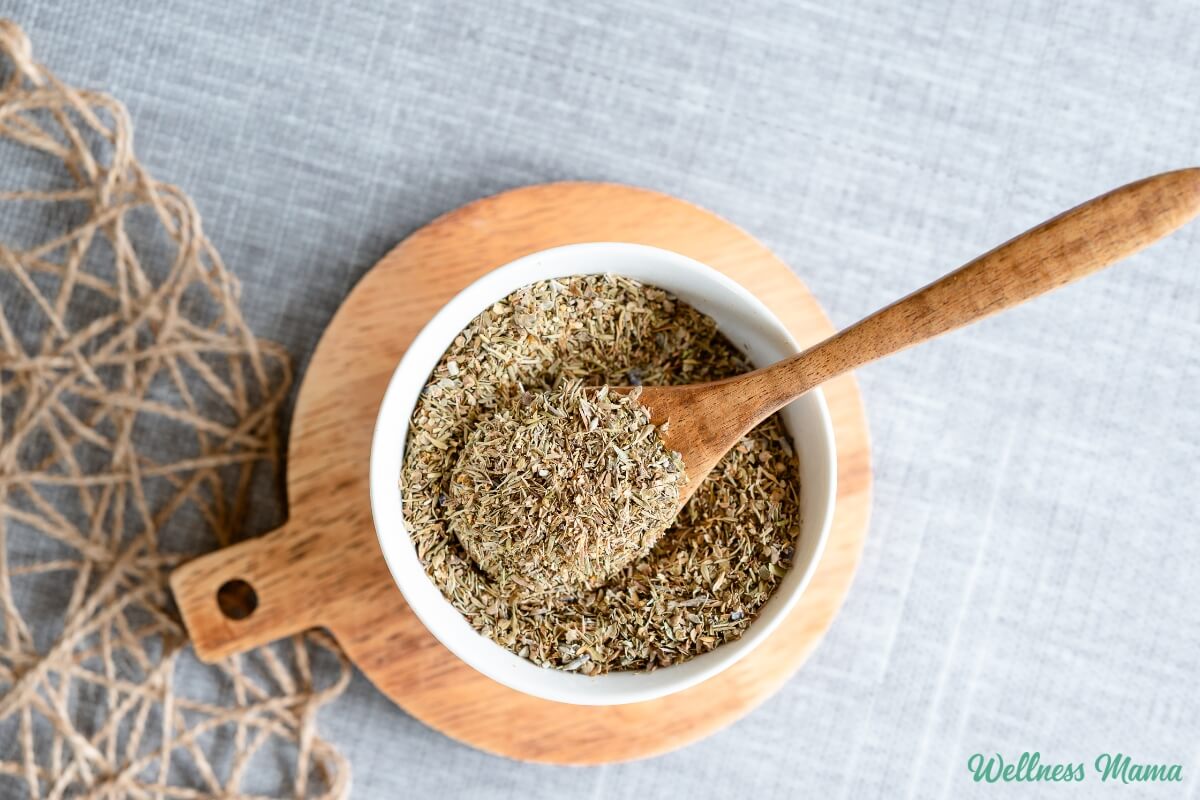
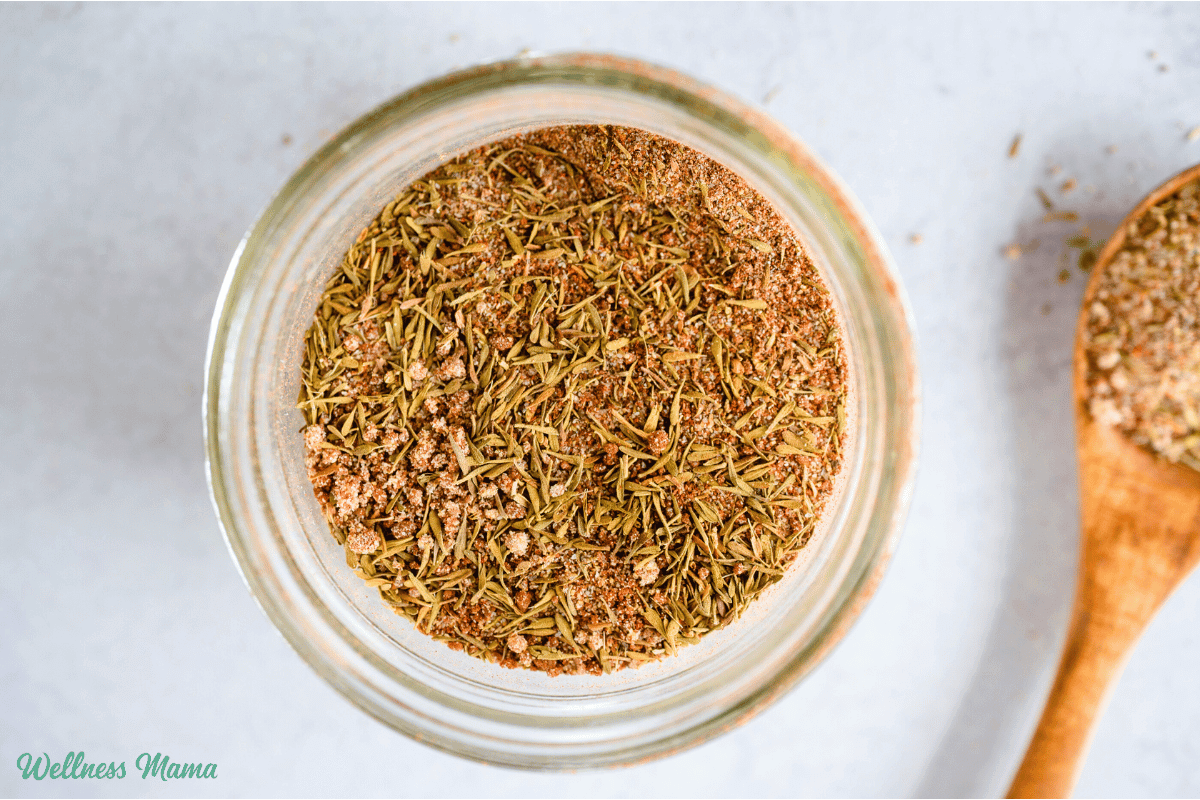
How to Make Herbes de Provence at Home

Homemade Herbes de Provence Spice Mix Recipe

I’m never without homemade herbes de Provence in our kitchen. Abundant in the south of France, this spice mix really speaks to my love of French cooking. I use it in just about anything I can!

My mom’s French heritage was a big influence growing up, and because of her, I will always have a soft spot for French dishes like boeuf bourguignon and pâté. I’m no Julia Child (or even Martha Stewart for that matter!), but I do try to incorporate French recipes in our meal plan whenever possible.

Many people think French cooking is fussy or difficult, but it doesn’t have to be. 

The French Cure for Picky Eaters

I’ve always been fascinated by French food culture and how even children in France typically like a wide variety of foods. We can learn a lot from the French, especially in how we teach our children to view food. I actually devoted a part of my Wellness Mama Cookbook to this topic!

A big part of raising non-picky eaters is exposing kids to well-rounded, varied flavors—like those in this seasoning blend. 

What is Herbs de Provence?

The blend originated in the south, or Provence region, of France, and is made up of herbs that naturally grow in that area. The original blend of herbs de Provence ingredients contained summer savory, thyme, marjoram, and rosemary. Later on, lavender, fennel, and even orange zest were added to certain versions. Many of the herbs de Provence spice blends at the grocery stores include lavender and other herbs. 

Not only do they taste good, but these herbs have strong antimicrobial properties to help the immune system do its job. Among many other things, rosemary helps with memory, thyme is great for the lungs, and marjoram helps relax nervous tension. Lavender is also good for stress relief, orange zest is uplifting, and fennel helps aid digestion. Together, they make for a powerful and tasty spice blend. 

Herbs de Provence vs Italian Seasoning

While I love both seasonings, they definitely have some differences. Italian seasoning also includes thyme and rosemary, but you’ll often find spicy oregano and basil in there too. And most versions of Italian seasoning don’t include marjoram or summer savory (and certainly not lavender)!

If you need an herbs de Provence substitute, the simplest recipe is summer savory, thyme, marjoram, and rosemary.

How to Make Herbs de Provence

It’s very simple, but it does require an extra step compared to many of my spice blend recipes. Usually I just add all of the herbs to a jar, shake, and voila… done. Since these herbs are often whole, like fennel seeds or lavender buds, I do a quick run through the food processor first. Not only does it make them easier to use in recipes, but freshly ground herbs are more fragrant and flavorful. Blending or chopping herbs releases more of their volatile oils so they taste fresher. 

So what is herbes de Provence for anyway, besides sounding fancy? The answer is a lot!

How to Use This Homemade Seasoning

Herbes de Provence is very versatile. It can be described as bold, woodsy, and a little bit floral. It pairs well with almost any cut of meat (especially pork and chicken recipes) and really complements most fish and seafood. I often add it to homemade soups and broths too.

We love to pre-mix a little into grass-fed butter and keep it at the ready for topping veggies, sourdough bread, or cauliflower rice. It also makes a great addition to breakfast dishes like my favorite sous vide egg bites or homemade breakfast sausage.

Try adding herbs de Provence compound butter to a roast chicken before putting it in the oven. Since the herbs are chunkier, not quite powdered, they work best when added to the beginning of recipes. This gives them a chance to infuse their flavors into the dish. It’s equally delicious on roasted vegetables or potatoes. 

A bonus… not only is it healthy and tastes good, but it fills the kitchen with amazing smells!

You can certainly buy it from the store, but this homemade herbes de Provence spice blend and other homemade spice blends are a great way to save time and money. And this way, you know exactly how long it’s been sitting on the shelf! It’s also a fun and easy kitchen project kids can help make.

Homemade Herbs de Provence Recipe

Homemade herbs de Provence combines herbs like thyme and marjoram with lavender, fennel, and orange zest for a savory and flavorful spice blend.

  • Use a mortar and pestle or a food processor to lightly grind any herbs that are whole, such as the rosemary, lavender flowers, or fennel. The herbs should be coarse, not finely ground.

  • If you are zesting the orange yourself, remove the zest of one organic orange and dry it in an oven on lowest setting or a dehydrator until completely dry.

  • Combine all ingredients in a jar or bowl and mix.

  • Store in an airtight container away from heat and light.

Nutrition Facts

Homemade Herbs de Provence Recipe

Amount Per Serving (1 tsp)

Calories 9
Calories from Fat 2

% Daily Value*

Fat 0.2g0%

Saturated Fat 0.1g1%

Polyunsaturated Fat 0.04g

Monounsaturated Fat 0.01g

Sodium 2mg0%

Potassium 28mg1%

Carbohydrates 2g1%

Fiber 1g4%

Sugar 0.04g0%

Protein 0.3g1%

Vitamin A 131IU3%

Vitamin C 2mg2%

Calcium 60mg6%

Iron 3mg17%

* Percent Daily Values are based on a 2000 calorie diet.

  • Mix a teaspoon or two of this flavorful herb blend into softened butter for topping vegetables, season chicken or seafood, or use it to make your own breakfast sausage. 
  • The total yield for this recipe is about 1/2 cup plus 2 teaspoons of herbs de Provence. 

Herbs de Provence Alternate Recipe

I’ll often buy my herbs in bulk online, but sometimes savory can be difficult to find at your local store. If you’re looking for a recipe without summer savory or just something new to try, I like this blend too. Simply process, mix, and store like the above recipe. All of the following herbs are dried:

  • 2 TBSP thyme
  • 2 TBSP rosemary
  • 1 TBSP basil
  • 1 TBSP oregano
  • 1 TBSP summer savory (optional but traditional)
  • 1 tsp marjoram (optional)
  • 1 tsp lavender buds (optional)

Have you ever used herbes de Provence? What French flavors do you love?

Tags: , , , , ,
jerk seasoning

Homemade Jerk Seasoning Recipe

I resisted trying Jamaican jerk seasoning for years. It seemed strange to me to add cinnamon to savory dishes. Then, I was introduced to Cincinnati-style chili, which also uses cinnamon in a savory dish (along with chocolate!). I realized cinnamon really could get along with savory flavors. 

I figured if I could learn to love cinnamon in chili, I could learn to like it in chicken or other dishes as well. So I attempted to make Jamaican jerk chicken seasoning at home. My first try wasn’t successful. It turns out, cinnamon has to be kept in a very careful balance. Too much, and it overwhelms everything else.

Since then, I’ve perfected the recipe and really love the sweet, spicy, and cinnamon combination of this spice blend. These flavors can be an acquired taste, so don’t give up if they seem strange at first. A good Caribbean jerk seasoning balances heat, sweetness, and earthiness in a way that’s bold but still versatile.

What Is Jerk Seasoning?

Traditionally, it’s a bold Jamaican spice blend used to season meats, especially chicken and pork, before grilling or smoking. Authentic blends can be made as a dry powder or a paste, depending on how it’s used. This homemade jerk seasoning version uses pantry spices so it’s easy to keep on hand and customize to your tastes. 

What Is Jerk Seasoning Made Of?

While recipes vary, classic jerk seasoning ingredients often include allspice, thyme, garlic, onion, cinnamon, nutmeg, cloves, and a spicy element like cayenne or Scotch bonnet peppers.

The three main ingredients of jerk seasoning are allspice, thyme, and hot peppers as the core flavors, with supporting spices layered in. So what gives jerk its flavor? The signature taste comes from the warm, aromatic spices (especially allspice and cinnamon) combined with heat, herbs, and a touch of sweetness. It’s that mix of spicy, savory, and slightly sweet that makes jerk seasoning so distinctive (and addictive!). 

How to Make Jerk Seasoning at Home

If you’re wondering how to make jerk seasoning, the good news is that it’s simple to mix as a dry spice powder. You can also blend the spices into a paste with oil, vinegar, and/or honey. A Jamaican jerk seasoning recipe can be customized for heat level and sweetness, depending on your family’s preferences.

This seasoning is usually added to chicken, but it’s also great on roasted vegetables, other meats, and even grilled seafood. I love mixing this seasoning with equal parts honey and coconut oil to make a marinade or rub. I’ll use it on different meats and vegetables, especially when grilling. The combo of sweet, spicy, and earthy adds a caramelized, smoky flavor that’s hard to beat.

Jerk Seasoning Recipe

Homemade Jamaican jerk seasoning recipe with onion powder, cinnamon, allspice, and other herbs provides depth and flavor to many dishes.

Nutrition Facts

Jerk Seasoning Recipe

Amount Per Serving

Calories 3

% Daily Value*

Sodium 39mg2%

Carbohydrates 0.6g0%

Fiber 0.2g1%

Sugar 0.2g0%

Protein 0.1g0%

* Percent Daily Values are based on a 2000 calorie diet.

Try mixing the seasoning with equal parts honey and coconut oil to rub onto meat or other food.

Another Variation

I’ve played around with this recipe over the years and the above is the updated version. If you’re looking for the original that has a stronger onion and cinnamon flavor, then give this a try.

What Is the Closest Thing to Jerk Seasoning?

Looking for a substitute for jerk seasoning? If you don’t have all the spices on hand, a mix of allspice, thyme, garlic powder, onion powder, and cayenne is a good starting point. It won’t be identical to an authentic blend, but it captures the general flavor profile.

If this just isn’t your thing, check out my other homemade herb and spice blends to replace pricey store-bought spice blends. Making your own lets you control the ingredients, skip fillers, and adjust the flavors. Plus, once you start experimenting with spice blends like this, it’s hard to go back to pre-made mixes.

Ever used Jamaican jerk seasoning? What are your favorite ways to use it? Leave a comment and let us know!
Tags: , , ,
Samoas_Recipe

Healthier Homemade Samoas Cookies Recipe

Girl Scout cookies are popular this time of year. It’s estimated that over 200 million of those crunchy, chewy, addictive small boxes sell every year. What’s not so tasty are the ingredients and pesticide residues they contain. 

If you’re a fan of chewy coconut, caramel, and rich chocolate Samoas, then you’ll love this healthier take. It’s made with real-food ingredients but tastes even better (in my opinion). I’ve always been a big coconut fan and use it in everything from skincare to desserts for its healthy fats.  

This healthier homemade Samoas cookies version delivers on flavor and quality. It’s inspired by traditional Samoas cookies and makes an easy Samoas recipe you can enjoy year-round, not just during cookie season. Plus, it’s grain-free, uses natural sweeteners, and has a texture that’ll satisfy any coconut lover.

What Are Samoas Cookies and Why Make a Homemade Version?

Samoas are a beloved variety of Girl Scout cookies with toasted coconut, caramel, and chocolate. In some areas they’re labelled Caramel deLites or coconut Girl Scout cookies, but the flavor profile remains the same. They’re sweet, chewy, and irresistible. However, the first ingredient is sugar, the next is vegetable oil, and the ingredients list goes downhill from there. 

I don’t have a huge sweet tooth, but my kids won’t say no to homemade cookies! And I want something that’s just as nourishing as it is delicious. That’s where this healthier Samoas dupe comes in.

It features clean, simple, and absolutely delicious ingredients. These homemade Samoas use Medjool dates for caramel-like sweetness, toasted coconut for texture, and dark chocolate. The result is a coconut cookie that tastes indulgent but is made entirely with real food ingredients. 

A Nourishing Spin on a Classic

One of the best things about making homemade treats is being able to choose the ingredients and sweetness level. Many homemade Samoas recipes get bogged down in complicated caramel steps or refined sugars. This version keeps things simple and nutrient dense.

Toasted coconut adds texture, sweetness, healthy fats, and fiber. Dates provide the sticky, caramel-like feel without needing to boil sugar, plus they’re rich in nutrients. The dark chocolate drizzle ties it all together with antioxidants and minerals. You can even adjust the level of chocolate or swap in dairy-free options to fit your family’s preferences.

Tips For Making Homemade Samoas

Homemade Samoas cookies (or any cookie) isn’t just about copying what’s on the side of the box. I don’t know about you, but I don’t keep sorbitol, caramel coloring, and carrageenan in my pantry! These Samoas start with simple ingredients, but you can tweak them to fit your preferences. 

  • Customize your chocolate: Use a dark chocolate you love (70–90% cacao works well) to control the sweetness level. You can also opt for dairy-free chocolate.
  • Play with fats: Coconut cream, melted coconut oil, or even grass-fed butter all work here. Use what you have or what you like. Butter and ghee taste the most like a classic Samoa and are richer. Coconut cream gives it a softer chew, while coconut oil is firmer if you eat these chilled. 
  • Prep the dates: If your dates are dry or firm, soak them in warm water for 5–10 minutes first. Then drain and pat dry before using.

These homemade Samoas cookies are perfect for family gatherings, lunchbox treats, or a weekend project with kids. And once you’ve made this Samoas dupe, I guarantee you’ll be excited to explore other real-food dessert recipes too.

Healthier Homemade Samoas Cookies

This delicious and healthy twist on the classic Samoas cookies features nourishing fats, dates for sweetness, and a generous chocolate drizzle.

  • Preheat the oven to 400°F. Spread shredded coconut evenly on a baking sheet and toast for 3–5 minutes, watching closely, until golden. Remove and let cool slightly.

  • Add dates to a food processor and pulse until sticky and broken down. Add toasted coconut, vanilla, salt, and your chosen fat. Pulse until a thick, cohesive dough forms.

  • Scoop out about 1 tablespoon of dough, roll into a ball, and flatten slightly. I used the back of a ½ measuring cup with parchment between the cookie and the measuring cup. Use a straw or chopstick to punch a hole in the center. Reshape as needed.

  • Reduce oven temperature to 350°F.

  • Place cookies on a parchment-lined baking sheet and bake for 12–15 minutes, until edges are lightly golden and cookies feel set. Allow cookies to cool completely on the pan.

  • Transfer cooled cookies to the freezer for 5 minutes to firm up before dipping.

  • Using a double boiler, melt dark chocolate with coconut oil (or butter) until smooth.

  • Dip the bottoms of the cookies into the melted chocolate. Place back on parchment and drizzle remaining chocolate over the tops.

  • Refrigerate for 10–15 minutes, until chocolate is fully set.

Nutrition Facts

Healthier Homemade Samoas Cookies

Amount Per Serving (1 cookie)

Calories 123
Calories from Fat 72

% Daily Value*

Fat 8g12%

Saturated Fat 6g38%

Trans Fat 0.002g

Polyunsaturated Fat 0.1g

Monounsaturated Fat 1g

Cholesterol 0.1mg0%

Sodium 28mg1%

Potassium 169mg5%

Carbohydrates 13g4%

Fiber 3g13%

Sugar 10g11%

Protein 1g2%

Vitamin A 20IU0%

Vitamin C 0.2mg0%

Calcium 14mg1%

Iron 1mg6%

* Percent Daily Values are based on a 2000 calorie diet.

  • For chewier cookies, bake closer to 12 minutes
  • For crispier cookies, bake closer to 15 minutes and toast the coconut a bit darker

How to Store Homemade Samoas

We all know someone who keeps a stash of Girl Scout cookies in their freezer for later. The good news is that these homemade Samoas are also freezable! Keep leftovers in the freezer for up to 2 months or in the refrigerator for up to one week. Let the cookies come to room temperature first before eating though for the best texture. 

Does your family love Girl Scout cookies? What are some of your favorite flavors or healthier alternatives? Let us know in the comments!

Tags: , , , ,
Slow_Cooker_Boston_Butt_Recipe

Slow Cooker Boston Butt Recipe (Instant Pot Option)

Growing up and living in the south, I’m pretty familiar with pork barbecue. I’m also familiar with the fact that most barbecue places rely on high fructose corn syrup and other non-foods in their sauce. This Boston butt pork roast recipe avoids all that and simply uses delicious, whole food ingredients for the best taste. 

Boston butt is one of the easiest cuts of pork to cut and it’s also one of the most affordable. I’ve been able to find Boston butt from pastured pork at great prices, and slow cooking this recipe makes it incredibly tender. Boston butt roast in the Crockpot is also an easy recipe on days when you’re out of the house all day and need dinner to be ready when you get home. With a houseful of kids and teens in sports that happens a lot around here!

How to Serve Boston Butt Roast

For our family, one Boston butt roast lasts for about 3 meals with all of the leftovers. It’s a tasty source of protein and tastes good on its own, or repurposed into other dishes. We’ve done barbecue omelets with the leftovers. It also tastes great in tacos or for a protein-rich salad. 

I like the roast alongside almost any kind of potato or vegetable dish. It’s also great with some sourdough bread, rice, or salad. Try it with some sweet potato fries, savory stuffed sweet potatoes, or roasted Brussel sprouts. Here’s a tip: batch cook some roasted whole sweet potatoes to pull out of the fridge for a fast meal. Throw some Boston butt roast BBQ on top and you’ve got an easy meal!

 Use leftovers for tacos, nachos, baked potatoes, lettuce wraps, or breakfast hash.

Tips For the Best Boston Butt Roast Recipe

Store any leftovers in the remaining juices for the best flavor and tenderness. If you ever need to freeze it, freeze it with the liquid too. This protects the texture when it thaws.

If there’s too much liquid for you after cooking, then there’s an easy fix. Simmer for 10–20 minutes, stirring occasionally, until it reduces and looks glossy and slightly thick. It should coat a spoon, not run like broth.

This recipe is great for meal prepping. Use leftovers for tacos, nachos, baked potatoes, lettuce wraps, or even breakfast hash.

Slow Cooker Boston Butt Recipe

An easy slow cooker Boston Butt with flavorful spices, fruity pineapple, and smoky barbecue.

  • Thinly slice the onions and place them in the bottom of a 6-quart or larger slow cooker.

  • Rinse the Boston butt and place it on top of the onions.

  • Sprinkle with spices.

  • Pour the whole can of pineapple over it. If using fresh pineapple, peel, core, and thin chop the pineapple and place over pork.

  • Add the apple cider vinegar.

  • Put the lid on the slow cooker and cook on low for 10-12 hours or until fork tender. Don’t open until at least 8 hours and then check for tenderness.

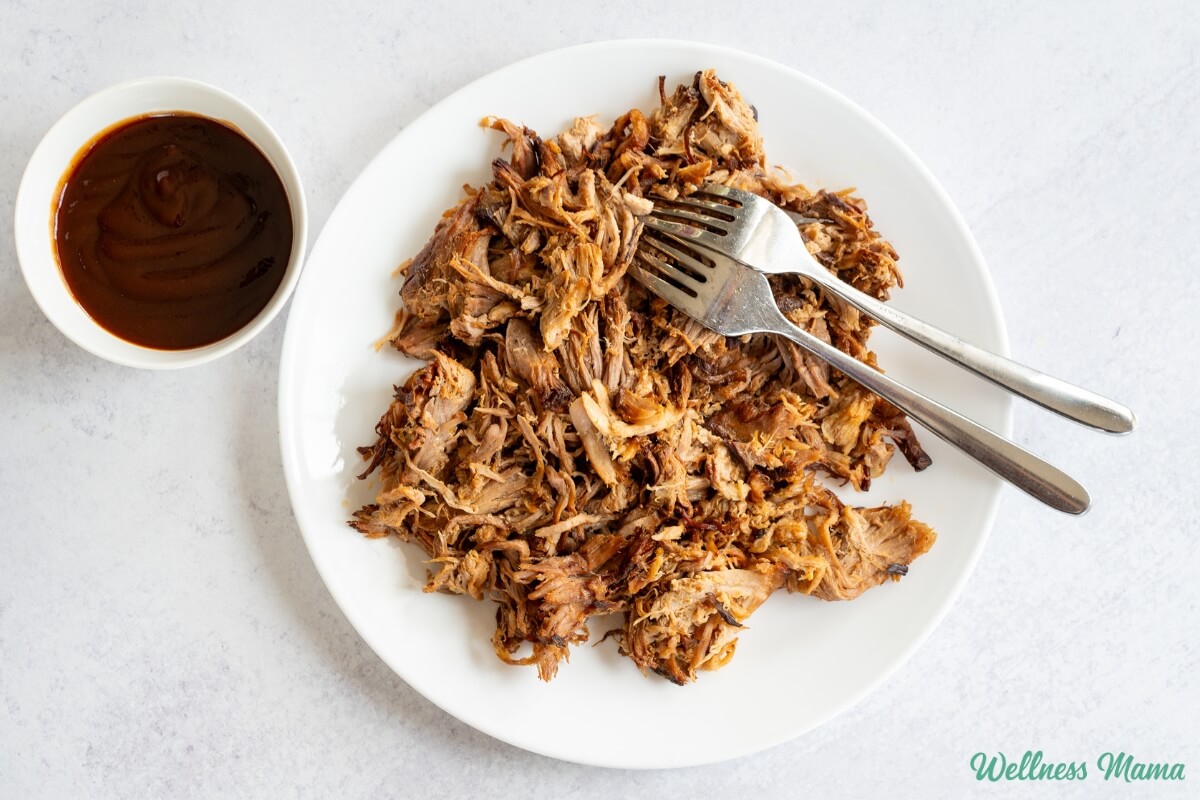
  • ?After cooking, shred the pork.

  • Spoon out ½ -1 cup cooking liquid and simmer with the BBQ sauce for 5–10 minutes. Pour the liquid back into the pork and stir to coat.

Nutrition Facts

Slow Cooker Boston Butt Recipe

Amount Per Serving

Calories 585
Calories from Fat 277

% Daily Value*

Fat 30.8g47%

Saturated Fat 11.3g71%

Cholesterol 167mg56%

Sodium 1196mg52%

Carbohydrates 30.9g10%

Fiber 1.9g8%

Sugar 23.9g27%

Protein 44.1g88%

* Percent Daily Values are based on a 2000 calorie diet.

Try leftovers on top of salads or in omelettes for breakfast!

Instant Pot Boston Butt Recipe

The recipe above is for slow cooker Boston butt, but you can easily modify it for the Instant Pot. 

Instant Pot Instructions

  1. Turn the Instant Pot to Sauté. Add a small splash of oil and cook the sliced onions for 3–4 minutes until softened. Press Cancel.
  2. Place the Boston butt roast on top of the onions. Sprinkle evenly with all the spices.
  3. Pour the crushed (or fresh chopped) pineapple and apple cider vinegar over the pork. Add ½ cup of water or broth to help the Instant Pot come to pressure.
  4. Secure the lid and set the valve to Sealing. Cook on High Pressure for 75 minutes. Let the pressure release naturally for 20–30 minutes, then release any remaining pressure.
  5. Remove the pork and shred with two forks.
  6. Turn the Instant Pot back to Sauté and simmer the cooking liquid for 10–15 minutes until slightly thickened.
  7. Stir in the barbecue sauce and simmer for 2–3 minutes.
  8. Return the shredded pork to the pot, toss to coat, and serve.

Are you a barbecue fan? What’s your secret recipe? Please share below!

Tags: , , , , , , ,
baby balm

Homemade Baby Balm Skin Cream Recipe

When I was pregnant with my first child, my friends and relatives literally gave me 11 bottles of baby lotion. The smell reminded me of my own childhood. I loved that it was specially formulated for babies, so of course, the ingredients had to be natural and safe. Right?

… and then I actually read the ingredients.

What’s in Baby Lotion?

Ingredients like petroleum, artificial fragrances, and propylene glycol weren’t something I wanted on my baby’s skin. I searched for natural baby balm options and found a few great ones. There are even more options available now if you’re not in the DIY mood. 

This Everyday Baby Balm from Motherlove or this one from Badger have clean ingredients and work well. I still preferred making my own baby balm though because I could easily customize the ingredients and it was a lot cheaper. 

Choosing Natural Ingredients For Baby Balm

I decided to make my own from food-safe ingredients. And I even had many of the ingredients on hand already for my homemade lotion bars and other beauty products.

This baby balm recipe uses:

  • Cocoa Butter – High in antioxidants and skin moisturizing fatty acids. It leaves a barrier on the skin to help prevent moisture loss and keep things like urine from irritating sensitive skin. 
  • Shea Butter – A natural source of vitamin A and other nutrients, shea butter is highly nourishing and protective to the skin.
  • Olive Oil– Attracts moisture to the skin and repairs damaged skin. It’s also a major source of plant-based squalene, a lipid our skin cells make to lubricate and protect the skin. 
  • Castor Oil– High in ricinoleic acid and skin protective. 
  • Essential Oils – You can use any diluted baby-safe essential oils you prefer, but I use frankincense, chamomile, and rose. 

Important Note on Essential Oil Safety and Babies

I love essential oils and use them daily for cleaning, aromatherapy, skincare, and more. They are highly concentrated though and not every essential oil is safe or appropriate for every purpose. 

Frankincense, lavender, chamomile, and rose are all gentle options and generally considered safe for babies 3 months and older. Essential oils should always be diluted for little ones and generally should not be more than .25% of the recipe. For this recipe that translates to about 7 drops of essential oils total. 

Herbal Infused Oil

If you have a baby under 3 months or just prefer to skip the essential oils, then an herb-infused baby balm is a great alternative. Here are detailed instructions for how to make an herbal infused oil. 

Lots of herbs will work in a baby balm, but here are some of my favorites. They have natural skin soothing and healing properties and are safe for babies (barring any allergies).

Here’s how to make my favorite homemade baby balm!

Homemade Baby Balm Recipe

This moisturizing baby balm helps protect baby’s delicate skin with natural ingredients.

Prep Time5 minutes

Active Time10 minutes

Cooling Time2 hours

Total Time1 hour 15 minutes

Yield: 5 ounces

Author: Katie Wells

  • Heat all of the ingredients (except essential oils) in a double boiler or in a glass jar or bowl over a small pan of boiling water.

  • Stir carefully until melted.

  • Remove from heat and add essential oils if using.

  • Pour into a glass jar and let it cool in the fridge for several hours or until firm.

  • Store at room temperature and use a small amount as needed for baby’s skin (or adult skin)

Use herb infused olive oil to make the recipe if desired. Check the article for ideas of what to use.

Shelf Life and Storage

Since this baby balm is oil based it has a much longer shelf life than baby lotion with water-based ingredients. It should last 1-2 years when stored away from direct light and heat. 

The baby balm takes a few minutes to absorb into the skin and you only need to use a tiny bit. I’ve had friends say it was incredibly helpful for eczema and skin problems as well.

What did you use on your little ones? Ever made your own? Share below!

Tags: , , , , ,
Crockpot_Chicken_Tacos

Easy Crockpot Chicken Tacos Recipe

There are seasons when life feels (extra) full. Meals still need to happen, kids still get hungry (often earlier than expected), and having a plan for dinner can make the whole day feel more grounded. That’s where dependable recipes like crockpot chicken tacos can be a lifesaver.

These crock pot chicken tacos are simple, flexible, and made with real ingredients you probably already have on hand. They’re the kind of dinner that works just as well for a busy Tuesday as it does for feeding a crowd on the weekend—and the leftovers somehow taste even better the next day.

Why Crockpot Shredded Chicken Tacos Work So Well

One reason crockpot shredded chicken tacos are so popular is that slow cooking does all the hard work. The chicken is tender enough to easily shred, and it soaks up the spices and juices without drying out. This means no babysitting the stove and no last-minute scrambling.

Another bonus is how forgiving this recipe is. You can use chicken breasts or thighs, adjust the spices to your family’s heat tolerance, and choose your own toppings. Unlike my easy salsa chicken recipe, these are crockpot chicken tacos without salsa. Instead I rely on diced tomatoes, onion, garlic, and spices for flavor. It’s a great option if you’re avoiding added sugars or just prefer a cleaner ingredient list.

How to Make Crockpot Chicken Tacos

Years ago I actually took a look at the taco seasoning packets and was shocked by what I saw. I’ve since made my own taco seasoning that’s quick and easy. The spice blend here is simple but effective—chili powder, cumin, smoked paprika, and oregano create that classic taco flavor without needing a packet. Smoked paprika adds depth, while optional chipotle in adobo gives a subtle smoky heat if you want it.

You can swap out the spices in these Crockpot chicken tacos for homemade taco seasoning though if preferred. 

I also add bell peppers and onions near the end of the cooking time. This keeps them from turning to mush and makes it more of a fajita-style filling. A squeeze of fresh lime at the end brightens everything and makes the flavors pop.

Practical Tips for Real Life

This is one of those recipes that works whether you’re home all day or out running errands. Cook it on low if you’re gone most of the day, or on high if you’re starting later. It also adapts well to the Instant Pot when time is especially tight.

For serving, set out tortillas and a few toppings and let everyone build their own tacos. Avocado, cilantro, shredded cheese, or a simple taco slaw all work well. We love adding homemade guacamole and pico, and sometimes a sprinkle of homemade Tajín for extra flavor.

While we don’t always have dinner at home, it is a priority in our home to share a healthy meal together. This one checks all the boxes. It’s protein-rich, customizable, and incredibly low effort. Crockpot chicken tacos are a delicious way to get dinner on the table without adding more stress!

Crockpot Chicken Tacos

These delicous Crockpot chicken tacos are easy to make and great for busy nights. Customize them with your favorite toppings!

  • Add chicken, diced tomatoes, onion, garlic, and all spices to the crockpot. Stir gently.

  • Cover and cook on low for 6–7 hours or on high for 3–4 hours, until chicken is tender.

  • Optional Fajita Vegetables: Add sliced peppers and onion during the last 30–40 minutes of cooking.

  • Remove chicken and shred with two forks. Return to the crock pot and stir.

  • Squeeze fresh lime juice over the top and serve in tortillas with desired toppings.

Nutrition Facts

Crockpot Chicken Tacos

Amount Per Serving (1 serving)

Calories 262
Calories from Fat 45

% Daily Value*

Fat 5g8%

Saturated Fat 1g6%

Trans Fat 0.02g

Polyunsaturated Fat 1g

Monounsaturated Fat 1g

Cholesterol 116mg39%

Sodium 568mg25%

Potassium 1034mg30%

Carbohydrates 13g4%

Fiber 3g13%

Sugar 5g6%

Protein 41g82%

Vitamin A 1273IU25%

Vitamin C 91mg110%

Calcium 66mg7%

Iron 2mg11%

* Percent Daily Values are based on a 2000 calorie diet.

  • Try topping your chicken tacos with avocado, cilantro, shredded cheese, salsa, Greek yogurt, or slaw. 


Instant Pot Instructions

If you want to make these in the Instant Pot instead, here’s an easy way to do it. This recipe version takes less than 30 minutes for when you need dinner on the table fast!

  1. Add all ingredients except the fajita vegetables and lime to the Instant Pot.
  2. Seal the lid and cook on High Pressure for 12 minutes.
  3. Allow a natural pressure release for 10 minutes, then manually release remaining pressure.
  4. Shred chicken and stir back into the sauce.
  5. Add sliced peppers and onions if using. Turn on sauté mode and cook 3–5 minutes, just until tender.
  6. Finish with fresh lime juice if desired and serve.

What are your favorite taco night toppings? Leave a comment and let us know!

Tags: , , , ,
Homemade_Chili-Lime_Seasoning

Chili Lime Seasoning Recipe

Chili lime seasoning is one of those things I didn’t think much about until it became something we used all the time. It’s simple, easy to make, and somehow works with a wide range of foods. Once it’s in the pantry, it tends to get sprinkled on everything.

I started making a homemade chili lime seasoning after noticing how often we reached for it. Store-bought versions can be convenient, but many include added ingredients I’d rather skip. Making it at home takes just a few minutes and (mostly) uses ingredients I already keep on hand.

Why Chili Lime Seasoning Works

There’s a reason chili and lime show up together in so many traditional foods. The warming heat of chili and cayenne wake up the taste buds and stimulate digestion. The lime adds some tang and brightness, while salt ties it all together.

This balance is what makes lime and chili seasoning so useful. It adds flavor without covering up the food itself. It works just as well on fresh produce as it does on cooked dishes.

One Seasoning, Lots of Uses

We’ve been sprinkling it on pretty much everything. Fruit like mango, watermelon, and pineapple is an easy favorite. The contrast of sweet, salty, and spicy makes even simple fruit feel more interesting. It’s a great way to get some more variety, especially for picky kids!

I’ve also been adding it to avocado and eggs, and even roasted sweet potatoes. I’ll mix a little into olive oil for taco bowls or roasted veggies, and it’s become our go-to popcorn topping for movie nights. I’ve even been throwing a pinch on cucumber slices after sports. It’s oddly refreshing and a simple way to make sliced veggies more appealing.

Skip the Fillers

One of the reasons I like this homemade chili lime seasoning is how straightforward it is. There’s no long ingredient list and nothing extra added in.

Some popular store-bought blends, including Tajín, contain silicon dioxide. It’s naturally found in sand and quartz as silica. In food, it’s used as an anti-caking agent to keep powders from clumping and to extend shelf life.

While silicon dioxide is widely used in packaged foods, it’s not really necessary in a homemade seasoning blend. When you’re mixing small batches and storing them properly, clumping usually isn’t an issue. Skipping it is an easy way to keep the ingredient list simple and focused on flavor, not fillers.

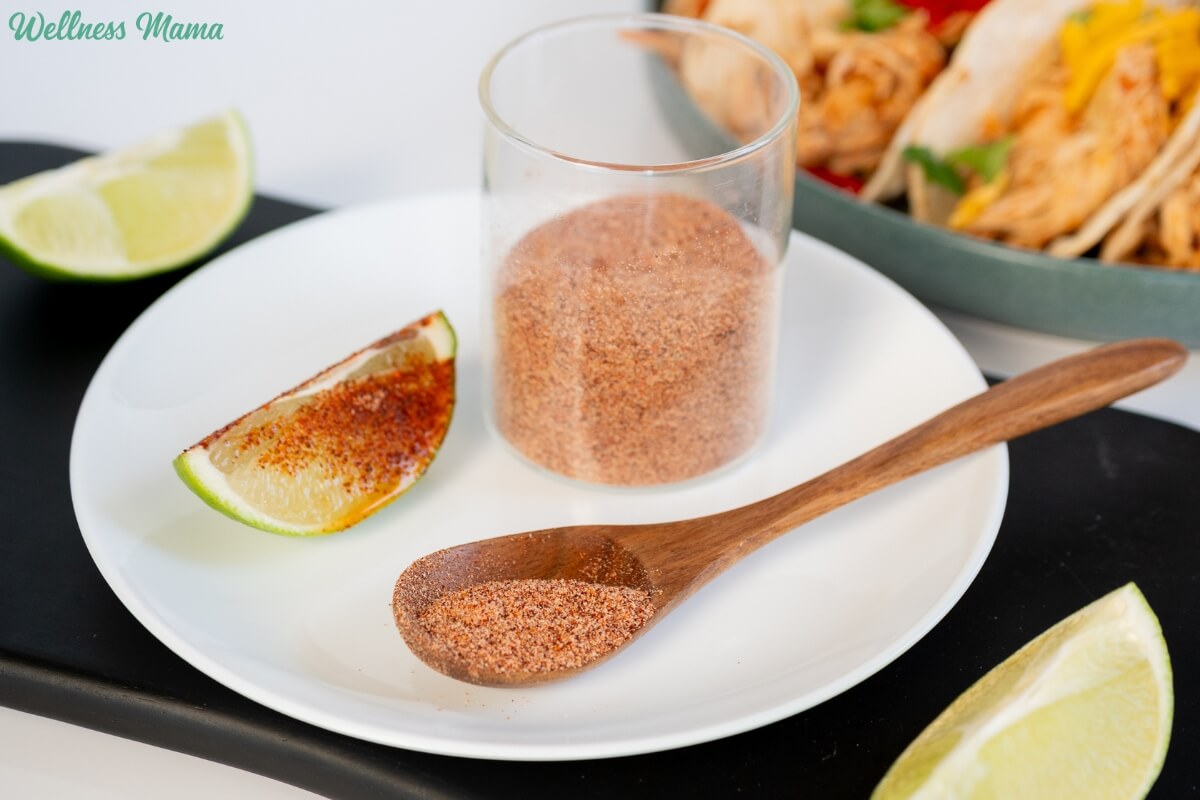
This chili lime seasoning recipe uses just four ingredients: salt, lime powder, chili powder, and cayenne pepper (to taste). The chili powder adds warmth without overwhelming heat. And if your family is like mine and likes a little heat, then add some cayenne. Lime powder gives it a citrus flavor without the moisture of lime juice, and salt brings out the flavor in everything.

How to Make Chili Lime Seasoning

Making DIY chili lime seasoning is more about adjusting to taste than following exact measurements. Start with the chili and lime powder as the base, then add salt to taste. If you like a little more heat, then add cayenne slowly, tasting as you go.

Once it’s mixed, taste and adjust. A little more lime powder adds more tang. A pinch more cayenne increases the heat. Store the finished seasoning in a glass jar away from heat and light, and it will keep well for months. If it does start to clump up, just give it a good shake or break it up with a fork. 

Everyday Ways to Use Lime and Chili Seasoning

This is one of those blends that’s earned a place on my spice shelf because it actually gets used. It adds flavor without needing sauces, marinades, or extra prep. Even though I still like whipping up a good sauce now and then. 

Sprinkle it on fruit or vegetables, use it on eggs or potatoes, or stir it into olive oil for a quick dressing. It’s an easy way to make simple, real foods more enjoyable, especially on busy days when complicated recipes just aren’t happening.

Here’s how to make it!

Homemade Chili-Lime Seasoning

This tangy and spicy seasoning is perfect for fruit, popcorn, and everything else. Quick and easy without any unecessary additives.

  • Combine all ingredients in a small bowl and mix until well combined.

  • Taste the blend on a piece of fruit or cucumber and add more salt, lime, or chili powder as desired.

  • Store in an airtight container.

Nutrition Facts

Homemade Chili-Lime Seasoning

Amount Per Serving (0.5 tsp)

Calories 2
Calories from Fat 1

% Daily Value*

Fat 0.1g0%

Saturated Fat 0.01g0%

Polyunsaturated Fat 0.04g

Monounsaturated Fat 0.02g

Sodium 241mg10%

Potassium 11mg0%

Carbohydrates 0.3g0%

Fiber 0.2g1%

Sugar 0.05g0%

Protein 0.1g0%

Vitamin A 162IU3%

Vitamin C 0.1mg0%

Calcium 2mg0%

Iron 0.1mg1%

* Percent Daily Values are based on a 2000 calorie diet.

  • Store the seasoning in an airtight container or a glass jar. Storing it properly prevents clumping and maintains freshness for up to several months.

Do you use chili lime seasoning? What are your favorite ways to use it? Leave a comment and let us know!
Tags: , , ,
Best oLive
Privacy Overview

This website uses cookies so that we can provide you with the best user experience possible. Cookie information is stored in your browser and performs functions such as recognising you when you return to our website and helping our team to understand which sections of the website you find most interesting and useful.