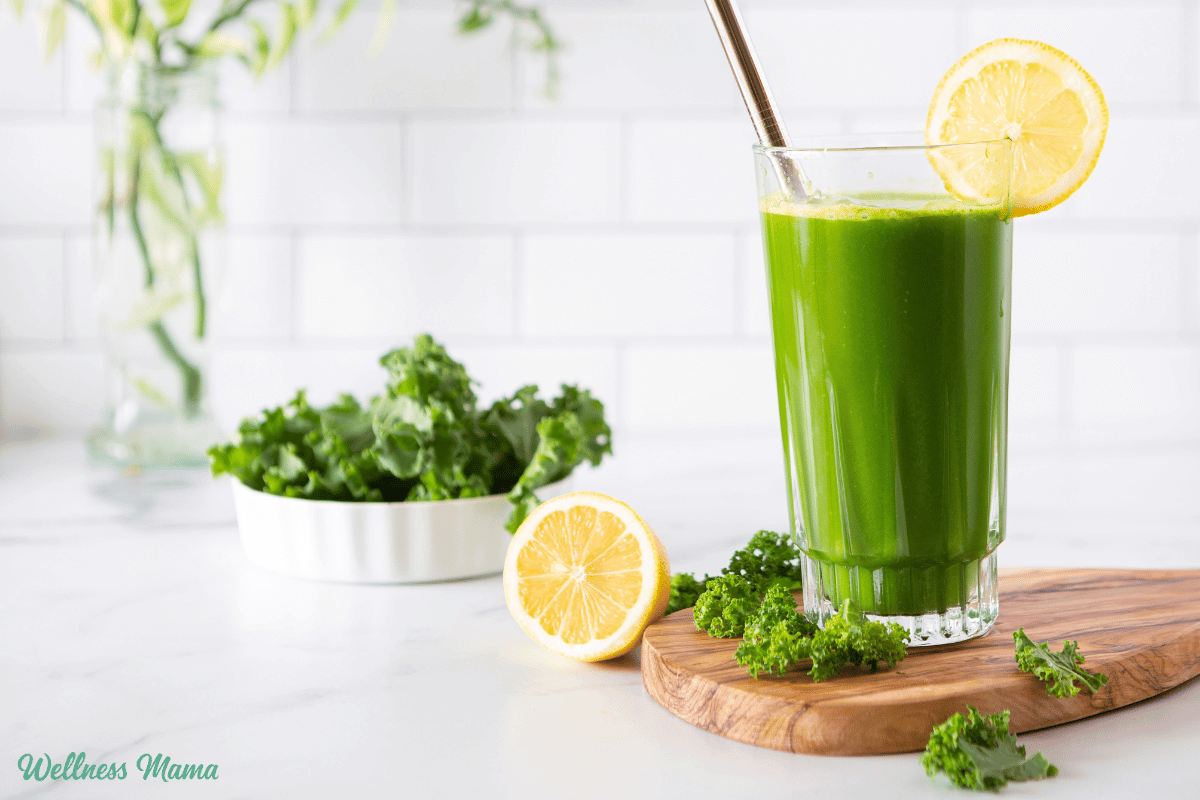
green juice

Refreshing Green Juice Recipe

Green juice has become more popular in recent years, especially during fasting or detox. It’s one of those wellness trends people either swear by or completely write off. For some it’s a daily habit that brings energy, while others just notice blood sugar spikes and get hangry (hungry + angry). 

I’ve experimented with green juice for years. And while they’re not a magical cure all, they can have some very real benefits. It depends on how you use it, what you put in it, and when you drink it. 

Instead of framing it as simply a detox or a meal replacement, I look at green juice as a healthy addition. When used intentionally as a nutrient boost (not a nutritional crutch) it can be a really helpful addition to a whole-foods lifestyle.

Green Juice as a Meal Replacement

One of the most common ways people use green juice is as a breakfast replacement or as part of a juice fast. It sounds great: flood the body with vitamins and give your digestion a “break.” But in reality, that approach can backfire.

Juicing removes most of the insoluble fiber from fruits and vegetables. Fiber plays an important role in slowing down sugar absorption, feeding beneficial gut bacteria, and helping us feel full. Without it, juices, especially fruit juice, can quickly raise blood sugar. Sugary juice for breakfast means higher cortisol levels, energy crashes, sugar cravings later in the day, and disrupted hunger hormones. 

This is why I’m not a huge fan of drinking only juice for breakfast. I like to front-load my hydration and protein early in the day to stabilize blood sugar and support hormones. Research consistently shows that higher-protein breakfasts keep us feeling fuller longer. They also help with insulin sensitivity and overall metabolic health compared to carbohydrate-heavy ones. Starting the day with juice alone doesn’t offer those benefits.

That said, a green juice doesn’t have to be sugary or metabolically disruptive.

Green Juice as a Nutrient Boost

I prefer to think of green juice as concentrated nourishment. A well-made green juice is naturally lower in sugar than most juicing recipes. Plus you get a large amount of vitamins, minerals, and phytonutrients that are easily absorbed.

According to the CDC, about 90% of Americans don’t eat enough veggies. Even with the best intentions, getting several cups of leafy greens, herbs, and hydrating vegetables into meals every single day is a challenge. Green juice is an easy way to get more veggie nutrition without all of that chewing. 

Another benefit is hydration. Green juices contain potassium, magnesium, sodium, and trace minerals that help water actually move into cells. This is why many people find green juice more hydrating than plain water alone. Proper hydration isn’t just about fluid, it’s about electrolytes, and vegetables naturally provide them in balanced amounts. 

Of course, eating whole fruits and veggies is still important!

Juicing vs. Smoothies: Why Both Have a Place

I love smoothies, especially ones that combine fruit, vegetables, protein, and healthy fats. They’re filling, support healthy blood sugar, and taste refreshing. Sometimes drinking a thick smoothie feels like too much though. It can be heavy, especially if digestion is sluggish or appetite is low. Juicing is a great alternative.

By removing most of the insoluble fiber, you’re able to get the nutrients without getting full so fast. Vitamins and antioxidants are absorbed quickly in liquid form since our body doesn’t have to work as hard to digest them. For someone recovering from illness, dealing with low appetite, or just looking for an easy nutrient boost, juicing can be incredibly helpful.

Juicing isn’t better than blending, it’s just different. Smoothies are more complete and filling. Juices are lighter and more concentrated. Having both tools gives you flexibility instead of forcing one approach to fit every situation. 

Hydration at the Cellular Level

Hydration is about more than drinking enough water. Our cells need minerals for proper fluid balance, nerve signaling, and muscle function. When we don’t have enough minerals, water doesn’t hydrate as effectively.

Vegetables like celery and cucumber are naturally rich in electrolytes, especially potassium and sodium. Coconut water adds additional potassium and small amounts of magnesium. Together, these ingredients support cellular hydration.

Studies on electrolyte balance show that fluids with minerals are retained better than plain water, especially during physical activity or periods of stress. While green juice isn’t a replacement for water, it can be a meaningful complement to hydration. Especially for anyone struggling to drink enough fluids throughout the day.

The Benefits of Green Juice Ingredients

I’ll get to the actual recipe in just a second, but first I wanted to explain why I chose these ingredients. You’ll notice there’s a whole lot of veggies and not a lot of fruit here. And the fruits I do use are naturally very low in sugar. This combination offers hydration, micronutrients, antioxidants, and gentle digestive support.

Celery

I’m a big fan of celery juice even by itself. Celery is high in water, potassium, and sodium, which is great for hydration and electrolyte balance. Unlike conventional sports drinks, celery provides these minerals in a whole-food form our body recognizes and uses more efficiently. It’s great for anyone who feels dehydrated despite drinking water. 

Celery also has antioxidant flavonoids like apigenin and luteolin, which have been studied for their anti-inflammatory effects. You’ll also get vitamins A, C, and K, calcium, and iron with celery. 

Cucumber

Next to celery, cucumbers are one of the most hydrating vegetables, with over 95% water content. They also provide small but meaningful amounts of potassium and vitamin K to support fluid balance and normal blood clotting. Their high water content also helps dilute some of the stronger flavors in green juice.

Beyond hydration, cucumbers have antioxidants like cucurbitacins and flavonoids. Researchers have found that the compounds in cucumbers have anti-inflammatory, antimicrobial, anticancer, and antidiabetic effects. Plus, cucumber is just so refreshing. 

Green Apple

Green apples add just enough natural sweetness to balance out the bitter greens without adding too much sugar. Compared to sweeter apple varieties, green apples are lower in fructose and have a more gradual impact on blood sugar when used in small amounts.

They also have polyphenols like quercetin, an antioxidant that helps support the immune system. Not only does quercetin show anti-cancer activity, but it’s also antiviral and supports healthy blood vessels. And with potassium, B vitamins, and vitamin K, it’s a delicious and healthy addition to green juice. 

Kale

Most green juice recipes feature leafy greens like spinach, kale, or chard. Kale is really nutrient-dense, providing vitamins A, C, and K, along with folate and manganese. These nutrients support immune function, collagen production, and normal blood clotting, all of which are essential for overall health.

More importantly, kale is low in oxalates compared to greens like spinach and Swiss chard. It also has calcium, which can bind to oxalates in the digestive tract and reduce absorption. Not everyone has issues with high oxalate foods, but over time, especially in large amounts, they can cause problems. 

Lemon Juice

Lemon adds brightness and some tang from vitamin C, a key nutrient for immune health and collagen synthesis. Vitamin C also enhances the absorption of certain minerals, including non-heme iron from plant foods. Lemon stimulates digestion and can help green juice feel lighter, especially when combined with mineral-rich vegetables. 

Some recipes call for adding a peeled lemon to the juicer, but I don’t want to bother with peeling a lemon. Instead, I just cut it in half and squeeze the lemon juice in. It’s also great for grip strength!

Ginger

Ginger has been used for thousands of years to support digestion, circulation, and immune health. Modern researchers have looked at its active compounds for their anti-inflammatory and antioxidant effects. Ginger can help calm nausea and move food from the stomach into the intestines for better digestion. 

It’s warming and I love the bit of a spicy kick it adds.

Parsley

When you think of parsley, garnishes on restaurant plates and hospital food may come to mind. In reality though, parsley is a nutritional powerhouse. It’s rich in vitamins C and K and chlorophyll to support immune function, detox, and blood health.

Parsley also has apigenin, a flavonoid known for its antioxidant and cell-protecting properties. Traditionally, parsley has been used to support kidney and urinary health.

Coconut Water

Optional, but I like adding this sometimes for more electrolytes. Coconut water naturally contains potassium, magnesium, and sodium to support electrolyte balance and hydration. These minerals are vital for regulating nerve signaling, muscle contraction, and fluid movement into cells.

When used in moderation, coconut water gives the green juice an extra hydration boost without overdoing it on the sugar. Be sure to look for coconut water without added sugar!

Oxalates, Greens, and Context 

Oxalates are naturally occurring and found in many plant foods. They often get labeled as bad, but it’s not so simple. We only absorb about 2–5% of oxalates in our food. When we eat high-oxalate foods on an empty stomach or in large amounts (especially in liquid form) absorption can increase to around 10–12%.

Too many oxalates can irritate the kidneys and contribute to kidney stones for some people. It’s also important to note that only about 20% of our oxalates come from food. The rest are produced in our bodies naturally through metabolism and other factors.

This is one reason I prefer kale over spinach in green juice. Kale is low in oxalates and also contains calcium. Oxalates carry a negative charge and readily bind to positively charged minerals like calcium, magnesium, and iron. When we eat oxalate-rich foods alongside calcium, it reduces the absorption.

Who Should Drink Green Juice?

Green juice can be especially helpful for people who:

  • Struggle to eat enough vegetables 
  • Have low appetite or difficulty digesting large meals
  • Need extra hydration and electrolytes
  • Want a light, nutrient-dense snack between meals
  • Want a nutrition boost

Green juice that’s heavy on fruit isn’t ideal for anyone with unstable blood sugar or as a meal replacement. Like most wellness tools, it’s about using it intentionally.

Green Juice Recipe

This delicious green juice has a pleasant earthy taste with a sour twist from the lemon.

  • 4 stalks celery (leaves removed)
  • 1 green apple (cut in quarters)
  • 1 cucumber
  • 6 leaves kale
  • 2 inches fresh ginger
  • ½ cup fresh parsley
  • ½ lemon
  • ¼ cup coconut water (optional)
  • Add all of the ingredients except lemon and coconut water to the juicer.

  • Once the juice is pressed, squeeze in the lemon juice and add the coconut water if desired.

  • Keep in the fridge for up to 72 hours.

Nutrition Facts

Green Juice Recipe

Amount Per Serving (1 serving)

Calories 113
Calories from Fat 9

% Daily Value*

Fat 1g2%

Saturated Fat 0.2g1%

Polyunsaturated Fat 0.4g

Monounsaturated Fat 0.1g

Sodium 127mg6%

Potassium 849mg24%

Carbohydrates 25g8%

Fiber 4g17%

Sugar 15g17%

Protein 4g8%

Vitamin A 5083IU102%

Vitamin C 78mg95%

Calcium 178mg18%

Iron 2mg11%

* Percent Daily Values are based on a 2000 calorie diet.

  • Opt for organic produce as much as possible.
  • Add more or less of certain ingredients to suit your tastes.
  • With my juicer, I found it worked best to add the leafy greens first before adding the other veggies. 

How To Make Green Juice Without a Blender

If you don’t have a juicer, you can still make green juice. Add all of the ingredients to your blender and add just enough water or coconut water to get the mixture to blend. After you’ve blended it to a smooth consistency, use a fine mesh strainer to remove the fiber.

How Long Does Fresh Green Juice Last?

I’m a big fan of bulk meal prepping whenever I can for faster meals. Juicing doesn’t always work well with that strategy though. Low-acid green juices (like this recipe) will last for 24-72 hours in the fridge before they start to go bad. I like to drink it fresh as soon as I make it, but you can make a few days’ worth at a time if you prefer.

Final Thoughts on Green Juice

While green juice does help our bodies detox and function better, you don’t need to go on a full green juice cleanse. It is however a great way to pack in some extra nutrition from fruits and veggies. When used thoughtfully, it can support hydration, boost nutrition, and overall vitality without sabotaging blood sugar. 

Using green juice alongside real food and prioritizing protein and healthy fats helps support the body rather than overwhelm it. Play with the ingredients and the amounts to suit your tastes! 

Are you a fan of green juice? What are some of your favorite ways to use it? Leave a comment and let us know!

Tags: , , ,
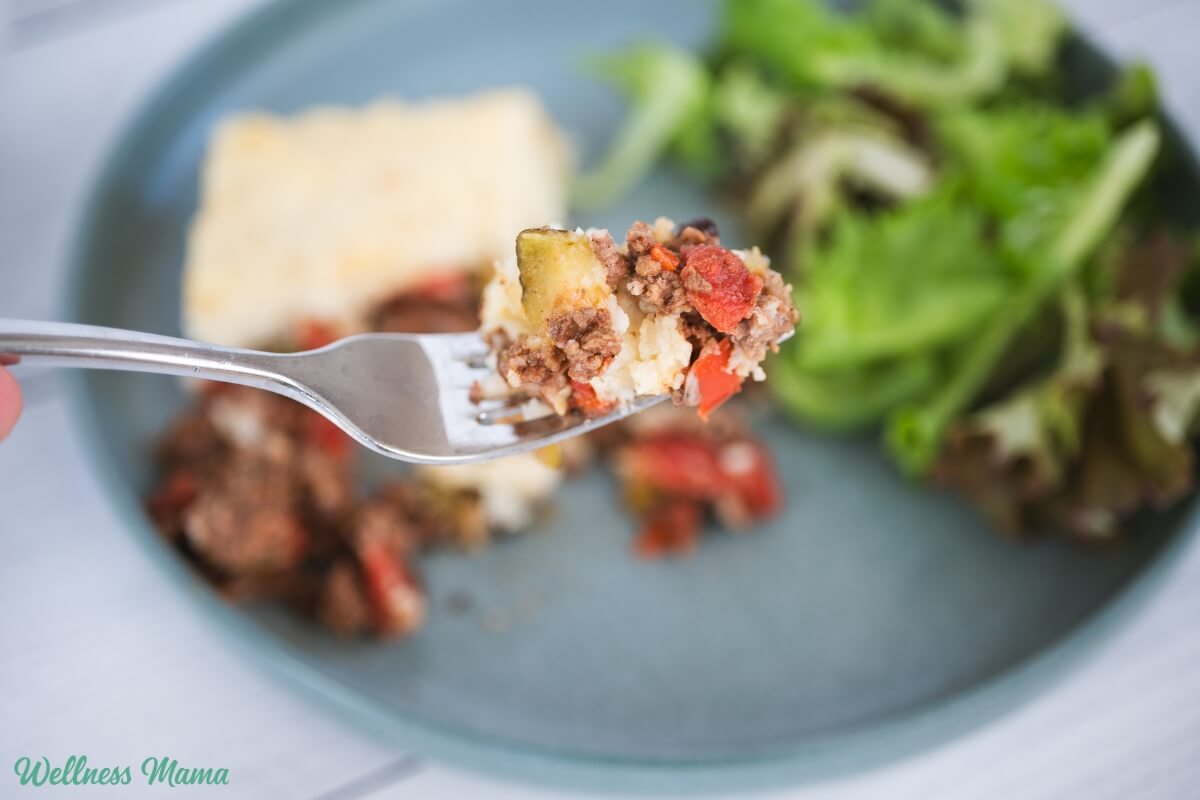
Southwest_Shepherds Pie

Southwest Shepherd’s Pie Recipe

Growing up in Texas, I have a special place in my heart for Tex-Mex recipes. Simple dishes like these Tex-Mex lettuce wraps and southwest shepherd’s pie make a regular appearance on our family menu. It’s a delicious twist on the classic shepherd’s pie recipe.

It’s similar to a taco casserole, but with a creamy potato topping. You can also make this easy Southwest shepherd’s pie recipe ahead of time and pop it in the oven for an easy supper. The toppings are customizable, but cilantro and chopped jalapenos are some of our favorites. 

Southwest Shepherd’s Pie Ingredients

This recipe uses a variety of southwestern style ingredients. Instead of the classic carrots, celery, and peas, we’re using zucchini, tomatoes, and bell peppers. And the spices get an upgrade too with spicy oregano and chili powder, flavorful cumin, and smoky paprika. 

You can even choose your favorite potato for the topping. I like using Russet potatoes since they’re more starchy and give it a good texture. Creamy yellow or red potatoes work well too. Or switch it up and try a southwestern sweet potato shepherd’s pie with orange or white sweet potatoes. 

For the meat, I use grass-fed ground beef. It has a better nutrient profile than grain-fed beef (plus it’s overall healthier). I also like to cook ground beef in bulk at the beginning of the week to make meal prep easier. If you prefer, ground chicken or ground turkey work just as well. 

Why You’ll Love Southwest Shepherd’s Pie

In addition to the delicious flavor, I love that this recipe has 21 grams of protein per serving. It’s cozy and satisfying for chilly nights when I want something warm for supper. Even though there are a few steps involved, it pulls together fairly quickly with only 20 minutes of prep time. 

Sometimes I’ll make a double batch and freeze some for later. Simply place the completely cooled casserole in the freezer (in a freezer-safe container). Once you’re ready to reheat, let it thaw and then pop it in the oven until warmed through and bubbly. Southwest shepherd’s pie tastes even better the next day if you have leftovers. This gives the ingredients some more time to meld. 

Here’s how to make it!

Southwest Shepherd’s Pie

For the Topping

  • 2 medium potatoes of choice (peeled and chopped)
  • 2 TBSP grass-fed butter (or avocado oil)
  • ¼ cup unsweetened almond milk (or milk of choice)
  • ½ tsp garlic powder
  • salt to taste
  • Preheat the oven to 375°F.

  • Boil the chopped potatoes in salted water until soft, about 12–15 minutes. Drain and mash with butter, almond milk, garlic powder, and salt. Set aside.

  • Brown the meat in a large skillet over medium heat.

  • Add onion, garlic, bell pepper, and zucchini and sauté 5–7 minutes until softened.

  • Stir in spices, tomatoes, and black beans. Add broth if the mixture looks dry and simmer for 5 minutes.

  • Transfer the filling to a greased 9×9 or medium casserole dish. Spread the mashed potato mixture evenly on top.

  • Bake for 20–25 minutes, until bubbling and lightly golden on top.

Nutrition Facts

Southwest Shepherd’s Pie

Amount Per Serving (1 serving)

Calories 298
Calories from Fat 108

% Daily Value*

Fat 12g18%

Saturated Fat 6g38%

Trans Fat 1g

Polyunsaturated Fat 1g

Monounsaturated Fat 4g

Cholesterol 59mg20%

Sodium 480mg21%

Potassium 793mg23%

Carbohydrates 27g9%

Fiber 5g21%

Sugar 4g4%

Protein 21g42%

Vitamin A 1324IU26%

Vitamin C 35mg42%

Calcium 79mg8%

Iron 4mg22%

* Percent Daily Values are based on a 2000 calorie diet.

  • Top and serve: Garnish with cilantro, avocado, or a dollop of Greek yogurt.
  • Use any potato you’d like here. Russet, sweet potatoes, or white sweet potatoes are all great options!

Customize the Toppings

My kids like to choose their own toppings when I make this. You can even make a toppings bar (kind of like a taco bar). Have a few options on the table for the family to choose from, so everyone can tweak the flavors to their liking. Here are some ideas:

  • A dollop of sour cream or Greek yogurt
  • Pickled onions
  • Chopped cilantro
  • Chopped bacon pieces
  • Avocado slices or guacamole
  • Extra cheese
  • Sliced black olives
  • Chopped jalapeno or poblano peppers

What are some of your favorite casserole-style dishes to make? Leave a comment and let us know!

Tags: , , ,
herbal throat spray

DIY Herbal Throat Spray Recipe

Once upon a very terrible time, all my kids got a stomach bug at the same time… while I was gone. We don’t get sick often, but it was terrible and I wasn’t on hand to use all of our natural remedies.

Thankfully, that was the first and last stomach bug they’ve all gotten at once. However, at least one child gets a stuffy nose or cough sometime during the winter. Or I dust my closet and get a cough/congestion/nasal drip for a few days.

In those cases, I like to have this herbal throat spray on hand. It’s great for sore throat, cough or congestion.

Herbal Throat Spray Ingredients

This herbal throat spray is essentially a strong herbal tincture mixed with raw honey. The herbs provide both immediate relief and longer-lasting benefits for beating illness. You can use many different immune boosting and throat soothing herbs, but I prefer the following:

  • Echinacea root – Naturally antimicrobial and anti-inflammatory. Eases sore throat and cough and supports the immune system. Helps soothe throat pain and is great for strep throat or tonsillitis in a tea or throat spray. 
  • Ginger – Warming and stimulates circulation. Its antimicrobial and helps thin mucus and get it out of the body. Helps ease inflammation, pain, and muscle spasms. Ginger also stimulates white blood cells, helps prevent viruses from attaching to cells, and destroys viruses. 
  • Marshmallow root – A soothing demulcent herb that coats and soothes inflamed, dry, or damaged tissues. Reduces inflammation, supports white blood cells, and is an expectorant. 
  • Elderberry – Traditionally used for throat inflammation and may help reduce swelling in the mouth and throat. It also supports better drainage, less nasal congestion, and is an expectorant. It’s especially great for cough and congestion from viral infections. 
  • Thyme – Not just for Italian food! Thyme herb is excellent at breaking up stuck congestion and mucus in the lungs and getting it out. It’s antimicrobial, anti-inflammatory, and helps with better breathing. 
  • Peppermint – This adds a refreshing flavor and is warming and stimulating when used internally. It’s antimicrobial and helps fight a variety of viral, bacterial, and fungal infections. 
  • Cayenne – Cayenne is warming, stimulating, and boosts circulation to improve healing. It’s been traditionally used for sore throats, coughs, and illness prevention. It does add a spicy kick though, so reduce or skip if preferred. 

You don’t need every single herb on this list to make an herbal throat spray. If you don’t have some of them on hand, then just use more of the ones you do. I make an herbal tincture with the herbs and then mix with raw honey for a strong spray. When it’s made this way the herbal throat spray will last for months in the refrigerator.

Premade Herbal Throat Spray

Don’t feel like making it or don’t have the herbs you need? I also like this pre-made herbal throat spray that includes echinacea and propolis. This propolis throat spray is also a family favorite. 

Herbal Throat Spray Tincture

To make the tincture, I combine 1 tablespoon each of these dried herbs: Echinacea, Ginger, Marshmallow Root, Elderberry, Thyme and Mint and 1 teaspoon of dried cayenne pepper (optional) in a pint-size mason jar.

Fill the rest of the jar with a strong food-grade liquor like rum or vodka (must be at least 80-proof alcohol). Put on an airtight lid and let it sit for at least two weeks or up to eight weeks (the longer it sits the stronger it will be). Store in a cool dark place. I make this once a year and have enough to last at least the year.

Here’s my full tutorial on making herbal tinctures if you’re new to herbal remedies.

If you get a cough, sore throat or cold this winter, try this herbal throat spray to get some relief and feel better soon! Here’s how to make the standard tincture version.


DIY Herbal Throat Spray Recipe

Prep Time5 minutes

Active Time5 minutes

Steeping Time14 days

Total Time14 days 10 minutes

Author: Katie Wells

  • Add the herbs to a pint-size Mason jar.

  • Pour alcohol over the herbs, leaving a ½ inch headspace.

  • Cap tightly with the lid and let the tincture steep for 2-4 weeks, shaking occasionally.

  • Once the tincture is done, strain out the herbs and reserve the liquid.

  • For every 6 Tablespoons of tincture add 2 Tablespoons of raw honey.

  • Shake well to combine and store in the fridge for up to 6 months.

  • I pour some into a small spray bottle for easy use as needed.

You don’t have to use every single herb on the list. If you want/need to omit some of the herbs, just replace them with more of the others. 
 

Two Hour Herbal Throat Spray Tincture

If you want to use the full herbal mixture and don’t have weeks to sit around waiting for the tincture, you can make a two-hour version with this method:

  1. Combine 1 teaspoon of all of the herbs (2 Tablespoons total) in a pint size glass jar.
  2. Pour enough boiling water on them to just cover the herbs with water.
  3. Let steep for 20 minutes until the water cools.
  4. Strain out the herbs and mix with equal parts of 80-proof or higher liquor. I use rum or vodka.
  5. For every 3 parts of herbal liquid, add 1 part of honey. 

This version should last for a few weeks in the fridge. 

More Throat Spray Variations

If you prefer not to make a tincture with alcohol, you can make a glycerite with vegetable glycerin instead. Glycerites aren’t as potent and generally don’t extract the herbal properties as well as alcohol. It will still be helpful though and you’ll just need to use a little more of the spray on the throat. 

You can also make a strong herbal tea and mix with honey. This won’t last nearly as long and should be used within a week. 

 Do you ever get a sore throat or cough? What remedies do you use?

Tags: , , , ,
peppermint mocha

Healthy Peppermint Mocha Recipe

Every time Christmas rolls around, I start to have visions of a peppermint mocha. I unapologetically enjoy all things coffee, but fancy coffee drinks can be a real budget breaker (not to mention full of sugar). Thankfully, there’s an easy and delicious peppermint mocha recipe you can make at home with wholesome real food ingredients.

You won’t even miss the $7 Starbucks peppermint mocha!

A Healthy Peppermint Mocha Recipe

In college, I frequented coffee shops for my caffeine fix. Now that I’m older, and hopefully a little wiser, I usually make my coffee at home with organic beans.

I don’t miss mainstream coffee shops at all since I can even make fancy coffees like pumpkin spice or vanilla lattes at home. They taste just as good as the conventional version, or better in my book. I love that I can use real food ingredients that give my brain and body a boost. 

I often get asked, “how do you get it all done with a blog and so many kids?” The answer is I don’t do it all myself, but also having a structured schedule and eating enough healthy fats. This recipe is packed with brain-boosting fats and it keeps me energetic, but not jittery, all day.

Peppermint Mocha Ingredients

Baristas at the popular coffee shop chain use espresso, peppermint syrup, and milk to make their famous peppermint mocha coffee. I feel like this homemade version is even better. It won’t taste exactly the same as Starbucks or other coffee shops, but I like it more.

You could add some dairy-free almond milk, oat milk, or grass-fed cow milk to the recipe if you prefer. However, I’ve found that with the healthy fats it’s ultra creamy and doesn’t even need the added milk!

Want something even faster to have on hand when a peppermint mocha craving hits? Try my peppermint mocha creamer recipe to add to your morning coffee. 

How to Make a Homemade Peppermint Mocha

I almost always include a tablespoon of butter, coconut oil, and/or MCT oil in my coffee. It’s the perfect way to get healthy fats and extra benefits.

I often use mushroom coffee from Four Sigmatic for the extra superfood benefits as well. I promise it doesn’t taste like mushrooms, just great coffee! They also have a delicious reishi mushroom hot chocolate that would also make a yummy addition to this recipe.

I’ve made variations of this recipe with coffee, decaf coffee, chai tea, and herbal teas. They’re all delicious! All you need is some brewed coffee, a few ingredients, and a blender to make your own peppermint mocha in just a few minutes.

A word of warning: If you aren’t used to consuming coconut oil, start slowly. Coconut oil and MCT oil can cause short-term nausea if you aren’t used to them. They both have immune boosting, metabolism boosting, and yeast-fighting properties. But if you jump in too fast your stomach might rebel!

Peppermint Mocha Recipe

Make your own peppermint mocha with brain-boosting healthy fats, antioxidant-rich cocoa powder, and a little minty kick.

  • Brew the coffee.

  • While it’s still hot, pour the coffee into a blender or large cup if using an immersion blender.

  • Add the remaining ingredients and blend on high for 10 seconds until emulsified. If using peppermint stevia then omit the honey and peppermint extract/oil. This step is important as it creates froth and a creamy flavor instead of an oily one. No frother necessary!

  • Drink and enjoy!

Nutrition Facts

Peppermint Mocha Recipe

Amount Per Serving (1 cup)

Calories 291
Calories from Fat 234

% Daily Value*

Fat 26g40%

Saturated Fat 19g119%

Trans Fat 0.5g

Polyunsaturated Fat 1g

Monounsaturated Fat 4g

Cholesterol 30mg10%

Sodium 96mg4%

Potassium 162mg5%

Carbohydrates 19g6%

Fiber 1g4%

Sugar 17g19%

Protein 1g2%

Vitamin A 350IU7%

Vitamin C 0.1mg0%

Calcium 12mg1%

Iron 0.4mg2%

* Percent Daily Values are based on a 2000 calorie diet.

  • If pregnant or nursing, see the safety information below. 
  • Serve with my homemade marshmallows or whipped cream for an extra special treat!

Topping it Off

I don’t always add toppings to my drinks, but some people love the extra decoration. If you want to make your holiday season drink a little fancier, then add some garnish. I like some of these crushed natural candy canes on top when I need something fancy for guests. Some healthy white chocolate or dark chocolate curls also go great on top.

Add a little dollop of grass-fed whipped cream or whipped coconut cream if desired. Some homemade marshmallows are also a great topping option!

Essential Oil Safety

This recipe calls for natural peppermint extract or 1 drop of peppermint essential oil. Since peppermint extract is made with essential oil diluted in alcohol, either way, you’ll be consuming the plant oil. Some people prefer one form over the other though.

There is some concern that peppermint oil in medicinal or supplemental amounts can reduce breast milk production. And pregnant women (especially first trimester) are recommended against ingesting essential oils. The amount included in this recipe (especially if using peppermint extract) is minimal, in culinary amounts, and generally considered safe for most people. 

A Whole Latte Love

If you aren’t a mint person or want to skip the peppermint, try these variations instead:

Are you a fan of peppermint mochas? Ever made your own lattes before? Leave a comment and let me know!

Tags: , , ,
Peppermint_Date_Bark

Peppermint Date Bark Recipe

With Christmas just around the corner our family is in full holiday mode. That means hosting, baking, and making tasty treats like this peppermint date bark. It’s naturally sweetened with dates and is full of nutrients. 

This dessert looks pretty on the plate for guests, but it shines just as bright for an everyday dessert for the family. I’ll make a double batch and freeze the extra for a quick and easy way to have dessert on hand. 

Peppermint Date Bark Ingredients

You’ve probably heard of chocolate bark before. It usually involves waxy tasting, super sweet chocolate covered in fruit, nuts, or candy. Bark candy has gotten an upgrade in recent years and there are lots of great recipes. However, they can still rely on a lot of sugar. 

Mighty Medjool Dates

This version though relies on Medjool dates for the bulk of the sweetness. These dates are full of fiber and have modest amounts of iron, calcium, potassium, and magnesium. They’re also a good source of vitamin B6 and copper. Medjool dates are rich in antioxidants to fight free radical damage. 

Researchers have studied their carotenoid and phenolic acid antioxidants and discovered benefits when it comes to heart health. A 2021 study concluded eating whole dates helped improve heart health markers. This included better cholesterol levels, and lower oxidative stress and inflammation. 

Cacao vs Chocolate Chips

Instead of regular chocolate chips, I used two kinds of cacao wafers for this peppermint date bark. Cacao wafers are pure chocolate without the added milk or sugar. They have calcium, iron, antioxidants, and other nutrients that are great for overall health.

Cacao butter wafers are made from the pure fatty part of the cacao bean. They’re similar to white chocolate chips, but again without the added milk and sugar. I added a little coconut oil to the cacao butter wafers and cacao wafers when melting for a more spreadable texture.

 The addition makes this peppermint bark a great vegan, allergen-friendly option for anyone who wants to avoid dairy. 

Nut Butter (and Substitutes)

I love the smooth, creamy flavor of almond butter in these. You can also make date bark with peanut butter. Need a nut free option? To make date bark without peanut butter or other nut butters, substitute sunflower butter. And instead of the chopped almonds, try pumpkin seeds or hemp seeds for some crunch. 

While the original date bark recipes tasted more like a Snickers bar, these have a mint flavor. I added some crushed candy canes to the top for some festive sweetness. Most peppermint candy has ingredients I prefer to avoid, but I really like these ones from Yum Earth for an occasional treat. They’re naturally flavored with real mint, use organic sugar, and are colored with fruits and veggies. 

Peppermint date bark is high in calories, but it’s also high in healthy fats and nutrition so it’s filling. Here’s how to make it!

Peppermint Date Bark Recipe

  • Fold a piece of parchment paper in half and lay it open on a flat surface. Slice each pitted date in half lengthwise, but don’t cut all the way through, the halves should remain attached. Arrange the dates on one half of the parchment in four rows of three.

  • Lightly wet the parchment paper. Fold the parchment over the dates and gently roll with a rolling pin to flatten them evenly.

  • Spread almond butter evenly over the flattened dates. Sprinkle the chopped almonds over the almond butter layer.

  • Fill a pot or the bottom of the double boiler with a few inches of water and bring to a simmer. Add the chocolate chips and 1 teaspoon of coconut oil to the top pot or bowl.

  • Pour the melted chocolate over the almond butter and date layer and spread evenly.

  • Place candy canes or peppermint candies in a small bag and crush with a rolling pin or heavy object. Sprinkle the crushed peppermint evenly over the chocolate.

  • Melt the cacao butter wafers in the top of the double boiler or glass bowl with 1/2 teaspoon coconut oil. Drizzle or pipe the cacao butter over thh top of the bark.

  • Sprinkle flaky sea salt over the top.

  • Lift the bark using the parchment onto a baking sheet and chill in the fridge or freezer until fully set, about 20–30 minutes.

  • Slice or break into pieces and enjoy!

Nutrition Facts

Peppermint Date Bark Recipe

Amount Per Serving (1 serving)

Calories 0

* Percent Daily Values are based on a 2000 calorie diet.

  • Store leftovers in an airtight container in the fridge for up to a week.
  • You can also freeze leftovers for longer term storage.

Want some more healthy bark ideas? Try this healthy, high protein yogurt bark!

Have you ever made bark before? What are your favorite toppings? Leave a comment and let us know!

Tags: , , ,
Protein_Cinnamon_Rolls

Homemade Protein Cinnamon Rolls Recipe (With Greek Yogurt)

There’s something so magical about pulling some warm cinnamon rolls from the oven on a chilly morning. These high protein cinnamon rolls are an easy way to get all the magic, without all of the sugar or junky ingredients. My kids love these and because they have no yeast, they’re ready in less than an hour!

More people are focusing on protein now because of its benefits for building and maintaining muscle. You’ll find plenty of new protein bars on the market in tons of flavors and more brands are adding protein to various foods. While I’m all for more protein, the quality matters. Ingredients like GMO soy protein or whey protein from CAFO cattle may do more harm than good. 

While we’re probably a ways off from buying healthy high protein cinnamon rolls in a tube at the grocery store, you can easily make them at home!

Healthy Cinnamon Rolls

So, are cinnamon rolls healthy? They’re certainly not in the same category as pasture raised meats or organic veggies, but it is possible to make a healthier version of cinnamon rolls. Instead of gobs of sugar these protein cinnamon rolls are naturally sweetened with coconut sugar and raw honey. No sugar cinnamon roll recipes usually call for sugar alcohols that can cause digestive issues for many people. That’s not what you’ll find here, but they’re still mildly sweet and absolutely delicious. 

Protein Cinnamon Roll Ingredients

Now that my Hashimotos is gone and I’m able to eat a wider variety of healthy foods, I’ll eat gluten on occasion. I still avoid bleached, enriched, glyphosate sprayed conventional flour, but sometimes I pull out organic flour for baking. You can easily make these protein cinnamon rolls gluten free though with a gluten free flour blend. Just be sure to choose one that has clean ingredients, like this one. 

Greek yogurt is one of the main ingredients in the creamy frosting and to gives the rolls a protein boost. If you need dairy free, then a really thick coconut milk yogurt could work, but I haven’t personally tried it. 

Instead of making cottage cheese or whey protein cinnamon rolls, I used a different version of protein for these. I used Equip Prime protein which is made from beef protein, collagen, and gelatin. It’s a nose to tail protein source, but it’s not gritty or beefy tasting. If you don’t have any on hand, then collagen powder will also work. 

Protein Cinnamon Rolls with Greek Yogurt

Protein Cinnamon Roll Dough

Greek Yogurt Frosting

  • 4 oz cream cheese (softened)
  • ½ cup plain Greek yogurt (whole milk for best texture)
  • 2 TBSP raw honey (or to taste)
  • 1 tsp vanilla extract
  • 1 pinch salt
  • In a large bowl, whisk together the flour, protein powder, baking powder, salt, cinnamon, and coconut sugar.

  • Add the Greek yogurt and melted coconut oil, then stir until a soft dough forms. If the dough feels too dry, add milk or water a tablespoon at a time until it comes together.

  • Knead gently on a floured surface for 1–2 minutes, just until smooth.

  • Roll the dough into a rectangle about ¼ inch thick. Spread softened butter evenly over the surface.

  • In a small bowl, mix the coconut sugar and cinnamon, then sprinkle evenly over the dough.

  • Roll it up tightly into a log and slice into 8 even rolls.

  • Place the rolls in a greased 8×8-inch baking dish or parchment-lined skillet. Bake at 350°F for 20–25 minutes, until golden brown. Let cool slightly before frosting.

  • In a medium bowl or stand mixer bowl, beat the cream cheese until smooth. Add Greek yogurt, honey, vanilla, salt, and (optional) protein powder. Mix until thick and creamy. Spread generously over the warm, but not hot rolls.

Nutrition Facts

Protein Cinnamon Rolls with Greek Yogurt

Amount Per Serving (1 roll)

Calories 303
Calories from Fat 108

% Daily Value*

Fat 12g18%

Saturated Fat 8g50%

Trans Fat 0.1g

Polyunsaturated Fat 1g

Monounsaturated Fat 2g

Cholesterol 31mg10%

Sodium 260mg11%

Potassium 282mg8%

Carbohydrates 40g13%

Fiber 2g8%

Sugar 12g13%

Protein 10g20%

Vitamin A 283IU6%

Vitamin C 0.1mg0%

Calcium 160mg16%

Iron 2mg11%

* Percent Daily Values are based on a 2000 calorie diet.

For a thicker frosting, chill it for 10–15 minutes before spreading.

Serving High Protein Cinnamon Rolls

These taste so good when they’re still slightly warm and fresh from the oven. If you know you’re not going to eat them right away, then save the frosting for right before serving. Store any leftovers in the fridge in an airtight container for up to 4 days.

What are some of your favorite baked goods to make? I’d love to hear about it in the comments!

Tags: , , , , , ,
Sweet_Potato_Shepherds pie

Sweet Potato Shepherd’s Pie Recipe (Family Favorite!)

One of our favorite cold-weather meals is classic shepherd’s pie. In this not-so-classic version, you get a big veggie boost from mashed sweet potato. It’s a delicious spin on traditional shepherd’s pie, especially if you’re making the switch from white potatoes (or if you just prefer the taste!).

Sweet Potato Shepherd’s Pie Recipe

You might be wondering if you can use sweet potatoes to make shepherd’s pie. While white potatoes are key in the traditional Irish dish, no one says you can’t use sweet potatoes! And really, our family prefers the taste. White potatoes or sweet potatoes aren’t any better, it’s really just about preference.

If you’re doing Whole 30, which doesn’t allow dairy (and favors sweet potatoes), then this version is easily adaptable. Not only is it healthy and easy, but it’s also paleo, gluten-free, and can easily be made dairy-free.

How to Make Sweet Potato Shepherd’s Pie

I’ve left the recipe for my shepherd’s pie pretty similar to most, but added kale for a little extra vegetable boost and swapped out the traditional with potatoes for sweet potatoes. This recipe is similar to my meatloaf cupcakes, but with more veggies.

To make the casserole, I brown the ground beef with seasonings, then stir in the diced vegetables, heat it up, and pour it into a casserole dish. I have this oven safe deep skillet that I use for both purposes and save myself a pan to wash.

While the meat is cooking I mash the sweet potatoes with butter and salt and smooth them on top of the meat and vegetable mixture when it is done. To save myself a little time, I usually make extra sweet potatoes with another meal earlier in the week then just pull them out of the fridge when I’m ready to use them.

Shepherd’s Pie Ingredients and Substitutions 

While I like the kale for extra nutrition, you can also leave it out if you just prefer to have mixed veggies. Or use another leafy green like spinach or chard instead. If you want to add even more flavor, add a splash of coconut aminos, Worcestershire sauce, or balsamic vinegar for extra depth.

Want to make it dairy-free? Use coconut oil instead of butter and skip the cream cheese. If you still want to make the sweet potato topping creamier, you can try adding a little coconut milk when mashing. And if dairy isn’t a concern at all, shepherd’s pie with cheese on top is also delicious!

I make this recipe with ground beef since it’s easy to get, but you could also use ground lamb for a more traditional taste. If you want a lower calorie or fat version, ground turkey works well. And while I’m not vegetarian, I’ve heard cooked lentils also work well instead of the ground meat. 

Quick Tips

To save time on the sweet potatoes you can bake them ahead of time. I’ll make some earlier on in the week and pull them out of the fridge when needed. You can bake them for about an hour until soft. For a faster version, boil diced sweet potatoes for about 10 minutes, drain, then use for this recipe. 

I’m big on meal prep and this is a great recipe to make ahead. You can even bake the ingredients in pint-sized mason jars for easy packable lunches!

Store any leftovers in the fridge for up to 4 days, or freeze for up to 3 months. To freeze, place the unbaked, layered, shepherd’s pie in a freezer safe container and wrap tightly. Let it thaw in the fridge before baking for 30 minutes at 350. I like doubling the recipe and freezing half for later. 

If you love sweet potatoes as much as we do, give this recipe a try!

Sweet Potato Shepherd’s Pie Recipe

This healthier take on shepherd’s pie features a creamy sweet potato topping. This is a family favorite at our house and my kids love helping make the layers.

  • Preheat the oven to 350°F

  • In a large skillet over medium heat, brown the meat.

  • Mix in 1 teaspoon of the salt and all remaining seasonings and transfer to a large bowl.

  • Saute the onion and kale in the skillet until slightly soft and add to the meat.

  • Pour the mixed vegetables into the skillet and heat on low heat. 

  • While the vegetables are heating, mash the cooked sweet potatoes with butter and the remaining 1/2 teaspoon salt until smooth. 

  • Add the mixed vegetables to the meat mixture, sprinkle the arrowroot on top, and stir to combine. 

  • Pour the meat/vegetable mixture into a 9×13 baking dish and spread in an even layer. Add the mashed sweet potatoes and smooth evenly over the top.

  • Bake at 350°F for approximately 30 minutes.

  • When done, top with a small dollop of cream cheese if desired and enjoy.

Nutrition Facts

Sweet Potato Shepherd’s Pie Recipe

Amount Per Serving (1 serving)

Calories 490
Calories from Fat 243

% Daily Value*

Fat 27g42%

Saturated Fat 14g88%

Trans Fat 1g

Polyunsaturated Fat 1g

Monounsaturated Fat 9g

Cholesterol 117mg39%

Sodium 793mg34%

Potassium 947mg27%

Carbohydrates 33g11%

Fiber 6g25%

Sugar 7g8%

Protein 28g56%

Vitamin A 20036IU401%

Vitamin C 23mg28%

Calcium 136mg14%

Iron 4mg22%

* Percent Daily Values are based on a 2000 calorie diet.

  • Store any leftovers in the fridge for up to 4 days, or freeze for up to 3 months. 

Is It Shepherd’s Pie or Cottage Pie?

Shepherd’s pie is Irish in origin and usually is made with ground lamb. Cottage pie is British and made with ground beef. However, most people don’t quibble over the small differences and use the terms interchangeably. Read more fun shepherd’s pie facts here.

Sweet Potatoes: Versatile, Healthy, and Delicious

My kids absolutely love sweet potatoes and happily eat them every way I fix them. Which is why I have such an extensive and creative collection of sweet potato recipes! Here are some others to try:

Ever make shepherd’s pie with sweet potatoes? How’d it turn out? Share below!

Tags: , , , , , ,
Best oLive
Privacy Overview

This website uses cookies so that we can provide you with the best user experience possible. Cookie information is stored in your browser and performs functions such as recognising you when you return to our website and helping our team to understand which sections of the website you find most interesting and useful.