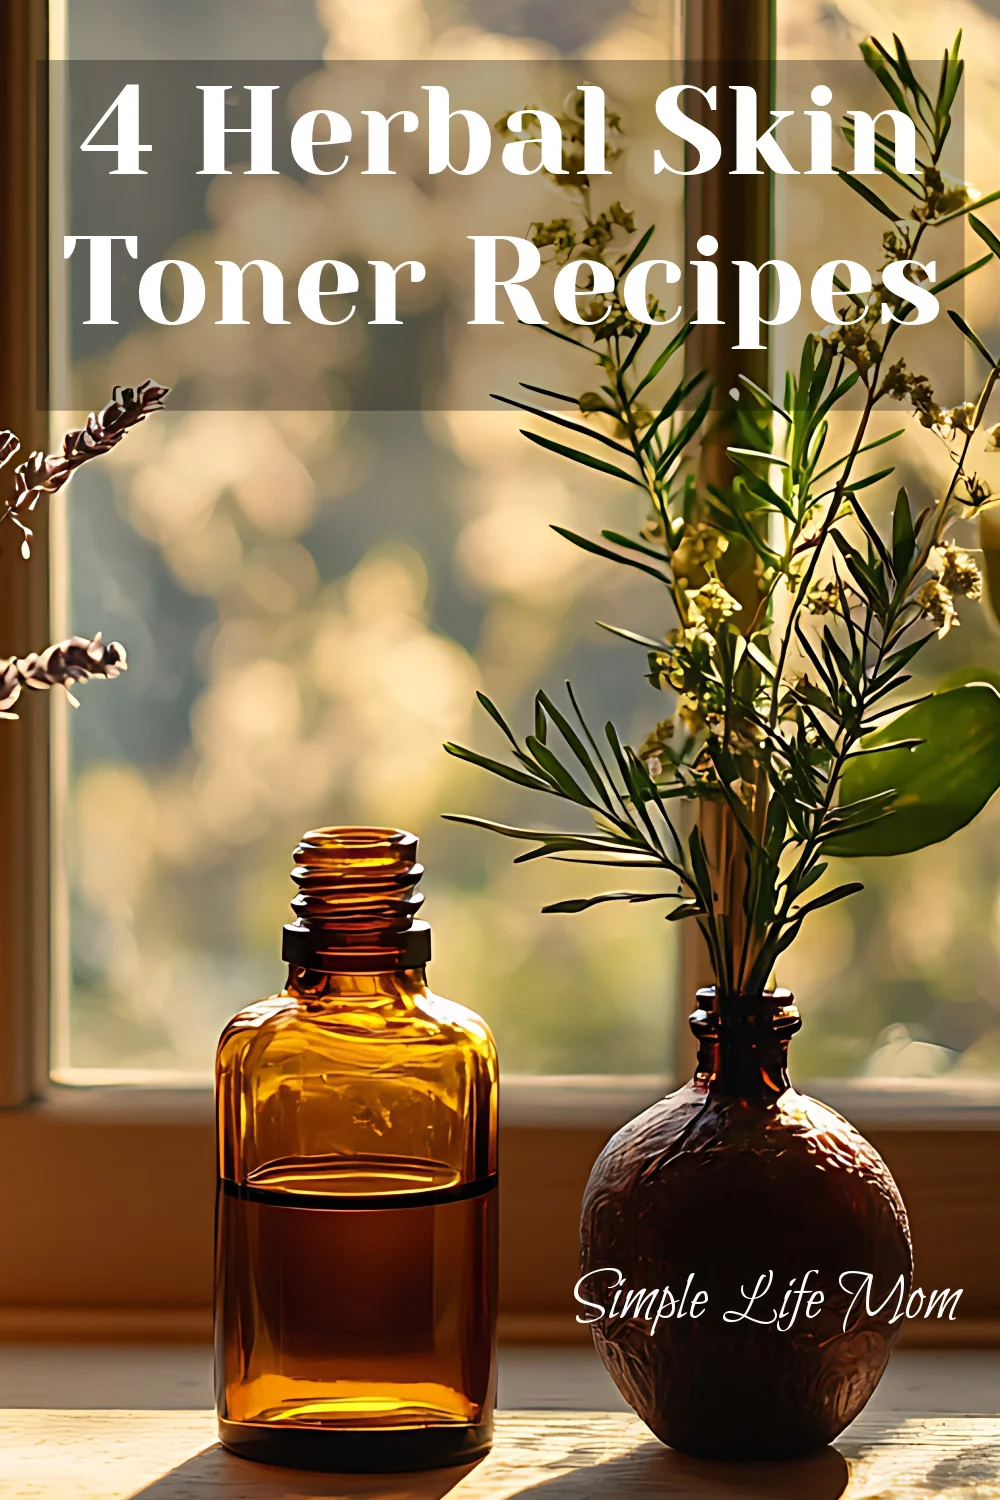
4 Herbal Skin Toners - recipes with natural ingredients for all skin types.

4 Herbal Skin Toners: How to Make Organic Astringents

These 4 herbal skin toners are beneficial for every skin type and play an important role in a natural skincare routine. Before I started using homemade skincare products, my face often felt tight and stripped after washing—especially since I’ve always had dry skin. Using a natural toner helps restore balance, refresh the skin, minimize the appearance of pores, and prepare your face to better absorb lotions or facial oils.

I especially like the last toner recipe below: Acne Astringent Toner, because it shrinks my pores lovely and goes great with my Anti-Aging Serum recipe.  I think I look younger now than I did ten years ago when my body was under so much stress.

You can also try before you make your own by checking out the ones I have in my shop: Anti-Aging Toner & Acne Toner. OR grab a cleanser and toner combo Gift Set.

Why Use Herbal Toners?

Before recipes, here’s what herbal toners can do for your skin:

  • Balance pH after cleansing (important for barrier health).
  • Hydrate and calm with natural botanicals like chamomile or aloe.
  • Minimize appearance of pores gently.
  • Prep skin for serums and moisturizers to absorb better.

Frequently Asked Questions About Herbal Skin Toners

What does a skin toner do?

A skin toner helps restore balance after cleansing by removing leftover residue, refreshing the skin, and helping pores to close. Using a toner also prepares your skin to better absorb lotions and oils applied afterward.

Are herbal skin toners good for all skin types?

Yes, herbal skin toners can benefit all skin types when made with the right ingredients. Dry skin may benefit from soothing herbs like chamomile or comfrey, while oily or acne-prone skin often responds well to astringent herbs such as mint or witch hazel.

Can I use a homemade toner every day?

Most homemade herbal toners are gentle enough for daily use, once or twice a day. If you have sensitive skin, start by using the toner once a day and monitor how your skin responds.

How long do homemade herbal toners last?

Because homemade toners do not contain preservatives, they usually last a month if kept clean. For longer shelf life, you can make smaller batches or use ingredients like the apple cider vinegar in some of the recipes below.

How do I apply a natural skin toner?

Apply toner after cleansing your face. You can use a cotton pad, reusable cloth, or gently pat it onto your skin with clean hands. Allow it to absorb before applying lotion or facial oils.

Is toner necessary if I already moisturize?

While not required, using a toner can significantly improve how well your skin absorbs moisture. Toners help prep the skin, making your lotion or oils more effective and reducing dryness or irritation.

Mint and vinegar toner – in process. Final product is strained

4 Herbal Skin Toners

1. DIY Comfrey & Oat Herbal Toner for Gentle Exfoliation

This comfrey and oat skin toner is quick and easy to prepare, making it ideal for a simple DIY skincare routine. Comfrey helps soothe and heal the skin, while oats gently absorb excess oil and remove impurities.1 Stored dry, this natural blend works as both a gentle facial scrub and an herbal toner, leaving skin clean, balanced, and refreshed.

Best for: Dry to normal skin
Benefits: Oats calm irritation; comfrey supports healing and softness.

Ingredients:

Instructions:

  1. Blend the comfrey and oats in a mixer until they make a fine powder. Store this in an airtight jar.
  2. Place 1 tablespoon of the scrub on the palm of your hand.  Pour about 1/2 tablespoon of rose water (or yogurt) on top and mix with your finger until it is a creamy paste.
  3. Rub onto your face with your hands, or a soft, wet cloth or sponge. Gently scrub face.
  4. Rinse with water.
  5. Store and use for 10 months by keeping sterile.  Always use a clean dry tablespoon to dip it out and never your hand.

2. DIY Apple Cider Vinegar & Chamomile Herbal Skin Toner

This apple cider vinegar and chamomile toner goes a long way, making it an easy and mess-free addition to your natural skincare routine. Apple cider vinegar helps tone and balance the skin without over-drying, while gently conditioning the complexion. Chamomile adds powerful soothing benefits by reducing inflammation, calming irritated skin, and helping relieve puffiness and acne.2

Best for: Sensitive or redness-prone skin
Benefits: Chamomile eases puffiness and irritation; apple cider vinegar tones.

Ingredients:

• 2 cups filtered water
• 1/2 cup raw apple cider vinegar
• 1/2 cup dried chamomile flowers

Instructions:

  1. Heat water in a kettle until it is hot.  It does not need to boil.
  2. Pour water into a jar and add chamomile flowers.
  3. Screw on an airtight lid and shake.
  4. Allow mixture to cool.
  5. Add vinegar and place in a warm, dark place for 1 week, shaking daily.
  6. After the one week, strain the toner through a mesh strainer and discard chamomile leaves.
  7. I pour about 1 Tablespoon into the palm of my hand after washing my face, rub my hands together and rub all over my face. You can also put it in a spray bottle and spray your face after washing.

3. DIY Mint & Vinegar Toner for Refreshing Skin

This vinegar and mint toner helps restore the skin’s natural balance. Vinegar works well for all skin types, helping oily skin stay clear while also easing dryness and flakiness, so I really like to use it as part of my toner recipes. The fresh mint adds a light, cooling feel that leaves your skin refreshed without being harsh.

Best for: Combination to oily skin
Benefits: Mint cools, vinegar helps control oil and restore skin acidity.

Ingredients:

Instructions:

  1. Mix together all ingredients, then pour into a clean container and let sit for 3 days.
  2. Strain or filter out all solids and pour into a clean bottle with a tight-fitting lid.
  3. To use: Apply to clean skin with a cotton pad or put it in a spray bottle.

4. Homemade Witch Hazel Toner with Healing Herbs

I love this toner because it works well for just about any skin type. The witch hazel acts as a gentle astringent, helping to tighten and close pores, while the herbs work to heal, soothe, and naturally purify the skin. It’s a simple, well-rounded option that’s easy to use and easy on your skin.

Best for: Acne-prone or blemish-forming skin
Benefits: Witch hazel tightens pores; herbs help purify and soothe.

Ingredients:

Instructions:

  1. Combine all ingredients in an airtight jar and shake.
  2. Place jar in a dark, warm place and shake daily for 2 to 3 weeks.
  3. The mixture will be the color of iced tea when ready. Strain.
  4. Apply astringent with a cotton ball, up to twice daily. Use for 6 months to 1 year.

Bonus Recipe:

Herbal Geranium Facial Toner for All Skin Types

Ingredients:

Instructions:

  • Combine the apple cider vinegar and rose water.
  • Add the essential oils.
  • Keep in a jar and dip a clean cotton ball into it for application on a clean face each time.

How to Use Herbal Toners (Best Practices)

✔ After cleansing: Apply toner before serums or oils to help absorption.
✔ Patch test first: You could be allergic to anything. Always test new ingredients on a small area like your wrist before using all over your face.
✔ Store safely: Homemade toners lack preservatives—keep airtight and refrigerate when needed.

Try my Other Specialized Toners

For acne-prone skin, try our homemade acne toner.

For anti-aging benefits, see our rose water anti-aging toner.

Tags: , , , ,
face steam with herbs

Rejuvenating Herbal Face Steam

I’ve been known for my unconventional skincare methods. They often involve herbs or essential oils and sometimes rubbing ice or even mud on my face. There are so many plants in nature that provide a wide variety of skin benefits. This herbal face steam is a great way to get some of those benefits!

I’ve done steams before, mainly for congestion or upper respiratory support. An herbal face steam makes for a wonderful all natural facial. It’s really simple to do and doesn’t require any fancy equipment.

You can even pick and choose which herbs you want to use. Just use one, or use a combination of whatever you have on hand that will work. 

The Best Herbs For a Face Steam

There are lots of different plants that work well in a face steam and you probably already have some in your pantry. Feel free to mix and match from this list or use something completely different. Just be sure it’s not something that will irritate your skin. 

Here are some of my favorite herbs to use in herbal face steams.

  • Rose petals – Rose has long been used for glowing, more youthful skin. The fragrant petals also have potent aromatherapy benefits that soothe heartache. A 2015 study noted rose helped improve skin elasticity, moisture, and reduced wrinkles. 
  • Lavender flowers – Soothing and calming to skin, lavender is a skincare favorite. It’s naturally anti-inflammatory and helps repair damaged skin. 
  • Mint leaves – Refreshing and invigorating, hot mint relaxes arteries and stimulates circulation for faster healing. It’s also a rich source of vitamins and minerals that thirsty skin craves!
  • Calendula flowers – Anti-inflammatory, anti-microbial, calendula has a wide and long history of use for healing wounds and damaged skin. 
  • Chamomile – The flowers and leaves have a floral, apple-like scent that’s calming and relaxing. It has the same effect on skin and is great for soothing irritation and damaged skin. 
  • Comfrey – This plant is another favorite of mine for skincare. Both the flowers and leaves are very efficient at healing damaged skin and even bone. It stimulates tissue repair and cell proliferation. 
  • Echinacea – People use the flowers or leaves topically for a variety of skin complaints, including damaged skin, eczema, varicose veins. Echinacea is anti-inflammatory, antibacterial, and anti-viral so it’s also helpful for acne. 
  • Helichrysum –  This herb has cheery yellow flowers with potent skin benefits. It’s drying, warm, and astringent, so pair it with a demulcent herb like violet or marshmallow if you have really dry skin. A 2020 study looked at a nightcream that contained helichrysum and found it significantly improved wrinkles, hyperpigmentation, and UV spots
  • Horsetail – A wonder herb that is full of micronutrients, including silica for more resilient skin. It’s also anti-inflammatory and anti-microbial and is traditionally used for improving wrinkles, acne, and moisturizing the skin. 
  • Lemon – Not just for lemonade, lemon has so many uses for skin too. The juice is high in vitamin C and acids, while the peel has volatile essential oils that uplift the mood and brightens dull and damaged skin. A 2013 study found lemon juice was even more effective for acne than the conventional option tested. 

How to Do an Herbal Face Steam

I prefer to use herbs that are more gentle on the skin and don’t have strong volatile oils that can irritate my skin or eyes. Cinnamon and oregano come to mind! 

You might have seen some of the face steamer machines in stores or online. Companies usually use plastic to make facial steamers, so you’re getting steam heated in plastic directly on your pores. A pot on the stove isn’t as fancy, but sometimes simpler is better (and cheaper!). 

You also can’t add herbs into the face steamer tank or it can cause damage. Again, another win for doing it the old fashioned way. 

Step by Step Face Steam Directions

  1. Simply place the herbs you’re using in a pot of very hot, filtered or distilled water. Be sure it’s not boiling hard or you could burn yourself.
  2. Turn the stove off and/or move the pot to a countertop. Drape a towel over your head and lean over the steam. 
  3. You want to be close enough for the steam to wash over your face, but not so close you get a steam burn. 

If you’re looking for a more specific recipe, here’s one to start with.

Rejuvenating Herbal Face Steam

A relaxing way to open pores, moisturize skin, and improve blemishes and signs of aging.

Prep Time3 minutes

Steam Time10 minutes

Total Time13 minutes

Yield: 1 face steam

Author: Katie Wells

  • Place the water, lemon, and herbs in a clean pot and gently bring it to a boil with the lid on. This helps preserve more of the volatile oils.

  • Turn the heat off and lean over the pot with your eyes closed. Be sure not to get too close or you’ll get a steam burn! I’ve found that as the water cools I’ll edge closer. You can also drape a towel over your head to trap more of the steam in.

  • Once the pot is done steaming, compost your herbal face steam.

The herbs I used here can be mixed and matched with any skincare friendly herbs. Just aim for about 1/3 cup of herbs total.

You can save some time and mix the herbs up in bulk for later. Just add 1/4 cup of each (or however much you want) and store in a large glass jar. Scoop out 1/3 cup when you’re ready to use. Then you’ll just need to add the freshly sliced lemon and water to make your face steam!

What are some of your favorite herbs to use for skincare? Have you done a steam before? Leave a comment and let us know!

Tags: , , ,
herbal tea benefits

Delicious Herbal Tea Recipes and Their Benefits

Herbal teas are a delicious and easy way to boost fluid intake and sneak in some extra nutrients. Unlike coffee and other teas that have caffeine, herbal tea benefits the body without keeping you awake or jittery. And while I love healthy coffee, I don’t drink it every day. Instead, I keep a big pitcher of herbal tea in my fridge to always have on hand. 

There are thousands of herbal tea recipes, so there’s something for every palate. Herbal teas can be very inexpensive if you buy the ingredients in bulk and you can mix up your own combinations!

Whether you’re already an avid herbal tea drinker or curious, here are some delicious combinations to try. 

1. Iced Dandelion Lime Tea

Dandelions are high in a variety of nutrients and are a great addition to recipes, including tea. Dandelion lime tea is a refreshing way to get the benefits. This recipe also includes raspberry leaf for even more nutrition and stevia for sweetness. Be sure to remove the petals from the green base to avoid a bitter flavor. 

2. Chamomile

Sweet and simple, chamomile flower is one of the most popular teas worldwide. Chamomile flowers have a naturally sweet taste with a hint of apple flavor. It’s known for its calming and soothing properties and has a variety of vitamins and minerals. 

While it’s often nicknamed the children’s herb thanks to its gentle nature, chamomile is still a powerful ally to keep on hand. I’ve used it for sleep, colicky babies, and even pink eye. Try it as a tincture for a longer shelf life.

3. Mint

Peppermint tea soothes the digestive tract and can be helpful for nausea, and indigestion. Some people find it helps with acid reflux, while others find it irritates their reflux. Hot peppermint tea stimulates circulation and helps open the airways. I drink it daily in early pregnancy to help alleviate nausea and use it in my homemade digestive tincture.

Mint is also known as an “activator herb” that helps boost the effectiveness of other herbs in a blend. 

4. Raspberry Leaf

Raspberry leaf is my favorite tea and I drink it almost daily. It’s highly nutritious and especially beneficial for women as it helps balance hormones and is good for the skin. It’s also popular during pregnancy to strengthen the uterus and is a good source of vitamins and minerals pregnant mamas need.

It tastes similar to black tea and I like mixing it with stevia leaf to make a naturally sweet tea. I drink it hot in the winter and cold during the summer months and my kids like it iced (and sometimes with chia seeds in it). Herbalists often recommend raspberry leaf tea or tincture to women suffering from infertility, PCOS, endometriosis, or painful menses.

5. Sleep Easy Blend

My go-to tea when I’m having trouble sleeping is an equal mixture of chamomile, mint, and catnip herbs. Catnip is naturally relaxing and soothing. It’s also one of the ingredients in my Sweet Dreams Sleep Tincture, to help the whole family relax and sleep better, especially during illness.

To make it, mix one teaspoon each of chamomile, mint, and catnip herbs in 16 ounces of hot water. Steep for 5 minutes, then strain and drink. 

6. Lavender Tea

Lavender is my favorite scent and essential oil but it’s too strong to be used alone in a tea. Lavender is calming, relaxing, and helps with better sleep. My favorite lavender tea recipe is:

Mix all and store in an airtight container. Use 1-2 tsp per cup of water to make hot or iced tea.

7. Chai Tea

Chai tea is a favorite around our house and we usually make it with raspberry leaf tea instead of black tea and with coconut milk instead of regular milk. Here’s my basic recipe but play with the ingredients to see what spices you like. 

When I don’t feel like making my own, I love this caffeine free Firefly Chai that’s slightly sweeter than regular chai and is great for nighttime. Add some chamomile and catnip for a delicious evening drink for kids.

8. Herbal Coffee

Have trouble kicking the coffee habit? While I still love coffee, herbal coffee is a great caffeine-free alternative. Sip Herbals is a robust, earthy herbal tea that’s reminiscent of your favorite cuppa Joe. Made with clean ingredients like chicory, carob, and dandelion root. 

9. Stomach Soother Herbal Tea

For stomach aches or for those prone to digestive troubles, this is my go-to tea recipe. Plus it’s easy to make. Mint stimulates digestion, fennel helps expel gas, and ginger combats nausea. 

Pour 1 cup of boiling water over the herbs, steep, covered for 5 minutes, then strain and drink. You can also add a tablespoon of  grass-fed gelatin powder for extra gut soothing. 

10. Pregnan-Tea

During pregnancy I drink a special tea to helps keep nausea and digestive troubles at bay and strengthen the uterus. The nettle also provides vitamin K, an essential nutrient for pregnancy and birth to help with clotting.

Many women report having easier and faster labors from using this tea. My labors are typically 24+ hours even though I go natural, so I may not be the best example! This tea is delicious anytime, but especially during pregnancy.

Mix and use 1 Tablespoon per 8 ounces or 1 cup per gallon. Here’s another pregnancy tea recipe I like to make with even more nutrient rich herbs. 

11. Nursing Mama Tea

Another favorite to have on hand during pregnancy and postpartum. The herbs in this tea soothe digestion, boost milk supply, and supply much needed nutrition. Get the recipe here. 

12. Herbal Wassail Tea

Wassail is a festive drink our family (and many others!) love to drink during the holidays. My herbal wassail version has a base of herbal tea with added fruit and spices. Make a big batch for guests or to keep in the fridge! 

13. Iced Lavender Peach Tea

I’ve already mentioned how much I love lavender tea, but it’s worth bringing up again. This lavender peach tea is refreshing and delicious to have on hand in the warmer months. A great way to upgrade your sweet tea. 

14. Elderberry Tea

I’m known for my elderberry syrup recipe, but I also enjoy making elderberry tea. It has all of the same benefits and flavors, but in tea form. Great for cold and flu season. 

15. Cumin, Coriander, and Fennel Tea

Probably not something you’ve tried before, but this tea blend is one of my favorites for improving digestion. It helps expel excess gas and is also good for nausea or constipation. Try the recipe here. 

16. Calendula Tea

While I love calendula flowers in soothing salves and skincare, it’s equally as good internally. Calendula tea is soothing to the digestive tract and the gut lining. I’ve grown calendula for a long time, but I also buy it in bulk. 

What’s your favorite herbal tea? Do you make any of your own? Share below!

Tags: , , , ,
herbal throat spray

DIY Herbal Throat Spray Recipe

Once upon a very terrible time, all my kids got a stomach bug at the same time… while I was gone. We don’t get sick often, but it was terrible and I wasn’t on hand to use all of our natural remedies.

Thankfully, that was the first and last stomach bug they’ve all gotten at once. However, at least one child gets a stuffy nose or cough sometime during the winter. Or I dust my closet and get a cough/congestion/nasal drip for a few days.

In those cases, I like to have this herbal throat spray on hand. It’s great for sore throat, cough or congestion.

Herbal Throat Spray Ingredients

This herbal throat spray is essentially a strong herbal tincture mixed with raw honey. The herbs provide both immediate relief and longer-lasting benefits for beating illness. You can use many different immune boosting and throat soothing herbs, but I prefer the following:

  • Echinacea root – Naturally antimicrobial and anti-inflammatory. Eases sore throat and cough and supports the immune system. Helps soothe throat pain and is great for strep throat or tonsillitis in a tea or throat spray. 
  • Ginger – Warming and stimulates circulation. Its antimicrobial and helps thin mucus and get it out of the body. Helps ease inflammation, pain, and muscle spasms. Ginger also stimulates white blood cells, helps prevent viruses from attaching to cells, and destroys viruses. 
  • Marshmallow root – A soothing demulcent herb that coats and soothes inflamed, dry, or damaged tissues. Reduces inflammation, supports white blood cells, and is an expectorant. 
  • Elderberry – Traditionally used for throat inflammation and may help reduce swelling in the mouth and throat. It also supports better drainage, less nasal congestion, and is an expectorant. It’s especially great for cough and congestion from viral infections. 
  • Thyme – Not just for Italian food! Thyme herb is excellent at breaking up stuck congestion and mucus in the lungs and getting it out. It’s antimicrobial, anti-inflammatory, and helps with better breathing. 
  • Peppermint – This adds a refreshing flavor and is warming and stimulating when used internally. It’s antimicrobial and helps fight a variety of viral, bacterial, and fungal infections. 
  • Cayenne – Cayenne is warming, stimulating, and boosts circulation to improve healing. It’s been traditionally used for sore throats, coughs, and illness prevention. It does add a spicy kick though, so reduce or skip if preferred. 

You don’t need every single herb on this list to make an herbal throat spray. If you don’t have some of them on hand, then just use more of the ones you do. I make an herbal tincture with the herbs and then mix with raw honey for a strong spray. When it’s made this way the herbal throat spray will last for months in the refrigerator.

Premade Herbal Throat Spray

Don’t feel like making it or don’t have the herbs you need? I also like this pre-made herbal throat spray that includes echinacea and propolis. This propolis throat spray is also a family favorite. 

Herbal Throat Spray Tincture

To make the tincture, I combine 1 tablespoon each of these dried herbs: Echinacea, Ginger, Marshmallow Root, Elderberry, Thyme and Mint and 1 teaspoon of dried cayenne pepper (optional) in a pint-size mason jar.

Fill the rest of the jar with a strong food-grade liquor like rum or vodka (must be at least 80-proof alcohol). Put on an airtight lid and let it sit for at least two weeks or up to eight weeks (the longer it sits the stronger it will be). Store in a cool dark place. I make this once a year and have enough to last at least the year.

Here’s my full tutorial on making herbal tinctures if you’re new to herbal remedies.

If you get a cough, sore throat or cold this winter, try this herbal throat spray to get some relief and feel better soon! Here’s how to make the standard tincture version.


DIY Herbal Throat Spray Recipe

Prep Time5 minutes

Active Time5 minutes

Steeping Time14 days

Total Time14 days 10 minutes

Author: Katie Wells

  • Add the herbs to a pint-size Mason jar.

  • Pour alcohol over the herbs, leaving a ½ inch headspace.

  • Cap tightly with the lid and let the tincture steep for 2-4 weeks, shaking occasionally.

  • Once the tincture is done, strain out the herbs and reserve the liquid.

  • For every 6 Tablespoons of tincture add 2 Tablespoons of raw honey.

  • Shake well to combine and store in the fridge for up to 6 months.

  • I pour some into a small spray bottle for easy use as needed.

You don’t have to use every single herb on the list. If you want/need to omit some of the herbs, just replace them with more of the others. 
 

Two Hour Herbal Throat Spray Tincture

If you want to use the full herbal mixture and don’t have weeks to sit around waiting for the tincture, you can make a two-hour version with this method:

  1. Combine 1 teaspoon of all of the herbs (2 Tablespoons total) in a pint size glass jar.
  2. Pour enough boiling water on them to just cover the herbs with water.
  3. Let steep for 20 minutes until the water cools.
  4. Strain out the herbs and mix with equal parts of 80-proof or higher liquor. I use rum or vodka.
  5. For every 3 parts of herbal liquid, add 1 part of honey. 

This version should last for a few weeks in the fridge. 

More Throat Spray Variations

If you prefer not to make a tincture with alcohol, you can make a glycerite with vegetable glycerin instead. Glycerites aren’t as potent and generally don’t extract the herbal properties as well as alcohol. It will still be helpful though and you’ll just need to use a little more of the spray on the throat. 

You can also make a strong herbal tea and mix with honey. This won’t last nearly as long and should be used within a week. 

 Do you ever get a sore throat or cough? What remedies do you use?

Tags: , , , ,
5 herbal skincare rituals to try at home

5 herbal skincare rituals to try at home

What’s the story

African herbal skincare rituals have been practiced for centuries, offering natural ways to maintain healthy skin.
These rituals use locally sourced herbs and plants, known for their beneficial properties.
From cleansing to moisturizing, these traditional methods provide an alternative to modern skincare products.
By incorporating these practices into your routine, you can experience the benefits of nature’s bounty without the use of synthetic ingredients.

Shea butter for moisturizing

Shea butter is a staple in African skincare, thanks to its rich moisturizing properties.
Extracted from the nuts of the shea tree, it is packed with vitamins A and E. It deeply hydrates the skin, making it soft and supple.
Applying shea butter regularly can help reduce dryness and improve skin elasticity. It also acts as a barrier against environmental damage.

Neem leaves for cleansing

Neem leaves are famous for their cleansing properties in many African cultures.
The leaves are rich in antioxidants and have antibacterial properties that help keep the skin clear of impurities.
A neem leaf infusion can be used as a facial wash or toner to remove dirt and excess oil without stripping the skin’s natural moisture.

Baobab oil for nourishment

Extracted from the seeds of the baobab tree, baobab oil is a powerhouse of nutrients.
This oil is rich in omega fatty acids, which nourish and repair the skin.
It is especially beneficial for those with dry or damaged skin, as it helps restore moisture balance and promotes healing.

Rooibos tea for anti-aging

Rooibos tea is loaded with antioxidants that fight free radicals responsible for premature aging.
Applying cooled rooibos tea as a toner can tighten pores and improve skin texture over time.
Its anti-inflammatory properties also help calm irritated or sensitive skin.

Hibiscus flowers for exfoliation

Hibiscus flowers contain natural alpha hydroxy acids (AHAs), which are excellent exfoliators.
They gently slough off dead cells from the surface of the skin without causing irritation or redness—making them perfect even for sensitive types.
Regular use can lead to a brighter complexion by promoting cell renewal processes naturally.

Tags: , , ,
How To Make a Heated Herbal Neck Wrap

How To Make a Heated Herbal Neck Wrap

This happy little heat therapy pack nestles into all the tense nooks and crannies around your neck, soothing away tension and softening the painful spots that pop up as we age.

I don’t know when it happened, but at some point my body decided that all it wants is to be warm and comfortable. I work from home most days, so when I’m feeling cranky and just over it, I’ll change into comfy clothes around 4 PM, put on my slippers and grab this warming herbal neck wrap.

A quick spin in the microwave is all it takes to warm the flaxseed inside and activate the lavender blossoms for a little aromatherapy. Then I’ll drape it over my neck and melt into the sofa like it’s a waterbed.

While it does require a sewing machine (you don’t want glue melting in the microwave), as long as you can sew in a straight line it’ll be a piece of cake.

Herbal Neck Wrap Supplies

Making your own warming neck wrap is simple and surprisingly quick. You can finish it in about an hour, and the result feels just as cozy and effective as anything you’d buy in a store.

If you have the time and supplies, you can always make a second one that you can keep in the freezer for some cold therapy. Or scale it down and make one the perfect size for a weighted eye mask.

Since it goes in the microwave, just make sure you’re not using anything that could potentially melt or catch on fire.

  • 100% Cotton Fabric – You can use any organic cotton you like, but I prefer to use cotton flannel baby blankets. They’re soft and comfortable. They’re also organic and free of any weird chemicals or coatings that might get gross when heated. Organic linen or hemp would also work here as well. 
  • 100% Cotton Thread – Avoid any metallic thread, which might spark in the microwave, or synthetic thread, which may melt if overheated.
  • Twill Tape – While not totally necessary, I think having handles on my neck wrap is a cheap upgrade. Pulling on them increases the pressure and heat on your tired muscles. They can also be tied, helping to keep the wrap in place. But if you find the added steps overwhelming, you can leave them off without affecting the wrap.

Fill it will flaxseed (or rice, in a pinch) and some dried flower blossoms for scent. Lavender is a great choice, but you can also go with chamomile, rose or jasmine depending on your preferences.

  • Organic Flax Seed – I’ve seen both white rice and flaxseed used in warming wraps, but I recommend sticking with flax. The oils in the flaxseed heat up slowly and retain heat longer than rice, so your wrap won’t need to be reheated as often. It’s also less likely to retain moisture and get moldy, which is an added bonus. 
  • Organic Dried Lavender Blossoms – I’m partial to lavender because I find it especially relaxing, but you can use any dried flowers you like. Chamomile, rose, jasmine, gardenia or lilac could all work. You could also use soothing herbs, like peppermint, rosemary, or thyme, if that’s more your speed.

See the recipe card below for quantities.

Instructions

With the right sides together, fold the fabric in half lengthwise (hot dog style) so that the long edges line up.

Using a ½” seam allowance, sew the long seam. Then turn right side out and press.

On one of the short ends, fold the raw edge of the fabric in by ½ inch and press.

Insert the ends of your twill tape and pin in place.

Sew the end closed with the twill tape in place using a top stitch. Remove the pins.

Starting at the closed end, measure 1.5″ down from the top edge. Draw a horizontal line.

Come down to the line you just drew. Measure 1.5″ in from the left edge and draw a line lengthwise down the neck wrap, ending 2″ from the bottom (this includes your ½” inseam).

Move another 1.5″ to the right and draw a second line lengthwise down the wrap.

You should end up with 2 equidistant vertical lines starting 1.5 inches from the top edge, and 1.5 inches in from each side. The lines should stop 2 inches from the bottom edge.

Sew along each vertical line.

Your lines should look like this. This gives the wrap structure that helps keep the flaxseed in place and prevents it from settling on either end of the wrap.

Mix the lavender and flaxseed together in a small bowl. Pour ½ cup into the open end then shake to get it to the bottom.

Keep going until the wrap is almost, but not quite, full. There needs to be some flexibility so it can wrap around your neck.

Fold the raw ends of the open side under and press and insert the ends of your twill tape on the outer edges

Top stitch the end closed. And your neck wrap is ready to use!

How To Use Your Neck Wrap

Place the wrap in the microwave and heat in 30-second intervals until desired warmth is achieved. Be careful not to microwave for more than 90 seconds, otherwise you risk it drying out and starting on fire.

Test the temperature of your pack (make sure it’s not too hot!) then drape it around your neck and shoulders to relax tight muscles, ease tension, or warm up on a chilly day. You can also place it on your lower back or across your abdomen for gentle comfort.

The heat usually lasts around 20 to 30 minutes. When it cools down, just pop it back in the microwave for another minute to get it back to the desired temperature.

Top Tip: If you use white rice instead of flaxseed, place a small cup of water in the microwave with your wrap when you heat it. Rice has less oil the flaxseed and tends to dry out more in the microwave, which may cause a fire if you’re not careful. 

FAQ

What fabric works best for a DIY neck wrap?

Any organic, natural fiber fabric will work. Cotton or flannel are great choices because they’re soft, breathable, and safe to heat in the microwave. Always avoid synthetic fabrics, which can melt, off gas chemicals or give off odors.

Can I use essential oils instead of dried flowers?

Yes, absolutely. Mixing a few drops of essential oil with the flaxseed will give you the same aromatherapy benefits as dried flowers.

Can I use it as this heated neck wrap as a cold pack too?

Sure, just place it in a sealed bag and store pop it in the freezer for a few hours. It’s great for headaches, sore muscles or tired eyes.

How long does a DIY neck wrap last?

With regular use, it can last several years. If it starts to smell off or the fabric wears thin, it’s time to make a new one.

Print

]]>]]>

DIY Herbal Neck Wrap

This happy little heat therapy pack nestles into all the tense nooks and crannies of your neck, soothing away tension and softening the painful spots that pop up as we age.

Prep Time1 hour

Total Time1 hour

Course: Aromatherapy

Keyword: DIY

Yield: 1 neck wrap

Author: Stephanie Pollard

Cost: $15

Equipment

  • Wide neck funnel

  • Iron

  • Sewing machine

  • Ruler

  • Sewing chalk

Instructions

  • With the right sides together, fold your cotton fabric in half so that the long edges line up

  • Sew this long seam. Then turn the fabric right side out and press.

  • Take one of the short ends. Tuck the raw edge under by about ½” and press.

  • Insert the ends of your twill tape and pin in place. Sew the edge closed using a top stitch.

  • Starting at the closed end, measure 1.5″ down from the top edge. Draw a horizontal line.

  • Come down to the line you just drew. Measure 1.5″ in from the left edge and draw a line lengthwise down the neck wrap, ending 2″ from the bottom (this includes your ½” inseam)Move another 1.5″ to the right and draw a second line lengthwise down the wrap.You should end up with 2 equidistant vertical lines starting 1.5″ from the top edge, and 1.5″ in from each side. The lines should stop 2″ from the bottom edge.
  • Then sew along the vertical lines.

  • Mix the lavender and flaxseed in a bowl. Fill your neck wrap with the flaxseed mixture. Leave room at the top so there’s some flexibility to the neck wrap.

  • Fold the raw ends of one side under and press. Just like you did for the other end, insert the ends of your twill tape on the outer edges of this short end. Topstitch closed.

Notes

I simply poured the mixture into the wrap as best I could, trying to get the seed evenly spread between each of the three columns. But you might find that a wide neck funnel makes it easier to fill.
If you use white rice instead of flaxseed, place a small cup of water in the microwave with your wrap when you heat it. Rice has less oil the flaxseed and tends to dry out more in the microwave, which may cause a fire if you’re not careful. 
0

Tags: , , ,
Best oLive
Privacy Overview

This website uses cookies so that we can provide you with the best user experience possible. Cookie information is stored in your browser and performs functions such as recognising you when you return to our website and helping our team to understand which sections of the website you find most interesting and useful.