Homestead Blog Hop - Homestead tips, ideas, animal care, and recipes every Wednesday

Homestead Blog Hop 615 – Make Homemade Cookies and Pumpkin Seeds

Welcome to the Homestead Blog Hop. A weekly gathering for homesteaders and simple living enthusiasts. We all share DIY projects, from-scratch recipes, and creative inspiration from our homes to yours.

This week’s hop features yummy foods. It also offers practical ideas that celebrate handmade living and self-sufficiency. Explore ideas that fit a thoughtful, sustainable lifestyle.

Whether you’re looking for seasonal crafts, homemade treats, or encouragement on your homesteading journey, you’ll find plenty of inspiration to carry into the upcoming seasons.

Grab a cup of tea, explore the featured posts, and join us in sharing your own homestead creations.

Meet Your Homesteading Hosts

We’re Kelly from Simple Life Mom, Liz from The Cape Coop, Natasha from Houseful of Nicholes, and Laurie from Ridgehaven Homestead. We’re about from-scratch living, simple ingredients, frugal habits, and intentional, sustainable living. We share recipes, tips, and ideas to support home cooks and makers.

We’re delighted to host the Homestead Blog Hop. You can find fresh inspiration each week for DIY projects, homemade recipes, and practical living ideas. Join us for new ideas and a growing community. Together, we celebrate everyday craftsmanship and thoughtful living.

Follow Us for More Homestead Inspiration

Natasha – Houseful of Nicholes
Facebook | Pinterest | X | Instagram

Laurie – Ridge Haven Homestead
Facebook | Pinterest | Instagram

Liz – The Cape Coop
Facebook | Pinterest | X | Instagram

Kelly – Simple Life Mom
Facebook | Pinterest | X | Instagram

FEATURED POSTS from the Last Homestead Blog Hop

Each week, we take turns selecting three featured posts from the Homestead Blog Hop. These features are shared across all of our social media platforms. They spotlight the creativity and hard work of our fellow homesteaders.

Here are the featured posts from last week’s hop:

1. Best Ranger Cookies Recipe with Chocolate Chips from Press Print Party

2. Delicious Fall Recipe: Roasting Pumpkin Seeds from Crazy Little Love Birds

3. Easy Pumpkin Cheesecake Cookies Recipe from Organized Island

Congrats! Feel free to grab the featured on button for your post.

Just right click and ‘save image as…‘

Guidelines for the Homestead Blog Hop

  1. Click the “Add Your Link” button below and upload a clear, eye-catching image from your project or recipe. Please link directly to the family-friendly post itself, not your blog’s homepage.
  2. You may link up up to three posts each week.
  3. Take time to visit a few other blogs in the hop and leave a thoughtful comment to let them know you stopped by. Community support makes this hop special!
  4. Please include a link back to the Homestead Blog Hop in your post. Posts without a back link are not eligible to be featured. All featured posts are shared across all hosts’ social media channels.
  5. Share posts that haven’t been linked to the hop before. Older posts are welcome as long as they are new to the hop.
  6. By joining the Homestead Blog Hop, you grant the hosts permission to use one image from your post, with a link back to your site, if your post is selected as a feature next week.
  7. This is a family-friendly link-up designed to encourage, inspire, and support the homesteader in all of us.

Let the Party Begin!

Which project are you excited to try this week? Leave a comment below.

Join Our Homestead Blog Hop Pinterest Board

Follow all of your hosts on Pinterest and send a message if you’d like to be added to our Homestead Blog Hop group board. This board is a great place to share your DIY projects, crafts, and from-scratch recipes with the homesteading community.

Guideline: Only pin posts that you’ve linked up to the Homestead Blog Hop.
Tags: , , , , , ,
Homestead Blog Hop - Homestead tips, ideas, animal care, and recipes every Wednesday

Homestead Blog Hop 612 – Make Homemade Lunches, Cards, and Strawberry Lemonade

Welcome to Homestead Blog Hop, a weekly gathering for homesteaders and simple living enthusiasts to share DIY projects, from-scratch recipes, and creative inspiration. This week’s hop features cozy homesteading tips, along with practical ideas that celebrate handmade living and self-sufficiency.

Whether you’re looking for seasonal crafts, homemade treats, or encouragement on your homesteading journey, you’ll find plenty of inspiration to carry into the new year. Grab a cup of tea, explore the featured posts, and join us in sharing your own homestead creations.

Meet Your Homesteading Hosts

We’re Kelly from Simple Life Mom, Liz from The Cape Coop, Natasha from Houseful of Nicholes, and Laurie from Ridgehaven Homestead. Together, we’re passionate about from-scratch living, simple ingredients, frugal habits, and intentional homesteading. We’re delighted to host the Homestead Blog Hop, where you can find fresh inspiration each week for DIY projects, homemade recipes, and practical simple living ideas.

Follow Us for More Homestead Inspiration

Natasha – Houseful of Nicholes
Facebook | Pinterest | X | Instagram

Laurie – Ridge Haven Homestead
Facebook | Pinterest | Instagram

Liz – The Cape Coop
Facebook | Pinterest | X | Instagram

Kelly – Simple Life Mom
Facebook | Pinterest | X | Instagram

FEATURED POSTS from the Last Homestead Blog Hop

Each week, we take turns selecting three featured posts from the Homestead Blog Hop. These features are shared across all of our social media platforms, helping spotlight the creativity and hard work of our fellow homesteaders. Here are the featured posts from last week’s hop:

1. Strawberry Lemonade – from Flour on my Face

2. Easy Back to School Lunch Ideas – from Mommy Hates Cooking

3. How to Use Dried Flowers on Handmade Cards from Amy’s Creative Pursuits

Congrats! Feel free to grab the featured on button for your post.

Just right click and ‘save image as…‘

Guidelines for the Homestead Blog Hop

  1. Click the “Add Your Link” button below and upload a clear, eye-catching image from your project or recipe. Please link directly to the family-friendly post itself, not your blog’s homepage.
  2. You may link up up to three posts each week.
  3. Take time to visit a few other blogs in the hop and leave a thoughtful comment to let them know you stopped by. Community support makes this hop special!
  4. Please include a link back to the Homestead Blog Hop in your post. Posts without a back link are not eligible to be featured. All featured posts are shared across all hosts’ social media channels.
  5. Share posts that haven’t been linked to the hop before. Older posts are welcome as long as they are new to the hop.
  6. By joining the Homestead Blog Hop, you grant the hosts permission to use one image from your post, with a link back to your site, if your post is selected as a feature next week.
  7. This is a family-friendly link-up designed to encourage, inspire, and support the homesteader in all of us.

Let the Party Begin!

Which project are you excited to try this week? Leave a comment below.

Join Our Homestead Blog Hop Pinterest Board

Follow all of your hosts on Pinterest and send a message if you’d like to be added to our Homestead Blog Hop group board. This board is a great place to share your DIY projects, crafts, and from-scratch recipes with the homesteading community.

Guideline: Only pin posts that you’ve linked up to the Homestead Blog Hop.
Tags: , , , , , , ,
Homestead Blog Hop - Homestead tips, ideas, animal care, and recipes every Wednesday

Homestead Blog Hop 609 – Homemade Mozzarella, Pickles, and Salmon

Welcome to Homestead Blog Hop, a weekly gathering for homesteaders and simple living enthusiasts to share DIY projects, from-scratch recipes, and creative inspiration. This week’s hop features cozy homesteading tips, along with practical ideas that celebrate handmade living and self-sufficiency.

Whether you’re looking for seasonal crafts, homemade treats, or encouragement on your homesteading journey, you’ll find plenty of inspiration to carry into the new year. Grab a cup of tea, explore the featured posts, and join us in sharing your own homestead creations.

Meet Your Homesteading Hosts

We’re Kelly from Simple Life Mom, Liz from The Cape Coop, Natasha from Houseful of Nicholes, and Laurie from Ridgehaven Homestead. Together, we’re passionate about from-scratch living, simple ingredients, frugal habits, and intentional homesteading. We’re delighted to host the Homestead Blog Hop, where you can find fresh inspiration each week for DIY projects, homemade recipes, and practical simple living ideas.

Follow Us for More Homestead Inspiration

Natasha – Houseful of Nicholes
Facebook | Pinterest | X | Instagram

Laurie – Ridge Haven Homestead
Facebook | Pinterest | Instagram

Liz – The Cape Coop
Facebook | Pinterest | X | Instagram

Kelly – Simple Life Mom
Facebook | Pinterest | X | Instagram

FEATURED POSTS from the Last Homestead Blog Hop

Each week, we take turns selecting three featured posts from the Homestead Blog Hop. These features are shared across all of our social media platforms, helping spotlight the creativity and hard work of our fellow homesteaders. Here are the featured posts from last week’s hop:

1. Grandma’s No Cook Refrigerator Pickles from Recipe Idea Shop

2. Quick Homemade Mozzarella Cheese from The Once and Future Homestead

3. Garlic Butter Salmon from Yummi Haus

Congrats! Feel free to grab the featured on button for your post.

Just right click and ‘save image as…‘

Guidelines for the Homestead Blog Hop

  1. Click the “Add Your Link” button below and upload a clear, eye-catching image from your project or recipe. Please link directly to the family-friendly post itself, not your blog’s homepage.
  2. You may link up up to three posts each week.
  3. Take time to visit a few other blogs in the hop and leave a thoughtful comment to let them know you stopped by. Community support makes this hop special!
  4. Please include a link back to the Homestead Blog Hop in your post. Posts without a backlink are not eligible to be featured. All featured posts are shared across all hosts’ social media channels.
  5. Share posts that haven’t been linked to the hop before. Older posts are welcome as long as they are new to the hop.
  6. By joining the Homestead Blog Hop, you grant the hosts permission to use one image from your post, with a link back to your site, if your post is selected as a feature next week.
  7. This is a family-friendly link-up designed to encourage, inspire, and support the homesteader in all of us.

Let the Party Begin!

Which project are you excited to try this week? Leave a comment below.

Join Our Homestead Blog Hop Pinterest Board

Follow all of your hosts on Pinterest and send a message if you’d like to be added to our Homestead Blog Hop group board. This board is a great place to share your DIY projects, crafts, and from-scratch recipes with the homesteading community.

Guideline: Only pin posts that you’ve linked up to the Homestead Blog Hop.

Tags: , , , , , ,
Homemade_Greek_Seasoning

Homemade Greek Seasoning

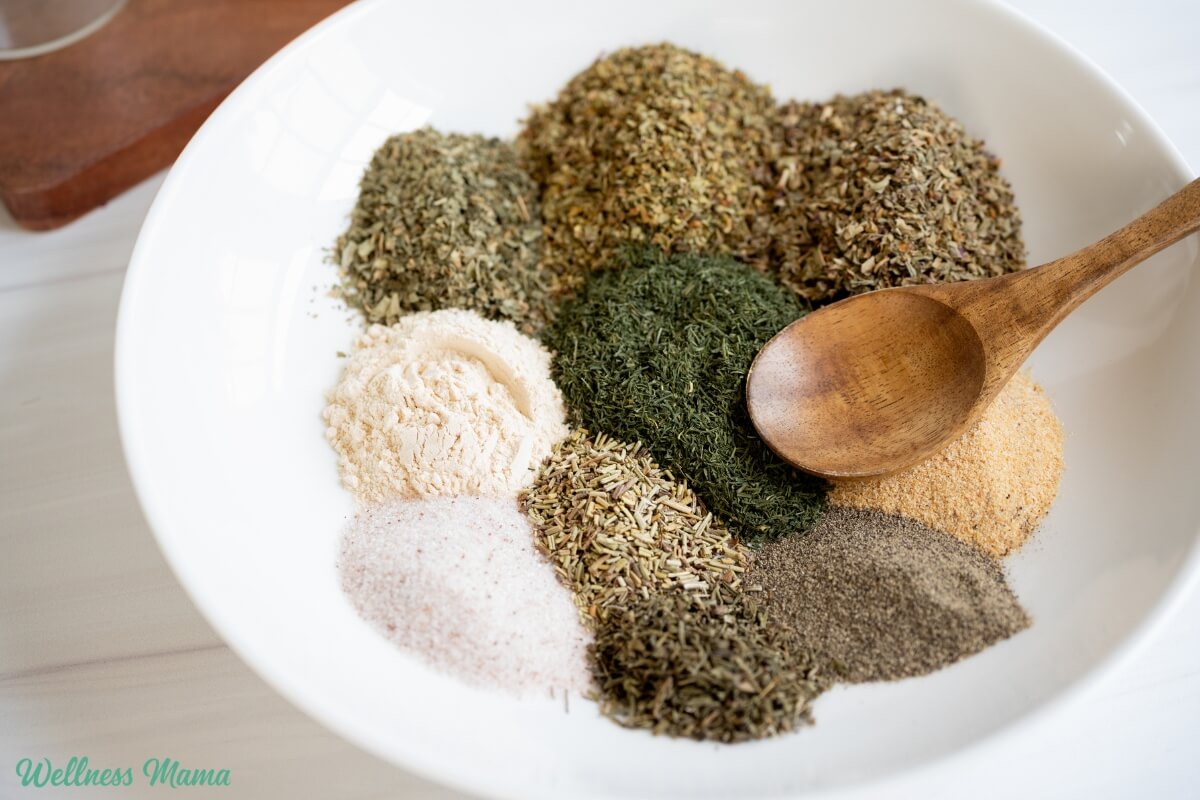
One of the best ways to make healthy eating easy is to keep some homemade staples on hand. Simple DIY spice blends and sauces take very little effort but they can make meals so much more flavorful. This Greek seasoning is one staple I like to keep in the pantry! 

Many pre-made seasoning blends use fillers, preservatives, added sugars, or ingredients I wouldn’t use in my kitchen. Making your own is so simple and you can choose exactly what you use (and don’t). Plus the DIY versions often taste better than what’s been sitting on a store shelf for months. 

What Is Greek Seasoning?

Greek seasoning is a flavorful Mediterranean-inspired blend of herbs traditionally used to add depth to meats, vegetables, sauces, and marinades. It combines classic Greek flavors like oregano, basil, dill, garlic, and rosemary. The result is a savory seasoning that works in a variety of recipes.

Oregano is one of the most popular Greek flavors and adds a pungent taste (it’s not just for Italian seasoning!). Then I add herbs like basil, parsley, dill, thyme, and rosemary to hit all the flavor notes. Garlic and onion powder bring that savory base that makes this blend so versatile, while a touch of cinnamon adds some warmth.

It’s also an easy way to include a wide variety of micronutrients, antioxidants, and anti-microbial compounds into everyday meals. People have used herbs for thousands of years not only to make dishes taste good, but because they support overall wellness. 

Why You Should Make Your Own Seasonings

I started making more of my own pantry staples because it’s an easy way to simplify ingredients without sacrificing flavor. And with 7 kids now, it’s cheaper to buy in bulk and mix it yourself! Seasoning blends are one of the easiest swaps because they take only a few minutes to make and last for months.

This Greek seasoning is one of those recipes that’s become a kitchen staple. I love having a jar ready because it instantly upgrades simple meals. A plain chicken breast, roasted vegetables, or even a basic salad instantly gets a flavor upgrade with homemade seasoning. 

It’s also easy to customize. If you love garlic, you can add more. If you prefer a stronger herb flavor, adjust the amounts of oregano, basil, or dill. Homemade recipes are flexible, which is one of the best parts of cooking from scratch.

How to Use Greek Seasoning

This seasoning is so versatile and works well with both quick weeknight meals and more involved recipes. Sprinkle it over chicken before grilling, mix it into burger patties, or use it to season roasted vegetables like zucchini, squash, or asparagus.

One of my favorite ways? Toss some diced potatoes with olive oil, salt, and Greek seasoning then roast. The herbs create a crispy, savory coating that rivals any restaurant dish. 

You can also mix it into homemade salad dressings, sprinkle it over eggs, or stir it into Greek yogurt for a quick and easy dip. It’s a great way to add flavor without needing complicated sauces or extra ingredients.

For an easy meal prep option, try this blend as the base for a simple Greek chicken marinade. Combine Greek seasoning with olive oil and fresh lemon juice, then marinate chicken before grilling. The result is tender, flavorful chicken with a bright Mediterranean flavor.

Here’s how to make it!

Homemade Greek Seasoning

This savory Greek seasoning blend is perfect for meat, veggies, or even mixed into yogurt as a dip. Full of flavor, healthy, and versatile.

Nutrition Facts

Homemade Greek Seasoning

Amount Per Serving (1 teaspoon)

Calories 4

% Daily Value*

Fat 0.04g0%

Saturated Fat 0.02g0%

Polyunsaturated Fat 0.01g

Monounsaturated Fat 0.01g

Sodium 167mg7%

Potassium 23mg1%

Carbohydrates 1g0%

Fiber 0.4g2%

Sugar 0.04g0%

Protein 0.2g0%

Vitamin A 18IU0%

Vitamin C 0.3mg0%

Calcium 17mg2%

Iron 1mg6%

* Percent Daily Values are based on a 2000 calorie diet.

Store in an airtight container for up to 6 months.

More Homemade Seasoning

Looking for some more make it yourself seasoning blends? Here are some of our favorites!

Have you ever used Greek seasoning before? What are your favorite ways to use it? Share below!

Tags: , ,
rice krispie treats recipe

Rice Krispie Treats Recipe (With Homemade Marshmallow)

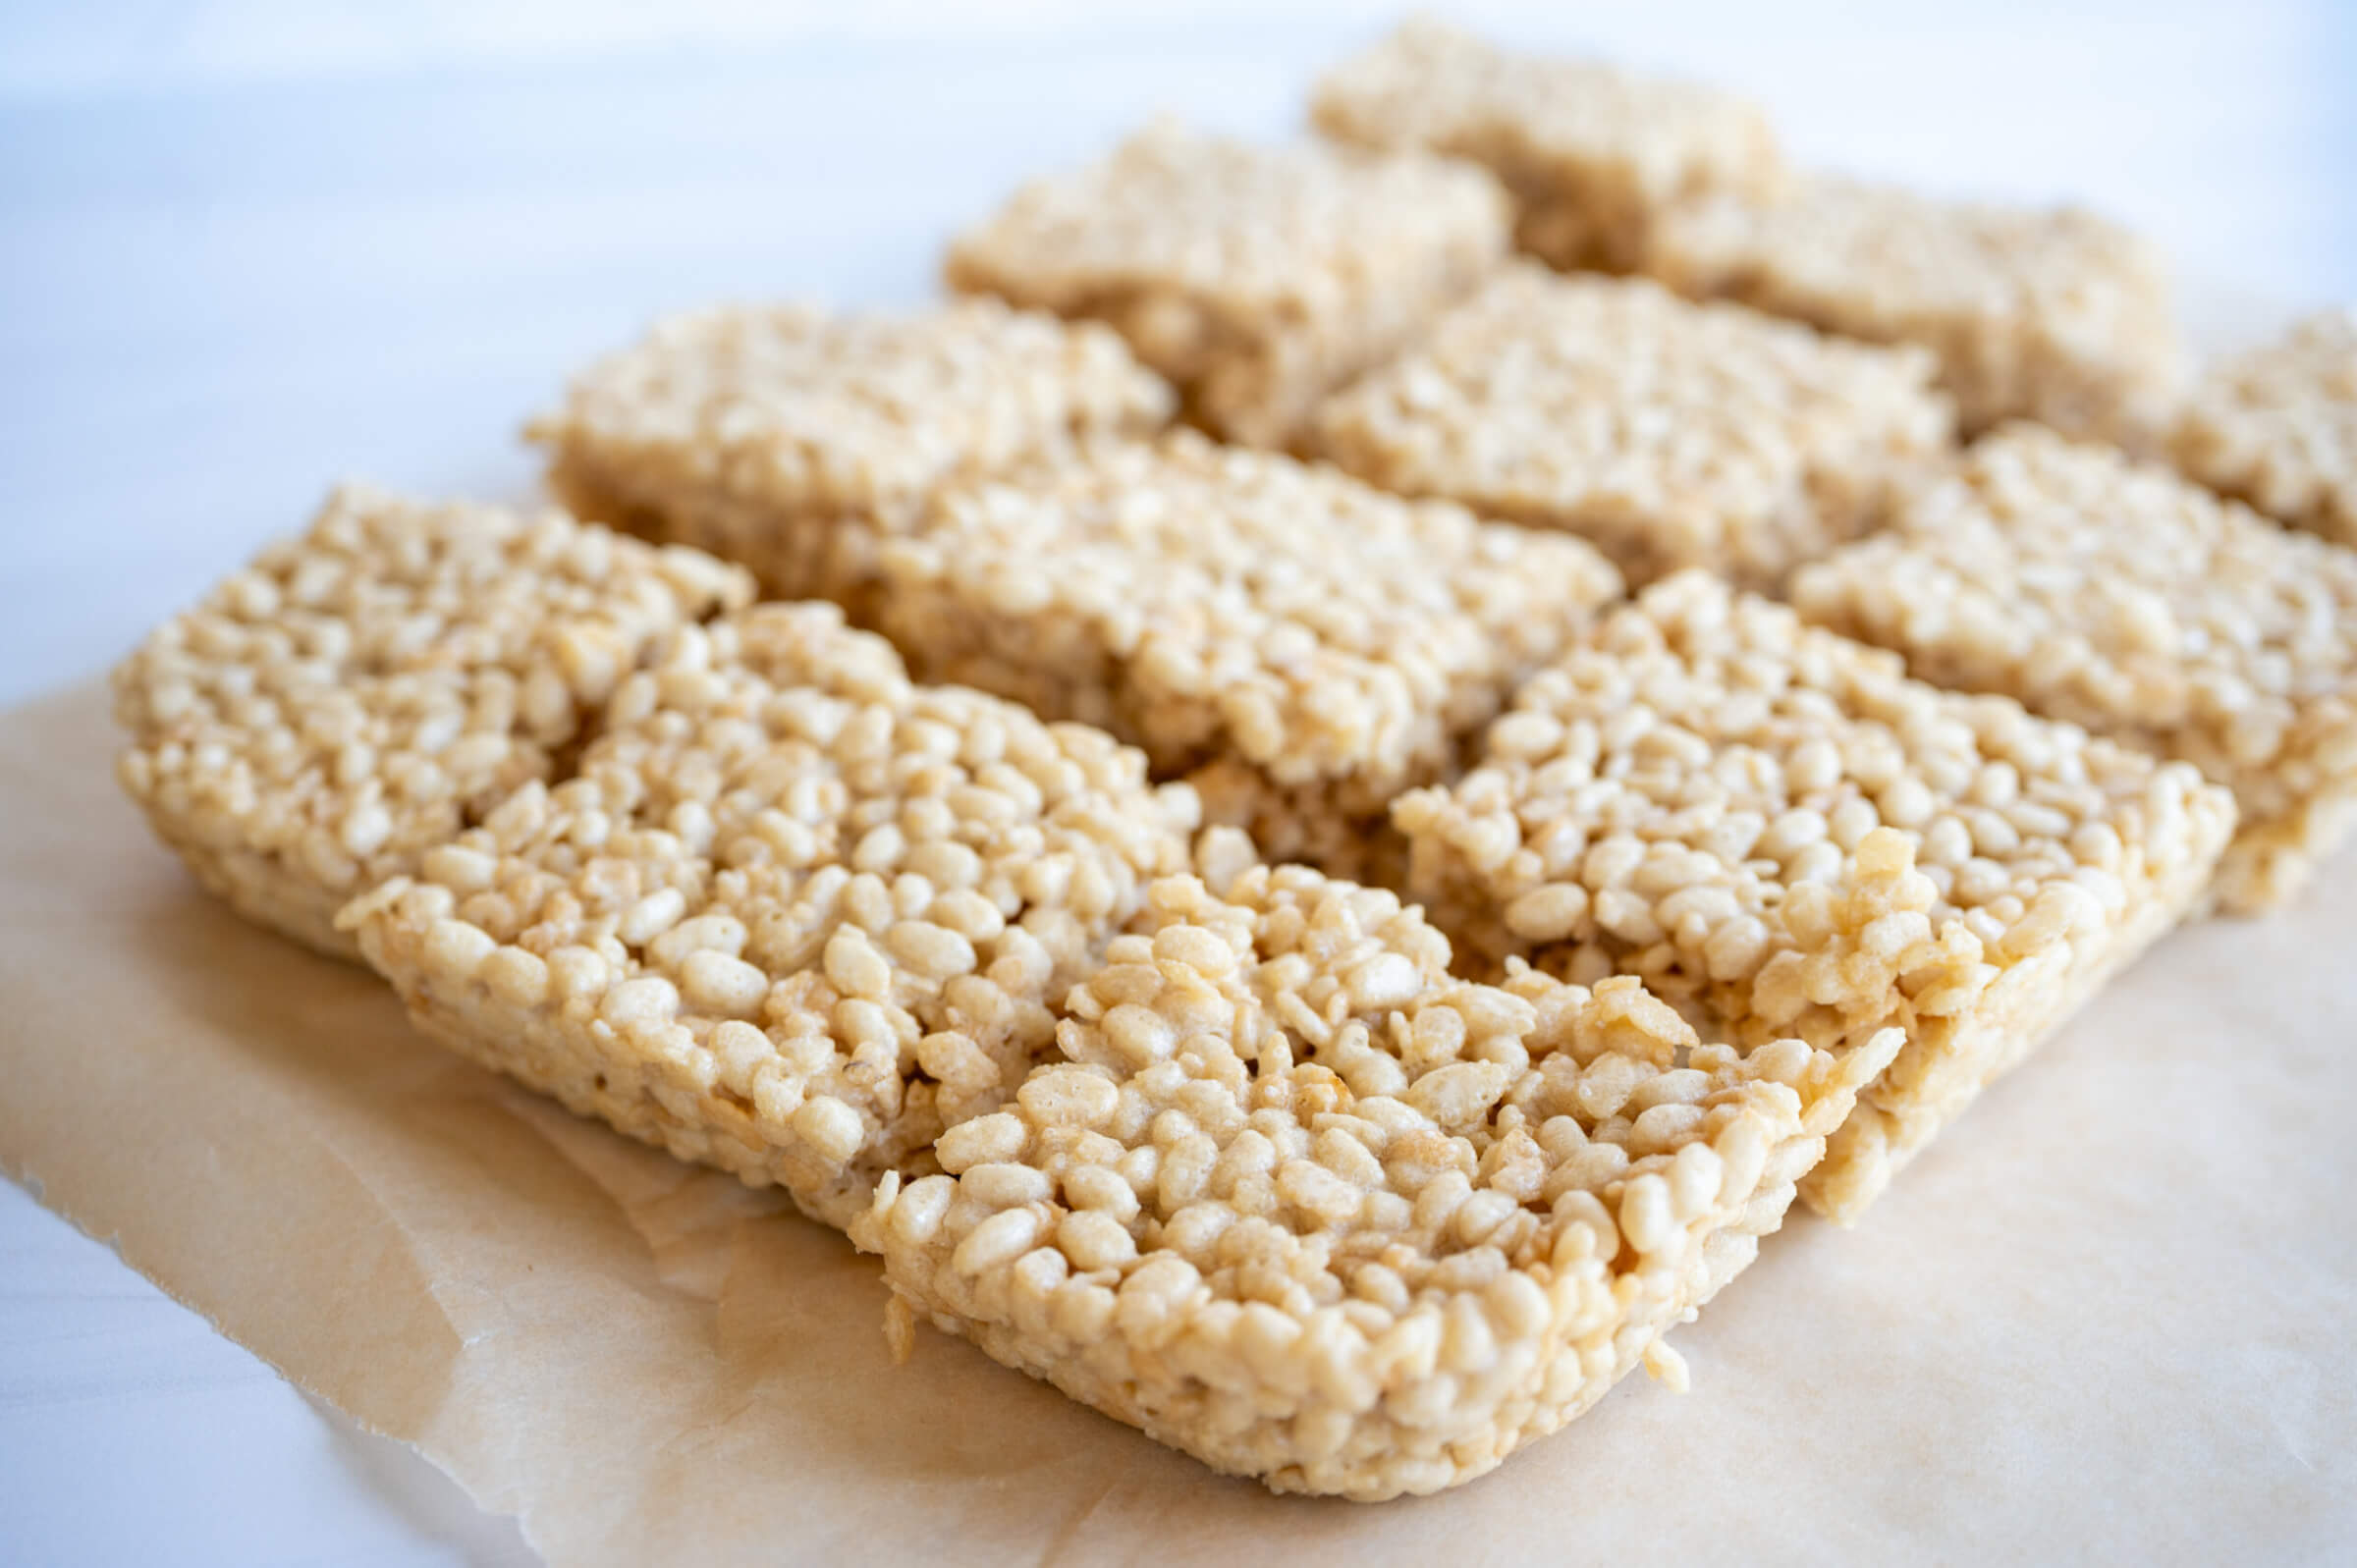
There’s something just so nostalgic about biting into a gooey Rice Krispie treat. And while I remember them from my childhood, they’re not something that I’ve had in many years. Until now that is. This homemade, healthy Rice Krispie treat recipe is a new favorite in our house. 

The Rice Krispie treats from the store are usually a little hard and not so fresh tasting. You’ll find ingredients like corn syrup, GMO soybean oil, artificial flavors, and acetylated monoglycerides… whatever that is. And many of the homemade Rice Krispies treats, while they taste good, aren’t much healthier. 

An Upgraded Rice Krispies Treat Recipe 

One of the questions I get all the time is how to use my homemade marshmallows recipe to make Rice Krispie treats. And honestly that’s not something I’d ever tried. For years my family avoided grains as I was in a healing phase. Now that grains are back in my diet on occasion, that means I’ve been experimenting with more grain-based recipes. 

Of course, this doesn’t mean I’m eating glyphosate covered, artificially fortified white flour all the time. It’s about balance, but I still choose healthier options when I can. So for this recipe that means the name brand (or store brand) rice crispy cereal is out. Instead I used sprouted brown rice cereal. 

Yes, it’s still cereal and not as nutritious as a grass-fed steak, but I’m ok with it for the occasional treat. Sprouted grains are easier for our body to digest. This cereal is organic, non-GMO, and sweetened with just a touch of coconut sugar. I’ve linked to the kind I used in the recipe below, but you can also use organic rice cereal from your local store if that’s all they have. 

Homemade Marshmallows

My marshmallow recipe base is sweetened with honey instead of sugar. They feature gut healthy, grass-fed gelatin and real marshmallow root for more gut soothing benefits. I’ve experimented over the years with variations like elderberry, matcha, and even hibiscus rose marshmallows. 

The marshmallow portion of the Rice Krispie treats recipe is very similar, but you don’t have to press them into a pan and let them set first. After whipping up the marshmallow mixture, simply add it to melted butter and stir in the cereal. 

Homemade Rice Krispie Treat Variations

The kids and I love this recipe as is. In fact, the first time I made a batch the kids devoured them within minutes! However, you can also add some ingredients if you want a different flavor. 

Try sprinkling some flaky sea salt on the top for a salty, sweet treat. Or drizzle the top with melted dark chocolate (and then sprinkle with salt!). Sometimes I’ll gently press mini chocolate chips onto the top before they’ve really hardened. Work quickly with this one though or you’ll just end up with melted chocolate all over your hand! I haven’t tried it here, but some people like adding ¼ cup of creamy peanut butter when stirring in the marshmallows to the butter. 

For another depth of flavor, try browning the butter first before adding the marshmallows. It gives it a caramel-like taste! I give more details on how to brown butter in this pistachio chocolate chunk cookie recipe. 

Here’s how to make healthier, naturally sweetened rice treats with homemade marshmallow!

Rice Krispie Treats Recipe (With Homemade Marshmallow)

This healthier, naturally sweetened version of rice krispie treats is a kid (and parent!) favorite.

Homemade Marshmallow Base

  • Line a 9×13-inch baking dish with parchment paper and set aside.

  • Pour ½ cup of the cold water into the bowl of a stand mixer. Sprinkle the gelatin evenly over the water and let it sit while you prepare the honey syrup.

  • In a small saucepan, combine the remaining ½ cup of water, honey, and sea salt.

  • Bring the mixture to a gentle boil over medium heat. Simmer for 7-8 minutes, until slightly thickened.

  • Turn the mixer on low speed. Carefully and slowrly pour the hot honey syrup into the gelatin mixture.

  • Gradually increase the mixer speed to high. Whip for 8-10 minutes, until thick, glossy, fluffy, and marshmallow-like. Add the vanilla extract during the last minute of mixing.

  • While the marshmallow is whipping, melt the butter in a large pot over low heat.

  • Add the whipped marshmallow mixture to the melted butter and stir until combined.

  • Fold in the crispy rice cereal until evenly coated.

  • Transfer the mixture to the prepared baking dish. Using lightly buttered hands or a piece of parchment paper, gently press into an even layer.

  • Sprinkle with flaky sea salt if desired. Let cool for about 30 minutes before slicing into squares and serving.

Nutrition Facts

Rice Krispie Treats Recipe (With Homemade Marshmallow)

Amount Per Serving (1 square)

Calories 135
Calories from Fat 27

% Daily Value*

Fat 3g5%

Saturated Fat 2g13%

Trans Fat 0.1g

Polyunsaturated Fat 0.2g

Monounsaturated Fat 1g

Cholesterol 8mg3%

Sodium 118mg5%

Potassium 26mg1%

Carbohydrates 26g9%

Fiber 0.1g0%

Sugar 18g20%

Protein 2g4%

Vitamin A 786IU16%

Vitamin C 7mg8%

Calcium 4mg0%

Iron 3mg17%

* Percent Daily Values are based on a 2000 calorie diet.

  • The optional flaky sea salt turns this into an amazing salty sweet treat. 
  • Try drizzling the top with some melted dark chocolate for a more decadent dessert.

How to Store Homemade Rice Krispie Treats

Homemade Rice Krispie treats store best at room temperature. Keep them in an airtight container and enjoy within 4-5 days. However, if your house is like mine, they won’t last long!

What are your favorite Rice Krispie treat flavors? Ever made them before? Leave a comment and share below!

Tags: , , , , ,
Healthy_Homemade_Fudgsicles

Homemade Fudgesicles Recipe (Clean Ingredients)

Growing up in the south, summer days meant swimming in the pool, late nights, and frozen treats. And while you won’t find me reaching for the frozen fudgesicles at the local store, these homemade fudge pops are the perfect healthy solution. 

I have plenty of popsicle recipes and they’re a big hit around our home. Fudgesicles are creamier and richer with their frozen chocolate fudge taste. I like mine only mildly sweet, but you can adjust the sweetness with raw honey and the kind of chocolate used. 

Homemade Fudgesicles

Real food just tastes better. Like many kids, I was a fan of fudge pops growing up. However, once I switched to whole foods I realized the junk food just didn’t taste as good. 

Homemade fudgesicles not only taste better, but they’re simple to pull together and healthier. You can even make several batches at once to freeze for later. My kids love these! And I’ll keep treats like this stashed in the freezer to pull out when the neighbor kids stop by to play (which is constantly!). 

Fudge Pop Ingredients

A lot of the recipes I saw used things like prepackaged instant pudding mix. Just read the ingredients list on the back of the box and you’ll see why I’d rather skip that. These fudgesicles instead use real chocolate, both chocolate chips and cocoa powder. 

I also used raw whole milk and full-fat canned coconut milk for that rich, creamy taste. If you want yours even creamier, use coconut cream instead of coconut milk. Whole milk is higher in healthy fats for that creamy mouth feel. However, you can use your favorite dairy-free milk if you need a dairy-free version. 

Sweet, Sweet Chocolate

Chocolate has some pretty impressive health benefits… when it’s not drowning in sugar. Semi-sweet or bittersweet chocolate both work well in this recipe. Choose a chocolate you enjoy eating on its own since the flavor really shines through. I prefer really dark chocolate, but you may like something a little sweeter. 

For a sweeter version, add honey a little at a time until it reaches your preferred sweetness. One to two tablespoons works well if you want to add honey. 

Homemade Fudgesicles Recipe

  • Combine the coconut milk, milk, cocoa powder, and sea salt to a small saucepan. Whisk until the cocoa is fully incorporated and no lumps remain.

  • Heat over medium-low heat until the mixture is steaming and just beginning to bubble around the edges. There’s no need to boil it.

  • Remove the pan from the heat and stir in the chopped chocolate. Continue whisking until the chocolate melts completely and the mixture is silky smooth.

  • Taste and add honey if desired, stirring until dissolved.

  • Fill the popsicle molds. Allow the mixture to cool slightly before pouring it into popsicle molds. This helps it thicken slightly and prevents separation.

  • Insert sticks and freeze until completely firm, about 6 hours or overnight.

Nutrition Facts

Homemade Fudgesicles Recipe

Amount Per Serving (1 fudgesicle)

Calories 310
Calories from Fat 225

% Daily Value*

Fat 25g38%

Saturated Fat 18g113%

Trans Fat 0.01g

Polyunsaturated Fat 1g

Monounsaturated Fat 4g

Cholesterol 4mg1%

Sodium 27mg1%

Potassium 397mg11%

Carbohydrates 20g7%

Fiber 5g21%

Sugar 12g13%

Protein 4g8%

Vitamin A 48IU1%

Vitamin C 1mg1%

Calcium 59mg6%

Iron 4mg22%

* Percent Daily Values are based on a 2000 calorie diet.

To release the fudgsicles, briefly run warm water over the outside of the molds. Gently pull on the sticks and serve immediately.

Shelf Life and Storage

Since they’re a frozen treat, you’ll obviously want to keep them in the freezer. They’ll stay fresh for several weeks when stored in an airtight container. You can even make several batches at once and freeze them for later.

More Popsicle Recipes

Here are some more of our family’s favorite sweet treats on hot days!

What are some of your favorite treats for hot days? Leave a comment and let us know!

Tags: , , , ,
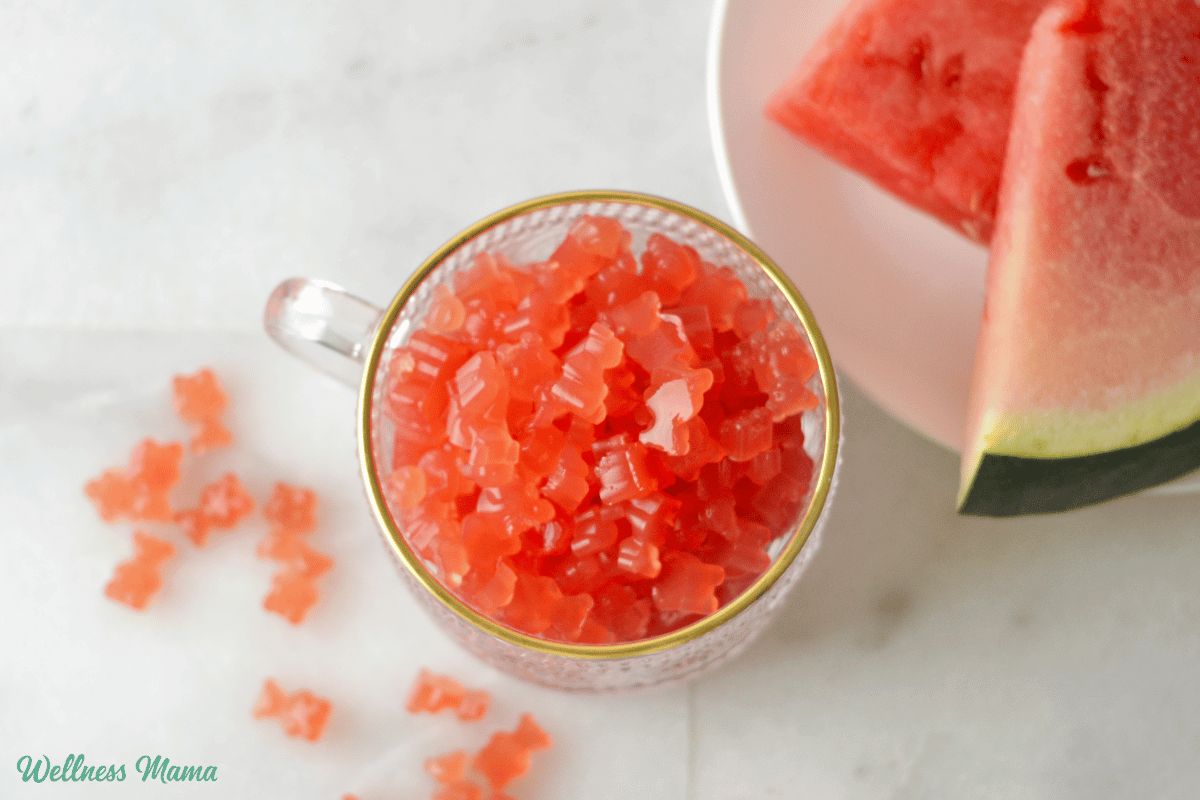
watermelon electrolyte gummies

Homemade Electrolyte Gummies Recipe

My kids love homemade gummies and I’m quite the fan myself. They’re a fun way to get gummy candy without the processed ingredients and refined sugar. This version has a delicious fruity flavor and adds electrolytes for better hydration.

Electrolyte Gummy Benefits

In the past few years it seems like there’s a gummy version of almost everything. You can get gummy multivitamins, gummy ACV, and gummy beets. And while people love their gummies, they often contain processed sugars and fillers I’d rather avoid. 

I’ve made a lot of gummies to target a variety of health complaints or just for general wellness. (See the bottom for a full list!). I wanted to try something a little different this time though and incorporate electrolytes like potassium, magnesium, and sodium. We need these all of the time, but we can especially get depleted during hotter months. And if you’re really active or use a sauna, these health habits can deplete electrolytes even more. 

We need electrolytes to power our cells, have energy, and do basically everything in the body. I’ve come to the realization that we are electrical beings first and biomechanical second! So the more that I can do to support that, the better. 

Electrolyte Gummy Ingredients

This ingredient list focuses on nutrient dense, whole food ingredients that taste delicious.

  • Watermelon – Has vitamin A, potassium, magnesium, and antioxidants like vitamin C, carotenoids, lycopene, and cucurbitacin E. It’s really hydrating and there’s some evidence it’s antioxidants help with cancer prevention.
  • Coconut water – Loaded with potassium and has some magnesium and sodium too. You’ll also find phosphorus, vitamin C, and calcium.
  • Electrolyte powder – My favorite is LMNT. It offers a concentrated and balanced blend of magnesium, sodium, and potassium. Most brands don’t have the levels our body actually needs to hydrate.  
  • Raw Honey – Adds a touch of sweetness, antioxidants, and antimicrobial benefits. 
  • Gelatin – Grass-fed gelatin offers naturally occurring collagen for healthier skin, hair, nails, and gut function. 

How To Make Electrolyte Gummies

There are a few different ways to make these. Option 1 is to use watermelon that’s been blended and strained. This creates a thin juice for a more traditional gelatin gummy. Or you can not strain the pulp out to create a higher fiber version. The texture is obviously different, but either way works. 

Tips For Using Gelatin

It’s also important to let the gelatin “bloom” first. This way it dissolves into the liquid instead of getting clumpy and grainy. Just sprinkle the gelatin on top of the juice and wait until it’s absorbed and looks like a wrinkly layer on top. Another tip when making gummies is to not stir too vigorously after adding the gelatin. You want to combine the ingredients, but overwhisking can make it really foamy. 

Some readers ask about a vegan version and I’ve heard agar agar powder works, though I haven’t personally tried it. I’m a big fan of grass-fed gelatin for its health benefits so that’s what I use and recommend. 

Fruity Electrolyte Gummies

These delicious electrolyte gummies are a fun way to get more hydration. Featuring vitamins, minerals, antioxidants, and electrolytes for maximum nourishment!

  • Blend the watermelon until smooth. Pour through a strainer to remove the larger pieces of pulp. You can also leave the fiber in if preferred.

  • Add the fruit juice, coconut water, electrolytes, and honey to a pot and stir to combine. It’s ok if the honey doesn’t fully mix in yet.

  • Evenly sprinkle the gelatin over the top. Allow it to bloom for a minute or until it looks absorbed into the liquid.

  • Gently heat the mixture over low heat, whisking until dissolved.

  • Pour the liquid into your molds and let harden in the fridge for several hours, or until firm.

Nutrition Facts

Fruity Electrolyte Gummies

Amount Per Serving (2 TBSP)

Calories 19
Calories from Fat 1

% Daily Value*

Fat 0.1g0%

Saturated Fat 0.02g0%

Polyunsaturated Fat 0.01g

Monounsaturated Fat 0.01g

Sodium 56mg2%

Potassium 4755mg136%

Carbohydrates 3g1%

Fiber 0.2g1%

Sugar 3g3%

Protein 2g4%

Vitamin A 108IU2%

Vitamin C 2mg2%

Calcium 5mg1%

Iron 0.1mg1%

* Percent Daily Values are based on a 2000 calorie diet.

  • If you don’t have a silicone mold, then grease a glass baking dish and use that instead. Cut the gummies into squares before serving.
  • This recipe makes a little over 3 cups of liquid. The exact amount of gummies depends on the size of your molds. 

The Best Electrolyte Powder

I use LMNT because it uses research backed, balanced amounts of potassium, magnesium, and sodium. They have some delicious flavors or you can use their unflavored “raw” version. Another option is to make your own with their recipe here.

For this recipe I used their Watermelon Salt flavor, but the Lime Salt would taste really good too.

More Gummy Recipes

Here are some more gummy recipes to try. Some are for specific health complaints, but many are just for overall nutrition. 

Do you prioritize getting enough electrolytes? What are some ways you’ve found to do that? Leave a comment and share below!

Tags: , , ,
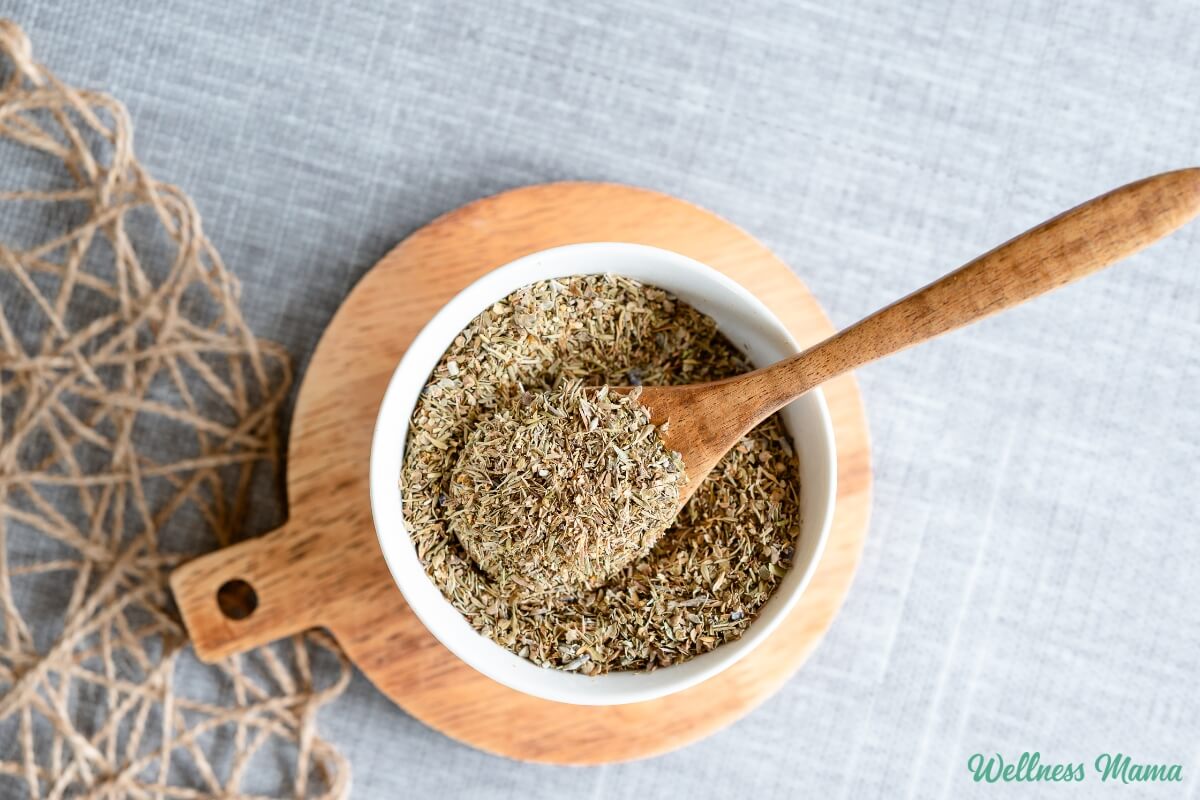
How to Make Herbes de Provence at Home

Homemade Herbes de Provence Spice Mix Recipe

I’m never without homemade herbes de Provence in our kitchen. Abundant in the south of France, this spice mix really speaks to my love of French cooking. I use it in just about anything I can!

My mom’s French heritage was a big influence growing up, and because of her, I will always have a soft spot for French dishes like boeuf bourguignon and pâté. I’m no Julia Child (or even Martha Stewart for that matter!), but I do try to incorporate French recipes in our meal plan whenever possible.

Many people think French cooking is fussy or difficult, but it doesn’t have to be. 

The French Cure for Picky Eaters

I’ve always been fascinated by French food culture and how even children in France typically like a wide variety of foods. We can learn a lot from the French, especially in how we teach our children to view food. I actually devoted a part of my Wellness Mama Cookbook to this topic!

A big part of raising non-picky eaters is exposing kids to well-rounded, varied flavors—like those in this seasoning blend. 

What is Herbs de Provence?

The blend originated in the south, or Provence region, of France, and is made up of herbs that naturally grow in that area. The original blend of herbs de Provence ingredients contained summer savory, thyme, marjoram, and rosemary. Later on, lavender, fennel, and even orange zest were added to certain versions. Many of the herbs de Provence spice blends at the grocery stores include lavender and other herbs. 

Not only do they taste good, but these herbs have strong antimicrobial properties to help the immune system do its job. Among many other things, rosemary helps with memory, thyme is great for the lungs, and marjoram helps relax nervous tension. Lavender is also good for stress relief, orange zest is uplifting, and fennel helps aid digestion. Together, they make for a powerful and tasty spice blend. 

Herbs de Provence vs Italian Seasoning

While I love both seasonings, they definitely have some differences. Italian seasoning also includes thyme and rosemary, but you’ll often find spicy oregano and basil in there too. And most versions of Italian seasoning don’t include marjoram or summer savory (and certainly not lavender)!

If you need an herbs de Provence substitute, the simplest recipe is summer savory, thyme, marjoram, and rosemary.

How to Make Herbs de Provence

It’s very simple, but it does require an extra step compared to many of my spice blend recipes. Usually I just add all of the herbs to a jar, shake, and voila… done. Since these herbs are often whole, like fennel seeds or lavender buds, I do a quick run through the food processor first. Not only does it make them easier to use in recipes, but freshly ground herbs are more fragrant and flavorful. Blending or chopping herbs releases more of their volatile oils so they taste fresher. 

So what is herbes de Provence for anyway, besides sounding fancy? The answer is a lot!

How to Use This Homemade Seasoning

Herbes de Provence is very versatile. It can be described as bold, woodsy, and a little bit floral. It pairs well with almost any cut of meat (especially pork and chicken recipes) and really complements most fish and seafood. I often add it to homemade soups and broths too.

We love to pre-mix a little into grass-fed butter and keep it at the ready for topping veggies, sourdough bread, or cauliflower rice. It also makes a great addition to breakfast dishes like my favorite sous vide egg bites or homemade breakfast sausage.

Try adding herbs de Provence compound butter to a roast chicken before putting it in the oven. Since the herbs are chunkier, not quite powdered, they work best when added to the beginning of recipes. This gives them a chance to infuse their flavors into the dish. It’s equally delicious on roasted vegetables or potatoes. 

A bonus… not only is it healthy and tastes good, but it fills the kitchen with amazing smells!

You can certainly buy it from the store, but this homemade herbes de Provence spice blend and other homemade spice blends are a great way to save time and money. And this way, you know exactly how long it’s been sitting on the shelf! It’s also a fun and easy kitchen project kids can help make.

Homemade Herbs de Provence Recipe

Homemade herbs de Provence combines herbs like thyme and marjoram with lavender, fennel, and orange zest for a savory and flavorful spice blend.

  • Use a mortar and pestle or a food processor to lightly grind any herbs that are whole, such as the rosemary, lavender flowers, or fennel. The herbs should be coarse, not finely ground.

  • If you are zesting the orange yourself, remove the zest of one organic orange and dry it in an oven on lowest setting or a dehydrator until completely dry.

  • Combine all ingredients in a jar or bowl and mix.

  • Store in an airtight container away from heat and light.

Nutrition Facts

Homemade Herbs de Provence Recipe

Amount Per Serving (1 tsp)

Calories 9
Calories from Fat 2

% Daily Value*

Fat 0.2g0%

Saturated Fat 0.1g1%

Polyunsaturated Fat 0.04g

Monounsaturated Fat 0.01g

Sodium 2mg0%

Potassium 28mg1%

Carbohydrates 2g1%

Fiber 1g4%

Sugar 0.04g0%

Protein 0.3g1%

Vitamin A 131IU3%

Vitamin C 2mg2%

Calcium 60mg6%

Iron 3mg17%

* Percent Daily Values are based on a 2000 calorie diet.

  • Mix a teaspoon or two of this flavorful herb blend into softened butter for topping vegetables, season chicken or seafood, or use it to make your own breakfast sausage. 
  • The total yield for this recipe is about 1/2 cup plus 2 teaspoons of herbs de Provence. 

Herbs de Provence Alternate Recipe

I’ll often buy my herbs in bulk online, but sometimes savory can be difficult to find at your local store. If you’re looking for a recipe without summer savory or just something new to try, I like this blend too. Simply process, mix, and store like the above recipe. All of the following herbs are dried:

  • 2 TBSP thyme
  • 2 TBSP rosemary
  • 1 TBSP basil
  • 1 TBSP oregano
  • 1 TBSP summer savory (optional but traditional)
  • 1 tsp marjoram (optional)
  • 1 tsp lavender buds (optional)

Have you ever used herbes de Provence? What French flavors do you love?

Tags: , , , , ,
Jalapeno salt recipe, how to make jalapeno salt, homemade jalapeno salt Jalapeno salt seasoning, for margaritas, smoked jalapeno salt

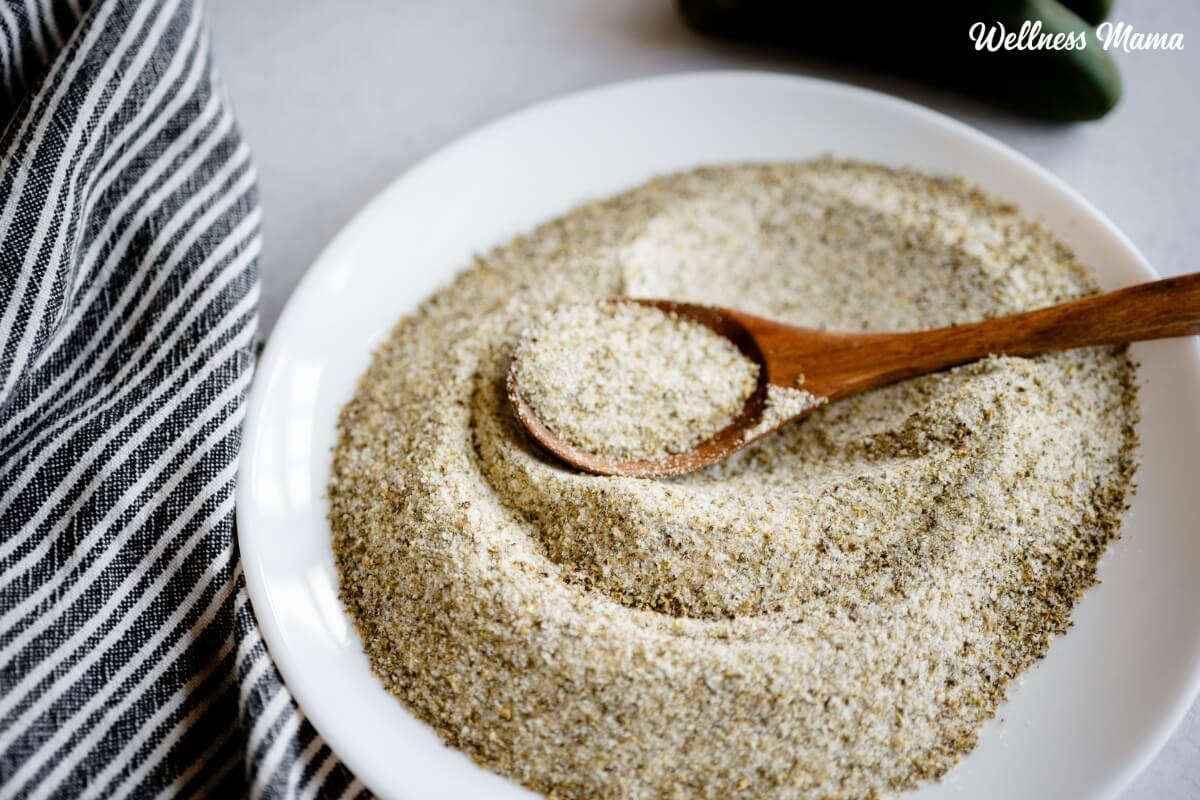
Homemade Jalapeño Salt (Easy Mineral-Rich Spicy Seasoning)

Sometimes you just need to spice things up a little. This jalapeno salt recipe will do just that. With simple ingredients it’s full of healthy minerals and the perfect seasoning for meats, veggies, or even fruit.

You can easily control the spice level here and either use a little or a lot on your foods. Even my older kids like sprinkling some on their meals.

How to Make Jalapeno Salt

This homemade jalapeno salt is exactly what it sounds like: mineral-rich salt blended with dried jalapeños for a simple but flavorful seasoning. It’s one of those small kitchen upgrades that makes everyday meals feel special without adding extra work.

The process is surprisingly straightforward. Slice the peppers, dry them completely until they’re brittle, then blend with salt until finely ground. That’s it. The salt pulls the flavor from the jalapenos and also helps keep the peppers dry. 

Homemade Jalapeno Salt Seasoning

Jalapeno seasoning is like an all-purpose finishing salt with a kick. I love it sprinkled over grilled chicken, roasted vegetables, scrambled eggs, or sliced avocado. It’s also delicious on fresh fruit like mango or watermelon if you like that sweet-and-spicy combination.

You can try it for margaritas too. If you’re the type who likes margaritas, it makes a great rim salt before serving. You can also stir a small amount into soups or taco meat for an easy flavor boost without needing multiple spices. 

The nice thing about homemade jalapeno salt is that it’s easy to be in control. For a milder blend, remove the seeds and membranes before drying the peppers. If you prefer more heat, keep them in. 

And if you’re sensitive to spice, wear a mask while blending since the fine jalapeño dust can be surprisingly strong. I also recommend wearing gloves when cutting up the peppers! The oils from the hot peppers can quickly start to burn your hands. Also, don’t touch your eyes when cutting. That’s never a fun thing to experience!

If you’re using Celtic sea salt, keep in mind that it’s naturally more moist than other mineral salts. If it feels damp, spread it on a baking sheet to air dry for several hours or warm it gently in the oven on the lowest setting for 10–15 minutes before blending. Excess moisture can lead to clumping and shorten shelf life.

Jalapeno salt is an easy and delicious way to turn up the heat on your favorite foods!

Jalapeno Salt

Jalapeno salt is a delicious spicy seasoning that adds a flavorful kick to meat, veggies, and even fruits like watermelon and mango.

  • Wash and dice fresh jalapeños. Spread evenly on dehydrator trays and dehydrate at 125°F for 6–10 hours, until fully dry and brittle.

  • Add dried jalapeños to a food processor and pulse 2–3 times to break them into smaller pieces. (Skip if you prefer a very fine salt.)

  • Add mineral salt to the processor.

  • Pulse until fully combined and the texture is to your liking. Less blending keeps it chunky; more blending creates a finer seasoning.

  • Transfer to an airtight container and store in a cool, dark place.

Nutrition Facts

Jalapeno Salt

Amount Per Serving (0.5 tsp)

Calories 0.4

% Daily Value*

Fat 0.004g0%

Polyunsaturated Fat 0.002g

Sodium 786mg34%

Potassium 3mg0%

Carbohydrates 0.1g0%

Fiber 0.01g0%

Sugar 0.1g0%

Protein 0.02g0%

Vitamin A 9IU0%

Vitamin C 1mg1%

Calcium 1mg0%

Iron 0.02mg0%

* Percent Daily Values are based on a 2000 calorie diet.

  • If you’re starting with already dehydrated jalapenos, then use 1/2 cup. 
  • This recipe yields about 1 and 1/2 cups of jalapeno salt.

Flavor Twist Options

Once you know how to make jalapeno salt, it’s easy to customize. Here are some more flavor options to try. 

  • Smoked jalapeno salt –  To make smoky jalapeno salt, lightly roast the jalapeños at 250°F for 20–30 minutes before dehydrating for deeper flavor.
  • Garlic jalapeno salt – Add 1–2 teaspoons of garlic powder after blending.
  • Citrus jalapeno salt –  Mix in 1 teaspoon of fully dried lemon or lime zest for brightness
  • Herbal jalapeno salt – Mix in ½–1 teaspoon dried oregano or cilantro

Storage and Shelf Life 

Store the finished salt in an airtight container in a cool, dark cupboard. Thanks to salt’s natural preserving qualities, it keeps well for over a year when stored properly.

What are your favorite seasonings to use on food? Leave a comment and let us know!

Tags: , , , , , ,
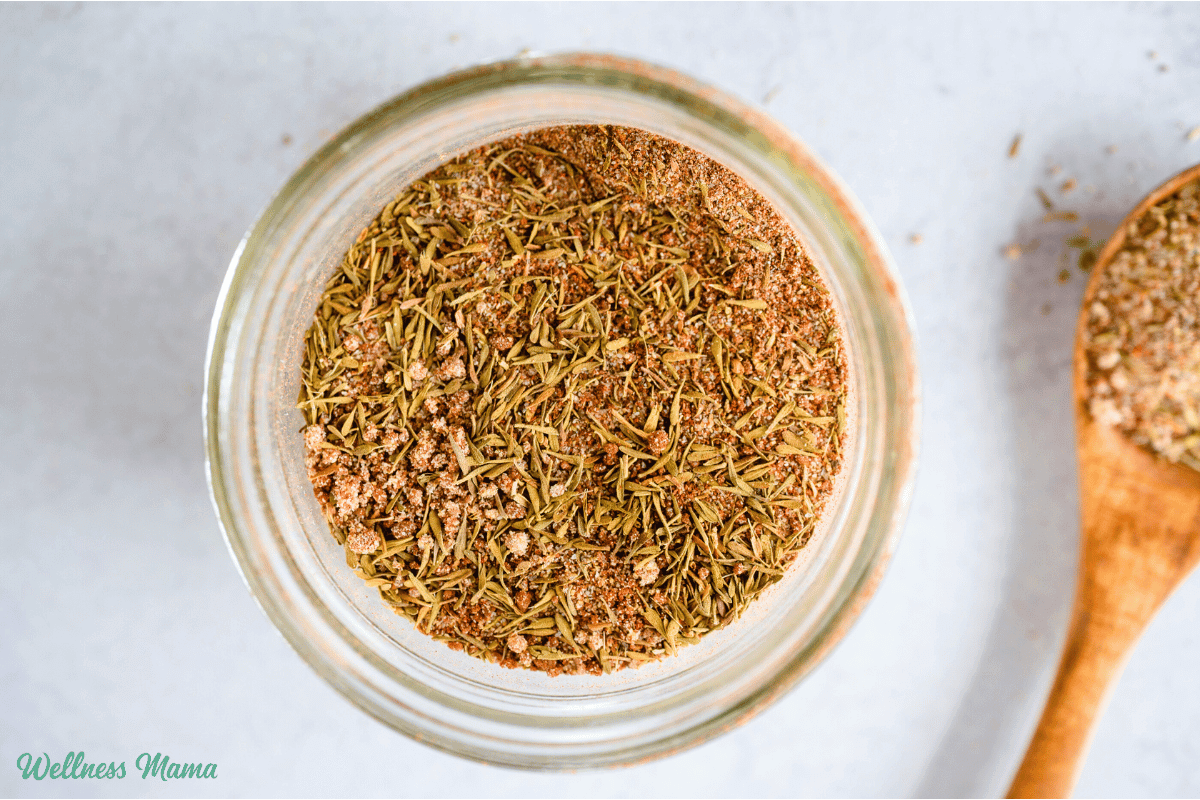
jerk seasoning

Homemade Jerk Seasoning Recipe

I resisted trying Jamaican jerk seasoning for years. It seemed strange to me to add cinnamon to savory dishes. Then, I was introduced to Cincinnati-style chili, which also uses cinnamon in a savory dish (along with chocolate!). I realized cinnamon really could get along with savory flavors. 

I figured if I could learn to love cinnamon in chili, I could learn to like it in chicken or other dishes as well. So I attempted to make Jamaican jerk chicken seasoning at home. My first try wasn’t successful. It turns out, cinnamon has to be kept in a very careful balance. Too much, and it overwhelms everything else.

Since then, I’ve perfected the recipe and really love the sweet, spicy, and cinnamon combination of this spice blend. These flavors can be an acquired taste, so don’t give up if they seem strange at first. A good Caribbean jerk seasoning balances heat, sweetness, and earthiness in a way that’s bold but still versatile.

What Is Jerk Seasoning?

Traditionally, it’s a bold Jamaican spice blend used to season meats, especially chicken and pork, before grilling or smoking. Authentic blends can be made as a dry powder or a paste, depending on how it’s used. This homemade jerk seasoning version uses pantry spices so it’s easy to keep on hand and customize to your tastes. 

What Is Jerk Seasoning Made Of?

While recipes vary, classic jerk seasoning ingredients often include allspice, thyme, garlic, onion, cinnamon, nutmeg, cloves, and a spicy element like cayenne or Scotch bonnet peppers.

The three main ingredients of jerk seasoning are allspice, thyme, and hot peppers as the core flavors, with supporting spices layered in. So what gives jerk its flavor? The signature taste comes from the warm, aromatic spices (especially allspice and cinnamon) combined with heat, herbs, and a touch of sweetness. It’s that mix of spicy, savory, and slightly sweet that makes jerk seasoning so distinctive (and addictive!). 

How to Make Jerk Seasoning at Home

If you’re wondering how to make jerk seasoning, the good news is that it’s simple to mix as a dry spice powder. You can also blend the spices into a paste with oil, vinegar, and/or honey. A Jamaican jerk seasoning recipe can be customized for heat level and sweetness, depending on your family’s preferences.

This seasoning is usually added to chicken, but it’s also great on roasted vegetables, other meats, and even grilled seafood. I love mixing this seasoning with equal parts honey and coconut oil to make a marinade or rub. I’ll use it on different meats and vegetables, especially when grilling. The combo of sweet, spicy, and earthy adds a caramelized, smoky flavor that’s hard to beat.

Jerk Seasoning Recipe

Homemade Jamaican jerk seasoning recipe with onion powder, cinnamon, allspice, and other herbs provides depth and flavor to many dishes.

Nutrition Facts

Jerk Seasoning Recipe

Amount Per Serving

Calories 3

% Daily Value*

Sodium 39mg2%

Carbohydrates 0.6g0%

Fiber 0.2g1%

Sugar 0.2g0%

Protein 0.1g0%

* Percent Daily Values are based on a 2000 calorie diet.

Try mixing the seasoning with equal parts honey and coconut oil to rub onto meat or other food.

Another Variation

I’ve played around with this recipe over the years and the above is the updated version. If you’re looking for the original that has a stronger onion and cinnamon flavor, then give this a try.

What Is the Closest Thing to Jerk Seasoning?

Looking for a substitute for jerk seasoning? If you don’t have all the spices on hand, a mix of allspice, thyme, garlic powder, onion powder, and cayenne is a good starting point. It won’t be identical to an authentic blend, but it captures the general flavor profile.

If this just isn’t your thing, check out my other homemade herb and spice blends to replace pricey store-bought spice blends. Making your own lets you control the ingredients, skip fillers, and adjust the flavors. Plus, once you start experimenting with spice blends like this, it’s hard to go back to pre-made mixes.

Ever used Jamaican jerk seasoning? What are your favorite ways to use it? Leave a comment and let us know!

Tags: , , ,
Best oLive
Privacy Overview

This website uses cookies so that we can provide you with the best user experience possible. Cookie information is stored in your browser and performs functions such as recognising you when you return to our website and helping our team to understand which sections of the website you find most interesting and useful.