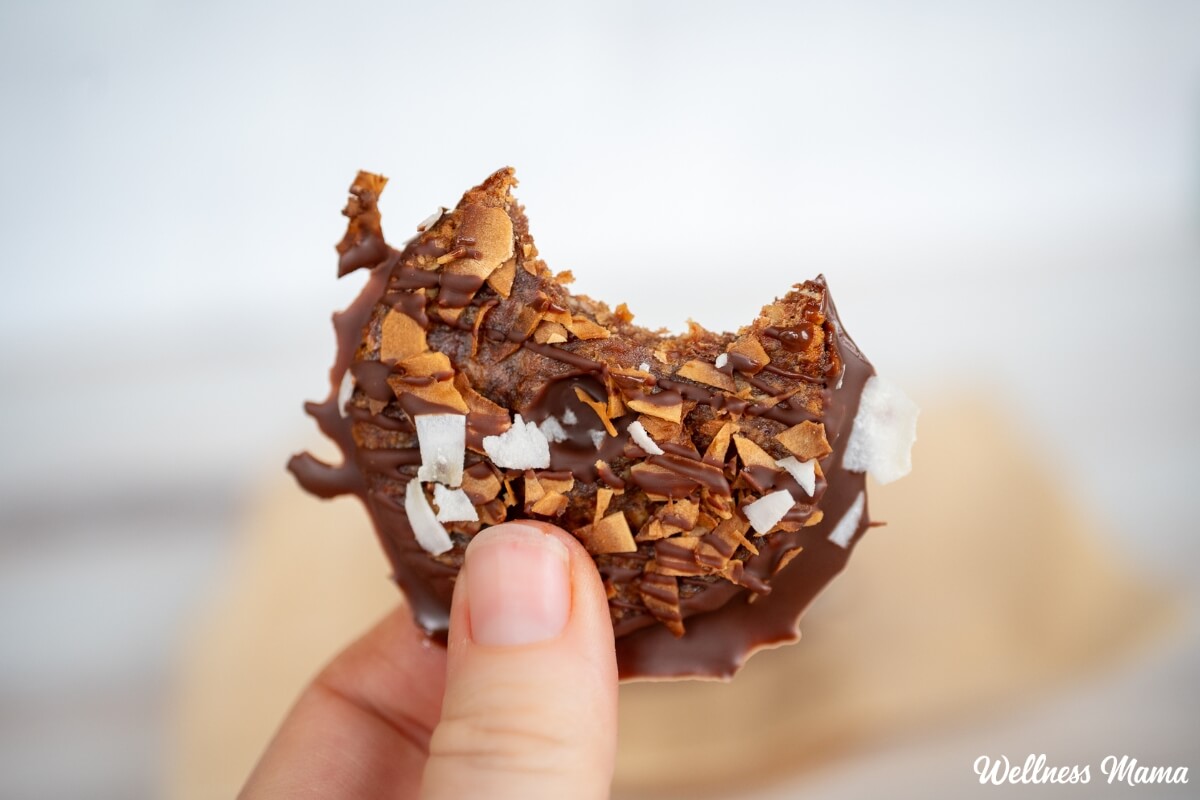
Samoas_Recipe

Healthier Homemade Samoas Cookies Recipe

Girl Scout cookies are popular this time of year. It’s estimated that over 200 million of those crunchy, chewy, addictive small boxes sell every year. What’s not so tasty are the ingredients and pesticide residues they contain. 

If you’re a fan of chewy coconut, caramel, and rich chocolate Samoas, then you’ll love this healthier take. It’s made with real-food ingredients but tastes even better (in my opinion). I’ve always been a big coconut fan and use it in everything from skincare to desserts for its healthy fats.  

This healthier homemade Samoas cookies version delivers on flavor and quality. It’s inspired by traditional Samoas cookies and makes an easy Samoas recipe you can enjoy year-round, not just during cookie season. Plus, it’s grain-free, uses natural sweeteners, and has a texture that’ll satisfy any coconut lover.

What Are Samoas Cookies and Why Make a Homemade Version?

Samoas are a beloved variety of Girl Scout cookies with toasted coconut, caramel, and chocolate. In some areas they’re labelled Caramel deLites or coconut Girl Scout cookies, but the flavor profile remains the same. They’re sweet, chewy, and irresistible. However, the first ingredient is sugar, the next is vegetable oil, and the ingredients list goes downhill from there. 

I don’t have a huge sweet tooth, but my kids won’t say no to homemade cookies! And I want something that’s just as nourishing as it is delicious. That’s where this healthier Samoas dupe comes in.

It features clean, simple, and absolutely delicious ingredients. These homemade Samoas use Medjool dates for caramel-like sweetness, toasted coconut for texture, and dark chocolate. The result is a coconut cookie that tastes indulgent but is made entirely with real food ingredients. 

A Nourishing Spin on a Classic

One of the best things about making homemade treats is being able to choose the ingredients and sweetness level. Many homemade Samoas recipes get bogged down in complicated caramel steps or refined sugars. This version keeps things simple and nutrient dense.

Toasted coconut adds texture, sweetness, healthy fats, and fiber. Dates provide the sticky, caramel-like feel without needing to boil sugar, plus they’re rich in nutrients. The dark chocolate drizzle ties it all together with antioxidants and minerals. You can even adjust the level of chocolate or swap in dairy-free options to fit your family’s preferences.

Tips For Making Homemade Samoas

Homemade Samoas cookies (or any cookie) isn’t just about copying what’s on the side of the box. I don’t know about you, but I don’t keep sorbitol, caramel coloring, and carrageenan in my pantry! These Samoas start with simple ingredients, but you can tweak them to fit your preferences. 

  • Customize your chocolate: Use a dark chocolate you love (70–90% cacao works well) to control the sweetness level. You can also opt for dairy-free chocolate.
  • Play with fats: Coconut cream, melted coconut oil, or even grass-fed butter all work here. Use what you have or what you like. Butter and ghee taste the most like a classic Samoa and are richer. Coconut cream gives it a softer chew, while coconut oil is firmer if you eat these chilled. 
  • Prep the dates: If your dates are dry or firm, soak them in warm water for 5–10 minutes first. Then drain and pat dry before using.

These homemade Samoas cookies are perfect for family gatherings, lunchbox treats, or a weekend project with kids. And once you’ve made this Samoas dupe, I guarantee you’ll be excited to explore other real-food dessert recipes too.

Healthier Homemade Samoas Cookies

This delicious and healthy twist on the classic Samoas cookies features nourishing fats, dates for sweetness, and a generous chocolate drizzle.

  • Preheat the oven to 400°F. Spread shredded coconut evenly on a baking sheet and toast for 3–5 minutes, watching closely, until golden. Remove and let cool slightly.

  • Add dates to a food processor and pulse until sticky and broken down. Add toasted coconut, vanilla, salt, and your chosen fat. Pulse until a thick, cohesive dough forms.

  • Scoop out about 1 tablespoon of dough, roll into a ball, and flatten slightly. I used the back of a ½ measuring cup with parchment between the cookie and the measuring cup. Use a straw or chopstick to punch a hole in the center. Reshape as needed.

  • Reduce oven temperature to 350°F.

  • Place cookies on a parchment-lined baking sheet and bake for 12–15 minutes, until edges are lightly golden and cookies feel set. Allow cookies to cool completely on the pan.

  • Transfer cooled cookies to the freezer for 5 minutes to firm up before dipping.

  • Using a double boiler, melt dark chocolate with coconut oil (or butter) until smooth.

  • Dip the bottoms of the cookies into the melted chocolate. Place back on parchment and drizzle remaining chocolate over the tops.

  • Refrigerate for 10–15 minutes, until chocolate is fully set.

Nutrition Facts

Healthier Homemade Samoas Cookies

Amount Per Serving (1 cookie)

Calories 123
Calories from Fat 72

% Daily Value*

Fat 8g12%

Saturated Fat 6g38%

Trans Fat 0.002g

Polyunsaturated Fat 0.1g

Monounsaturated Fat 1g

Cholesterol 0.1mg0%

Sodium 28mg1%

Potassium 169mg5%

Carbohydrates 13g4%

Fiber 3g13%

Sugar 10g11%

Protein 1g2%

Vitamin A 20IU0%

Vitamin C 0.2mg0%

Calcium 14mg1%

Iron 1mg6%

* Percent Daily Values are based on a 2000 calorie diet.

  • For chewier cookies, bake closer to 12 minutes
  • For crispier cookies, bake closer to 15 minutes and toast the coconut a bit darker

How to Store Homemade Samoas

We all know someone who keeps a stash of Girl Scout cookies in their freezer for later. The good news is that these homemade Samoas are also freezable! Keep leftovers in the freezer for up to 2 months or in the refrigerator for up to one week. Let the cookies come to room temperature first before eating though for the best texture. 

Does your family love Girl Scout cookies? What are some of your favorite flavors or healthier alternatives? Let us know in the comments!
Tags: , , , ,
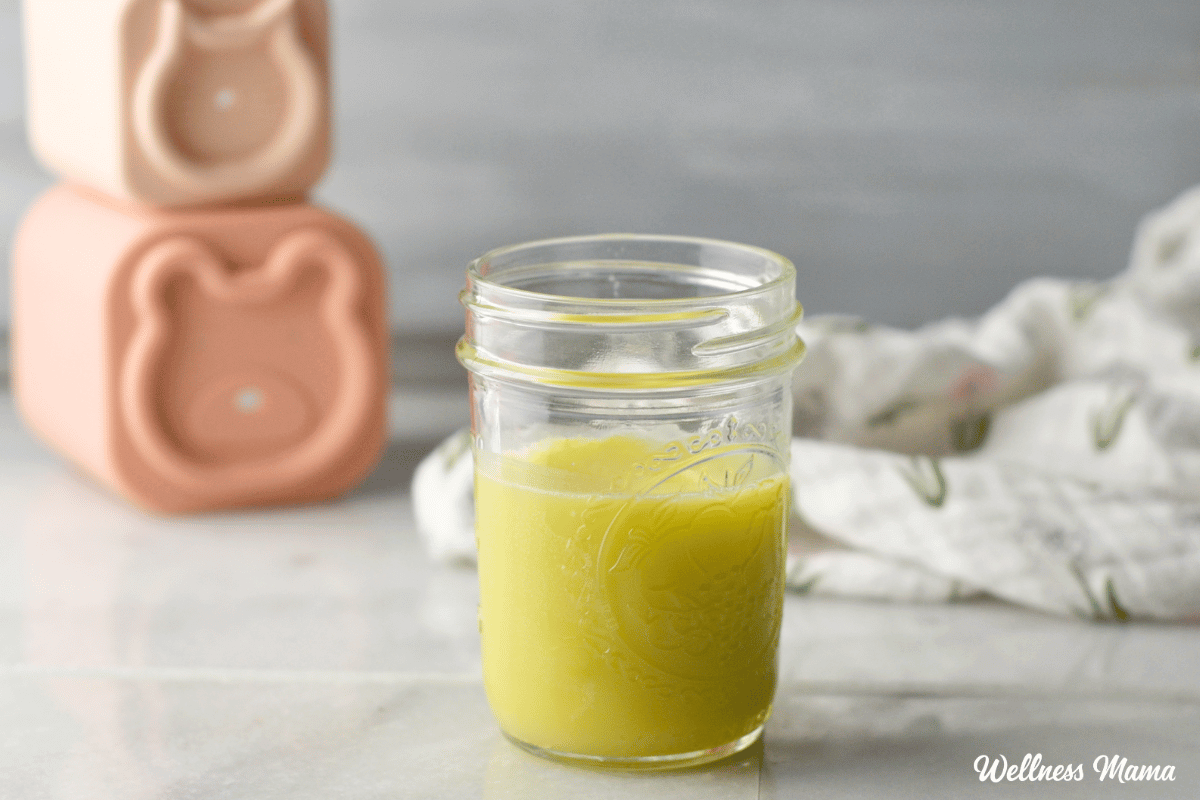
baby balm

Homemade Baby Balm Skin Cream Recipe

When I was pregnant with my first child, my friends and relatives literally gave me 11 bottles of baby lotion. The smell reminded me of my own childhood. I loved that it was specially formulated for babies, so of course, the ingredients had to be natural and safe. Right?

… and then I actually read the ingredients.

What’s in Baby Lotion?

Ingredients like petroleum, artificial fragrances, and propylene glycol weren’t something I wanted on my baby’s skin. I searched for natural baby balm options and found a few great ones. There are even more options available now if you’re not in the DIY mood. 

This Everyday Baby Balm from Motherlove or this one from Badger have clean ingredients and work well. I still preferred making my own baby balm though because I could easily customize the ingredients and it was a lot cheaper. 

Choosing Natural Ingredients For Baby Balm

I decided to make my own from food-safe ingredients. And I even had many of the ingredients on hand already for my homemade lotion bars and other beauty products.

This baby balm recipe uses:

  • Cocoa Butter – High in antioxidants and skin moisturizing fatty acids. It leaves a barrier on the skin to help prevent moisture loss and keep things like urine from irritating sensitive skin. 
  • Shea Butter – A natural source of vitamin A and other nutrients, shea butter is highly nourishing and protective to the skin.
  • Olive Oil– Attracts moisture to the skin and repairs damaged skin. It’s also a major source of plant-based squalene, a lipid our skin cells make to lubricate and protect the skin. 
  • Castor Oil– High in ricinoleic acid and skin protective. 
  • Essential Oils – You can use any diluted baby-safe essential oils you prefer, but I use frankincense, chamomile, and rose. 

Important Note on Essential Oil Safety and Babies

I love essential oils and use them daily for cleaning, aromatherapy, skincare, and more. They are highly concentrated though and not every essential oil is safe or appropriate for every purpose. 

Frankincense, lavender, chamomile, and rose are all gentle options and generally considered safe for babies 3 months and older. Essential oils should always be diluted for little ones and generally should not be more than .25% of the recipe. For this recipe that translates to about 7 drops of essential oils total. 

Herbal Infused Oil

If you have a baby under 3 months or just prefer to skip the essential oils, then an herb-infused baby balm is a great alternative. Here are detailed instructions for how to make an herbal infused oil. 

Lots of herbs will work in a baby balm, but here are some of my favorites. They have natural skin soothing and healing properties and are safe for babies (barring any allergies).

Here’s how to make my favorite homemade baby balm!

Homemade Baby Balm Recipe

This moisturizing baby balm helps protect baby’s delicate skin with natural ingredients.

Prep Time5 minutes

Active Time10 minutes

Cooling Time2 hours

Total Time1 hour 15 minutes

Yield: 5 ounces

Author: Katie Wells

  • Heat all of the ingredients (except essential oils) in a double boiler or in a glass jar or bowl over a small pan of boiling water.

  • Stir carefully until melted.

  • Remove from heat and add essential oils if using.

  • Pour into a glass jar and let it cool in the fridge for several hours or until firm.

  • Store at room temperature and use a small amount as needed for baby’s skin (or adult skin)

Use herb infused olive oil to make the recipe if desired. Check the article for ideas of what to use.

Shelf Life and Storage

Since this baby balm is oil based it has a much longer shelf life than baby lotion with water-based ingredients. It should last 1-2 years when stored away from direct light and heat. 

The baby balm takes a few minutes to absorb into the skin and you only need to use a tiny bit. I’ve had friends say it was incredibly helpful for eczema and skin problems as well.

What did you use on your little ones? Ever made your own? Share below!

Tags: , , , , ,
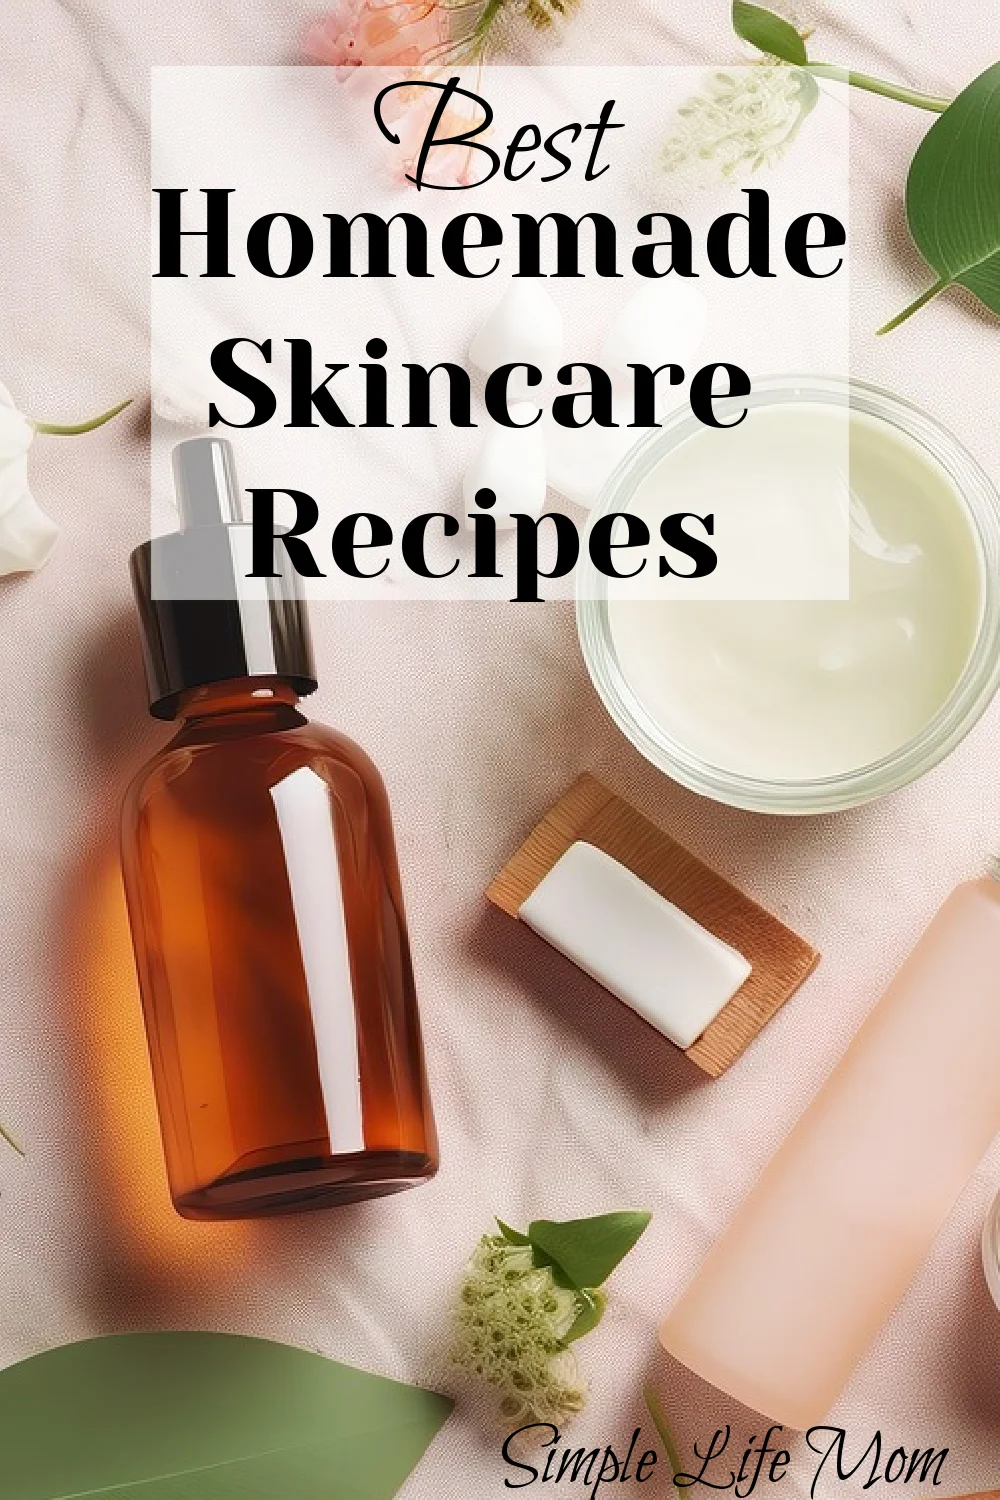
Simple, Natural, and Frugal: The Best Homemade Skincare Recipes for Healthy Skin

Simple, Natural, and Frugal: The Best Homemade Skincare Recipes for Healthy Skin

For years, I thought taking care of my skin meant buying more products. More bottles. More steps. More money spent. But the deeper I went into simple living and natural health, the more I realized something surprising:

Healthy skin thrives on simplicity.

Once I started making my own skincare products, my routine became easier, my skin became calmer, and my budget finally breathed a sigh of relief. Homemade skincare isn’t about perfection or luxury—it’s about using real ingredients, reducing toxins, and caring for your body in a way that supports overall health.

This post brings together my best homemade skincare recipes – the ones I’ve relied on again and again. These recipes are simple, affordable, effective, and perfect for anyone who wants a natural beauty routine without the overwhelm.

Don’t fall for fads and ads that slowly convince you that you have to spend a ton of money to get good results with your skin. I’ve been there! The ads are simply doing their job, but you can do the same thing with simple, organic ingredients.

Why Homemade Skincare Recipes are Better for Your Skin (and Your Life)

Before diving into recipes, let’s talk about why homemade skincare fits so well into a simple, natural lifestyle.

Homemade skincare helps you:

  • Avoid unnecessary toxic chemicals and fragrances
  • Reduce clutter in your bathroom
  • Save significant money over time
  • Support your skin’s natural balance
  • Simplify your daily routine

Your skin is an organ. What you put on it matters. When you nourish it with real ingredients and a natural homemade skincare routine without harsh chemicals, it responds with better tone, texture, and resilience. That natural glow that you want? Yes, it’s possible with even easier to get with homemade skincare products.

A Simple Natural Skincare Routine at Home

You don’t need 25 steps. Most skin does best with just:

  1. Step 1 – Gentle Homemade Facial Cleanser (and Toner if desired)
  2. Step 2 – Nourishing Homemade Face Moisturizer
  3. Step 3 – Weekly Exfoliation with a Homemade Sugar Scrub
  4. Step 4 – Any extras as needed like Deodorant and Lip Balm.

Everything below fits into that simple framework. These recipes create easy homemade skincare for beginners, but simple doesn’t mean ineffective.

Like I said above, our skin THRIVES on nourishing simplicity.

1) Gentle Homemade Facial Cleanser for Balanced Skin

Recipe: 5 Organic Homemade Facial Cleansers

Cleansing should clean—not strip. These gentle homemade cleansers remove dirt and makeup while respecting your skin’s natural oils. Win-Win!

Why it’s amazing for your skin:

  • Helps prevent dryness and irritation
  • Supports acne-prone or sensitive skin
  • Simple ingredients you can trust, because you made it!

Many people struggle with breakouts because of an overproduction of oils (hormonal issue), a bacterial buildup from touching the face or having a dirty pillowcase, or an allergic reaction to products such as detergents and makeup.

These recipes simplify everything by working with your skin instead of against it. They cleanse gently and organically.

Instructional tip: Massage gently for 30–60 seconds, then rinse with warm (not hot) water.

You can also try my acne liquid cleanser or my anti-aging liquid cleansers from my shop.

2) Simple Homemade Facial Toner for Balanced Skin

Recipe: Homemade Facial Toner for Acne Prone Skin

A simple homemade facial toner can gently refresh the skin, balance pH, and prepare it for moisture without adding unnecessary steps or products.

Benefits of a homemade facial toner include:

  • Helps remove leftover residue after cleansing
  • Supports skin’s natural pH
  • Calms irritation and redness
  • Closes pores and prepares skin to better absorb moisturizer

Unlike store-bought toners, homemade versions skip alcohol, synthetic fragrance, and harsh preservatives.

I like to use witch hazel, rose water, and aloe. They are wonderful at closing pores and soothing irritated skin. You can use the link above or buy some from my shop.

3) Homemade Face Moisturizer That Actually Works

Recipe: Homemade Face Cream with Rose and Sandalwood

I have perpetually dry skin. I’ve tried every product imaginable before making my own. It’s obviously an internal issue that I’ve been working on, but in the meantime, my shea lotion moisturizers are simply amazing. Not only do they keep my face (and body) moisturized throughout the winter, but it doesn’t clog my pores like so many face creams.

So that being said, this is one of my most foundational recipes — for good reason. Most lotions are full of alcohol and preservatives. This recipe uses beeswax and cocoa butter, which are both a humectant, trapping moisture near the skin.

Why this moisturizer is so effective:

  • Locks in moisture naturally with beeswax (a humectant)
  • Supports skin elasticity (thank you!)
  • No water, no preservatives, no chemicals

Because it’s oil-based, you only need a tiny amount. One batch lasts months, making it incredibly frugal. This is the moisturizer I reach for daily—and it’s replaced every store-bought cream I once relied on.

I have an Anti-Aging Face cream and body lotions in my shop that are so incredibly luxurious!

4) Homemade Sugar Scrub for Glowing Skin

Recipe: 5 Easy Homemade Sugar Scrub Recipes

Sugar is one of the most underrated skincare ingredients. It exfoliates gently while drawing moisture into the skin. There’s a reason your skin feel’s silky smooth after using one.

Why this scrub works so well:

  • Removes dead skin without damage
  • Improves circulation
  • Leaves skin smooth, not tight

This recipe is perfect for face, lips, or body, and it takes just minutes to make. No fancy exfoliants required.

Instructional tip: Use once a week—more is not better when it comes to exfoliation. Also, be careful using in the shower or bathtub! The oils make for a SLIPPERY surface.

Try one with organic sugar and essential oils from my shop.

5) Natural Homemade Deodorant

Recipe: The Best, Easy Homemade Deodorant

This is a really big one! Deodorants can be extremely toxic, and even if you try to buy healthy, most “natural” deodorants still sneak in some toxic ingredients. Switching to a natural homemade deodorant is one of the simplest ways to reduce daily toxin exposure (and I have a number of recipes if you have an aversion to certain ingredients). These recipes really work!

This particular recipe uses coconut oil, baking soda, and arrowroot powder to control odor naturally. Add the essential oil of choice for scent, but you can leave it unscented and it will still work wonderfully.

Why it’s so beneficial:

  • No aluminum or artificial fragrance
  • Gentle and customizable
  • Supports the natural detox process but allowing you to sweat lightly
  • Does not clog lymph nodes

This recipe fits perfectly into a healthy, natural lifestyle without unnecessary toxins like aluminum.

Need a non baking soda recipe? Try this one.

If you’d like to buy a baking soda or non-baking soda version, you can get them in my shop.

6) Simple Homemade Lip Balm

Recipe: Easy Lip Balm Recipe with Herbs and Essential Oils

Most store-bought lip balms actually make lips drier over time. This simple homemade version heals instead of masking the problem.

Why this lip balm works:

  • Nourishes deeply with natural oils
  • No petroleum or synthetic ingredients
  • Safe for kids and adults

This is a great beginner recipe and a reminder that skincare doesn’t need to be complicated to be effective. If you need to leave out the herbs, because it just seems overwhelming, that’s ok! It still makes a wonderful lip balm.

The cocoa butter and beeswax are a humectant that traps moisture close to the skin. They naturally heal lips heal and hydrate while protecting from wind and cold dry air.

I have clear and red tinted lip balm for that small color boost that I sell in my shop.

How Homemade Skincare Recipes Simplify Daily Life

One of the biggest benefits of making your own skincare is how much mental space it frees up. Fewer products. Fewer decisions. Less stress.

Instead of chasing trends, you build a routine that:

  • Supports long-term skin health
  • Fits naturally into your day
  • Aligns with frugal, intentional living

Your beauty routine should align with your values.

Simple living isn’t about doing without—it’s about choosing what truly matters.

Every recipe above costs just a fraction of commercial products. Many use ingredients you already have at home. Over time, the savings add up!

Final Thoughts: Start Small and Keep It Simple

If you’re new to homemade skincare, don’t try everything at once. Start with:

  • One cleanser
  • One moisturizer

Give your skin time to adjust. Simplicity allows your body to do what it was designed to do.

Homemade skincare isn’t about perfection—it’s about stewardship, health, and intentional living (including what you eat and drink). And that’s what simple life is all about.

Tags: , , , , , , ,
Homemade Lush-Like Lavender Sleepy Soap

Homemade Lush-Like Lavender Sleepy Soap

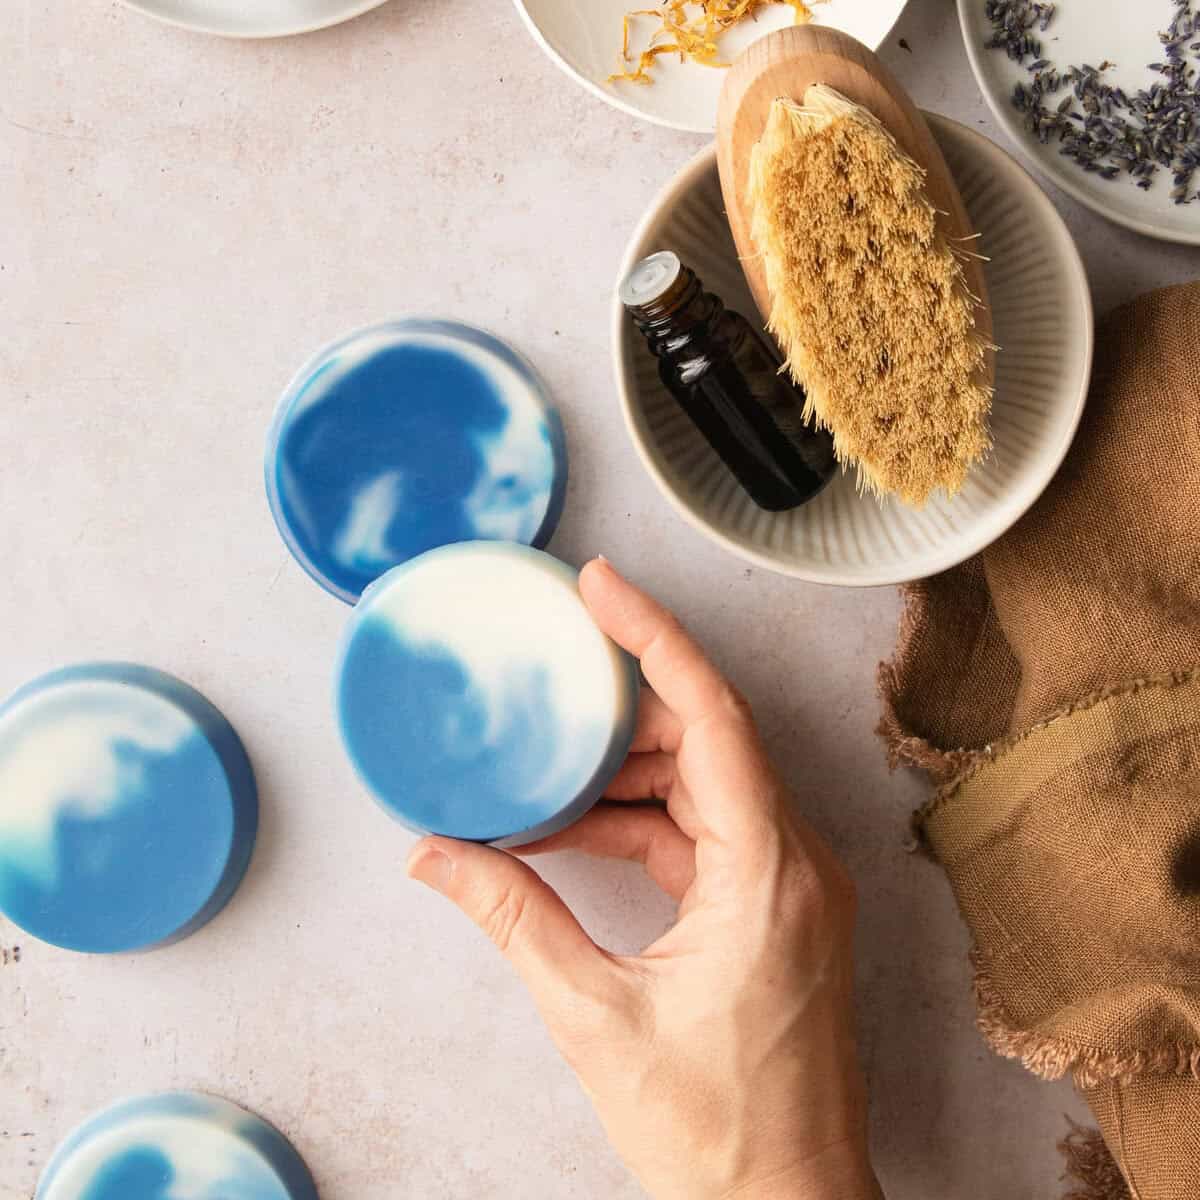
Calming essential oil blends transform your bathroom into a pre-bedtime sanctuary with this homemade sleep soap with calming lavender. Coupled with a hot shower to relax muscles and turn off the nervous system, these soaps will revolutionize your bedtime routine and have you sleeping through the night in no time.

When was the last time you had a really good night’s sleep? For me, I honestly can’t remember. Aging, stress, and hormones have all affected my ability to either fall asleep or stay asleep, and I often wake up feeling exhausted. Which is why I’ve resorted to things like herbal remedies and hot showers before bed to get my body into sleep mode.

I added a simple swirl technique to give these homemade lavender soaps those dreamy, cloud-like patterns in vibrant blues and soft whites. But even if you skip the swirl in the Lush lookalikes, they’ll still be super effective (and smell amazing).

Supplies

Here’s what you’ll need to gather before you get started:

  • Melt and pour soap base — You can use any type of soap base you like. Clear glycerin, white, goat milk, shea butter, or coconut milk bases all work well. But whichever one you choose, I recommend sticking with the same type and brand, rather than mixing different bases together.
  • Mica powder — Mica is a great natural colorant that won’t irritate the skin or cause an allergic reaction.
  • Round soap mold — Single-cavity silicone molds are my go-to because the soap cools quickly (this prevents the colors from swirling and settling too much as the soap cools) and pops out easily. 
  • Heat-safe containers — Glass measuring cups or microwave-safe bowls work perfectly. You’ll need one for each color you’re planning to use.
  • Stirring utensils — Silicone spatulas or spoons are ideal for stirring in your colors and essential oils.
  • Wooden skewers — Ideal for swirling soap colors.
  • Rubbing alcohol in a spray bottle — This is essential for popping bubbles and helping layers adhere to each other if you’re doing a layered pour.
  • Thermometer — To get the best swirls, you want the temperature to be somewhere around 120°F. Without a thermometer its hard to know when the soap reaches the perfect temperature, so I highly recommend investing in one. 
  • Essential oils — As always, you can use whatever oils you have at home, or you can choose from the sleepy time blends below.

Essential Oils for Sleep

If you want your soap to smell as relaxing as it looks, essential oils are the way to go. Whether that’s classic lavender, cozy chamomile, or something with a hint of cedarwood or ylang ylang, there’s definitely a scent in there that’ll work for you.

Here are some of my favorite oils for creating that sleepy-time atmosphere:

  • Lavender — The classic calming floral. Lavender is probably the most well-known essential oil for relaxation, and for good reason! It has a soft, herbal scent that just makes you want to curl up and unwind.
  • Chamomile — Soft and incredibly grounding, Roman chamomile is especially gentle and works beautifully in sleep blends.
  • Cedarwood — Warm and steadying cedarwood has a woody, slightly sweet scent that’s perfect for evening. It pairs really well with lavender.
  • Bergamot — This one’s a little unexpected. Bergamot is bright and citrusy, but it also has relaxing properties that help quiet the mind. Just use it sparingly since it can be a bit strong.
  • Ylang ylang — Lush, floral, and deeply soothing. A little goes a long way with ylang ylang, so use it lightly or it can be overwhelming.

Instructions

I’m keeping this high-level here since there’s a detailed recipe card at the end, but here’s the basic process:

Melt and mix the soap. Cut your soap base into small cubes and melt each color in separate containers using the microwave (in short bursts) or a double boiler. Stir in your chosen colors and essential oils until everything is evenly distributed.

Dreamy Essential Oil Blends

You need a total of 1-2 teaspoons of essential oil per pound of soap base so you may need to scale these blends up depending on how much soap base you’re using and your own personal preference.

1. Soothing Lavender Blend

30 drops Lavender + 16 drops Cedarwood + 6 drops Bergamot

2. Nighty Night Blend

25 drops Roman Chamomile + 12 drops Lavender + 8 drops Vanilla

3. PM Calm Blend

20 drops Cedarwood + 8 drops Ylang Ylang + 5 drops Lavender

Let it cool slightly (this is important!) If the soap is too hot when you pour it, the colors will blend together and you’ll lose that beautiful swirl definition. Aim for 120°F, give or take a few degrees.

Pour the colors into the mold at the same time. Then lightly drag a skewer through the soap 1-2 times to create the swirl. Pouring simultaneously ensure that you can see the swirl on all the surface of the soap.

Let it harden and unmold. This usually takes at least 4-5 hours. If the soap is being stubborn, pop the mold in the fridge or freezer for a few minutes to help it release.

Top Tip

In order to get those gorgeous, distinct swirls, let the colors cool a little longer than you think you should before pouring. I know it’s tempting to pour right away, but slightly thicker soap creates more distinct, dreamy swirls and keeps the colors from muddying together. Trust me on this one, patience pays off!

Storage

Melt and pour soap naturally attracts moisture from the air, which creates those little beads on the surface. So you’ll want to wrap finished bars in plastic wrap to prevent glycerin dew. 

Then store in a cool, dry place away from bright sunlight. Depending on your soap base and colorant, you may find that the swirls start to bleed into each other over time, and heat and light can exacerbate this.

If this happens, either melt the bars down and blend the colors so there’s no more bleed. Or toss them out and make a fresh a batch.

More DIY Lush Madness

FAQ

Can I re-melt the soap if I mess up?

Absolutely. That’s one of the best things about melt and pour—it’s incredibly forgiving. If you don’t like how it turned out, just chop it up, re-melt it, and try again.

How long do the soaps last?

Typically 1 to 2 years, depending on how you store them. Keep them wrapped and in a cool spot, and they’ll stay fresh for a long time.

Can kids use these soaps?

Yes, just make sure to use kid-safe essential oils.

Print

]]>]]>

How To Make Sleepy Soap with Essential Oils

The cloud soaps make wonderful gifts, or you can keep them all for yourself and enjoy a little slice of calm every night before bed. Sweet dreams!

Prep Time1 hour

Cooling Time4 hours

Total Time5 hours

Course: Bath and Body Soap, DIY

Keyword: soap

Yield: 6 soaps

Author: Stephanie Pollard

Cost: $15

Equipment

  • Circular silicone soap mold

  • Heat-resistant containers for melting and pouring one per color

  • Stirring utensils for stirring soap as it melts

  • Kitchen thermometer

  • Wooden skewers for swirling soap

Notes

For wispy swirls: Pour from a distance to make the colors mix more intricately.
For bold swirls: Pour larger amounts of soap at once.
For defined layers: Pour a layer, let it form a thin skin, and then pour the next layer on top.

Soothing Lavender Blend

30 drops Lavender + 16 drops Cedarwood + 6 drops Bergamot

Nighty Night Blend

25 drops Roman Chamomile + 12 drops Lavender + 8 drops Vanilla

PM Calm Blend

20 drops Cedarwood + 8 drops Ylang Ylang + 5 drops Lavender
0

Tags: , , , ,
DIY Christmas Gifts

140+ Homemade & DIY Christmas Gifts

I love Christmas morning… homemade cinnamon rolls, family, and giving thoughtful gifts. It’s so easy to let the commercialism of the Christmas season take over. Over the years though, I’ve found that the simple things are often the most meaningful. Store-bought gifts certainly have their place, but homemade gift ideas are usually budget-friendly and a great way to give a customized gift.

Our family focuses more on giving experiences than material gifts, but I still find DIY gifts a good option. There are so many great gift options for DIY homemade gifts. Below you’ll find lots of handmade gift ideas and suggestions for some simple gift baskets. Whether it’s under the Christmas tree or as a stocking stuffer, handmade Christmas gifts are an easy way to love on your friends and family.

Why Make DIY Christmas Gifts?

Modern society is flooded with stuff everywhere. We’ve been told that piles of toys, jewelry, and other goodies from Santa make the holidays. Thoughtful gifts, like easy DIY projects, not only save money but are a simple way to make Christmas more special.

And if you don’t have time for homemade gifts, it’s nothing to beat yourself up over. Spending quality time with loved ones is the important thing. If you’re looking for some last-minute gifts to buy, then check out my gift-giving guide for the whole family. I’ve also got a ton of great ideas for in my gift guide for her in this post.

I’ve divided some of the homemade Christmas gift ideas by type of person (grandparents, kids, men, etc.), so you can easily find something for everyone on your list. There’s a lot of crossover though, and some DIY projects in one category may be perfect for someone else on your list.

Don’t forget the gift wrapping! You can decorate plain paper gift bags. Have the kids help with some markers and stickers (if it’s for a grandparent). And if you’re really feeling crafty, make your own reusable fabric gift bags to use year after year.

DIY Christmas Decorations

While you’re making some homemade gifts, why not make your own Christmas decorations too? This DIY garland is made from natural materials like pine, cranberries, and dried oranges. Or try this tutorial for a burlap garland with ribbon and twine. I’ve also made some of these burlap wreaths to decorate our front door. For a table decoration, how about these naturally scented cinnamon pine cones?

And we can’t forget the Christmas cards! When my kids were little they’d wear matching outfits for our Christmas photo for annual Christmas cards. If you’re a crafter then some homemade Christmas cards or gift tags are also a nice touch.

Now onto the DIY Christmas gift ideas!

DIY Christmas Gift Ideas For Men

Treat your man with holiday gifts he’ll love, from food gifts to homemade body care. The perfect gift doesn’t have to be crazy expensive or complicated. Whether it’s for grandpa, dad, or your significant other, these easy DIY Christmas gifts are just the thing.

DIY Christmas Gifts for Grandparents

Many of these Christmas crafts are simple enough for the kids to make for grandma and grandpa. There are also some DIY beauty recipes that are great for mature or drier skin types.

DIY Christmas Gifts for Women

Your child’s teacher, your mom, your best friend… here are gifts that women will enjoy this holiday season. While you’re at it, don’t forget to make some extra for yourself!

DIY Christmas Gifts for Kids

It depends on your child’s age and gender, but in general, here are some fun DIY gifts for the kids. The little items also make great stocking stuffer ideas!

Gifts for a Healthy Home

Edible Christmas Gift Ideas

Instead of sugar-filled candy canes and drink mixes, gift your loved ones some homemade food items. Who wouldn’t want a cute hand-packed box of homemade truffles?

Gift Basket Ideas

Gift baskets are great for family members, co-workers, or friends. They’re simple enough to put together but look impressive. Be sure to choose a cute basket or tote for your assorted items and arrange them as desired! Browse through the categories above for options to put in your customized gift basket, or choose from the ideas below.

Herbal Teas Basket

Give an assortment of homemade herbal tea blends with a glass teapot. You could even throw in some organic tea towels.

Gardener’s Gift Basket

Have a gardener in your life? Or maybe some kids who are interested in playing in the dirt? Gift them a gardening basket with everything they need. Add in some organic seeds (maybe saved from last year’s garden!), gardener’s hand salve, and some bug repellent lotion bars.

Spa Gift Basket

Create your own spa experience with a DIY spa gift basket. There are tons of ideas above for what to put in it. I like adding some bulkier items like sugar scrubs, lotions, and foot scrubs to help fill the basket out.

Natural Baby Basket

Mom-to-be or New Mom Basket

What are some of your favorite gifts to make or that you’ve received over the years? Let us know below!

Tags: , , ,
peppermint mocha creamer

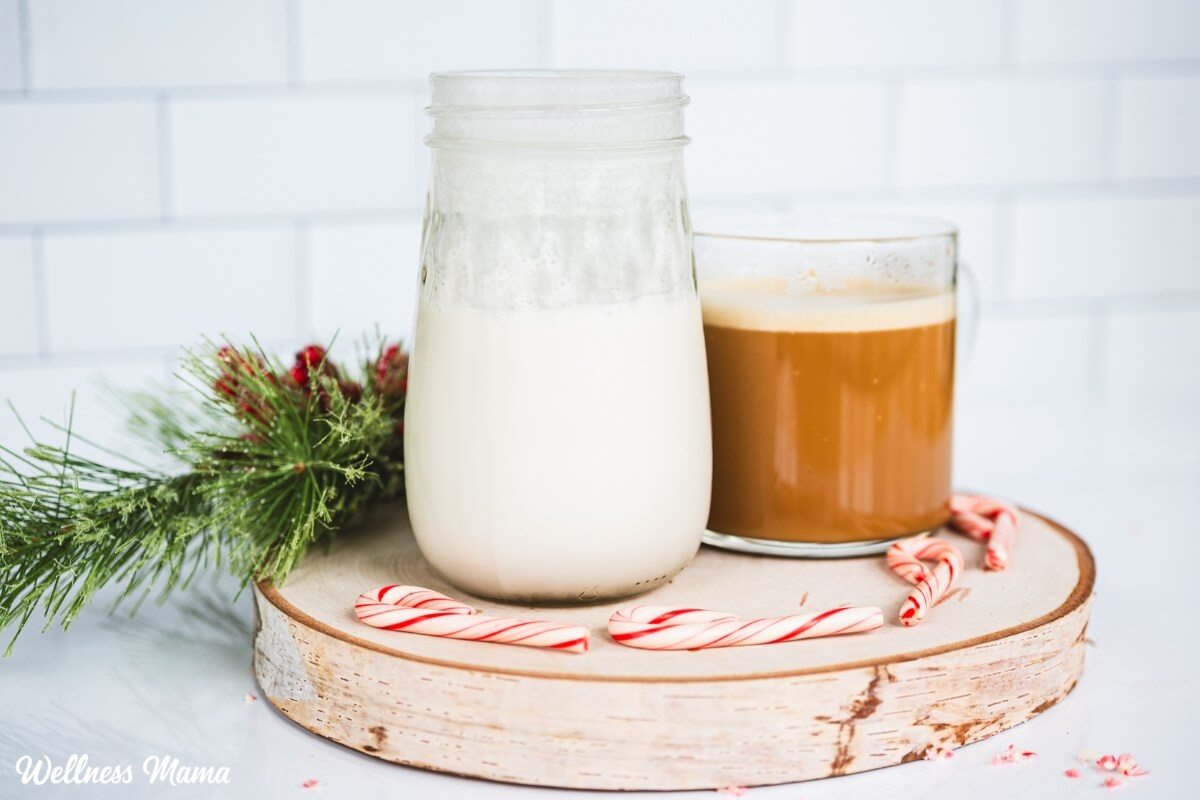
Homemade Peppermint Mocha Creamer (Dairy-Free)

It’s no secret that I’m an avid coffee drinker, even if I don’t drink it everyday. I’ve written many posts on the health benefits and controversies of coffee and have a podcast episode on my favorite mushroom coffee. And I have lots (and I do mean LOTS!) of recipes for my favorite coffee shop style drinks. So when I realized I could easily make my own festive peppermint mocha creamer, I was thrilled!

Peppermint Mocha Creamer

Store-bought coffee creamer comes in so many fun flavors. There’s the Chobani peppermint mocha creamer and even Starbucks has their own line of creamers. It’s kind of a bummer they’re so full of ingredients I try to avoid. Ingredients like carrageenan, high-fructose corn syrup, and hydrogenated oils.

And while many stores now have simpler coffee creamer with cleaner ingredients, they still have some downsides. This healthier peppermint mocha creamer is simple, easy, and tastes even better!

Dairy-Free Creamer Options

This coffee creamer is paleo and dairy-free thanks to its coconut milk base. I prefer using coconut milk for my peppermint mocha creamer since it’s naturally so thick and creamy. I like to add healthy fats to my coffee anyway. If you’d rather use a different milk, feel free. Oat milk and cashew milk are especially creamy options. 

I add a little peppermint extract for flavor and maple syrup for natural sweetness. If you’re looking for a sugar free peppermint mocha creamer, try liquid stevia instead. Both the sweetener and flavor can be adjusted to suit your tastes. Want to try a different flavor? Simply swap out the peppermint for another extract, like vanilla, almond, or orange. 

Peppermint Mocha Creamer Recipe

Dairy-free coffee creamer made with coconut milk, peppermint extract, and a touch of maple syrup.

  • Warm the can of coconut milk in a bowl of hot water for about 5 minutes to make it easier to pour.

  • In a pint-size mason jar, combine the coconut milk, peppermint extract, and maple syrup.

  • Put a lid on the mason jar and shake vigorously to mix.

  • Stir into coffee or milk for a festive treat.

  • Store leftovers in the refrigerator and use within 7-10 days.

Nutrition Facts

Peppermint Mocha Creamer Recipe

Amount Per Serving (2 TBSP)

Calories 76
Calories from Fat 63

% Daily Value*

Fat 7g11%

Saturated Fat 6g38%

Polyunsaturated Fat 0.1g

Monounsaturated Fat 0.3g

Sodium 5mg0%

Potassium 97mg3%

Carbohydrates 4g1%

Fiber 0.5g2%

Sugar 2g2%

Protein 1g2%

Vitamin C 0.3mg0%

Calcium 11mg1%

Iron 1mg6%

* Percent Daily Values are based on a 2000 calorie diet.

  • Feel free to adjust the peppermint and syrup up or down to suit your tastes.
  • Omit the cocoa powder if you just want a peppermint creamer.

How to Use Homemade Coffee Creamer (of Any Flavor!)

The most obvious is, of course, to stir it into a fresh cup of coffee. However, there are a lot of other tasty options as well. I like to use it in leftover chilled coffee or cold brew coffee. It’s also great in tea without the cocoa powder if you’re more of a tea drinker.

My kids love it added to hot chocolate or just cold milk for a festive treat. You can also add it to homemade vanilla ice cream to make a shake.

Try a batch of this healthy creamer with vanilla extract instead of mint over steel cut oats for breakfast. I bet this recipe for gingerbread creamer would be delicious that way too!

More Homemade Hot Beverages to Try

When you’re longing for a hot and tasty beverage (that doesn’t cost $7 or more!) try these:

Side note: Don’t throw out your used coffee grounds — they have lots of uses!

Do you make your own coffee creamer? What’s your favorite flavor?

Tags: , , , ,
Homestead Blog Hop - Homestead tips, ideas, animal care, and recipes every Wednesday

Homestead Blog Hop 575 – Turkey, Broth, and Homemade Mozzarella

I’m so excited to try our featured recipes this week: turkey brine bomb, homemade bone broth and meat broth differences, and how to make mozzarella at home.

Share your own recipes and DIYs below. I just shared how to make your own yogurt this week. Do you have an instant pot? Use the yogurt setting or use the light in your oven. You can make yogurt at home.

Welcome to the Homestead Blog Hop!

Homestead Blog Hop will take place every Wednesday and is for all things homesteading: real food recipes, farm animals, crafts, DIY, how-to’s, gardening, anything from-scratch, natural home/health, self-sufficiency, self-reliance, natural remedies, essential oils, & more! Basically, anything related to homesteading.

Meet Your Hosts!

Follow Their Blogs

Natasha – Houseful of Nicholes (Facebook | Pinterest | Twitter | Instagram)

Laurie – Ridge Haven Homestead (Facebook | Pinterest | Instagram)

Liz – The Cape Coop (Facebook | Pinterest | Twitter | Instagram)

Kelly – Simple Life Mom (Facebook | Pinterest | Instagram)

FEATURED POSTS from the Last Homestead Blog Hop

Each week we take turns choosing three posts to feature. Each post will be shared on all social media platforms by all of the hosts! Here are the features from Last Week’s Hop:

1. Bone Broth vs. Meat Broth from The Once and Future Homestead

2. Fresh Made Mozzarella Cheese from Homemade on a Weeknight

3. Brine Bomb Smoked Turkey from That Guy Who Grills

Congrats! Feel free to grab the featured on button for your post.

Just right click and ‘save image as…‘

Guidelines for this Get-Together:

  1. Click on the “Add your Link” Button below and add a great image of your project or recipe. Make sure you link to the page of your family friendly post – not the main page of your blog.
  2. Link up to three posts each week.
  3. Try to visit at least a few other blogs at the party. Be sure to leave a comment to let them know you stopped by.
  4. Link your post back to the Homestead Blog Hop. If the hop isn’t linked to your post then you cannot be featured. All featured posts will be shared on all hosts’ social media channels.
  5. Please link up posts that you haven’t linked to the hop before. You are welcome to link old posts from your blog.
  6. By joining the party, you are giving the hosts permission to use one photo from your post with a link back to your site if it is selected as one of next week’s Features.
  7. This is a family-friendly link up meant to inspire and motivate the homesteader in all of us.

Let the Party Begin!

Join Our Pinterest Board

Follow all your hosts on Pinterest and send me a message that you’d like to be added to our Homestead Blog Hop group board. The only rule is to only add posts that you’ve also added here.

Tags: , , , , , ,
Protein_Cinnamon_Rolls

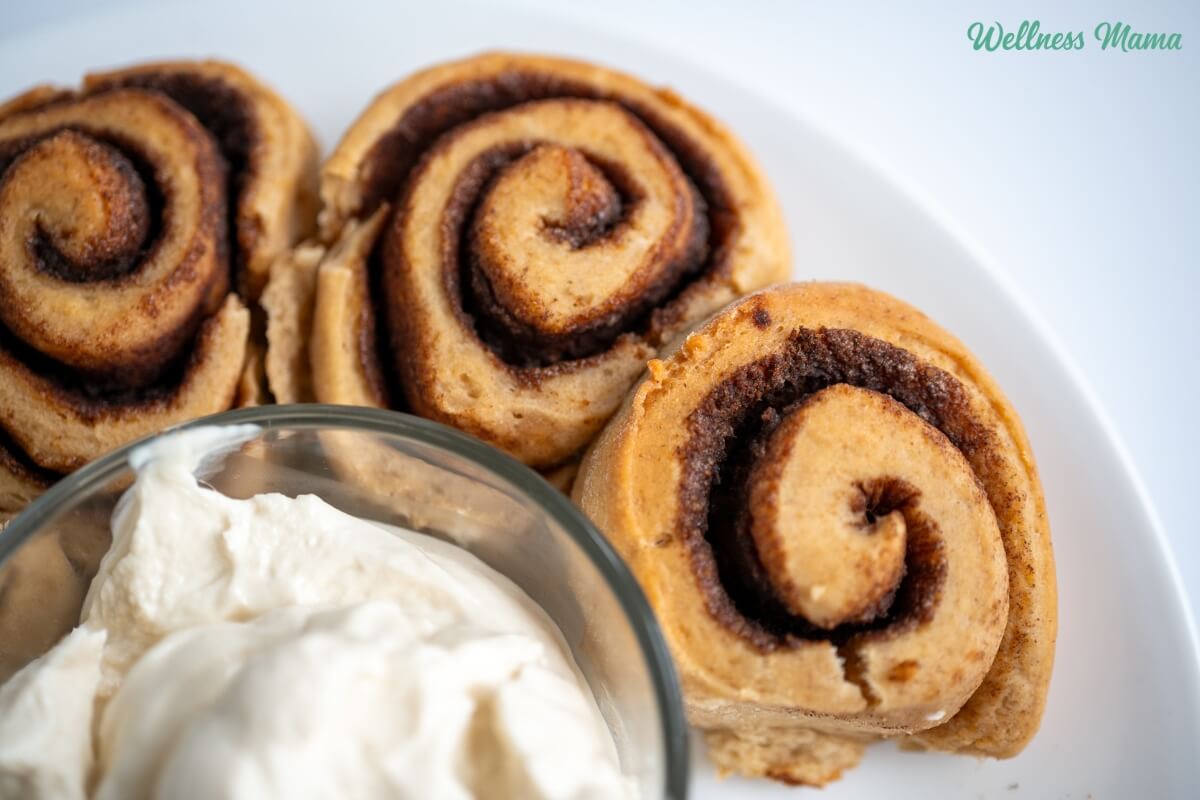
Homemade Protein Cinnamon Rolls Recipe (With Greek Yogurt)

There’s something so magical about pulling some warm cinnamon rolls from the oven on a chilly morning. These high protein cinnamon rolls are an easy way to get all the magic, without all of the sugar or junky ingredients. My kids love these and because they have no yeast, they’re ready in less than an hour!

More people are focusing on protein now because of its benefits for building and maintaining muscle. You’ll find plenty of new protein bars on the market in tons of flavors and more brands are adding protein to various foods. While I’m all for more protein, the quality matters. Ingredients like GMO soy protein or whey protein from CAFO cattle may do more harm than good. 

While we’re probably a ways off from buying healthy high protein cinnamon rolls in a tube at the grocery store, you can easily make them at home!

Healthy Cinnamon Rolls

So, are cinnamon rolls healthy? They’re certainly not in the same category as pasture raised meats or organic veggies, but it is possible to make a healthier version of cinnamon rolls. Instead of gobs of sugar these protein cinnamon rolls are naturally sweetened with coconut sugar and raw honey. No sugar cinnamon roll recipes usually call for sugar alcohols that can cause digestive issues for many people. That’s not what you’ll find here, but they’re still mildly sweet and absolutely delicious. 

Protein Cinnamon Roll Ingredients

Now that my Hashimotos is gone and I’m able to eat a wider variety of healthy foods, I’ll eat gluten on occasion. I still avoid bleached, enriched, glyphosate sprayed conventional flour, but sometimes I pull out organic flour for baking. You can easily make these protein cinnamon rolls gluten free though with a gluten free flour blend. Just be sure to choose one that has clean ingredients, like this one. 

Greek yogurt is one of the main ingredients in the creamy frosting and to gives the rolls a protein boost. If you need dairy free, then a really thick coconut milk yogurt could work, but I haven’t personally tried it. 

Instead of making cottage cheese or whey protein cinnamon rolls, I used a different version of protein for these. I used Equip Prime protein which is made from beef protein, collagen, and gelatin. It’s a nose to tail protein source, but it’s not gritty or beefy tasting. If you don’t have any on hand, then collagen powder will also work. 

Protein Cinnamon Rolls with Greek Yogurt

Protein Cinnamon Roll Dough

Greek Yogurt Frosting

  • 4 oz cream cheese (softened)
  • ½ cup plain Greek yogurt (whole milk for best texture)
  • 2 TBSP raw honey (or to taste)
  • 1 tsp vanilla extract
  • 1 pinch salt
  • In a large bowl, whisk together the flour, protein powder, baking powder, salt, cinnamon, and coconut sugar.

  • Add the Greek yogurt and melted coconut oil, then stir until a soft dough forms. If the dough feels too dry, add milk or water a tablespoon at a time until it comes together.

  • Knead gently on a floured surface for 1–2 minutes, just until smooth.

  • Roll the dough into a rectangle about ¼ inch thick. Spread softened butter evenly over the surface.

  • In a small bowl, mix the coconut sugar and cinnamon, then sprinkle evenly over the dough.

  • Roll it up tightly into a log and slice into 8 even rolls.

  • Place the rolls in a greased 8×8-inch baking dish or parchment-lined skillet. Bake at 350°F for 20–25 minutes, until golden brown. Let cool slightly before frosting.

  • In a medium bowl or stand mixer bowl, beat the cream cheese until smooth. Add Greek yogurt, honey, vanilla, salt, and (optional) protein powder. Mix until thick and creamy. Spread generously over the warm, but not hot rolls.

Nutrition Facts

Protein Cinnamon Rolls with Greek Yogurt

Amount Per Serving (1 roll)

Calories 303
Calories from Fat 108

% Daily Value*

Fat 12g18%

Saturated Fat 8g50%

Trans Fat 0.1g

Polyunsaturated Fat 1g

Monounsaturated Fat 2g

Cholesterol 31mg10%

Sodium 260mg11%

Potassium 282mg8%

Carbohydrates 40g13%

Fiber 2g8%

Sugar 12g13%

Protein 10g20%

Vitamin A 283IU6%

Vitamin C 0.1mg0%

Calcium 160mg16%

Iron 2mg11%

* Percent Daily Values are based on a 2000 calorie diet.

For a thicker frosting, chill it for 10–15 minutes before spreading.

Serving High Protein Cinnamon Rolls

These taste so good when they’re still slightly warm and fresh from the oven. If you know you’re not going to eat them right away, then save the frosting for right before serving. Store any leftovers in the fridge in an airtight container for up to 4 days.

What are some of your favorite baked goods to make? I’d love to hear about it in the comments!

Tags: , , , , , ,
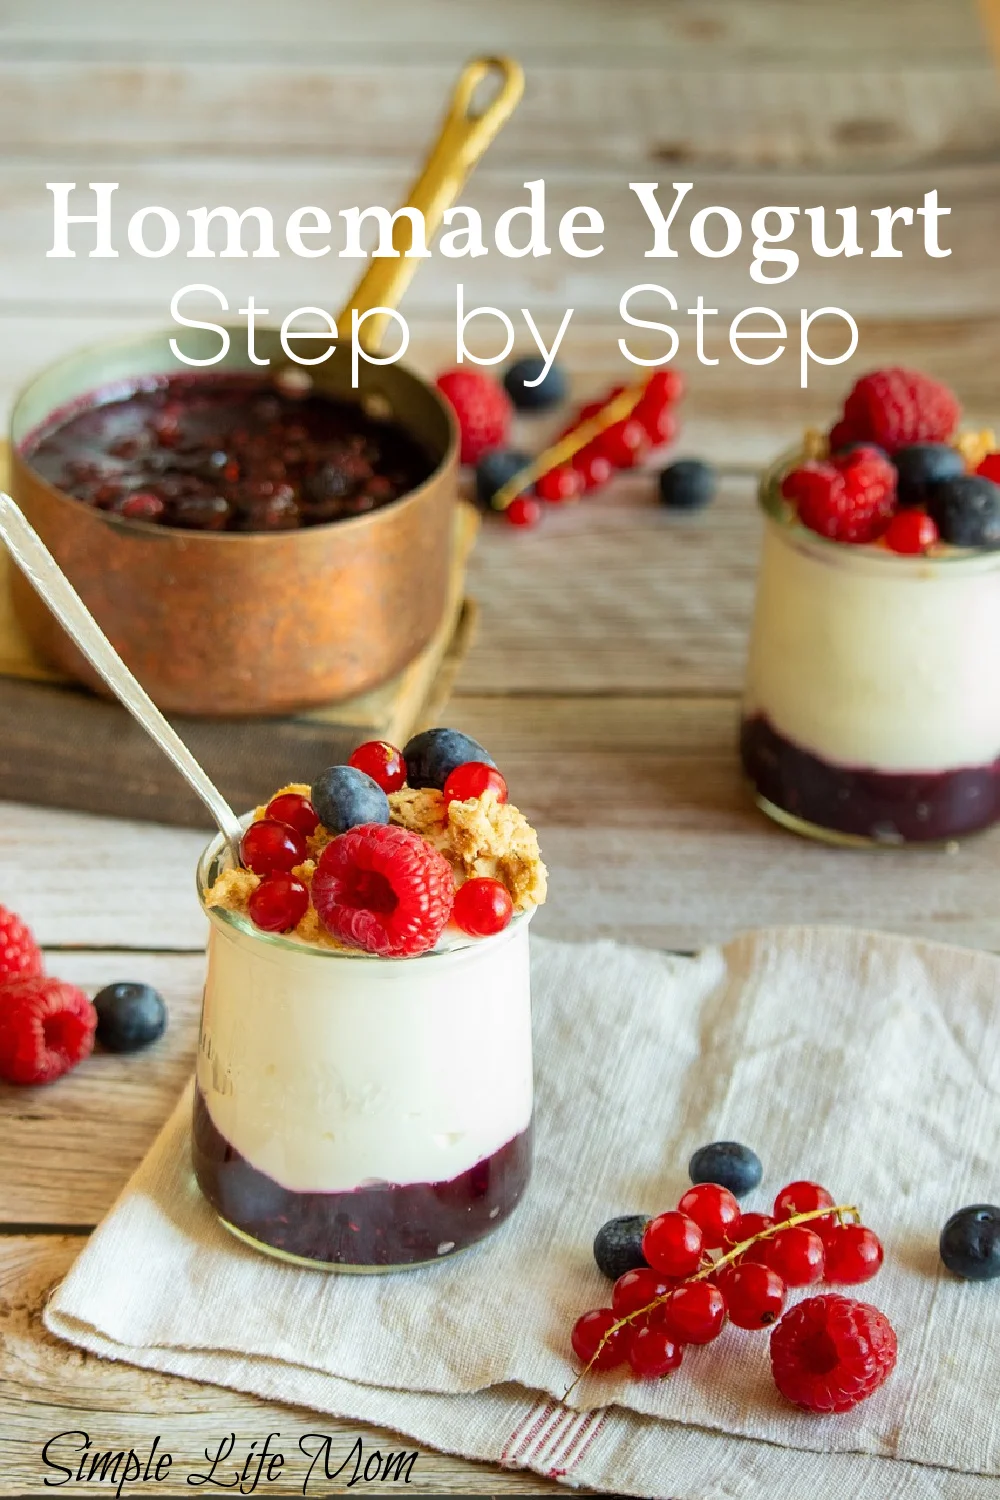
Step by Step, Easy, Homemade Yogurt Recipe from Simple Life Mom

How to Make Homemade Yogurt

Who knew that making homemade yogurt could be so simple? Homemade yogurt is actually super easy and really versatile. Instead of dealing with extra, unneeded ingredients, you can make homemade yogurt and add fresh fruit or eat it with homemade granola.

It really is easy!

Best Milk for Homemade Yogurt

If you can get your hands on some raw milk, you will avoid the harm that occurs at the cellular level from homogenization, and you’ll retain the good bacteria that usually gets destroyed through pasteurization.  The scare from raw milk started with industrialization and people moving away from farms and into the cities.  Milk took longer to get from the cow to the people’s homes. But treated properly, it is really the only milk you should be drinking.

Raw milk is also beneficial because it already has the nutrients in it ready to make yogurt, but if you need to buy pasteurized milk that’s ok too.

What about percentage?

I’ve only made homemade yogurt with whole milk, but I have a friend who uses 2% and it sets up just fine.

4 Step Homemade Yogurt Process:

Follow these few easy steps and you’ll have fresh, delicious yogurt that you’ve learned to make yourself!

1) First, in a large pot, gently bring one gallon of milk up to 180 degrees Fahrenheit, and then remove it from heat and cool to 110 degrees Fahrenheit. 

By completing the heating process, you prepare the milk to be thicken smoothly by denaturing the whey protein. If you slowly heat it and remove it from the heat immediately, you will not kill all the good bacteria in your raw milk. You can still make good yogurt if you skip this step, but sometimes it won’t be as smooth.

2) Once the milk is cooled to 110 degrees Fahrenheit, remove 1 cup to a separate bowl and add a 1/2 cup of organic yogurt with 1 cup of the warm milk. Mix well, then pour the mixture into the saucepan with the rest of the milk. Milk well again.

It’s important to not add the yogurt when the milk is too hot or you will kill the cultures.

3) If you want to make vanilla yogurt, now is the time to add 2 tablespoons homemade vanilla extract.

4) Pour the milk into sanitized jars and put lids on loosely.  Keep at 110 Fahrenheit for 6 hours without mixing, stirring, or moving! This is important. 

There are a few ways to do this (Choose One):

  1. Put the jars into a yogurt maker that keeps them at 110 degrees Fahrenheit.
  2. Put the jars in a large pot of water on the stove that is already at 110 degrees Fahrenheit and wrap towels around it to keep warm. I’ve done this before, and it stays warm for a very long time. You just need to check occasionally and turn the burner on for a minute or two (REMOVE TOWELS FIRST) if it cools down too much. Watch carefully.
  3. Put the jars in the oven with the light on and place candy thermometer on the rack so you can see the temperature. This usually stays at 110 degrees Fahrenheit for about 4 of the 6 hours. If you turn the oven on, watch it very carefully.

Homemade Yogurt Recipe

Below is the yogurt recipe in a printable format.

Homemade Yogurt Recipe

Yogurt made from scratch

Prep Time20 minutes

Cook Time6 hours

Total Time6 hours 20 minutes

Course: Snack

Keyword: yogurt

Servings: 1 gallon

Author: Kelly

  • 1 gallon milk
  • ½ cup organic yogurt
  • In a large pot, bring the milk up to 180 degrees Fahrenheit. Remove from heat and cool to 110 degrees Fahrenheit.

    1 gallon milk

  • In a separate bowl, mix 1/2 cup organic yogurt with 1 cup of the warm milk, then pour the mixture into the rest of the milk, mixing well. If you want to make vanilla yogurt, now is the time to add 2 tablespoons homemade vanilla extract.

    1/2 cup organic yogurt

  • Pour the milk into sanitized jars and put the lids on loosely. Keep at 110 Fahrenheit for 6 hours without mixing, stirring, or moving if possible.

There are a few ways to do this (Choose one):

  • 1. Put in a yogurt maker that keeps them at 110 degrees Fahrenheit.

  • 2. OR Put the jars in a large pot of water on the stove that is already at 110 degrees Fahrenheit and wrap towels around it to keep warm. I’ve done this before and it stays warm for a very long time. You just need to check occasionally and turn the burner on for a minute or two (REMOVE THE TOWELS FIRST) if it cools down too much. Watch carefully.

  • 3. OR Put the jars in the oven with the light on and place a candy thermometer on the rack so you can see the temperature. This usually stays at 110 degrees Fahrenheit for about 4 of the 6 hours. If you turn the oven on, watch it very carefully.

Special Tips:

Looking for a way to start your yogurt without a yogurt starter culture? Heat 2 cups of milk and then cool it to 110 degrees Fahrenheit. Add 1-1/2 teaspoons of cardamom seeds and let it sit in a warm place for 10-12 hours. This will be your starter. Follow the recipe above and add 1/2 cup of this starter instead of yogurt to your milk.

Have an instant pot? Most instant pots these days have a yogurt setting. Get your milk fully ready to set for 6 hours and instead of incubating them, put them in your instant pot and turn it on to the yogurt setting and you’re done!

Tags: ,
DIY Homemade Face Packs to Keep Your Skin Glowing This Winter

DIY Homemade Face Packs to Keep Your Skin Glowing This Winter

When the winter chill sets in, our skin often bears the brunt — turning dry, dull, and lifeless. The lack of humidity and harsh winds strip away natural oils, leaving skin craving hydration. While store-bought products promise quick fixes, nothing works quite like homemade face packs made from natural ingredients. These easy, nourishing recipes help restore moisture, radiance, and softness — all from the comfort of your kitchen.

Here are six simple, effective DIY winter face packs that will pamper your skin and bring back that healthy glow.

1. Honey & Aloe Vera Hydrating Pack

Best for: Dry, dull, or sensitive skin

If your skin feels tight or flaky, this soothing blend is the perfect fix. Honey acts as a natural humectant, locking in moisture, while aloe vera cools and heals irritation.

Ingredients:

  • 1 tablespoon aloe vera gel
  • 1 tablespoon raw honey

Method:

Mix the two ingredients into a smooth paste. Apply evenly over your face and neck, and let it sit for 15–20 minutes before rinsing off with lukewarm water.

Result: Soft, supple, and deeply hydrated skin that glows naturally.

2. Milk Cream & Turmeric Glow Pack

Best for: Normal to dry skin

Fresh milk cream (malai) is one of nature’s best moisturizers. Combined with a pinch of turmeric, it helps brighten your complexion while keeping the skin nourished and smooth.

Ingredients:

  • 1 tablespoon fresh milk cream
  • A pinch of turmeric

Method:

Blend both ingredients well and apply to your face. Leave on for 15 minutes and rinse with lukewarm water.

Result: A natural, golden glow with baby-soft skin.

3. Banana & Honey Moisture Boost Pack

Best for: Extremely dry or flaky skin

Bananas are rich in potassium and antioxidants that help repair and hydrate rough winter skin. When paired with honey, they create a moisture powerhouse.

Ingredients:

  • ½ ripe banana (mashed)
  • 1 tablespoon honey

Method:

Mash the banana and mix in honey. Apply to clean skin and let it sit for 20 minutes. Rinse with cool water.

Result: Smooth, plump, and deeply nourished skin.

4. Oatmeal & Yogurt Exfoliating Pack

Best for: Combination to dry skin

Exfoliation is essential in winter to remove dead cells that block moisture absorption. Oats gently scrub without stripping the skin, while yogurt hydrates and brightens.

Ingredients:

  • 1 tablespoon oatmeal powder
  • 1 tablespoon yogurt
  • 1 teaspoon honey (optional)

Method:

Mix all ingredients into a creamy paste. Apply gently in circular motions and leave for 10–15 minutes before rinsing.

Result: Soft, radiant skin that feels clean and rejuvenated.

5. Coconut Oil & Cocoa Butter Repair Mask

Best for: Very dry, cracked, or mature skin

Winter can be harsh on mature or sensitive skin. This rich mask combines coconut oil and cocoa butter to provide intense nourishment and repair.

Ingredients:

  • 1 teaspoon coconut oil
  • 1 teaspoon melted cocoa butter
  • ½ teaspoon honey

Method:

Blend the ingredients and apply while slightly warm. Leave on for 15 minutes, then wipe off with a warm, damp cloth.

Result: Velvety, hydrated skin with a natural sheen.

6. Avocado & Olive Oil Nourishing Pack

Best for: Dry and aging skin

Avocado’s healthy fats and vitamin E make it a winter skincare hero. Mixed with olive oil, it deeply nourishes and improves skin elasticity.

Ingredients:

  • ½ ripe avocado
  • 1 teaspoon olive oil

Method:

Mash the avocado and mix in olive oil. Apply generously and leave for 20 minutes before rinsing.

Result: Soft, youthful, and radiant skin even on the coldest days.

Winter Skincare Tip:

Always follow up your face pack routine with a mild moisturizer or face oil to lock in hydration. And remember — consistency is key. Using these natural masks 2–3 times a week will keep your skin glowing all season long.

This winter, skip the chemical-laden creams and rediscover the beauty of natural skincare. With these DIY face packs, your skin will stay hydrated, healthy, and beautifully radiant — no matter how chilly it gets outside.

Tags: , , , , , ,
Best oLive
Privacy Overview

This website uses cookies so that we can provide you with the best user experience possible. Cookie information is stored in your browser and performs functions such as recognising you when you return to our website and helping our team to understand which sections of the website you find most interesting and useful.