17 Natural Fall Soap Recipes

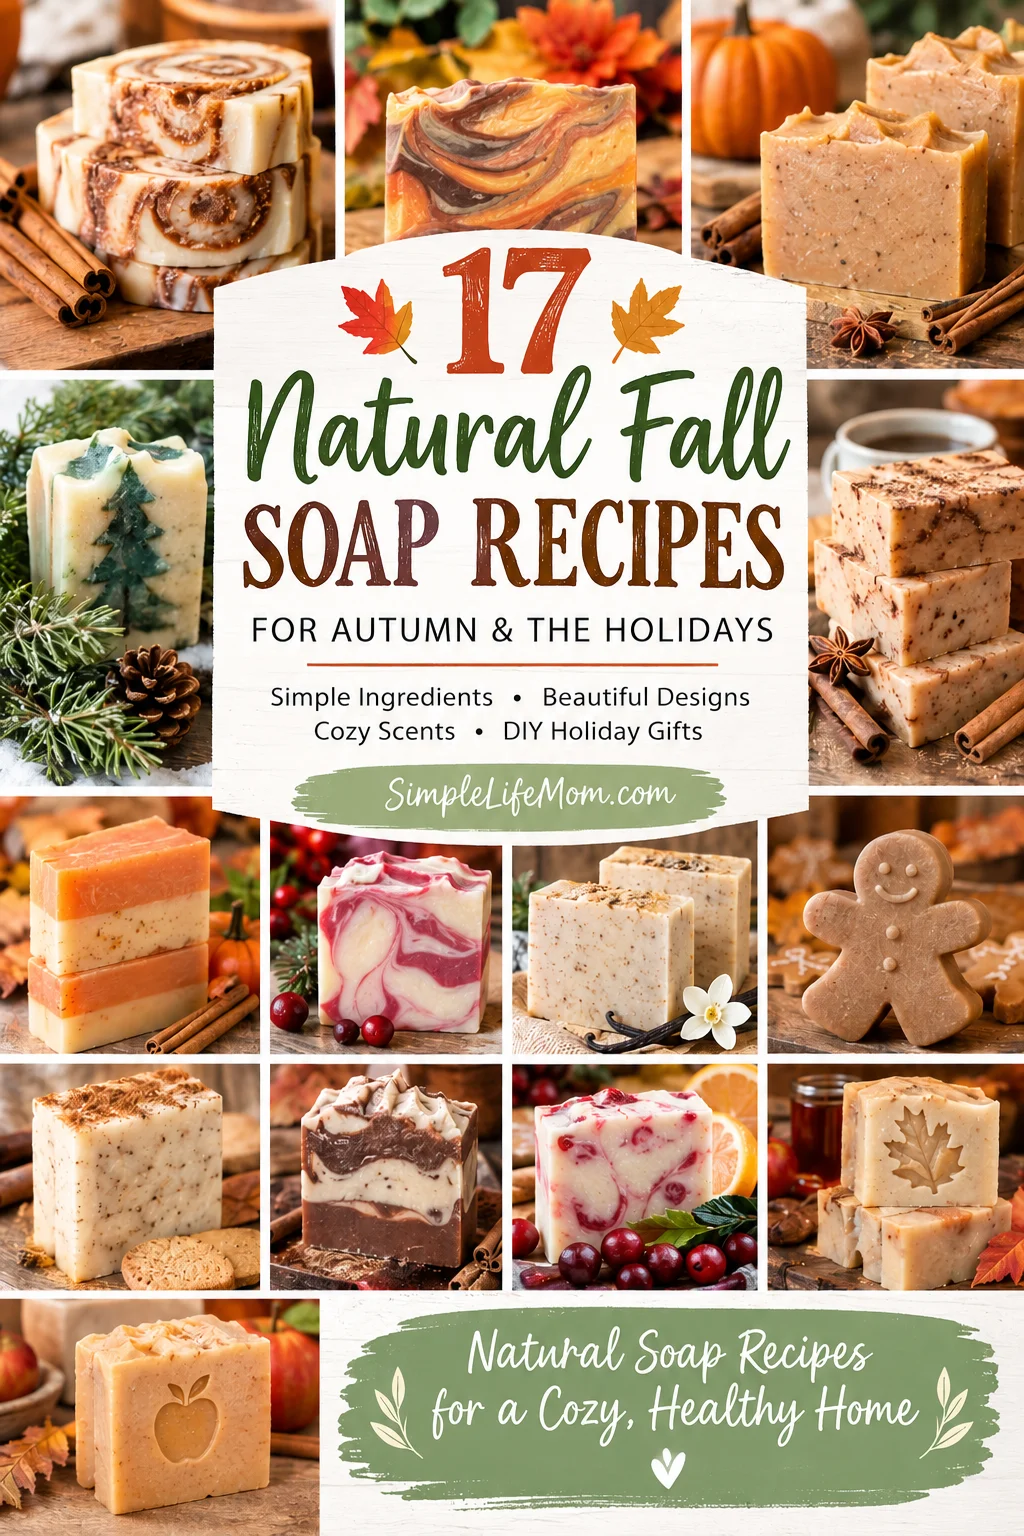
17 Fall Soap Recipes for Any Time of the Year

I’ve made a lot of homemade soap recipes over the years, and every time I go back through them, I’m reminded of how many fun seasonal soaps I’ve made! So, I decided to gather my 17 favorite fall soap recipes all in one place.

Even I had forgotten about some of these. Looking through the recipes was such a fun reminder and gave me plenty of inspiration to make a few that I haven’t made in a while.

These natural fall soap recipes are perfect for Autumn, Thanksgiving, Christmas, and the entire winter season. They also make beautiful handmade gifts for friends, family, teachers, neighbors, and anyone who enjoys natural homemade products.

And, of course, you don’t have to wait for fall to make them. If you love warm, spicy, woodsy, citrusy, and cozy scents, you can enjoy these homemade soap recipes any time of year. I do! And they’re scents that my family often ask for year around as well.

Natural Ingredients for Fall Soap

If I’m going to take the time to make my own soap, I want to be careful with what is going into it. After all, why go to all that trouble just to add something toxic and ruin it all?

You can certainly make soap simply because it’s a fun craft—and it is! But one of my favorite things about making homemade soap is being able to choose simple, natural ingredients and leave out the artificial colors, synthetic fragrances, and unnecessary additives found in many commercial soaps.

You’ll find ingredients such as:

  • Shea butter
  • Cocoa butter
  • Coconut oil
  • Mango butter
  • Tallow
  • Lard
  • Beeswax
  • Essential oils
  • Natural clays
  • Root powders
  • Herbs and other botanicals

I use essential oils for scent and natural ingredients such as clays, herbs, and root powders for color whenever possible. You can learn more about naturally coloring homemade soap in my natural soap coloring chart.

Vegan, Tallow, or Lard Soap

Some of the recipes below are vegan, while others use tallow, lard, or beeswax. All of them make wonderful soap bars.

If you prefer a vegan soap recipe but love the colors, scent, or design of a recipe that contains tallow, don’t be afraid to use the design and essential oil blend from one recipe with the base oils from another.

For example, maybe you love the tree design and cedarwood scent of the Evergreen Tree Soap but would rather make a vegan bar. You can use your favorite vegan soap recipe and recreate is with the design and scent suggestions below.

Just be sure that you are working from a properly calculated soap recipe. Do not substitute oils or fats by weight without recalculating the lye amount, because different oils require different amounts of lye to saponify.

If beeswax is the only ingredient you want to avoid, you can also look for a suitable vegan wax alternative—but remember that waxes can change the properties of your finished soap, so substitutions should be made carefully. You can learn more about how to make substitutions here.

No Artificial Fragrances or Dyes

I don’t use artificial fragrance oils or synthetic dyes in my homemade soap recipes.

There are also other ingredients commonly added to soap that I personally choose to leave out, including titanium dioxide and artificially dyed micas.

Why add unnecessary questionable or outright toxic ingredients, when you can make something beautiful with natural ingredients? Instead, you’ll see natural colorants in my recipes, such as clays, herbs, and root powders, along with essential oils for those wonderful Autumn scents.

That’s one of the reasons I love making soap so much. You can create beautiful bars that look and smell amazing while knowing exactly what you used to make them.

How to Make Homemade Soap

If you’re brand new to soap making, don’t worry. I have a beginner-friendly guide that walks you through the process.

Start here: 7 Easy Steps to Homemade Lye Soap for Beginners.

I’ve also written several books about natural soap making, along with ebooks and other resources available through my shop.

Browse my natural soap-making books and resources

Cold Process vs. Hot Process Soap

Most of these recipes can be made using either the cold process or hot process method.

When made using the cold process method, the soap generally needs several weeks to cure before it is ready to use. I recommend following the individual recipe for its specific curing time, but many of these recipes are ready for use at around 3–4 weeks, while a longer cure can make an even harder, longer-lasting bar.

If you don’t want to wait as long, you can make all of these recipes using the hot process method. Hot process soap is cooked, which speeds up saponification, and the soap can be used once as soon as it has cooled and hardened. The main difference is in texture. Hot process tends to be chunkier looking, whereas cold process has that smooth soap bar look. Both have beautiful merits.

Keep in mind that “ready to use” and “fully cured” aren’t necessarily the same thing. Even hot process soap will continue to lose water and become harder over time.

Now for the fun part!

These 17 fall soap recipes are filled with cozy Autumn scents, natural ingredients, pretty designs, and plenty of inspiration for homemade holiday gifts. These are great as stocking stuffers, or in gift baskets.

Most recipes make either 2 or 3 pounds of soap, but be sure to check the individual recipe before getting started.

1. Cinnamon Roll Soap

Get the Cinnamon Roll Soap Recipe

This one looks almost good enough to eat!

The cinnamon swirl running through the middle of these soap bars makes them look like little cinnamon rolls. They’re especially fun to make for holiday gifts, and the warm cinnamon scent is perfect for Autumn.

Just remember to remind everyone that they’re soap—not breakfast!

2. Fall Sunset Soap

Get the Fall Sunset Soap Recipe

This has become one of my favorite fall soap recipes.

The colors remind me of an Autumn sunset, with beautiful shades of orange, purple, yellow, and pink swirled together. The essential oil blend adds those warm, comforting scents that make you think of crisp evenings and changing leaves.

I’ve even sold these in my shop during the holiday season.

3. Pumpkin Spice Soap

Get the Pumpkin Spice Soap Recipe

Of course pumpkin spice had to make the list!

Pumpkin spice is one of those scents that immediately makes a home feel like Fall. This recipe uses real pumpkin puree along with nutmeg, cinnamon, and clove for a warm, spicy seasonal soap.

It’s a favorite year after year and is a staple holiday soap in my shop.

4. Evergreen Tree Soap

Get the Evergreen Tree Soap Recipe

If you love woodsy scents, this is the soap for you.

Cedarwood gives this soap a wonderful earthy scent, and the tree design running through the center of each bar makes it especially fun for the winter and Christmas season (I add a green swirl, but you can also use an insert).

There’s something about cedarwood in the shower that feels like a little pick-me-up in the morning. It’s energizing and uplifting. A must have for anyone who suffers from those winter blues.

This is another one I like to keep in my shop year around.

5. Chai Soap

Get the Chai Soap Recipe

I love the smell of chai tea, especially when the weather starts to cool down. This soap combines the warm scents of cardamom, clove, and cinnamon and is simple to make because it uses a real chai tea bag in the recipe.

It’s a cozy soap bar that feels right at home during the Fall and winter months.

6. Orange and Clove Soap

Get the Orange and Clove Soap Recipe

Orange and clove are two of my favorite essential oils for creating that classic Fall feeling.

If I’m diffusing essential oils around the house in the Autumn, orange and clove are often my first choice. Together, they make a bright but warm scent that’s perfect for homemade soap.

This is a great one to make for holiday gifts, too.

7. Spiced Cider Soap

Get the Spiced Cider Soap Recipe

Apple cider is one of those things my kids love about Fall. They spot it in the store before anyone else!

This soap captures those sweet, warm cider scents in a homemade bar. It’s a wonderful choice if you want something that immediately brings back memories of cool weather, warm drinks, and Autumn afternoons.

8. Walk in the Woods Soap

Get the Walk in the Woods Soap Recipe

There is nothing quite like taking a walk through the woods when the air turns cool and crisp. This soap was really inspired by that feeling.

It’s earthy, woodsy, and calming—a wonderful choice if you prefer natural soap scents that aren’t overly sweet or spicy.

9. Autumn Leaves Soap

Get the Autumn Leaves Soap Recipe

This soap has a unique combination of orange, patchouli, and ginger essential oils. The result is a warm, woodsy scent that feels just like Autumn leaves and cool evenings.

If you like earthy essential oil blends, this is definitely one to try.

10. Gingerbread Soap

Get the Gingerbread Soap Recipe

These gingerbread soap bars are especially fun when made in molds. You can make little gingerbread people, gingerbread shapes, or whatever seasonal molds you have on hand.

They make adorable Christmas and holiday gifts, and they’re a fun project to make with the family.

11. Pumpkin Cinnamon Layered Soap

Get the Pumpkin Cinnamon Layered Soap Recipe

Pumpkin and cinnamon are two of the scents I immediately associate with Fall.

This soap combines the two in beautiful layers for a simple but eye-catching bar. It’s been a very popular Fall soap over the years.

12. Cranberry Vanilla Swirl Soap

Get the Cranberry Vanilla Swirl Soap Recipe

Pretty pink cranberry swirls are combined with a creamy vanilla-colored soap base.

The finished bars are beautiful enough to give as gifts, and the cranberry and vanilla combination makes them especially appropriate for the Thanksgiving and Christmas seasons.

13. Sugar Cookie Soap

Get the Sugar Cookie Soap Recipe

These sugar cookie soap bars are speckled with cinnamon and scented with vanilla. They’re another one that can fool your guests for just a second. They smell so good that you’ll probably need to remind everyone that they’re soap!

I love making soaps like this for the holidays because they look like little treats without actually being edible.

14. Hot Chocolate Soap

Get the Hot Chocolate Soap Recipe

Who doesn’t love hot chocolate?

Hot cocoa is appropriate for all kinds of cozy weather, but there’s something especially wonderful about it on a cold Fall or winter day. This recipe uses cocoa powder and cocoa butter, which add their own naturally chocolatey qualities to the finished soap.

It’s a fun winter soap and makes a great homemade gift.

15. Cranberry Orange Soap

Get the Cranberry Orange Soap Recipe

Cranberry and orange are such a pretty combination for the holiday season.

One fun thing about this recipe is that using cranberry juice doesn’t make the soap turn pink. You’ll have to use clays for that. But the cranberry juice is still a beautiful addition because it helps create a creamy texture and contributes to a bubbly finished bar.

The bright citrus combined with cranberry makes this one feel especially festive.

16. Vanilla Maple Soap

Get the Vanilla Maple Soap Recipe

Vanilla is always a favorite and adding maple gives it that rich bubbly lather. This soap also has a naturally darker cream color, making it look just as cozy as it smells.

If you like sweet soap scents but don’t want something overwhelmingly fruity, this is a great choice.

17. Apple Cider Soap

Get the Apple Cider Soap Recipe

This is a little different from the Spiced Cider Soap above. Instead of simply creating a spiced cider scent, this recipe actually uses apple cider in the soap. The sugar also helps contribute to extra bubbles, making this a wonderful Fall bar for everyday use.

Which Fall Soap Recipe Will You Make?

I hope you find a few recipes here that inspire you to get out your soap-making supplies and start creating!

These homemade fall soaps are wonderful for keeping around your own home, but they’re also perfect for DIY Christmas gifts, Thanksgiving hostess gifts, teacher gifts, stocking stuffers, and handmade gift baskets.

One of my favorite things about making soap is that you can take a basic skill and make it completely your own. Change the essential oil blend, try a different natural color, experiment with a new mold, or combine a design you love with your favorite soap base.

And if you make one of these, I’d love to know which one is your favorite!

Happy soap making and enjoy all those wonderful Fall scents.
Tags: , , , ,
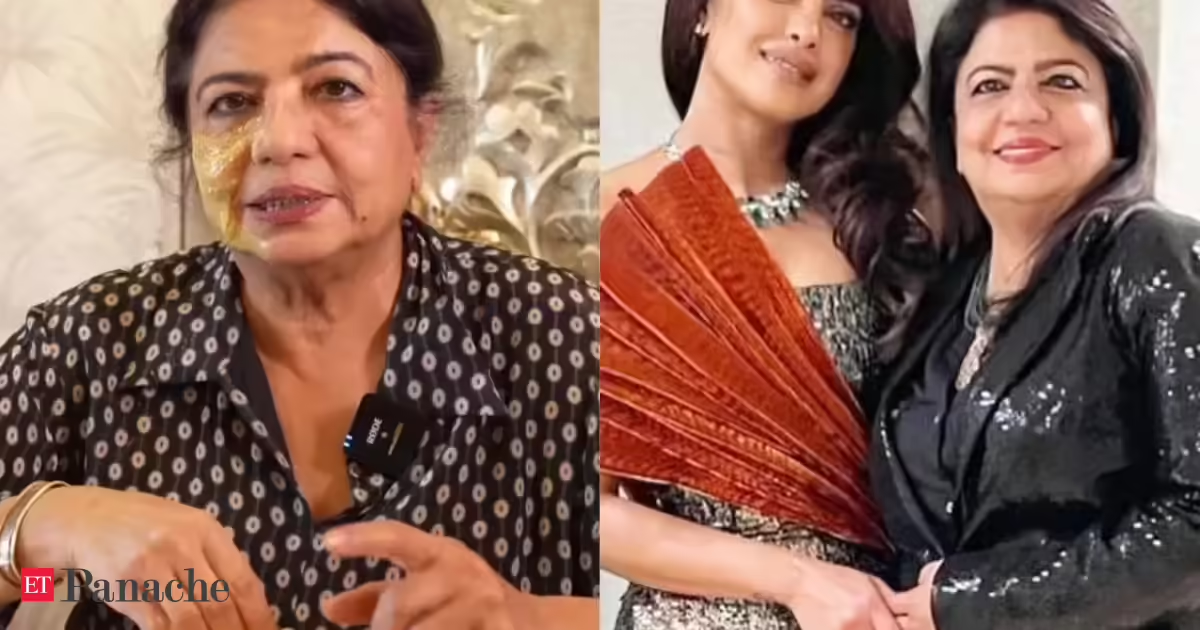
No soap, no facewash. Priyanka Chopra’s mother shares her one simple skincare routine for glowing skin and the actress follows it too. What is it?

No soap, no facewash. Priyanka Chopra’s mother shares her one simple skincare routine for glowing skin and the actress follows it too. What is it?

When everyone just talks about expensive skincare products and complicated routines, many still search for something simple and effective. From serums to cleansers, the choices can feel endless and confusing. But what if glowing skin didn’t require any of that? What if the secret was something basic, natural, and already available at home? Interestingly, a traditional remedy followed for years by Priyanka Chopra’s mother, Madhu Chopra, proves that sometimes, less really is more.

The skincare secret revealed by Priyanka Chopra Jonas’ mother

Dr Madhu Chopra, mother of Priyanka Chopra, recently shared her go-to skincare routine, and it’s surprisingly simple. Taking to her social media handle, she revealed that she has never relied on soap or facewash for her skin. Instead, she uses a traditional homemade ubtan, a natural face pack made with everyday kitchen ingredients.
She explained that this routine has helped her maintain clear and healthy skin over the years, keeping issues like acne, pimples, and pigmentation at bay. What makes it even more interesting is that Priyanka Chopra also follows the same skincare ritual.

What goes into the face pack?

The base of this DIY face pack is gram flour (besan) and turmeric (haldi), both widely known for their skin-friendly properties. Besan works as a gentle cleanser, while turmeric helps soothe the skin and reduce inflammation.

To make the pack suitable for dry skin, Dr Madhu adds ingredients like fresh cream (malai), yoghurt, and a bit of cold milk. These elements help moisturise the skin and prevent dryness. Turmeric, considered the key ingredient, plays a major role in fighting infections, reducing acne, and giving the skin a natural glow.

How to use it properly

The preparation of the face pack is simple and quick. All the ingredients are mixed into a smooth paste and applied evenly on the face, just like a mask. It is then left on the skin for about 15 to 20 minutes before being washed off with water. Dr Madhu also advises being careful while applying the pack, especially around the eyes. She cautions that the under-eye area is delicate and should be left untouched to avoid irritation.
Alternatives for sensitive skin
While the face pack works well for many, Dr Madhu also suggests alternatives for those with sensitive skin or allergies. For instance, if gram flour doesn’t suit someone, wheat flour can be used instead. Similarly, if turmeric causes irritation, lemon juice can be added as a substitute, as it is rich in vitamin C. For those who cannot use dairy products like cream or yoghurt, natural options such as grated tomato or potato juice can be included in the mixture. These ingredients are known to improve skin texture and provide additional nourishment.
According to Dr Madhu Chopra, the secret to achieving good results lies in regular use. She recommends applying the face pack frequently, even daily, for visible improvement in skin texture and glow. Over time, this consistent routine can help restore the skin’s natural radiance without relying on chemical-based products.Her approach highlights a larger idea: skincare doesn’t always have to be expensive or complicated. Sometimes, traditional remedies passed down through generations can be just as effective, if not more. With both Dr Madhu Chopra and Priyanka Chopra trusting this simple routine, it also kind of shows that glowing skin might just be a few natural ingredients away.
Add as a Reliable and Trusted News Source

Tags: , , , , , , , , , , ,
Sarah Jessica Parker's divisive skincare routine includes 'any old soap'

Sarah Jessica Parker’s divisive skincare routine includes ‘any old soap’

Sarah Jessica Parker may be known for her flawless complexion and radiant glow, but her skincare routine includes a habit that raises eyebrows in the beauty world – and it all comes down to how she removes her makeup.

The Sex and the City alum, who ushered in her 61st birthday on March 25, has always stayed true to her minimalist approach to skincare. The actress appeared on Caroline Hirons’ podcast to discuss her routine with the esthetician and owner of cosmetic brand Skin Rocks.

“When I go into the bathroom, the first thing I do is take off my false eyelashes and remove my makeup,” shared Sarah Jessica. “Then I use Boots fragrance-free makeup remover wipes , which cost around £1.99, to remove all my makeup. I use them because I’m afraid that the amount of oil or product I’m wearing will clog the sink.” 

© Penske Media via Getty ImagesSarah Jessica Parker turned 61

She continued: “Then I wash my face thoroughly. Some people are a little hesitant when I say I use soap, because facial cleansing is a very serious matter for many, but I don’t care. My husband uses a simple bar of soap and has beautiful skin. It almost makes me angry, because he doesn’t even wear makeup and yet he has perfect skin . So, honestly, I use any soap . I don’t really care.” 

Sarah Jessica is married to Matthew Broderick, and the couple share three children: James Wilkie, 23, and twins Tabitha Hodge and Marion Loretta, 16. According to the actor, his wife “has beautiful skin”. 

© CBS via Getty ImagesMatthew Broderick and Sarah Jessica Parker

Should we be using makeup wipes?

While Sarah Jessica’s unfussy skincare routine works for her, it’s not typically advised by industry experts. Nichola Joss, Sanctuary skincare expert, previously spoke to us about the use of makeup wipes. “Face wipes tend to be a little aggressive on the skin as they drag and pull the skin when being swept across the face,” she shared.

“Dragging and pulling the skin can subsequently cause premature ageing and put stress on the skin. Also, often the ingredients of the face wipes are concentrated onto the wipe which can dry out the skin too.”

Sarah Jessica Parker’s routine

© InstagramThe actress opened up about her beauty routine

The & Just Like That star exclusively shared with HELLO! some of the secrets behind her A-list glow. “Usually, I’ll do two things at most,” she said. “Every now and then, I’ll add a third element.” She added: “Simplicity and efficacy. I have great admiration for women who do nine steps in the morning and at night, but it’s something I don’t have the patience for. I don’t understand why we are asking that of women; all of our time is valuable.”

Tags: , , , , , , ,
A visual guide to common soap making problems, including seizing, cracking, separation, and overheating, with natural solutions for beginners.

Soap Making Troubleshooting Guide: Why Your Soap Didn’t Turn Out Right (And How to Fix It)

Making homemade soap is such a beautiful, simple skill to learn—but if you’ve ever had a batch go wrong, you know how discouraging it can feel. One minute everything looks perfect, and the next you’re in the middle of soap making troubleshooting because your soap is thickening too fast, cracked, crumbling, or just… wrong.

Here’s the good news: every soap maker has been there. Every mistake is part of the learning process, and most problems are completely fixable—or preventable next time.

This guide will walk you through the most common soap making problems, why they happen, and how to fix them using simple, practical, real-life solutions to get you on the right path.

After all, learning homemaking skills like soap making isn’t just about the end product—it’s about stewardship, patience, and building something meaningful for your home and family. Mistakes are part of learning, and every imperfect batch is still a step toward wisdom, confidence, and self-sufficiency.

Table of Contents

  • Quick Soap Making FAQ
  • Why Did My Soap Seize?
  • Why Did My Soap Separate?
  • Why Is My Soap Too Soft?
  • Why Did My Soap Crack on Top?
  • Why Did My Soap Change Color or Fade?
  • Why Is My Soap Sweating?
  • Why Doesn’t My Soap Lather Well?
  • Why Are There Air Pockets or Tunnels?
  • Why is My Soap Chalky and Crumbly?
  • Why Does My Soap Smell Bad?
  • Gentle Reminders for New Soap Makers

Soap Making Troubleshooting Quick FAQ:

Good soap making starts with great techniques and great recipes. Make sure to read my articles on both so you start with great quality.

Here are my most common questions with rapid answers up front!

Can failed soap be saved?
Yes! Most failed soap can be re-batched or hand-milled (melted and remolded). Learn how here.

What does seizing mean in soap making?
Seizing is when soap batter thickens suddenly due to high temperatures, using fragrance oils, using hot essential oils like cinnamon and clove, or over-mixing. Change to essential oils and soap at cooler temperatures.

Why does my soap get a white powder on top?
That’s soda ash. It’s harmless and can be rinsed or gently shaved off.

Why are lye pockets in my soap after curing?
If you have liquid pockets that give you that slick feeling on your fingers when you feel it, you know it’s lye. You didn’t mix enough and then poured too cool. The oils and lye water didn’t emulsify and separated, not fully saponifying. But don’t worry. As long as you know that you used the right ingredient amounts, you can hand-mill (re-batch) the soap. Learn how here.

So, lets dive into the meat of each topic to make sure you minimize problems in the future, or at least know what to do when they happen.

Soap Making Troubleshooting Guide

Why Did My Soap Seize?

What it looks like: Soap batter suddenly turns thick, grainy, and chunky, like lumpy mashed potatoes.

Common causes:

  • Essential oils or fragrance oils that accelerate trace: Some essential oils are considered “hot” oils and will accelerate trace. If you’re going to make a Fall soap with cinnamon, clove, or nutmeg, then lower the temperature of your oils and lye water slightly more than usual to accommodate this issue.
  • Soaping at high temperatures: When soap making temperatures are above 100 degrees Fahrenheit, soap can come to trace faster.
  • Over stick blending: Using a stick blender can cause soap to come to trace a lot faster than a whisk or hand mixer. Pay close attention.
  • Heavy water discounting: If you don’t use enough water in your recipe, you can have a whole host of problems. The primary issue is lye being concentrated in a way that creates lumps of saponified oil before the other oils can be mixed evenly.

Simple fix:

  • Stop blending with the stick blender. Use a spoon if you need to finish mixing in scent or natural soap colorant but work as fast as you can.
  • Spoon the soap into your mold as quickly as you can.
  • Press firmly and texture the top for a rustic look.

How to prevent it next time:

  • Don’t use Fragrance oils. Use essential oils instead.
  • Soap cooler (80–100°F). If you’re using a recipe with a lot of hard oils like lard, cocoa butter, coconut oil, you have a higher likelihood of saponifying quickly.
  • Hand-stir essential oils into the soap instead of stick blending if you notice it came to trace quickly.
  • Always research scent behavior. There are “hot” essential oils like cinnamon and clove that will cause soap to come to trace quickly.

Why Did My Soap Separate?

What it looks like: Oil pooling, watery layers, or curdled soap batter.

Common causes:

  • False trace: False trace is rare if you measured correctly and your temperatures are right. But if your soap is too cold and you don’t stir enough, you can get results that you don’t see are messed up until you try to take the soap out of the mold.
  • Incorrect measurements: soap recipes are very precise. Measurements are scientific for a chemical reaction. If you measure precisely, you will have a lot less problems.
  • Not enough mixing: If lye water isn’t mixed enough, the water won’t be emulsified into the oils. This will cause pockets of lye water to separate as it sits in the mold.
  • Curing temperature too cold after limited mixing: If didn’t mix great, but you have warm temperatures, sometimes you can luck out and the soap turns out ok. But if you undermixed and then temperatures are too cold it’s a definite combination for lye pockets.

Simple fix:

  • If you catch it before it sets up, re-blend until fully emulsified.
  • If it’s already molded, don’t worry. It can be fixed. If you had a scale problem or forgot something, try to figure out what you did. You can always re-batch or hand mill the batch and add the missing ingredient to fix it. If you didn’t mix enough, hand-mill and mix well.

How to prevent it next time:

  • Always weigh ingredients carefully.
  • Match oil and lye temperatures to at least 80 degrees Fahrenheit.
  • Blend to emulsion. Look for light trace.

Why Is My Soap Too Soft?

What it looks like: When unmolding the soap, your hand may leave fingerprints, or the soap is extremely soft or even fully liquid.

Common causes:

  • Too much water: Double check your recipe and make sure the water amount is correct. It should be 32-38% of the oils.
  • High olive oil content and not enough hard oils: Castile and Bastille soaps can be very soft when first unmolded.
  • Superfat content too high: Too many oils compared to lye water will leave your soap slightly softer than a lower superfat content. Common amounts are 5-15%, unless you are making a salt bar recipe.
  • Not cured long enough: Most of the time, the soap just needs to sit in the mold for a little longer or be cured for a few more days.

Simple fix:

  • Leave it in the mold longer.
  • Put it in the freezer before unmolding.
  • Let it cure longer (3-4 weeks).
  • Rebatch with harder oils if needed.

How to prevent it next time:

  • Edit recipe in lye calculator with coconut oil, tallow, lard, or cocoa butter
  • Slightly reduce water if water content is too high.

Why Did My Soap Crack on Top?

What it looks like: It looks like a crack in a river bed and the soap is a lot darker than usual. When soap overheats it darkens and cracks, as if it is boiling beneath the surface and heat has to escape somehow.

Common causes:

  • Overheating due to hot essential oils or using fragrance oils.
  • Heavy insulation in an already warm room.
  • Sugars or milk cause overheating during saponification: Just like how soap curds can burn when added to water, it also speeds up saponification and creates heat quickly. Always keep this in mind when adding milks and sugars (honey, manuka, etc.)

Simple fix:

  • Cool as soon as possible when you notice it. Place it in the refrigerator for a few minutes to cool it down.
  • Gently press cracks together while warm.
  • Plane the top after curing.

How to prevent it next time:

  • Don’t heavily insulate if the room is already in the mid 70s Fahrenheit.
  • Soap at cooler temperatures if that recipe tends to harden quickly or the oils cause it to set quickly.

Why Did My Soap Change Color or Fade?

What it looks like: Soap is one color when it’s molded, but another when you unmold it. Turmeric is yellow but turns tan. Alkanet root is purple, turns blue, then turns purple again. Beet root is a beautiful pink but turns brown when added to soap.

Common causes:

  • Fading or lye effected natural colorants, especially root powders and herbs.
  • Gel phase: The gel phase is when soap warms to a consistent temperature and goes into gel phase which is a natural glycerin transition time during the first 24 hours of saponification. Gel phase will darken a white soap slightly but is good for coloring when trying to bring out more vibrant colors.

Simple fix:

  • Embrace the natural patina. Soap colors will change based on temperature and colorant used. It’s a beautiful natural process.
  • Learn what changes and how so you can change your recipe as needed for next time.

How to prevent it next time:

  • Research how essential oils change colors in soap. Some will darken the soap bar a lot more than others.
  • Use clays, oxides, and stable botanicals that don’t change color. Clays are pretty consistent. Rose clay, Moroccan clay, or even charcoal are some of my favorites. Check out my book for a full color description and chart of herbs and
  • Control gel phase by not letting it enter gel phase (let it get warm enough for saponification, and not any warmer), or make sure it fully gels for a richer, darker color and harder finished soap.

Why Is My Soap Sweating?

What it looks like: There will be little beads of “sweat” all over the soap as it’s curing. Sometimes it’s enough that there is a pool of liquid under the soap where it sits.

Common causes:

  • This is usually glycerin dew, and it’s very common in humid climates.
  • You probably have a very high glycerin soap.

Simple fix:

  • Store in a dry, cool space.
  • Wrap fully once it’s cured to keep glycerin from beading outside the soap bar.

How to prevent it next time:

  • Cure in low humidity.
  • Avoid airtight curing containers. Let your soap sit out on a table for the first week at least.

Why Doesn’t My Soap Lather Well?

What it looks like: There may be tiny bubbles, but no big lather like you wanted.

Common causes:

  • Too much olive oil. Olive oil or Castile bars don’t have much cleansing power and don’t create bubbles without additives.
  • High superfat: If your soap recipe has a very high superfat content (20% or more), the oils can be weighed down by the extra oils available in the soap bar.
  • Low bubble creating oils: Every oil in a soap recipe has a purpose. If the recipe hasn’t been put together well, it may not account for moisturizing, cleansing, or lather. Learn more about lathering oils.
  • Hard water: The minerals in hard water will kill the bubbles. They also affect your hair, so keep this in mind when switching to natural shampoo bars.

Simple fix:

  • Use a soap saver like this one.
  • Use a water filter to soften hard water.

How to prevent it next time:

  • Balance bubbly and creamy oils.
  • Make sure there’s enough coconut, babassu oil, or castor oil to create a good lather.

Why Are There Air Pockets or Tunnels?

What it looks like: When you take your soap out of the mold and cut it, there are air pockets or tunnels running through your soap.

Common causes:

  • Pouring at thick trace. If the soap is thick, air pockets can be trapped as you pour or scoop the soap into the mold.
  • Not tapping the mold. Tapping the mold gently on a table or countertop can help bubbles escape if the soap is thin enough.

Simple fix:

  • Embrace the unique bar and enjoy it!
  • Hand-mill the finished bar. Your soap will still look rustic, but it won’t have the air pockets on the inside.

How to prevent it next time:

  • Pour at light trace.
  • Tap molds firmly to get air pockets out of the soap.

Why is My Soap Chalky and Crumbly?

What it looks like: The soap is white and chalky and crumbles in your hand. It also may be chalky only on the corners of the mold but solid in the center.

Common causes:

  • Soap is lye heavy. When too much lye is used, soap can become crumbly and chalky.
  • Soap was too cold when within the mold in the first 24 hours. When I’ve poured soap in the winter time, I’ve added a space heater and covered the mold with a towel and can still have the corners get crumbly. This is because the corners became too cold and there wasn’t proper saponification.

Simple fix:

  • If the batch is crumbly only on the outside due to the cold while in the mold, cut those areas off and use the rest of the soap.
  • If the batch was lye heavy, add the soap to a slow cooker as you would when re-batching any soap, but add oil during the process. If you have no idea how much extra lye you added, this can be a risk and you can still have lye heavy soap, but I’ve usually been able to figure out what I’ve done, or I’ve added enough oils that I know the soap is now fine for home use. If you are not sure, discard the batch.

How to prevent it next time:

  • Measure everything very carefully.
  • Make sure your soap is molded warm and kept warm for the first 24 hours. 75 degrees is usually a great temperature to make sure overheating, or soaping that’s too cold doesn’t occur.

Why Does My Soap Smell Bad?

What it smells like: There’s a dusty scent. Something is off.

Common causes:

  • Old or rancid oils.
  • Improper storage. Soap was left out in a hot and humid environment or has a lot of botanicals within it, causing it to go bad faster.
  • Expired fragrance oils.

Simple fix:

  • Discard the batch. There’s nothing else to do if you have rancid oils.

How to prevent it next time:

  • Use fresh oils.
  • Only use essential oils for an indefinite shelf life while still in the bottle.
  • Store soap in a cool, dry environment and store in plastic containers if possible when cured.

Gentle Reminders for New Soap Makers

  • Measure carefully. The smaller the batch, the more specific you need to be.
  • Keep recipes simple until you learn more about ingredients and what they do in soap. You can learn more about soap making oils here.
  • Don’t rush trace. Know what trace is and what you want for your specific recipe. Some soaps you want to pour at light trace so you have time to include colors. Others need to be thicker so you can create swirls or layers.
  • Insulate for 24 hours, longer if soap is still soft. Then cure for 3 weeks so your soap is hard and lasts longer.
  • Enjoy experimenting!

Soap making isn’t about perfection; it’s about learning, growing, and building a simple, natural skill for your home or small business. Every batch teaches you something new, and even the mistakes have value.

Save this guide, come back to it when something goes wrong, and remember: you’re learning a real homestead skill, and that takes time.

If you have a question that wasn’t answered, ask it here.

Tags: , , , , , ,
How To Make Color Swirl Melt + Pour Soap

How To Make Color Swirl Melt + Pour Soap

Color swirl melt and pour soap is one of my favorite projects. It’s beautiful, beginner-friendly, and always feels a little bit magical when you unmold it and slice into it. But getting those crisp, clean swirls does require understanding a few key techniques that are unique to melt and pour.

If you’re coming from the cold process soap world, you might think swirling melt and pour soap is going to be the same deal. But here’s the thing… it’s a totally different beast.

Melt and pour soap cools and thickens way faster than cold process, and it doesn’t reach “trace” (a pudding-like consistency that’s perfect for swirling). So your swirl window is pretty limited. You’ve got to work quickly and strategically or you’ll end up with a solid block before you even get your skewer in there.

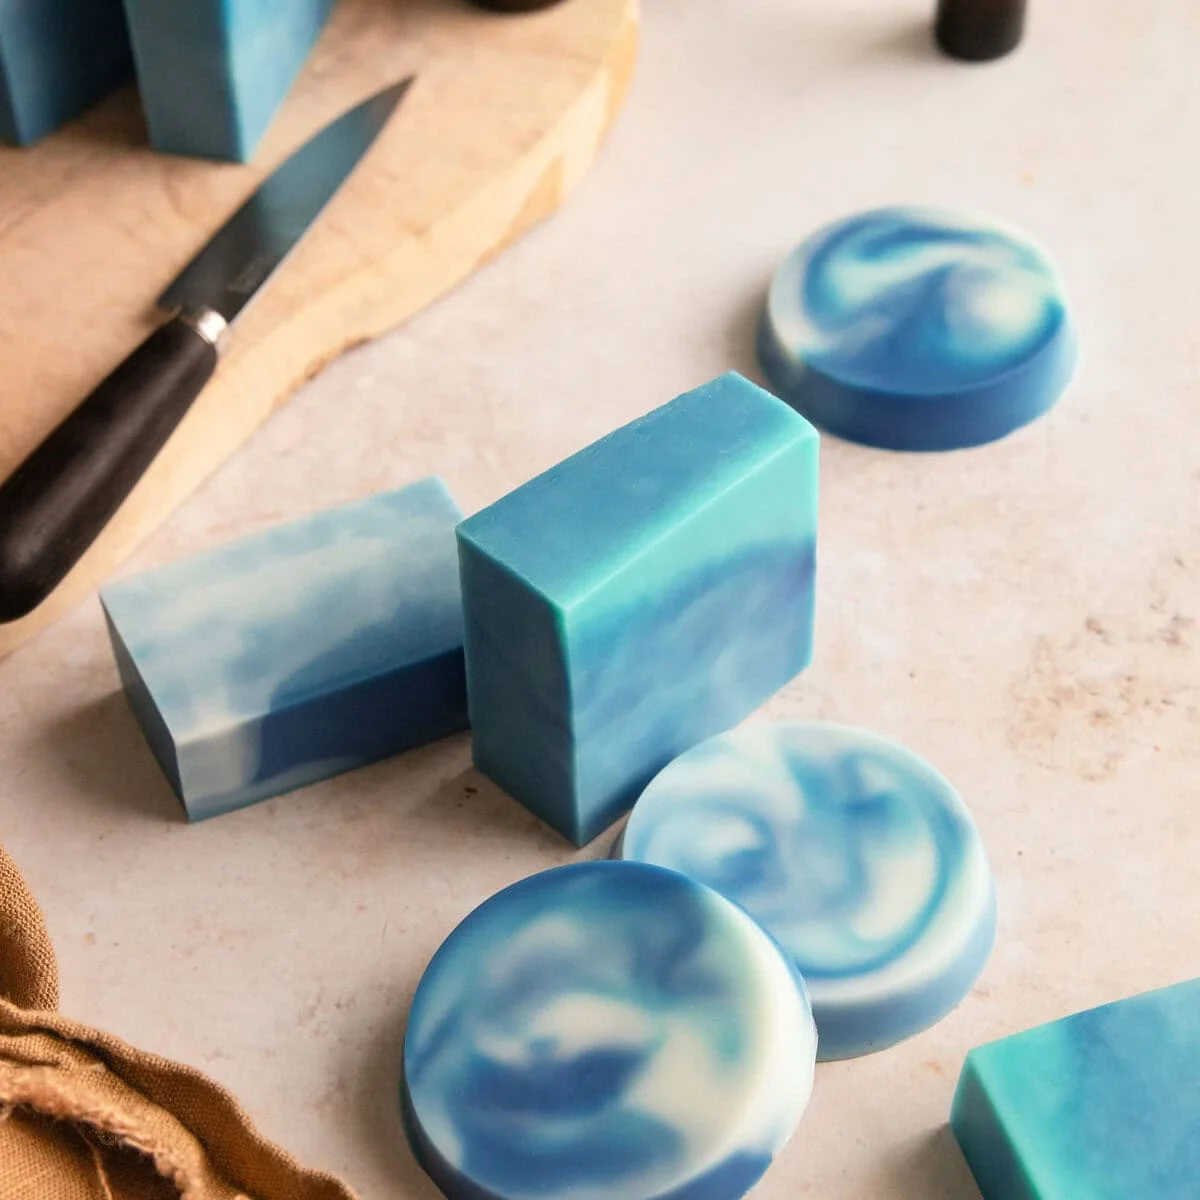
But don’t let that scare you off! With a few key tricks in your back pocket, creating swirls in melt and pour (like these dreamy cloud lavender soaps) becomes totally doable.

]]>Jump to:

Supplies

Before you dive in, let’s get your supplies together. Having everything prepped and ready to go is crucial since melt and pour soap sets quickly and you won’t have time to scramble for a thermometer or skewer once you’re in the middle of swirling.

Ingredients:

  • Soap Base: You’ll need either white or clear soap base. The clear base gives you that translucent effect, while white provides opacity. While you can use either type of base, I recommend sticking with just on type and not mixing them together! Different brands and types have different weights, and if you mix them together you may find that one sinks to the bottom, leaving you with layers as opposed to swirls.
  • Mica powder: You want to use non-bleeding colorants for crisp, clean swirl lines. Mica is my go-to, but you can also use color blocks or liquid soap dye.
  • Essential oils: Totally optional, but if you’re planning to scent your soap, have the oils measured out and ready to add right after you melt the base. A good rule of thumb is roughly 1-2 teaspoons essential oil per pound of soap base.

Tools:

  • Molds: Loaf molds are super common for swirl designs since they give you those beautiful cross-sections when you slice the soap. Silicone molds also make unmolding way easier, so you don’t risk ruining your pretty swirls trying to wrestle the soap out. Feel free to use single cavity silicone molds (like we did in this post (link to swirled Sleepy Time Soap post)) if you prefer.
  • Microwave-safe containers (preferably with a spout): You’ll use these for melting your soap base and then keeping each color separate. Having multiple containers on hand means you can work with several colors at once.
  • Spoon or spatula: This is for stirring your melted soap base and mixing in your colorants and oils. A heat-safe silicone spatula works great since it can handle the heat and won’t scratch your containers.
  • Skewers: These are your swirling tools! Gently drag one through the soap to create those beautiful marbled patterns. If you don’t have a bamboo skeewer, you can also use a butter knife or chopstick.
  • Thermometer: A kitchen thermometer lets you know exactly when your soap hits that perfect swirling temperature, which makes all the difference between crisp swirls and muddy blobs.
  • Rubbing alcohol in a spray bottle: This eliminates those pesky surface bubbles after pouring. Just a few quick spritzes will pop the bubbles, leaving you with a smooth, professional-looking top.
  • Divider material: While I had a hard time making dividers work, many tutorials recommend using wax-coated dividers, stiff paper, or even a manila folder to get more controlled swirls. You’ll cut these down to size and place them in your mold to keep colors separated until you’re ready to pull the divider out and start swirling. Even though I had a hard time getting them to work, it doesn’t hurt to play around with these when making swirls your soap.

How to Swirl Melt and Pour Soap

1. Prep & Melt

Start by cutting your soap base into small, evenly-sized cubes and divide it into separate microwave-safe containers (one for each color you’re planning to use). This helps it melt more quickly and evenly.

You can melt it in the microwave in short bursts. I usually do 30 seconds at a time, stirring in between. Or use a double boiler if that’s more your style.

2. Add Color and Essential Oil

Once your soap is fully melted, add your mica powder and essential oil to each container, stirring well to make sure everything is evenly distributed.

3. Let Cool

Watch the temperature. Temperature control is everything. And I mean everything. Get that right, and you’re 90% of the way there.

You need to cool your soap until it hits the “sweet spot” for swirling (about 120°F). If your soap is too hot (around 135°F or above), the colors will blend together and your colors will blend together into a muddy mess. Too cool, and the soap will start to set before you can create your swirls. 

For more defined swirls, you want to pour around 120°F. But here’s the catch: at that temperature, the soap sets quickly, so you’ve got to work fast.

Tip: Use a thermometer. Guessing just doesn’t cut it when you’re working with such a narrow window. You need to know exactly how hot your soap is before pouring.

4. Pour into Molds

When it comes to pouring, you’ve got two main options:

Option A: Use dividers to control where each color goes and prevent premature blending. This is great if you want really structured, distinct swirls. To be totally honest though, I couldn’t get this trick to work for me.

Even with a sturdy divider, the soap simply leaked around the edges and flooded the mold. But I’m sure different types of dividers and/or dividers types of soap base will work better than others and are worth testing out.

Option B: Pour free-form, alternating colors and pouring from different heights to create a more organic, unpredictable pattern.

Vary your pour technique. Don’t just pour all your colors in the same spot or from the same height. Pour from different heights and into different parts of the mold to create interesting patterns. High pours create more movement, while low pours keep things more contained.

4. Swirl

Now for the fun part!

Drag a skewer or chopstick through the soap. You’re not stirring. You’re just gliding the tool through to pull one color into another.

A light touch is key here.

Tips: Only drag the skewer 1-2 times, max. I know it’s tempting to keep swirling and swirling to get that perfect pattern, but over-swirling will just muddle the colors. Often, just a couple gentle passes are enough.

5. Spritz with Alcohol and Let Cool

Immediately spritz the top of your soap with 99% isopropyl alcohol to get rid of any surface bubbles. Then let the soap harden fully before you unmold and cut it.

I know it’s tempting to peek early, but trust me, let it set completely so you don’t mess up your design.

Tips & Tricks

Stick to one base brand and type. We touched on this earlier, but it’s worth repeating: different bases can have different densities, even within the same brand. If you mix them, one color might sink while another floats, and your swirl definition will suffer. To avoid this, use the same soap base for all your colors.

Control the bubbles. Spritzing with 99% rubbing alcohol right after you pour helps eliminate surface bubbles. Just a few quick spritzes and those bubbles will pop right away.

Don’t move the mold until the soap has cooled completely. Even just bumping your mold can cause your swirls to mix. So once you’ve put the skewer down, don’t touch the mold! 

Cut your cooled soap based on the swirl. Sometimes you’ll end up with better swirl definition where you least expect it. If you don’t see much swirl action in the middle of the soap loaf but you do on the sides or ends, then cut your soap to highlight where the swirls are.

Troubleshooting

Even with the best techniques, sometimes things don’t go quite right. Here are some common issues and how to fix them.

Colors look muddy or blended together. This usually happens when the soap is too hot when you pour it. The heat causes the colors to mix and lose their definition, creating that muddy look.

To fix this, let your melted base cool to around 120°F before pouring. The cooler temperature helps the colors stay separate and crisp.

Swirl lines look faint or washed out. If your swirls are barely visible, you’ve probably dragged your tool through the soap too many times. Over-swirling blends the colors together and weakens those beautiful lines. A few slow, deliberate passes are usually enough to create gorgeous patterns without muddying things up.

One color sinks or rises above the others. This frustrating issue typically happens when you use bases with different densities, for example, mixing goat’s milk base with clear glycerin base. Since they have different weights, one will naturally settle above or below the other.

To avoid this, use the same melt and pour base for all your colors, or at least make sure all your bases are from the same brand and product line.

Lots of bubbles. Air gets trapped during pouring, especially if you’re pouring from a height or pouring quickly. The good news is this is one of the easiest problems to fix: simply spritz the top of your soap with 99% isopropyl alcohol right after you pour. The alcohol breaks the surface tension and those bubbles will pop almost instantly.

Soap thickens before you can pour or swirl. To prevent this, work a little quicker, or keep your containers on a heating pad or in a warm water bath so the soap stays fluid long enough to swirl.

If the soap gets chunky before you’ve had a chance to pour it, pop it in the microwave for 15 seconds. Keep heating and stirring until it’s a pourable consistency once again.

Sharp lines disappear after the soap sets. You created perfect swirls, but a day later they’ve blurred or bled into each other. This happens to the best of us. The fix is to use non-bleeding colorants like micas or color blocks specifically formulated for melt and pour soap. They’ll stay put and keep your swirls looking sharp.

FAQ

Do I need a loaf mold to swirl?

No, you can use loaf molds or single-cavity silicone molds to make swirl patterns in soap. Whichever mold you choose, the process is the roughly same.

Can I swirl with more than two colors?

Yes, many swirls use three or more colors. With more colors, dividers or careful pouring help maintain definition so everything doesn’t just blend together.

How long do I wait to unmold and cut?

Let the soap fully harden. Depending on your base and the temperature, this may take a few hours up to overnight. It’s better to wait too long than not long enough.

Will the swirl fade or bleed over time?

If you use non-bleeding colorants, you’re less likely to see bleeding later. Also, store your soap in dry, cool places to minimize sweating or color migration.

Is it normal for my soap to sweat as it sits?

Melt and pour soap can attract moisture from the air, which creates those little clear beads on the surface. To reduce sweating, wrap your soap once it’s fully set, store it in a cool, dry place, or adjust your base or additives accordingly.

0

Tags: , , , ,
Homemade Lush-Like Lavender Sleepy Soap

Homemade Lush-Like Lavender Sleepy Soap

Calming essential oil blends transform your bathroom into a pre-bedtime sanctuary with this homemade sleep soap with calming lavender. Coupled with a hot shower to relax muscles and turn off the nervous system, these soaps will revolutionize your bedtime routine and have you sleeping through the night in no time.

When was the last time you had a really good night’s sleep? For me, I honestly can’t remember. Aging, stress, and hormones have all affected my ability to either fall asleep or stay asleep, and I often wake up feeling exhausted. Which is why I’ve resorted to things like herbal remedies and hot showers before bed to get my body into sleep mode.

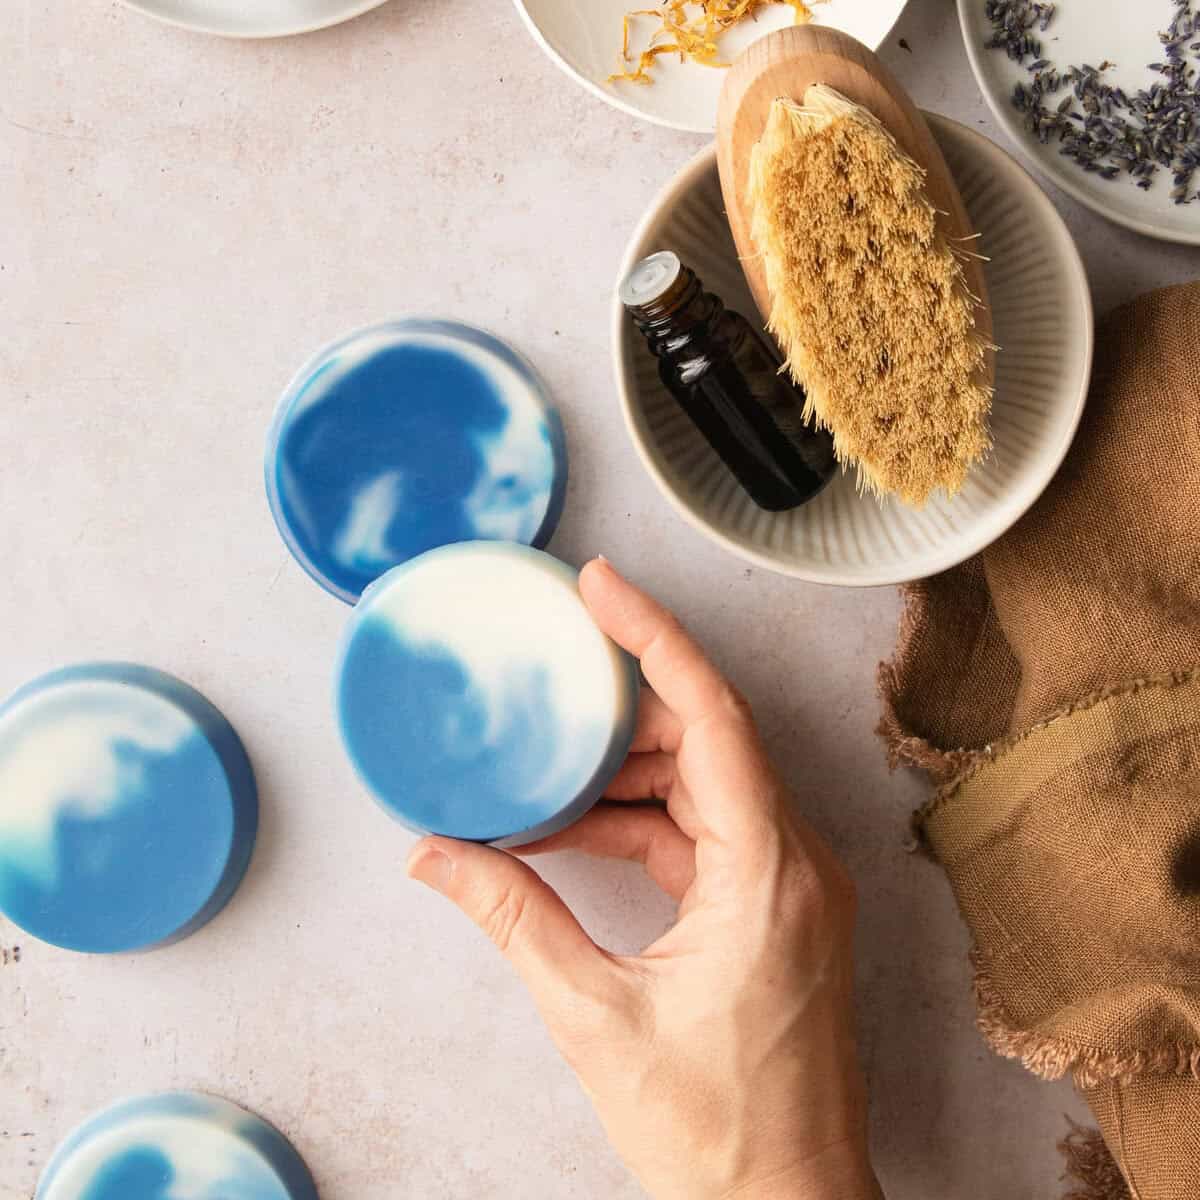
I added a simple swirl technique to give these homemade lavender soaps those dreamy, cloud-like patterns in vibrant blues and soft whites. But even if you skip the swirl in the Lush lookalikes, they’ll still be super effective (and smell amazing).

Supplies

Here’s what you’ll need to gather before you get started:

  • Melt and pour soap base — You can use any type of soap base you like. Clear glycerin, white, goat milk, shea butter, or coconut milk bases all work well. But whichever one you choose, I recommend sticking with the same type and brand, rather than mixing different bases together.
  • Mica powder — Mica is a great natural colorant that won’t irritate the skin or cause an allergic reaction.
  • Round soap mold — Single-cavity silicone molds are my go-to because the soap cools quickly (this prevents the colors from swirling and settling too much as the soap cools) and pops out easily. 
  • Heat-safe containers — Glass measuring cups or microwave-safe bowls work perfectly. You’ll need one for each color you’re planning to use.
  • Stirring utensils — Silicone spatulas or spoons are ideal for stirring in your colors and essential oils.
  • Wooden skewers — Ideal for swirling soap colors.
  • Rubbing alcohol in a spray bottle — This is essential for popping bubbles and helping layers adhere to each other if you’re doing a layered pour.
  • Thermometer — To get the best swirls, you want the temperature to be somewhere around 120°F. Without a thermometer its hard to know when the soap reaches the perfect temperature, so I highly recommend investing in one. 
  • Essential oils — As always, you can use whatever oils you have at home, or you can choose from the sleepy time blends below.

Essential Oils for Sleep

If you want your soap to smell as relaxing as it looks, essential oils are the way to go. Whether that’s classic lavender, cozy chamomile, or something with a hint of cedarwood or ylang ylang, there’s definitely a scent in there that’ll work for you.

Here are some of my favorite oils for creating that sleepy-time atmosphere:

  • Lavender — The classic calming floral. Lavender is probably the most well-known essential oil for relaxation, and for good reason! It has a soft, herbal scent that just makes you want to curl up and unwind.
  • Chamomile — Soft and incredibly grounding, Roman chamomile is especially gentle and works beautifully in sleep blends.
  • Cedarwood — Warm and steadying cedarwood has a woody, slightly sweet scent that’s perfect for evening. It pairs really well with lavender.
  • Bergamot — This one’s a little unexpected. Bergamot is bright and citrusy, but it also has relaxing properties that help quiet the mind. Just use it sparingly since it can be a bit strong.
  • Ylang ylang — Lush, floral, and deeply soothing. A little goes a long way with ylang ylang, so use it lightly or it can be overwhelming.

Instructions

I’m keeping this high-level here since there’s a detailed recipe card at the end, but here’s the basic process:

Melt and mix the soap. Cut your soap base into small cubes and melt each color in separate containers using the microwave (in short bursts) or a double boiler. Stir in your chosen colors and essential oils until everything is evenly distributed.

Dreamy Essential Oil Blends

You need a total of 1-2 teaspoons of essential oil per pound of soap base so you may need to scale these blends up depending on how much soap base you’re using and your own personal preference.

1. Soothing Lavender Blend

30 drops Lavender + 16 drops Cedarwood + 6 drops Bergamot

2. Nighty Night Blend

25 drops Roman Chamomile + 12 drops Lavender + 8 drops Vanilla

3. PM Calm Blend

20 drops Cedarwood + 8 drops Ylang Ylang + 5 drops Lavender

Let it cool slightly (this is important!) If the soap is too hot when you pour it, the colors will blend together and you’ll lose that beautiful swirl definition. Aim for 120°F, give or take a few degrees.

Pour the colors into the mold at the same time. Then lightly drag a skewer through the soap 1-2 times to create the swirl. Pouring simultaneously ensure that you can see the swirl on all the surface of the soap.

Let it harden and unmold. This usually takes at least 4-5 hours. If the soap is being stubborn, pop the mold in the fridge or freezer for a few minutes to help it release.

Top Tip

In order to get those gorgeous, distinct swirls, let the colors cool a little longer than you think you should before pouring. I know it’s tempting to pour right away, but slightly thicker soap creates more distinct, dreamy swirls and keeps the colors from muddying together. Trust me on this one, patience pays off!

Storage

Melt and pour soap naturally attracts moisture from the air, which creates those little beads on the surface. So you’ll want to wrap finished bars in plastic wrap to prevent glycerin dew. 

Then store in a cool, dry place away from bright sunlight. Depending on your soap base and colorant, you may find that the swirls start to bleed into each other over time, and heat and light can exacerbate this.

If this happens, either melt the bars down and blend the colors so there’s no more bleed. Or toss them out and make a fresh a batch.

More DIY Lush Madness

FAQ

Can I re-melt the soap if I mess up?

Absolutely. That’s one of the best things about melt and pour—it’s incredibly forgiving. If you don’t like how it turned out, just chop it up, re-melt it, and try again.

How long do the soaps last?

Typically 1 to 2 years, depending on how you store them. Keep them wrapped and in a cool spot, and they’ll stay fresh for a long time.

Can kids use these soaps?

Yes, just make sure to use kid-safe essential oils.

Print

]]>]]>

How To Make Sleepy Soap with Essential Oils

The cloud soaps make wonderful gifts, or you can keep them all for yourself and enjoy a little slice of calm every night before bed. Sweet dreams!

Prep Time1 hour

Cooling Time4 hours

Total Time5 hours

Course: Bath and Body Soap, DIY

Keyword: soap

Yield: 6 soaps

Author: Stephanie Pollard

Cost: $15

Equipment

  • Circular silicone soap mold

  • Heat-resistant containers for melting and pouring one per color

  • Stirring utensils for stirring soap as it melts

  • Kitchen thermometer

  • Wooden skewers for swirling soap

Notes

For wispy swirls: Pour from a distance to make the colors mix more intricately.
For bold swirls: Pour larger amounts of soap at once.
For defined layers: Pour a layer, let it form a thin skin, and then pour the next layer on top.

Soothing Lavender Blend

30 drops Lavender + 16 drops Cedarwood + 6 drops Bergamot

Nighty Night Blend

25 drops Roman Chamomile + 12 drops Lavender + 8 drops Vanilla

PM Calm Blend

20 drops Cedarwood + 8 drops Ylang Ylang + 5 drops Lavender
0

Tags: , , , ,
DIY Gift Box Soap | Hello Glow

DIY Gift Box Soap | Hello Glow

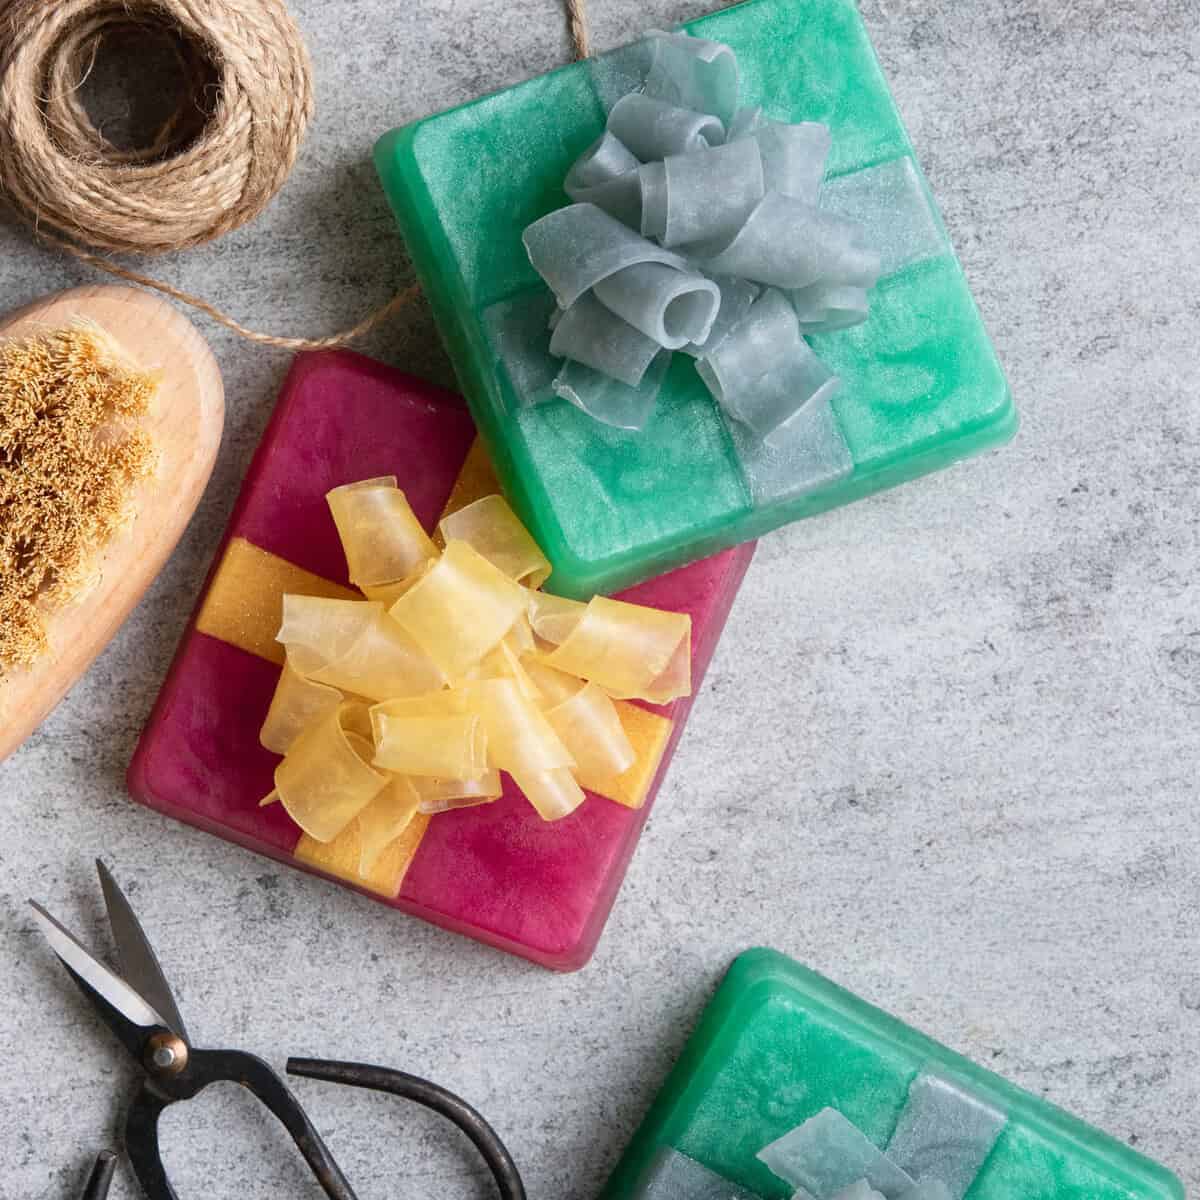
There’s something so satisfying about giving handmade gifts during the holidays, and these DIY gift box soaps are my new favorites to make. They look like tiny wrapped presents, complete with a “bow” made from soap curls on top. Not to mention, they’re adorable, they smell amazing, and they’re super easy to whip up, even if you’re not the “crafty” type.

The best part? These soaps are basically just melt and pour base and mica, which makes them totally beginner-friendly and inexpensive (say it with me: we’re keeping the holidays simple this year).

You don’t need any fancy equipment or special skills, just a few supplies and a bit of patience. The soap curls on top are what really make them stand out, and once you get the hang of it (this post will help!), you can customize them with different colors and scents to match your holiday theme.

  • Clear melt and pour soap base — I like using clear base because it gives you a translucent, glassy look that lets you see the colors and glitter inside.
  • Mica — A non-toxic colorant, mica is safe for skin and blends really well into melt and pour soap base. It also creates a swirly, marble-like effect as the soap cools. I used purple-red and a dark turquoise for mine.
  • Glitter — While not totally necessary, glitter adds extra shimmer to your soap curls so they look like fancy ribbons. I used mica-based glitter rather than traditional plastic glitter because I thought it would less scratchy and it wouldn’t pollute our waterways once it goes down the drain. 
  • Essential oils — Cinnamon, clove, pine, cedarwood, sweet orange, peppermint or vanilla essential oils make for perfect holiday scents, but you can use any fragrance that makes you happy.
  • Spray bottle with rubbing alcohol — Spritz this on freshly poured soap to get rid of air bubbles and between layers to help everything stick together.
  • Vegetable peeler — It’s the easiest tool for getting those thin, ribbon-like curls. If you don’t have a vegetable peeler, check out this post [insert link for to How to Make Curls post] for different methods you can use to make your curls. 
  • Square silicone mold — You’ll need square single-cavity soap molds to create the gift box shape.
  • Heat-proof measuring cup — A glass measuring cup with a pour spout makes melting and pouring your soap a lot easier.
  • Large microwave-safe bowl — This is handy if you’re melting a bigger batch of soap or if you need extra room to mix in your mica and fragrance.
  • Kitchen thermometer — It’s important to know how hot your soap is when working in layers. I recommend keeping the soap aroun 140 F to prevent it from melting the ribbons or curls.

Instructions

Step 1: Make the Ribbons

Start by melting clear soap base and adding gold mica to create one thin square of soap for cutting into ribbon strips, plus one thicker block that you’ll use later when peeling the curls.

Step 1: Cut Soap

Cut 3 ounces of clear soap base into 1-inch cubes and place them in a microwave-safe measuring cup.

Step 2: Melt & Add Glitter

Melt the soap in the microwave in 30-second bursts, stir after each. When melted, add the glitter and stir again.

Step 3: Pour Soap

Pour about 0.5 ounce of soap into one of the mold compartments. This thin square will make the ribbon strips. Pour the rest of the soap into another mold compartment to make a thicker block for the curls you’ll make later.

Step 4: Remove Bubbles

Spritz everything with rubbing alcohol to get rid of surface bubbles, then let the soap harden completely.

Step 5: Cut Ribbon Strips

Once everything is set, cut the thin square into four strips.

Step 6: Add Ribbon to Soap Mold

Take 2 of the strips and place one on top of the other to make a plus sign. Trim off the part where they overlap in the middle so they’ll lay flat in the mold (don’t worry, the seam will get covered up by soap curls).

Step 2: Make the Boxes

The soap “boxes” require two separate pours, which helps keep the ribbons in place and prevents them from floating around.

Step 1: Melt + Color Soap

Melt 4 ounces of clear soap base in the microwave. Stir in your mica color and add essential oil.

Step 2: Cover Ribbons

Let the soap cool to about 140 degrees F. Press the ribbon strips firmly into the bottom of your mold so they stay put, then pour just enough soap to cover them.

Step 3: Remove Bubbles + Cool

Spritz with alcohol and let cool. Once that first layer has cooled, spray with alcohol again.

Step 4: Fill Soap Mold

Pour in the remaining soap to fill the rest of the mold. You might need to heat it again to remelt it. Spritz one more time, then let it cool completely.

Step 3: Attach the Soap Curls

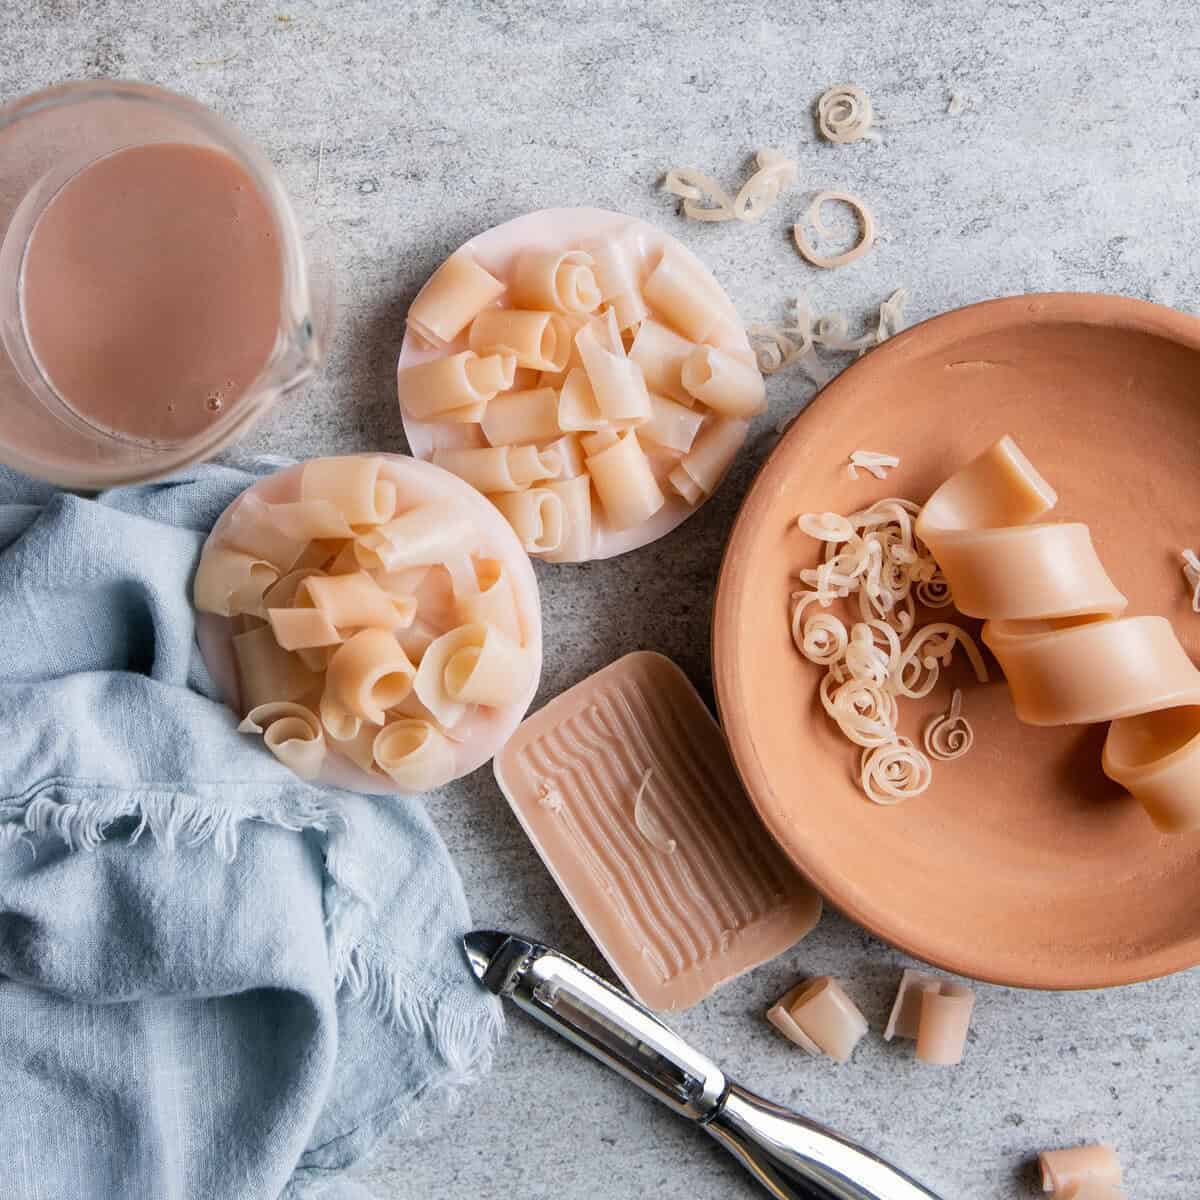
Use a vegetable peeler to shave thin curls from the thick gold block you made earlier and stack them on top of your gift box to create a clustered ribbon effect.

Step 1: Shave Soap

Take the thick gold square you set aside earlier and use a vegetable peeler to shave off thin ribbons of soap.

Step 2: Curl Soap

If they don’t naturally curl on their own, roll them with your fingers to create the curled ribbon shape.

Step 3: Attach Curls

Melt about 1 ounce of clear soap in a shallow glass or bowl. Dip the corner of one curl into the melted soap and place it on top of the gift box. Keep stacking curls until you’ve built a little cluster that looks like a bow.

You can also pour clear melted soap base over the curl cluster or dip the curl cluster in melted soap to create a protective shell over it and help the curls hold their shape.

Substitutions

  • Clear melt and pour base — You don’t have to use clear soap if you don’t want to. You can swap it for white, goat milk, shea butter, or aloe bases depending on the look you’re going for. Each one will give you a slightly different finish and feel.
  • Soap curls — You don’t need to make fresh curls every time. Any leftover soap scraps can be shaved with a peeler and turned into curls. You can also use premade embeds if you want to save time.
  • Vegetable peeler — Use a paring knife or a cheese planer instead. They’ll give you slightly different curl shapes, but they both work.
  • Kitchen thermometer — Just rely on visual cues (or a finger, if you’re brave). If the soap is warm but not steaming, and it hasn’t formed a skin on top yet, you’re good to go.
  • Rubbing alcohol spray — Gently tap the mold on the counter to release bubbles. It’s not as effective as alcohol, but it works in a pinch.

Top Tip

Prep all your curls and tools before you start making the boxes. Melt and pour soap cools fast and forms a thin film on top pretty quickly, so this project moves at warp speed once you get going.

Storage

Once your DIY gift box soaps are finished, wrap each one individually in plastic wrap to keep humidity out and prevent the colorant from smudging or bleeding. Store them in a cool, dry cupboard away from direct light. Light can fade the colors over time, especially if you used brighter micas.

For long-term storage, place the wrapped soaps in an airtight container (preferably with silica packets to keep sweating to a minimum). 

If you’re planning to gift them later and notice the soap has developed condensation, just unwrap it and polish the surface with a soft cloth before wrapping it back up.

FAQ

Can I use cold process soap instead?

Not for this specific project. Cold process soap behaves differently, and the curls won’t work the same way. Melt and pour is really the best option here.

How long do these soaps last?

They’ll last up to a year when wrapped and stored correctly. Just keep them away from heat and humidity.

Do I have to add fragrance?

No, fragrance is totally optional. If you’d rather keep your soaps unscented, that’s perfectly fine.

Print

]]>]]>

DIY Melt and Pour Gift Box Soaps

These festive gift box soaps look like tiny wrapped presents, complete with overlapping gold ribbons and soap curl bows on top. And since they’re made with melt and pour soap, they make perfect last-minute holiday gifts.

Prep Time1 hour

Cooling Time4 hours

Total Time5 hours

Course: Bath and Body Soap

Keyword: DIY, holiday gifts, soap

Yield: 2 soaps

Author: Stephanie Pollard

Cost: $10

Instructions

Step 1: Make the Ribbons

  • Cut 3 ounces of clear soap base into 1-inch cubes and place them in a measuring cup.

  • Melt the soap in the microwave, then stir in the glitter until it’s fully mixed.

  • Pour about 0.5 ounces of soap into one of the mold compartments. Pour the rest of the soap into another mold compartment to make a thicker block.

  • Spritz everything with rubbing alcohol to get rid of surface bubbles, then let the soap harden completely.

  • Take the thin square and cut it into 4 strips.

  • Take 2 of the strips and place one on top of the other to make a plus sign. Trim off the part where they overlap in the middle so they’ll lay flat in the mold (don’t worry, the seam will get covered up by soap curls).

Step 2: Make the Boxes

  • Melt 4 ounces of clear soap base in the microwave. Stir in your mica color and add essential oil if you’re using it.

  • Let the soap cool to about 140 degrees F. Press the ribbon strips firmly into the bottom of your mold so they stay put, then pour just enough soap over them to cover.

  • Spritz with alcohol and let cool.

  • Once that first layer has cooled, spray it with alcohol again and fill the rest of the cavity with soap. Spritz one more time, then let it cool completely.

Step 3: Make Soap Curls

  • Take the thick gold square you set aside earlier and use a vegetable peeler to shave off thin ribbons of soap.

  • Use your fingers to roll the soap into curls.

  • Melt about 1 ounce of clear soap in a shallow glass or bowl. Dip the corner of one curl into the melted soap and place it on top of the gift box. Keep stacking curls until you’ve built a little cluster that looks like a bow.

Notes

Pour clear melted soap base over the curl cluster or dip the curl cluster in melted soap to create a protective shell over it and help the curls hold their shape.

0

Tags: , , , ,
5 Easy Ways To Make Soap Curls + Roses

5 Easy Ways To Make Soap Curls + Roses

I’ll be honest, I love making melt and pour soap, but sometimes the process can feel a little repetitive. Melt, pour, wait, unmold, repeat. So I started looking for ways to add a little something extra to my bars without making the process feel fussy. And that’s when I discovered soap curls.

Soap curls are thin slivers of soap that you peel or shave from a larger block. They naturally roll into these delicate, ribbon-like shapes that can be used as decoration, like on these gift box soaps.

Let ’em harden and they have this crunchy texture that feels like a gentle, satisfying scrub when you use them. If you’re into ASMR, the sound and feel of them is surprisingly relaxing, too.

You can also embed soap curls into soap loaf molds for a really beautiful, layered effect. It’s an easy way to make your soaps look more professional and artisan without a ton of extra effort.

So if you’re ready to add a little texture and visual interest to your melt and pour projects, let’s start with the basics.

Curling Tools

  • Vegetable peeler — This is one of the best tools for making thin, delicate curls roughly ½” – 1″ wide. It gives you nice control and creates those pretty ribbon shapes.
  • Y-shaped peeler — If you want slightly thicker curls with a bit more texture, a Y peeler is perfect. It shaves off wide, thick ribbons that can be turned into roses or embedded into soap bars.
  • Sharp knife — Use this if you want straight, wide, rustic-looking curls that you shape by hand.
  • Clay trimming tools — These are great for making small, wabi sabi curls. They give you more control for creating organic-looking ribbons that have a really pretty imperfect feel.
  • Citrus zester — This creates lots of small, thin curls. It’s perfect if you want a more delicate, confetti-like look from fine, festive ribbons.

Soap Making Supplies

These supplies are pretty standard to all melt and pour soap projects. The only one you may not have seen pop up before is glycerin, but the rest are things you should have in your soap making toolkit already. 

  • Melt and pour soap base — Technically, you can use clear or white, depending on the look you’re going for. Clear bases work great if you want translucent, glassy curls, while white bases give you a more opaque, classic soap look. In my experience clear base is bit “stretchier” and gives you more curl than white soap base, thanks to the extra glycerin. But if you’re dead set on using white soap, I have a fix for it’s lack of stretch (see below).
  • Vegetable glycerin — This is the secret ingredient for making your soap more bendable and easier to curl. If you’re using white soap base, extra glycerin is a must for getting those pliable curls that hold their shape. Either, you can add a tablespoon or two of liquid glycerin to white soap base. Or you can mix clear (glycerin) soap base with white soap base and get the same affect.
  • Mica or liquid soap colorants — These are optional, but they’re a fun way to add color to your curls. I like using mica for a shimmery effect, but liquid colorants work just as well if you want solid, vibrant colors.
  • Fragrance or essential oils — Also optional, but adding a scent elevates your soap ever so slightly. Just make sure to use skin-safe fragrance oils or essential oils.
  • Microwave-safe bowl or measuring cup — You’ll need this for melting and pouring your soap base. A glass measuring cup with a pour spout makes things easier, but any microwave-safe container will work.
  • Spray bottle with rubbing alcohol — This helps eliminate air bubbles on the surface of your soap and can also be used to help curls stick to the top of a soap loaf if you’re using them as decoration.

Methods for Making Soap Curls

Here’s a high-level tutorial on the different ways to make soap curls. The method you choose depends on the tools you have and the look you’re going for. If you’d like more detailed instructions for working with soap base, check out our Complete Guide to Using Melt-and-Pour-Soap.

Prepare the Soap

  1. Start by cutting your soap base into manageable chunks so it melts evenly. You don’t want to put big blocks in the microwave, because they’ll heat unevenly and can scorch in some spots. Note: for this project, I used a 50-50 blend of white soap base and glycerin soap base. If using white base, make sure to add glycerin in some form or another, either by adding 1-2 tablespoons of liquid glycerin or by blending with clear soap base.
  2. Melt the soap in the microwave in short 20-30 second bursts. Stir it frequently to make sure you get a smooth, even consistency.
  3. If you’re using essential oils or mica for color, mix them in while the soap is still warm.
  4. Pour the soap into a silicone mold (the temperature of the melted soap base doesn’t matter here) and let cool. For smaller curls, I recommend using small, single cavity molds, which keep the curls from getting too long and breaking. For big, thick curls, you’ll need to use a loaf mold instead. If you’re not sure, just refer to the method instructions below.

How To Make Soap Curls Using Tools

1. Vegetable Peeler

Pour soap into a single cavity mold and let cool. Once your soap is unmolded and fully cooled, hold the block firmly in one hand. If it’s slippery from the glycerin, use a paper towel for a better grip. Run the peeler along the long, flat side of the block.

Let the soap naturally curl as you peel. If it doesn’t curl on its own, use your fingers to gently shape it into a ribbon while it’s still flexible.

Be careful! The thin curls can be fragile, especially if your soap is on the harder side.

2. Citrus Zester

Create a small bar of soap using a single-cavity mold. Drag the citrus zester lightly across the wide, flat side of a soap block. This creates lots of small, delicate curls that look almost like confetti. It’s a great option if you want a more subtle, layered effect.

3. Clay Trimming Tools

Pull the tool lightly across the flat face of a bar of soap. The curls will have an imperfect, organic look that I think looks really nice.

To keep creating clean curls, use a knife to cut the tattered soap off the bar and create a flat surface to work from. This prevents the curls from getting messy or uneven.

4. Y Shaped Peeler

Instead of creating a small block of soap, pour roughly 1 inch of melted soap into the bottom of a loaf soap mold. Let it cool completely.

Cut the cooled soap into 2 inch wide strips that’ll fit your Y peeler. Then run the peeler across the soap in smooth, even strokes to create thicker strips that you can form into curls using your hands.

5. Make Soap Curls by Hand – The Thin Pour Method

Pour a thin (approximately ⅛ – 1/16 of an inch) layer of soap into a loaf mold. Let it sit for 5-10 minutes to set partially. The timing depends on how thick your layer is, but you want it firm enough to handle without breaking.

Remove the layer from the mold and cut into 1-2″ wide strips. Then roll or curl it by hand while it’s still pliable. Allow the curls to set and firm up a bit more before using in soaps.

Ways to Use Soap Curls

Once you’ve mastered the basics of making soap curls, the fun part is figuring out how to use them. There are so many ways to get creative with these little ribbons, and honestly, experimenting is half the fun.

1. ASMR “crunchy soap”

If you’re more into the sensory side of soap making, you can decorate the tops of your bars with lots of curls to create that satisfying, crunchy texture. The sound and feel of peeling and using these soaps is oddly relaxing.

2. Embedding them in soap loaves

One technique I love is using the Pour-Thin method to create a long sheet of soap, then rolling it long-ways (like a Fruit Roll-Up) to make a tube-like curl. You can embed this inside a loaf soap mold for a really stunning cross-section when you cut the bars. For more tips on embedding shapes in soap, check out this post.

3. Mix and match for unique effects

Try mixing colors for a confetti look, or vary the curl thickness to add dimension. You can also combine soap curls with shredded soap for even more texture. Embedding curls in transparent soap creates a really cool, suspended look, while white soap gives you a more classic, layered look.

4. Making soap roses and floral designs

After making curls with either a vegetable peeler or cheese planer, you can roll them in a way that looks like roses. It takes some practice, but the results are gorgeous and perfect for special occasion soaps or gifts.

I’ve found that thicker curls (like those made with a cheese planer) creates better roses because the soap has enough thickness to stand up and look like petals. 

5. Soap Curl Gift Soap

These festive gift box soaps look like tiny wrapped presents, complete with overlapping gold ribbons and soap curl bows on top. And since they’re made with melt and pour soap, they make perfect last-minute holiday gifts.

Soap Curl Troubleshooting

Making soap curls can take a little practice, so don’t feel bad if your first batch doesn’t turn out perfectly. Here are some common challenges and how to fix ’em.

Cracked curls — If your curls are cracking or breaking as you make them, try adding 1-2 tablespoons of liquid glycerin to the melted soap. This increases flexibility and makes the soap easier to work with.

Air bubbles inside curls or embeds — Air can get trapped when you’re embedding curls into a soap loaf. To fix this, embed them at an angle so any trapped air has a chance to escape as the soap sets. Also make sure to spray the soap both before and just after pouring it. 

Curls falling apart — If your curls are fragile and falling apart after you’ve made them, lightly spritz them with rubbing alcohol. This helps set them and keeps their shape intact.

Curls melting when embedding or pouring over — This happens when the soap you’re pouring is too hot. Make sure your over-pour soap is at a lower temperature (around 140°F or below is best). This way, it won’t melt the curls when it makes contact.

Uneven or floppy curls — If your curls aren’t holding their shape or they look messy, try using a sharper peeler, creating a thicker curl or working with firmer soap. You can also play around with adding a bit of glycerin to the base or adjusting your peel technique to get cleaner, more consistent ribbons.

FAQ

Can I use any melt and pour soap base?

Not all bases are created equal when it comes to soap curls. Bases that are too soft can end up mushy and won’t hold their shape. On the flip side, bases that are too hard may not curl nicely and could crack or break instead. You may need to try out several different soap brands or types to find one with a good balance between firmness and flexibility.

Do I have to use glycerin in the pour-thin method?

Glycerin helps make the soap more pliable and helps your curls hold their shape, especially when working with thinner curls. But it’s optional depending on your base. Some melt and pour soaps are already pretty flexible, so you might not need it at all. You made need to test a soap base and see how well it holds up.

Can I fragrance or color the curls?

Yes! You can add fragrance and color while the soap is melted. Just make sure everything is mixed well before pouring into your molds.

How long should I dry curls for ASMR?

If you’re going for that crunchy, satisfying ASMR texture, use thin curls and let them dry for about 5 weeks in a well-ventilated space. This gives them time to harden up and develop that crispy feel.

Can I curl cold process soap too?

Yes, cold process soap can work for curls once it’s fully cured and hardened.

0

Tags: , , , ,
dropdown

Earthy Essentials Launches Handcrafted Organic Soap Set Designed for Natural Self-Care and Eco-Conscious Living

— A new 3-bar soap collection crafted with organic oils and pure essential oils brings sustainable luxury to everyday routines.

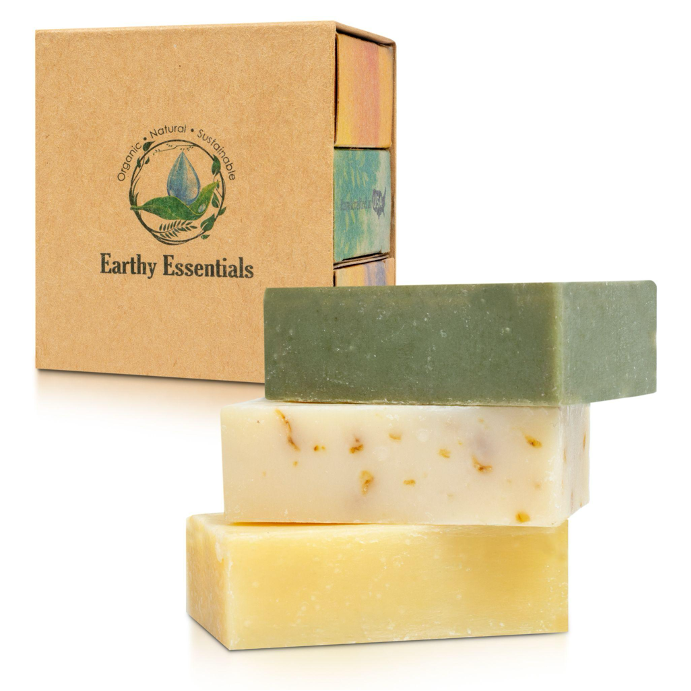
Earthy Essentials, a rising natural wellness brand dedicated to pure and sustainable self-care, announces the launch of its 3-Pack Organic Soap Set, handcrafted in small batches using organic saponified oils and therapeutic essential oils. Designed for consumers seeking cleaner ingredients and eco-friendly products, the collection delivers a spa-quality experience through nature-inspired scents and gentle, moisturizing formulas.

Each set includes three 3.25 oz bars in beautifully biodegradable kraft packaging. The scent trio — Green Tea & Peppermint, Oatmeal Lavender, and Lemongrass — reflects the brand’s commitment to natural aromatherapy and skin-nourishing botanicals. All bars are made from organic oils of palm, coconut, olive, and palm kernel, blended with essential oils and natural extracts, with no parabens, sulfates, synthetic dyes, or artificial fragrances.

“Our goal is simple: create products that honor the earth while elevating everyday self-care,” said the founder of Earthy Essentials. “This new soap collection represents the heart of our brand — natural, honest, and crafted with intention.”

The soaps are packaged in a plastic-free, kraft brown box designed to reduce environmental impact while offering a premium, gift-ready appearance. Ideal for daily use, gifts, and wellness routines, the collection caters to customers who value sustainability, purity, and artisan craftsmanship.

The Earthy Essentials Organic Soap Set is now available on Amazon, bringing accessible natural self-care to households nationwide.

About Earthy Essentials

Earthy Essentials is a natural self-care brand focused on clean ingredients, sustainable packaging, and handcrafted quality. Inspired by the beauty and simplicity of nature, the brand creates products that are gentle, effective, and environmentally responsible. Earthy Essentials believes self-care should be pure, honest, and kind — to both people and the planet.

Contact Info:
Name: Earthy Essentials
Email: Send Email
Organization: Earthy Essentials
Website: https://www.amazon.com/dp/B0FYW8TGP8

Release ID: 89177132

Tags: , , , , , , , , , , ,
Why black soap is a skincare must-have

Why black soap is a skincare must-have

Follow this guide

What’s the story

African black soap, a traditional skincare product, is making waves for its natural benefits.
Originating from West Africa, the soap is made from plantain skins, cocoa pods, palm leaves, and shea butter.
With its rich ingredients, African black soap promises to give you clearer, healthier skin.
Here are five amazing benefits of using this natural product in your skincare routine.

Deep cleansing properties

African black soap is famous for its deep cleansing properties.
The natural ingredients work to remove dirt, oil, and impurities from the skin’s surface.
This makes it an excellent choice for those with oily or acne-prone skin.
Regular use can help reduce excess oil production and prevent breakouts.

Exfoliation benefits

The texture of African black soap provides gentle exfoliation without irritating the skin.
It helps slough off dead skin cells, promoting cell turnover and revealing a smoother complexion.
This exfoliating action can improve skin tone and texture over time.

Moisturizing effects

Unlike many commercial soaps that strip the skin of moisture, African black soap contains shea butter and other moisturizing agents that help keep the skin hydrated.
These natural moisturizers nourish the skin while cleansing it, making it suitable for all skin types, including dry or sensitive ones.

Reduces inflammation

African black soap has anti-inflammatory properties that can help calm irritated or inflamed skin.
The presence of plantain skins and other botanicals helps soothe conditions like eczema or psoriasis by reducing redness and swelling.

Rich in antioxidants

Packed with antioxidants from its natural ingredients, African black soap helps protect your skin from environmental stressors such as pollution and UV rays.
These antioxidants neutralize free radicals that cause premature aging signs like fine lines or wrinkles, keeping your complexion youthful-looking over time.

Tags: , , ,
Best oLive
Privacy Overview

This website uses cookies so that we can provide you with the best user experience possible. Cookie information is stored in your browser and performs functions such as recognising you when you return to our website and helping our team to understand which sections of the website you find most interesting and useful.