How To Embed Shapes in Melt + Pour Soap

How To Embed Shapes in Melt + Pour Soap

For the past several years, I’ve been diving into the world of soap making. While I love making it from scratch, I find that melt and pour soap making can be equally cathartic. Especially once I learned how to embed colorful shapes and create fun scenes without it taking days on end, like with cold process soap.

While embedding shapes in soap might seem simple (and it is!) there’s a bit of a learning curve that comes with the process. Little things you might not think about, like soap type, temperature or cooling time, can make or break your designs.

I learned that the hard way. But in this guide I’ll show you how to embed shapes in melt and pour soap like a pro, so you can get right to the fun part.

Which Melt and Pour Soap Base To Use?

Melt and pour soap base is a special kind of soap that’s meant to be cut into pieces and heated in the microwave. Once melted, you can then add scents, colors or other ingredients to tailor the soap to your own needs. You’ll then pour the melted soap into a custom mold and let it harden before cutting and storing it.

While melt and pour soap comes in a variety of types (glycerin, goat milk, oatmeal, etc.), there’s really only two types you need to be aware of when embedding shapes:

1. White soap base (goat milk, shea butter, oatmeal, etc.)

White soap base is opaque and somewhat soft. It usually contains oils or other ingredients that are good for skin, such as honey, oatmeal or shea butter. Because it’s soft (it has a lower melting point than glycerin soap), it’s often used as the out layer of soap, rather than for embedded shapes.

2. Clear soap base (glycerin)

Clear soap has a higher concentration of glycerin, a moisturizer derived from plant and animal fats. It’s not quite as soft as white soap, which means it gets hotter, cools more slowly, and holds its shape better.

Colors also appear more vibrant and pop more in clear soap base, making it ideal for embedded shapes. This isn’t a hard rule though, and once you’ve mastered the basics of melt and pour soap making, you can easily use either type of base for your shapes.

  • Rubbing Alcohol in a Spray Bottle – Rubbing alcohol is used to help layers and shapes stick together in melt and pour soap. A quick spritz before pouring helps the new layer bond to the one below it. It also helps remove bubbles from the surface of freshly poured soap for a smoother finish.
  • Thermometer – A thermometer helps you keep track of your soap’s temperature so it doesn’t melt your embedded shapes. It’s especially useful when layering, since the pour temperature affects how well the soaps bond. Keeping it within the right range makes for clean, defined designs.
  • Large Knife for Cutting Shapes – A large knife helps you slice the soap base into manageable chunks before melting and cut larger pieces into simple shapes once it’s set. It gives you control over the size and thickness of each embedded piece.
  • Small Knife or Potato Peeler for Cleaning Up Shapes – A small knife or potato peeler helps refine your shapes by smoothing edges or trimming away extra bits. It’s great for small adjustments that make your designs look a little more polished.

Ways to Make Shapes with Molds

Molds give your soap and embeds their shape. You can use traditional block molds for larger bars or smaller silicone molds for the embedded shapes themselves. Flexible molds make it easy to release the soap once it’s fully cooled.

When it comes to creating your shapes, there are 3 different ways to make them. The one you choose depends on your personal preference and/or how you’ll be embedding the shape.

1. Column Molds

This is the most common way to make embedded shapes. These flexible silicone molds have an interlocking seal the snaps together to form a long “column.”

You then pour your liquid soap base in the center, let it cool, and peel away the sides, leaving you with one long shape you’ll then embed into a rectangular mold.

2. Silicone Cake Decorating Molds

If you plan to make soap bars one at a time as opposed to in a large rectangular mold, you can use silicone cake decorating molds to make your shapes. The end result will be small shapes that you can embed on top of individual soap bars rather than inside the soap prior to cutting.

3. Non Soap Eembeds

You don’t have to make your own shapes to embed in soap. Try other ideas like these:

Molds for Pouring Soap

1. Rectangular Molds

Rectangular or block molds are large, loaf-style molds that hold several bars’ worth of soap in one pour. Once the soap hardens, you remove the whole block and cut it into individual bars with a knife. You’ll pair these molds with column molds or hand cut shapes to get the embedded-shape effect.

2. Single Bar Molds

Unlike rectangular molds, single bar molds have individual cavities that you fill separately. Once the soap cools, you can simply pop each bar out, no cutting required. You’ll often use these molds with shapes made from silicone cake decorating molds.

Preparing the Soap

Melt and pour soap is made to be heated in the microwave. While this is a rather quick and painless method, it often results in hot spots, clumps, bubbles or other issues.

Here’s how to prepare your soap so as to avoid these common pitfalls.

  • Always cut your soap into 1” cubes before putting in the microwave.
  • Heat it in 30-second intervals, stirring thoroughly between each round. This helps prevent hot spots and ensures uniform melting.
  • Once melted, let the soap base cool to about 140°F before using. To cool it more quickly, put a thermometer in the melted soap and put it in the fridge. Check it every 5 minutes, peeling the hardened soap on the top to the side and gently stirring the melted soap to even out the temperature.
  • Its important that you don’t mix the cooled crust that forms on top of the soap back into the melted soap. If you do that, it’ll make the soap chunky when you pour it into your molds.
  • When it reaches 140°F, it’s ready to pour! If you miss the mark you can always put the soap back in the microwave and heat for another 5-10 seconds to liquify it again.

3 Techniques for Embedding Shapes

I rely on three main methods for embedding shapes. You can definitely get creative and come up with your own versions later, but mastering these three first will give you the skills to handle just about any soap design you dream up.

1. Using Column Shapes in a Rectangular Soap Mold

This method uses long, cylindrical shapes made with a column mold. Once your shapes have fully set, you place it inside a rectangular loaf mold and pour melt and pour soap around it. When the soap hardens, you’ll slice it into bars, revealing the embedded design running through the center of each one. It’s a simple and effective way to create a repeating pattern that looks striking from every angle.

We have a whole post explaining how to do this step-by-step with this pink peppermint soap.

2. Embedding Shapes in Single-Bar Molds

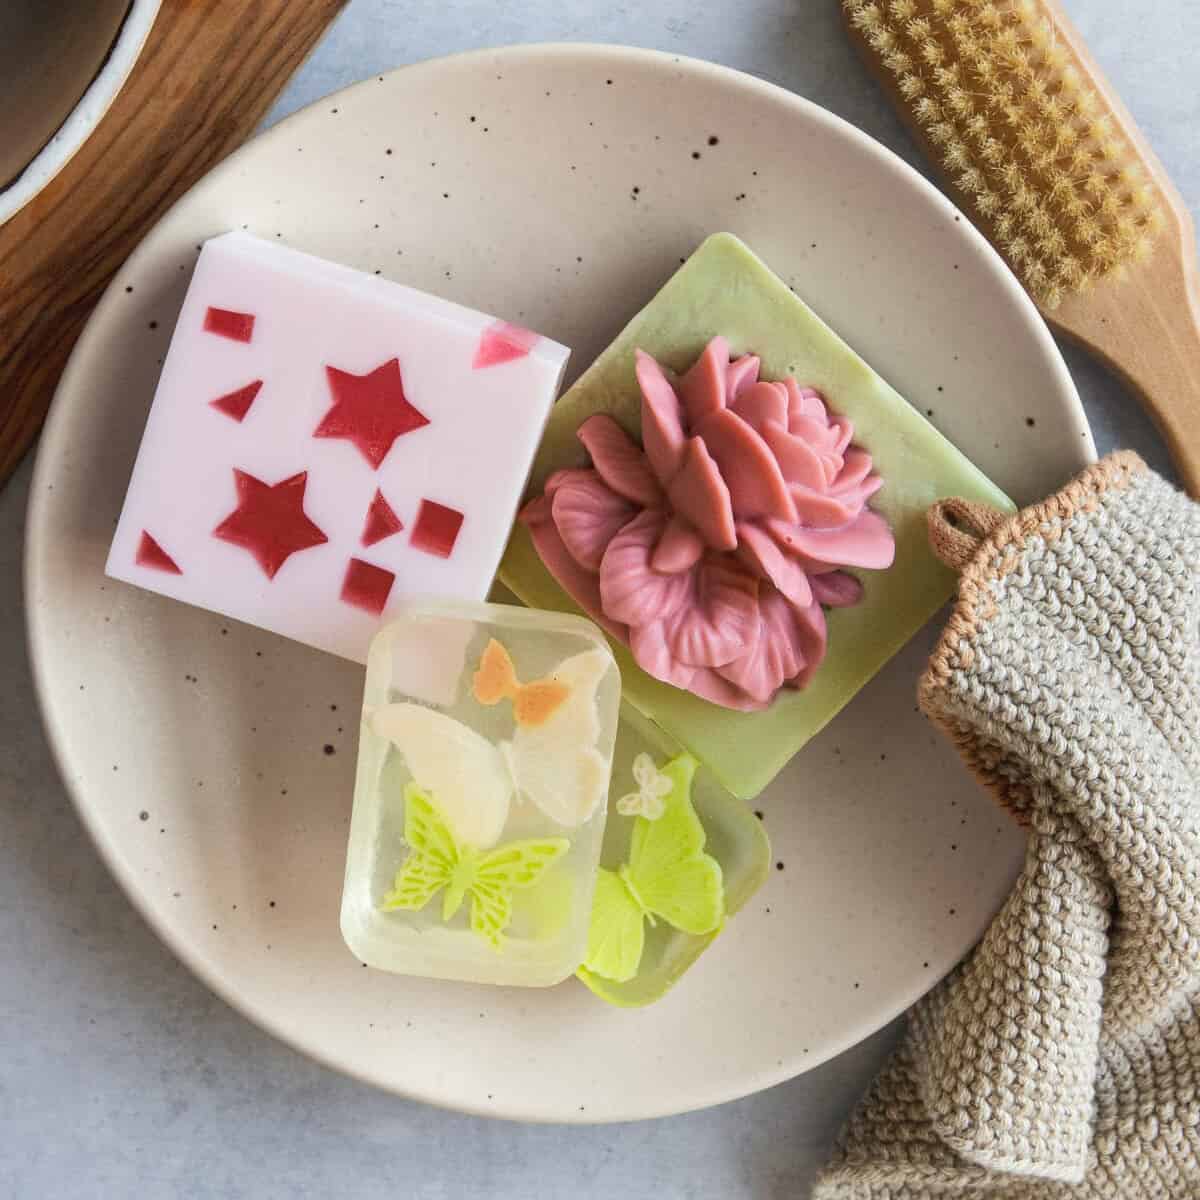
With this technique, you’ll use small silicone cake-decorating molds to make thin, flat-ish shapes. Once your shapes are ready, pour a thin layer of clear soap into each cavity of a single-bar mold, let it set slightly, then place your shape on top.

Finish by pouring more clear soap over it to encase the design in the middle. This layering method gives your soap a clean, professional look and works well for colorful or detailed designs.

Melt white soap base and add mica for color. Then pour into your silicone butterfly molds and let cool.

Melt clear soap base. Fill the cavity of a single-bar soap mold about halfway.

Spritz with alcohol and let cool for about 20 minutes.

Arrange 2-3 butterfly shapes in each mold cavity.

Make sure the temperature of your clear soap base is between 130°F and 140°F (if it’s too hot it will melt the butterfly shapes) before pouring your second layer. Spritz with alcohol.

Let cool completely before removing from the mold

3. Embedding 3D Shapes

If you want your shapes to stand out and look artsy, this is your method. You’ll create three-dimensional shapes using silicone molds, then embed them in single-bar molds so part of the shape extends beyond the soap’s surface.

The finished bar has a sculptural, playful look that makes it feel extra special. It’s a fun way to experiment with texture and depth while showing off your creativity.

Melt the white soap base and add a little red mica for color. Pour the melted soap into a silicone flower mold.

Spritz the top of the soap with rubbing alcohol to prevent any lumps or bubbles.

Allow it to cool for 1 hour before removing from the mold and cutting the soap in half.

Heat another batch of soap base in the microwave and add green mica for color. Fill the cavity of a single-bar soap mold until it’s ¾ full and spritz it with rubbing alcohol. Let cool for 10-15 minutes.

Check that the soap is 140°F or less. Then pour a thin, second layer of green soap on top of the cooled layer. Working quickly, embed the 3D shape on top.

Let cool completely before removing from the mold.

Tips for Successful Embedded Shapes

Control the temperature

When working with melt and pour soap, temperature is everything. If the soap is too hot when you pour it, it can cause your molds to warp, melt your embeds or create air bubbles. If it’s too cool, it may not fill out the mold properly.

Always use a thermometer to check the temperature before you pour. While a lot of tutorials recommend a temperature somewhere around 125°F, I’ve found that to be too cold. Instead I recommend pour the soap when it reaches about 140°F.

Don’t let the soap overheat

Always heat your soap base slowly, in short intervals if you’re using a microwave. Overheating can cause scorching, reduce clarity, or make the soap lose moisture and harden too quickly.

Keep your embeds in place

Let your first soap layer cool and form a sturdy skin before adding the next layer. This helps keep your embeds in place instead of floating or shifting.

If you find that your shapes are melting or bleeding when you add the layers, chill them in the refrigerator for a few minutes before embedding to prevent them from softening when the warm soap is poured around them.

Use rubbing alcohol generously

Keep a spray bottle of rubbing alcohol on hand and give everything a good spritz before and after pouring your layers. This makes a huge difference in the final look.

Rehydrate the soap before reheating

If you have to reheat the soap multiple times and it’s become too thick, add ½ teaspoon of water per pound of soap base each time you reheat it.

Troubleshooting Common Problems

Embeds sinking or melting

If your embeds keep sinking or shifting around, your soap base is probably too warm or too thin when you pour. Let the first layer cool until it forms a solid film on top (I usually touch it with my finger to make sure it’s nice and sturdy) before adding more embeds. That gives them something to rest on.

For lighter pieces, pour the next layer a little cooler so it thickens faster and holds everything in place.

If your embeds look a little melty, your soap is too hot. Try keeping it in the 130-140°F range to be safe.

Bubbles or cloudy layers

Two things can cause bubbles: either the air gets trapped or the soap is poured too hot. Always spray rubbing alcohol on the embeds before you pour to help the layers stick and keep bubbles from forming.

If your clear soap turns cloudy, it’s a sign it was overheated. Always microwave the soap slowly and stir well before each interval.

Cracks or separation between layers

Cracks or peeling is frustrating but easily avoidable. Cracks usually happen when the soap has cooled too much before adding the next layer. Try pouring the next layer while the bottom is still slightly warm but not soft. A light mist of rubbing alcohol before each pour can also help prevent this.

FAQ

How long does it take for melt and pour soap to set?

For large designs, it’s best to let it sit for at least 4 hours before cutting. If you’re in a hurry, you can pop it into the refrigerator for about 30 minutes, but avoid the freezer, which can cause condensation and sweating after you take it out.

How long to wait between layers of melt and pour soap?

I recommend waiting 15-20 minutes after pouring a layer to see if it’s sturdy enough for another. You want it to feel firm when you touch it, but not completely cold. If you wait too long you might get noticeable lines between layers, which can affect the look of your finished design. 

Can I add things to melt and pour soap?

Some people say you shouldn’t add extra oils or ingredients to melt and pour soap because it might affect the texture once it cools. But I’ve found that, when used in moderation, additives don’t make a noticeable difference to the soap’s quality. Just don’t go overboard or your soap could get lumpy or greasy.

Print

]]>]]>

3 Ways to Embed Shapes in Melt and Pour Soap

Prep Time4 hours

Total Time4 hours

Course: Bath and Body Soap

Keyword: DIY, soap

Yield: 6 soaps

Author: Stephanie Pollard

Cost: $15

Materials

For 3D Shapes That Stick Out

For Shapes in Single-Bar Molds

Instructions

Embedding 3D Shapes That Stick Out

  • Melt the white soap base and add a little red mica for color. Pour the melted soap into a silicone flower mold.

  • Spritz the top of the soap with rubbing alcohol to prevent any lumps or bubbles.

  • Allow it to cool for 1 hour before removing from the mold and cutting the soap in half.

  • Heat another batch of soap base in the microwave and add green mica for color. Fill the cavity of a single-bar soap mold until it’s ¾ full and spritz it with rubbing alcohol. Let cool for 10-15 minutes.

  • Check that the soap is 140°F or less. Then pour a thin, second layer of green soap on top of the cooled layer. Working quickly, embed the 3D shape on top.

  • Let cool completely before removing from the mold.

Embedding Shapes in Single-Bar Molds

  • Melt white soap base and add mica for color. Then pour into your silicone butterfly molds and let cool.

  • Melt clear soap base. Fill the cavity of a single-bar soap mold about halfway.

  • Spritz with alcohol and let cool for about 20 minutes.

  • Arrange 2-3 butterfly shapes in each mold cavity.

  • Make sure the temperature of your clear soap base is between 130°F and 140°F (if it’s too hot it will melt the butterfly shapes) before pouring your second layer. Spritz with alcohol.

  • Let cool completely before removing from the mold.

Notes

If your embeds look a little melty, your soap is too hot. Try keeping it in the 130-140°F range to be safe.

0
Tags: , , , ,
How To Create Diagonal Color Layers in Soap

How To Create Diagonal Color Layers in Soap

If you’ve been making melt and pour soap for a while, you’ve probably reached that point where plain, single-color bars just aren’t doing it for you anymore. Don’t get me wrong, there’s nothing wrong with simple soap. But once you get the hang of the basics, it’s natural to want to try something a little more interesting.

That’s where layering comes in.

Whether you’re going for bold stripes or a soft, stacked ombré effect, layering is one of those techniques that instantly elevates your soap game. And the best part? You don’t need any special equipment or advanced soap making skills.

Just a little patience, a spray bottle of rubbing alcohol, and a basic understanding of how temperature affects your layers. (Oh, and a good mold never hurt!)

So if you’re ready to take your melt and pour soap from basic to elevated, let’s talk about how to create layers in soap that look professional and stick together perfectly every single time.

Why Create Layers in Melt and Pour Soap?

Let’s start with the basics. Layering is exactly what it sounds like: you pour different colors or soap bases in stages, letting each one cool just enough before adding the next. It’s not rocket science, but there is a little technique involved (don’t worry, I’ll walk you through it).

The cool thing about layering is that it opens up a ton of design possibilities. You can create bold, punchy stripes. You can play around with ombré effects that fade from one color to the next (that’s a little more complicated and not covered here, but possibly in the future…). You can even alternate clear and opaque soap bases to add dimension and contrast that really makes your bars pop.

The secret to getting those clean, distinct layers? It all comes down to controlling temperature and timing.

Pour too hot and you’ll melt the layer underneath. Wait too long and your layers might not stick together at all.

Once you get the hang of it, layering is a super easy way to make soap that looks way more impressive than it actually is.

Supplies

Clear soap gives you that translucent, glassy look, while white soap makes your colors more opaque and vibrant. I like to alternate between the two so the layers really stand out.

  • Colorants–Mica powders, liquid soap dyes, or powdered herbs or botanicals all work here. Micas are my go-to because they’re skin-safe and nontoxic, though they’re a bit more subtle than traditional dyes.

If you want really bold, punchy colors, liquid soap dyes are the way to go. And if you’re keeping things natural, powders like beetroot or spirulina can give you soft, earthy tones.

  • Essential Oils–Totally optional, but this is where you can really personalize your soap.

You can use the same scent in every layer or switch it up for a more complex fragrance. Just remember to stick with skin-safe oils, especially if you’re gifting these bars (you don’t want to give the gift of a rash!)

  • Rubbing Alcohol in a Spray Bottle–Rubbing alcohol is your secret weapon.

A quick spritz before and after pouring each layer keeps them bonded together and gets rid of any surface bubbles that might mess up your design. And I’ve found that a bottle like this creates just the right amount of mist. Trust me, don’t skip this step.

Equipment

I’m partial to loaf molds because you can slice them into bars later and show off those gorgeous layers. But if you want individual soaps, cavity molds are perfect.

  • Heat-Safe Containers–You’ll need something to melt and mix your soap in.

These 16-ounce glass measuring cups with pour spouts are my favorite because they hold just enough soap for one layer and they make pouring really easy. If you’re doing multiple colors, grab one container per color to keep things moving smoothly.

  • Thermometer–Technically optional, but it makes life way easier.

Checking the temperature before you pour helps you avoid melting the layer underneath or ending up with layers that don’t stick. A basic kitchen thermometer does the trick, or you can opt for a digital instant read thermometer if you’ve got one.

  • Utensils–The usual suspects: stirring spoons, measuring spoons, and a sharp knife for cutting your finished soap into bars.

Optional Supplies

  • Chopstick or Skewer–Perfect for popping any stubborn bubbles that the rubbing alcohol doesn’t catch. Can also be used to scratch up a layer of soap that got too cold and may not bond properly to the next layer.
  • Small Ramekin or Book–These are great for tilting your mold if you want angled or diagonal layers. It’s a simple trick that adds a lot of visual interest without making things too complicated!
  • Extra Thermometers–If you’re working with several colors at once, having more than one thermometer means you can check all your containers quickly without waiting for one thermometer to cool down between checks.
  • Pipettes or Droppers–Super handy if you’re adding essential oils or colorants and want to be precise about how much goes into each layer.
  • Cutting Guide or Soap Cutter–Not essential for the layering process itself, but when it comes time to cut your loaf into bars, a soap cutter helps you get uniform slices that show off your layers perfectly.

How to Create Layers in Melt and Pour Soap

Since this post is all about technique (not a specific recipe), I’m going to walk you through the general process of layering melt and pour soap. You can adapt this to whatever colors, scents, and mold sizes you prefer. And if you want exact measurements and a step-by-step project, check out the holiday DIY Striped Soap post.

Step 1: Prepare Your Soap Base

Start by cutting your melt and pour base into small 1-inch cubes. This helps it melt evenly, prevents overheating or scorching, and saves you microwave time. Toss the cubes into a heat-safe container (one per color or layer) and pop it in the microwave.

Heat in short 30-second bursts, stirring well between each one, until the soap is just melted. The key word here is just. You don’t want to overheat it or the soap can scorch or get weirdly thick and hard to work with.

Step 2: Add Color and Fragrance

Once your soap is melted, stir in your colorant and fragrance. Go slow and gentle here because too much stirring can create bubbles, and bubbles are the enemy of clean layers.

This is also where you get to have fun. Each layer can have a different color, a different scent, or both.

Want a lavender layer that smells like lavender and a pink layer that smells like rose? Go for it. Just remember to stick with skin-safe essential oils if you’re planning to use or gift these bars.

Step 3: Pour the First Layer

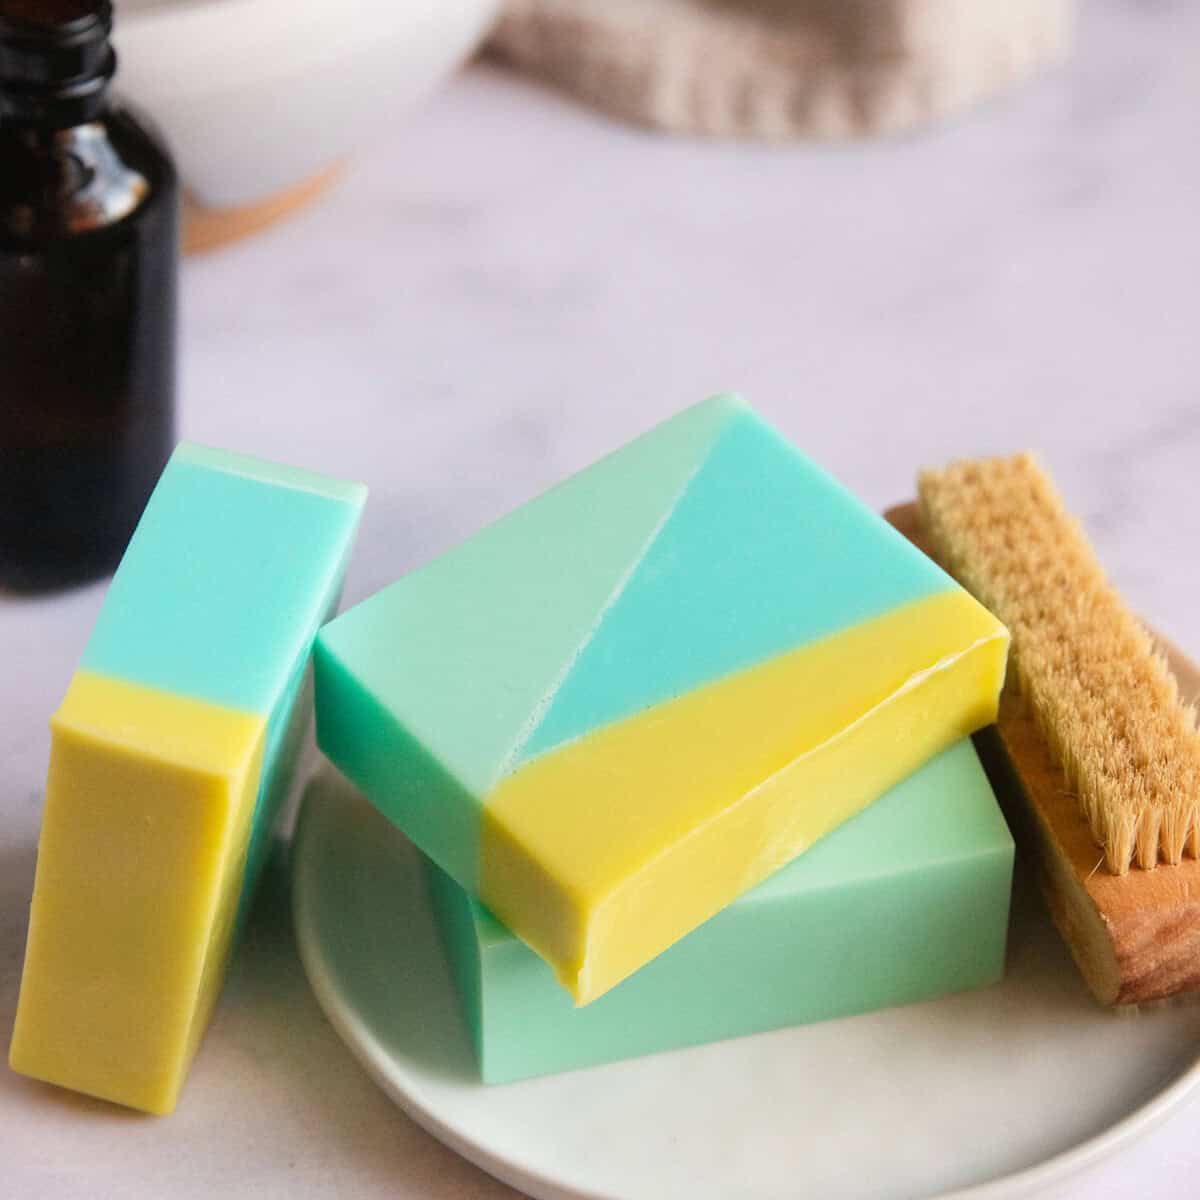
To get those fun slanted lines, tilt your mold by placing a small ramekin or a bunched up kitchen towel underneath one side.

Then pour your first layer into the mold. It doesn’t matter how hot this first layer is since there’s nothing underneath it to melt. Once it’s in the mold, give the top a light spritz with rubbing alcohol to pop any bubbles. Then let it cool.

You’ll know it’s ready for the next layer when a thin film (or “skin”) forms on top. It should feel slightly soft and warm to the touch, but not overly wobbly or like there’s liquid underneath.

This usually takes about 10-15 minutes, but it depends on how thick your layer is and how hot the soap was when you poured it.

Step 4: Pour the Next Layer

Before you pour the next layer, spritz the cooled surface again with rubbing alcohol. This is super important because it helps the new layer bond to the old one without any gaps or air pockets.

Now here’s where temperature matters. Let your melted soap cool to around 140 degrees F before pouring.

If it’s too hot, it’ll melt right through the filmy layer underneath and you’ll end up with muddy colors instead of distinct stripes. If it’s too cool, the layers might not stick together properly and could split apart when you cut the soap into bars.

Pour slowly and carefully, and then spritz the top with alcohol again to get rid of any new bubbles.

Step 5: Repeat Layers

Keep going, alternating colors, until your mold is almost full. Always spritz with alcohol before and after pouring each new layer. It might feel repetitive, but trust me, it’ll make or break your layers.

If you’ve been tilting your layers up to this point, make sure to remove the ramekin and lay the mold on a flat surface before pouring the last layer. Then give it one last spritz and let the whole thing cool completely.

I’m talking several hours or even overnight. I know it’s tempting to pop it out of the mold early, but if you try to unmold it too soon, the layers might still be soft and could separate or warp.

Once it’s fully set, you can unmold your soap and cut it into bars. And that’s it! You’ve got gorgeous, professional-looking layered soap that’s perfect for gifting or keeping all to yourself.

Tips and Tricks for Perfect Layers

Once you’ve got the basic process down, these little tricks will help you nail those clean, professional-looking layers every single time.

Keep alcohol nearby.

Seriously, keep that spray bottle within arm’s reach at all times. Spritz the surface of each layer right before you pour the next one. Think of the alcohol as the “glue” that makes your layers stick together. Then spritz again right after you pour to prevent any bubbles from cropping up. Trust me, you can’t use too much alcohol.

Create equal layers.

If you want your layers to be perfectly even, the easiest way to do it is to weigh your soap base and divide it into equal amounts before you start melting and coloring. So let’s say you’re filling a loaf mold and you want four layers. You’d divide your base into four equal portions, like 10 ounces each, and then color them separately.

But honestly? You don’t have to be that precise if you don’t want to. If you’re going for a more organic, free form look where some layers are thicker than others, just eyeball it.

Pour however much feels right for each layer and don’t stress about the measurements. Both approaches work, it just depends on the vibe you’re going for.

Don’t wait too long between layers.

Each one should be slightly soft to the touch and still warm. If you gently press your finger against it and it feels completely cool and solid, you’ve probably waited too long. 

Use contrasting bases.

Want your layers to really pop? Try alternating between clear and white soap bases. The contrast makes each layer super distinct and gives your bars a ton of visual interest. 

Tilt your mold.

This is one of my favorite tricks for taking layered soap to the next level. If you want diagonal or angled layers instead of straight horizontal ones, just prop one side of your mold up slightly while you pour.

A small ramekin or even a book works great for this. It’s such a simple thing, but it makes your soap look so much more fun and eye-catching.

Watch the temperature.

I know I already mentioned this about a thousand times already, but it’s worth repeating because temperature is ev-er-y-thing when it comes to layering.

Around 140 degrees F is the sweet spot for pouring layers. It’s cool enough that it won’t melt what’s underneath, but still warm enough to bond properly. If you don’t have a thermometer, let your melted soap sit for a few minutes after you take it out of the microwave. It should feel slightly hot to the touch.

Note: Some folks say to aim for 120-130 degrees, but I’ve found that 140 degrees keeps my layers from splitting as much, probably because it melts the layer underneath just enough to help them stick together. 

Troubleshooting Common Issues

Even with practice, layered soaps can be a little finicky. Here’s how to fix (or better yet, avoid) the most common problems you might run into.

Layers separated after cutting

This one’s frustrating because everything looks fine until you go to slice your soap and the layers just fall apart. This usually happens because you didn’t spritz with alcohol between layers, or you poured when the bottom layer was completely cold and had cooled too much.

Always, always spray alcohol between layers. And don’t wait too long between pours. The previous layer should still feel slightly warm and a little soft when you add the next one. If it’s totally firm and cool to the touch, you’ve waited too long and the layers won’t bond as well.

And if you did wait too long to pour the next layer, then I recommend pouring your next layer slightly too hot (say between 150 – 160 degrees F). Yes, it might melt the previous layer a little, but that’s what you need in order to keep your soap from splitting.

Colors bled together

Instead of clean stripes, you’ve got muddy, swirled colors where your layers should be. This happens when the soap is too hot, so it melts right through the layer underneath.

To fix this, let your melted base cool for a few minutes before pouring. Use a thermometer if you have one, or just test the temperature by touching the outside of your container. It should feel warm but not hot. 

Uneven or slanted layers

Your layers looked straight when you poured them, but now they’re all wonky and uneven. This can occur if your mold isn’t sitting level, or if the soap cools unevenly (maybe one side was closer to a window or heat source).

Before you pour each layer, take a second to make sure that your workspace is flat and level. And try to let your soap cool in a spot where the temperature is consistent, away from drafts or direct sunlight.

Air bubbles between layers

You’ve got little pockets of air trapped between your stripes, which can make the layers look cloudy or cause them to separate. When this happens it means that you didn’t spray enough alcohol, or you poured too quickly and created turbulence in the soap.

Be generous with that alcohol spray. Give each layer a good spritz before pouring the next one. And when you pour, go slowly and gently. Try pouring along the side of the mold or over the back of a spoon to help the soap flow smoothly without creating bubbles.

FAQ

Can I use any type of melt and pour base?

Yep! You can layer clear, white, or any of the specialty bases like goat’s milk, shea butter, honey, or aloe. The only thing you need to make sure of is that they’re all melt and pour soap bases. Don’t try to mix melt and pour with cold process soap or anything like that. 

Do I have to color each layer?

No, not if you don’t want to. You can absolutely alternate between colored and uncolored layers if you want a more subtle look. Or you can create an ombré effect by using different shades of the same color, going from light to dark (or vice versa). There are no rules here, so play around and see what you like.

How thick should each layer be?

Totally up to you and the look you’re going for. Thin layers have this elegant, delicate vibe. Thicker layers are bolder and more graphic. I usually aim for about a quarter to a half inch per layer to keep cooling time to a minimum, but you can go thinner or thicker depending on your mold size and how many layers you want to fit in there.

Can I add embeds between layers?

Definitely. Melt and pour soap layers are actually perfect for this. You can tuck small soap shapes, dried botanicals, or little surprises between the layers. Just make sure whatever you’re embedding is soap-safe and won’t bleed color or get gross over time.

How long should I wait between layers?

I think 15 minutes is a good rule of thumb, but it really depends on how hot the soap was when you poured it and how thick your layers are. 

Do layered soaps take longer to cure?

Nope. One of the best things about melt and pour soap is that it doesn’t need any “curing” time at all. Once your soap is fully cooled and set (which takes a few hours to overnight), you can unmold it, cut it into bars, and start using it right away. 

Can I use a single cavity mold instead of a loaf mold?

Yes, and the process is pretty much the same when you’re working with individual cavity molds instead of loaf molds. The main difference is that layers in smaller cavity molds tend to cool down faster, so you can usually move through the layering process a little more quickly.

Just remember the basics: spray each layer with rubbing alcohol before you pour the next one, and keep an eye on your temperatures. Those two things are non-negotiable, no matter what kind of mold you’re using.

0

Tags: , , , ,
GQ

12 Best skincare brands for men are begging you to ditch that bar of soap

Once upon a time, men’s skincare revolved solely around whatever soap was nearest the sink. Those days are over. Whether you’re a skincare obsessive with a bathroom shelf that looks like a laboratory or a total noob still stealing your partner’s cleanser, consider this your go-to guide to the brands that are genuinely worth your time, money and mirror space.

The skincare boom shows no sign of slowing down. Every week brings another glossy promise of perfect skin – the noise has never been louder. Our routines now rival the complexity of our coffee orders (oat milk optional). Just casually scrolling your FYP you’ll see it: people trading moisturiser tips like insider gossip, comparing ingredients, and preaching the gospel of SPF moisturisers with good reason. The problem? Decision fatigue. What should be simple now looks like half-used bottles, panic-buy retinol and a moisturiser you’re not totally sure is for your face. It’s about time someone made sense of it.

That’s where we come in. This guide separates the hype from the hard-working formulas so you can finally find the brands that actually work for you. From cult French-pharmacy classics to science-backed serums and luxury creams that justify the price tag, today’s best men’s skincare brands prove there’s a routine for every budget, skin type and attention span. From CeraVe and The Ordinary to Aesop and La Mer, these are the brands setting the tone for great skin. Think of it as skincare’s greatest hits – no one-hit wonders here. So, let’s get into it.

Kiehl’s

Kiehl’s

Facial Fuel Moisturiser

Kiehl’s

Ultra Facial Cream

Kiehl’s

Retinol Skin-Renewing Daily Micro-Dose Serum

Kiehl’s

Ultra Light Daily UV Defense SPF 50

Kiehl’s is proof that some things become classics for a reason. Before serums went viral and skincare routines needed flow charts, Kiehl’s was quietly doing the work – hydrating, smoothing, fixing. This is the brand for people who want results without the homework. The Ultra Facial Cream is the MVP moisturiser, offering deep hydration without the grease, while the caffeine-packed Facial Fuel line keeps even Monday faces looking human. Everything in the lineup still nods to its old-school apothecary roots, simple, effective, and instantly recognisable. Kiehl’s isn’t chasing trends; it’s setting the standard. And if your bathroom shelf is a mix of half-used experiments, this is the brand that’ll make sure you know what you’re doing.

Horace

Horace

Mattifying Face Moisturizer

Horace

Purifying Face Cleanser

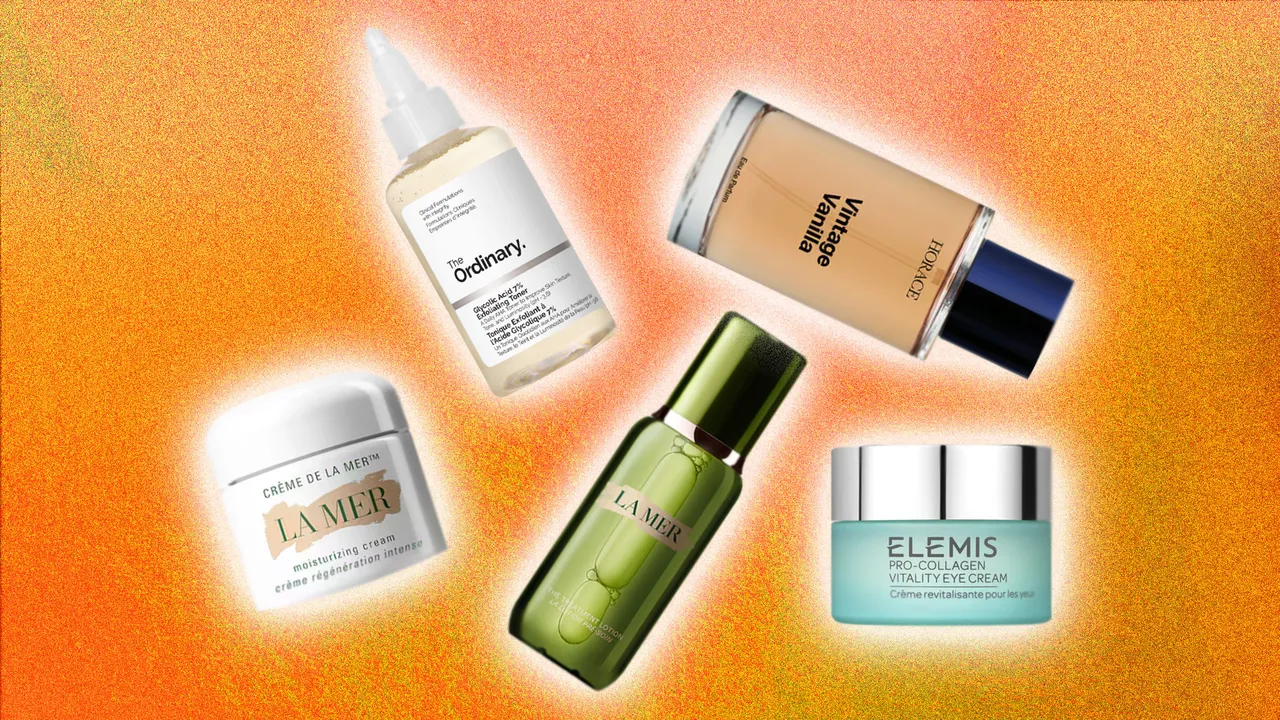
Every friend group has that one guy whose skin always looks good without trying – that’s Horace in brand form. Born in Paris and powered by natural, vegan formulas, it’s built around one goal: making skincare simple. Every product is tested and refined by its community, so formulas evolve with real feedback, not marketing fluff. Its line-up spans skincare, haircare and fragrance, making it a one-stop shop for routines that actually work. Its Purifying Face Cleanser uses aloe vera, grapefruit extract and zinc PCA to remove impurities, regulate oil and prevent breakouts without drying the skin, while the Mattifying Moisturiser keeps hydration steady and shine under control. Horace feels like the friend who tells you what works, not what’s trending.

Elemis

Elemis

Superfood Facial Oil

Elemis

Pro-Collagen Marine Cream

Elemis

Dynamic Resurfacing Facial Wash

Elemis

Pro-Collagen Vitality Eye Cream

Once a spa secret, Elemis has become the gold standard for at-home indulgence. Its results-driven formulas combine marine algae, peptides and botanicals to firm, brighten and smooth. Loved by frequent flyers and late-night types alike, it’s made for skin that needs visible results, fast. The Dynamic Resurfacing Facial Wash tackles dullness with enzyme technology, while the Pro-Collagen Marine Cream delivers hydration and lift without the heaviness. It’s premium skincare that backs up its price tag with real science, giving you that post-facial glow without the small talk or robe. Elemis is the steady achiever of luxury skincare – polished, effective and worth every drop.

Aesop

Aesop

Parsley Seed Anti-Oxidant Intense Serum

Aesop

Geranium Leaf Body Scrub

Aesop

Geranium Leaf Hydrating Body Treatment

Aesop is for people who want their skincare to double up as interior design. Its storied lineup of amber bottles were made to populate a minimalist bathroom while their contents smell like a gallery opening – herbal, woody, and suspiciously well curated. But it’s not style over substance. The formulas are equally as sophisticated, with antioxidant-rich cleansers, balancing gels and vitamin-packed serums that deliver real results. The Parsley Seed range is a hero, hydrating, fortifying and now a cult classic for city skin that faces pollution and stress. Aesop is functional luxury for people who read ingredient lists like essays. Use it, display it, and pretend you’re the kind of guy who has opinions about Brutalism.

La Mer

La Mer

The Lifting Firming Mask

La Mer

The Eye Concentrate

La Mer

The Treatment Lotion

La Mer is the most divisive name in skincare – worshipped, side-eyed, and still the one everyone measures against. The price raises eyebrows, but the results usually silence them. The secret lies in its formulas: at the core is the “Miracle Broth,” a slow-fermented blend of sea kelp, minerals and oils that soothes, repairs and drenches dry, stressed-out skin. Cult moisturiser Crème de la Mer remains the benchmark for deep hydration, instantly smoothing and reviving tired faces, while The Eye Concentrate targets fine lines, shadows and dehydration with the same cocooning richness. It’s not for minimalists or spreadsheet budgeters, but if you’re chasing the skincare equivalent of a tailored Tom Ford suit, this is it.

The Ordinary

The Ordinary

Niacinamide 10% + Zinc 1%

The Ordinary

Squalane Cleanser

The Ordinary

Hyaluronic Acid 2% + B5 (with Ceramides)

The Ordinary

Glycolic Acid 7% Exfoliating Toner

Proof that good skin doesn’t have to cost half your rent, The Ordinary is the brand that’s made skincare feel like science homework – in the best way possible. Its clinical, stripped-back formulas skip the fluff for ingredients that actually work: niacinamide to calm breakouts, hyaluronic acid to hydrate, retinol to smooth. There’s no luxury packaging, no lofty promises, just transparency and results. It’s skincare for the curious, the ones who’d rather read ingredient lists than marketing copy. Learn the labels, master the dropper, and you’ll get why dermatologists and minimalists alike swear by it. Simple, smart, and brilliantly affordable.

CeraVe

Cerave

Resurfacing Retinol Serum

Cerave

Skin Renewing Eye Cream

If skincare had a sensible older brother, it would be CeraVe. No fuss, no fragrance, no false promises — just dermatologist-developed formulas that quietly get the job done. Powered by ceramides and hyaluronic acid, its products strengthen the skin barrier, lock in moisture and keep irritation at bay. From the Hydrating Cleanser to the Moisturising Cream, results are steady and reliable without fanfare. When your routine goes rogue, CeraVe brings things back to balance. Affordable, effective and refreshingly unpretentious, it’s the brand that proves consistency still beats hype.

La Roche-Posay

La Roche-Posay

Hyalu B5 Suractivated Serum

La Roche-Posay

Anthelios UVMune 400 Suncream SPF50

La Roche-Posay

Lipikar Balm Ap+M Moisturiser

La Roche-Posay

Retinol B3 Anti-wrinkle Anti-Ageing Serum

French-pharmacy born and dermatologist-adored, La Roche-Posay is what you reach for when your skin’s acting up and you’ve lost faith in trends. Formulated with its signature thermal spring water – rich in minerals and antioxidants, every product works to calm, repair and strengthen sensitive skin. The Hyalu B5 Serum hydrates and plumps without irritation, while the Anthelios SPF remains the industry’s gold standard for daily protection. Backed by decades of clinical research and loved by people you assumed just had naturally great skin, it’s the brand that simplifies what the rest overcomplicate. Proof that sometimes the most clinical choice is the kindest.

Clinique

Clinique

Smart Clinical Repair AM/PM Retinoid Balm

Clinique

Dramatically Different Moisturising Lotion+ 125ml

Clinique

Charcoal face wash

Clinique

Super Energizer Anti-Fatigue Depuffing Eye Gel

Clinique is the quiet overachiever of men’s skincare – dependable, refined and built on real skin science. Created by dermatologists in 1968, it was the first brand to prove that effective doesn’t have to mean irritating: every formula is allergy-tested, fragrance-free and backed by decades of research. Its cult Dramatically Different Moisturizing Lotion uses glycerin, hyaluronic acid and barrier-strengthening botanicals to deliver calm, hydrated, balanced skin. While the Charcoal Face Wash brings the same no-nonsense clarity to your morning routine. Reliable, restorative and genuinely skin-kind, Clinique earns its place through six decades of proof, not promises.

Grown Alchemist

Grown Alchemist

Gentle Gel Facial Cleanser

Grown Alchemist

Regenerating Night Cream

Grown Alchemist

Skin Renewal Mask

Grown Alchemist

Regenerating Eye Cream

Australian-born Grown Alchemist is a new-generation skincare brand where natural ingredients meet advanced chemistry. Every formula is built around biocompatible actives – antioxidants, peptides and vitamins designed to optimise skin function, not just appearance. In other words, it’s clean beauty that actually does something. The results are impressive: firmer texture, calmer tone, better barrier health. Its antioxidant-rich moisturisers and detoxifying cleansers are packaged like minimalist art but deliver the kind of results you’d expect from a dermatologist’s shelf. Sustainable, intelligent and clinically minded, Grown Alchemist proves you don’t have to choose between science and sensibility – or between good skin and good taste.

Dermalogica

Dermalogica

Daily Microfoliant Exfoliator

Dermalogica

Special Cleansing Gel

Dermalogica

Dynamic Skin Recovery SPF 50

Dermalogica

Smart Response Serum

Dermalogica is what happens when skincare grows up. Created by professional skin therapists through the International Dermal Institute, it’s less about pampering and more about performance. Every formula is designed for long-term skin health – no synthetic fragrance, no filler, just barrier-building ingredients that deliver real results. The Daily Microfoliant is its hero: a rice-based enzyme powder that instantly smooths and brightens without irritation, while formulas packed with peptides, lactic acid and prebiotics support healthy, resilient skin. Dermalogica is the skincare equivalent of a personal trainer – practical, disciplined, and delivers excellent results once you commit.

Medik8

Medik8

Medik8 Daily Radiance Vitamin C Moisturiser

Medik8 is where science meets simplicity, a British brand built on the ‘CSA philosophy’: vitamin C by day, SPF always, and vitamin A by night. It’s a formula that works because it covers the foundations of long-term skin health: protection, prevention and renewal. Its hero product, Crystal Retinal, uses retinal – a next-generation form of vitamin A that works up to eleven times faster than standard retinol – to refine texture, smooth fine lines and boost radiance without irritation. Each formula is backed by serious research but designed to slot into real life, no confusion, no 10-step routine. Smart, effective and reassuringly precise, Medik8 is the go-to for anyone who wants dermatologist-grade results without the consultation fees. Consider it your shortcut to genuinely good skin.

Tags: , , , , , ,
Best oLive
Privacy Overview

This website uses cookies so that we can provide you with the best user experience possible. Cookie information is stored in your browser and performs functions such as recognising you when you return to our website and helping our team to understand which sections of the website you find most interesting and useful.