dropdown

Yari Baro Launches New Product Line Under Beauty by Color Inc.

Yari Baro, CEO of Beauty by Color Inc, introduces a new product line that empowers individuals to embrace their natural beauty with confidence and care.

— A Visionary Entrepreneur’s New Milestone

Yari Baro, a renowned hairstylist, entrepreneur, and creator, continues to make waves in the beauty industry with the launch of her innovative product line under Beauty by Color Inc. Baro, who has built her brand around creativity, confidence, and care, has once again demonstrated her commitment to empowering individuals by offering products that promote self-expression and confidence.

Having already made a name for herself through her expertise behind the chair and her impressive portfolio of hair care products, Yari Baro is not simply a stylist, she is an industry leader. With the launch of this product line, she aims to elevate the beauty experience for everyone, ensuring they feel confident and radiant in their skin.

The Story Behind Beauty by Color Inc

Founded by Yari Baro, Beauty by Color Inc. is a brand that represents more than just hair care. It is a movement dedicated to fostering self-expression through beauty. Baro’s journey from mastering hairstyling to becoming an entrepreneur has been fueled by her passion for helping others unlock their natural beauty. The products in the new line reflect her holistic approach to beauty, emphasizing both style and self-care.

The launch of this new product line is the latest chapter in Baro’s career, which has been marked by a blend of innovation and empowerment. Her efforts have already earned her recognition, including an honorary doctorate for her contributions to the beauty industry, a testament to her expertise and impact.

Innovation and Empowerment: The Core of the Product Line

Yari Baro’s new product line is not just about delivering high-quality hair care products; it’s about inspiring individuals to embrace their uniqueness. Each product has been carefully crafted with both function and creativity in mind, making them accessible to anyone who wants to enhance their beauty routine while maintaining a strong sense of individuality.

“I want my products to do more than just enhance beauty. I want them to empower individuals to feel confident and unapologetically themselves,” said Baro. Her dedication to promoting confidence is embedded in every product, allowing users to feel the difference from the moment they use them.

As a visionary in the beauty world, Baro believes that beauty is not defined by trends, but by authenticity and self-expression. Her new line reflects this ethos, offering solutions that are as unique as the individuals who use them.

A Community-Driven Approach to Beauty

Beyond her product line, Yari Baro’s impact extends to the broader beauty community. As a mentor and educator, Baro has shared her knowledge and experiences with aspiring hairstylists, helping to shape the next generation of beauty professionals. She has also been featured in prominent beauty and lifestyle publications, continuing to build her influence and inspire others.

Baro’s brand is grounded in community, whether it’s through educational initiatives or collaborations with like-minded professionals. Her holistic approach to beauty ensures that each interaction with her brand, from products to personal experiences, empowers individuals to feel more confident and true to themselves.

Building a Legacy of Excellence

The launch of Beauty by Color Inc.’s new product line marks another milestone in the company’s continued growth. With each new product release, Yari Baro is not just building a business; she is creating a legacy of excellence, empowerment, and transformation in the beauty industry. Her vision for the future includes expanding her reach, creating more opportunities for those in the beauty field, and, most importantly, continuing to empower individuals through beauty.

Her dedication to beauty and innovation has made her a trusted figure in the industry, and with her new product line, she shows no signs of slowing down. Baro’s influence goes beyond her work as a stylist, it’s about making a lasting impact in the beauty world, helping others embrace their natural beauty along the way.

About Beauty by Color Inc.

Beauty by Color Inc. is a beauty brand founded by Yari Baro, a visionary hairstylist and entrepreneur committed to empowering individuals through self-expression. The brand focuses on creating high-quality products that enhance natural beauty while promoting confidence. With a reputation for innovation and a passion for community empowerment, Beauty by Color Inc. is dedicated to transforming the beauty industry one product at a time.

Media Contact
Yaribey Baro
CEO
Beauty by Color Inc
Email: [email protected]

Social Media
Instagram
LinkedIn

Contact Info:
Name: Yaribey Baro
Email: Send Email
Organization: Beauty by Color Inc
Website: https://www.instagram.com/Yaribey_

Release ID: 89179307

Tags: , , , , , ,
How To Make Color Swirl Melt + Pour Soap

How To Make Color Swirl Melt + Pour Soap

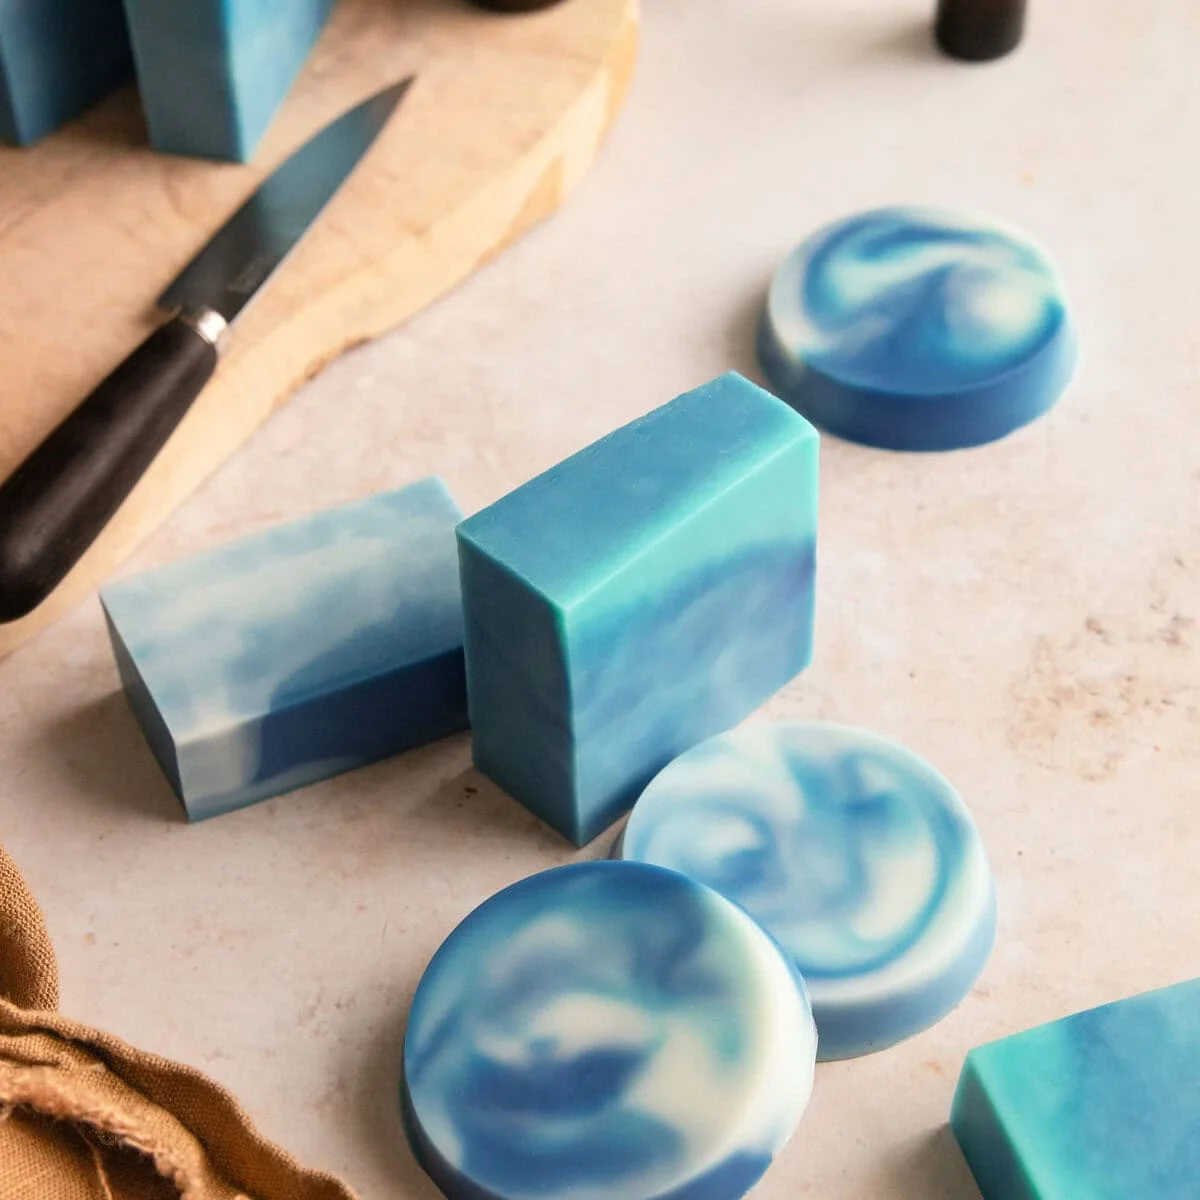
Color swirl melt and pour soap is one of my favorite projects. It’s beautiful, beginner-friendly, and always feels a little bit magical when you unmold it and slice into it. But getting those crisp, clean swirls does require understanding a few key techniques that are unique to melt and pour.

If you’re coming from the cold process soap world, you might think swirling melt and pour soap is going to be the same deal. But here’s the thing… it’s a totally different beast.

Melt and pour soap cools and thickens way faster than cold process, and it doesn’t reach “trace” (a pudding-like consistency that’s perfect for swirling). So your swirl window is pretty limited. You’ve got to work quickly and strategically or you’ll end up with a solid block before you even get your skewer in there.

But don’t let that scare you off! With a few key tricks in your back pocket, creating swirls in melt and pour (like these dreamy cloud lavender soaps) becomes totally doable.

]]>Jump to:

Supplies

Before you dive in, let’s get your supplies together. Having everything prepped and ready to go is crucial since melt and pour soap sets quickly and you won’t have time to scramble for a thermometer or skewer once you’re in the middle of swirling.

Ingredients:

  • Soap Base: You’ll need either white or clear soap base. The clear base gives you that translucent effect, while white provides opacity. While you can use either type of base, I recommend sticking with just on type and not mixing them together! Different brands and types have different weights, and if you mix them together you may find that one sinks to the bottom, leaving you with layers as opposed to swirls.
  • Mica powder: You want to use non-bleeding colorants for crisp, clean swirl lines. Mica is my go-to, but you can also use color blocks or liquid soap dye.
  • Essential oils: Totally optional, but if you’re planning to scent your soap, have the oils measured out and ready to add right after you melt the base. A good rule of thumb is roughly 1-2 teaspoons essential oil per pound of soap base.

Tools:

  • Molds: Loaf molds are super common for swirl designs since they give you those beautiful cross-sections when you slice the soap. Silicone molds also make unmolding way easier, so you don’t risk ruining your pretty swirls trying to wrestle the soap out. Feel free to use single cavity silicone molds (like we did in this post (link to swirled Sleepy Time Soap post)) if you prefer.
  • Microwave-safe containers (preferably with a spout): You’ll use these for melting your soap base and then keeping each color separate. Having multiple containers on hand means you can work with several colors at once.
  • Spoon or spatula: This is for stirring your melted soap base and mixing in your colorants and oils. A heat-safe silicone spatula works great since it can handle the heat and won’t scratch your containers.
  • Skewers: These are your swirling tools! Gently drag one through the soap to create those beautiful marbled patterns. If you don’t have a bamboo skeewer, you can also use a butter knife or chopstick.
  • Thermometer: A kitchen thermometer lets you know exactly when your soap hits that perfect swirling temperature, which makes all the difference between crisp swirls and muddy blobs.
  • Rubbing alcohol in a spray bottle: This eliminates those pesky surface bubbles after pouring. Just a few quick spritzes will pop the bubbles, leaving you with a smooth, professional-looking top.
  • Divider material: While I had a hard time making dividers work, many tutorials recommend using wax-coated dividers, stiff paper, or even a manila folder to get more controlled swirls. You’ll cut these down to size and place them in your mold to keep colors separated until you’re ready to pull the divider out and start swirling. Even though I had a hard time getting them to work, it doesn’t hurt to play around with these when making swirls your soap.

How to Swirl Melt and Pour Soap

1. Prep & Melt

Start by cutting your soap base into small, evenly-sized cubes and divide it into separate microwave-safe containers (one for each color you’re planning to use). This helps it melt more quickly and evenly.

You can melt it in the microwave in short bursts. I usually do 30 seconds at a time, stirring in between. Or use a double boiler if that’s more your style.

2. Add Color and Essential Oil

Once your soap is fully melted, add your mica powder and essential oil to each container, stirring well to make sure everything is evenly distributed.

3. Let Cool

Watch the temperature. Temperature control is everything. And I mean everything. Get that right, and you’re 90% of the way there.

You need to cool your soap until it hits the “sweet spot” for swirling (about 120°F). If your soap is too hot (around 135°F or above), the colors will blend together and your colors will blend together into a muddy mess. Too cool, and the soap will start to set before you can create your swirls. 

For more defined swirls, you want to pour around 120°F. But here’s the catch: at that temperature, the soap sets quickly, so you’ve got to work fast.

Tip: Use a thermometer. Guessing just doesn’t cut it when you’re working with such a narrow window. You need to know exactly how hot your soap is before pouring.

4. Pour into Molds

When it comes to pouring, you’ve got two main options:

Option A: Use dividers to control where each color goes and prevent premature blending. This is great if you want really structured, distinct swirls. To be totally honest though, I couldn’t get this trick to work for me.

Even with a sturdy divider, the soap simply leaked around the edges and flooded the mold. But I’m sure different types of dividers and/or dividers types of soap base will work better than others and are worth testing out.

Option B: Pour free-form, alternating colors and pouring from different heights to create a more organic, unpredictable pattern.

Vary your pour technique. Don’t just pour all your colors in the same spot or from the same height. Pour from different heights and into different parts of the mold to create interesting patterns. High pours create more movement, while low pours keep things more contained.

4. Swirl

Now for the fun part!

Drag a skewer or chopstick through the soap. You’re not stirring. You’re just gliding the tool through to pull one color into another.

A light touch is key here.

Tips: Only drag the skewer 1-2 times, max. I know it’s tempting to keep swirling and swirling to get that perfect pattern, but over-swirling will just muddle the colors. Often, just a couple gentle passes are enough.

5. Spritz with Alcohol and Let Cool

Immediately spritz the top of your soap with 99% isopropyl alcohol to get rid of any surface bubbles. Then let the soap harden fully before you unmold and cut it.

I know it’s tempting to peek early, but trust me, let it set completely so you don’t mess up your design.

Tips & Tricks

Stick to one base brand and type. We touched on this earlier, but it’s worth repeating: different bases can have different densities, even within the same brand. If you mix them, one color might sink while another floats, and your swirl definition will suffer. To avoid this, use the same soap base for all your colors.

Control the bubbles. Spritzing with 99% rubbing alcohol right after you pour helps eliminate surface bubbles. Just a few quick spritzes and those bubbles will pop right away.

Don’t move the mold until the soap has cooled completely. Even just bumping your mold can cause your swirls to mix. So once you’ve put the skewer down, don’t touch the mold! 

Cut your cooled soap based on the swirl. Sometimes you’ll end up with better swirl definition where you least expect it. If you don’t see much swirl action in the middle of the soap loaf but you do on the sides or ends, then cut your soap to highlight where the swirls are.

Troubleshooting

Even with the best techniques, sometimes things don’t go quite right. Here are some common issues and how to fix them.

Colors look muddy or blended together. This usually happens when the soap is too hot when you pour it. The heat causes the colors to mix and lose their definition, creating that muddy look.

To fix this, let your melted base cool to around 120°F before pouring. The cooler temperature helps the colors stay separate and crisp.

Swirl lines look faint or washed out. If your swirls are barely visible, you’ve probably dragged your tool through the soap too many times. Over-swirling blends the colors together and weakens those beautiful lines. A few slow, deliberate passes are usually enough to create gorgeous patterns without muddying things up.

One color sinks or rises above the others. This frustrating issue typically happens when you use bases with different densities, for example, mixing goat’s milk base with clear glycerin base. Since they have different weights, one will naturally settle above or below the other.

To avoid this, use the same melt and pour base for all your colors, or at least make sure all your bases are from the same brand and product line.

Lots of bubbles. Air gets trapped during pouring, especially if you’re pouring from a height or pouring quickly. The good news is this is one of the easiest problems to fix: simply spritz the top of your soap with 99% isopropyl alcohol right after you pour. The alcohol breaks the surface tension and those bubbles will pop almost instantly.

Soap thickens before you can pour or swirl. To prevent this, work a little quicker, or keep your containers on a heating pad or in a warm water bath so the soap stays fluid long enough to swirl.

If the soap gets chunky before you’ve had a chance to pour it, pop it in the microwave for 15 seconds. Keep heating and stirring until it’s a pourable consistency once again.

Sharp lines disappear after the soap sets. You created perfect swirls, but a day later they’ve blurred or bled into each other. This happens to the best of us. The fix is to use non-bleeding colorants like micas or color blocks specifically formulated for melt and pour soap. They’ll stay put and keep your swirls looking sharp.

FAQ

Do I need a loaf mold to swirl?

No, you can use loaf molds or single-cavity silicone molds to make swirl patterns in soap. Whichever mold you choose, the process is the roughly same.

Can I swirl with more than two colors?

Yes, many swirls use three or more colors. With more colors, dividers or careful pouring help maintain definition so everything doesn’t just blend together.

How long do I wait to unmold and cut?

Let the soap fully harden. Depending on your base and the temperature, this may take a few hours up to overnight. It’s better to wait too long than not long enough.

Will the swirl fade or bleed over time?

If you use non-bleeding colorants, you’re less likely to see bleeding later. Also, store your soap in dry, cool places to minimize sweating or color migration.

Is it normal for my soap to sweat as it sits?

Melt and pour soap can attract moisture from the air, which creates those little clear beads on the surface. To reduce sweating, wrap your soap once it’s fully set, store it in a cool, dry place, or adjust your base or additives accordingly.

0

Tags: , , , ,
How To Create Diagonal Color Layers in Soap

How To Create Diagonal Color Layers in Soap

If you’ve been making melt and pour soap for a while, you’ve probably reached that point where plain, single-color bars just aren’t doing it for you anymore. Don’t get me wrong, there’s nothing wrong with simple soap. But once you get the hang of the basics, it’s natural to want to try something a little more interesting.

That’s where layering comes in.

Whether you’re going for bold stripes or a soft, stacked ombré effect, layering is one of those techniques that instantly elevates your soap game. And the best part? You don’t need any special equipment or advanced soap making skills.

Just a little patience, a spray bottle of rubbing alcohol, and a basic understanding of how temperature affects your layers. (Oh, and a good mold never hurt!)

So if you’re ready to take your melt and pour soap from basic to elevated, let’s talk about how to create layers in soap that look professional and stick together perfectly every single time.

Why Create Layers in Melt and Pour Soap?

Let’s start with the basics. Layering is exactly what it sounds like: you pour different colors or soap bases in stages, letting each one cool just enough before adding the next. It’s not rocket science, but there is a little technique involved (don’t worry, I’ll walk you through it).

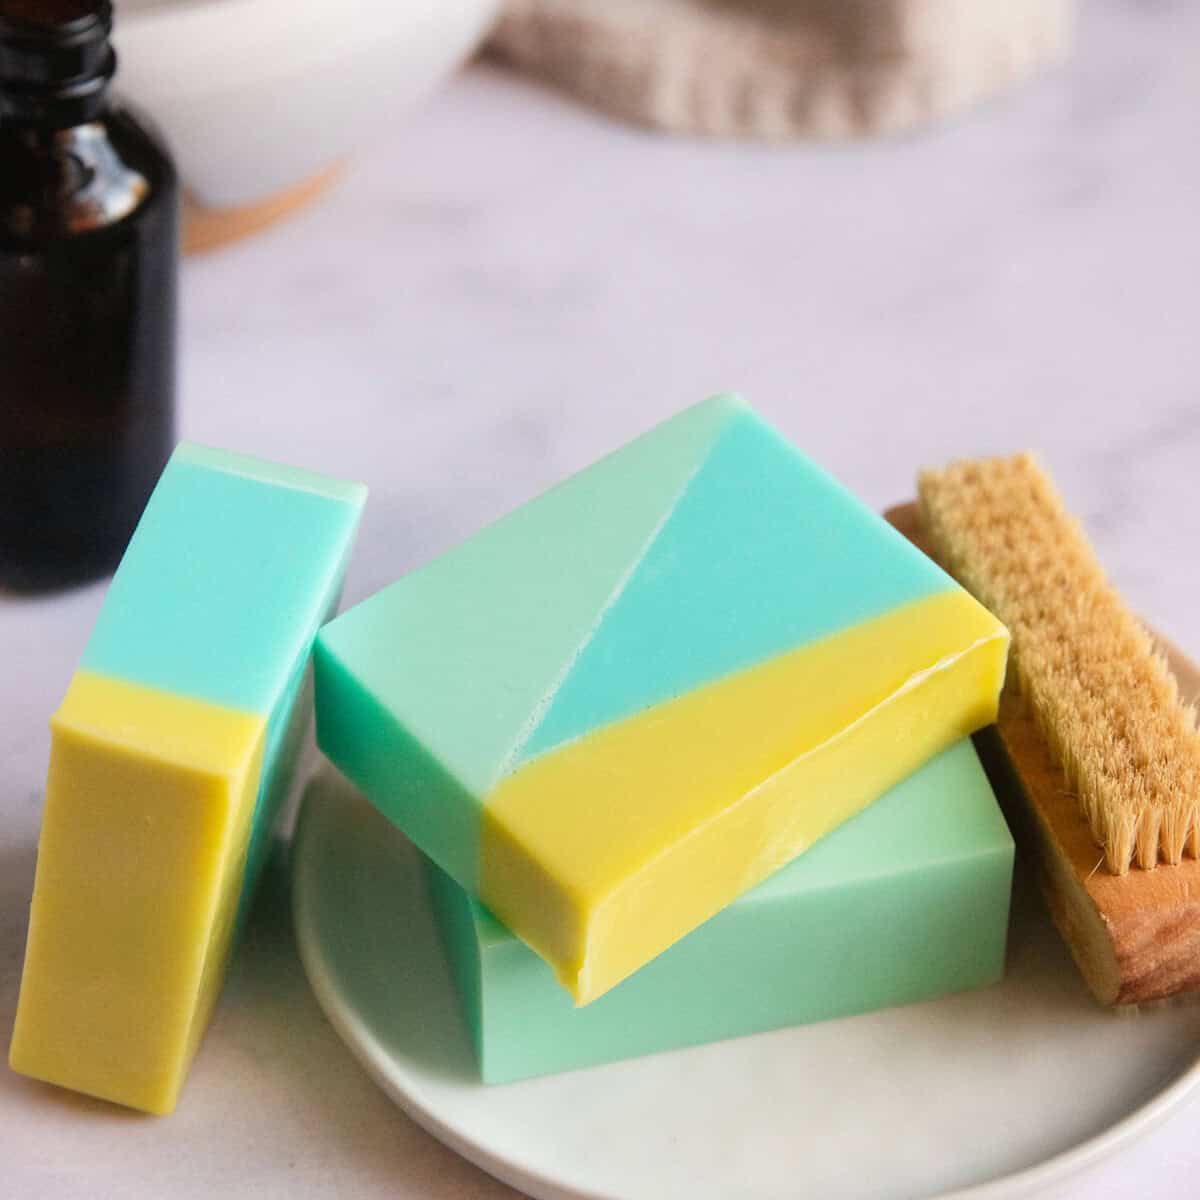
The cool thing about layering is that it opens up a ton of design possibilities. You can create bold, punchy stripes. You can play around with ombré effects that fade from one color to the next (that’s a little more complicated and not covered here, but possibly in the future…). You can even alternate clear and opaque soap bases to add dimension and contrast that really makes your bars pop.

The secret to getting those clean, distinct layers? It all comes down to controlling temperature and timing.

Pour too hot and you’ll melt the layer underneath. Wait too long and your layers might not stick together at all.

Once you get the hang of it, layering is a super easy way to make soap that looks way more impressive than it actually is.

Supplies

Clear soap gives you that translucent, glassy look, while white soap makes your colors more opaque and vibrant. I like to alternate between the two so the layers really stand out.

  • Colorants–Mica powders, liquid soap dyes, or powdered herbs or botanicals all work here. Micas are my go-to because they’re skin-safe and nontoxic, though they’re a bit more subtle than traditional dyes.

If you want really bold, punchy colors, liquid soap dyes are the way to go. And if you’re keeping things natural, powders like beetroot or spirulina can give you soft, earthy tones.

  • Essential Oils–Totally optional, but this is where you can really personalize your soap.

You can use the same scent in every layer or switch it up for a more complex fragrance. Just remember to stick with skin-safe oils, especially if you’re gifting these bars (you don’t want to give the gift of a rash!)

  • Rubbing Alcohol in a Spray Bottle–Rubbing alcohol is your secret weapon.

A quick spritz before and after pouring each layer keeps them bonded together and gets rid of any surface bubbles that might mess up your design. And I’ve found that a bottle like this creates just the right amount of mist. Trust me, don’t skip this step.

Equipment

I’m partial to loaf molds because you can slice them into bars later and show off those gorgeous layers. But if you want individual soaps, cavity molds are perfect.

  • Heat-Safe Containers–You’ll need something to melt and mix your soap in.

These 16-ounce glass measuring cups with pour spouts are my favorite because they hold just enough soap for one layer and they make pouring really easy. If you’re doing multiple colors, grab one container per color to keep things moving smoothly.

  • Thermometer–Technically optional, but it makes life way easier.

Checking the temperature before you pour helps you avoid melting the layer underneath or ending up with layers that don’t stick. A basic kitchen thermometer does the trick, or you can opt for a digital instant read thermometer if you’ve got one.

  • Utensils–The usual suspects: stirring spoons, measuring spoons, and a sharp knife for cutting your finished soap into bars.

Optional Supplies

  • Chopstick or Skewer–Perfect for popping any stubborn bubbles that the rubbing alcohol doesn’t catch. Can also be used to scratch up a layer of soap that got too cold and may not bond properly to the next layer.
  • Small Ramekin or Book–These are great for tilting your mold if you want angled or diagonal layers. It’s a simple trick that adds a lot of visual interest without making things too complicated!
  • Extra Thermometers–If you’re working with several colors at once, having more than one thermometer means you can check all your containers quickly without waiting for one thermometer to cool down between checks.
  • Pipettes or Droppers–Super handy if you’re adding essential oils or colorants and want to be precise about how much goes into each layer.
  • Cutting Guide or Soap Cutter–Not essential for the layering process itself, but when it comes time to cut your loaf into bars, a soap cutter helps you get uniform slices that show off your layers perfectly.

How to Create Layers in Melt and Pour Soap

Since this post is all about technique (not a specific recipe), I’m going to walk you through the general process of layering melt and pour soap. You can adapt this to whatever colors, scents, and mold sizes you prefer. And if you want exact measurements and a step-by-step project, check out the holiday DIY Striped Soap post.

Step 1: Prepare Your Soap Base

Start by cutting your melt and pour base into small 1-inch cubes. This helps it melt evenly, prevents overheating or scorching, and saves you microwave time. Toss the cubes into a heat-safe container (one per color or layer) and pop it in the microwave.

Heat in short 30-second bursts, stirring well between each one, until the soap is just melted. The key word here is just. You don’t want to overheat it or the soap can scorch or get weirdly thick and hard to work with.

Step 2: Add Color and Fragrance

Once your soap is melted, stir in your colorant and fragrance. Go slow and gentle here because too much stirring can create bubbles, and bubbles are the enemy of clean layers.

This is also where you get to have fun. Each layer can have a different color, a different scent, or both.

Want a lavender layer that smells like lavender and a pink layer that smells like rose? Go for it. Just remember to stick with skin-safe essential oils if you’re planning to use or gift these bars.

Step 3: Pour the First Layer

To get those fun slanted lines, tilt your mold by placing a small ramekin or a bunched up kitchen towel underneath one side.

Then pour your first layer into the mold. It doesn’t matter how hot this first layer is since there’s nothing underneath it to melt. Once it’s in the mold, give the top a light spritz with rubbing alcohol to pop any bubbles. Then let it cool.

You’ll know it’s ready for the next layer when a thin film (or “skin”) forms on top. It should feel slightly soft and warm to the touch, but not overly wobbly or like there’s liquid underneath.

This usually takes about 10-15 minutes, but it depends on how thick your layer is and how hot the soap was when you poured it.

Step 4: Pour the Next Layer

Before you pour the next layer, spritz the cooled surface again with rubbing alcohol. This is super important because it helps the new layer bond to the old one without any gaps or air pockets.

Now here’s where temperature matters. Let your melted soap cool to around 140 degrees F before pouring.

If it’s too hot, it’ll melt right through the filmy layer underneath and you’ll end up with muddy colors instead of distinct stripes. If it’s too cool, the layers might not stick together properly and could split apart when you cut the soap into bars.

Pour slowly and carefully, and then spritz the top with alcohol again to get rid of any new bubbles.

Step 5: Repeat Layers

Keep going, alternating colors, until your mold is almost full. Always spritz with alcohol before and after pouring each new layer. It might feel repetitive, but trust me, it’ll make or break your layers.

If you’ve been tilting your layers up to this point, make sure to remove the ramekin and lay the mold on a flat surface before pouring the last layer. Then give it one last spritz and let the whole thing cool completely.

I’m talking several hours or even overnight. I know it’s tempting to pop it out of the mold early, but if you try to unmold it too soon, the layers might still be soft and could separate or warp.

Once it’s fully set, you can unmold your soap and cut it into bars. And that’s it! You’ve got gorgeous, professional-looking layered soap that’s perfect for gifting or keeping all to yourself.

Tips and Tricks for Perfect Layers

Once you’ve got the basic process down, these little tricks will help you nail those clean, professional-looking layers every single time.

Keep alcohol nearby.

Seriously, keep that spray bottle within arm’s reach at all times. Spritz the surface of each layer right before you pour the next one. Think of the alcohol as the “glue” that makes your layers stick together. Then spritz again right after you pour to prevent any bubbles from cropping up. Trust me, you can’t use too much alcohol.

Create equal layers.

If you want your layers to be perfectly even, the easiest way to do it is to weigh your soap base and divide it into equal amounts before you start melting and coloring. So let’s say you’re filling a loaf mold and you want four layers. You’d divide your base into four equal portions, like 10 ounces each, and then color them separately.

But honestly? You don’t have to be that precise if you don’t want to. If you’re going for a more organic, free form look where some layers are thicker than others, just eyeball it.

Pour however much feels right for each layer and don’t stress about the measurements. Both approaches work, it just depends on the vibe you’re going for.

Don’t wait too long between layers.

Each one should be slightly soft to the touch and still warm. If you gently press your finger against it and it feels completely cool and solid, you’ve probably waited too long. 

Use contrasting bases.

Want your layers to really pop? Try alternating between clear and white soap bases. The contrast makes each layer super distinct and gives your bars a ton of visual interest. 

Tilt your mold.

This is one of my favorite tricks for taking layered soap to the next level. If you want diagonal or angled layers instead of straight horizontal ones, just prop one side of your mold up slightly while you pour.

A small ramekin or even a book works great for this. It’s such a simple thing, but it makes your soap look so much more fun and eye-catching.

Watch the temperature.

I know I already mentioned this about a thousand times already, but it’s worth repeating because temperature is ev-er-y-thing when it comes to layering.

Around 140 degrees F is the sweet spot for pouring layers. It’s cool enough that it won’t melt what’s underneath, but still warm enough to bond properly. If you don’t have a thermometer, let your melted soap sit for a few minutes after you take it out of the microwave. It should feel slightly hot to the touch.

Note: Some folks say to aim for 120-130 degrees, but I’ve found that 140 degrees keeps my layers from splitting as much, probably because it melts the layer underneath just enough to help them stick together. 

Troubleshooting Common Issues

Even with practice, layered soaps can be a little finicky. Here’s how to fix (or better yet, avoid) the most common problems you might run into.

Layers separated after cutting

This one’s frustrating because everything looks fine until you go to slice your soap and the layers just fall apart. This usually happens because you didn’t spritz with alcohol between layers, or you poured when the bottom layer was completely cold and had cooled too much.

Always, always spray alcohol between layers. And don’t wait too long between pours. The previous layer should still feel slightly warm and a little soft when you add the next one. If it’s totally firm and cool to the touch, you’ve waited too long and the layers won’t bond as well.

And if you did wait too long to pour the next layer, then I recommend pouring your next layer slightly too hot (say between 150 – 160 degrees F). Yes, it might melt the previous layer a little, but that’s what you need in order to keep your soap from splitting.

Colors bled together

Instead of clean stripes, you’ve got muddy, swirled colors where your layers should be. This happens when the soap is too hot, so it melts right through the layer underneath.

To fix this, let your melted base cool for a few minutes before pouring. Use a thermometer if you have one, or just test the temperature by touching the outside of your container. It should feel warm but not hot. 

Uneven or slanted layers

Your layers looked straight when you poured them, but now they’re all wonky and uneven. This can occur if your mold isn’t sitting level, or if the soap cools unevenly (maybe one side was closer to a window or heat source).

Before you pour each layer, take a second to make sure that your workspace is flat and level. And try to let your soap cool in a spot where the temperature is consistent, away from drafts or direct sunlight.

Air bubbles between layers

You’ve got little pockets of air trapped between your stripes, which can make the layers look cloudy or cause them to separate. When this happens it means that you didn’t spray enough alcohol, or you poured too quickly and created turbulence in the soap.

Be generous with that alcohol spray. Give each layer a good spritz before pouring the next one. And when you pour, go slowly and gently. Try pouring along the side of the mold or over the back of a spoon to help the soap flow smoothly without creating bubbles.

FAQ

Can I use any type of melt and pour base?

Yep! You can layer clear, white, or any of the specialty bases like goat’s milk, shea butter, honey, or aloe. The only thing you need to make sure of is that they’re all melt and pour soap bases. Don’t try to mix melt and pour with cold process soap or anything like that. 

Do I have to color each layer?

No, not if you don’t want to. You can absolutely alternate between colored and uncolored layers if you want a more subtle look. Or you can create an ombré effect by using different shades of the same color, going from light to dark (or vice versa). There are no rules here, so play around and see what you like.

How thick should each layer be?

Totally up to you and the look you’re going for. Thin layers have this elegant, delicate vibe. Thicker layers are bolder and more graphic. I usually aim for about a quarter to a half inch per layer to keep cooling time to a minimum, but you can go thinner or thicker depending on your mold size and how many layers you want to fit in there.

Can I add embeds between layers?

Definitely. Melt and pour soap layers are actually perfect for this. You can tuck small soap shapes, dried botanicals, or little surprises between the layers. Just make sure whatever you’re embedding is soap-safe and won’t bleed color or get gross over time.

How long should I wait between layers?

I think 15 minutes is a good rule of thumb, but it really depends on how hot the soap was when you poured it and how thick your layers are. 

Do layered soaps take longer to cure?

Nope. One of the best things about melt and pour soap is that it doesn’t need any “curing” time at all. Once your soap is fully cooled and set (which takes a few hours to overnight), you can unmold it, cut it into bars, and start using it right away. 

Can I use a single cavity mold instead of a loaf mold?

Yes, and the process is pretty much the same when you’re working with individual cavity molds instead of loaf molds. The main difference is that layers in smaller cavity molds tend to cool down faster, so you can usually move through the layering process a little more quickly.

Just remember the basics: spray each layer with rubbing alcohol before you pour the next one, and keep an eye on your temperatures. Those two things are non-negotiable, no matter what kind of mold you’re using.

0

Tags: , , , ,
Best oLive
Privacy Overview

This website uses cookies so that we can provide you with the best user experience possible. Cookie information is stored in your browser and performs functions such as recognising you when you return to our website and helping our team to understand which sections of the website you find most interesting and useful.