The Creamiest Hard-Boiled Egg Chocolate Pudding (High Protein)

The Creamiest Hard-Boiled Egg Chocolate Pudding (High Protein)

If someone handed me a bowl of this chocolate pudding and asked me to guess the secret ingredient, hard-boiled eggs wouldn’t even make the list.

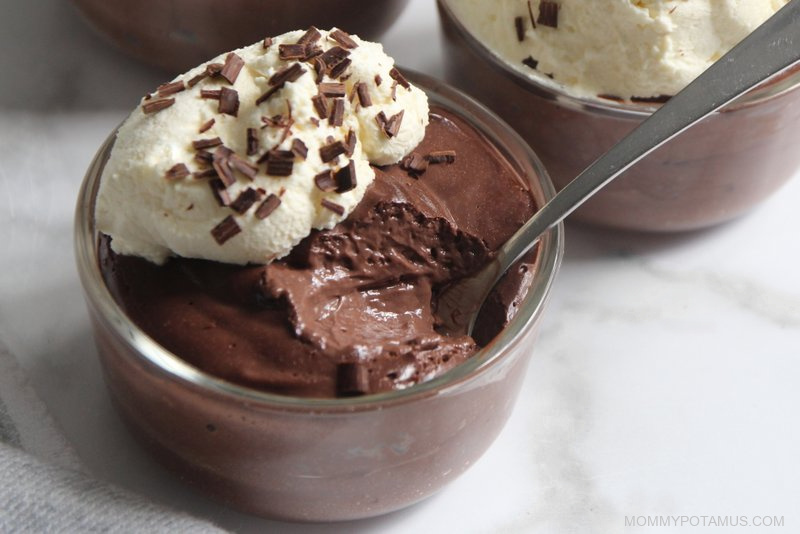
Once everything gets whirled together in a blender, the eggs somehow “disappear” into an incredibly smooth, rich chocolate pudding that my whole family loves.

It’s not “surprisingly good considering there are eggs in it” – it’s ACTUALLY good . . . possibly the best chocolate pudding I’ve ever made.

There’s no eggy flavor and no complicated technique. Just silky, chocolatey goodness . . . with a lot of bonus protein. 🙂

Okay, But Why Put Eggs In Pudding?

I realize hard-boiled eggs and chocolate pudding sound like two foods that should stay very far away from each other, but there’s actually a lot to love about this combination.

Traditional homemade pudding usually involves heating milk, sugar, and cocoa on the stove, then using cornstarch (or arrowroot), egg yolks, or another thickener to create a creamy texture.

This version is so much easier.

Hard-boiled eggs provide the structure and creaminess, while cocoa powder, vanilla extract, and maple syrup provide the sweet chocolatey goodness.

Everything goes straight into the blender, so there’s no tempering eggs and no whisking over the stove.

And because the base is made with whole eggs instead of milk and sugar, it’s naturally higher in protein than most traditional chocolate pudding recipes. (You know how much I love that.)

The Trick To Making It Taste Like Pudding

I know, “trust me” is doing a lot of heavy lifting with this recipe, but I served this to everyone in my family and none of them could tell it contained eggs.

That said, I do have a couple of tips for you.

First, use a high-speed blender if you have one. You want the hard-boiled eggs blended so thoroughly that there aren’t any tiny bits left behind.

Second, for the silkiest pudding, let your blender run longer than you think it needs to.

You’re not just combining the ingredients – you’re trying to completely emulsify the eggs into the mixture.

If your pudding seems too thick, add milk a tablespoon or two at a time. If it seems a little thin, keep in mind that it will firm up in the refrigerator.

And if you can detect even a hint of egg flavor while it’s still warm from blending, chill it before making any adjustments. The chocolate flavor comes through much more clearly once everything is cold.

🍓 August 8–12 Only

Quick interruption before we get back to chocolate pudding. 🙂

Paleovalley is celebrating their anniversary with up to 35% off everything in the store, plus a free mystery gift with every order.

It’s a good time to stock up on their Superfood Bars, Vanilla Bone Broth Protein, beef sticks, whole food supplements, and other snacks + pantry staples.

Shop The Sale + Get A Free Gift

Now, back to the recipe. 🙂

What You’ll Need

Hard-boiled eggs – You’ll need six peeled eggs. Use fully cooked hard-boiled eggs rather than soft-boiled eggs because you want the yolks completely set before blending.

Milk – I usually use whole milk, but if you’re dairy-free you can use coconut milk or another non-dairy milk.

Unsweetened cacao powder or cocoa powder – I use whichever one I have on hand at the moment.

Maple Syrup – Adds sweetness while blending in completely, so the pudding stays smooth and silky.

Vanilla extract – To round out the flavor.

A pinch of salt – Optional, but recommended. A little salt helps the chocolate and vanilla really “pop.”

Is This Good For Meal Prep?

Yes. This pudding keeps well for 3–4 days in the fridge, so I often make a double batch and scoop it into individual glass jars for my family to grab when they need a snack.

Hard-Boiled Egg Chocolate Pudding Recipe

This silky, rich recipe is very possibly the best chocolate pudding I’ve ever made. It’s easy, rich in protein, and can be made in advance for quick snacks throughout the week.

Keyword gluten-free, dairy optional

Prep Time 5 minutes Chilling time 1 hour

Author Heather Dessinger, FDN-P

  • 6 hard boiled eggs (peeled)
  • ½ cup whole milk or non-dairy milk
  • ⅓ cup maple syrup (or more to taste)
  • ¼ cup unsweetened cacao powder or cocoa powder
  • 1 tsp vanilla extract (how to make it)
  • pinch of salt (optional)
  • Add all ingredients to a high-speed blender.

  • Blend until completely smooth and creamy, stopping to scrape down the sides if needed.

  • Taste and add an extra tablespoon or two of sweetener if desired.

  • Transfer to individual serving jars, a large mason jar, or a covered container.

  • Refrigerate until thoroughly chilled. (At least one hour, but preferably longer.)

  • Serve plain or topped with whipped cream, berries or shaved chocolate.

The total volume of the finished pudding can vary from about 2 to 2.5 cups, depending on how much air is incorporated during blending. For the nutrition information below, one serving is ¼ of the finished batch, regardless of its total volume.
Nutrition calculation is based on whole milk (instead of non-dairy milk) and cacao powder (instead of cocoa powder). 

Calories: 222kcal | Carbohydrates: 24g | Protein: 11g | Fat: 10g | Saturated Fat: 3g | Polyunsaturated Fat: 1g | Monounsaturated Fat: 4g | Cholesterol: 283mg | Sodium: 137mg | Potassium: 284mg | Fiber: 2g | Sugar: 19g | Vitamin A: 439IU | Calcium: 111mg | Iron: 2mg

✋ Before You Go, Grab This Free Midlife Guide

If you’ve ever found yourself thinking, “Why doesn’t my body respond the way it used to?” . . . this guide was written for you.

Midlife can change the rules for everything from sleep and energy to workouts, recovery, body composition, and more. Knowing what’s changing can help you let go of strategies that no longer fit – and start focusing on what supports your body now.

Inside, I’ll walk you through 10 things I wish I’d known sooner, so you can make more sense of what you’re experiencing and get clearer about where to go from here.

Enter your email below and I’ll send it right over. You’ll also receive my weekly newsletter with practical wellness tips, recipes, and new guides like this one.
Share with a friend! 👇

Tags: , , , , , ,
Cottage Cheese Ice Cream Recipe (High Protein)

Cottage Cheese Ice Cream Recipe (High Protein)

Since you clicked on this article, I’m going to assume one of two things:

  • You’re curious if the recipe title is serious. (It is.)
  • You’re open to the idea that veggies can belong in meatballs and cottage cheese can belong in ice cream.

Whether it’s one or both, welcome. The idea of cottage cheese in dessert might sound a little weird at first, but don’t worry – it becomes a rich, creamy base that lets the sweet tropical mango flavor take the lead.

If you’re wondering, “But WHY does cottage cheese belong in ice cream,” you’re asking the right question. Traditional ice cream relies on a carefully balanced combination of fat, sugar, milk solids, and air to create its creamy texture.

If you try to, say, increase the protein because you’re in midlife and it’s suddenly your favorite macronutrient, chances are you’ll accidentally change that crucial balance and end up banging your spoon against an icy brick.

That’s where cottage cheese comes in. When blended until completely smooth, it allows you to change the ratios while keeping the creaminess and structure that makes ice cream scoopable and satisfying.

This mango version is lower in sugar and higher in protein than traditional ice cream, yet still silky smooth, sweet, and well worth the five-ish minutes of hands-on prep time.

Cottage Cheese Ice Cream Recipe

This mango ice cream is silky smooth, sweet, and well worth the five-ish minutes of hands-on prep time.Makes approximately 3.5 – 4 cups

Prep Time 5 minutes Churing time 20 minutes

Author Heather Dessinger, FDN-P

  • 2 cups whole milk cottage cheese I recommend 4% milkfat
  • 2 cups frozen mango chunks
  • 25-30 grams unflavored or vanilla protein powder Optional – I used 2 scoops Heart & Soil Whey
  • 1½ tsp vanilla extract Start with 1 tsp if using vanilla protein powder and add more to taste
  • 3 tbsp maple syrup

Ice Cream Maker Method

  • Blend in a high powered blender until very smooth.

  • Pour the mixture into your ice cream maker and churn according to your manufacturer’s instructions.

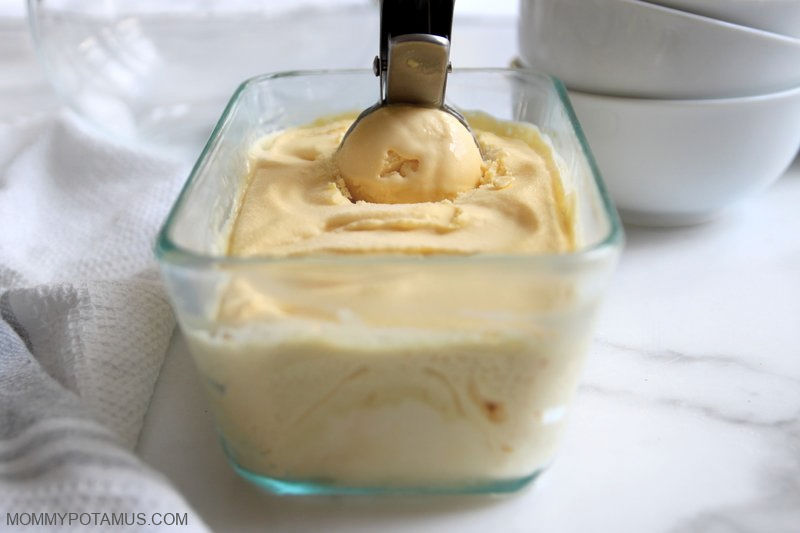
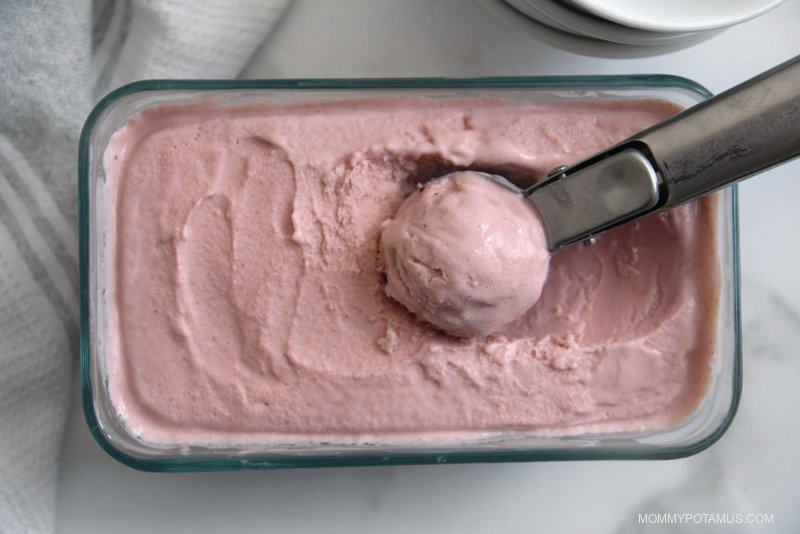
  • When the ice cream is ready it should have a soft serve consistency. You can eat it right away, or if you prefer a firmer consistency transfer it into an airtight container and place in the freezer for 2-4 hours. I like to use a glass loaf pan with a lid.
  • To Serve: If you decide to freeze the ice cream for a firmer texture, you’ll get the creamiest results by letting it soften a bit before serving. I like to think of it more as “well chilled” than deeply frozen.Because cottage cheese-based ice cream can become a little icy when frozen solid, letting it rest on the counter allows it to soften into a smoother, creamier texture that tastes more like traditional ice cream. Depending on the size and depth of your container, this can take anywhere from 10 to 20 minutes.

No Ice Cream Maker Method

  • Blend the ingredients in a high-powered blender until very smooth.

  • Transfer the mixture to a freezer-safe container and place it in the freezer. To help keep the texture creamy, give it a good fold with a spatula every 30 minutes or so. This helps break up ice crystals as they form.

  • Once the mixture becomes too firm to fold easily, just leave it alone and continue chilling until it reaches your desired consistency, about 3–4 hours total.

  • To Serve:Because cottage cheese-based ice cream can become a little icy when frozen solid, letting it rest on the counter allows it to soften into a smoother, creamier texture that tastes more like traditional ice cream. Depending on the size and depth of your container, this usually takes about 10–20 minutes.

Nutrition estimate based on Good Culture 4% and 2 scoops of Heart & Soil Whey. 

Serving: 0.5c | Calories: 111kcal | Carbohydrates: 13g | Protein: 10g | Fat: 3g | Saturated Fat: 2g | Polyunsaturated Fat: 0.03g | Monounsaturated Fat: 0.1g | Cholesterol: 16mg | Sodium: 20mg | Potassium: 142mg | Fiber: 1g | Sugar: 11g | Vitamin A: 446IU | Vitamin C: 15mg | Calcium: 61mg | Iron: 0.1mg

A Note About Ice Cream Makers

When I bought my current ice cream maker years ago, the product description listed only stainless steel and plastic. After it arrived, I discovered that the freezing bowl was actually made from anodized aluminum. It’s not my first choice in terms of material, but at the time I couldn’t find a compressor-style machine with a stainless steel bowl, so I decided to keep it for occasional use.

There are better options available now. If I were buying one today, I’d probably choose the Whynter Ice Cream Maker. It has a built-in compressor, so you can make ice cream, gelato, or sorbet whenever you want without freezing a bowl overnight. It also uses a stainless steel mixing bowl and a BPA-free plastic paddle.

If budget weren’t a factor, my top pick would be the Lello 4080 Musso Lussino Ice Cream Maker. The bowl and paddle are made with stainless steel, and it has a 4.6 star rating and over 1,000 reviews.

Also, if you enjoy this recipe, you might also like my Strawberry Cottage Cheese Ice Cream.

Share with a friend! 👇

Tags: , , , , , ,
Strawberry Cottage Cheese Ice Cream Recipe (High Protein)

Strawberry Cottage Cheese Ice Cream Recipe (High Protein)

Yesterday my husband walked into our bedroom carrying a plate of freshly-baked kale chips in one hand and his phone – hoisted high above his head like a boom box while blasting a love song from the neon-and-hairspray era – in the other.

That’s midlife, right?

We get to be our quirkiest selves, but we also have to make sure we use all the vegetables in the fridge before the next grocery run.

And eat protein, of course.

Because even if – like me – you never bought into the whole “training for your summer body” idea, you’re probably reading this because you’re training for a different kind of body: one with strong muscles, dense bones, healthy blood sugar, good balance, and the ability to carry your own groceries, travel, and stay fully engaged in life for decades to come.

Protein plays a role in all of those things. It provides the building blocks for muscle tissue, enzymes, hormones, immune molecules, and countless repair processes throughout the body. And because we naturally lose muscle mass as we age, getting enough protein becomes increasingly important for maintaining strength, stability, and resilience.

Skeletal muscle is one of the body’s most metabolically active tissues. It helps regulate blood sugar, influences inflammation, supports healthy immune function, and produces signaling molecules that affect everything from metabolism to brain health.

That’s why I’ve been experimenting with high-protein ice cream.

Not because I’m training for bikini season.

I’m training for my old-lady era.

And while I’m willing to put scrambled eggs in my smoothie on occasion, I also believe food should bring joy. I eat fewer desserts these days, but I enjoy them more, especially when they help me hit my protein goals.

Why Protein Ice Cream Is Tricky

Protein ice cream sounds simple enough: take a healthy ice cream base, add protein powder, freeze, and enjoy.

In reality, getting the right texture is a little more complicated than it sounds.

Traditional ice cream gets its creamy, scoopable texture from a careful balance of fat, sugar, solids, and air. When you reduce the sugar, lower the fat, and add more protein, the texture can shift pretty quickly from “creamy dessert” to “icy brick.”

That’s one reason the Ninja Creami has become so popular for protein ice cream. It can take a frozen solid base and re-spin it into something creamy, even when the recipe is lower in sugar or fat.

A regular ice cream maker works differently. It churns while the base freezes, which is wonderful for traditional ice cream, but lower-sugar, higher-protein mixtures can freeze too hard too quickly around the edges before the center has a chance to churn properly. The result is often icy, crystallized, or just not worth the effort.

I wanted a creamy texture without having to buy another piece of equipment or adding weird thickeners, so I started experimenting with cottage cheese.

When blended until completely smooth, it does a lot of the work that sugar and stabilizers usually do. It adds protein, creaminess, body, and enough structure to give it an ice cream texture.

Does it taste exactly like traditional ice cream? No – it has a bit of a tang that gives it more of a “cream cheese” note, so I leaned into that. I also kept the overall sugar content lower than traditional ice cream, so I figured this recipe would be safe from the not-so-tiny humans in my house.

I was wrong – they polished off the first test batch less than a day after I made it.

One thing to be aware of, though, it that some brands use more salt than others, and that can affect the final flavor. I tried a few and the one I liked best is Good Culture 4%. On its own, leaned a bit salty, so I added a cup of strawberries. Some of my family members liked it, but I personally didn’t and added a second cup. My recommendation is to start with one, taste your mixture after blending, and add more strawberries if needed.

So, how much protein is in this recipe?

The exact amount will vary depending on a few factors, including which protein powder you choose, and even how much air gets incorporated during churning.

In other words, your numbers may not match mine exactly.

To give you a ballpark, using two scoops of Heart & Soil Whey yields about 10 grams of protein per ½-cup serving. That’s a lot more protein than traditional ice cream – enough to make meaningful progress toward daily protein goals, one delicious spoonful at a time.

Strawberry Cream Cheese Protein Ice Cream Recipe

This recipe makes approximately 3.75 – 4 cups.

Prep Time 5 minutes Churning time 20 minutes

Author Heather Dessinger, FDN-P

  • 2 cups whole milk cottage cheese (I recommend 4% milkfat)
  • 1 tbsp vanilla extract (If using vanilla protein powder, start with 1 teaspoon and increase to taste)
  • ¼ cup maple syrup
  • 2 cups chopped strawberries
  • 25-30 grams unflavored or vanilla protein powder (Optional – I used 2 scoops Heart & Soil Whey)

Ice Cream Maker Method

  • Blend in a high powered blender until very smooth.

  • Pour the mixture into your ice cream maker and churn according to your manufacturer’s instructions.

  • When the ice cream is ready it should have a soft serve consistency. You can eat it right away, or if you prefer a firmer consistency transfer it into an airtight container and place in the freezer for 2-4 hours. I like to use a glass loaf pan with a lid.
  • To Serve:If you decide to freeze the ice cream for a firmer texture, you’ll get the creamiest results by letting it soften a bit before serving. I like to think of it more as “well chilled” than deeply frozen. Because cottage cheese-based ice cream can become a little icy when frozen solid, letting it rest on the counter allows it to soften into a smoother, creamier texture that tastes more like traditional ice cream. Depending on the size and depth of your container, this can take anywhere from 10 to 20 minutes.

No Ice Cream Maker Method

  • Blend the ingredients in a high-powered blender until very smooth.

  • Transfer the mixture to a freezer-safe container and place it in the freezer. To help keep the texture creamy, give it a good fold with a spatula every 30 minutes or so. This helps break up ice crystals as they form.

  • Once the mixture becomes too firm to fold easily, just leave it alone and continue chilling until it reaches your desired consistency, about 3–4 hours total.

  • To Serve:Because cottage cheese-based ice cream can become a little icy when frozen solid, letting it rest on the counter allows it to soften into a smoother, creamier texture that tastes more like traditional ice cream. Depending on the size and depth of your container, this usually takes about 10–20 minutes.

Nutrition facts based on Good Culture 4%, 2 scoops of Heart & Soil Whey, and 2 cups of chopped strawberries. 

Serving: 0.5cup | Calories: 107kcal | Carbohydrates: 11g | Protein: 10g | Fat: 2g | Saturated Fat: 2g | Polyunsaturated Fat: 0.1g | Monounsaturated Fat: 0.01g | Cholesterol: 16mg | Sodium: 210mg | Potassium: 135mg | Fiber: 1g | Sugar: 9g | Vitamin A: 4IU | Vitamin C: 21mg | Calcium: 65mg | Iron: 0.2mg

A Note On Ice Cream Makers

When I bought this ice cream maker many years ago, the only materials listed on the product description were stainless steel and plastic. I discovered after it arrived that the inner tub is actually made with anodized aluminum, which is not ideal. Back then, I couldn’t find a truly stainless steel option so I kept it to use on occasion.

Truly stainless steel options are available now, so I’m thinking about replacing mine with the Whynter Ice Cream Maker. It comes in two sizes and uses a powerful built-in compressor freezer that allows you to make ice cream, gelato or sorbet anytime (without needing to pre-freeze the inner canister). The inner bowl is stainless steel and the churn blade is BPA-free plastic.

If budget were not a consideration, I’d go for the Lello 4080 Musso Lussino 1.5-Quart Ice Cream Maker. The bowl and paddle are made with stainless steel, and has a 4.6 star rating and over 1,000 reviews.

Share with a friend! 👇

Tags: , , , , , , ,
Protein Brownie Batter Bites

High Protein Brownie Batter Bites

In high school and college I was addicted to all the processed junk food and sweets. Since then I’ve swapped out the mini snack cakes for real food options that are much healthier and way more delicious! These brownie batter bites are the latest creation to come out of my kitchen.

They’re a good source of protein and healthy fats for steady energy. Plus, they’re naturally sweetened, no highly processed sugar necessary! My kids love these and they’re gone pretty quickly once the batch is done. 

Healthy Brownie Batter Bites

One of the best things about making brownies isn’t even the brownies, but getting to lick the bowl. While I’m not afraid of raw egg from pastured chickens, there are other things lurking in most brownie recipes I’m not a fan of. Not only is this version packed with protein, but it skips the flour entirely. They’re also egg free for anyone who needs to avoid eggs. 

The nut butter gives it a creamy base and adds healthy fats. Then of course there’s antioxidant rich cocoa powder for a rich, chocolatey taste. My kids like mini chocolate chips too for extra chocolate. The maple syrup or raw honey add a touch of sweetness without overdoing it. And even better, these natural sweeteners are full of minerals and micronutrients for cellular health and energy that won’t give you a crash. 

Protein Packed

I’m all about prioritizing protein. After years of undereating my metabolism was much happier when I started nourishing my body. Part of that includes making sure I hit my protein goals. While I like to eat at least 40 grams of protein for breakfast, I want my snacks (and even desserts!) to support my goals. 

Here are some more protein rich desserts if you’re looking for more options!

These brownie batter bites taste like you’re eating a spoonful of sugary brownie batter, but they’re actually good for you. We’ll eat them as a dessert or snack. And if you’re packing them for lunches, freeze them before popping them into the lunch container so they keep their shape.

High Protein Brownie Batter Bites

A rich, chocolatey snack that tastes like a treat but fuels like a real-food meal.

  • Line a baking sheet with parchment paper and set aside.

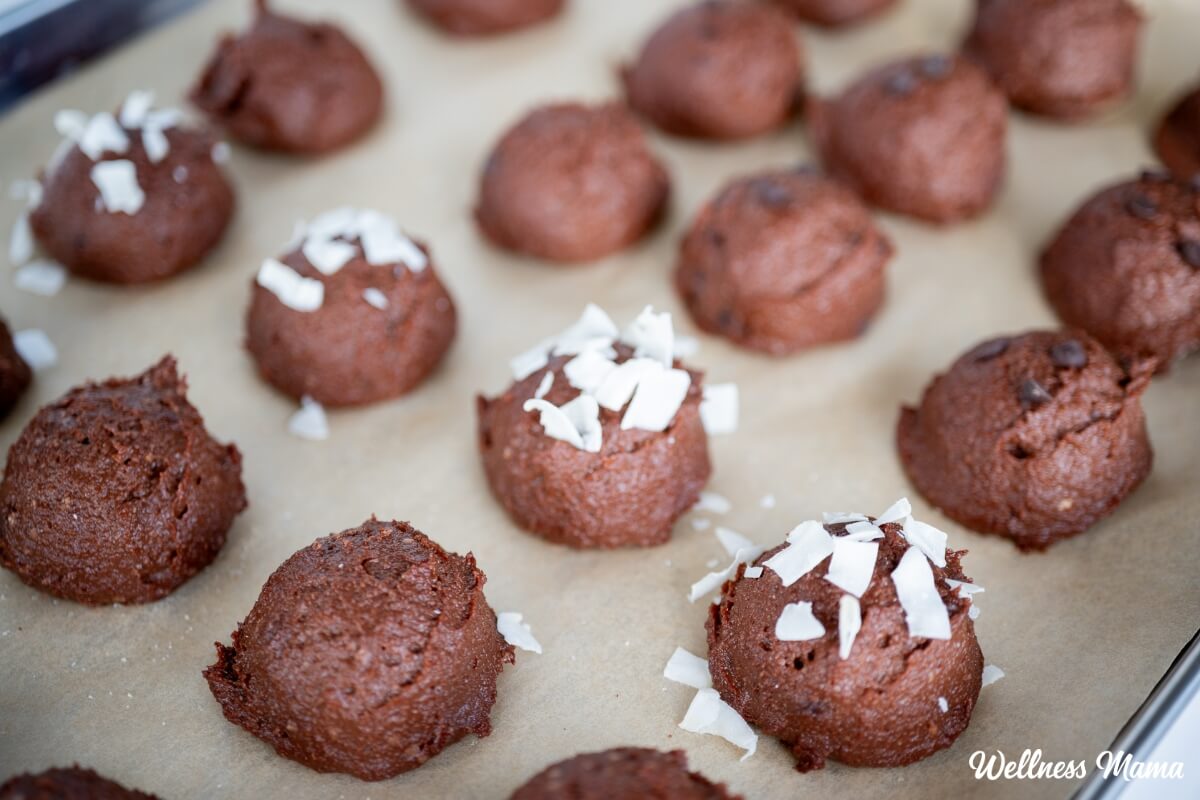
  • Blend cottage cheese, protein powder, cocoa powder, nut butter, maple syrup, and vanilla in a blender or food processor until smooth and thick.

  • Transfer to a bowl and stir in almond flour until the mixture is firm enough to scoop. Fold in chocolate chips if using.

  • Scoop and roll into 12–16 brownie batter bites. Place the dough onto the parchment lined baking tray and chill for at least 30 minutes before serving. If your dough is really soft, then chill the bowl for about 10–15 minutes first before scooping.

Nutrition Facts

High Protein Brownie Batter Bites

Amount Per Serving (1 bite)

Calories 65
Calories from Fat 27

% Daily Value*

Fat 3g5%

Saturated Fat 1g6%

Trans Fat 0.004g

Polyunsaturated Fat 0.3g

Monounsaturated Fat 1g

Cholesterol 7mg2%

Sodium 61mg3%

Potassium 69mg2%

Carbohydrates 6g2%

Fiber 1g4%

Sugar 3g3%

Protein 5g10%

Vitamin A 23IU0%

Vitamin C 0.01mg0%

Calcium 47mg5%

Iron 0.2mg1%

* Percent Daily Values are based on a 2000 calorie diet.

If your house is like mine, rolling them smaller helps stretch the batch. I’ll often make 16 mini bites so everyone gets one and the older kids can grab seconds.

Storage and Shelf Life

These brownie batter bites will keep in the fridge for up to 5 days or the freezer for up to 2 months. Whenever I make a batch they’re usually gone the same day! You can also double or triple the batch to freeze for later.

What are some of your favorite healthier treats to make? Leave a comment and share below!

Tags: , , , ,
greek yogurt bagels

High Protein Greek Yogurt Bagels (Perfect For Breakfast!)

My kids are old enough that they can make their own breakfast now, but we still enjoy eating together as a family. Learning how to cook is a great skill for kids to learn that benefits the whole family! These simple Greek yogurt bagels are easy enough that even kids can make them, and they’re perfect for a quick breakfast.  

Bagels are one of those foods on store shelves that are stuffed full of artificial ingredients. And if you’re lucky enough to have a made-from-scratch artisan bagel shop near you, they can get pricey. Homemade bagels give you the option of having great taste with high quality ingredients. And they taste so much better!

Greek Yogurt Bagel Ingredients

We don’t eat a ton of grains in our house, but I’ve incorporated some organic grains into my diet. Some Greek yogurt bagel recipes are made with bread flour or with almond flour. This particular recipe uses Einkorn flour. It’s naturally a little higher in protein and lower in carbs than modern, hybridized wheat. 

You can buy Einkorn online, but many health food stores and grocery stores sell it too. If you don’t have any, then regular organic, all-purpose flour will also work. And if you need a gluten-free bagel option, then go with your favorite gluten-free flour blend. 

Regular bagels are made with yeast to give them some rise. These are much faster to make since they skip the yeast and the rising time. Greek yogurt is naturally acidic and reacts with the baking powder to give the dough that familiar bagel texture. 

I use an egg wash on top to give the bagels a better texture and color. However, if you need to avoid eggs, you can omit them and make the bagels without. 

How To Use Greek Yogurt Bagels

Greek yogurt bagels are really easy to whip up, but I’ll often make a batch the night before. Try them along with breakfast or as part of a breakfast sandwich. We like toasting them for sandwiches or eating them slathered with some grass-fed butter or cream cheese. 

They also make great BLTs, sausage egg and cheese sandwiches, or try some sliced meat, cheese, and lettuce for lunch. My kids like these so much, they were all gone before they had even cooled! 

Greek Yogurt Bagel Recipe

These delicious bagels are simple and quick to make. Great for sandwiches, breakfast, or slathered with cream cheese.

  • Preheat the oven to 375°F and line a baking sheet with parchment paper.

  • In a large bowl, whisk together flour, baking powder, and salt.

  • Add in the Greek yogurt and mix with a fork until crumbly.

  • Knead with your hands until it forms a smooth dough (about 1–2 minutes).

  • Transfer the dough to a floured surface.

  • Divide into 6 equal pieces. Each should weigh roughly 120–130 grams for full-size bagels.

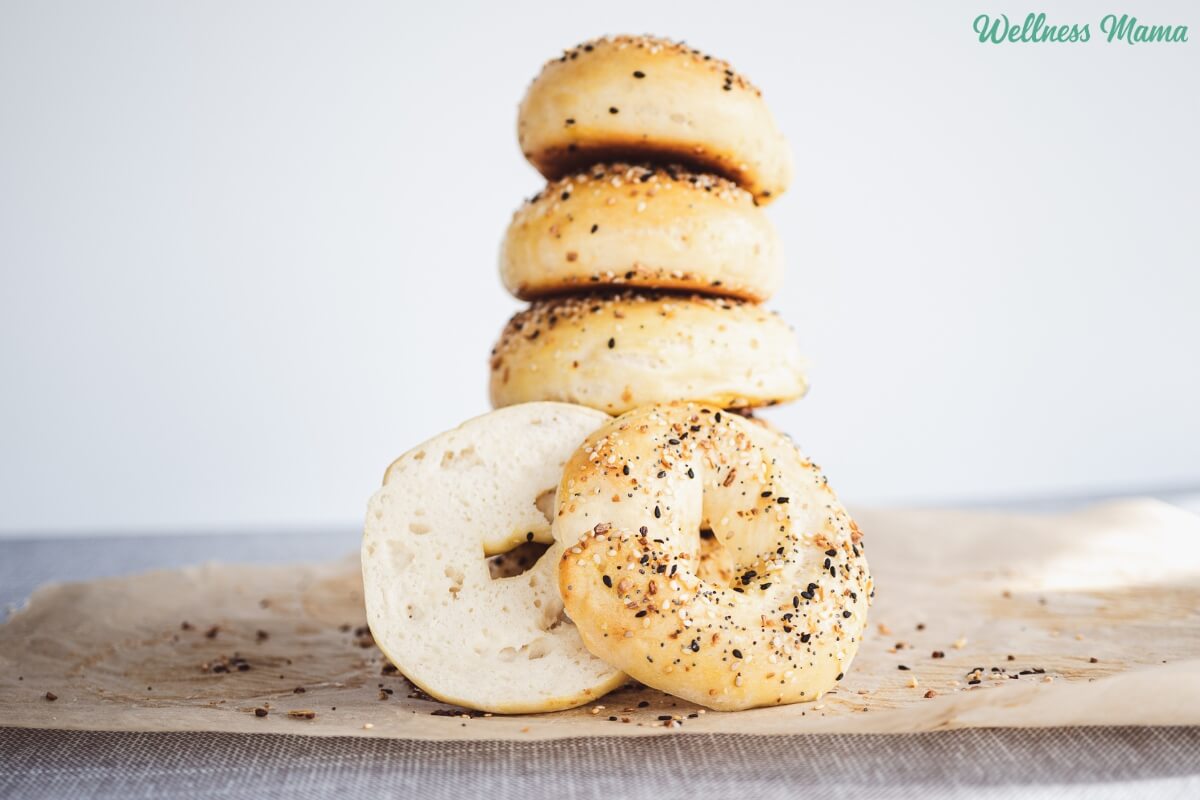
  • Roll each piece into a 7–8 inch rope and connect the ends to form a bagel shape.

  • Place on the baking sheet and brush with the beaten egg for shine and browning.

  • Bake for 22–26 minutes, or until golden and puffed. Optional: Broil for 1–2 minutes for extra color.

  • Let cool for at least 10 minutes. This helps the bagels finish setting and improves the texture.

Nutrition Facts

Greek Yogurt Bagel Recipe

Amount Per Serving (1 bagel)

Calories 176
Calories from Fat 9

% Daily Value*

Fat 1g2%

Saturated Fat 0.3g2%

Trans Fat 0.01g

Polyunsaturated Fat 0.1g

Monounsaturated Fat 0.3g

Cholesterol 30mg10%

Sodium 418mg18%

Potassium 363mg10%

Carbohydrates 29g10%

Fiber 0.04g0%

Sugar 2g2%

Protein 11.3g23%

Vitamin A 42IU1%

Calcium 146mg15%

Iron 1mg6%

* Percent Daily Values are based on a 2000 calorie diet.

  • If the dough is too sticky, add 1–2 tablespoons of flour while kneading. If it’s dry, add 1 tablespoon of yogurt at a time.

Different Bagel Flavor Options 

You can really play with the base recipe and make lots of different bagel flavors. Here are some of our favorites!

  • Everything Bagel – Sprinkle everything seasoning on top before baking.
  • Cinnamon Raisin – Add 1 TBSP coconut sugar, ½ tsp cinnamon, and  ? cup raisins to the dough.
  • Garlic & Herb – Add 1 tsp dried Italian seasoning and  ½ tsp garlic powder.
  • Cheddar Chive – Fold in ½ cup shredded cheese and 1 tbsp chopped chives.
  • Jalapeño Cheddar – Fold in 1–2 finely diced jalapeños (seeds optional)  and ½ cup shredded cheddar.

What Kind of Yogurt Should I Use? 

Greek yogurt is naturally thicker and higher in protein than regular yogurt. I prefer to use whole milk or full-fat Greek yogurt in these to give the dough a better texture. You can use no-fat or 2% Greek yogurt, but the dough won’t be quite as good

How Much Protein is in Greek Yogurt Bagels?

The protein content is a little over 11 grams of protein per bagel if you use organic or Einkorn flour. Gluten-free flour blends will vary in their protein content. Einkorn is also naturally lower in carbs than the typical, modern wheat flour. 

Cooking and Storage Tips

These bake in the oven in about 22-26 minutes. You can also use the air fryer and cook them at 350 degrees for 10-12 minutes or just until they start to turn golden brown. 

Their shelf life is about 3 days when stored in an airtight container. They also taste just as good the next day and you can freeze them for later.

What are your favorite bagel flavors? Leave a comment and let us know!

Tags: , , , , , ,
What's Skinimalism? Skincare With High Quality Products Over 10 Step Routine | Beauty News

What’s Skinimalism? Skincare With High Quality Products Over 10 Step Routine | Beauty News

Last Updated:November 22, 2025, 15:40 IST

Skinimalism may not work for skin types with pigmentation, acne, or scars as they may need more advanced skincare products to repair the skin barrier.

Skinminimalism is a concept that focuses on building healthy skin rather than flawless skin.

In a world full of serums, acids, and complicated multi-step rituals, a quieter and more mindful skincare movement is gaining popularity, known as “skinimalism”. The concept celebrates simplicity, being intentional, and embracing the natural texture of your skin, rather than using endless combinations or layering several actives. Skinimalism encourages individuals to identify their skin’s true needs. Dermatologists have observed this shift, noting that their patients are now more inclined to adopt less aggressive, more consistent, and simpler skincare routines that are easy to follow.

What Skinimalism Really Means?

Skinimalism is not just a minimal routine, shares Dr Purva Pande, MBBS, MD Dermatology, DNB, MNAMS, Director Dr Purva’s Skin Clinic, Panchkula, adding, “It is a concept that focuses on building healthy skin rather than flawless skin. It suggests fewer but more thoughtful products that help the skin barrier instead of adding one more layer.” Essentially, it means to take a step back from the endless experiments and skin routine and focus on following the basics of skincare, i.e., washing, moisturising, and protecting your skin from the sun.

The skin, when not overwhelmed by too many products, can function at its most optimal level, leading to better hydration, less irritation, and a natural glow.

Why Skinimalism Works

One of the biggest advantages of a simplified routine is the reduced risk of irritation and ingredient overlap. Too many products, especially exfoliants and strong actives, can weaken the skin barrier and lead to dryness, redness, or breakouts. Skinimalism helps prevent this by allowing the skin to recover and maintain equilibrium.

Dr Purva said, “Patients who switch to minimal routines often report fewer flare-ups, softer texture, and more predictable skin behaviour. Another underrated benefit is consistency, as when routines are simple and affordable, people are far more likely to follow them daily, leading to better long-term results.”

However, skinimalism does indeed have a few limitations, especially for skin types with deeper issues like pigmentation, acne, or scars. They may need something more advanced than standard skincare products to repair the skin barrier.

Under those circumstances, performing in-clinic treatment with devices like the Alma Hybrid can help target problematic skin through resurfacing and collagen stimulation therapy, while enabling patients to maintain a low-maintenance skincare regimen at home.

A Simple Skinimalism Routine Anyone Can Follow

“A basic skinimalism routine is built around a few essential steps,” explains Dr Purva. Cleansing skin with a gentle face wash in the morning to remove sweat and oil, applying a moisturising cream to hydrate the skin, and protecting your skin by using a broad-spectrum sunscreen of SPF 30 or more, and in the evening, following a 2-step routine by washing the face to remove the dirt and grime and then applying a rich night cream for repairing the skin overnight.

If someone feels the need for a little extra help, they can add one single targeted product, such as niacinamide or hyaluronic acid, but only in case there are specific skin issues. The idea is not to have a stash of products but to make deliberate choices.

Practising Skinimalism the Right Way

“To effectively practise skinimalism, pay attention to the needs of your skin,” says Dr Purva. Choose products that consist of multi-benefit ingredients such as ceramides, niacinamide, and hyaluronic acid. “Be mindful of not over-exfoliating, and introduce new products gradually to your skincare routine. Always patch-test any new product to check for a reaction, and definitely wear sun protection regularly,” the expert says.

Skinimalism is essentially about taking care of your skin in a way that suits your needs, not about limiting yourself. If you keep your routine simple and pay attention to what your skin is telling you, you can have skin that’s healthier, calmer, and stronger, with minimal effort.

First Published:

November 22, 2025, 15:36 IST

News lifestyle beauty What’s Skinimalism? Skincare With High Quality Products Over 10 Step RoutineDisclaimer: Comments reflect users’ views, not News18’s. Please keep discussions respectful and constructive. Abusive, defamatory, or illegal comments will be removed. News18 may disable any comment at its discretion. By posting, you agree to our Terms of Use and Privacy Policy.

Tags: , , , , , , , , ,
Best oLive
Privacy Overview

This website uses cookies so that we can provide you with the best user experience possible. Cookie information is stored in your browser and performs functions such as recognising you when you return to our website and helping our team to understand which sections of the website you find most interesting and useful.