The Creamiest Hard-Boiled Egg Chocolate Pudding (High Protein)

The Creamiest Hard-Boiled Egg Chocolate Pudding (High Protein)

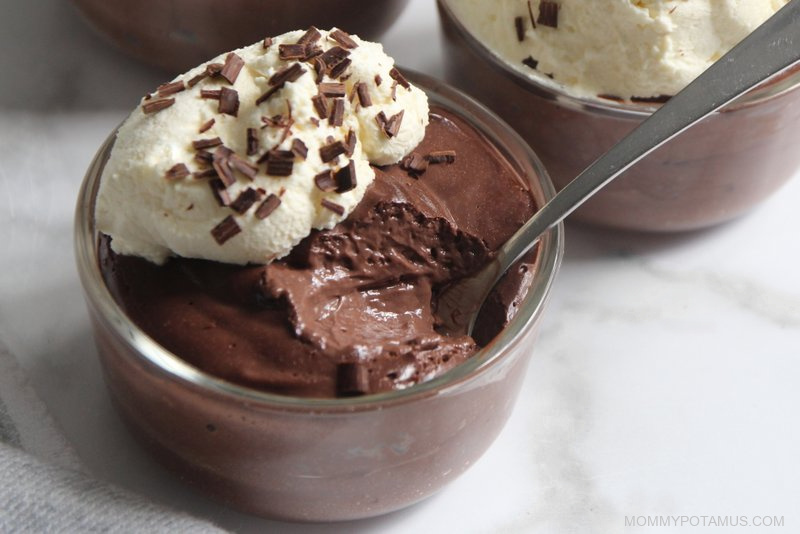
If someone handed me a bowl of this chocolate pudding and asked me to guess the secret ingredient, hard-boiled eggs wouldn’t even make the list.

Once everything gets whirled together in a blender, the eggs somehow “disappear” into an incredibly smooth, rich chocolate pudding that my whole family loves.

It’s not “surprisingly good considering there are eggs in it” – it’s ACTUALLY good . . . possibly the best chocolate pudding I’ve ever made.

There’s no eggy flavor and no complicated technique. Just silky, chocolatey goodness . . . with a lot of bonus protein. 🙂

Okay, But Why Put Eggs In Pudding?

I realize hard-boiled eggs and chocolate pudding sound like two foods that should stay very far away from each other, but there’s actually a lot to love about this combination.

Traditional homemade pudding usually involves heating milk, sugar, and cocoa on the stove, then using cornstarch (or arrowroot), egg yolks, or another thickener to create a creamy texture.

This version is so much easier.

Hard-boiled eggs provide the structure and creaminess, while cocoa powder, vanilla extract, and maple syrup provide the sweet chocolatey goodness.

Everything goes straight into the blender, so there’s no tempering eggs and no whisking over the stove.

And because the base is made with whole eggs instead of milk and sugar, it’s naturally higher in protein than most traditional chocolate pudding recipes. (You know how much I love that.)

The Trick To Making It Taste Like Pudding

I know, “trust me” is doing a lot of heavy lifting with this recipe, but I served this to everyone in my family and none of them could tell it contained eggs.

That said, I do have a couple of tips for you.

First, use a high-speed blender if you have one. You want the hard-boiled eggs blended so thoroughly that there aren’t any tiny bits left behind.

Second, for the silkiest pudding, let your blender run longer than you think it needs to.

You’re not just combining the ingredients – you’re trying to completely emulsify the eggs into the mixture.

If your pudding seems too thick, add milk a tablespoon or two at a time. If it seems a little thin, keep in mind that it will firm up in the refrigerator.

And if you can detect even a hint of egg flavor while it’s still warm from blending, chill it before making any adjustments. The chocolate flavor comes through much more clearly once everything is cold.

🍓 August 8–12 Only

Quick interruption before we get back to chocolate pudding. 🙂

Paleovalley is celebrating their anniversary with up to 35% off everything in the store, plus a free mystery gift with every order.

It’s a good time to stock up on their Superfood Bars, Vanilla Bone Broth Protein, beef sticks, whole food supplements, and other snacks + pantry staples.

Shop The Sale + Get A Free Gift

Now, back to the recipe. 🙂

What You’ll Need

Hard-boiled eggs – You’ll need six peeled eggs. Use fully cooked hard-boiled eggs rather than soft-boiled eggs because you want the yolks completely set before blending.

Milk – I usually use whole milk, but if you’re dairy-free you can use coconut milk or another non-dairy milk.

Unsweetened cacao powder or cocoa powder – I use whichever one I have on hand at the moment.

Maple Syrup – Adds sweetness while blending in completely, so the pudding stays smooth and silky.

Vanilla extract – To round out the flavor.

A pinch of salt – Optional, but recommended. A little salt helps the chocolate and vanilla really “pop.”

Is This Good For Meal Prep?

Yes. This pudding keeps well for 3–4 days in the fridge, so I often make a double batch and scoop it into individual glass jars for my family to grab when they need a snack.

Hard-Boiled Egg Chocolate Pudding Recipe

This silky, rich recipe is very possibly the best chocolate pudding I’ve ever made. It’s easy, rich in protein, and can be made in advance for quick snacks throughout the week.

Keyword gluten-free, dairy optional

Prep Time 5 minutes Chilling time 1 hour

Author Heather Dessinger, FDN-P

  • 6 hard boiled eggs (peeled)
  • ½ cup whole milk or non-dairy milk
  • ⅓ cup maple syrup (or more to taste)
  • ¼ cup unsweetened cacao powder or cocoa powder
  • 1 tsp vanilla extract (how to make it)
  • pinch of salt (optional)
  • Add all ingredients to a high-speed blender.

  • Blend until completely smooth and creamy, stopping to scrape down the sides if needed.

  • Taste and add an extra tablespoon or two of sweetener if desired.

  • Transfer to individual serving jars, a large mason jar, or a covered container.

  • Refrigerate until thoroughly chilled. (At least one hour, but preferably longer.)

  • Serve plain or topped with whipped cream, berries or shaved chocolate.

The total volume of the finished pudding can vary from about 2 to 2.5 cups, depending on how much air is incorporated during blending. For the nutrition information below, one serving is ¼ of the finished batch, regardless of its total volume.
Nutrition calculation is based on whole milk (instead of non-dairy milk) and cacao powder (instead of cocoa powder). 

Calories: 222kcal | Carbohydrates: 24g | Protein: 11g | Fat: 10g | Saturated Fat: 3g | Polyunsaturated Fat: 1g | Monounsaturated Fat: 4g | Cholesterol: 283mg | Sodium: 137mg | Potassium: 284mg | Fiber: 2g | Sugar: 19g | Vitamin A: 439IU | Calcium: 111mg | Iron: 2mg

✋ Before You Go, Grab This Free Midlife Guide

If you’ve ever found yourself thinking, “Why doesn’t my body respond the way it used to?” . . . this guide was written for you.

Midlife can change the rules for everything from sleep and energy to workouts, recovery, body composition, and more. Knowing what’s changing can help you let go of strategies that no longer fit – and start focusing on what supports your body now.

Inside, I’ll walk you through 10 things I wish I’d known sooner, so you can make more sense of what you’re experiencing and get clearer about where to go from here.

Enter your email below and I’ll send it right over. You’ll also receive my weekly newsletter with practical wellness tips, recipes, and new guides like this one.
Share with a friend! 👇

Tags: , , , , , ,
Chocolate Chia Pudding

Creamy Chocolate Chia Pudding

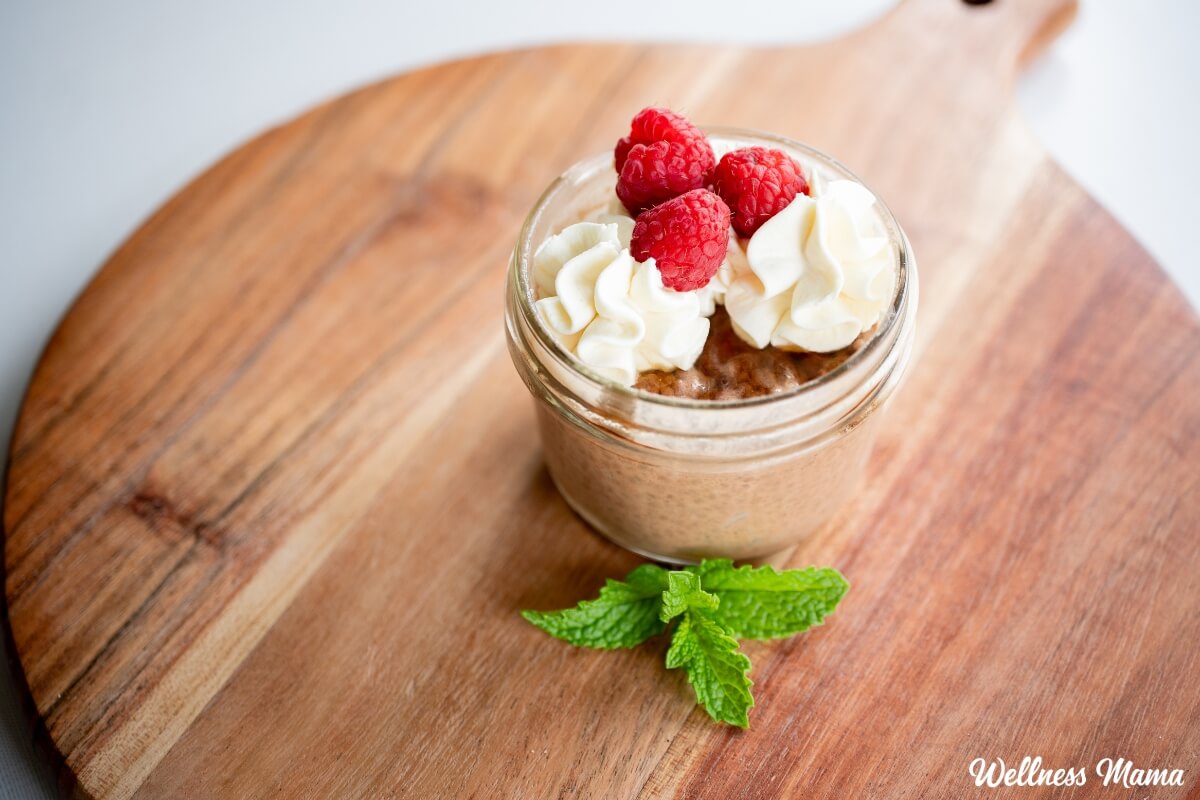
You’d think that with lots of kids that mornings would be complete chaos around here. However, I’ve learned that taking a moment to slow down and plan ahead really reduces the chaos. I’ve got plenty of quick breakfasts and snacks in my back pocket, and this chocolate chia pudding is the newest one. 

It has protein, healthy fats, natural sweetness from honey, and clean energy from cacao and chia. Chocolate chia pudding is sweet enough for dessert, but healthy enough to accompany breakfast. 

Sometimes I’ll just pop the whole bowl in the fridge after mixing, but usually I’ll put them into jars for individual servings. This way the kids (or me!) can easily grab one as needed. Chocolate chia pudding is the perfect grab-and-go snack or dessert. 

How to Make Chocolate Chia Pudding With Coconut Milk

The recipe is simple and is basically dumping and mixing ingredients together. If you’re using gelatin make sure to let it “bloom” first though to prevent clumps. Chill for several hours or leave it in the fridge for an overnight chocolate chia pudding. 

You can add whatever toppings you like before serving. Some favorites at our house are fresh berries, nuts, or cacao nibs. Shredded coconut, a spoonful of nut butter, or banana slices are also delicious!

I chose canned coconut milk because it’s extra rich and creamy. Raw milk adds extra nutrition and helps get the texture just right. If you want to make this completely dairy-free though, then unsweetened almond milk works as a raw milk substitute. I haven’t tried it, but I bet macadamia, hazelnut, or other nut milk would also be delicious! You could make chocolate chia pudding with almond milk by itself, but it’s not nearly as rich or creamy. 

Healthy Chocolate Chia Pudding

Clean ingredients make for a delicious and nutrient dense chia seed pudding. Cacao powder is rich in antioxidants and polyphenols to combat inflammation. You’ll also find minerals, including magnesium, and heart and brain health benefits. 

Coconut milk is rich and creamy and full of healthy and filling medium chain triglyceride fats (MCT). Coconut milk can also support brain health, the immune system, and reduce inflammation. 

I’ve also added gelatin for additional health benefits and a little protein boost. Gelatin is my go-to for healthier hair, skin, and nails. Plus, it’s great for gut health and digestion. Gelatin helps thicken the pudding a little (along with the chia seeds), but you can use collagen instead. Collagen won’t add thickness, but it does add some clean protein and the same health benefits as gelatin. 

Here’s how to make it!

Chocolate Chia Pudding Recipe

A delicious chocolate chia pudding that’s perfect for a snack, breakfast, or dessert. Full of nutrients, healthy fats, and rich chocolate.

  • If using gelatin, evenly sprinkle a layer of gelatin over 2 tablespoons of cold milk in a small bowl and let it sit for 2 to 3 minutes. If you’re using collagen peptides, skip this step and just add them directly in the next step.

  • In a medium bowl or large measuring cup, whisk together the coconut milk, remaining milk, cacao powder, honey, vanilla, salt, and cinnamon until smooth and fully combined. If you bloomed gelatin, whisk it in now.

  • Stir in the chia seeds and mix well to distribute them evenly. Don’t skip this step or they’ll clump at the bottom.

  • Let the mixture sit for 10 minutes, then give it one more good stir to break up any clumps that have formed.

  • Pour into individual jars or cover the bowl and refrigerate for at least 4 hours, or overnight, until thick and pudding-like.

  • Give each jar a stir before eating.

Nutrition Facts

Chocolate Chia Pudding Recipe

Amount Per Serving (1 serving)

Calories 348
Calories from Fat 261

% Daily Value*

Fat 29g45%

Saturated Fat 22g138%

Trans Fat 0.02g

Polyunsaturated Fat 3g

Monounsaturated Fat 2g

Cholesterol 4mg1%

Sodium 227mg10%

Potassium 436mg12%

Carbohydrates 21g7%

Fiber 8g33%

Sugar 11g12%

Protein 8g16%

Vitamin A 56IU1%

Vitamin C 3mg4%

Calcium 139mg14%

Iron 3mg17%

* Percent Daily Values are based on a 2000 calorie diet.

  • Top with fresh berries, a drizzle of raw honey, shredded coconut, or cacao nibs if desired. 
  • Store this pudding in the fridge and eat within 3-5 days. 

Chia Seed Variations and Toppings

There are plenty of toppings that work well with this chocolate chia pudding recipe. My kids love to customize it with their favorites. Here are a few to try:

  • Sliced bananas
  • Peanut butter or almond butter
  • Fruit jam
  • Toasted or chopped nuts
  • Chocolate chips
  • Cacao nibs
  • Berries
  • Shredded coconut

Looking for some more chia seed recipes? Here are some of our favorites:

What are some of your favorite ways to use chia seeds? Leave a comment and let us know!

Tags: , , ,
Chocolate_Chunk_Cookies

Brown Butter Pistachio Chocolate Chunk Cookies

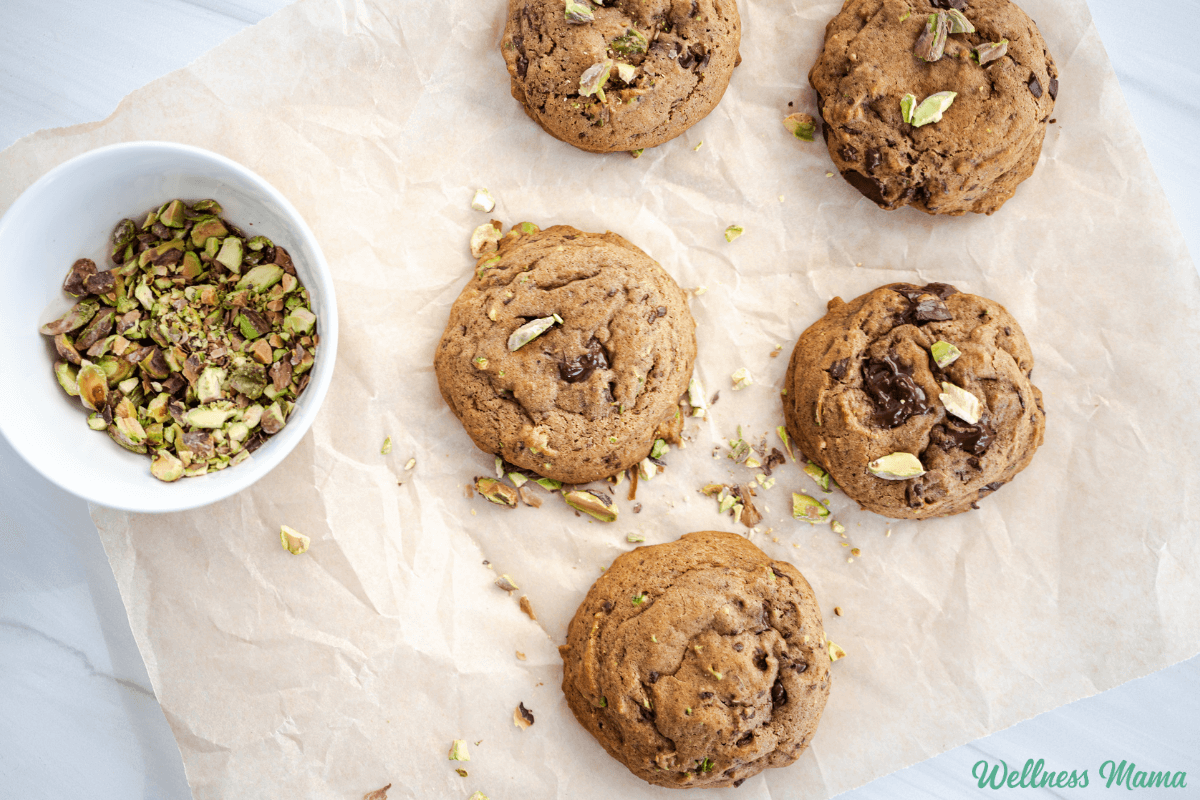
The kids and I have been on a cookie testing spree lately. These brown butter chocolate chunk cookies with pistachios have made the cut. They’re sweet and savory in every bite and have layers of flavor. A fresh batch doesn’t last long around here!

Brown butter chocolate chunk cookies are thick and chewy with crispy edges and a soft center. I’ve made a few ingredient swaps to make this dessert a little healthier, but they’re still a treat we enjoy in moderation. 

Brown Butter Chocolate Chunk Cookies

Salty, sweet, crunchy, chewy… you get all of the flavors and textures in one bite. Instead of brown sugar I used coconut sugar here. It has a similar flavor, but coconut sugar is a less processed option and has unique caramel undertones that really add to the cookie. I also added some collagen powder for a subtle protein boost. 

Dark chocolate chunks offer a bittersweet bite in every mouthful and add some healthy polyphenol antioxidants, magnesium, and micronutrients. They’re made with sea salt which offers electrolytes and a nice contrast to the sweet cookie. And the pistachio pieces are just the icing on top. They’re also salty but give it such a unique flavor. 

One of the biggest differences you’ll notice is that these use browned butter instead of regular. It offers such a richer depth of flavor, almost like caramel. Brown butter is easy enough to make, but you do want to keep a close eye on it as it cooks. You want to cook it (stirring constantly!) until you notice browned bits and it smells fragrant. Pull it off the stove at this point or you’ll have burnt butter, which does not taste as nice!

Tips For Making Salted Pistachio Chocolate Chunk Cookies

I recommend using chopped chocolate bars since it’s easier to find ones with 70% or more cocoa content. Bagged chocolate chunks also work. The taste of a good chocolate chunk cookie relies heavily on having good quality chocolate!

When you’re mixing the dough be sure not to overmix the flour, as this can overwork the gluten proteins and make for tough, hard cookies. If the dough feels too soft after mixing, chill it for 15–20 minutes before baking to prevent excess spreading. For even thicker cookies, chill the dough for 30 minutes before scooping.

Brown Butter Pistachio Chocolate Chunk Cookies

These delicious chocolate chunk cookies have an extra depth of flavor thanks to the crunchy pistachios and flavorful browned butter.

  • Melt the butter over medium heat, stirring constantly until it foams and turns golden brown (about 4–5 minutes), then remove from heat and let cool for 20–30 minutes.

  • Preheat the oven to 350°F and line a baking sheet with parchment paper.

  • Whisk together the cooled browned butter, coconut sugar, and maple syrup, then add the egg and vanilla and whisk until smooth.

  • Stir in the flour (all-purpose or 1:1 gluten-free), collagen if using, baking soda, and salt until just combined, then fold in the chopped pistachios and dark chocolate.

  • Scoop dough onto the prepared baking sheet (about 2 Tablespoons each), chilling for 15–20 minutes first if the dough feels soft.

  • Bake for 10–13 minutes until the edges are golden and the centers look slightly underdone. Sprinkle with flaky sea salt and cool on a rack before serving.

Nutrition Facts

Brown Butter Pistachio Chocolate Chunk Cookies

Amount Per Serving (1 cookie)

Calories 217
Calories from Fat 117

% Daily Value*

Fat 13g20%

Saturated Fat 7g44%

Trans Fat 0.3g

Polyunsaturated Fat 1g

Monounsaturated Fat 4g

Cholesterol 31mg10%

Sodium 394mg17%

Potassium 139mg4%

Carbohydrates 21g7%

Fiber 2g8%

Sugar 8g9%

Protein 4g8%

Vitamin A 244IU5%

Vitamin C 0.2mg0%

Calcium 20mg2%

Iron 2mg11%

* Percent Daily Values are based on a 2000 calorie diet.

For thicker cookies, chill the dough for 30 minutes before scooping.

Shelf Life and Storage

I made a double batch of these to save some for later.  The dough freezes well. Scoop into balls and freeze, then bake straight from frozen, adding 1–2 minutes to bake time. 

Store the cookies in an airtight container at room temperature for up to 3 days, or refrigerate for up to 1 week.

Looking for some more healthier cookie recipes? Here are some of our favorites!

What are your favorite cookies to make or eat? Leave a comment and let us know!

Tags: , , , , ,
Chocolate_Covered_Raspberries

Bite Size Chocolate Covered Raspberry Bites

Valentine’s Day is a day where many of us take the opportunity to tell our loved ones how much we appreciate them. Whether that’s a significant other, the ladies in your Galentine’s group, or your kids, these chocolate covered raspberry bites are a great way to do that. 

They’re a healthy treat that are delicious anytime of the year!

Chocolate Covered Raspberries Get an Upgrade

Chocolate covered fruit is a favorite in our house. I’ll make this dark chocolate fondue on certain occasions to dip fruit and homemade marshmallows in. While chocolate covered fruit can be a healthy treat, it can be tricky to get it to work sometimes. 

If you’ve ever made your own chocolate covered raspberries or other fruit you might have experienced this. Gloppy chocolate that falls off and looks anything but appetizing. These chocolate covered raspberry bites have the same flavor, but even better.

Chocolate Covered Raspberry Bites

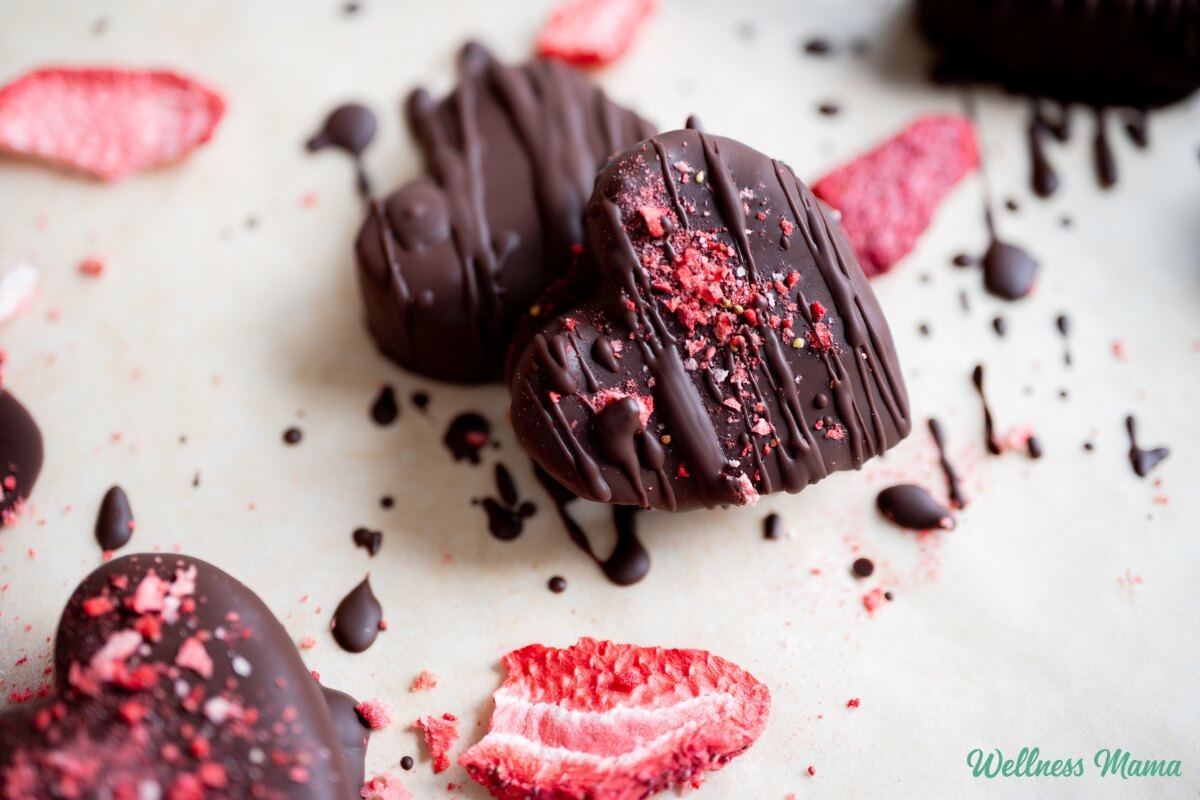
I make these in some cute heart molds that are perfect for Valentine’s Day. You can really use any silicone molds you want though that make chunky shapes. And instead of simply dipping raspberries in chocolate, we’re making a raspberry filling first. It’s naturally sweetened with maple syrup and thickened with chia seeds. 

Research shows that maple syrup isn’t just sugar, but a unique array of minerals, antioxidants, and anti-inflammatory compounds. Chia seeds are a great source of fiber, but they have a whole lot of other benefits. These include supporting healthy blood pressure and digestion, reducing inflammation, and even helping improve anxiety and depression symptoms by nurturing the gut. 

Then there are the juicy raspberries with their vitamin C, fiber, and antioxidants. These chocolate covered raspberry bites are naturally colorful, fun to decorate, and great for any little helpers in the kitchen. My younger kids had no problem helping make these. Plus, they were gone by that afternoon!

 Tips and Tricks

You can use a different mold, but I chose a heart mold for these. If you don’t have a good silicone mold on hand, then you can also make them without one. Simply spoon small jam mounds onto parchment, freeze, and then dip in chocolate to make rustic bites. 

Start with a smaller amount of maple syrup, taste, and adjust to your preference. I prefer mine to be more on the tart side. These store well in the fridge for up to a week. You can also keep them in an airtight container in the freezer for up to 1 month. Fair warning: if you want any leftover for the freezer you may need to double the batch!

Here’s how to make delicious, festive, and nutritious chocolate covered raspberry bites.

Chocolate Covered Raspberry Bites

They taste like chocolate-covered raspberry jam… but better.

Optional Topping

  • 2 TBSP freeze-dried strawberries or raspberries (crushed)
  • In a bowl, mash raspberries with maple syrup, chia seeds, and vanilla until thick and jam-like. Let rest 5–10 minutes so the chia thickens.

  • Spoon the mixture evenly into 10 large 2-inch silicone heart cavities, filling nearly to the top and smoothing the surface.

  • Freeze at least 4 hours or overnight until fully firm.

  • Melt dark chocolate and coconut oil gently until smooth.

  • Remove frozen hearts from molds and dip into chocolate until fully coated.

  • Sprinkle with crushed freeze-dried berries if desired.

  • Place on a parchment paper lined baking sheet and freeze for 10–15 minutes until hardened.

  • Serve straight from the freezer or allow to soften slightly before eating.

Nutrition Facts

Chocolate Covered Raspberry Bites

Amount Per Serving (1 heart)

Calories 135
Calories from Fat 72

% Daily Value*

Fat 8g12%

Saturated Fat 4g25%

Trans Fat 0.01g

Polyunsaturated Fat 1g

Monounsaturated Fat 2g

Cholesterol 0.4mg0%

Sodium 4mg0%

Potassium 180mg5%

Carbohydrates 15g5%

Fiber 4g17%

Sugar 8g9%

Protein 2g4%

Vitamin A 12IU0%

Vitamin C 41mg50%

Calcium 34mg3%

Iron 3mg17%

* Percent Daily Values are based on a 2000 calorie diet.

If the molds you use are bigger or smaller than mine, then the nutrition data will be a little different per serving. 

More Chocolatey Treats

Looking for more ways to treat yourself and family? Here are some of our favorite scrumptious desserts!

What are some of your favorite fruity desserts to make? Leave a comment and let us know!

Tags: , , , , ,
Homestead Blog Hop - Homestead tips, ideas, animal care, and recipes every Wednesday

Homestead Blog Hop 577 – Make Crafts and Chocolate Mousse

Welcome to the Homestead Blog Hop!

Homestead Blog Hop will take place every Wednesday and is for all things homesteading: real food recipes, farm animals, crafts, DIY, how-to’s, gardening, anything from-scratch, natural home/health, self-sufficiency, self-reliance, natural remedies, essential oils, & more! Basically, anything related to homesteading.

Meet Your Hosts!

Follow Their Blogs

Natasha – Houseful of Nicholes (Facebook | Pinterest | Twitter | Instagram)

Laurie – Ridge Haven Homestead (Facebook | Pinterest | Instagram)

Liz – The Cape Coop (Facebook | Pinterest | Twitter | Instagram)

Kelly – Simple Life Mom (Facebook | Pinterest | Instagram)

FEATURED POSTS from the Last Homestead Blog Hop

Each week we take turns choosing three posts to feature. Each post will be shared on all social media platforms by all of the hosts! Here are the features from Last Week’s Hop:

1. How to Turn a Flat Sheet into a Full Kitchen Linen Set from The Once and Future Homestead

2. Easy Christmas Coffee Filter Wreath Craft for Kids from Darcy and Brian

3. Vegan Banana Chocolate Mousse from Esme Salon

Congrats! Feel free to grab the featured on button for your post.

Just right click and ‘save image as…‘

Guidelines for this Get-Together:

  1. Click on the “Add your Link” Button below and add a great image of your project or recipe. Make sure you link to the page of your family friendly post – not the main page of your blog.
  2. Link up to three posts each week.
  3. Try to visit at least a few other blogs at the party. Be sure to leave a comment to let them know you stopped by.
  4. Link your post back to the Homestead Blog Hop. If the hop isn’t linked to your post then you cannot be featured. All featured posts will be shared on all hosts’ social media channels.
  5. Please link up posts that you haven’t linked to the hop before. You are welcome to link old posts from your blog.
  6. By joining the party, you are giving the hosts permission to use one photo from your post with a link back to your site if it is selected as one of next week’s Features.
  7. This is a family-friendly link up meant to inspire and motivate the homesteader in all of us.

Let the Party Begin!

Join Our Pinterest Board

Follow all your hosts on Pinterest and send me a message that you’d like to be added to our Homestead Blog Hop group board. The only rule is to only add posts that you’ve also added here.

Tags: , , , , ,
Syren Spreads launches first spoonable adaptogenic beauty chocolate

Syren Spreads launches first spoonable adaptogenic beauty chocolate

Syren Spreads has debuted what it calls the world’s first spoonable adaptogenic and botanical beauty chocolate, set to launch 1 December 2025.

The new edible beauty brand, which has recently launched into the functional food and wellness space, aims to transform traditional supplement routines into indulgent, sensory-driven self-care experiences.

At a time when many consumers are showing signs of ‘pill fatigue’, Syren Spreads offers an alternative: a spoonable, chef-crafted chocolate hazelnut spread infused with 2,400mg of research-backed adaptogens per serving, including Tremella Mushroom, Astragalus Root, Gotu Kola and Bamboo Silica. The result is a beauty from within supplement designed to nourish skin health, hydration and radiance, while tasting like a dessert.

The spread’s chocolate hazelnut base delivers a smooth texture without a herbal aftertaste, ideal for consumers who want both functional efficacy and sensory pleasure.

Each serving is vegan, non-GMO and low in sugar and can be enjoyed straight from the tub or incorporated into smoothies or on toast or snacks.

The spread will be available nationwide from 1 December via the Syren Spread’s website.

Tags: , , , , , ,
Best oLive
Privacy Overview

This website uses cookies so that we can provide you with the best user experience possible. Cookie information is stored in your browser and performs functions such as recognising you when you return to our website and helping our team to understand which sections of the website you find most interesting and useful.