Global Shea Butter Market Set to Reach USD 8.57 Billion by 2034 as Clean Beauty, Sustainable Sourcing and Food-Grade Applications Strengthen, says Maximize Market Research
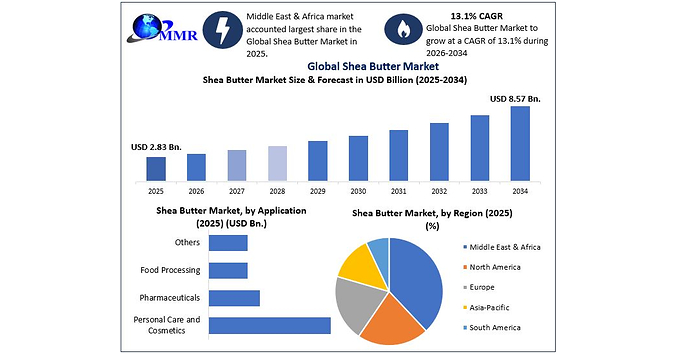
PUNE, India, Oct. 6, 2026 /PRNewswire/ — The Global Shea Butter Market was valued at USD 2.83 Billion in 2025 and is projected to grow at a CAGR of 13.1% from 2026 to 2034, reaching USD 8.57 Billion by 2034, according to a new analysis by Maximize Market Research.
Explore 125 market data tables and 60 figures across 324 pages, along with a detailed Table of Contents covering the Global Shea Butter Market.
Global Shea Butter Market Size
Global Shea Butter Market Size & Forecast
Market Size (Base Year 2025): USD 2.83 Billion
Forecast Market Size (2034): USD 8.57 Billion
CAGR (2026–2034): 13.1%
Base Year: 2025
Forecast Period: 2026–2034
Historical Period: 2020–2025
Global Shea Butter Market Overview
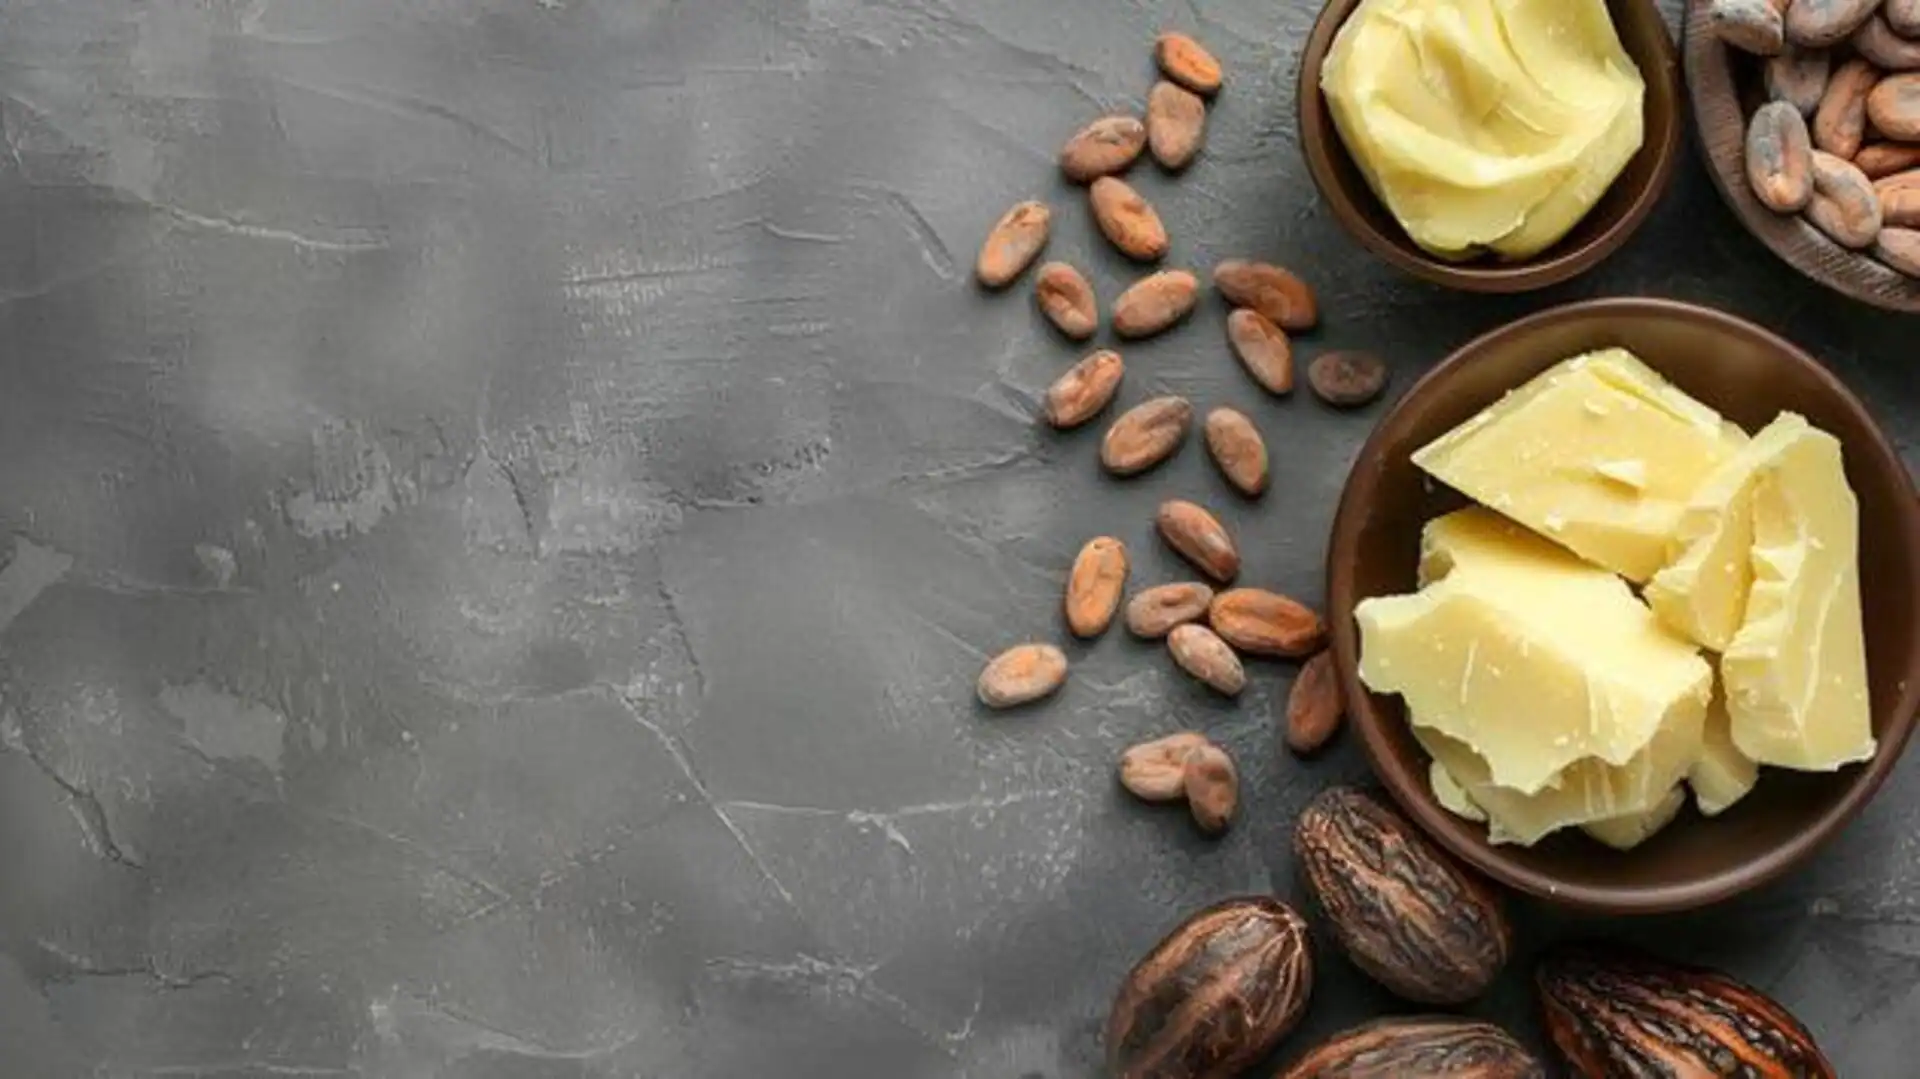
The Global Shea Butter Market continues to expand as demand rises for natural ingredients, plant-based raw materials, clean-label products, sustainable personal care ingredients, and functional food fats. Shea butter is widely used across cosmetics and personal care, food processing, pharmaceuticals, bakery products, confectionery, skincare, haircare, medicinal ointments, and cocoa butter equivalent applications. The Shea Butter Market growth is supported by increasing consumer preference for raw and unrefined shea butter, refined shea butter, organic shea butter, cosmetic-grade shea butter, food-grade shea butter, and ethically sourced shea products. Growing demand for moisturizing ingredients, natural antioxidants, essential fatty acids, and plant-derived emollients is strengthening the Global Shea Butter Market size, market share, market demand, and long-term Shea Butter Market forecast.
The market is also being shaped by organic certification, fair-trade sourcing, sustainable shea butter production, transparent supply chains, digital traceability, women-led cooperatives, regenerative sourcing practices, and increasing investment in West African processing infrastructure. The rising use of shea butter in clean beauty, natural skincare, premium haircare, pharmaceutical formulations, chocolate, bakery, and cocoa butter equivalent products is creating strong Shea Butter Market opportunities. The Middle East and Africa remain the leading regional market due to the concentration of shea cultivation, harvesting, and processing across the West African Shea Belt, while demand from North America, Europe, and Asia Pacific continues to strengthen the global Shea Butter Industry outlook. Companies are increasingly focusing on supply reliability, quality consistency, organic and fair-trade certification, product innovation, refined and ultra-refined grades, and value-added shea butter solutions to improve their competitive position in the Shea Butter Market.
Get Full PDF Sample Copy of Report: (Including Full TOC, List of Tables & Figures, Chart) @https://www.maximizemarketresearch.com/request-sample/23770/
The Global Shea Butter Market is evolving as cosmetics, food, pharmaceutical, and confectionery companies increase their use of natural, sustainable, traceable, and plant-based ingredients. Organic shea butter, fair-trade shea butter, cosmetic-grade shea butter, food-grade shea butter, cocoa butter equivalents, clean beauty formulations, sustainable sourcing, and supply-chain modernization are creating stronger market opportunities. Companies that combine product quality, ethical sourcing, traceability, consistent supply, advanced processing, organic certification, and application-focused innovation are likely to shape the Shea Butter Market through 2034.
Shea Butter Market Growth Drivers, Opportunities & Key Highlights
The Global Shea Butter Market is expanding as demand rises for natural ingredients, clean-label cosmetics, plant-based emollients, sustainable raw materials, and cocoa butter equivalents. Raw and unrefined shea butter remains a key category due to its strong use in skincare, haircare, balms, soaps, and body butter, while refined shea butter supports food processing, confectionery, pharmaceuticals, and large-scale cosmetic production.
New market opportunities are emerging through organic certification, fair-trade sourcing, digital traceability, women-led cooperatives, and supply-chain modernization. AAK introduced new liquid shea butter solutions in 2025, while Bunge Loders Croklaan strengthened localized processing in West Africa through its partnership with Mali Shi.
Key Market Highlights
- USD 2.83 Billion: Market size in 2025
- USD 8.57 Billion: Projected market size by 2034
- 13.1% CAGR: Growth during 2026–2034
- 16 million+ women: Engaged in shea collection and processing across West Africa
- 26,000+ women collectors: Supported through the Mali Shi partnership
- 250,000–350,000 tons: Annual dry kernel production in the leading MEA region
- Middle East & Africa: Leading regional market
- Raw and Unrefined Shea Butter: Leading type segment
Germany Shea Butter Market Strengthens with Sustainable Sourcing Partnership
In Germany, the Shea Butter Market gained momentum in 2026 as Beiersdorf and AAK extended their partnership to strengthen sustainable shea sourcing in West Africa. The initiative has already supported more than 10,500 women in Ghana and Burkina Faso through training, savings programs, improved processing support, and sustainable production practices. The next phase focuses on sustainable land management, water infrastructure restoration, and new processing equipment. These developments reflect rising demand for traceable, ethically sourced, fair-trade, and sustainable shea butter for skincare, body care, and lip-care applications, while reinforcing Germany’s role in clean-beauty innovation and responsible shea supply chains.
The Global Shea Butter Market is segmented by Type, Nature, Application, Distribution Channel, and Region.
By Type, Raw and Unrefined Shea Butter holds the leading position in 2025 due to higher nutrient retention, natural aroma, and strong demand from clean-beauty and organic personal care brands. It is widely used in skincare, haircare, balms, soaps, and artisanal formulations because of its vitamins, antioxidants, and bioactive compounds. Refined Shea Butter also maintains strong demand across food processing, confectionery, pharmaceuticals, and large-scale cosmetic manufacturing where consistent color, odor, texture, purity, and stability are important.
By Nature, Conventional Shea Butter accounts for a major share because of its broad availability, cost-effectiveness, and wide use in food processing, bakery, confectionery, commercial cosmetics, and cocoa butter equivalent applications. Organic Shea Butter is the fastest-growing category, supported by rising demand for clean, traceable, chemical-free, fair-trade, and sustainably sourced ingredients in premium skincare, haircare, and therapeutic products.
Get Insightful Data on Regions, Market Segments, Customer Landscape, and Top Companies (Charts, Tables, Figures and More) https://www.maximizemarketresearch.com/request-sample/23770/
Middle East & Africa Leads the Shea Butter Market as West African Production and Sustainable Sourcing Strengthen
Middle East & Africa remains the leading region in the Global Shea Butter Market, supported by the concentration of shea cultivation, harvesting, and primary processing across the West African Shea Belt. Ghana, Burkina Faso, Nigeria, Mali, Benin, and Togo remain major production and export centers, while annual dry kernel production of more than 250,000–350,000 tons supports the region’s dominant market share. Rising demand for raw and unrefined shea butter, organic shea butter, cosmetic-grade shea butter, and food-grade shea butter is strengthening regional exports to cosmetics, pharmaceuticals, food processing, bakery, confectionery, and cocoa butter equivalent applications.
North America and Europe remain important demand markets, supported by strong adoption of natural skincare, clean-label cosmetics, premium personal care, sustainable ingredients, and cocoa butter equivalents. Asia Pacific is also expanding as beauty, haircare, food processing, and pharmaceutical industries increase their use of plant-based and natural ingredients. South America continues to develop through growing demand for natural personal-care products, specialty ingredients, and sustainable raw materials, supporting wider global Shea Butter Market opportunities.
Global Shea Butter Market Competitive Landscape
The Global Shea Butter Market is highly competitive, with major companies focusing on sustainable sourcing, product purity, processing quality, supply reliability, organic certification, fair-trade practices, and application-specific shea butter solutions. Competition is increasingly centered on raw and unrefined shea butter, refined and ultra-refined shea butter, cosmetic-grade shea butter, food-grade shea butter, traceable supply chains, and clean-label ingredients across cosmetics, food, pharmaceuticals, bakery, and confectionery applications.
Major players include AAK, Bunge Loders Croklaan, Fuji Oil, BASF, Croda, Clariant, OLVEA, and Ghana Nuts Company. Recent developments show that competition is shifting toward product innovation, localized processing, ethical sourcing, and stronger West African supply networks. In 2025, AAK introduced LIPEX 205, LIPEX SheaLiquid TR, and LIPEX SheaClear, expanding liquid shea butter options for personal-care formulations, while Bunge Loders Croklaan strengthened its partnership with Mali Shi, supporting local processing, more than 100 direct jobs, and over 26,000 women collectors. Across the market, companies are strengthening their positions through sustainable sourcing programs, advanced refining, traceability, community partnerships, and value-added shea butter products.
Global Shea Butter Market Recent Development
In October 2025, AAK AB introduced its new Liquid Shea Butter Solutions portfolio, including LIPEX 205, LIPEX SheaLiquid TR, and LIPEX SheaClear, marking one of the most notable recent developments in the Global Shea Butter Market. The new solutions are designed to deliver the moisturizing and barrier-supporting benefits of traditional shea butter in a pumpable, non-crystallizing liquid format that simplifies processing, improves formulation stability, and supports lighter and transparent personal-care products. The development strengthens AAK’s position in cosmetic-grade shea butter and reflects the market’s growing focus on innovation, clean-label formulations, traceable sourcing, and value-added shea ingredients for premium skincare and personal-care applications.
Immediate Delivery Available | Buy this Research Report (Insights, Charts, Tables, Figures and More) https://www.maximizemarketresearch.com/checkout/23770/
Global Shea Butter Market – Key Players
- AAK AB
- BASF SE
- Bunge Limited
- Cargill, Incorporated
- Croda International Plc
- Fuji Oil Holdings Inc.
- Ghana Nuts Company Limited
- IOI Loders Croklaan Group BV
- Clariant AG
- OLVEA Group
- SOPHIM S.A.
- Olam International
- Manorama Industries Limited
- The Savannah Fruits Company
- Baraka Impact
- SheaMoisture (Unilever)
- L’Occitane en Provence
- The Body Shop
- Agrobotanicals, LLC
- Suru Chemicals and Pharmaceuticals Pvt. Ltd.
- Medaure Limited
- All Organic Treasures GmbH
- Sekaf Ghana Ltd.
- Shea Radiance LLC
- Pameri Organic US
- 3F Industries Limited
- Wilmar Africa Limited
- International Oils & Fats Limited
- Akoma International Ltd.
- Better Butter Company
- Shebu Industries
- Makers Ingredients Limited
- Purenso Select
- NOW Foods
- Bulk Apothecary
- Green Leaf Naturals
- Zoic Cosmetics
- Gombella Integrated Services
- Natural Sourcing, LLC
- Right Shea
- Hallstar (Biochemica)
- Synthite Industries Pvt. Ltd.
- Cornelius Group PLC
- Enkay Indo-Nigerian Industries Ltd.
- Mary Tylor Naturals LLC
- Medikonda Nutrients
- VedaOils
- A.G. Organica Private Limited
- Alaffia
- Naasakle International LLC
Access Full Summary: https://www.maximizemarketresearch.com/market-report/global-shea-butter-market/23770/
Analyst Perspective
Analyst highlights that the Global Shea Butter Market is gaining importance as demand for natural ingredients, clean-label cosmetics, sustainable raw materials, plant-based emollients, food-grade fats, and cocoa butter equivalents continues to support market growth. Product innovation in organic shea butter, fair-trade sourcing, traceable supply chains, refined and ultra-refined grades, and liquid shea solutions is strengthening the market, while Middle East & Africa remains the leading region due to the strong West African production base. Companies that improve product quality, strengthen sustainable sourcing, expand processing capacity, invest in traceability, and develop value-added shea butter solutions are likely to shape the market through 2034.
Related Reports:
Moisturizing Cream Market by Product Type, Distribution Channel, Consumer Group, and Region – Global Forecast to 2034.
Cosmetic Ingredients Market by Type, Ingredient Type, Application, and Region – Global Forecast to 2034.
Natural Skin Care Products Market by Type, Product, End-User, and Region – Global Forecast to 2034.
Cosmetic Skin Care Market is segmented by Product, Gender, Distribution Channel, Application, and Region – Global Forecast to 2034.
Vegan Cosmetics Market by Product, Price Point, End User, Distribution Channel, and Region – Global Forecast to 2034.
Lip Care Products Market is segmented by Product Type, Distribution Channel, Application, End-User, and Region – Global Forecast to 2034.
Lip Balm Market by Product, Type, Usage, Application, and Region – Global Forecast to 2034.
Baby Care Products Market by Product, Age Group, Distribution Channel, and Region – Global Forecast to 2034.
Aloe Vera Products Market by Product Type, Category, Distribution Channel, End-User, and Region – Global Forecast to 2034.
Facial Care Market by Age, Product, Gender, Distribution Channel, and Region – Global Forecast to 2034.
About Maximize Market Research – Global Shea Butter Market
Maximize Market Research is a global market research and business consulting firm providing data-driven insights across consumer goods & services, beauty & personal care, food processing, pharmaceuticals, and natural ingredients. Its Global Shea Butter Market research covers raw and refined shea butter, organic and conventional products, cosmetics, food, pharmaceuticals, distribution channels, regional demand, sustainable sourcing, fair-trade practices, cocoa butter equivalents, competitive strategies, and recent industry developments. The report helps businesses understand market trends, product innovation, ethical sourcing, supply-chain developments, and long-term opportunities through 2034.
Global Seismic Services Market 2025–2032: Expanding Oil & Gas Exploration, Advanced 3D/4D Seismic Imaging, Renewable Energy Surveys, and AI-Driven Reservoir Analytics – MMR Statistics
MMR Statistics is a part of Maximize Market Research, developed to provide quick access to market size, industry data, forecasts, trends, and statistical insights across a wide range of sectors. It presents research data in multiple formats, making it easier for businesses, analysts, and decision-makers to use market intelligence for presentations, strategy, benchmarking, and business planning.
Global Eyeglasses Market (2026–2032) Market Size, Trends & Key Players – Stellar Market Research
Stellar Market Research is a strategic partner of Maximize Market Research, providing global and region-wise market research reports across multiple industries. Its research focuses on market trends, competitive developments, regional opportunities, industry dynamics, and growth outlooks, complementing Maximize Market Research with broader market coverage and region-specific business intelligence.
Contact:
Lumawant Godage
MAXIMIZE MARKET RESEARCH PVT. LTD.
+91 96073 65656
Email: [email protected]
Visit Our Web Site: https://www.maximizemarketresearch.com/
SOURCE Maximize Market Research Pvt. Ltd.