Cottage Cheese Ice Cream Recipe (High Protein)

Cottage Cheese Ice Cream Recipe (High Protein)

Since you clicked on this article, I’m going to assume one of two things:

  • You’re curious if the recipe title is serious. (It is.)
  • You’re open to the idea that veggies can belong in meatballs and cottage cheese can belong in ice cream.

Whether it’s one or both, welcome. The idea of cottage cheese in dessert might sound a little weird at first, but don’t worry – it becomes a rich, creamy base that lets the sweet tropical mango flavor take the lead.

If you’re wondering, “But WHY does cottage cheese belong in ice cream,” you’re asking the right question. Traditional ice cream relies on a carefully balanced combination of fat, sugar, milk solids, and air to create its creamy texture.

If you try to, say, increase the protein because you’re in midlife and it’s suddenly your favorite macronutrient, chances are you’ll accidentally change that crucial balance and end up banging your spoon against an icy brick.

That’s where cottage cheese comes in. When blended until completely smooth, it allows you to change the ratios while keeping the creaminess and structure that makes ice cream scoopable and satisfying.

This mango version is lower in sugar and higher in protein than traditional ice cream, yet still silky smooth, sweet, and well worth the five-ish minutes of hands-on prep time.

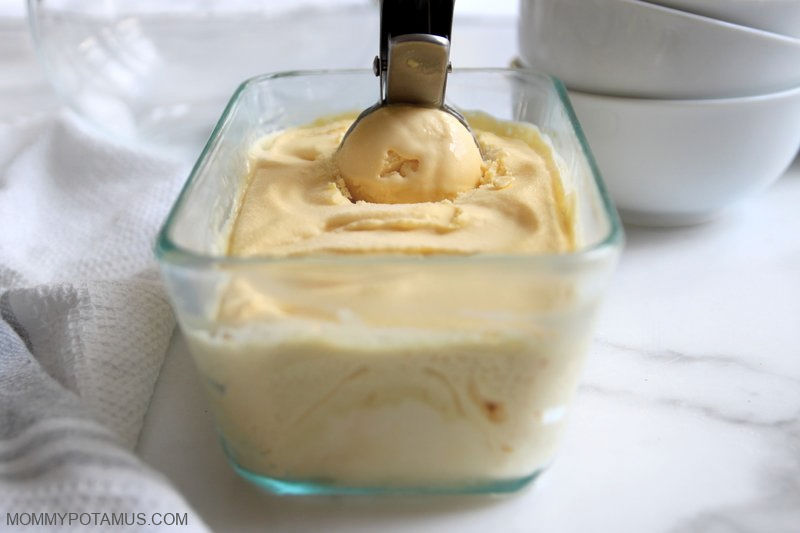
Cottage Cheese Ice Cream Recipe

This mango ice cream is silky smooth, sweet, and well worth the five-ish minutes of hands-on prep time.Makes approximately 3.5 – 4 cups

Prep Time 5 minutes Churing time 20 minutes

Author Heather Dessinger, FDN-P

  • 2 cups whole milk cottage cheese I recommend 4% milkfat
  • 2 cups frozen mango chunks
  • 25-30 grams unflavored or vanilla protein powder Optional – I used 2 scoops Heart & Soil Whey
  • 1½ tsp vanilla extract Start with 1 tsp if using vanilla protein powder and add more to taste
  • 3 tbsp maple syrup

Ice Cream Maker Method

  • Blend in a high powered blender until very smooth.

  • Pour the mixture into your ice cream maker and churn according to your manufacturer’s instructions.

  • When the ice cream is ready it should have a soft serve consistency. You can eat it right away, or if you prefer a firmer consistency transfer it into an airtight container and place in the freezer for 2-4 hours. I like to use a glass loaf pan with a lid.
  • To Serve: If you decide to freeze the ice cream for a firmer texture, you’ll get the creamiest results by letting it soften a bit before serving. I like to think of it more as “well chilled” than deeply frozen.Because cottage cheese-based ice cream can become a little icy when frozen solid, letting it rest on the counter allows it to soften into a smoother, creamier texture that tastes more like traditional ice cream. Depending on the size and depth of your container, this can take anywhere from 10 to 20 minutes.

No Ice Cream Maker Method

  • Blend the ingredients in a high-powered blender until very smooth.

  • Transfer the mixture to a freezer-safe container and place it in the freezer. To help keep the texture creamy, give it a good fold with a spatula every 30 minutes or so. This helps break up ice crystals as they form.

  • Once the mixture becomes too firm to fold easily, just leave it alone and continue chilling until it reaches your desired consistency, about 3–4 hours total.

  • To Serve:Because cottage cheese-based ice cream can become a little icy when frozen solid, letting it rest on the counter allows it to soften into a smoother, creamier texture that tastes more like traditional ice cream. Depending on the size and depth of your container, this usually takes about 10–20 minutes.

Nutrition estimate based on Good Culture 4% and 2 scoops of Heart & Soil Whey. 

Serving: 0.5c | Calories: 111kcal | Carbohydrates: 13g | Protein: 10g | Fat: 3g | Saturated Fat: 2g | Polyunsaturated Fat: 0.03g | Monounsaturated Fat: 0.1g | Cholesterol: 16mg | Sodium: 20mg | Potassium: 142mg | Fiber: 1g | Sugar: 11g | Vitamin A: 446IU | Vitamin C: 15mg | Calcium: 61mg | Iron: 0.1mg

A Note About Ice Cream Makers

When I bought my current ice cream maker years ago, the product description listed only stainless steel and plastic. After it arrived, I discovered that the freezing bowl was actually made from anodized aluminum. It’s not my first choice in terms of material, but at the time I couldn’t find a compressor-style machine with a stainless steel bowl, so I decided to keep it for occasional use.

There are better options available now. If I were buying one today, I’d probably choose the Whynter Ice Cream Maker. It has a built-in compressor, so you can make ice cream, gelato, or sorbet whenever you want without freezing a bowl overnight. It also uses a stainless steel mixing bowl and a BPA-free plastic paddle.

If budget weren’t a factor, my top pick would be the Lello 4080 Musso Lussino Ice Cream Maker. The bowl and paddle are made with stainless steel, and it has a 4.6 star rating and over 1,000 reviews.

Also, if you enjoy this recipe, you might also like my Strawberry Cottage Cheese Ice Cream.
Share with a friend! 👇

Tags: , , , , , ,
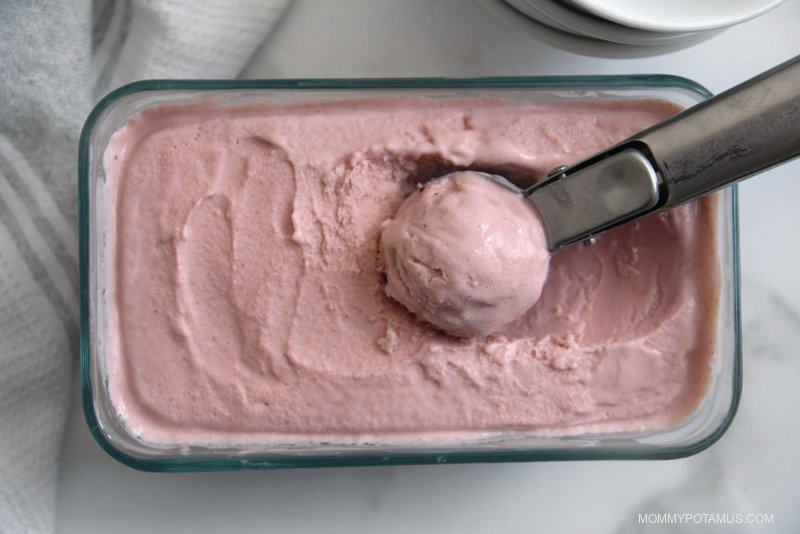
Strawberry Cottage Cheese Ice Cream Recipe (High Protein)

Strawberry Cottage Cheese Ice Cream Recipe (High Protein)

Yesterday my husband walked into our bedroom carrying a plate of freshly-baked kale chips in one hand and his phone – hoisted high above his head like a boom box while blasting a love song from the neon-and-hairspray era – in the other.

That’s midlife, right?

We get to be our quirkiest selves, but we also have to make sure we use all the vegetables in the fridge before the next grocery run.

And eat protein, of course.

Because even if – like me – you never bought into the whole “training for your summer body” idea, you’re probably reading this because you’re training for a different kind of body: one with strong muscles, dense bones, healthy blood sugar, good balance, and the ability to carry your own groceries, travel, and stay fully engaged in life for decades to come.

Protein plays a role in all of those things. It provides the building blocks for muscle tissue, enzymes, hormones, immune molecules, and countless repair processes throughout the body. And because we naturally lose muscle mass as we age, getting enough protein becomes increasingly important for maintaining strength, stability, and resilience.

Skeletal muscle is one of the body’s most metabolically active tissues. It helps regulate blood sugar, influences inflammation, supports healthy immune function, and produces signaling molecules that affect everything from metabolism to brain health.

That’s why I’ve been experimenting with high-protein ice cream.

Not because I’m training for bikini season.

I’m training for my old-lady era.

And while I’m willing to put scrambled eggs in my smoothie on occasion, I also believe food should bring joy. I eat fewer desserts these days, but I enjoy them more, especially when they help me hit my protein goals.

Why Protein Ice Cream Is Tricky

Protein ice cream sounds simple enough: take a healthy ice cream base, add protein powder, freeze, and enjoy.

In reality, getting the right texture is a little more complicated than it sounds.

Traditional ice cream gets its creamy, scoopable texture from a careful balance of fat, sugar, solids, and air. When you reduce the sugar, lower the fat, and add more protein, the texture can shift pretty quickly from “creamy dessert” to “icy brick.”

That’s one reason the Ninja Creami has become so popular for protein ice cream. It can take a frozen solid base and re-spin it into something creamy, even when the recipe is lower in sugar or fat.

A regular ice cream maker works differently. It churns while the base freezes, which is wonderful for traditional ice cream, but lower-sugar, higher-protein mixtures can freeze too hard too quickly around the edges before the center has a chance to churn properly. The result is often icy, crystallized, or just not worth the effort.

I wanted a creamy texture without having to buy another piece of equipment or adding weird thickeners, so I started experimenting with cottage cheese.

When blended until completely smooth, it does a lot of the work that sugar and stabilizers usually do. It adds protein, creaminess, body, and enough structure to give it an ice cream texture.

Does it taste exactly like traditional ice cream? No – it has a bit of a tang that gives it more of a “cream cheese” note, so I leaned into that. I also kept the overall sugar content lower than traditional ice cream, so I figured this recipe would be safe from the not-so-tiny humans in my house.

I was wrong – they polished off the first test batch less than a day after I made it.

One thing to be aware of, though, it that some brands use more salt than others, and that can affect the final flavor. I tried a few and the one I liked best is Good Culture 4%. On its own, leaned a bit salty, so I added a cup of strawberries. Some of my family members liked it, but I personally didn’t and added a second cup. My recommendation is to start with one, taste your mixture after blending, and add more strawberries if needed.

So, how much protein is in this recipe?

The exact amount will vary depending on a few factors, including which protein powder you choose, and even how much air gets incorporated during churning.

In other words, your numbers may not match mine exactly.

To give you a ballpark, using two scoops of Heart & Soil Whey yields about 10 grams of protein per ½-cup serving. That’s a lot more protein than traditional ice cream – enough to make meaningful progress toward daily protein goals, one delicious spoonful at a time.

Strawberry Cream Cheese Protein Ice Cream Recipe

This recipe makes approximately 3.75 – 4 cups.

Prep Time 5 minutes Churning time 20 minutes

Author Heather Dessinger, FDN-P

  • 2 cups whole milk cottage cheese (I recommend 4% milkfat)
  • 1 tbsp vanilla extract (If using vanilla protein powder, start with 1 teaspoon and increase to taste)
  • ¼ cup maple syrup
  • 2 cups chopped strawberries
  • 25-30 grams unflavored or vanilla protein powder (Optional – I used 2 scoops Heart & Soil Whey)

Ice Cream Maker Method

  • Blend in a high powered blender until very smooth.

  • Pour the mixture into your ice cream maker and churn according to your manufacturer’s instructions.

  • When the ice cream is ready it should have a soft serve consistency. You can eat it right away, or if you prefer a firmer consistency transfer it into an airtight container and place in the freezer for 2-4 hours. I like to use a glass loaf pan with a lid.
  • To Serve:If you decide to freeze the ice cream for a firmer texture, you’ll get the creamiest results by letting it soften a bit before serving. I like to think of it more as “well chilled” than deeply frozen. Because cottage cheese-based ice cream can become a little icy when frozen solid, letting it rest on the counter allows it to soften into a smoother, creamier texture that tastes more like traditional ice cream. Depending on the size and depth of your container, this can take anywhere from 10 to 20 minutes.

No Ice Cream Maker Method

  • Blend the ingredients in a high-powered blender until very smooth.

  • Transfer the mixture to a freezer-safe container and place it in the freezer. To help keep the texture creamy, give it a good fold with a spatula every 30 minutes or so. This helps break up ice crystals as they form.

  • Once the mixture becomes too firm to fold easily, just leave it alone and continue chilling until it reaches your desired consistency, about 3–4 hours total.

  • To Serve:Because cottage cheese-based ice cream can become a little icy when frozen solid, letting it rest on the counter allows it to soften into a smoother, creamier texture that tastes more like traditional ice cream. Depending on the size and depth of your container, this usually takes about 10–20 minutes.

Nutrition facts based on Good Culture 4%, 2 scoops of Heart & Soil Whey, and 2 cups of chopped strawberries. 

Serving: 0.5cup | Calories: 107kcal | Carbohydrates: 11g | Protein: 10g | Fat: 2g | Saturated Fat: 2g | Polyunsaturated Fat: 0.1g | Monounsaturated Fat: 0.01g | Cholesterol: 16mg | Sodium: 210mg | Potassium: 135mg | Fiber: 1g | Sugar: 9g | Vitamin A: 4IU | Vitamin C: 21mg | Calcium: 65mg | Iron: 0.2mg

A Note On Ice Cream Makers

When I bought this ice cream maker many years ago, the only materials listed on the product description were stainless steel and plastic. I discovered after it arrived that the inner tub is actually made with anodized aluminum, which is not ideal. Back then, I couldn’t find a truly stainless steel option so I kept it to use on occasion.

Truly stainless steel options are available now, so I’m thinking about replacing mine with the Whynter Ice Cream Maker. It comes in two sizes and uses a powerful built-in compressor freezer that allows you to make ice cream, gelato or sorbet anytime (without needing to pre-freeze the inner canister). The inner bowl is stainless steel and the churn blade is BPA-free plastic.

If budget were not a consideration, I’d go for the Lello 4080 Musso Lussino 1.5-Quart Ice Cream Maker. The bowl and paddle are made with stainless steel, and has a 4.6 star rating and over 1,000 reviews.

Share with a friend! 👇

Tags: , , , , , , ,
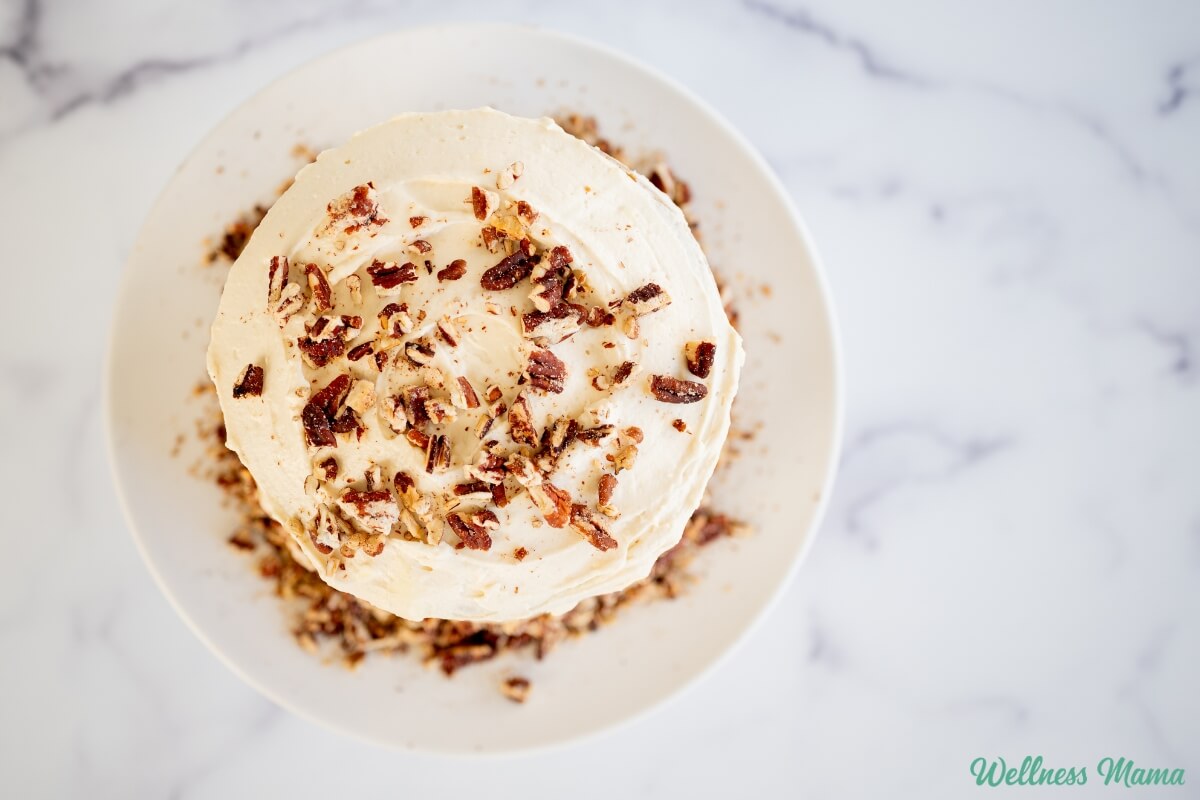
carrot cake

Brown Butter Carrot Cake with Honey Cream Cheese Frosting

Carrots are one of our favorite vegetables and I’ll often make recipes like carrot coulis, carrot salad, or roasted carrots. This homemade carrot cake is another way to enjoy all that carrots have to offer. It’s simple to make, moist, and full of delicious flavors. 

Years ago I came up with a grain and gluten-free carrot cake with pineapple. That recipe used coconut flour and lots of eggs for protein. While I still like that recipe and make it on occasion, I wanted to have another carrot cake recipe on hand that was more traditional. 

Carrot Cake Ingredients

Now that our family includes some organic flour on occasion, I’ve been making more baked goods with it. It’s an easy way to make a healthier dessert that has the same taste and texture as traditional desserts. That doesn’t mean it’s packed with sugar, vegetable oils, or other ingredients I prefer to avoid though!

Carrot cake ingredients typically include flour, sugar, carrots, spices, oil, and eggs. Then there are the optional mix-ins like raisins, pineapple, and shredded coconut. This recipe is very similar, but I’ve opted for raw honey instead of sugar. And it uses butter instead of vegetable oil. Applesauce adds a little more moisture and natural sweetness. 

Need a gluten-free carrot cake? Simply substitute a 1:1 gluten-free flour blend for the organic all-purpose flour. 

How to Make Carrot Cake

The long list of ingredients can be intimidating at first, but this really is a simple recipe. You’re basically combining all of the wet ingredients, then combining all of the dry ingredients, then adding them together. Finally, you’ll stir in the mix-ins like carrots, raisins, and coconut. 

There is the additional step of browning the butter first, which really adds an extra layer of flavor to the cake. Browned butter tastes a lot like caramel, but without the extra sugar. 

Tip: When you’re browning the butter, be sure to keep a close eye on it. It needs to be removed from the stove after it’s browned, but before it’s gotten really dark brown (aka burnt). Because burnt butter carrot cake is not delicious. 

Cream Cheese Frosting For Carrot Cake (Without Refined Sugar)

Carrot cake wouldn’t be what it is without the iconic cream cheese frosting. It adds a nice tang to the sweetness, so the dessert isn’t overwhelmingly sweet. Most cream cheese frosting recipes call for powdered sugar to help thicken and make it spreadable. My version uses raw honey for sweetness and butter for a buttercream frosting consistency.  I prefer honey in this recipe, but maple syrup would taste good too. 

Instead of powdered sugar to thicken, I used arrowroot starch (also known as arrowroot flour). It helps to thicken without making the frosting super sweet. Start with 2 Tablespoons of arrowroot and add more as needed to get the right consistency. You want it to be thick enough it won’t fall down the cake, but not so thick that it’s difficult to spread. 

Different Pan Options

This cake is 4 layers high because I like the look of the extra layers. If you don’t have four 6-inch cake pans, then two 9-inch round pans will also work. Simply change the bake time to 30-35 minutes if using 9-inch pans. If you want to make cupcakes, then bake for 18-22 minutes.

You could also make a sheet pan carrot cake, but I haven’t personally tried it. Let me know if you do! If you’re craving carrot cake or need a fancy (but easy!) spring dessert, then give this carrot cake a try. 

Brown Butter Carrot Cake With Honey Cream Cheese Frosting

This delicious carrot cake is moist and naturally sweetened with honey and

Honey Cream Cheese Frosting

  • Melt the butter over medium heat, swirling occasionally, until it foams and turns golden with a nutty aroma. Remove from heat and pour into a large mixing bowl, allowing it to cool for about 5 minutes.

  • Grate the carrots using the medium holes of a box grater.

  • Preheat the oven to 350°F and grease and line four 6-inch cake pans (or see notes for other pan options).

  • To the cooled brown butter, whisk in the honey or maple syrup, applesauce, eggs, coconut milk, and vanilla extract until smooth and fully combined.

  • In a separate bowl, whisk together the flour, cinnamon, ginger, nutmeg, cardamom, baking powder, baking soda, and salt.

  • Add the dry ingredients to the wet ingredients and stir until just combined, being careful not to overmix. Fold in the grated carrots, chopped nuts, raisins, and shredded coconut if using.

  • Divide the batter evenly between the prepared pans and bake for 24–28 minutes, or until a toothpick inserted in the center comes out clean.

  • Allow the cakes to cool in the pans for about 10–15 minutes before transferring to a wire rack to cool completely.

  • To make the frosting, beat the cream cheese and butter together until smooth. Add the honey, vanilla, salt, and arrowroot starch, and continue beating until light, fluffy, and spreadable. Start with 2 Tablespoons of arrowroot and increase as needed to thicken the frosting to the desired consistency.

  • Place one cake layer on a serving plate and spread a layer of frosting on top. Repeat with the remaining layers. Apply a thin crumb coat over the entire cake. Refrigerate for 20–30 minutes to set before finishing with the remaining frosting.

Nutrition Facts

Brown Butter Carrot Cake With Honey Cream Cheese Frosting

Amount Per Serving (1 serving)

Calories 399
Calories from Fat 234

% Daily Value*

Fat 26g40%

Saturated Fat 15g94%

Trans Fat 0.4g

Polyunsaturated Fat 3g

Monounsaturated Fat 6g

Cholesterol 86mg29%

Sodium 306mg13%

Potassium 254mg7%

Carbohydrates 39g13%

Fiber 2g8%

Sugar 20g22%

Protein 6g12%

Vitamin A 3410IU68%

Vitamin C 2mg2%

Calcium 70mg7%

Iron 2mg11%

* Percent Daily Values are based on a 2000 calorie diet.

  • Garnish with toasted nuts, a sprinkle of cinnamon, or a drizzle of honey if desired.
  • Serve at room temperature for the best flavor and texture.
  • You can also make this in two 9-inch round cake pans.

Does Carrot Cake Need to Be Refrigerated?

Since this recipe uses cream cheese, any leftovers should be refrigerated. I’ve also found that cakes/muffins made with applesauce or other fruit as a sweetener spoil faster at room temperature. How long does it last in the refrigerator? Well, as long as your family doesn’t eat it right away, it will last for up to a week!

It tastes best at room temperature though, so I like to pull it out and let the slice warm up before eating. 

Can You Freeze Carrot Cake? 

Yes, and no. Some recommend freezing the unfrosted and cooled cake layers or individual slices. They’ll last for about 2-3 months in the freezer this way. It is not recommended to freeze a whole, frosted carrot cake. The frosting can crack and it may not look as pretty, but it will still be tasty. Just be sure to use an airtight container to prevent freezer burn. 

What are some of your favorite carrot recipes? Leave a comment and let us know!

Tags: , , , , , , ,
Best oLive
Privacy Overview

This website uses cookies so that we can provide you with the best user experience possible. Cookie information is stored in your browser and performs functions such as recognising you when you return to our website and helping our team to understand which sections of the website you find most interesting and useful.