5 Easy Ways To Make Soap Curls + Roses

5 Easy Ways To Make Soap Curls + Roses

I’ll be honest, I love making melt and pour soap, but sometimes the process can feel a little repetitive. Melt, pour, wait, unmold, repeat. So I started looking for ways to add a little something extra to my bars without making the process feel fussy. And that’s when I discovered soap curls.

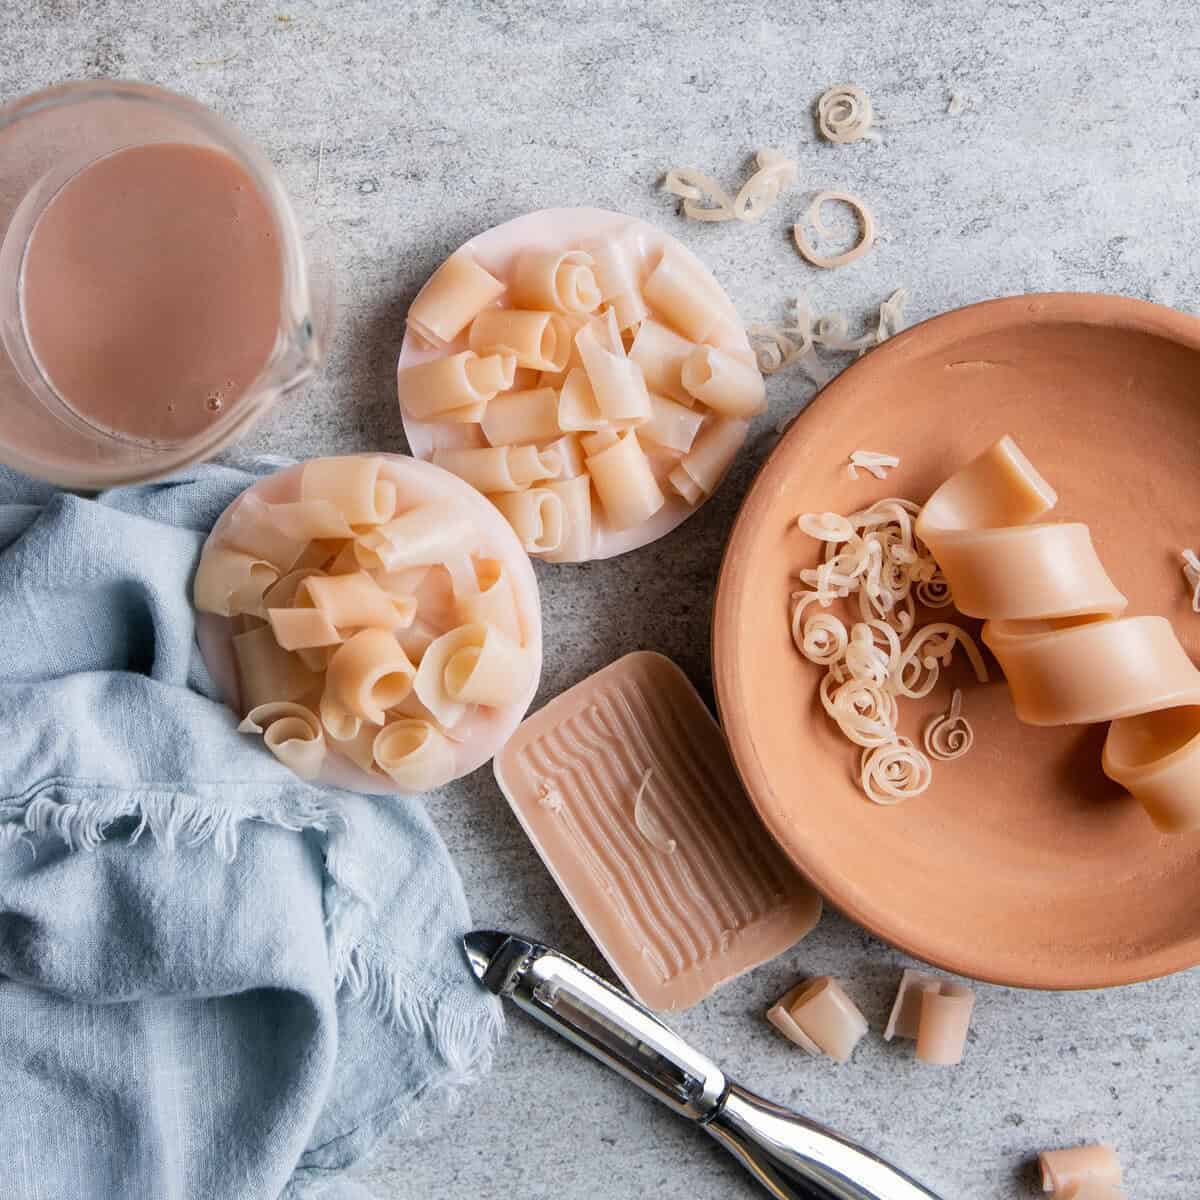
Soap curls are thin slivers of soap that you peel or shave from a larger block. They naturally roll into these delicate, ribbon-like shapes that can be used as decoration, like on these gift box soaps.

Let ’em harden and they have this crunchy texture that feels like a gentle, satisfying scrub when you use them. If you’re into ASMR, the sound and feel of them is surprisingly relaxing, too.

You can also embed soap curls into soap loaf molds for a really beautiful, layered effect. It’s an easy way to make your soaps look more professional and artisan without a ton of extra effort.

So if you’re ready to add a little texture and visual interest to your melt and pour projects, let’s start with the basics.

Curling Tools

  • Vegetable peeler — This is one of the best tools for making thin, delicate curls roughly ½” – 1″ wide. It gives you nice control and creates those pretty ribbon shapes.
  • Y-shaped peeler — If you want slightly thicker curls with a bit more texture, a Y peeler is perfect. It shaves off wide, thick ribbons that can be turned into roses or embedded into soap bars.
  • Sharp knife — Use this if you want straight, wide, rustic-looking curls that you shape by hand.
  • Clay trimming tools — These are great for making small, wabi sabi curls. They give you more control for creating organic-looking ribbons that have a really pretty imperfect feel.
  • Citrus zester — This creates lots of small, thin curls. It’s perfect if you want a more delicate, confetti-like look from fine, festive ribbons.

Soap Making Supplies

These supplies are pretty standard to all melt and pour soap projects. The only one you may not have seen pop up before is glycerin, but the rest are things you should have in your soap making toolkit already. 

  • Melt and pour soap base — Technically, you can use clear or white, depending on the look you’re going for. Clear bases work great if you want translucent, glassy curls, while white bases give you a more opaque, classic soap look. In my experience clear base is bit “stretchier” and gives you more curl than white soap base, thanks to the extra glycerin. But if you’re dead set on using white soap, I have a fix for it’s lack of stretch (see below).
  • Vegetable glycerin — This is the secret ingredient for making your soap more bendable and easier to curl. If you’re using white soap base, extra glycerin is a must for getting those pliable curls that hold their shape. Either, you can add a tablespoon or two of liquid glycerin to white soap base. Or you can mix clear (glycerin) soap base with white soap base and get the same affect.
  • Mica or liquid soap colorants — These are optional, but they’re a fun way to add color to your curls. I like using mica for a shimmery effect, but liquid colorants work just as well if you want solid, vibrant colors.
  • Fragrance or essential oils — Also optional, but adding a scent elevates your soap ever so slightly. Just make sure to use skin-safe fragrance oils or essential oils.
  • Microwave-safe bowl or measuring cup — You’ll need this for melting and pouring your soap base. A glass measuring cup with a pour spout makes things easier, but any microwave-safe container will work.
  • Spray bottle with rubbing alcohol — This helps eliminate air bubbles on the surface of your soap and can also be used to help curls stick to the top of a soap loaf if you’re using them as decoration.

Methods for Making Soap Curls

Here’s a high-level tutorial on the different ways to make soap curls. The method you choose depends on the tools you have and the look you’re going for. If you’d like more detailed instructions for working with soap base, check out our Complete Guide to Using Melt-and-Pour-Soap.

Prepare the Soap

  1. Start by cutting your soap base into manageable chunks so it melts evenly. You don’t want to put big blocks in the microwave, because they’ll heat unevenly and can scorch in some spots. Note: for this project, I used a 50-50 blend of white soap base and glycerin soap base. If using white base, make sure to add glycerin in some form or another, either by adding 1-2 tablespoons of liquid glycerin or by blending with clear soap base.
  2. Melt the soap in the microwave in short 20-30 second bursts. Stir it frequently to make sure you get a smooth, even consistency.
  3. If you’re using essential oils or mica for color, mix them in while the soap is still warm.
  4. Pour the soap into a silicone mold (the temperature of the melted soap base doesn’t matter here) and let cool. For smaller curls, I recommend using small, single cavity molds, which keep the curls from getting too long and breaking. For big, thick curls, you’ll need to use a loaf mold instead. If you’re not sure, just refer to the method instructions below.

How To Make Soap Curls Using Tools

1. Vegetable Peeler

Pour soap into a single cavity mold and let cool. Once your soap is unmolded and fully cooled, hold the block firmly in one hand. If it’s slippery from the glycerin, use a paper towel for a better grip. Run the peeler along the long, flat side of the block.

Let the soap naturally curl as you peel. If it doesn’t curl on its own, use your fingers to gently shape it into a ribbon while it’s still flexible.

Be careful! The thin curls can be fragile, especially if your soap is on the harder side.

2. Citrus Zester

Create a small bar of soap using a single-cavity mold. Drag the citrus zester lightly across the wide, flat side of a soap block. This creates lots of small, delicate curls that look almost like confetti. It’s a great option if you want a more subtle, layered effect.

3. Clay Trimming Tools

Pull the tool lightly across the flat face of a bar of soap. The curls will have an imperfect, organic look that I think looks really nice.

To keep creating clean curls, use a knife to cut the tattered soap off the bar and create a flat surface to work from. This prevents the curls from getting messy or uneven.

4. Y Shaped Peeler

Instead of creating a small block of soap, pour roughly 1 inch of melted soap into the bottom of a loaf soap mold. Let it cool completely.

Cut the cooled soap into 2 inch wide strips that’ll fit your Y peeler. Then run the peeler across the soap in smooth, even strokes to create thicker strips that you can form into curls using your hands.

5. Make Soap Curls by Hand – The Thin Pour Method

Pour a thin (approximately ⅛ – 1/16 of an inch) layer of soap into a loaf mold. Let it sit for 5-10 minutes to set partially. The timing depends on how thick your layer is, but you want it firm enough to handle without breaking.

Remove the layer from the mold and cut into 1-2″ wide strips. Then roll or curl it by hand while it’s still pliable. Allow the curls to set and firm up a bit more before using in soaps.

Ways to Use Soap Curls

Once you’ve mastered the basics of making soap curls, the fun part is figuring out how to use them. There are so many ways to get creative with these little ribbons, and honestly, experimenting is half the fun.

1. ASMR “crunchy soap”

If you’re more into the sensory side of soap making, you can decorate the tops of your bars with lots of curls to create that satisfying, crunchy texture. The sound and feel of peeling and using these soaps is oddly relaxing.

2. Embedding them in soap loaves

One technique I love is using the Pour-Thin method to create a long sheet of soap, then rolling it long-ways (like a Fruit Roll-Up) to make a tube-like curl. You can embed this inside a loaf soap mold for a really stunning cross-section when you cut the bars. For more tips on embedding shapes in soap, check out this post.

3. Mix and match for unique effects

Try mixing colors for a confetti look, or vary the curl thickness to add dimension. You can also combine soap curls with shredded soap for even more texture. Embedding curls in transparent soap creates a really cool, suspended look, while white soap gives you a more classic, layered look.

4. Making soap roses and floral designs

After making curls with either a vegetable peeler or cheese planer, you can roll them in a way that looks like roses. It takes some practice, but the results are gorgeous and perfect for special occasion soaps or gifts.

I’ve found that thicker curls (like those made with a cheese planer) creates better roses because the soap has enough thickness to stand up and look like petals. 

5. Soap Curl Gift Soap

These festive gift box soaps look like tiny wrapped presents, complete with overlapping gold ribbons and soap curl bows on top. And since they’re made with melt and pour soap, they make perfect last-minute holiday gifts.

Soap Curl Troubleshooting

Making soap curls can take a little practice, so don’t feel bad if your first batch doesn’t turn out perfectly. Here are some common challenges and how to fix ’em.

Cracked curls — If your curls are cracking or breaking as you make them, try adding 1-2 tablespoons of liquid glycerin to the melted soap. This increases flexibility and makes the soap easier to work with.

Air bubbles inside curls or embeds — Air can get trapped when you’re embedding curls into a soap loaf. To fix this, embed them at an angle so any trapped air has a chance to escape as the soap sets. Also make sure to spray the soap both before and just after pouring it. 

Curls falling apart — If your curls are fragile and falling apart after you’ve made them, lightly spritz them with rubbing alcohol. This helps set them and keeps their shape intact.

Curls melting when embedding or pouring over — This happens when the soap you’re pouring is too hot. Make sure your over-pour soap is at a lower temperature (around 140°F or below is best). This way, it won’t melt the curls when it makes contact.

Uneven or floppy curls — If your curls aren’t holding their shape or they look messy, try using a sharper peeler, creating a thicker curl or working with firmer soap. You can also play around with adding a bit of glycerin to the base or adjusting your peel technique to get cleaner, more consistent ribbons.

FAQ

Can I use any melt and pour soap base?

Not all bases are created equal when it comes to soap curls. Bases that are too soft can end up mushy and won’t hold their shape. On the flip side, bases that are too hard may not curl nicely and could crack or break instead. You may need to try out several different soap brands or types to find one with a good balance between firmness and flexibility.

Do I have to use glycerin in the pour-thin method?

Glycerin helps make the soap more pliable and helps your curls hold their shape, especially when working with thinner curls. But it’s optional depending on your base. Some melt and pour soaps are already pretty flexible, so you might not need it at all. You made need to test a soap base and see how well it holds up.

Can I fragrance or color the curls?

Yes! You can add fragrance and color while the soap is melted. Just make sure everything is mixed well before pouring into your molds.

How long should I dry curls for ASMR?

If you’re going for that crunchy, satisfying ASMR texture, use thin curls and let them dry for about 5 weeks in a well-ventilated space. This gives them time to harden up and develop that crispy feel.

Can I curl cold process soap too?

Yes, cold process soap can work for curls once it’s fully cured and hardened.

0

Tags: , , , ,
dark nails with glitter

Thanksgiving Nails: Easy DIY Ideas to Celebrate in Style

The holiday season is right around the corner, and what better way to show your festive spirit than with Thanksgiving-inspired nails? 

Professional nail art looks amazing but you can get in the holiday mood with DIY manicure. Here are easy DIY Thanksgiving nail ideas to celebrate in style.

]]>Jump to:

1. Fall-Inspired Base Colors

The perfect Thanksgiving manicure starts with colors that capture the season’s warmth. 

The usual burgundies and deep reds are getting an upgrade this season. Instead of going for the same old wine-colored polish, try a deep berry shade with gold shimmer mixed in. It catches the light beautifully and adds something special to an otherwise basic manicure. 

Dark forest greens are also having a moment. They’re moody enough for fall but still totally wearable for work or weekends.

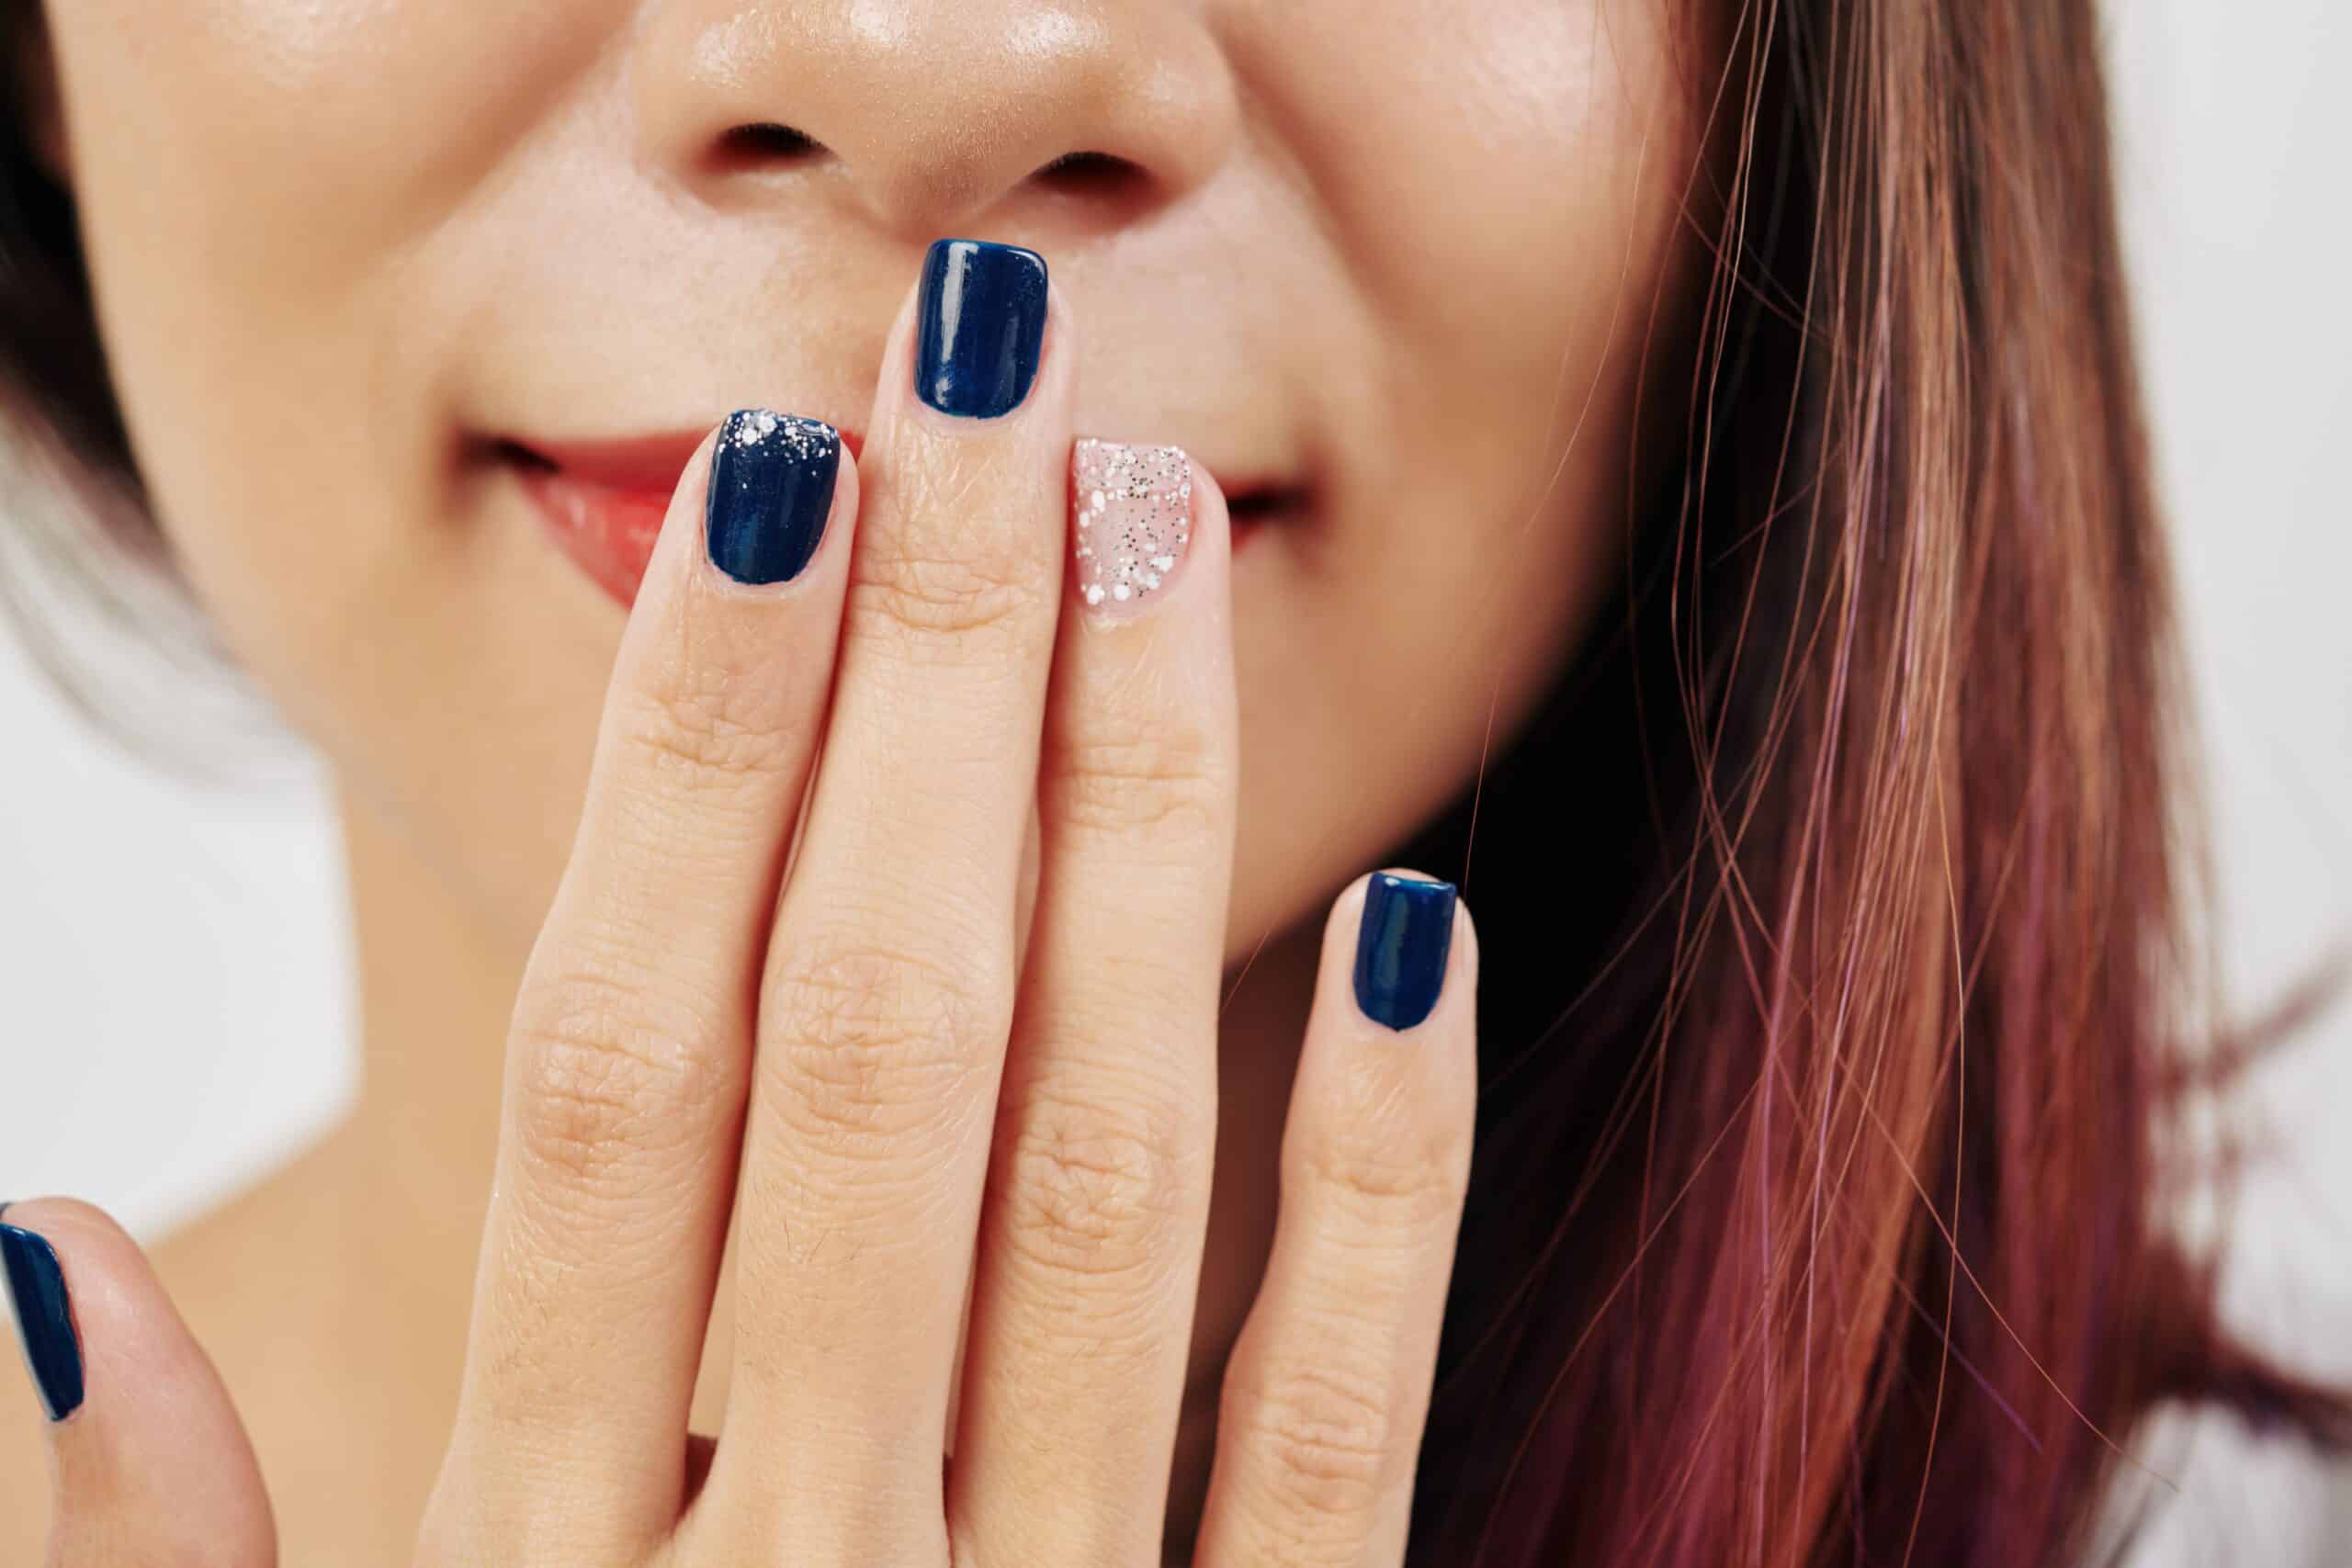
For something different, try a deep navy blue. It’s unexpected for fall but works perfectly with autumn clothes and gives a sophisticated edge to any outfit. 

The best part? These colors look great in any finish: glossy, matte, or somewhere in between.

How to Achieve Basic Fall Manicure

Step 1: Clean nails with polish remover and buff gently

Step 2: Apply a quality base coat to protect your nails

Step 3: Select your fall shade (try mixing burnt orange and copper)

Step 4: Paint 2-3 thin coats, waiting 2 minutes between each

Step 5: Add a shimmery top coat for extra shine

Step 6: For accent nails, add gold details or glitter

This classic look is perfect for those who want seasonal style without the fuss. The best part? It pairs perfectly with everything from cozy sweaters to fancy Thanksgiving dinner outfits.

2. Simple Leaf Design

Fall leaves are the perfect way to celebrate the season without being too obvious. This design looks impressive but uses basic techniques anyone can handle. The secret is not aiming for perfection because real leaves aren’t perfect either.

How to Create Fall Leaves

Step 1: Choose a fall-colored base (burgundy works great)

Step 2: Make three small dots in a triangle shape

Step 3: Use a thin brush to connect the dots

Step 4: Add a simple stem at the bottom

Step 5: Dot some gold polish for extra sparkle

Step 6: Lock in your design with top coat.

These delicate leaves bring a touch of nature to your manicure while keeping things elegant. They’re subtle enough for work but festive enough for holiday celebrations.

Want something easier? Try a gradient of fall colors across your nails, going from deep red to orange to yellow. It mimics the way leaves change color and looks way more complicated than it actually is. 

You can also do a simple accent nail with a leaf design while keeping the rest of your nails solid.

3. Easy Plaid Pattern

Plaid screams cozy fall vibes and this nail version is easier than you’d think. The trick is focusing on one or two accent nails rather than trying to plaid everything. Trust me, your sanity will thank you later.

How to Create a Plaid Design

Step 1: Paint a light neutral base color

Step 2: Apply thin striping tape in parallel lines

Step 3: Paint over with your chosen fall shade

Step 4: Remove the tape while the polish is still wet

Step 5: Repeat the process with crossing lines

Step 6: Finish with a thick top coat.

This design looks complex but takes less than 30 minutes to create. It’s perfect for those who want to make a statement without spending hours on their nails.

4. Seasonal Squash

Now that you’ve mastered plaid, take it up a notch to create a simple pattern for pumpkins and squash. Perfect for celebrating the season’s bounty!

5. Copper Shimmer

This season’s glitter isn’t about looking like a disco ball. Instead, try polishes with fine shimmer that gives depth to fall colors. 

A brown polish with copper shimmer or a grey with silver sparkles adds interest without going overboard. 

These subtle sparkles work especially well in office settings where you want to keep things professional but still fun.

For weekends, you can go a bit bolder with metallic accents. Try painting just the tips of your nails with gold or copper polish, or add a thin metallic stripe down the center of each nail.

6. Pumpkin Spice and Everything Nice

Pumpkins are not just for your coffee anymore. Orange is having a real moment in nail art but forget about bright Halloween orange. 

Look for burnt orange, terra cotta, and copper shades that feel sophisticated. These colors work especially well with matte top coats, which give them a velvet-like finish.

For a cute but not cutesy pumpkin design, paint tiny white pumpkin silhouettes on one or two nails while keeping the others in solid fall shades. Or try a gradient from orange to white for a candy corn effect that’s subtle enough for grown-ups.

7. Acorn Accents

Take a basic nude colored manicure up a notch with simple acorn shapes. Dot on black and white polish on the nail bed of an accent nail with black French tips.

8. Modern French Tips

The French manicure is back but with autumnal twists. Instead of white tips, try gold or copper. Or go for an ombre effect where the tip gradually fades into the base color. 

This works beautifully with fall shades like burgundy fading into nude, or dark green fading into a lighter sage.

Another option is to do the tips in different fall colors on each nail, keeping the base neutral. This gives you the chance to wear all your favorite autumn shades at once without looking too busy.

9. Quick and Easy Options

Not everyone has time for complicated designs. A solid color in any fall shade looks perfectly seasonal and takes minutes to apply. 

Dark purple, burgundy, or forest green are foolproof choices that go with everything in your fall wardrobe.

If you want something a little extra but still simple, try adding a single thin stripe of gold down the center of each nail, or just on the ring finger as an accent. It takes barely any extra time but makes your manicure look much more intentional.

Essential Tips for Success

Getting your Thanksgiving nail art right comes down to a few key practices that make all the difference in your final look.

Tip 1: Proper Nail Prep

Clean your nails thoroughly with polish remover and gently buff the surface. Push back your cuticles and trim any hangnails. 

A smooth, clean canvas makes your design look more professional and helps it last longer. Apply a base coat and let it dry completely before starting your design.

Tip 2: Quality Tools Matter

Invest in a few basic tools like thin brushes, dotting tools, and striping tape. Good quality brushes make precise lines easier while dotting tools create perfect circles every time. 

Clean your tools after each use to prevent polish buildup and keep them working like new.

Tip 3: Work in Good Lighting

Natural daylight or a bright desk lamp helps you spot mistakes and ensure even application. Poor lighting can make you miss spots or apply polish unevenly. 

Position your workspace near a window or use a good LED lamp to see what you’re doing clearly.

Tip 4: Take Your Time

Rushing leads to smudges and mistakes. Allow each layer to dry completely before adding the next element. 

If you’re creating detailed designs, practice on paper first to get comfortable with the motion. It’s better to spend extra time doing it right than to rush and start over.

Tip 5: Master the Clean-Up

Keep a small angled brush and acetone handy for tidying edges. Dip the brush in acetone and carefully clean around your cuticles after applying polish. 

This simple step makes your manicure look salon-perfect. For detailed designs, use a cotton swab to fix small mistakes before they dry.

Tip 6: Seal Your Design

Apply your top coat carefully to avoid smearing designs. Start with a thin layer, then add a thicker one once the first is dry. 

Make sure to cap the free edge of your nails to prevent chipping. Also, try reapplying top coat every few days to extend the life of your manicure.

Ready for the Holiday Table?

These nail designs are perfect for showing your holiday spirit while staying practical enough for all your Thanksgiving preparations. So have fun with it, experiment with different combinations, and most importantly, wear your design with confidence.

2

Tags: , , , , , ,
Groom Makeup Tips: 5 Easy Ways To Look Smart, Sharp, And Photo-Ready! | Beauty News

Groom Makeup Tips: 5 Easy Ways To Look Smart, Sharp, And Photo-Ready! | Beauty News

Last Updated:November 14, 2025, 14:37 IST

With the right, refined touches, a groom can look polished and radiant. Let’s check out a few smart makeup tips that can elevate the look from simple to strikingly unforgettable!

Grooms can achieve a polished look with subtle makeup.

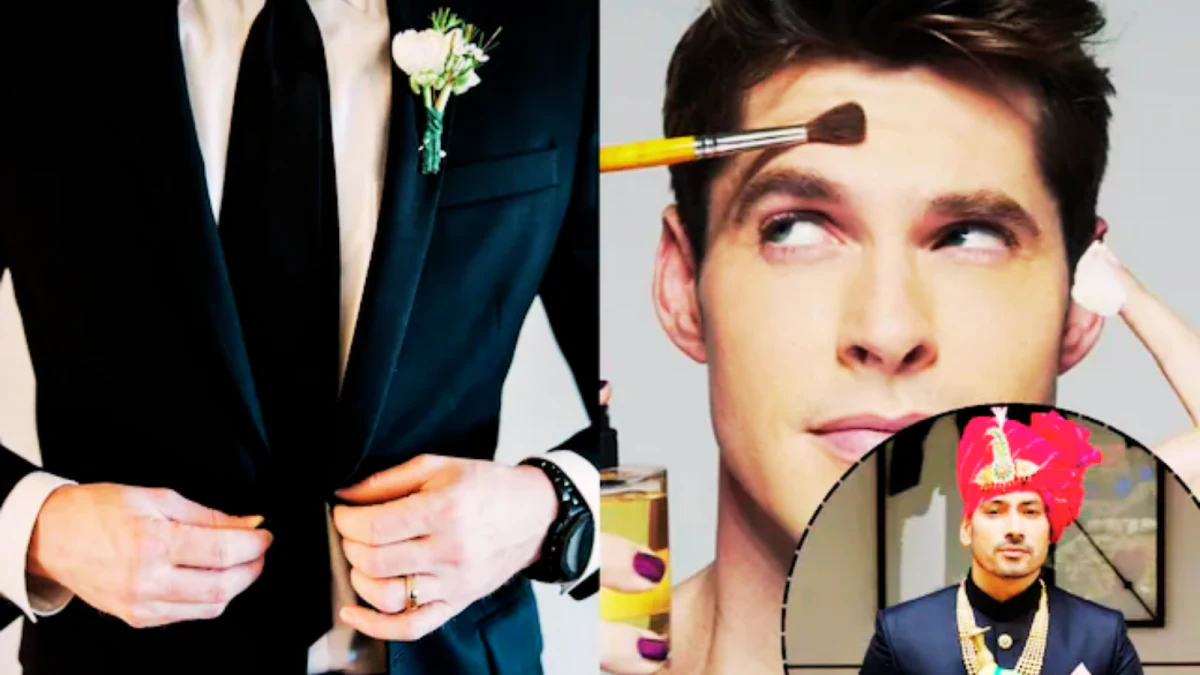
A wedding day holds equal significance for the groom as it does for the bride. With cameras capturing every candid smile and cinematic moment, the groom needs to look sharp, fresh, and well-groomed. Gone are the days when a simple haircut and suit were enough; modern grooms are embracing subtle makeup to enhance their natural features and complement their overall look.

This isn’t about heavy makeup, but a refined touch that ensures you appear just as radiant as your bride. Here’s what every groom should keep in mind for flawless wedding grooming, as well as the mistakes one must avoid.

Makeup Tips For Grooms

  1. Keep contouring light: If you want a sharper, more defined appearance, use a contour or bronzer only 1-2 shades darker than your skin tone. Apply it lightly under the cheekbones and along the jawline for a subtle, natural finish.
  2. Groom your eyebrows: Brush your brows into place and fill any sparse areas with a pencil matching your natural hair colour. Well-shaped brows instantly make your face appear neater and more structured.
  3. Subtly define your eyes: A thin coat of clear or black waterproof mascara opens up the eyes and adds freshness without looking overly made-up.
  4. Never skip lip balm: Chapped lips can be noticeable in photographs. Apply a plain or lightly tinted lip balm to keep them soft, smooth, and hydrated.
  5. Use a setting spray: A light mist at the end helps remove any powdery finish and keeps your makeup intact throughout the celebrations.

What Grooms Should Avoid

  1. Avoid over-contouring: Harsh lines and excessive sculpting can appear unnatural. Keep everything soft and well-blended.
  2. Don’t overfill your eyebrows: Extremely dark or heavily shaped brows can look artificial. Only fill gaps, don’t redesign the shape.
  3. Stay away from shimmer: Glittery bronzers or highlighters often look out of place on men. Opt for matte products for a clean, polished look.
  4. Don’t ignore your neck and ears: If you’re applying base makeup, blend a little onto your neck and ears for a consistent, even tone in photos.
  5. Don’t leave it until the last minute: If you’re hiring a professional, book a trial session. If doing your own makeup, practise beforehand to avoid wedding-day mishaps.

Your wedding is one of the most memorable days of your life. Just as the bride invests time in perfecting her look, the groom too should focus on grooming and subtle enhancement. The aim isn’t to appear glamorous, but to look effortlessly fresh, confident, and photo-ready from every angle.

Follow these simple tips, and the camera will love you just as much as your bride does!

First Published:

November 14, 2025, 14:37 IST

Disclaimer: Comments reflect users’ views, not News18’s. Please keep discussions respectful and constructive. Abusive, defamatory, or illegal comments will be removed. News18 may disable any comment at its discretion. By posting, you agree to our Terms of Use and Privacy Policy.

Tags: , , , , , , , , ,
Easy & Classy DIY Hostess Gifts That Wow!

Easy & Classy DIY Hostess Gifts That Wow!

Sharing is caring!

It’s the season of get togethers and holiday parties and I have been noticing so many amazing DIY hostess gift ideas on Pinterest. Plus I have a few on this blog that are tried and true. I thought I’d round up the best, most classy DIY hostess gifts that are affordable and easy to make and so much more special than grabbing a bottle of wine on the way! 

Making your own gifts is such a lovely way to show your friends and family that you care. In the days of consumerism where everyone seems to have everything they need and all that they want, I think as a society we are longing for connection and realness. An intentional, down to earth item that was made with thought and love is the perfect way to celebrate this holiday season! 

Many of these DIY gifts can be made in bulk easily and affordably. Add a beautiful gift tag and pretty bow and you’ve definitely brought the holiday cheer any hostess would welcome! 

More Holiday Gift Ideas:

Hot Cocoa Mix:

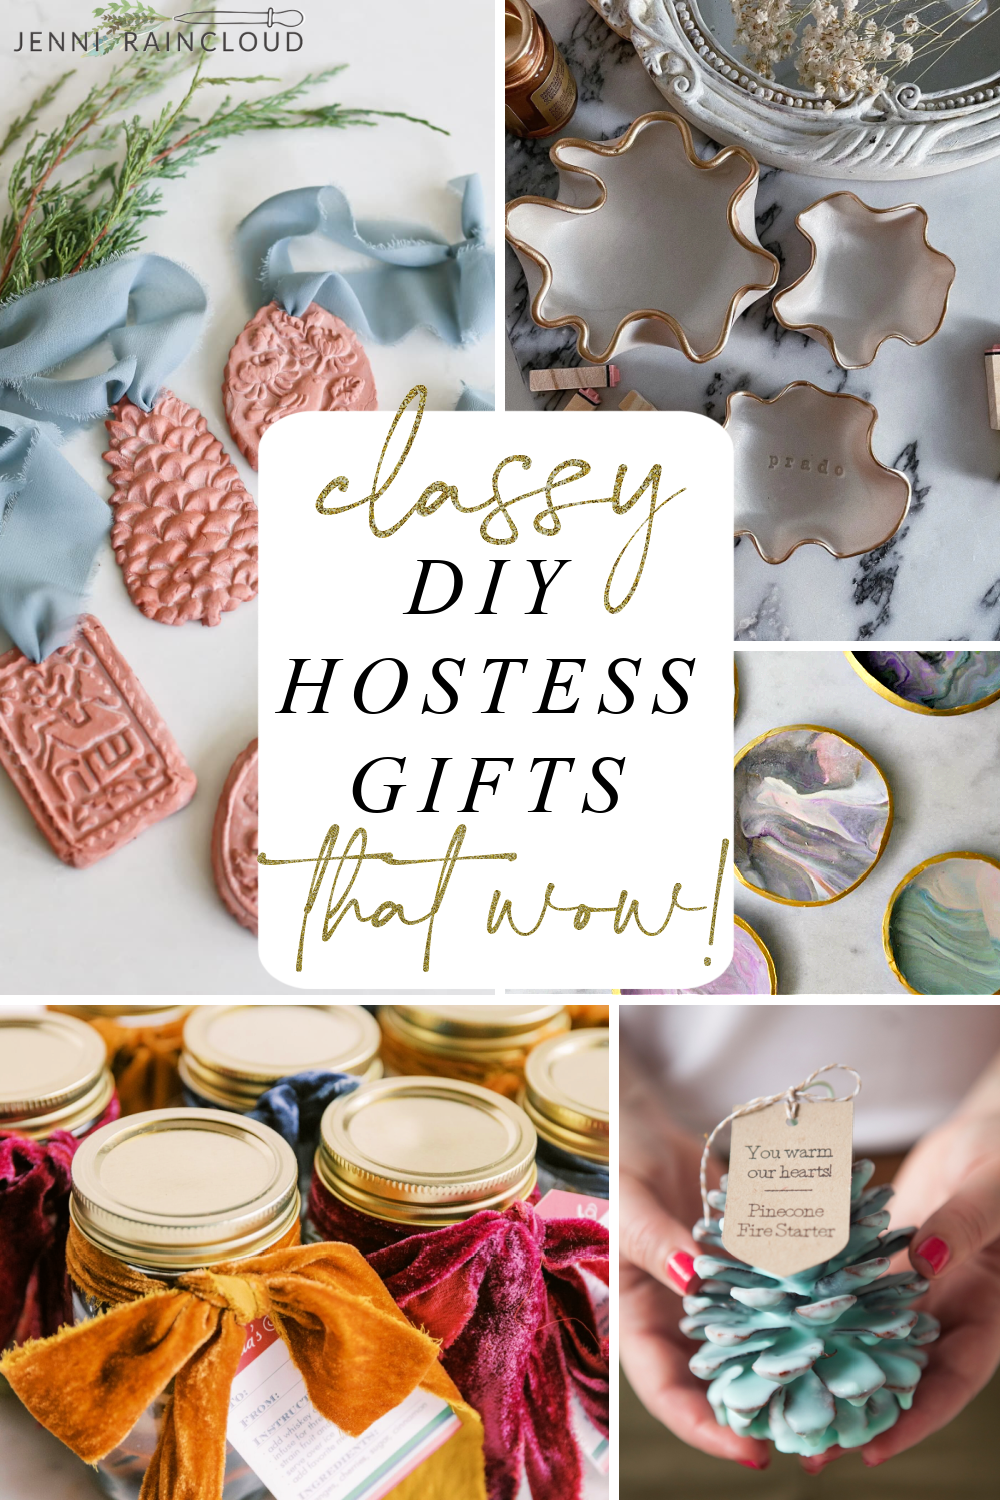
I posted my hot cocoa mix recipe last winter and it’s been an absolute hit. I made a HUGE amount and it’s now time to make a fresh batch for my home. It’s easy, affordable and cuts back on some nasty ingredients you’d find in many hot cocoa packets. My family has been using it all throughout the year and agreed it tastes better than store bought. While I didn’t post this as a gift idea, it’s a great gift idea! It can be made and sorted into 4 ounce glass jars. Add a little bottle of Bailey’s and marshmallows for an extra treat! Add a label and ribbon and you’ve got such a cute hostess gift! 

Find the recipe HERE. 

DIY Terrariums:

I love making terrariums and indoor succulent gardens. Even though it’s not summer, you can find succulents or terrarium friendly plants at a plant nursery. You can get creative and add your choice of rock and glass vessels are super chic yet affordable. I find mine at Hobby Lobby. 

Go HERE for more direction and ideas. 

Marbled Clay Trinket Dishes:

Making marbled clay dishes is one of my favorite DIYs. It’s so easy yet looks so high end! You can customize colors, choose to add a shiny top coat and even add a metallic rim if you choose! I chose clay that needs to be baked but you could also work with air dry clay. 

For the full tutorial, go HERE. 

Wavy Trinket Dishes w/ Stamped Last Name

Laura Jade Prado

These trinket dishes are so gorgeous and I love the idea of stamping someone’s name into the dish. Amazon has very affordable stamp kits. These dishes would be easy to make with the irregular waviness of the dishes. I love the gold edge as well! 

Go HERE for full tutorial. 

Firestarter Pinecones:

Something Turqouise

If you’re like me and live near pine trees, pinecones are everywhere and I’m always looking for fun DIYs to use them. This is an easy and unique way to give a cute gift. This tutorial comes with a downloadable label as well! Plus, you can use the remnants of old candles or buy soy on Amazon. You just need wicks! 

Get full fire starter pinecone tutorial HERE. 

DIY Simmer Pot Jars

Twelve On Main

I love to simmer cinnamon, cranberries, oranges, rosemary and lemons on the stove in the colder months. It’s a great way to create a cozy atmosphere and it smells amazing! It’s such a clever idea to add these items to a jar and give as a hostess gift! By dehydrating the citrus fruits in the oven, this makes a fantastic gift that the host can use whenever they are ready! 

For the full tutorial go HERE. 

DIY Cocktail Infusion Kits:

Pretty Together

Did you know you can infuse liquors like bourbon, whiskey, rum and vodka? Infused cocktails take your bartending prowess up about 20 notches! Adding items like dehydrated citrus, sugar, cinnamon or herbs to a jar for your host to add a specific liquor is such a great idea! This blog post even comes with printable tags making it so easy to throw these cocktail infusion kits together and give to all your friends this holiday season!

For instructions go HERE. 

DIY Terracotta Ornaments:

Tidbits & Company

These terracotta ornaments are just stunning. They stopped me dead in my tracks on Pinterest! Turns out they are made from molds (from Amazon) with a dusting of flour to create the look. Adding a beautiful bow makes them even prettier. What a special gift to give this holiday season! Plus, did you know you can use terracotta to diffuse essential oils? Just drop a few drops into the ornament and hang anywhere you’d like a special scent! 

For how to make terracotta ornaments, go HERE. 

Rosemary Infused Salt:

Boxwood Avenue

Rosemary infused salt is such an easy DIY but also an incredibly thoughtful gift that could easily be found in higher end stores like William Sonoma, Anthropologie or West Elm. Add a simple tag and you’ve got a creative and useful gift to give your host!! 

For the recipe go HERE. 

There you have it-the best hostess gifts for this holiday season all in one post! I hope you found some great options! Which is your favorite? Mine are the infused cocktail kits but I also love the hot cocoa mix as well! 

xx, Jenni

Sharing is caring!

Tags: , , , , ,
Best oLive
Privacy Overview

This website uses cookies so that we can provide you with the best user experience possible. Cookie information is stored in your browser and performs functions such as recognising you when you return to our website and helping our team to understand which sections of the website you find most interesting and useful.