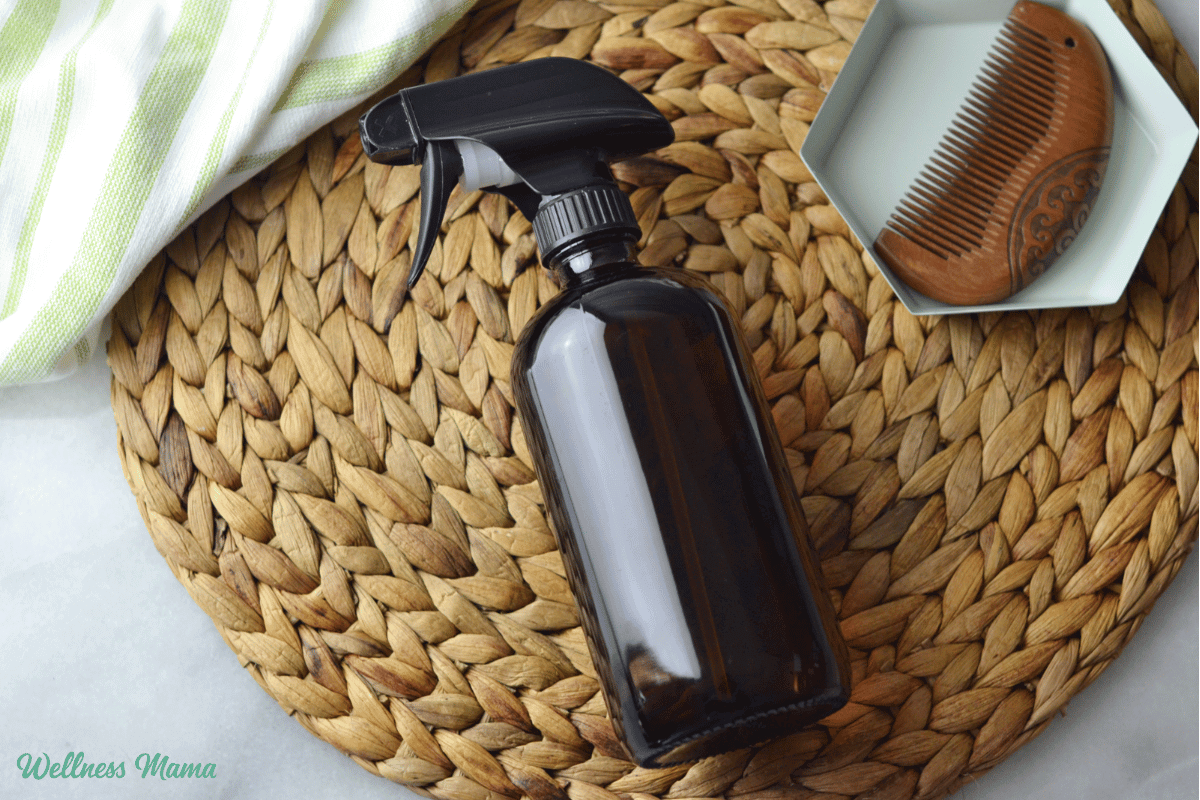
hair growth serum

DIY Hair Growth Serum (and What Really Helps Hair Grow)

When our body starts to feel overwhelmed by stress, illness, or shifting hormones one of the first places we can see it is our hair. Hormones affect nearly every aspect of health, and I’ve certainly seen the connection between hormones and hair growth firsthand.

After many years of pregnancy, nursing, and thyroid challenges, my body was tired. I remember standing at the bathroom mirror after years of elevated hormones from pregnancy and nursing. The postpartum hair loss finally hit… and boy did it ever.

I addressed the stress and hormone imbalance, and the hair loss slowed. But I still wanted something to help new hair grow more quickly and protect my scalp and hair. This homemade hair growth serum is the result.

Some women go to a dermatologist or beautician for hair concerns. I tend to go to my pantry. Like my homemade sea salt spray, this DIY hair serum for growth is affordable and uses nourishing ingredients to naturally support scalp health.

What Really Causes Hair Loss 

Hair loss rarely happens in isolation. It’s often a sign that something deeper is happening in the body. Common root causes include chronic stress, hormone shifts, thyroid imbalance, postpartum changes, nutrient deficiencies, and post-viral illness. When our body doesn’t have enough resources, it prioritizes keeping us alive. And hair doesn’t make the cut. 

Supporting hair growth starts from the inside. Prioritizing protein, iron, zinc, and B vitamins helps the body rebuild hair tissue. Managing stress through sleep, gentle movement, and nervous system support can also make a noticeable difference. For hormonal hair loss, balancing blood sugar and supporting thyroid and adrenal health can be helpful. 

While addressing the root cause is key, using products topically can also help. That’s where a scalp serum for hair growth can be beneficial.

Do Hair Growth Serums Actually Work?

The answer is, it depends. A serum won’t fix hormone imbalances or chronic stress on its own, but it can support scalp health and stimulate circulation, which helps hair follicles function better.

Treatments like minoxidil are widely used, and studies show they can sometimes work, but not without risks. There are plenty of natural ingredients that can work just as well or even better than the conventional options. Rosemary oil for one. One study showed it worked as well as minoxidil for certain types of hair loss. If you want a natural approach, a homemade serum is a gentle option.

So, what stimulates hair growth best? Healthy circulation, nutrients, lowering inflammation, and a healthy scalp all play a role. A serum can provide the support your scalp needs externally while lifestyle and nutrition address the issue from the inside.

Why Use a Hair Growth Serum?

A good hair serum for growth helps:

  • Stimulate circulation to the scalp
  • Nourish follicles with vitamins and minerals
  • Soothe irritation and dryness
  • Protect hair from environmental damage

Whether you’re looking for the best hair growth serum for women or a hair growth serum for men, the goal is the same: create a healthy scalp environment that supports regrowth.

Best Hair Serum for Hair Growth: DIY Recipe

This DIY serum combines herbs and essential oils traditionally used to support hair and scalp health. It’s gentle enough for regular use and water based so it doesn’t make hair feel really oily.

Key Ingredients in This Serum For Hair Growth

  • Nettle – Rich in iron and vitamins A, C, and K, along with potassium and magnesium. These nutrients are essential for healthy hair follicles. Helps stimulate hair growth and improve scalp health.
  • Horsetail – High in silica, a mineral that supports hair strength and elasticity. Silica is linked with thicker, shinier hair.
  • Aloe Vera Gel – Aloe vera gel naturally soothes the scalp. Its the base of the serum and helps reduce irritation and dryness. Aloe also provides lightweight hydration so it’s great for most hair types.

Essential Oils for Hair Growth

Not only do they smell good, but these essential oils help stimulate circulation and promote hair growth.

  • Rosemary oil is one of the most studied essential oils for hair growth. Some research suggests it may be comparable to minoxidil for certain types of hair loss.
  • Clary sage oil is traditionally used for hormonal balance and may be helpful for hormone-related hair loss. 
  • Lavender oil supports scalp health and has antimicrobial properties, which can help maintain a healthy scalp environment.

Together, these ingredients combine to create a powerhouse hair growth serum!

Hair Growth Serum Recipe

Help stimulate hair growth with this aloe vera, herb, and, essential oil recipe.

Prep Time5 minutes

Steeping Time15 minutes

Total Time20 minutes

Yield: 8 ounces

Author: Katie Wells

  • In a small pan, bring the distilled water to a boil.

  • Remove from the heat and add the dried nettle leaf and horsetail leaf.

  • Cover the pot and let the herbs sit in the water for at least 10 minutes or until the water cools.

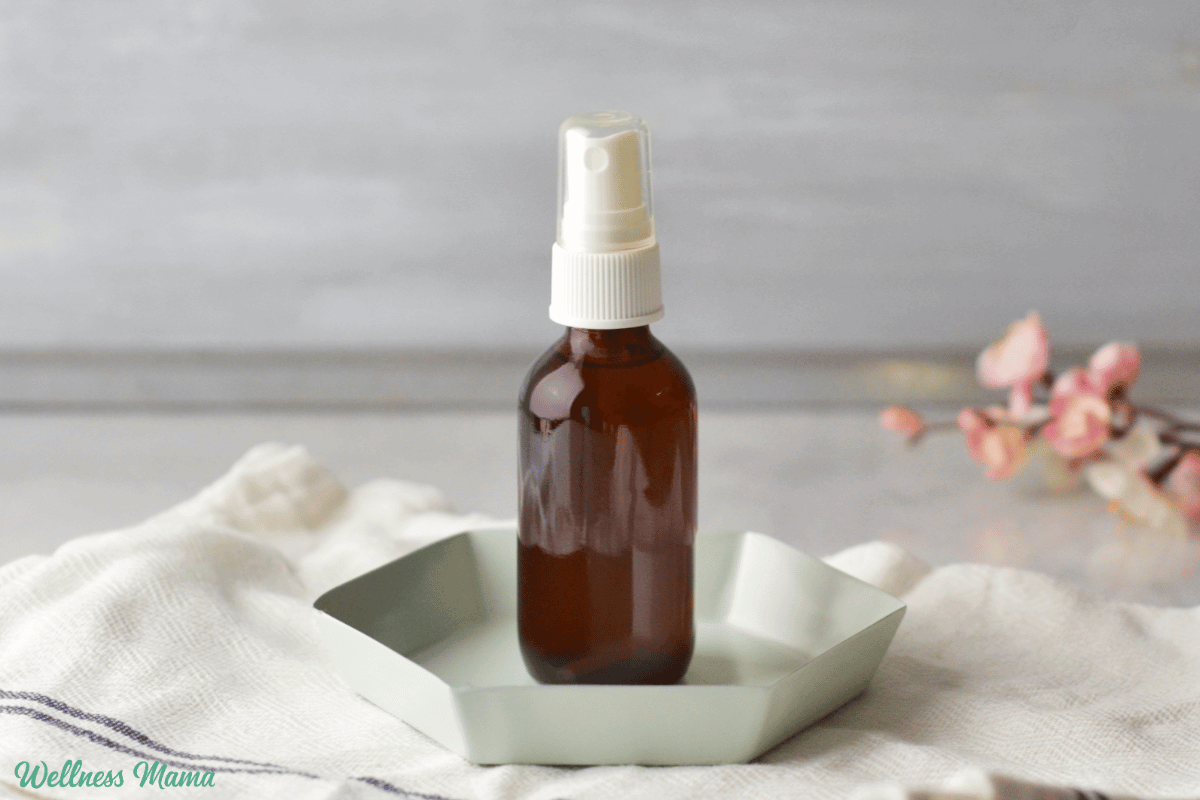
  • Strain the herbs out and pour the herbal tea into a spray bottle.

  • Add the aloe vera gel and essential oils and shake well.

  • Store in the refrigerator and shake well before use.

  • Spray liberally on hair roots once or more per day. I found that it was easiest and worked the best to spray on before bed each night.
  • This hair serum will last about 1 week if stored in the fridge. You can also freeze some if you want to make a bigger batch for later. 

How to Use Scalp Serum For Hair Growth

Apply a small amount of serum to the scalp and massage gently. Focus on your scalp and hair roots. Massage increases circulation, which helps deliver nutrients to follicles. I sprayed this scalp serum on every night before bed. You can use it on either wet or dry hair. 

What Is the Most Effective Hair Growth Serum?

The “most effective” serum depends on the cause of hair loss. Rosemary oil has emerging research and is a popular natural alternative. Herbal and essential oil–based serums, like this DIY recipe, work best as part of an overall approach that includes nutrition, stress management, and hormone support.

So, which hair serum can regrow hair? Regrowth actually depends on follicle health. A serum can support follicles that are dormant or weakened, but it’s much harder to revive inactive follicles. That’s why early intervention and addressing root causes are important.

Final Thoughts on Hair Growth Serum

Hair loss can feel discouraging, especially when it’s tied to postpartum changes, stress, or illness. While hair loss is common in life, we don’t have to take it lying down. It’s so important to address the root causes, but using a hair growth serum can also be really helpful in the meantime. 

I love this hair growth serum because it’s simple with nourishing ingredients and I noticed a definite difference from it. 

How do you support healthy hair? What products have you tried? Leave a comment and let us know!
Tags: , , , , ,
DIY Orange Peel Face Mask for Brighter, Healthier Skin

DIY Orange Peel Face Mask for Brighter, Healthier Skin

In the age of expensive skincare products and complicated beauty routines, sometimes the most effective solutions come straight from the kitchen. If your skin looks tired, uneven, or lacks its natural shine, a simple homemade remedy using orange peels might help restore freshness and radiance. Packed with nutrients and antioxidants, orange peel has long been used in traditional skincare for its brightening and cleansing properties.

Instead of throwing away leftover peels after enjoying an orange, you can transform them into an easy, four-ingredient face mask that helps nourish the skin and improve texture. This DIY treatment is affordable, chemical-free, and easy to prepare at home.

Why Orange Peel Works for Skin

Orange peel is rich in Vitamin C, which supports collagen production and helps brighten the complexion. It also contains natural fruit acids that gently exfoliate dead skin cells, revealing smoother and clearer skin underneath. Antioxidants present in the peel fight environmental damage caused by pollution and sun exposure.

Together, these benefits can help reduce dullness, even out skin tone, and give the skin a healthy, dewy appearance. When combined with other natural ingredients like milk, gram flour, and turmeric, the mask becomes even more nourishing.

Ingredients You’ll Need

This face mask requires only four easily available ingredients:

  • Half a small bowl of milk
  • One orange peel
  • One tablespoon gram flour (besan)
  • One tablespoon roasted turmeric

Each ingredient plays an important role. Milk moisturizes and softens skin, besan helps cleanse and tighten pores, and turmeric supports skin clarity while calming minor inflammation.

Step-by-Step Preparation

Making this mask is quick and simple.

First, place the milk and orange peel in a pan and boil them together for about 10 minutes on medium heat. This helps release the peel’s nutrients into the milk. Once cooled slightly, blend the mixture until it forms a smooth paste.

Next, add gram flour and roasted turmeric to the paste. Mix well until all ingredients are evenly combined. Your homemade face mask is now ready to use.

How to Apply for Best Results

Apply the mask evenly across your face and neck using clean fingers or a brush. Leave it on for about five to eight minutes, allowing the ingredients to work their magic. Once it begins to dry, rinse off gently with lukewarm water and pat your skin dry with a soft towel.

For noticeable results, use this mask twice a week. Always prepare it fresh to ensure maximum effectiveness and hygiene.

Who Should Avoid This Mask?

While this natural remedy suits many skin types, it may not be ideal for everyone. Orange peel contains citric acid, which has strong exfoliating properties. This can irritate sensitive or acne-prone skin.

If your skin is easily reactive or currently experiencing breakouts, it’s better to avoid using this mask. Even for normal skin, conducting a patch test beforehand is recommended. Apply a small amount to your wrist or behind the ear and wait 24 hours to check for any reaction.

Simple Skincare, Real Results

Natural skincare remedies continue to gain popularity because they are gentle, affordable, and easy to make at home. This orange peel face mask offers a refreshing alternative to store-bought products, helping you achieve brighter, healthier-looking skin without harsh chemicals.

With just a few pantry staples and a little time, glowing skin might be closer than you think.

Tags: , , , , , , ,
DIY rice flour face mask for glowing skin

DIY rice flour face mask for glowing skin

Rice flour is a simple kitchen ingredient that gently exfoliates, controls oil, and supports clearer skin. Ayurveda expert explains how to use it safely for a natural, healthy glow.

Natural skincare does not always need fancy products or long routines. Sometimes, the most effective solutions are already sitting in your kitchen. Rice flour is one such ingredient that has been used for centuries in Asian beauty rituals for maintaining smooth, clear, and glowing skin. Made from finely milled white or brown rice, it is gentle, affordable, and suitable for most skin types.

As per Ayurveda expert Dimple Jangda, rice flour works as a natural exfoliant. It removes dead skin cells while absorbing excess oil without stripping the skin of moisture. Backed by traditional use, rice flour can support brighter skin, better texture, and a balanced complexion when used correctly. Let us understand why this humble ingredient works and how to include it in your skincare routine.

What makes rice flour good for skin?

Rice flour has a mildly coarse texture that helps lift dead skin cells gently. A study published in the Advances in Social Science, Education, and Humanities Research Journal found that rice-based formulations can improve skin texture and support a more even tone. Jangda says its natural enzymes also help with dullness and mild pigmentation over time.

1. Controls excess oil without drying the skin

If you struggle with oily or acne-prone skin, rice flour can be helpful. It absorbs excess sebum and helps tighten enlarged pores, making the skin feel fresh and balanced. Unlike harsh cleansers, it does not damage the skin barrier, which is important for preventing breakouts.

2. Soothes sensitive and irritated skin

Rice flour has natural anti-inflammatory properties that help calm redness and irritation. This makes it suitable for sensitive skin when used in mild combinations like yoghurt or honey. Jangda often recommends it as a gentler alternative to chemical exfoliants.

This DIY face mask can help you get rid of dull skin. Picture Courtesy: Adobe Stock

3. Helps protect against early ageing

Rice flour contains antioxidants such as vitamin E, which help fight free radicals caused by pollution and sun exposure. These antioxidants support skin elasticity and reduce the appearance of fine lines, giving skin a healthier, more youthful look with regular use.

How to use rice flour for skin?

1. For gentle exfoliation: Mix 2 tbsp rice flour with 1 tbsp honey. Massage gently on the face, leave for 10–15 minutes, and rinse with cool water.

2. For sensitive skin: Mix 2 tbsp rice flour with 1 tbsp plain yoghurt. Apply evenly, leave for 10 minutes, then wash off.

3. For oily skin: Combine 2 tbsp rice flour, 2 tbsp multani mitti, and rose water to form a paste. Leave on for 5–10 minutes and rinse.

4. For natural glow: Mix 2 tbsp rice flour with a pinch of turmeric and milk or yoghurt. Apply, leave for 10–15 minutes, and wash off.

5. For dry skin: Mix 1 tbsp rice flour with 1 tbsp honey and ¼ mashed avocado. Apply, leave for 10–15 minutes, then rinse.

You may also like

Jangda highlights that consistency and gentle application matter more than overuse. Always do a patch test, and pair topical care with healthy habits for best results.

Tags: , , , , , ,
Homestead Blog Hop - Homestead tips, ideas, animal care, and recipes every Wednesday

Homestead Blog Hop 582 – DIY Lights, Vases, and Garlands

Welcome to Homestead Blog Hop, a weekly gathering for homesteaders and simple living enthusiasts to share DIY projects, from-scratch recipes, and creative inspiration. This week’s hop features cozy homesteading tips, along with practical ideas that celebrate handmade living and self-sufficiency.

Whether you’re looking for seasonal crafts, homemade treats, or encouragement on your homesteading journey, you’ll find plenty of inspiration to carry into the new year. Grab a cup of tea, explore the featured posts, and join us in sharing your own homestead creations.

Meet Your Homesteading Hosts

We’re Kelly from Simple Life Mom, Liz from The Cape Coop, Natasha from Houseful of Nicholes, and Laurie from Ridgehaven Homestead. Together, we’re passionate about from-scratch living, simple ingredients, frugal habits, and intentional homesteading. We’re delighted to host the Homestead Blog Hop, where you can find fresh inspiration each week for DIY projects, homemade recipes, and practical simple living ideas.

Follow Us for More Homestead Inspiration

Natasha – Houseful of Nicholes
Facebook | Pinterest | X | Instagram

Laurie – Ridge Haven Homestead
Facebook | Pinterest | Instagram

Liz – The Cape Coop
Facebook | Pinterest | X | Instagram

Kelly – Simple Life Mom
Facebook | Pinterest | X | Instagram

FEATURED POSTS from the Last Homestead Blog Hop

Each week, we take turns selecting three featured posts from the Homestead Blog Hop. These features are shared across all of our social media platforms, helping spotlight the creativity and hard work of our fellow homesteaders. Here are the featured posts from last week’s hop:

1. Upcycled Painted Glass Jar to Shimmery Flower Light Display from Steph Creates Things

2. How To Make a Vintage Linens Garland from Petticoat Junktion

3. How to Make DIY Crackle Glass Vase from Sonata Home Design

Congrats! Feel free to grab the featured on button for your post.

Just right click and ‘save image as…‘

Guidelines for the Homestead Blog Hop

  1. Click the “Add Your Link” button below and upload a clear, eye-catching image from your project or recipe. Please link directly to the family-friendly post itself, not your blog’s homepage.
  2. You may link up up to three posts each week.
  3. Take time to visit a few other blogs in the hop and leave a thoughtful comment to let them know you stopped by. Community support makes this hop special!
  4. Please include a link back to the Homestead Blog Hop in your post. Posts without a backlink are not eligible to be featured. All featured posts are shared across all hosts’ social media channels.
  5. Share posts that haven’t been linked to the hop before. Older posts are welcome as long as they are new to the hop.
  6. By joining the Homestead Blog Hop, you grant the hosts permission to use one image from your post, with a link back to your site, if your post is selected as a feature next week.
  7. This is a family-friendly link-up designed to encourage, inspire, and support the homesteader in all of us.

Let the Party Begin!

Which project are you excited to try this week? Leave a comment below.

Join Our Homestead Blog Hop Pinterest Board

Follow all of your hosts on Pinterest and send a message if you’d like to be added to our Homestead Blog Hop group board. This board is a great place to share your DIY projects, crafts, and from-scratch recipes with the homesteading community.

Guideline: Only pin posts that you’ve linked up to the Homestead Blog Hop.

Tags: , , , , , ,
Homestead Blog Hop - Homestead tips, ideas, animal care, and recipes every Wednesday

Homestead Blog Hop 581- DIY, Crafts & From-Scratch Recipes

Welcome to Homestead Blog Hop, a weekly gathering for homesteaders and simple living enthusiasts to share DIY projects, from-scratch recipes, and creative inspiration. This week’s hop features cozy homesteading tips, along with practical ideas that celebrate handmade living and self-sufficiency.

Whether you’re looking for seasonal crafts, homemade treats, or encouragement on your homesteading journey, you’ll find plenty of inspiration to carry into the new year. Grab a cup of tea, explore the featured posts, and join us in sharing your own homestead creations.

Meet Your Homesteading Hosts

We’re Kelly from Simple Life Mom, Liz from The Cape Coop, Natasha from Houseful of Nicholes, and Laurie from Ridgehaven Homestead. Together, we’re passionate about from-scratch living, simple ingredients, frugal habits, and intentional homesteading. We’re delighted to host the Homestead Blog Hop, where you can find fresh inspiration each week for DIY projects, homemade recipes, and practical simple living ideas.

Follow Us for More Homestead Inspiration

Natasha – Houseful of Nicholes
Facebook | Pinterest | X | Instagram

Laurie – Ridge Haven Homestead
Facebook | Pinterest | Instagram

Liz – The Cape Coop
Facebook | Pinterest | X | Instagram

Kelly – Simple Life Mom
Facebook | Pinterest | X | Instagram

FEATURED POSTS from the Last Homestead Blog Hop

Each week, we take turns selecting three featured posts from the Homestead Blog Hop. These features are shared across all of our social media platforms, helping spotlight the creativity and hard work of our fellow homesteaders. Here are the featured posts from last week’s hop:

1. What Makes a Homestead Real (Even When It’s Tiny) from The Once and Future Homestead

2. Lemon Chicken and Rice from Recipe Ideas Shop

3. How to create a vision board and manifest the life you want from Our Tiny Nest

Congrats! Feel free to grab the featured on button for your post.

Just right click and ‘save image as…‘

Guidelines for the Homestead Blog Hop

  1. Click the “Add Your Link” button below and upload a clear, eye-catching image from your project or recipe. Please link directly to the family-friendly post itself, not your blog’s homepage.
  2. You may link up up to three posts each week.
  3. Take time to visit a few other blogs in the hop and leave a thoughtful comment to let them know you stopped by. Community support makes this hop special!
  4. Please include a link back to the Homestead Blog Hop in your post. Posts without a backlink are not eligible to be featured. All featured posts are shared across all hosts’ social media channels.
  5. Share posts that haven’t been linked to the hop before. Older posts are welcome as long as they are new to the hop.
  6. By joining the Homestead Blog Hop, you grant the hosts permission to use one image from your post, with a link back to your site, if your post is selected as a feature next week.
  7. This is a family-friendly link-up designed to encourage, inspire, and support the homesteader in all of us.

Let the Party Begin!

Which project are you excited to try this week? Leave a comment below.

Join Our Homestead Blog Hop Pinterest Board

Follow all of your hosts on Pinterest and send a message if you’d like to be added to our Homestead Blog Hop group board. This board is a great place to share your DIY projects, crafts, and from-scratch recipes with the homesteading community.

Guideline: Only pin posts that you’ve linked up to the Homestead Blog Hop.

Tags: , , , , , ,
herbal throat spray

DIY Herbal Throat Spray Recipe

Once upon a very terrible time, all my kids got a stomach bug at the same time… while I was gone. We don’t get sick often, but it was terrible and I wasn’t on hand to use all of our natural remedies.

Thankfully, that was the first and last stomach bug they’ve all gotten at once. However, at least one child gets a stuffy nose or cough sometime during the winter. Or I dust my closet and get a cough/congestion/nasal drip for a few days.

In those cases, I like to have this herbal throat spray on hand. It’s great for sore throat, cough or congestion.

Herbal Throat Spray Ingredients

This herbal throat spray is essentially a strong herbal tincture mixed with raw honey. The herbs provide both immediate relief and longer-lasting benefits for beating illness. You can use many different immune boosting and throat soothing herbs, but I prefer the following:

  • Echinacea root – Naturally antimicrobial and anti-inflammatory. Eases sore throat and cough and supports the immune system. Helps soothe throat pain and is great for strep throat or tonsillitis in a tea or throat spray. 
  • Ginger – Warming and stimulates circulation. Its antimicrobial and helps thin mucus and get it out of the body. Helps ease inflammation, pain, and muscle spasms. Ginger also stimulates white blood cells, helps prevent viruses from attaching to cells, and destroys viruses. 
  • Marshmallow root – A soothing demulcent herb that coats and soothes inflamed, dry, or damaged tissues. Reduces inflammation, supports white blood cells, and is an expectorant. 
  • Elderberry – Traditionally used for throat inflammation and may help reduce swelling in the mouth and throat. It also supports better drainage, less nasal congestion, and is an expectorant. It’s especially great for cough and congestion from viral infections. 
  • Thyme – Not just for Italian food! Thyme herb is excellent at breaking up stuck congestion and mucus in the lungs and getting it out. It’s antimicrobial, anti-inflammatory, and helps with better breathing. 
  • Peppermint – This adds a refreshing flavor and is warming and stimulating when used internally. It’s antimicrobial and helps fight a variety of viral, bacterial, and fungal infections. 
  • Cayenne – Cayenne is warming, stimulating, and boosts circulation to improve healing. It’s been traditionally used for sore throats, coughs, and illness prevention. It does add a spicy kick though, so reduce or skip if preferred. 

You don’t need every single herb on this list to make an herbal throat spray. If you don’t have some of them on hand, then just use more of the ones you do. I make an herbal tincture with the herbs and then mix with raw honey for a strong spray. When it’s made this way the herbal throat spray will last for months in the refrigerator.

Premade Herbal Throat Spray

Don’t feel like making it or don’t have the herbs you need? I also like this pre-made herbal throat spray that includes echinacea and propolis. This propolis throat spray is also a family favorite. 

Herbal Throat Spray Tincture

To make the tincture, I combine 1 tablespoon each of these dried herbs: Echinacea, Ginger, Marshmallow Root, Elderberry, Thyme and Mint and 1 teaspoon of dried cayenne pepper (optional) in a pint-size mason jar.

Fill the rest of the jar with a strong food-grade liquor like rum or vodka (must be at least 80-proof alcohol). Put on an airtight lid and let it sit for at least two weeks or up to eight weeks (the longer it sits the stronger it will be). Store in a cool dark place. I make this once a year and have enough to last at least the year.

Here’s my full tutorial on making herbal tinctures if you’re new to herbal remedies.

If you get a cough, sore throat or cold this winter, try this herbal throat spray to get some relief and feel better soon! Here’s how to make the standard tincture version.


DIY Herbal Throat Spray Recipe

Prep Time5 minutes

Active Time5 minutes

Steeping Time14 days

Total Time14 days 10 minutes

Author: Katie Wells

  • Add the herbs to a pint-size Mason jar.

  • Pour alcohol over the herbs, leaving a ½ inch headspace.

  • Cap tightly with the lid and let the tincture steep for 2-4 weeks, shaking occasionally.

  • Once the tincture is done, strain out the herbs and reserve the liquid.

  • For every 6 Tablespoons of tincture add 2 Tablespoons of raw honey.

  • Shake well to combine and store in the fridge for up to 6 months.

  • I pour some into a small spray bottle for easy use as needed.

You don’t have to use every single herb on the list. If you want/need to omit some of the herbs, just replace them with more of the others. 
 

Two Hour Herbal Throat Spray Tincture

If you want to use the full herbal mixture and don’t have weeks to sit around waiting for the tincture, you can make a two-hour version with this method:

  1. Combine 1 teaspoon of all of the herbs (2 Tablespoons total) in a pint size glass jar.
  2. Pour enough boiling water on them to just cover the herbs with water.
  3. Let steep for 20 minutes until the water cools.
  4. Strain out the herbs and mix with equal parts of 80-proof or higher liquor. I use rum or vodka.
  5. For every 3 parts of herbal liquid, add 1 part of honey. 

This version should last for a few weeks in the fridge. 

More Throat Spray Variations

If you prefer not to make a tincture with alcohol, you can make a glycerite with vegetable glycerin instead. Glycerites aren’t as potent and generally don’t extract the herbal properties as well as alcohol. It will still be helpful though and you’ll just need to use a little more of the spray on the throat. 

You can also make a strong herbal tea and mix with honey. This won’t last nearly as long and should be used within a week. 

 Do you ever get a sore throat or cough? What remedies do you use?

Tags: , , , ,
DIY Christmas Gifts

140+ Homemade & DIY Christmas Gifts

I love Christmas morning… homemade cinnamon rolls, family, and giving thoughtful gifts. It’s so easy to let the commercialism of the Christmas season take over. Over the years though, I’ve found that the simple things are often the most meaningful. Store-bought gifts certainly have their place, but homemade gift ideas are usually budget-friendly and a great way to give a customized gift.

Our family focuses more on giving experiences than material gifts, but I still find DIY gifts a good option. There are so many great gift options for DIY homemade gifts. Below you’ll find lots of handmade gift ideas and suggestions for some simple gift baskets. Whether it’s under the Christmas tree or as a stocking stuffer, handmade Christmas gifts are an easy way to love on your friends and family.

Why Make DIY Christmas Gifts?

Modern society is flooded with stuff everywhere. We’ve been told that piles of toys, jewelry, and other goodies from Santa make the holidays. Thoughtful gifts, like easy DIY projects, not only save money but are a simple way to make Christmas more special.

And if you don’t have time for homemade gifts, it’s nothing to beat yourself up over. Spending quality time with loved ones is the important thing. If you’re looking for some last-minute gifts to buy, then check out my gift-giving guide for the whole family. I’ve also got a ton of great ideas for in my gift guide for her in this post.

I’ve divided some of the homemade Christmas gift ideas by type of person (grandparents, kids, men, etc.), so you can easily find something for everyone on your list. There’s a lot of crossover though, and some DIY projects in one category may be perfect for someone else on your list.

Don’t forget the gift wrapping! You can decorate plain paper gift bags. Have the kids help with some markers and stickers (if it’s for a grandparent). And if you’re really feeling crafty, make your own reusable fabric gift bags to use year after year.

DIY Christmas Decorations

While you’re making some homemade gifts, why not make your own Christmas decorations too? This DIY garland is made from natural materials like pine, cranberries, and dried oranges. Or try this tutorial for a burlap garland with ribbon and twine. I’ve also made some of these burlap wreaths to decorate our front door. For a table decoration, how about these naturally scented cinnamon pine cones?

And we can’t forget the Christmas cards! When my kids were little they’d wear matching outfits for our Christmas photo for annual Christmas cards. If you’re a crafter then some homemade Christmas cards or gift tags are also a nice touch.

Now onto the DIY Christmas gift ideas!

DIY Christmas Gift Ideas For Men

Treat your man with holiday gifts he’ll love, from food gifts to homemade body care. The perfect gift doesn’t have to be crazy expensive or complicated. Whether it’s for grandpa, dad, or your significant other, these easy DIY Christmas gifts are just the thing.

DIY Christmas Gifts for Grandparents

Many of these Christmas crafts are simple enough for the kids to make for grandma and grandpa. There are also some DIY beauty recipes that are great for mature or drier skin types.

DIY Christmas Gifts for Women

Your child’s teacher, your mom, your best friend… here are gifts that women will enjoy this holiday season. While you’re at it, don’t forget to make some extra for yourself!

DIY Christmas Gifts for Kids

It depends on your child’s age and gender, but in general, here are some fun DIY gifts for the kids. The little items also make great stocking stuffer ideas!

Gifts for a Healthy Home

Edible Christmas Gift Ideas

Instead of sugar-filled candy canes and drink mixes, gift your loved ones some homemade food items. Who wouldn’t want a cute hand-packed box of homemade truffles?

Gift Basket Ideas

Gift baskets are great for family members, co-workers, or friends. They’re simple enough to put together but look impressive. Be sure to choose a cute basket or tote for your assorted items and arrange them as desired! Browse through the categories above for options to put in your customized gift basket, or choose from the ideas below.

Herbal Teas Basket

Give an assortment of homemade herbal tea blends with a glass teapot. You could even throw in some organic tea towels.

Gardener’s Gift Basket

Have a gardener in your life? Or maybe some kids who are interested in playing in the dirt? Gift them a gardening basket with everything they need. Add in some organic seeds (maybe saved from last year’s garden!), gardener’s hand salve, and some bug repellent lotion bars.

Spa Gift Basket

Create your own spa experience with a DIY spa gift basket. There are tons of ideas above for what to put in it. I like adding some bulkier items like sugar scrubs, lotions, and foot scrubs to help fill the basket out.

Natural Baby Basket

Mom-to-be or New Mom Basket

What are some of your favorite gifts to make or that you’ve received over the years? Let us know below!

Tags: , , ,
DIY Gift Box Soap | Hello Glow

DIY Gift Box Soap | Hello Glow

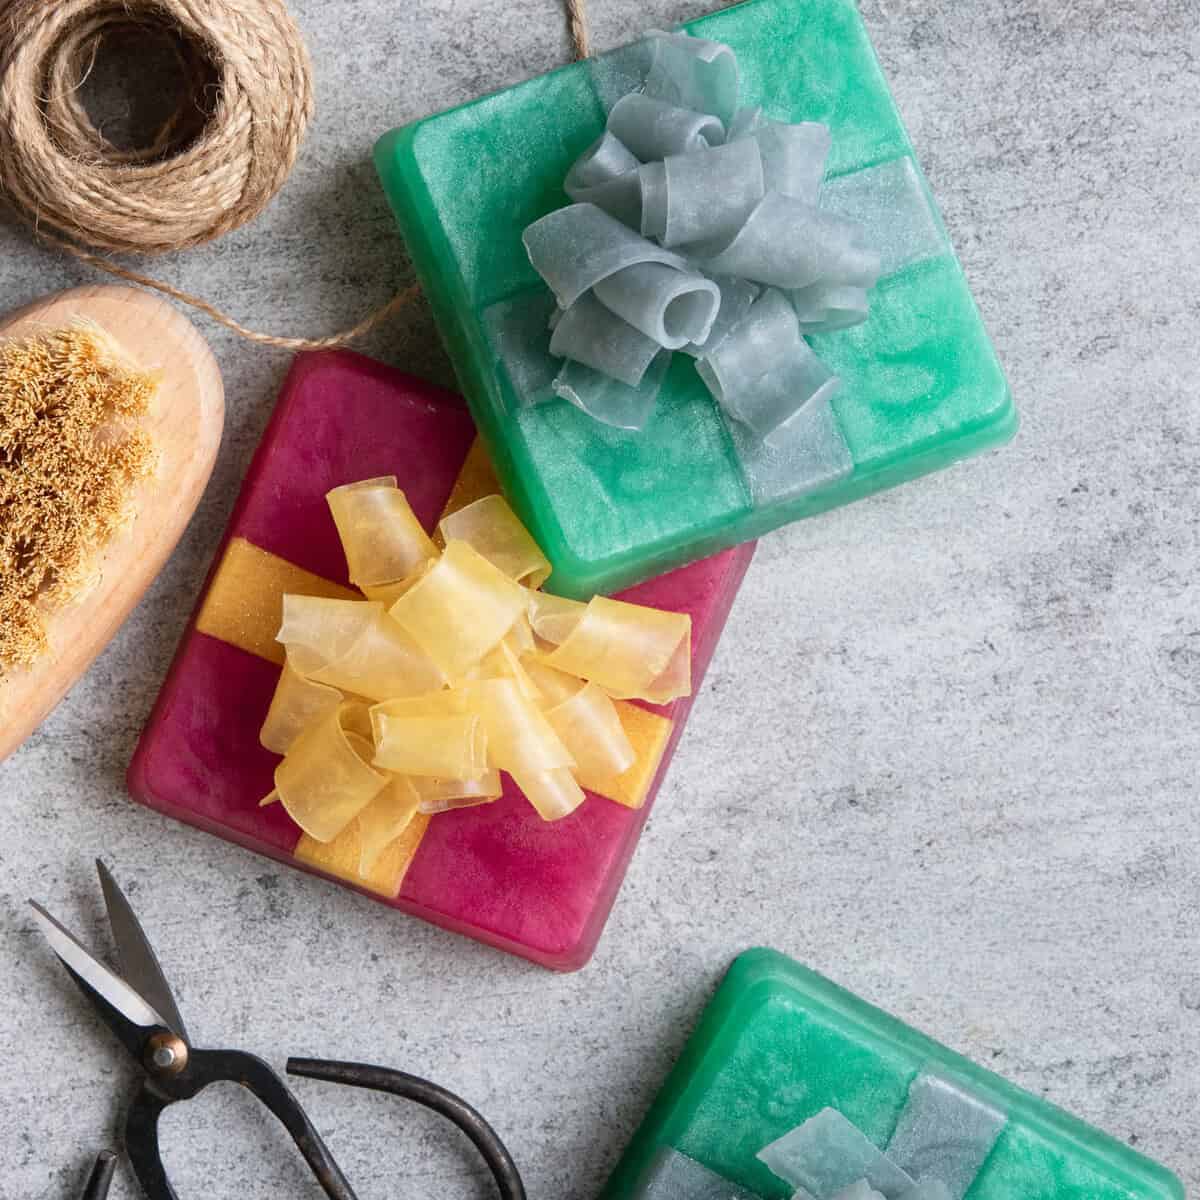
There’s something so satisfying about giving handmade gifts during the holidays, and these DIY gift box soaps are my new favorites to make. They look like tiny wrapped presents, complete with a “bow” made from soap curls on top. Not to mention, they’re adorable, they smell amazing, and they’re super easy to whip up, even if you’re not the “crafty” type.

The best part? These soaps are basically just melt and pour base and mica, which makes them totally beginner-friendly and inexpensive (say it with me: we’re keeping the holidays simple this year).

You don’t need any fancy equipment or special skills, just a few supplies and a bit of patience. The soap curls on top are what really make them stand out, and once you get the hang of it (this post will help!), you can customize them with different colors and scents to match your holiday theme.

  • Clear melt and pour soap base — I like using clear base because it gives you a translucent, glassy look that lets you see the colors and glitter inside.
  • Mica — A non-toxic colorant, mica is safe for skin and blends really well into melt and pour soap base. It also creates a swirly, marble-like effect as the soap cools. I used purple-red and a dark turquoise for mine.
  • Glitter — While not totally necessary, glitter adds extra shimmer to your soap curls so they look like fancy ribbons. I used mica-based glitter rather than traditional plastic glitter because I thought it would less scratchy and it wouldn’t pollute our waterways once it goes down the drain. 
  • Essential oils — Cinnamon, clove, pine, cedarwood, sweet orange, peppermint or vanilla essential oils make for perfect holiday scents, but you can use any fragrance that makes you happy.
  • Spray bottle with rubbing alcohol — Spritz this on freshly poured soap to get rid of air bubbles and between layers to help everything stick together.
  • Vegetable peeler — It’s the easiest tool for getting those thin, ribbon-like curls. If you don’t have a vegetable peeler, check out this post [insert link for to How to Make Curls post] for different methods you can use to make your curls. 
  • Square silicone mold — You’ll need square single-cavity soap molds to create the gift box shape.
  • Heat-proof measuring cup — A glass measuring cup with a pour spout makes melting and pouring your soap a lot easier.
  • Large microwave-safe bowl — This is handy if you’re melting a bigger batch of soap or if you need extra room to mix in your mica and fragrance.
  • Kitchen thermometer — It’s important to know how hot your soap is when working in layers. I recommend keeping the soap aroun 140 F to prevent it from melting the ribbons or curls.

Instructions

Step 1: Make the Ribbons

Start by melting clear soap base and adding gold mica to create one thin square of soap for cutting into ribbon strips, plus one thicker block that you’ll use later when peeling the curls.

Step 1: Cut Soap

Cut 3 ounces of clear soap base into 1-inch cubes and place them in a microwave-safe measuring cup.

Step 2: Melt & Add Glitter

Melt the soap in the microwave in 30-second bursts, stir after each. When melted, add the glitter and stir again.

Step 3: Pour Soap

Pour about 0.5 ounce of soap into one of the mold compartments. This thin square will make the ribbon strips. Pour the rest of the soap into another mold compartment to make a thicker block for the curls you’ll make later.

Step 4: Remove Bubbles

Spritz everything with rubbing alcohol to get rid of surface bubbles, then let the soap harden completely.

Step 5: Cut Ribbon Strips

Once everything is set, cut the thin square into four strips.

Step 6: Add Ribbon to Soap Mold

Take 2 of the strips and place one on top of the other to make a plus sign. Trim off the part where they overlap in the middle so they’ll lay flat in the mold (don’t worry, the seam will get covered up by soap curls).

Step 2: Make the Boxes

The soap “boxes” require two separate pours, which helps keep the ribbons in place and prevents them from floating around.

Step 1: Melt + Color Soap

Melt 4 ounces of clear soap base in the microwave. Stir in your mica color and add essential oil.

Step 2: Cover Ribbons

Let the soap cool to about 140 degrees F. Press the ribbon strips firmly into the bottom of your mold so they stay put, then pour just enough soap to cover them.

Step 3: Remove Bubbles + Cool

Spritz with alcohol and let cool. Once that first layer has cooled, spray with alcohol again.

Step 4: Fill Soap Mold

Pour in the remaining soap to fill the rest of the mold. You might need to heat it again to remelt it. Spritz one more time, then let it cool completely.

Step 3: Attach the Soap Curls

Use a vegetable peeler to shave thin curls from the thick gold block you made earlier and stack them on top of your gift box to create a clustered ribbon effect.

Step 1: Shave Soap

Take the thick gold square you set aside earlier and use a vegetable peeler to shave off thin ribbons of soap.

Step 2: Curl Soap

If they don’t naturally curl on their own, roll them with your fingers to create the curled ribbon shape.

Step 3: Attach Curls

Melt about 1 ounce of clear soap in a shallow glass or bowl. Dip the corner of one curl into the melted soap and place it on top of the gift box. Keep stacking curls until you’ve built a little cluster that looks like a bow.

You can also pour clear melted soap base over the curl cluster or dip the curl cluster in melted soap to create a protective shell over it and help the curls hold their shape.

Substitutions

  • Clear melt and pour base — You don’t have to use clear soap if you don’t want to. You can swap it for white, goat milk, shea butter, or aloe bases depending on the look you’re going for. Each one will give you a slightly different finish and feel.
  • Soap curls — You don’t need to make fresh curls every time. Any leftover soap scraps can be shaved with a peeler and turned into curls. You can also use premade embeds if you want to save time.
  • Vegetable peeler — Use a paring knife or a cheese planer instead. They’ll give you slightly different curl shapes, but they both work.
  • Kitchen thermometer — Just rely on visual cues (or a finger, if you’re brave). If the soap is warm but not steaming, and it hasn’t formed a skin on top yet, you’re good to go.
  • Rubbing alcohol spray — Gently tap the mold on the counter to release bubbles. It’s not as effective as alcohol, but it works in a pinch.

Top Tip

Prep all your curls and tools before you start making the boxes. Melt and pour soap cools fast and forms a thin film on top pretty quickly, so this project moves at warp speed once you get going.

Storage

Once your DIY gift box soaps are finished, wrap each one individually in plastic wrap to keep humidity out and prevent the colorant from smudging or bleeding. Store them in a cool, dry cupboard away from direct light. Light can fade the colors over time, especially if you used brighter micas.

For long-term storage, place the wrapped soaps in an airtight container (preferably with silica packets to keep sweating to a minimum). 

If you’re planning to gift them later and notice the soap has developed condensation, just unwrap it and polish the surface with a soft cloth before wrapping it back up.

FAQ

Can I use cold process soap instead?

Not for this specific project. Cold process soap behaves differently, and the curls won’t work the same way. Melt and pour is really the best option here.

How long do these soaps last?

They’ll last up to a year when wrapped and stored correctly. Just keep them away from heat and humidity.

Do I have to add fragrance?

No, fragrance is totally optional. If you’d rather keep your soaps unscented, that’s perfectly fine.

Print

]]>]]>

DIY Melt and Pour Gift Box Soaps

These festive gift box soaps look like tiny wrapped presents, complete with overlapping gold ribbons and soap curl bows on top. And since they’re made with melt and pour soap, they make perfect last-minute holiday gifts.

Prep Time1 hour

Cooling Time4 hours

Total Time5 hours

Course: Bath and Body Soap

Keyword: DIY, holiday gifts, soap

Yield: 2 soaps

Author: Stephanie Pollard

Cost: $10

Instructions

Step 1: Make the Ribbons

  • Cut 3 ounces of clear soap base into 1-inch cubes and place them in a measuring cup.

  • Melt the soap in the microwave, then stir in the glitter until it’s fully mixed.

  • Pour about 0.5 ounces of soap into one of the mold compartments. Pour the rest of the soap into another mold compartment to make a thicker block.

  • Spritz everything with rubbing alcohol to get rid of surface bubbles, then let the soap harden completely.

  • Take the thin square and cut it into 4 strips.

  • Take 2 of the strips and place one on top of the other to make a plus sign. Trim off the part where they overlap in the middle so they’ll lay flat in the mold (don’t worry, the seam will get covered up by soap curls).

Step 2: Make the Boxes

  • Melt 4 ounces of clear soap base in the microwave. Stir in your mica color and add essential oil if you’re using it.

  • Let the soap cool to about 140 degrees F. Press the ribbon strips firmly into the bottom of your mold so they stay put, then pour just enough soap over them to cover.

  • Spritz with alcohol and let cool.

  • Once that first layer has cooled, spray it with alcohol again and fill the rest of the cavity with soap. Spritz one more time, then let it cool completely.

Step 3: Make Soap Curls

  • Take the thick gold square you set aside earlier and use a vegetable peeler to shave off thin ribbons of soap.

  • Use your fingers to roll the soap into curls.

  • Melt about 1 ounce of clear soap in a shallow glass or bowl. Dip the corner of one curl into the melted soap and place it on top of the gift box. Keep stacking curls until you’ve built a little cluster that looks like a bow.

Notes

Pour clear melted soap base over the curl cluster or dip the curl cluster in melted soap to create a protective shell over it and help the curls hold their shape.

0

Tags: , , , ,
dark nails with glitter

Thanksgiving Nails: Easy DIY Ideas to Celebrate in Style

The holiday season is right around the corner, and what better way to show your festive spirit than with Thanksgiving-inspired nails? 

Professional nail art looks amazing but you can get in the holiday mood with DIY manicure. Here are easy DIY Thanksgiving nail ideas to celebrate in style.

]]>Jump to:

1. Fall-Inspired Base Colors

The perfect Thanksgiving manicure starts with colors that capture the season’s warmth. 

The usual burgundies and deep reds are getting an upgrade this season. Instead of going for the same old wine-colored polish, try a deep berry shade with gold shimmer mixed in. It catches the light beautifully and adds something special to an otherwise basic manicure. 

Dark forest greens are also having a moment. They’re moody enough for fall but still totally wearable for work or weekends.

For something different, try a deep navy blue. It’s unexpected for fall but works perfectly with autumn clothes and gives a sophisticated edge to any outfit. 

The best part? These colors look great in any finish: glossy, matte, or somewhere in between.

How to Achieve Basic Fall Manicure

Step 1: Clean nails with polish remover and buff gently

Step 2: Apply a quality base coat to protect your nails

Step 3: Select your fall shade (try mixing burnt orange and copper)

Step 4: Paint 2-3 thin coats, waiting 2 minutes between each

Step 5: Add a shimmery top coat for extra shine

Step 6: For accent nails, add gold details or glitter

This classic look is perfect for those who want seasonal style without the fuss. The best part? It pairs perfectly with everything from cozy sweaters to fancy Thanksgiving dinner outfits.

2. Simple Leaf Design

Fall leaves are the perfect way to celebrate the season without being too obvious. This design looks impressive but uses basic techniques anyone can handle. The secret is not aiming for perfection because real leaves aren’t perfect either.

How to Create Fall Leaves

Step 1: Choose a fall-colored base (burgundy works great)

Step 2: Make three small dots in a triangle shape

Step 3: Use a thin brush to connect the dots

Step 4: Add a simple stem at the bottom

Step 5: Dot some gold polish for extra sparkle

Step 6: Lock in your design with top coat.

These delicate leaves bring a touch of nature to your manicure while keeping things elegant. They’re subtle enough for work but festive enough for holiday celebrations.

Want something easier? Try a gradient of fall colors across your nails, going from deep red to orange to yellow. It mimics the way leaves change color and looks way more complicated than it actually is. 

You can also do a simple accent nail with a leaf design while keeping the rest of your nails solid.

3. Easy Plaid Pattern

Plaid screams cozy fall vibes and this nail version is easier than you’d think. The trick is focusing on one or two accent nails rather than trying to plaid everything. Trust me, your sanity will thank you later.

How to Create a Plaid Design

Step 1: Paint a light neutral base color

Step 2: Apply thin striping tape in parallel lines

Step 3: Paint over with your chosen fall shade

Step 4: Remove the tape while the polish is still wet

Step 5: Repeat the process with crossing lines

Step 6: Finish with a thick top coat.

This design looks complex but takes less than 30 minutes to create. It’s perfect for those who want to make a statement without spending hours on their nails.

4. Seasonal Squash

Now that you’ve mastered plaid, take it up a notch to create a simple pattern for pumpkins and squash. Perfect for celebrating the season’s bounty!

5. Copper Shimmer

This season’s glitter isn’t about looking like a disco ball. Instead, try polishes with fine shimmer that gives depth to fall colors. 

A brown polish with copper shimmer or a grey with silver sparkles adds interest without going overboard. 

These subtle sparkles work especially well in office settings where you want to keep things professional but still fun.

For weekends, you can go a bit bolder with metallic accents. Try painting just the tips of your nails with gold or copper polish, or add a thin metallic stripe down the center of each nail.

6. Pumpkin Spice and Everything Nice

Pumpkins are not just for your coffee anymore. Orange is having a real moment in nail art but forget about bright Halloween orange. 

Look for burnt orange, terra cotta, and copper shades that feel sophisticated. These colors work especially well with matte top coats, which give them a velvet-like finish.

For a cute but not cutesy pumpkin design, paint tiny white pumpkin silhouettes on one or two nails while keeping the others in solid fall shades. Or try a gradient from orange to white for a candy corn effect that’s subtle enough for grown-ups.

7. Acorn Accents

Take a basic nude colored manicure up a notch with simple acorn shapes. Dot on black and white polish on the nail bed of an accent nail with black French tips.

8. Modern French Tips

The French manicure is back but with autumnal twists. Instead of white tips, try gold or copper. Or go for an ombre effect where the tip gradually fades into the base color. 

This works beautifully with fall shades like burgundy fading into nude, or dark green fading into a lighter sage.

Another option is to do the tips in different fall colors on each nail, keeping the base neutral. This gives you the chance to wear all your favorite autumn shades at once without looking too busy.

9. Quick and Easy Options

Not everyone has time for complicated designs. A solid color in any fall shade looks perfectly seasonal and takes minutes to apply. 

Dark purple, burgundy, or forest green are foolproof choices that go with everything in your fall wardrobe.

If you want something a little extra but still simple, try adding a single thin stripe of gold down the center of each nail, or just on the ring finger as an accent. It takes barely any extra time but makes your manicure look much more intentional.

Essential Tips for Success

Getting your Thanksgiving nail art right comes down to a few key practices that make all the difference in your final look.

Tip 1: Proper Nail Prep

Clean your nails thoroughly with polish remover and gently buff the surface. Push back your cuticles and trim any hangnails. 

A smooth, clean canvas makes your design look more professional and helps it last longer. Apply a base coat and let it dry completely before starting your design.

Tip 2: Quality Tools Matter

Invest in a few basic tools like thin brushes, dotting tools, and striping tape. Good quality brushes make precise lines easier while dotting tools create perfect circles every time. 

Clean your tools after each use to prevent polish buildup and keep them working like new.

Tip 3: Work in Good Lighting

Natural daylight or a bright desk lamp helps you spot mistakes and ensure even application. Poor lighting can make you miss spots or apply polish unevenly. 

Position your workspace near a window or use a good LED lamp to see what you’re doing clearly.

Tip 4: Take Your Time

Rushing leads to smudges and mistakes. Allow each layer to dry completely before adding the next element. 

If you’re creating detailed designs, practice on paper first to get comfortable with the motion. It’s better to spend extra time doing it right than to rush and start over.

Tip 5: Master the Clean-Up

Keep a small angled brush and acetone handy for tidying edges. Dip the brush in acetone and carefully clean around your cuticles after applying polish. 

This simple step makes your manicure look salon-perfect. For detailed designs, use a cotton swab to fix small mistakes before they dry.

Tip 6: Seal Your Design

Apply your top coat carefully to avoid smearing designs. Start with a thin layer, then add a thicker one once the first is dry. 

Make sure to cap the free edge of your nails to prevent chipping. Also, try reapplying top coat every few days to extend the life of your manicure.

Ready for the Holiday Table?

These nail designs are perfect for showing your holiday spirit while staying practical enough for all your Thanksgiving preparations. So have fun with it, experiment with different combinations, and most importantly, wear your design with confidence.

2

Tags: , , , , , ,
Best oLive
Privacy Overview

This website uses cookies so that we can provide you with the best user experience possible. Cookie information is stored in your browser and performs functions such as recognising you when you return to our website and helping our team to understand which sections of the website you find most interesting and useful.