Homestead Blog Hop - Homestead tips, ideas, animal care, and recipes every Wednesday

Homestead Blog Hop 605 – Raising Backyard Hens, plus Recipes

Welcome to Homestead Blog Hop, a weekly gathering for homesteaders and simple living enthusiasts to share DIY projects, from-scratch recipes, and creative inspiration. This week’s hop features cozy homesteading tips, along with practical ideas that celebrate handmade living and self-sufficiency.

Whether you’re looking for seasonal crafts, homemade treats, or encouragement on your homesteading journey, you’ll find plenty of inspiration to carry into the new year. Grab a cup of tea, explore the featured posts, and join us in sharing your own homestead creations.

Meet Your Homesteading Hosts

We’re Kelly from Simple Life Mom, Liz from The Cape Coop, Natasha from Houseful of Nicholes, and Laurie from Ridgehaven Homestead. Together, we’re passionate about from-scratch living, simple ingredients, frugal habits, and intentional homesteading. We’re delighted to host the Homestead Blog Hop, where you can find fresh inspiration each week for DIY projects, homemade recipes, and practical simple living ideas.

Follow Us for More Homestead Inspiration

Natasha – Houseful of Nicholes
Facebook | Pinterest | X | Instagram

Laurie – Ridge Haven Homestead
Facebook | Pinterest | Instagram

Liz – The Cape Coop
Facebook | Pinterest | X | Instagram

Kelly – Simple Life Mom
Facebook | Pinterest | X | Instagram

FEATURED POSTS from the Last Homestead Blog Hop

Each week, we take turns selecting three featured posts from the Homestead Blog Hop. These features are shared across all of our social media platforms, helping spotlight the creativity and hard work of our fellow homesteaders. Here are the featured posts from last week’s hop:

1. Vintage Linen Tissue Pouch from Air Fryer Fanatics

2. Red White and Blue Pinwheels from Organized Island

3. Raising Backyard Hens 101–Getting Back to Basics Part 1 from Two Chicks and a Mom

Congrats! Feel free to grab the featured on button for your post.

Just right click and ‘save image as…‘

Guidelines for the Homestead Blog Hop

  1. Click the “Add Your Link” button below and upload a clear, eye-catching image from your project or recipe. Please link directly to the family-friendly post itself, not your blog’s homepage.
  2. You may link up up to three posts each week.
  3. Take time to visit a few other blogs in the hop and leave a thoughtful comment to let them know you stopped by. Community support makes this hop special!
  4. Please include a link back to the Homestead Blog Hop in your post. Posts without a backlink are not eligible to be featured. All featured posts are shared across all hosts’ social media channels.
  5. Share posts that haven’t been linked to the hop before. Older posts are welcome as long as they are new to the hop.
  6. By joining the Homestead Blog Hop, you grant the hosts permission to use one image from your post, with a link back to your site, if your post is selected as a feature next week.
  7. This is a family-friendly link-up designed to encourage, inspire, and support the homesteader in all of us.

Let the Party Begin!

Which project are you excited to try this week? Leave a comment below.

Join Our Homestead Blog Hop Pinterest Board

Follow all of your hosts on Pinterest and send a message if you’d like to be added to our Homestead Blog Hop group board. This board is a great place to share your DIY projects, crafts, and from-scratch recipes with the homesteading community.

Guideline: Only pin posts that you’ve linked up to the Homestead Blog Hop.

Tags: , , , , , ,
5 Anti-Ageing Habits That Go Beyond Serums and Creams

5 Anti-Ageing Habits That Go Beyond Serums and Creams

According to Dr Shifa Yadav, Consultant, Dermatology, Artemis Hospitals, “Anti-ageing is often linked with expensive serums, creams and cosmetic treatments. Healthy ageing really starts from within. Of course, skincare products may help improve the look of skin. How we eat, sleep, move and manage stress has a far greater impact on how we age than any cream we put on the surface. Developing healthy daily habits can help you keep your skin youthful, your muscles strong, your mind sharp, and your overall well-being for years to come.”

5 Anti-Ageing Habits That Go Beyond Serums and Creams

Prioritise Quality Sleep

Sleep is one of the most potent anti-ageing tools. While you sleep, your body mends damaged cells, creates collagen, and recharges your energy. Sleep deprivation can cause dull skin, dark circles, wrinkles and increased stress hormones that speed up the ageing process. Adults should try for 7-9 hours of quality sleep each night for good health and healthy ageing.

Eat for Longevity

A diet high in fruits, vegetables, whole grains, nuts, and lean proteins provides nutrients that help protect cells from damage. Berries, spinach, tomatoes and green tea are all antioxidant-rich foods that help fight free radicals that contribute to premature ageing. Drinking enough water is critical for the skin to be elastic and for the body to be able to process things.

Stay Physically Active

Exercise does more than keep the body fit. It aids blood circulation, builds muscles and bones, raises energy levels and aids the health of the heart. Physical activity also triggers the release of hormones that help repair tissue and reduce inflammation. Even a daily 30-minute walk can bring huge anti-ageing benefits.

Stress Management

Long-term stress can accelerate the ageing process by promoting inflammation and interfering with hormone balance. It can also cause bad sleep and unhealthy lifestyle choices. Practising mindfulness, meditation, and deep breathing and spending time in nature can all help to reduce stress and improve emotional well-being.

Protect Your Skin Naturally

While there are benefits to skincare products, simple habits such as wearing sunscreen daily, not smoking, limiting alcohol intake and protecting the skin from excessive sun exposure can prevent premature wrinkles and pigmentation. Such preventative measures often have more long-term benefits than expensive treatment.

Anti-ageing isn’t about looking younger overnight. It is about establishing good habits that will pay off for your body and mind over time. The real foundations of ageing gracefully and staying vital at every stage of life are quality sleep, proper nutrition, regular exercise, stress management, skin protection and mental engagement.

Image credits: Freepik

For more such stories, stay tuned to HerZindagi.

Tags: , , ,
rice krispie treats recipe

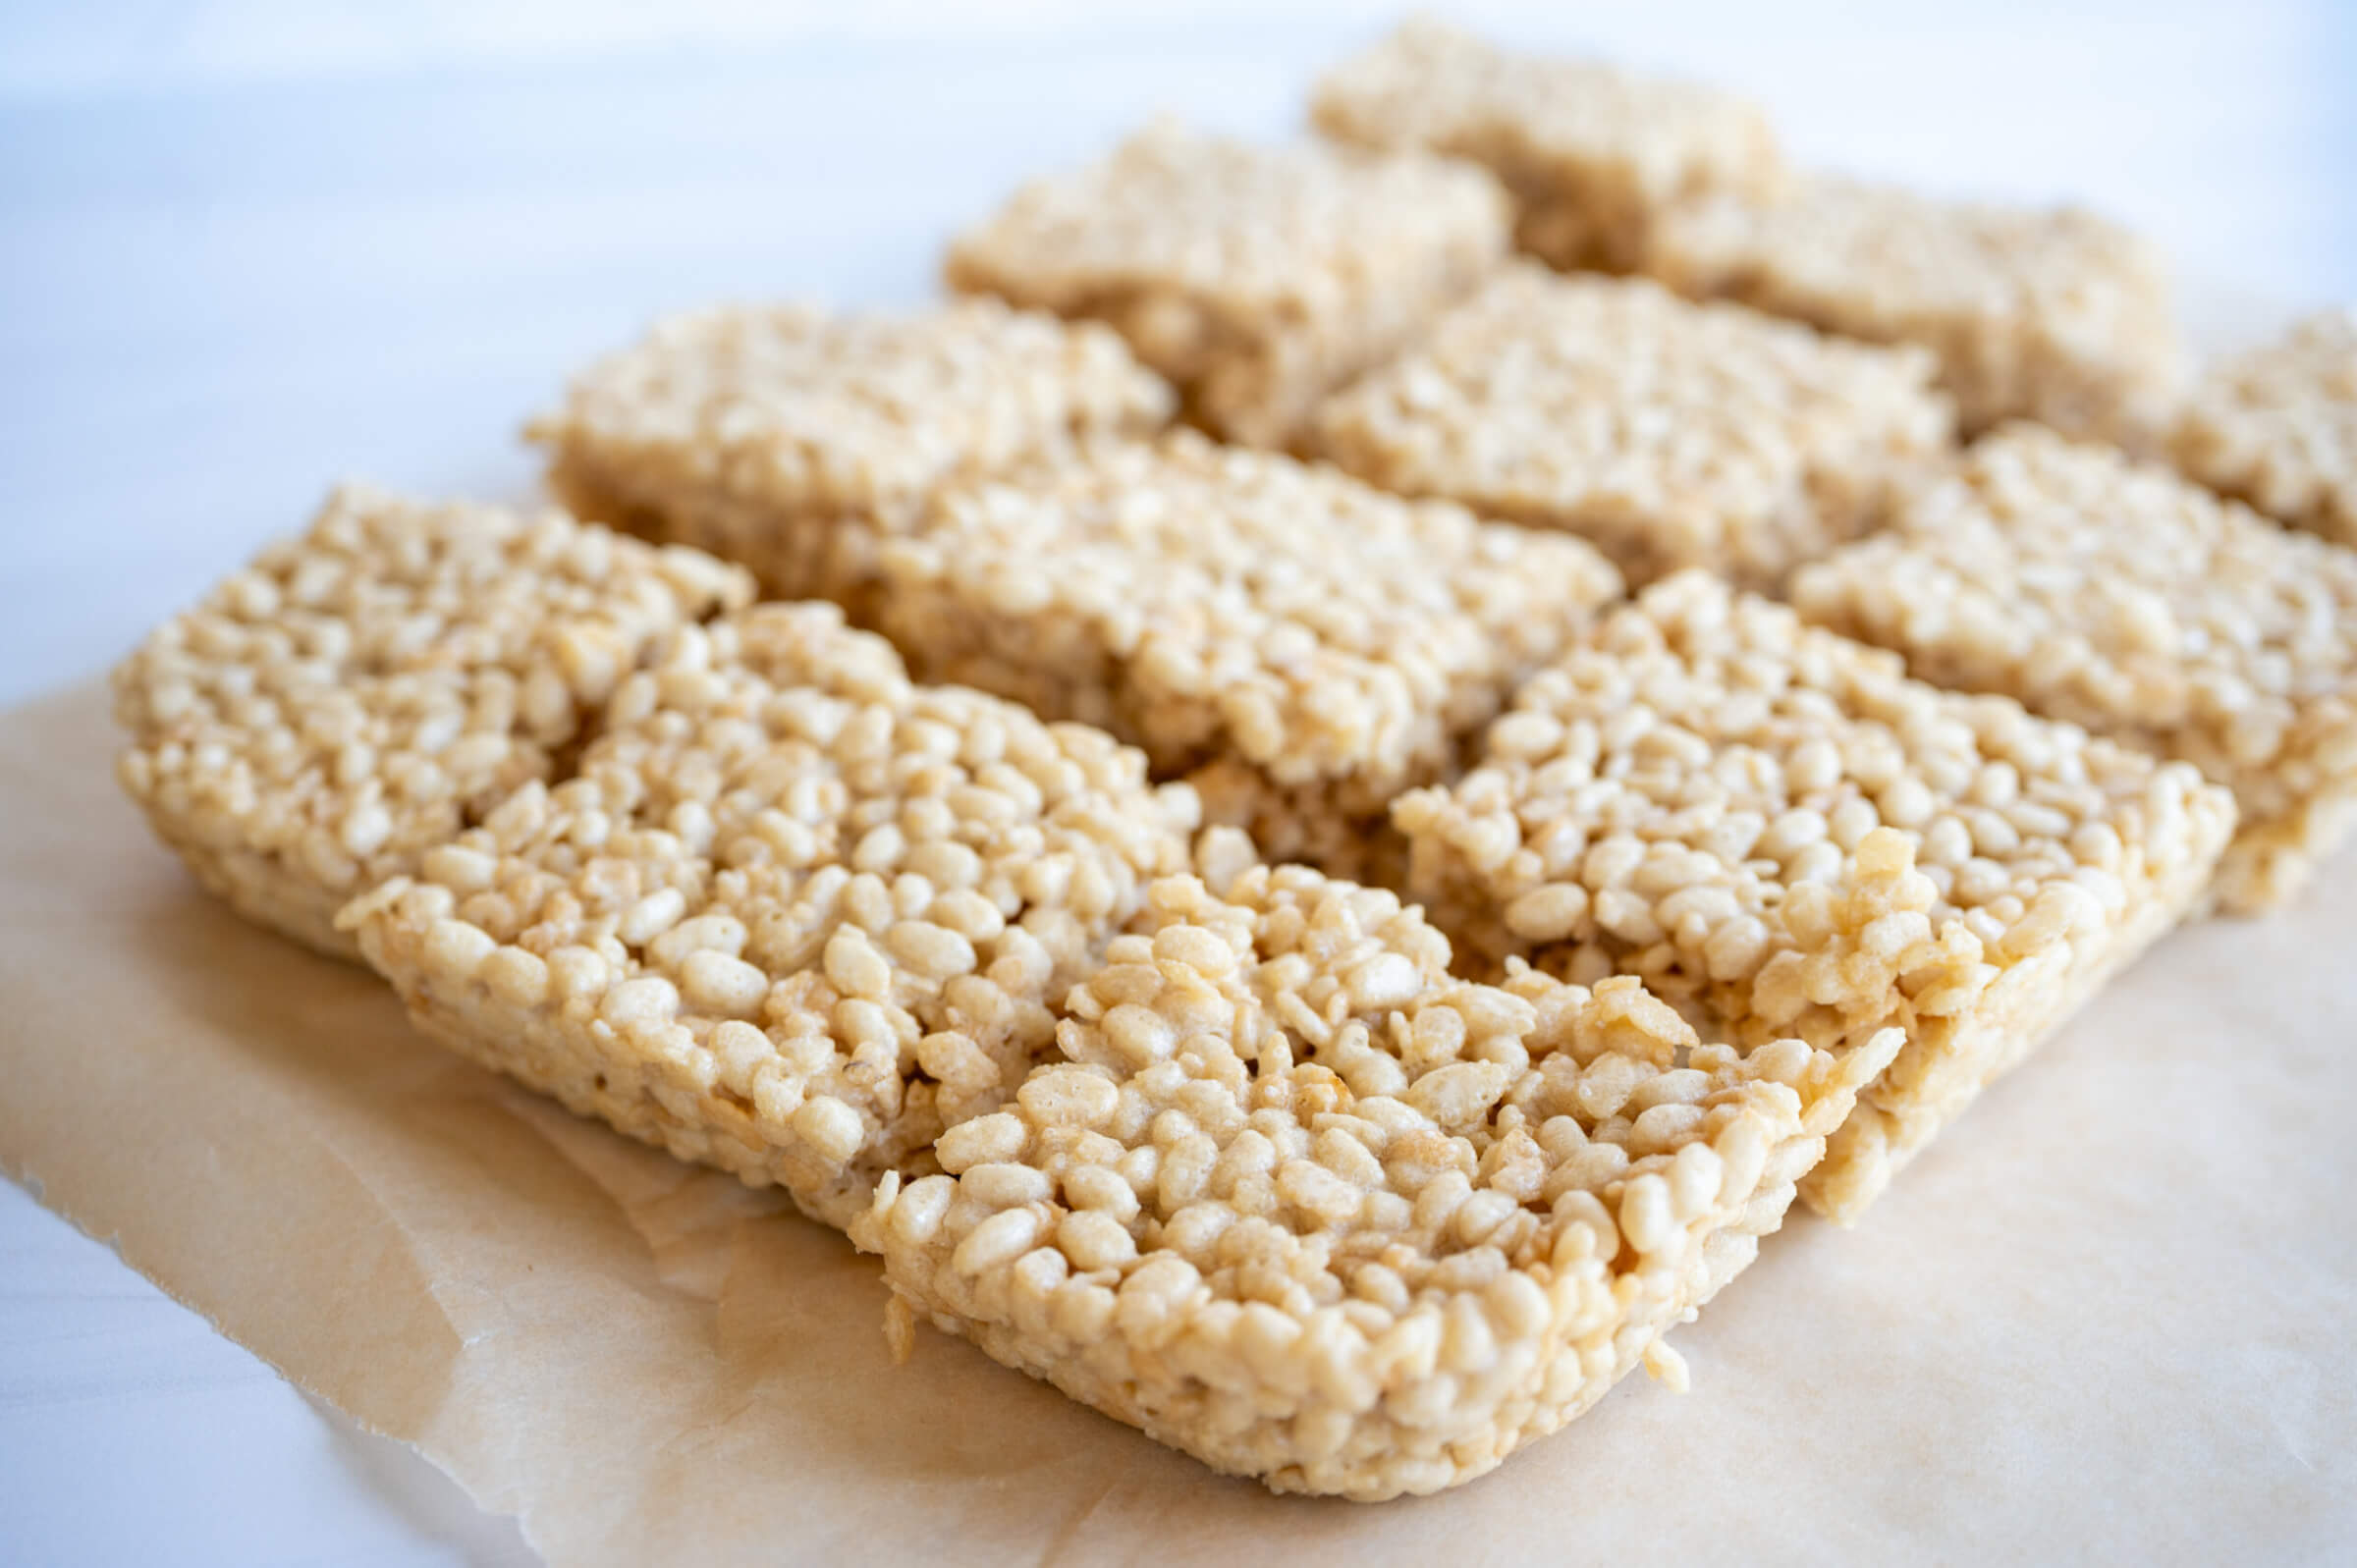
Rice Krispie Treats Recipe (With Homemade Marshmallow)

There’s something just so nostalgic about biting into a gooey Rice Krispie treat. And while I remember them from my childhood, they’re not something that I’ve had in many years. Until now that is. This homemade, healthy Rice Krispie treat recipe is a new favorite in our house. 

The Rice Krispie treats from the store are usually a little hard and not so fresh tasting. You’ll find ingredients like corn syrup, GMO soybean oil, artificial flavors, and acetylated monoglycerides… whatever that is. And many of the homemade Rice Krispies treats, while they taste good, aren’t much healthier. 

An Upgraded Rice Krispies Treat Recipe 

One of the questions I get all the time is how to use my homemade marshmallows recipe to make Rice Krispie treats. And honestly that’s not something I’d ever tried. For years my family avoided grains as I was in a healing phase. Now that grains are back in my diet on occasion, that means I’ve been experimenting with more grain-based recipes. 

Of course, this doesn’t mean I’m eating glyphosate covered, artificially fortified white flour all the time. It’s about balance, but I still choose healthier options when I can. So for this recipe that means the name brand (or store brand) rice crispy cereal is out. Instead I used sprouted brown rice cereal. 

Yes, it’s still cereal and not as nutritious as a grass-fed steak, but I’m ok with it for the occasional treat. Sprouted grains are easier for our body to digest. This cereal is organic, non-GMO, and sweetened with just a touch of coconut sugar. I’ve linked to the kind I used in the recipe below, but you can also use organic rice cereal from your local store if that’s all they have. 

Homemade Marshmallows

My marshmallow recipe base is sweetened with honey instead of sugar. They feature gut healthy, grass-fed gelatin and real marshmallow root for more gut soothing benefits. I’ve experimented over the years with variations like elderberry, matcha, and even hibiscus rose marshmallows. 

The marshmallow portion of the Rice Krispie treats recipe is very similar, but you don’t have to press them into a pan and let them set first. After whipping up the marshmallow mixture, simply add it to melted butter and stir in the cereal. 

Homemade Rice Krispie Treat Variations

The kids and I love this recipe as is. In fact, the first time I made a batch the kids devoured them within minutes! However, you can also add some ingredients if you want a different flavor. 

Try sprinkling some flaky sea salt on the top for a salty, sweet treat. Or drizzle the top with melted dark chocolate (and then sprinkle with salt!). Sometimes I’ll gently press mini chocolate chips onto the top before they’ve really hardened. Work quickly with this one though or you’ll just end up with melted chocolate all over your hand! I haven’t tried it here, but some people like adding ¼ cup of creamy peanut butter when stirring in the marshmallows to the butter. 

For another depth of flavor, try browning the butter first before adding the marshmallows. It gives it a caramel-like taste! I give more details on how to brown butter in this pistachio chocolate chunk cookie recipe. 

Here’s how to make healthier, naturally sweetened rice treats with homemade marshmallow!

Rice Krispie Treats Recipe (With Homemade Marshmallow)

This healthier, naturally sweetened version of rice krispie treats is a kid (and parent!) favorite.

Homemade Marshmallow Base

  • Line a 9×13-inch baking dish with parchment paper and set aside.

  • Pour ½ cup of the cold water into the bowl of a stand mixer. Sprinkle the gelatin evenly over the water and let it sit while you prepare the honey syrup.

  • In a small saucepan, combine the remaining ½ cup of water, honey, and sea salt.

  • Bring the mixture to a gentle boil over medium heat. Simmer for 7-8 minutes, until slightly thickened.

  • Turn the mixer on low speed. Carefully and slowrly pour the hot honey syrup into the gelatin mixture.

  • Gradually increase the mixer speed to high. Whip for 8-10 minutes, until thick, glossy, fluffy, and marshmallow-like. Add the vanilla extract during the last minute of mixing.

  • While the marshmallow is whipping, melt the butter in a large pot over low heat.

  • Add the whipped marshmallow mixture to the melted butter and stir until combined.

  • Fold in the crispy rice cereal until evenly coated.

  • Transfer the mixture to the prepared baking dish. Using lightly buttered hands or a piece of parchment paper, gently press into an even layer.

  • Sprinkle with flaky sea salt if desired. Let cool for about 30 minutes before slicing into squares and serving.

Nutrition Facts

Rice Krispie Treats Recipe (With Homemade Marshmallow)

Amount Per Serving (1 square)

Calories 135
Calories from Fat 27

% Daily Value*

Fat 3g5%

Saturated Fat 2g13%

Trans Fat 0.1g

Polyunsaturated Fat 0.2g

Monounsaturated Fat 1g

Cholesterol 8mg3%

Sodium 118mg5%

Potassium 26mg1%

Carbohydrates 26g9%

Fiber 0.1g0%

Sugar 18g20%

Protein 2g4%

Vitamin A 786IU16%

Vitamin C 7mg8%

Calcium 4mg0%

Iron 3mg17%

* Percent Daily Values are based on a 2000 calorie diet.

  • The optional flaky sea salt turns this into an amazing salty sweet treat. 
  • Try drizzling the top with some melted dark chocolate for a more decadent dessert.

How to Store Homemade Rice Krispie Treats

Homemade Rice Krispie treats store best at room temperature. Keep them in an airtight container and enjoy within 4-5 days. However, if your house is like mine, they won’t last long!

What are your favorite Rice Krispie treat flavors? Ever made them before? Leave a comment and share below!

Tags: , , , , ,
5 Exercises To Try At Home

5 Exercises To Try At Home

Show Quick Read

Key points generated by AI, verified by newsroom

  • TV star Gauri Pradhan suggests face yoga for natural beauty.
  • Exercising facial muscles improves tone, reduces wrinkles, and fine lines.
  • Specific exercises include Fish Face, The Poser, and Brow Line Eraser.
  • Consistency with face yoga enhances overall self-care routines.

Expensive skincare products, salon services and complex cosmetic regimens are frequently linked to radiant skin But according to TV star Gauri Pradhan, one of the best beauty techniques doesn’t involve expensive products or specialized tools. After more than 20 years in front of the camera, the Kyunki Saas Bhi Kabhi Bahu Thi star recently disclosed that face yoga has been an important component of her beauty regimen. The actress claims that maintaining a naturally lifted and renewed appearance can be achieved by routinely exercising the facial muscles.

According to Gauri, there are around fifty muscles in the face, neck and lips many of which are hardly used. In order to improve facial tone, promote circulation and lessen the appearance of typical issues including smile lines, forehead wrinkles, droopy eyelids and double chins, face yoga focuses on engaging these muscles through specific movements. 

ALSO READ |Trying To Lose Belly Fat? Experts Say You’re Probably Focusing On The Wrong Exercise

5 Face Yoga Exercises Shared By Gauri Pradhan

  • Fish Face: Gauri suggests beginning with the Fish Face exercise, which involves making a fish-like look by sucking the cheeks inward. Hold the pose for around 30 seconds, then progressively extend it as your facial muscles get stronger. It is said that the activity will lessen the appearance of smile wrinkles and help clarify face contours.
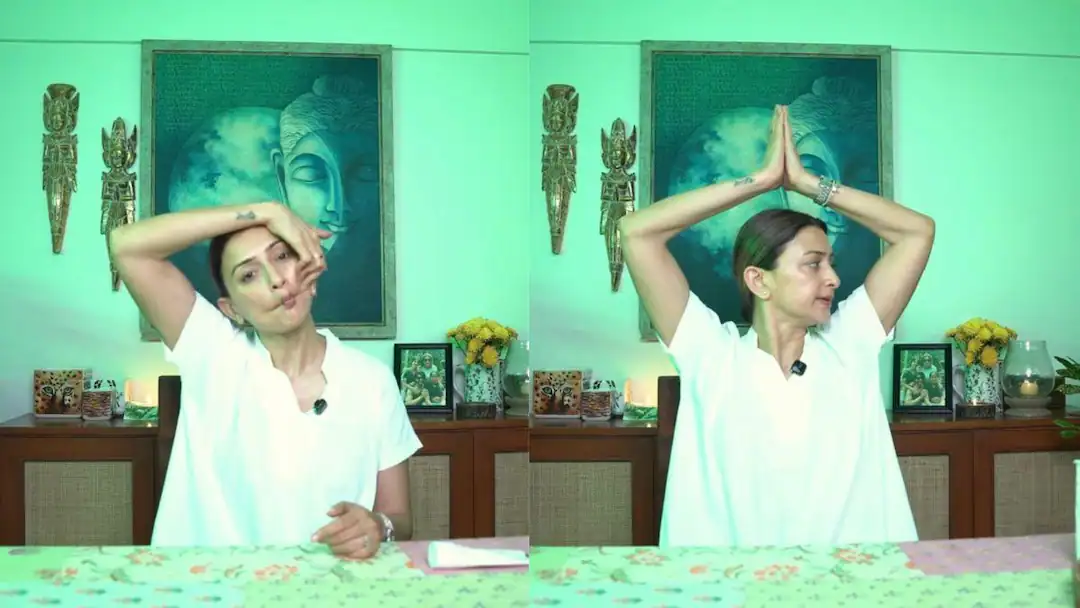
  • The Poser: In this exercise, the face is turned to one side and the palms are joined above the head in a namaste stance. Hold the position for roughly 30 seconds while extending the tongue toward the nose, then switch to the other side. Gauri claims that it may help lessen the look of a double chin by engaging the muscles in the neck and jawline.
  • Brow Line Eraser: Try to elevate the eyebrows without letting wrinkles form by placing both palms firmly across the forehead. Perform multiple sets of the exercise, repeating it about 20 times. The goal of the workout is to reduce noticeable forehead lines by strengthening the muscles in the forehead.
  • The Caterpillar: Gauri also recommends gently crawling across the eyebrow region with the fingertips. This exercise, when done with light pressure, strengthens the muscles surrounding the eyes and may help enhance the stiffness of the eyelids while lessening the appearance of crow’s feet.
  • Cheek Caterpillar: Apply a mild moisturizer, then make a fish-face expression and move your fingers gently over your cheeks. It is thought that this workout, which targets the cheek muscles, will eventually result in a more defined, toned, and elevated appearance.

ALSO READ |Is Jaggery A Healthy Alternative To Sugar? Truth About Diabetes And Blood Sugar

Consistency Is Key

The simplicity of face yoga is one of its main benefits. You can do the exercises at home, on breaks from work, or even while doing everyday chores. Face yoga shouldn’t be seen as a substitute for skincare, hydration, sun protection, and a healthy diet, but experts say regular self-care practices are still crucial for keeping skin looking good. Gauri’s message is simple: it may occasionally be necessary to rely less on chemicals and more on regular wellness routines in order to get a natural glow.

Check out below Health Tools-
Calculate Your Body Mass Index ( BMI )

Calculate The Age Through Age Calculator

Could a Single Injection Replace Chemotherapy and Radiation in Cancer Treatment?

Tags: ,
Best oLive
Privacy Overview

This website uses cookies so that we can provide you with the best user experience possible. Cookie information is stored in your browser and performs functions such as recognising you when you return to our website and helping our team to understand which sections of the website you find most interesting and useful.