Spicy Asian Cucumber Salad Recipe

Spicy Asian Cucumber Salad Recipe

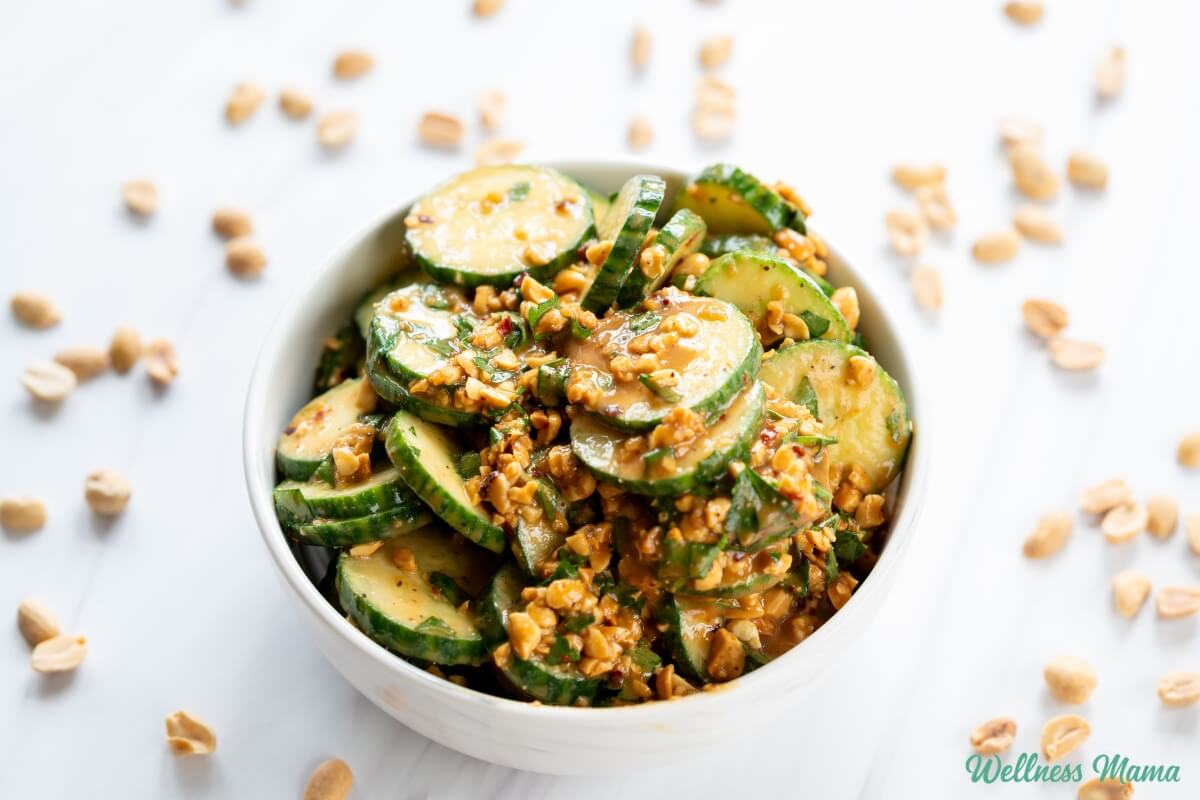
I’ve had a garden for many years now and every Spring I look forward to getting my hands back in the dirt! One of the easy vegetables you’ll often find growing in my backyard are cucumbers. They’re the perfect, refreshing side dish on warmer days, especially when they’re in this Asian cucumber salad. 

Veggies don’t have to be boring when they’re covered in a flavorful (and healthy!) sauce. Some of my kids favorite sauces to dip vegetables in include homemade ranch dressing or French onion dip. This recipe offers another option to get kids (and adults) more excited to eat their veggies. 

Spicy Cucumber Salad Recipe

The ingredients are pretty simple and the recipe only requires about 10 minutes of hands on time total. You might have seen the viral 3 ingredient spicy cucumber salad, but this version has more complex flavors. Even so, it takes just a couple minutes to mix up the sauce. 

Coconut aminos or soy sauce adds a nice umami flavor, raw honey adds sweetness and minerals, and the chopped peanuts add an addictive crunch. The rice vinegar helps cut through the earthy flavors and sweetness of the honey to really balance out the blend. Plus there’s the added flavors of the parsley, garlic, and black pepper. 

The spice in this spicy cucumber salad comes from red chili flakes which add a nice heat. If your family doesn’t like it as spicy (or at all), then reduce or omit them. Like it really spicy? Feel free to add more! Just be sure to taste it first before adding more and adjust to taste. 

Prepping the Cucumbers

I usually just chop my veggies in the food processor and call it a day, but this Asian cucumber salad has an additional step. By sprinkling the slices with some salt first and then patting them dry it reduces some of the extra moisture. Cucumbers are mostly water and when they’re added to a salad like this it can get really watery. It’s a simple step that allows the cucumbers to really soak up all of that delicious sauce. 

Here’s how to make it!

Spicy Asian Cucumber Salad Recipe

This delicious Asian cucumber salad recipe is a spicy, salty, and refreshing side dish. Full of flavor and nutrition it’s a summer staple!

  • Lay the sliced cucumbers in a single layer on a clean kitchen towel or paper towels. Sprinkle evenly with ½ teaspoon salt and let sit for 10 minutes to draw out excess moisture.

  • Rinse the salted cucumber slices under cool water, then pat thoroughly dry with paper towels. This step keeps the sauce from getting watery and ensures the best flavor absorption.

  • In a medium bowl, whisk together coconut aminos, rice vinegar, natural peanut butter, raw honey, garlic, dried red chili flakes, ground black pepper, and fresh parsley until smooth and fully combined.

  • Add the dried cucumber slices to the peanut sauce and toss until every slice is well coated. Transfer to a serving plate and garnish with chopped peanuts.

  • Serve immediately or chill for up to 1 hour.

Nutrition Facts

Spicy Asian Cucumber Salad Recipe

Amount Per Serving (1 serving)

Calories 204
Calories from Fat 117

% Daily Value*

Fat 13g20%

Saturated Fat 2g13%

Polyunsaturated Fat 4g

Monounsaturated Fat 6g

Sodium 479mg21%

Potassium 434mg12%

Carbohydrates 17g6%

Fiber 3g13%

Sugar 8g9%

Protein 8g16%

Vitamin A 476IU10%

Vitamin C 7mg8%

Calcium 56mg6%

Iron 2mg11%

* Percent Daily Values are based on a 2000 calorie diet.

Adjust the spice level to your preference by adding more or less chili flakes

Shelf Life and Storage

This is one of those recipes that tastes even better if you wait a bit. You can eat this recipe right away or you can let the sauce soak into the cucumbers for an hour first to marry the flavors. Keep any leftovers in a covered container in the refrigerator for up to 1 week. 

Unless you like soft peanuts, save these as a garnish for right before serving. 

More Addictive Salad Recipes

Here are some more of my veggie packed salad recipes I love eating when the weather starts to warm up. 

What are some of your favorite easy and healthy side dishes? Leave a comment and let us know!

Tags: , , , ,
hormone replacement therapy

My Take on Hormone Replacement Therapy (and What I’ll Do)

Hormones are one of those topics that eventually find their way into almost every conversation about women’s health. At some point, many women begin to notice subtle changes. Trouble sleeping, unpredictable moods, and inconsistent cycles. Naturally, questions follow. Is this perimenopause? Is something wrong? Should I consider hormone replacement therapy?

It’s a topic I get a surprising number of questions about, especially from women wondering what my personal plan is. Hormone replacement therapy (HRT) has become one of the most talked-about topics in women’s health in the past few years. Some experts strongly support it, while others urge caution. Many women find themselves caught somewhere in the middle, trying to make sense of conflicting information.

The Changing Conversation on Hormones

At the same time, the conversation around hormones has shifted quite a bit. For years, hormone therapy was widely viewed as risky after early research raised concerns about cancer and cardiovascular disease. Recently, though, researchers have revisited that data and recognized that much of it was misunderstood or misapplied. The updated perspective is more nuanced, especially for healthy women who begin HRT near menopause using doses that mimic what our body naturally produces.

Even with that shift, though, hormones aren’t a simple topic. They influence nearly every system in the body, from metabolism and circadian rhythm to mood, sleep, and cellular energy. I approach this conversation like most health topics. It’s not about having all the right answers, but getting curious and root causes and how to really support the body.

Understanding the Phases of Hormonal Change

Before diving into hormone replacement therapy, it helps to understand the different stages of hormonal change women move through as we age. These shifts don’t happen overnight, but unfold gradually over several years.

Perimenopause

Perimenopause is the transitional phase leading up to menopause. Hormone levels, especially estrogen and progesterone, begin to fluctuate more than our reproductive years. For some women these changes are barely noticeable, while others experience a variety of symptoms that can feel confusing or frustrating.

Sleep disruptions, irregular cycles, mood changes, and shifts in metabolism are all common during this phase. Because hormone levels may swing up and down rather than simply decline, symptoms can feel unpredictable.

Menopause

Menopause is officially defined as the point when a woman has gone twelve months in a row without a menstrual cycle. At this stage, estrogen and progesterone levels stabilize at lower levels than during our fertile years.

This shift can affect many areas of health, including bone density, cardiovascular health, metabolism, and brain function. Some women move through this transition smoothly, while others experience symptoms like hot flashes, night sweats, or changes in mood and sleep.

Postmenopause

Postmenopause refers to the years following menopause. The body gradually adapts to its new hormonal baseline, and many symptoms that appeared during the transition begin to stabilize.

For some women, this phase can feel like a new equilibrium. For others, lingering symptoms may lead them to explore additional support options, including hormone therapy.

Why Hormone Therapy Is Back in the Conversation

One reason hormone replacement therapy has returned to the spotlight is a re-evaluation of research that shaped the conversation for decades. In the early 2000s, the Women’s Health Initiative (WHI) study reported increased risks of breast cancer, heart disease, stroke, and blood clots in women using hormone therapy. The headlines that followed were dramatic, and millions of women stopped taking hormones almost overnight.

Over time, however, researchers began taking a closer look at the study and noticed several important nuances. First, many participants were significantly older when they began hormone therapy, often more than a decade after menopause. Starting hormones much later in life appears to carry different risks than starting them closer to the transition into menopause.

Second, the study mainly used synthetic hormones, not bioidentical progesterone. These compounds behave differently in the body, which may have influenced the outcomes.

As scientists revisited the data, they found that some of the reported risks were smaller than originally interpreted and may not apply equally to all women. More recent takes suggest that healthy women who begin hormone replacement therapy near menopause may have lower risks than previously thought.

Because of this evolving understanding, regulatory agencies have begun revising some of the warnings placed on hormone therapies. The updated messaging emphasizes personal decision-making instead of blanket avoidance.

Of course, none of this means hormone replacement therapy is risk-free. Like most medical interventions, it has potential benefits and risks. Those depend heavily on the individual woman, the type of hormones used, and how they are delivered.

My Focus on Root Causes First

Even with the evolving science around hormone therapy, my philosophy hasn’t changed much. When it comes to hormones (or any part of health) I’m much more interested in understanding the underlying signals the body is sending.

Hormones are incredibly powerful messengers. They don’t act in isolation, and they rarely change without a reason. When the body stops producing certain hormones or begins producing them differently, there’s often a deeper story behind that shift.

Of course, aging plays a role. Hormonal transitions are a natural part of life, but there are also many other factors that influence hormone balance. These include sleep, stress, metabolism, nutrition, and environmental exposures. My approach is to start with the foundations. If hormone therapy eventually becomes helpful, I want the rest of my health to be as supported as possible so the body can respond to those hormones effectively.

Without that foundation, adding hormones can sometimes feel like turning up the volume on a broken radio. The signal becomes louder, but the underlying problem hasn’t been addressed.

The Foundational Systems That Influence Hormones

When we look at hormone health through a broader lens, there are several foundational systems that consistently show up. 

Circadian Rhythm and Light

Circadian rhythm is one of the most powerful regulators of hormone production. Our bodies innately respond to natural light cycles, using sunrise and sunset as cues for everything from sleep timing to hormone release.

Modern life, of course, looks very different from the environment our biology evolved in. Artificial lighting, screens late at night, and long hours indoors can all disrupt those signals. Over time, this disruption can affect the brain’s communication with the endocrine system. Some researchers even suggest many hormonal symptoms may actually be circadian rhythm symptoms in disguise.

One of the simplest, yet most profound habits I have is to get morning light exposure every morning. Morning sunlight helps anchor the circadian rhythm and supports the brain’s timing of hormone release throughout the day. At night, reducing bright artificial light and protecting sleep becomes just as important.

Blood Sugar and Metabolic Health

Metabolic health is another major factor that often shows up in conversations about hormones. During perimenopause and menopause, many women become more sensitive to blood sugar fluctuations. Changes in insulin sensitivity can influence energy levels, mood, and even weight regulation.

Stabilizing blood sugar doesn’t require complicated strategies. It often comes down to consistent meals that contain enough protein, healthy fats, and fiber. Prioritizing regular movement and maintaining muscle mass by lifting heavy things also plays a key role. When metabolism is supported, the body has an easier time maintaining hormonal balance.

Mitochondrial Health

Mitochondria are often described as the powerhouses of the cell, but they’re so much more than just energy production. These tiny structures influence inflammation, cellular signaling, and hormone regulation. Some researchers estimate the human body contains trillions of mitochondria working round the clock to maintain cellular function.

Supporting our mitochondria is essentially the same as what our body needs for overall wellness. Nutrient-dense food, movement, natural light exposure, adequate minerals, and restorative sleep are essential for mitochondria. When the body has strong cellular energy production, it has more resources for hormone balance during transitions like perimenopause.

The Role of the Nervous System

Something that’s really shaped my perspective is the idea that the body prioritizes safety before anything else. When cells perceive a threat, whether from toxins, chronic stress, trauma, or infection, they shift into a defensive state. This is sometimes referred to as the cell danger response. During this state, the body temporarily puts less focus and energy towards processes that aren’t essential for immediate survival.

Hormone production can be one of those processes. From a biological standpoint, this makes sense. If the body believes it’s in a dangerous environment, it prioritizes survival over reproduction, long-term repair, or optimal hormone balance.

This is why nervous system regulation has become such an important piece of the puzzle for me. Practices that help the body feel safe, like breathwork, time in nature, restorative movement, and meaningful connection, can shift the nervous system out of survival mode. It helps the body go back into a state where healing and hormone balance are possible.

Potential Benefits and Risks of Hormone Therapy

To circle back to our original topic… While I prioritize foundational health first, hormone therapy can absolutely have a place in some women’s health journeys.

For women experiencing severe symptoms, hormone replacement therapy can provide meaningful relief. Hot flashes, night sweats, and sleep disruptions can sometimes improve significantly with appropriate hormone support. Some research also suggests potential benefits for bone density and overall quality of life.

At the same time, hormone therapy isn’t completely risk-free. Depending on the formulation and how its delivered, potential risks may include blood clots, stroke, or cancers for certain women. These risks vary widely depending on factors like age, health history, dosage, and whether hormones are synthetic or bioidentical. Because it’s a complex issue, it’s essential to work with a knowledgeable practitioner who knows your case.

My Personal Hormone Plan

At this stage of my life, I’m not in perimenopause and don’t currently need to consider hormone therapy. However, I’ve thought quite a bit about how I might approach it in the future. My plan is to continue focusing on the foundational aspects of health that naturally support hormones. That means prioritizing circadian rhythm, metabolic health, mitochondrial support, and nervous system balance. Practically speaking, this means prioritizing minerals and micronutrients, dialing in light exposure, de-stressing, and moving my body. 

If hormone shifts eventually begin affecting my quality of life despite those foundations, I would be open to exploring hormone therapy with a knowledgeable practitioner. My preference would be bioidentical hormones at the lowest effective dose and with careful monitoring. For me, it isn’t a hard “no.” It’s simply not the first step.

A Different Way to View Menopause

One perspective I find helpful is remembering that menopause is not a disease. It’s a natural biological transition. In many cultures throughout history, menopause has been viewed as the beginning of a new phase of life rather than the end of something. Women often move into roles that focus more on leadership, creativity, mentorship, and community.

Without the demands of pregnancy and early motherhood, this stage can create space for entirely new pursuits and passions.

That reframing can change the way we approach the transition. Instead of seeing menopause as something to fight against, we can focus on supporting the body through it with the same care and respect we would give any other life stage. Personally, I’m looking forward to stepping into that role once its time!

Supporting the Body Through Hormonal Transitions

Hormone replacement therapy is a deeply personal decision, and there isn’t a single answer that applies to everyone. Each woman’s history, genetics, lifestyle, and health goals are unique.

What I’ve come to believe is that the most empowering place to begin is with the foundations of health. When we support healthy sleep, light exposure, nutrition, metabolism, and nervous system balance, the body is better equipped to navigate hormonal transitions.

If hormones eventually become part of the picture, they can act as a supportive tool instead of a last-ditch solution.

Wherever you are in your own journey, my hope is that this conversation encourages curiosity, thoughtful research, and trust in your body’s wisdom. Hormonal transitions are a natural part of life, and with the right support, they can be approached with confidence rather than fear.

Where are you at in your hormonal journey as a woman? What daily habits do you have to support hormone balance? Leave a comment and let us know!

Tags: , , ,
dit da jow

Dit Da Jow Recipe | Wellness Mama

Years ago our whole family started taking Jujutsu for a season. We all enjoyed it, but the rolls, throws and climbing definitely came more easily to the kids! Any activity that involves wooden swords and rolling will inevitably create some bumps and bruises along the way.

After one class that left us particularly sore, the Sensei (teacher) shared a traditional herbal remedy. It’s been used in Asian countries for pain relief and rapid healing for years. Dit Da Jow (literally translated “hit wine medicine”) is essentially an herbal tincture or liniment packed with healing herbs.

What is Dit Da Jow?

Dit Da Jow is an analgesic liniment traditionally preferred by martial artists. Often a martial arts master blends his unique mixture of many aromatic herbs like myrrh, ginseng, and traditional TCM herbs. The combination helps stimulate circulation, reduce pain and swelling, and improve injuries and speed wound healing.

The tradition became known as “hit medicine”. Many people have also found this liquid analgesic useful for reducing muscle aches, arthritis, and rheumatism discomfort.

Dit Da Jow Recipes

I researched traditional Dit Da Jow recipes and while it was hard to find many of them (most are considered secret family recipes), I finally found a mixture that works really well for us. Traditional Dit Da Jow uses a long list of herbs that are native to Asia, many of which are hard to find in the US.

The version I came up with has the same benefits, but many of the herbs are found in the US. While this wouldn’t be considered true Dit Da Jow, it’s been very effective for our bumps and bruises. It also helps speed recovery of non-martial arts related injuries so I keep it stocked in our natural medicine cabinet. 

You can also find more traditional Dit Da Jow here if you want to try it.

The Benefits of Dit Da Jow

Overall Dit Da Jow helps reduce swelling and speed healing from bumps and sprains. Since the recipes are all so different, I’ll just give a quick overview of the benefits of the herbs I chose. 

  • Arnica – Often used for strains, sprains, and bruising.
  • Plantain leaf – A go-to herb for soothing and healing minor wounds, cuts, and irritated skin. Plantain also helps reduce inflammation and supports recovery from skin damage. 
  • Comfrey leaf – Nicknamed “boneknit,” comfrey rapidly heals skin and supports bone healing.
  • Frankincense – This resin helps calm inflammation and promote tissue repair. It’s a favorite for soothing sore muscles, joints, and damaged skin topically.
  • Myrrh – Known for its antimicrobial and anti-inflammatory properties, myrrh supports wound healing. It also reduces swelling and eases pain in bruised or strained tissues.
  • Fennel – Fennel offers gentle warming and anti-inflammatory support to help relieve muscle tension. It also promotes circulation for faster recovery.
  • Angelica Root – This warming root helps ease pain and inflammation in muscles and joints while supporting circulation for faster healing times. 
  • Calendula – A gentle herb that promotes rapid healing of cuts, scrapes, and irritated skin. It’s also soothing and reduces inflammation for overall tissue repair.
  • Dandelion root – Rich in minerals, dandelion root supports detox and lessens inflammation. It’s used to help reduce swelling in sore muscles and joints.
  • Horsetail – High in silica, horsetail strengthens connective tissues and supports bone and ligament repair for better resilience after injury.
  • Nettle leaf – Packed with minerals and micronutrients, nettle nourishes tissues, reduces inflammation, and helps ease muscle and joint pain.
  • Clove – Clove is a warming analgesic that eases deep muscle pain and supports circulation for faster recovery.
  • Turmeric – This powerful anti-inflammatory herb helps reduce swelling and pain in muscles, joints, and ligaments while supporting the body’s natural healing process.

How Does Herbal Liniment Work?

The alcohol extracts the beneficial properties from the herbs. When applied topically alcohol quickly absorbs into our skin and works quickly. You may be familiar with making herbal tinctures to take internally, this is just a topical version. This recipe is for external use only, it’s not the kind of tincture you take internally.

Yes, the recipe does call for a lot of herbs, but I’ve seen it get rid of bruises and pain overnight! This Dit Da Jow recipe has been really effective for our family and others I’ve shared it with.

Dit Da Jow Muscle Liniment Recipe

Prep Time5 minutes

Steeping Time42 days

Total Time42 days 5 minutes

Author: Katie Wells

  • Place all of the herbs in a 16 ounce glass mason jar.

  • Fill the rest of the jar with food-grade, 80-proof or higher alcohol and stir with a clean spoon.

  • Put the lid on the jar. Store the jar in a cool/dry place, shaking daily, for at least three weeks and up to 1 year. I usually leave the herbs for six weeks.

  • Strain through cheesecloth and compost the herbs. Store the tincture in colored dropper bottles or clean glass jars.

Use on skin as needed to help with bruises, sore muscles and pain. Do not use on cut or broken skin.

As with any natural remedies consult with a natural healthcare practitioner before using, especially if you’re pregnant, nursing, or have medical conditions. 

Shelf Life and Storage

Traditionally Dit Da Jow is brewed for months, if not years. Some research has shown that a batch steeped for 5 years had significantly more benefits than one steeped for 1 year. You probably don’t want to wait that long before using your liniment though. I’ve found that even 6 weeks is enough to get herbal benefits. Plus, the traditional recipes are often made with Chinese root herbs that are tougher than plantain, calendula, etc.

You can keep the herbs in the jar and strain the liquid out as needed. Just be sure the herbs stay completely covered in alcohol. Once you’ve used more of the liquid, just strain the herbs out. Store your Dit Da Jow in a cool, dark place, away from direct light and heat. 

What are your favorite herbal remedies for muscle aches and pains? Share below!

Tags: , , , ,
spring cleaning checklist

My Natural Spring Cleaning Checklist (Room by Room)

I’ve written many times about how I clean my house with natural cleaners. Now to check off something that’s been on my list for a while: a complete cleaning checklist for the whole house!

Sometimes it’s hard to get the motivation (or time) to take on deep cleaning. However, the one time of year most of us feel like tackling it is when spring finally arrives and the weather warms up.

Spring cleaning doesn’t have to mean complicated systems or cabinets full of cleaning supplies. In fact, the simpler the process, the more likely I am to actually do it (or convince the kids to help!). I like to open the windows for fresh air, turn on the air filter, and tackle one room at a time. Nothing beats the satisfaction of checking items off a list as you go.

Below is the room-by-room checklist I use for deep cleaning the house each spring. You’ll also find the printable version at the bottom.

Cleaning Supplies to Have on Hand

Before getting started, it helps to gather a few simple cleaning supplies so everything is within reach. Most of these are items you may already have around the house. 

A Note on Microfiber

I have some old microfiber cloths that I bought when I first started with natural cleaning that I still use. However, if you’re buying supplies, I recommend opting for cotton cloths or re-using old natural fiber clothing as rags. Microfiber is basically plastic and contributes to our plastic pollution problem every time they’re washed. 

I’m using mine up since I already have them, but I won’t be buying more. You can read more about microfiber and my thoughts and solutions to the problem here. So whenever you see cleaning cloths or microfiber mentioned below, just keep this in mind. 

Basic cleaning supplies:

  • Microfiber cloths, cotton cloths, or old T-shirt rags
  • Spray bottles of cleaners
  • Mop
  • Small bucket for soapy water
  • Vacuum with attachments

Helpful natural cleaning products:

You don’t need every single cleaner on this list, just pick and choose what works best for you. Basics like baking soda, vinegar, and natural dish soap can tackle most messes!

My Minimalist Natural Cleaning Closet

Confession time: If you ever wonder how I do it all… well, I don’t. Like most busy families, it’s all about priorities and simplifying where possible.

I used to make all my cleaners from scratch, but life with older kids, a business, and a podcast eventually changed that. These days there are so many excellent natural options available that I prefer using a few high-quality products that work for multiple purposes.

Here’s a quick roundup of my current natural cleaning favorites:

With just a handful of supplies, it’s possible to clean almost everything in the house without the harsh chemicals found in many conventional cleaners.

Whole-House Tasks (Start Here)

there are a few cleaning tasks that apply throughout the entire house. Start by opening windows for ventilation and turning on an air filter if you have one. Fresh air makes the whole process feel easier and helps clear out lingering dust and indoor pollutants.

Before diving into deep cleaning, start with a quick tidy-up. Pick up items from the floor, return things to their proper places, and keep a bin nearby for items you want to donate or get rid of. Spring cleaning is the perfect time to declutter as you go.

And if you have kids at home, enlist them! My kids have their own room checklists, and they love the satisfaction of crossing something off the list. Next, work from the top down in each room. This keeps dust from falling onto areas you’ve already cleaned.

Whole-house cleaning checklist:

  • Dust from the highest points (door frames, window frames, shelves, etc.)
  • Vacuum or dust away cobwebs
  • Clean light fixtures and ceiling fans
  • Wipe down walls, switch plates, and door frames
  • Clean doors and door handles (hydrogen peroxide works well if anyone has been sick)
  • Clean baseboards
  • Vacuum or sweep all floors
  • Mop hard floors
  • Move furniture (coffee tables, chairs, etc.) and clean underneath
  • Clean windows inside and outside
  • Wipe window frames and sills
  • Wash blinds, drapes, and window screens
  • Clean rugs and decorative pillows
  • Vacuum couches and under cushions
  • Wax and polish wooden surfaces

After dusting or vacuuming walls, wipe them down with a damp cloth to remove grime, grease, and marks. Kitchens especially tend to collect grease buildup on walls over time. If you have tile in the kitchen or bathroom, spring is also a good time to clean and reseal grout lines, which helps prevent water damage and staining.

Living Room and Living Areas

Living spaces tend to collect the most daily clutter, so I like to start here. Begin by picking up everything on the floors and moving it to the appropriate rooms. Then work from top to bottom, dusting furniture, shelves, and fixtures.

Living room cleaning checklist:

  • Open windows or run an air filter for ventilation
  • Dust furniture with a damp rag or cloth
  • Dust lighting fixtures and fan blades
  • Spot clean furniture with baking soda and water or natural all-purpose cleaner
  • Clean lamps with cloths. Hydrogen peroxide spray is great for cleaning white lampshades
  • Wipe down electronics and screens with a screen safe cleaner
  • Wash windows and windowsills
  • Wash or wipe down blinds. I like taking them down and washing them in the bathtub with vinegar and water. 
  • Wipe down walls and switch plates
  • Wash throw blankets and pillows
  • Vacuum couches and chairs
  • Remove couch cushions and vacuum crumbs
  • Condition leather furniture if needed
  • Sweep, vacuum, or mop floors

If your living room has area rugs or carpet, spring is also a great time to deep clean them. Use your vacuum attachments to reach corners and along baseboards.

Kitchen

The kitchen is often the most used room in the house, which means it benefits from a deep clean at least once a year. Start by clearing off countertops so you can thoroughly clean surfaces. This is also a great opportunity to declutter appliances and store ones you rarely use.

Kitchen cleaning checklist:

  • Open windows or run an air filter
  • Dust high surfaces, lights, and fans. Use warm, soapy water as needed to tackle kitchen grease.
  • Remove everything from countertops and wipe them down
  • Wipe down backsplash and walls to remove grease buildup
  • Clean the outside of cabinets (use a wood-safe cleaner if needed)
  • Wipe down appliances. Use a stainless steel cleaner as needed.
  • Clean the stove, stove vent, and replace vent filter
  • Deep clean the oven
  • Remove food from the fridge and freezer and wipe down inside
  • Wipe down the outside of the refrigerator
  • Pull out fridge and stove and clean underneath
  • Dust refrigerator coils and clean the grate at the front
  • Clean out the pantry and wipe shelves
  • Clean sink and fixtures
  • Deep clean dishwasher by running it empty with vinegar
  • Clean garbage disposal
  • Hose down the trash can and let it disinfect in the sun
  • Sweep and mop the floor
  • Clean tile grout if needed

If your kitchen has granite counters, use a granite-safe cleaner rather than vinegar, which can damage the stone over time. You can also find a more detailed kitchen cleaning checklist here.

Bathrooms

Bathrooms are another area where deep cleaning makes a big difference. Warm, damp environments can allow mold and mildew to develop if they aren’t cleaned regularly. Just like any other room, be sure to start at the highest surfaces first, like the walls and tops of the door and window frames. 

Bathroom cleaning checklist:

  • Open windows or run an air filter
  • Dust high surfaces, lights, and fan
  • Take everything out of cabinets and wipe shelves. Get rid of anything you don’t use, old or expired
  • Clean mirrors and windows
  • Wipe down counters and sinks
  • Clean makeup brushes and replace old makeup
  • Scrub shower and tub
  • Remove soap scum and hard water buildup in the shower/bath and sink
  • Replace or wash the shower liner
  • Clean tile and grout, reseal if needed. Baking soda and hydrogen peroxide work well for stained grout.
  • Deep clean the bathroom fan
  • Clean around the outside of the toilet
  • Clean the inside of the toilet bowl
  • Mop the floor and wipe baseboards
  • Restock natural bath supplies

A shower filter can also help reduce mineral buildup, which makes the shower easier to clean over time. If the toilet seat still looks dingy despite cleaning, it might simply be time to replace it. Sometimes that’s the easiest fix!

Bedrooms

Bedrooms are usually simpler to clean but benefit from a seasonal refresh. Start by picking up anything on the floors and clearing surfaces so you can clean more easily. Here’s what I keep in my nightstand for a more relaxed nighttime routine and refreshed morning.

Bedroom cleaning checklist:

  • Open windows or run an air filter
  • Dust furniture, lights, and fans. Start from the top and work your way down so any falling dirt/dust can be cleaned up. 
  • Wash sheets, blankets, and bedding
  • Wash throw pillows if needed
  • Hang pillows or mattress pads in the sun for a few hours to air out.
  • Wash pillows in the washer if they can be machine washed
  • Vacuum or mop floors
  • Clean under the bed
  • Wipe down walls and switch plates
  • Wipe down doors and handles
  • Clean lamps and lampshades
  • Wash windows, windowsills, and blinds
  • Clean out nightstands and drawers and toss expired items like old lip balm
  • Remove clothes from drawers, wipe down drawers, and return clothes. (This may not be the time to start KonMari folding, but I highly recommend checking it out!)
  • Refresh linen spray and drawer freshener sachets. 

Spring is also a great time to declutter closets and refresh your wardrobe. I like to use this time to simplify clothing and rotate seasonal items. A capsule wardrobe can make getting dressed much easier and keeps closets from becoming overcrowded.

If it’s been several years, evaluate whether the mattress still provides good support. Sometimes a better night’s sleep is just a mattress upgrade away. Here’s one we love.

Laundry Room or Utility Room

The laundry room often becomes a catch-all space for cleaning supplies, storage bins, and random household items. A quick seasonal reset helps keep things organized. I also keep this printable reference sheet for how to naturally treat stains in my laundry room. 

Laundry room cleaning checklist:

  • Open windows or run an air filter
  • Dust lights, shelves, and surfaces
  • Remove everything from cabinets and shelves. Declutter and organize what’s left.
  • Wipe down shelves and cabinets
  • Declutter old cleaning products or expired supplies
  • Wipe down washer and dryer
  • Deep clean the washing machine
  • Wash the dryer lint trap with dish soap to remove buildup
  • Clean the dryer vent
  • Wipe down walls and baseboards
  • Sweep and mop floors
  • Organize laundry products and restock as needed
  • Replace or refelt wool dryer balls if needed

This is also a good time to evaluate the space and see if better organization would help. Maybe it’s time to add coat hooks in the mudroom, a mat for muddy boots, or a shelf to store laundry supplies that are currently piled on the floor. 

Make Spring Cleaning a Family Routine

Deep cleaning the entire house can feel overwhelming, but breaking it down room by room makes it much more manageable. And when you sign up for my VIP newsletter you’ll get my free Deep Cleaning Checklist as a thank you here. I’m also giving you my complete Home Organization Binder printables with blank room cleaning templates to customize.

I like to print out the checklist and slip it into a binder sleeve so it can be reused each year. Turn on a favorite playlist, open the windows, and enjoy the fresh air while you work. By the time you finish, the whole house feels lighter, cleaner, and ready for the new season. Happy spring cleaning!

Did I miss anything on the checklist? I’d love to hear what’s on yours.

Tags: , , , ,
does red light work

What I Think About Red Light Therapy (and Why It’s Changed)

I first wrote about red light therapy more than a decade ago, long before it became trendy on social media. At the time, I was deep in my own healing journey with Hashimoto’s, trying to understand why my body felt so depleted and what I could do to support it at the root level.

Red light therapy was one of the tools I used during that season. And while I still believe it can be incredibly helpful, my perspective has shifted. I no longer see it primarily as a “device-based therapy.” Instead, I see red light as part of a much bigger conversation about light and mitochondria. Especially how disconnected many of us have become from the natural light environment our bodies were designed for.

While red light devices are still a powerful tool, there’s an even easier and simpler solution to get the benefits. 

What Red Light Therapy Actually Is (Without the Overwhelm)

Red light therapy, also called photobiomodulation, refers to using specific wavelengths of red and near-infrared light to influence how our cells work. The cellular function part is important, because this isn’t just about shining a red glow on your skin. It’s about how light interacts with our biology at the most foundational level.

The most commonly discussed wavelengths fall into two ranges:

  • 620–700 nanometers (visible red light)
  • 700–1100 nanometers (near-infrared light)

These ranges matter because they penetrate tissues differently and interact with the body in distinct ways. To understand why that’s important, we need to zoom into mitochondria.

The Mitochondria Connection 

When I was recovering from Hashimoto’s, I became fascinated by mitochondria. We often hear them described as the powerhouses of the cell, but that label barely scratches the surface. I’ve come to think of them as tiny solar power plants. They’re constantly responding to environmental inputs, including light.

Inside the mitochondria is an enzyme called cytochrome c oxidase (CcO). It plays a key role in the electron transport chain, which is the final step in producing ATP, the usable energy currency of the cell. When ATP production is impaired, we feel it in fatigue, slower healing, poor stress resilience, and all the subtle signs that the body is struggling.

Nitric oxide, which is beneficial in the right places (like supporting blood vessel dilation), can sometimes bind to CcO and slow down energy production. In that context, it acts almost like a brake. Red and near-infrared light are absorbed by CcO. When this happens, the light can displace nitric oxide in a process called photodissociation. Once nitric oxide is freed, electron flow improves, mitochondrial membrane potential increases, and ATP production rises.

In simpler terms, the cell’s battery charges more efficiently.

When I first understood this mechanism, it clicked for me why light exposure could have such far-reaching effects. During my healing process, supporting mitochondrial function was a priority, and red light became one of several ways I approached that.

Repair Signals Beneath the Surface

The ATP boost is just one piece of the story. Red light also triggers secondary signaling pathways that influence inflammation, repair, and cellular resilience. There’s often a brief increase in reactive oxygen species (ROS). While we often think of ROS as harmful, in this controlled context they act as a signal rather than damage. They can activate antioxidant pathways and help regulate the body’s internal cleanup systems.

Red light also influences calcium signaling inside cells. Small shifts in calcium inside our cells act as a communication system. They tell the nucleus to coordinate protein production, tissue repair, and reduce inflammation.

This is one reason why I’ve lately been really focusing on sending my body safety signals. When our body feels safe it can repair and regenerate. Light, especially in the right wavelengths can be one of those safety signals. 

Not All Red Light Is the Same

One thing I’ve learned over years of researching and testing is that wavelength matters. A lot.

Visible red light in the 620–670 nm range tends to be absorbed more superficially. This is why it’s often used for skin health, like fine lines, superficial wounds, and boosting collagen production. These wavelengths only go a few millimeters to about a centimeter into the body. When I started using a red light panel I noticed firmer skin and my old C-section scar was healing better. 

Near-infrared light, especially in the 800–850 nm range, penetrates deeper. This makes it a better choice for muscles, tendons, joints, and even peripheral nerves. Around 810–830 nm is often considered the sweet spot because it interacts well with CcO while still reaching deeper tissues.

During my Hashimoto’s recovery, I experimented with both ranges. I used red light for skin and surface-level support and near-infrared light over deeper tissues, including my thyroid area. I cycled sessions and paid close attention to how I felt, because these effects are hormetic. Meaning a little can be helpful, but more is not necessarily better.

This experience taught me something important: red light works best when used thoughtfully and in context.

What the Research Says (And Where It’s Still Growing)

There are some great studies that support red light therapy for musculoskeletal pain and recovery, especially in athletes. Some studies show improvements in inflammation markers and pain scores (with appropriate wavelengths and doses).

There’s also emerging research in oral health and mucosal healing, which I find especially interesting. Seeing dentistry adopt red light protocols reinforces that this isn’t just a wellness trend. It’s being taken seriously in clinical settings.

At the same time, it’s not a cure-all. Results depend heavily on wavelength, dose, distance, timing, and consistency. In my experience, disappointment often comes from using the wrong parameters or expecting it to replace foundational habits. Red light is an adjunct to health, not a substitute for the basics. 

Here Comes the Sun

As I’ve written and podcasted more about circadian biology, I’ve become increasingly convinced that our overall light environment may be even more important than any single therapy.

Sunrise and sunset are uniquely rich in red and near-infrared light. During these times, sunlight travels through more of the atmosphere. This filters out much of the ultraviolet spectrum and shifts the light composition toward red and near-infrared wavelengths. This means we can access these beneficial wavelengths daily, for free.

My morning routine now almost always includes stepping outside within an hour of sunrise. It’s become one of my non-negotiables. I do this without glasses, contacts, or sunglasses and not through a window, since glass filters parts of the light spectrum. I don’t stare directly at the sun, but I allow the ambient light to reach my eyes.

I often pair this with hydration, gentle movement, or simply standing barefoot on the grass. Over time, I’ve noticed that by prioritizing morning light, my sleep is better, my energy feels more stable, and my stress resilience is better.

Sunset has also become a meaningful daily ritual. Spending 10 to 20 minutes outside before dusk helps tell our bodies to wind down for the evening. Afterward, I dim indoor lights (they’re on a timer) and avoid bright overhead lighting as much as possible. This shift of prioritizing natural light at the bookends of the day has had a greater overall impact than any device alone.

When Devices Can Still Be Helpful

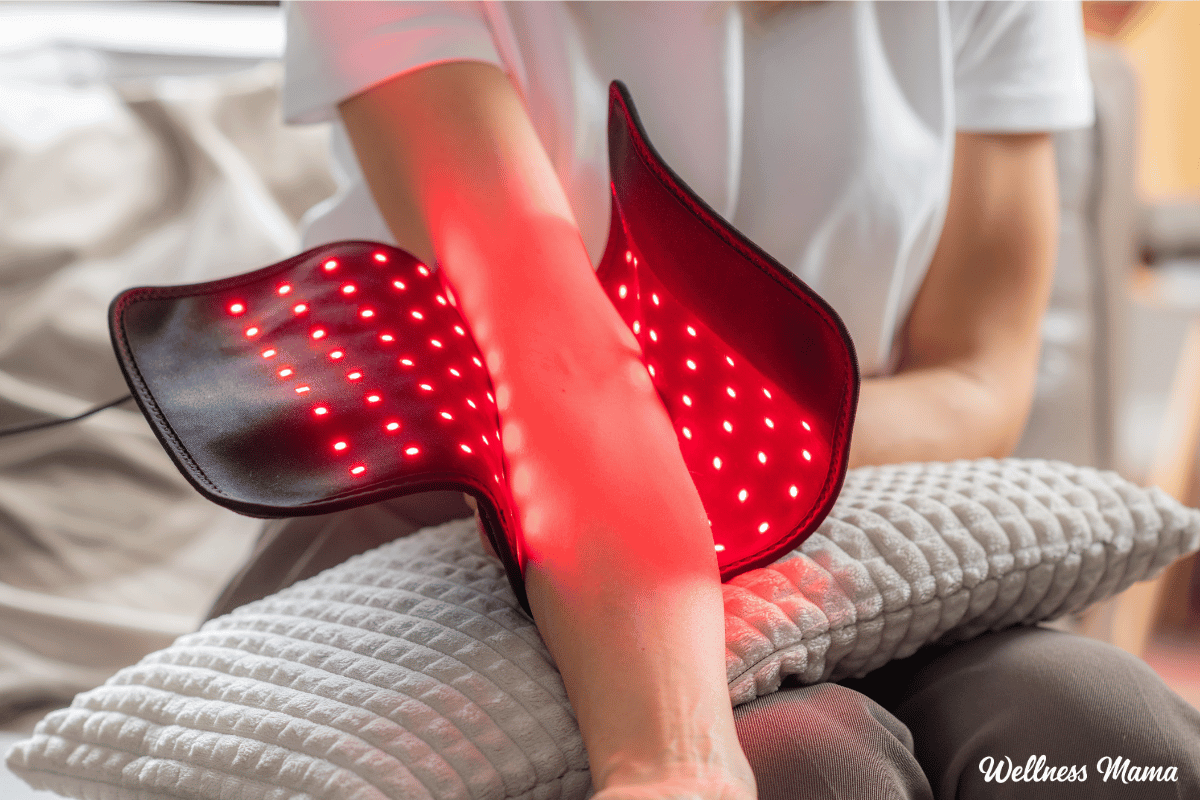
That said, I have not thrown out my red light devices. In fact, I’ve actually added to my collection! I consider these red light devices as a supplement to what I’m already doing. If you’re looking for a red light device I recommend paying attention to:

  • Wavelength
  • Irradiance (intensity at the surface)
  • Total energy dose
  • Distance from the body
  • Session duration

Most effective sessions are relatively short, often five to fifteen minutes. For skin support, studies commonly use 630–660 nm several times per week. For joint and muscle recovery, 800–850 nm is typical, often used multiple times weekly for a few weeks before tapering down.

My Favorite Red Light Therapy Devices

During my healing phase, I used devices more frequently and cycled them strategically. Now, I use them as needed, for muscle soreness, targeted recovery, or occasional skin support. However, they’re never a replacement for time outdoors. I’ve also started using this red light toothbrush for better oral health. 

Here are the ones that I’ve personally tried and recommend:

Safety, Context, and Listening to Your Body

Researchers have looked at red and near-infrared light for eye health, but I’m cautious about high-intensity exposure directly into the eyes. I don’t stare directly into the red light panels, but I do keep my eyes open while I’m facing sideways. I also pay attention to heat with higher near-infrared wavelengths.

As always, anyone pregnant, undergoing cancer care, using photosensitizing medications, or managing a complex medical condition should work with a practitioner who understands their case.

One of the biggest lessons from my own journey is that bio-individuality matters. What supported me during Hashimoto’s recovery may need to be adapted for someone else.

Final Thoughts: Start With the Sun

After more than a decade of writing about red light therapy, testing devices, and using it personally, my approach is simpler than it used to be. Try starting with sunrise then add sunset. Natural light exposure can be a daily habit before layering on anything else.

Red light therapy is not a hoax, and it’s not magic. The mechanisms are real, and the research is promising. But it works best along with light signalling from the sun and foundational changes (like drinking enough water.)

For me, red light was one supportive piece of my Hashimoto’s recovery. I still continue using red light devices as a supplement, but I mainly get it from sunrise and sunset exposure. The more I pursue wellness the more I’ve discovered that it’s not about the fancy devices, but getting our body in alignment with natural rhythms. 

Have you ever experimented with red light therapy before? I’d love to hear about it in the comments!

Tags: , , ,
Homestead Blog Hop - Homestead tips, ideas, animal care, and recipes every Wednesday

Homestead Blog Hop 589 – Make Egg Roll Bowls and Muffins

Welcome to Homestead Blog Hop, a weekly gathering for homesteaders and simple living enthusiasts to share DIY projects, from-scratch recipes, and creative inspiration. This week’s hop features cozy homesteading tips, along with practical ideas that celebrate handmade living and self-sufficiency.

Whether you’re looking for seasonal crafts, homemade treats, or encouragement on your homesteading journey, you’ll find plenty of inspiration to carry into the new year. Grab a cup of tea, explore the featured posts, and join us in sharing your own homestead creations.

Meet Your Homesteading Hosts

We’re Kelly from Simple Life Mom, Liz from The Cape Coop, Natasha from Houseful of Nicholes, and Laurie from Ridgehaven Homestead. Together, we’re passionate about from-scratch living, simple ingredients, frugal habits, and intentional homesteading. We’re delighted to host the Homestead Blog Hop, where you can find fresh inspiration each week for DIY projects, homemade recipes, and practical simple living ideas.

Follow Us for More Homestead Inspiration

Natasha – Houseful of Nicholes
Facebook | Pinterest | X | Instagram

Laurie – Ridge Haven Homestead
Facebook | Pinterest | Instagram

Liz – The Cape Coop
Facebook | Pinterest | X | Instagram

Kelly – Simple Life Mom
Facebook | Pinterest | X | Instagram

FEATURED POSTS from the Last Homestead Blog Hop

Each week, we take turns selecting three featured posts from the Homestead Blog Hop. These features are shared across all of our social media platforms, helping spotlight the creativity and hard work of our fellow homesteaders. Here are the featured posts from last week’s hop:

1. Winter Homestead Baking: Lemon Muffins & Apple Buckle from The Once and Future Homestead

2. Easy and Delicious Brats in a Blanket from Organized Island

3. Egg Roll Bowl from Yummi Haus

Congrats! Feel free to grab the featured on button for your post.

Just right click and ‘save image as…‘

Guidelines for the Homestead Blog Hop

  1. Click the “Add Your Link” button below and upload a clear, eye-catching image from your project or recipe. Please link directly to the family-friendly post itself, not your blog’s homepage.
  2. You may link up up to three posts each week.
  3. Take time to visit a few other blogs in the hop and leave a thoughtful comment to let them know you stopped by. Community support makes this hop special!
  4. Please include a link back to the Homestead Blog Hop in your post. Posts without a backlink are not eligible to be featured. All featured posts are shared across all hosts’ social media channels.
  5. Share posts that haven’t been linked to the hop before. Older posts are welcome as long as they are new to the hop.
  6. By joining the Homestead Blog Hop, you grant the hosts permission to use one image from your post, with a link back to your site, if your post is selected as a feature next week.
  7. This is a family-friendly link-up designed to encourage, inspire, and support the homesteader in all of us.

Let the Party Begin!

Which project are you excited to try this week? Leave a comment below.

Join Our Homestead Blog Hop Pinterest Board

Follow all of your hosts on Pinterest and send a message if you’d like to be added to our Homestead Blog Hop group board. This board is a great place to share your DIY projects, crafts, and from-scratch recipes with the homesteading community.

Guideline: Only pin posts that you’ve linked up to the Homestead Blog Hop.

Tags: , , , , , ,
Homestead Blog Hop - Homestead tips, ideas, animal care, and recipes every Wednesday

Homestead Blog Hop 588 – Make Mayonnaise, Seed Starters and Crafts

Welcome to Homestead Blog Hop, a weekly gathering for homesteaders and simple living enthusiasts to share DIY projects, from-scratch recipes, and creative inspiration. This week’s hop features cozy homesteading tips, along with practical ideas that celebrate handmade living and self-sufficiency.

Whether you’re looking for seasonal crafts, homemade treats, or encouragement on your homesteading journey, you’ll find plenty of inspiration to carry into the new year. Grab a cup of tea, explore the featured posts, and join us in sharing your own homestead creations.

Meet Your Homesteading Hosts

We’re Kelly from Simple Life Mom, Liz from The Cape Coop, Natasha from Houseful of Nicholes, and Laurie from Ridgehaven Homestead. Together, we’re passionate about from-scratch living, simple ingredients, frugal habits, and intentional homesteading. We’re delighted to host the Homestead Blog Hop, where you can find fresh inspiration each week for DIY projects, homemade recipes, and practical simple living ideas.

Follow Us for More Homestead Inspiration

Natasha – Houseful of Nicholes
Facebook | Pinterest | X | Instagram

Laurie – Ridge Haven Homestead
Facebook | Pinterest | Instagram

Liz – The Cape Coop
Facebook | Pinterest | X | Instagram

Kelly – Simple Life Mom
Facebook | Pinterest | X | Instagram

FEATURED POSTS from the Last Homestead Blog Hop

Each week, we take turns selecting three featured posts from the Homestead Blog Hop. These features are shared across all of our social media platforms, helping spotlight the creativity and hard work of our fellow homesteaders. Here are the featured posts from last week’s hop:

1. Fun Paper Plate Suncatcher Craft for Kids to Make at Home from Hunny I’m Home

2. Easy to Make, Seed Starter Pots from Cardboard Core from Scratch Made Food

3. How to Make Homemade Mayonnaise (3 Easy Methods) from Once and Future Homestead

Congrats! Feel free to grab the featured on button for your post.

Just right click and ‘save image as…‘

Guidelines for the Homestead Blog Hop

  1. Click the “Add Your Link” button below and upload a clear, eye-catching image from your project or recipe. Please link directly to the family-friendly post itself, not your blog’s homepage.
  2. You may link up up to three posts each week.
  3. Take time to visit a few other blogs in the hop and leave a thoughtful comment to let them know you stopped by. Community support makes this hop special!
  4. Please include a link back to the Homestead Blog Hop in your post. Posts without a backlink are not eligible to be featured. All featured posts are shared across all hosts’ social media channels.
  5. Share posts that haven’t been linked to the hop before. Older posts are welcome as long as they are new to the hop.
  6. By joining the Homestead Blog Hop, you grant the hosts permission to use one image from your post, with a link back to your site, if your post is selected as a feature next week.
  7. This is a family-friendly link-up designed to encourage, inspire, and support the homesteader in all of us.

Let the Party Begin!

Which project are you excited to try this week? Leave a comment below.

Join Our Homestead Blog Hop Pinterest Board

Follow all of your hosts on Pinterest and send a message if you’d like to be added to our Homestead Blog Hop group board. This board is a great place to share your DIY projects, crafts, and from-scratch recipes with the homesteading community.

Guideline: Only pin posts that you’ve linked up to the Homestead Blog Hop.

Tags: , , , , , ,
How to Use Essential Oils for Common Illnesses - a Beginner

How to Use Essential Oils for Common Illness

If you’re new to natural remedies and wondering how to essential oils for natural remedies, this guide is for you. You don’t need a ton of books and a huge collection of oils to get started. With just a few oils, you can care for everyday aches, stress, sleep troubles, digestion support, mood balance, skin care, and cold, all in a natural, gentle way that fits your home and family life.

This beginner-friendly guide will walk you through the safest, easiest ways to use essential oils so you can enjoy their benefits without feeling overwhelmed. Though there’s an initial cost to gathering a few quality essential oils, it definitely doesn’t have to be overly expensive or intimidating.

In this guide we’ll walk through:

  • What essential oils are
  • How to use them safely based on real aromatherapy guidelines
  • Everyday oils that are easy for beginners
  • Simple ways to use them in real life

Let’s keep this simple, practical, and doable.

What Are Essential Oils?

Essential oils are concentrated plant extracts, or aromatic molecules from flowers, leaves, stems, bark, or roots.

They’re not food, not fragrance oils, and not weak herbal teas, they’re potent plant concentrates, or elements within an oil of the plant (oil within an oil). When used properly, scents and compounds from essential oils can support the body and uplift the mind.

Because they are highly concentrated, a little goes a long way. And safety matters.

When used properly, they can support:

  • Immune health
  • Relaxation and sleep
  • Respiratory comfort
  • Headaches and tension
  • Skin care
  • Mood and emotional balance

How to Use Essential Oils Safely

Before using essential oils, a few simple rules make all the difference:

1. Dilute

First, essential oils are oils within oils of the plant. They are very concentrated and, as a general rule, should be diluted to reduce risk of irritation and sensitization, as well as avoiding evaporation. In an effort to get a “stronger” impact you may apply essential oils only to have them evaporate within seconds or minutes because you did not dilute them in a carrier oil.

Second, dilution with children is very important!

A Good Guideline:

  • 1% dilution: safe for children, pregnant women, elderly adults, and sensitive skin
  • 2% dilution: typical for most adults without health issues
    This means about 3 drops of essential oil per tablespoon of carrier oil for gentle use.

Learn more about essential oil safety here.

Oil that can be used for dilution:

  • Coconut oil
  • Olive oil
  • Sweet almond oil
  • Apricot kernel oil
  • Jojoba oil
  • Evening primrose oil

2. Avoid eyes, mouth, and sensitive areas

Oils are powerful. Keep them away from eyes, inner ears, and mucous membranes. Instead of inside the ear, place tea tree behind the ear to help with ear infections.

Both the Alliance of International Aromatherapists and NAHA do not recommend taking essential oils internally unless a healthcare practitioner trained in clinical aromatherapy specifically advises it.

I have used peppermint oil on the roof of my mouth to open sinuses or in a drink in the past, but even this must be used carefully, especially when not diluted in a carrier oil first.

3. Use oils carefully around sensitive people

Children need lower dilutions and gentler oils. Less is more.

I recommend higher caution for:

  • Infants and toddlers
  • Pregnant or breastfeeding women
  • Those with sensitive or damaged skin
  • Pets (especially cats!)

These groups may require much lower dilutions or avoidance of certain oils entirely. As I mentioned, cats are extremely sensitive. Dogs do better around oils like cedarwood or lavender.

There is SO much misinformation on the internet about essential oils for those in these categories. One person makes a statement and suddenly it’s regurgitated on 100 other websites who copied them. The national aromatherapy associations of various kinds are a much better source. I only use tested sources and my own experience, but also do your own research.

4. Quality matters

Essential oils can be a scam if they are diluted, have cheaper scents mixed in, or are actually cheap fragrance oils. Make sure to choose reputable sources that list botanical names and extraction methods. Their websites should show 3rd party testing, history, and the location of where the plants are sourced.

I really like Starwest Botanicals and Mountain Rose Herbs and really trust them.

The 7 Best Essential Oils for Beginners

If you’re just starting, you don’t need 20 bottles. Start with a simple foundation. It’s easier to learn about the plant and ways to use it as an herb as well as essential oil if you start slowly.

Below are oils that I recommend for everyday home use:

🌿 Lavender (Calming and Supportive)

Lavender is one of the most versatile oils, used for nervous tension, restlessness, and a soothing atmosphere before bedtime. It is known for being a gentle essential oil.

Good for: sleep, anxiety, soothing minor burns, headaches, skin irritation

How to use:

  • Diffuse in the bedroom at night for anxiety and as a sleep aid.
  • Add a drop to a carrier oil and massage onto wrists or feet for calming support.
  • Add 5 drops to 2 ounces of carrier oil and apply to light burns or skin irritations.

Learn more about using essential oils in skin care.

🌿 Peppermint (Headache and Focus)

Peppermint is another gentle, beginning oil with a powerful impact. It’s well-known for supporting headache relief, digestion comfort, and revitalizing energy and cooling.

Good for: headaches, nausea, focus, congestion, muscle tension

How to use:

  • Dilute peppermint with carrier oil and rub on temples or neck to ease headache discomfort.
  • To relieve congestion, place a drop on your finger and place it on the roof of your mouth.
  • As a cooling agent, buy a peppermint soap bar. I have a number to choose from in my shop.

🌿 Tea Tree (for Infections)

Tea tree essential oil is widely used for its antimicrobial and cleansing properties in skin care and home cleaning. It’s my go-to for acne problems, skin infections, and ear infection.

Good for: acne, cuts, fungal issues, immune support, skin infections

How to use:

  • Create a homemade cleanser with a few drops of tea tree + water + vinegar for natural cleaning. Here are more natural cleaning recipes.
  • Dilute 5-10 drops into 2 ounces of a carrier oil and gently apply to the skin for acne, eczema, and other skin irritations that may be bacteria related or effected.
  • For an ear infection, place a drop on your finger and put in on your neck, right behind the ear lobe. Repeat 3x a day.
  • Here are many acne products with tea tree in them as well.

🌿 Lemon (Uplifting and Cleansing)

Lemon essential oil has antioxidant and cleansing qualities and a bright scent that can uplift mood and support digestive comfort.

Good for: mood, cleaning, air purification, immune support

How to use:

  • Diffuse in living spaces for a refreshing atmosphere.
  • Add to homemade, natural cleaning sprays for a fresh, toxin-free clean

🌿 Eucalyptus (Respiratory Ease)

Eucalyptus is among the most commonly used oils for supporting respiratory comfort and clearing congestion.

Good for: congestion, coughs, chest support, sinus issues

How to use:

  • Diffuse during cold or allergy season (along with tea tree, lemon, and peppermint).
  • Inhale vapor (from a diffuser or steam) to help open nasal passages.

NOTE: do not diffuse eucalyptus around small children at all. Also, do not diffuse around pets unless they are able to leave the room easily.

🌿 Frankincense (For Inflammation!)

Frankincense is one of the oldest essential oils used historically for emotional grounding, calming, and skincare support. Research shows it has antioxidant and soothing properties. It is so incredibly anti-inflammatory that I make a frankincense extract for back and joint pain. I hear from people all the time who are excited at how much it has helped them.

Good for: skin health, anxiety, inflammation, immune support

How to use:

🌿 Ginger (Optional for Digestion & Nausea)

Ginger essential oil is kind of stinky, but it is great for supporting digestion, easing nausea, and soothing discomfort.

Good For: Digestion

How to use:

  • Inhale ginger during an upset stomach or nausea.
  • Dilute and then rub on your abdomen for mild digestive relief.

How to Use Essential Oils for Everyday Illnesses

Here’s how to use essential oils in real life, without any complicated recipes:

Headaches & Tension with Peppermint and Lavender

How to Use: Massage onto temples, back of neck, and shoulders for soothing tension relief.

Sleep & Anxiety with Lavender

  • 1–2 drops in a diffuser
  • Or diluted and applied to wrists and chest

Diffusing a few drops of lavender at bedtime can support restful sleep habits. Many people feel calmer and sleep better by using lavender in aromatherapy.

**I have to mention, another essential oil that is AMAZING for a mind that just won’t quit at night is vetiver.

Congestion & Colds with Eucalyptus and Peppermint

  • Diffuse
  • Or add to a bowl of hot water and inhale steam

Add 2–3 drops of eucalyptus or peppermint to a bowl of hot (not boiling) water. Cover your head with a towel and breathe deeply for a few minutes to open nasal passages.

Muscle Pain with Peppermint and Frankincense

Minor Cuts & Skin Issues with Tea Tree

  • Dilute and apply directly to the area

Natural Cleaning with Lemon and Tea Tree

  • 1 cup water
  • ½ cup white vinegar
  • 8–10 drops lemon or tea tree oil
  • Shake before use for a fresh, toxin-free cleaner.

Why Simple Living and Essential Oils Go Together

Natural living isn’t about doing everything. It’s about doing a few things well.

Essential oils help reduce:

  • Toxicity in the home (from toxic cleaners or synthetic fragrances)
  • Chemicals in skincare
  • Medicine cabinet products (less is more)

They support a slower, more intentional way of caring for your home and family, one rooted in stewardship, simplicity, and wisdom.

Essential oils aren’t a replacement for medical care, but when used wisely, they can be complimentary tools for everyday comfort and home care. Always approach them with respect, attention to safety, and in ways that honor your family’s unique needs.

Start removing toxins from your skin care routine by making your own products.

Tags: , , ,
liver support

How to Support Your Liver (Without Extreme Detoxes)

One of the questions I get all the time is how to do a liver detox. When to do it, how to do it, and what liver cleanse is best. It’s become almost expected in wellness circles that at some point we’ll need to “detox” our liver.

Over time, though, I began to question what that really meant. 

Spoiler alert: The liver does not need to be detoxed, at least not how you think. In fact, it’s the organ that detoxes us. Our liver is continuously at work, transforming and packaging compounds so they can be safely eliminated. Once I truly understood that, my approach shifted. Instead of asking how to push my liver harder, I started asking what it needed to function well.

Liver: The Underrated Organ

You’ve probably heard people say that the liver is our body’s primary detox organ, but that’s just a fraction of what it does for us. The liver is a metabolic hub that helps handle carbohydrate, fat, and protein metabolism. It stores glycogen to stabilize blood sugar. It converts thyroid hormone into its active form and helps regulate estrogen metabolism.

The liver also produces bile, emulsifies fats, carries bilirubin, manages cholesterol transport, and communicates closely with the immune system. It’s also involved with hormones and estrogen metabolism. Those with high estrogen, especially PCOS, have a liver component involved. When energy feels unstable, hormones feel off, or inflammation lingers, the liver is often part of the broader picture.

We’re also seeing a sharp rise in non-alcoholic fatty liver, a condition where there are fat deposits on the liver. And surprisingly, this is even happening in people who don’t (or rarely) drink alcohol. That alone tells me something has shifted in our modern environment. Excess sugar, ultra-processed foods, chronic stress, and circadian disruption all increase our liver’s burden.

How the Liver Detoxes

It’s less about taking something or doing a “detox” to cleanse the liver, but more about supporting it in doing it’s job. Our liver detoxes in multiple phases. In simplified terms:

  • Phase one (Cytochrome P450) transforms compounds
  • Phase two makes them water soluble for elimination

These processes require amino acids, B vitamins, minerals like magnesium and zinc, sulfur compounds, and antioxidant support. If those building blocks aren’t present, detox pathways can slow, not because the liver is failing, but because it lacks the materials it needs. I’ll also add that while we do need iron, there’s more nuance to it than just adding an iron supplement. And too much iron can actually harm the liver. 

Years ago, when I was navigating Hashimoto’s and systemic inflammation, my labs showed just how stressed out I was. Testing showed that my triglycerides were elevated and blood sugar regulation wasn’t optimal. Then of course, my thyroid markers were off. While I’ve done some liver and gallbladder cleanses in the past, I didn’t need an aggressive cleanse to fix the problem.

Instead, I needed foundational support. Over time, as I reduced my stress and toxin burden and supplied nutrients, those markers improved. Our body is always on our side and by supporting it, that’s when I saw a positive response. 

The body communicates, though not always in obvious ways. Liver-related symptoms can be subtle and overlap with many other conditions. But when several show up together, it can be worth exploring further. We live in a world with air pollution, water pollution, hormone disruptors, chronic stress, and so many things that put a burden on our liver. 

Even if we do our best to reduce these inputs, it’s hard to hit everything. You might stock your home with clean laundry products, but work next to someone who smells like they bathe in artificial fragrance. Or maybe you live in an area with high levels of pollution. All of these things cause our liver to work harder, and sometimes it needs some more support. 

Symptoms Your Liver Needs to Detox

Some common signs that may indicate increased liver burden include:

  • Brain fog
  • Anger and irritability 
  • Fatigue
  • Bloating or nausea after fatty meals
  • Pale stools or dark urine
  • Skin itching
  • Pain or discomfort in the upper right of our abdomen
  • Easy bruising
  • Acne, eczema, dandruff, or other skin issues
  • PMS or heavy cycles
  • Elevated triglycerides that won’t improve

There’s also a strong liver–skin connection. When our detox pathways are overloaded, our body can use the skin as an alternate “exit ramp.” Hormonal patterns, especially higher estrogen states, can also reflect how efficiently the liver is processing hormones. One of the tell-tale signs our liver is struggling with handling our hormones are anger, irritability, or other mood changes. 

Severe symptoms such as jaundice, significant abdominal pain, swelling, fever, or GI bleeding are medical red flags and require immediate care. What I’m referring to here are the somewhat more subtle signals and patterns that develop over time.

Lab markers like ALT, AST, GGT, ALP, bilirubin, triglycerides, fasting insulin, and HbA1C can offer additional insight when interpreted with a practitioner. Data doesn’t replace how you feel, but it can add helpful context. Be sure to work with a practitioner who will not only run labs for you, but is willing (and able) to act on that information. 

Detox Myths That Can Backfire

One of the biggest misconceptions is that the liver needs to be aggressively detoxed or flushed. Crash detoxes, extreme juice fasts, harsh binders, or highly restrictive protocols can sometimes increase stress rather than relieve it. The liver is already detoxing constantly. What it needs most is steady input and reduced burden.

Sweating is often highlighted in detox conversations. And while I appreciate sauna for its cardiometabolic benefits, liver detoxification primarily occurs through bile and urine. Sweat can be supportive, but it doesn’t replace digestion, elimination, or phase two conjugation.

Binders can also have a role in specific contexts, but they’re not a substitute for fundamentals. If hydration, protein intake, bowel movements, and circadian rhythm aren’t addressed, layering in aggressive tools may simply mask symptoms or make them worse.

It’s always best to start with the simple, foundational things to support our overall health. 

Foundational Nutrition for Liver Support

If I had to start in one place, it would be protein. The liver needs amino acids like glycine, cysteine, and taurine for detox conjugation. Many women especially under-eat protein. I began aiming for roughly 40 grams at breakfast. For years I avoided eggs, but now I’ll have several raw egg yolks with breakfast. These are a great source of choline, protein, healthy fats, and micronutrients. 

Getting enough protein, especially first thing in the day, gave me a noticeable shift in my energy and mental clarity. Choline was particularly impactful for me. It supports fat export from the liver and contributes to cognitive function. Once I started eating eggs and taking a choline supplement, it was like I could feel my brain waking up! Not everyone has the same exact nutritional needs or gaps, so it’s worth exploring through testing what your body might need more of. 

In general though, these nutrients are good across the board for liver support:

  • Egg yolks and liver for choline, B vitamins, healthy fats, iron, etc.
  • Cruciferous vegetables for phase two support
  • Garlic and onions for sulfur compounds
  • Adequate fiber for bile and estrogen metabolite binding
  • Fatty fish for anti-inflammatory 

Coffee is another interesting factor. Moderate intake is associated with lower liver enzyme elevations and reduced fibrosis risk. On the other hand, excess fructose, alcohol, sugary beverages, and ultra-processed foods increase liver burden. So while I love my coffee with healthy fats or even a splash of raw milk, I ditched the sugary creamers long ago.

Lifestyle Shifts That Matter More Than Supplements

Insulin sensitivity also plays a central role in liver health. Avoiding processed foods, unhealthy carbs, and refined sugars, and balancing hormones through light inputs all have a positive effect on blood sugar. Getting to a healthy (or at least healthier) weight can also significantly reduce liver fat. The daily habits we reach for matter beyond the scale though. 

Walking or moving after meals supports blood sugar regulation. Resistance training improves metabolic flexibility. Movement (especially rebounding) supports lymphatic flow and mitochondrial function.

Circadian rhythm was one of the most underestimated pieces in my own healing. Getting morning sunlight within 30 minutes of waking gradually improved my sleep and energy. I shifted toward eating earlier in the day and finishing before dark. The liver operates on its own clock, and aligning meals and light exposure with daylight made a measurable difference.

Hydration and minerals also support these processes. Magnesium, zinc, selenium, and adequate sodium all contribute to enzymatic reactions. Consistent bowel movements, ideally one to two daily, help prevent the recirculation of toxins and hormone metabolites. When our liver and body tries to detox but we can’t eliminate the toxins through bowel movements, then they’re still stuck in our body. 

While these habits may seem simple, over time they compound and can really make a big difference. 

Targeted Liver Support (After the Basics)

Once you’re reaching for liver supporting foods, avoiding toxins that can overburden your system, and supporting hormone balance, there are some targeted ways to help further. Here are some supplements that offer additional support the the liver as it does it’s job. 

A few notes on sulrofaphane and berberine. Cruciferous vegetables are a great source of sulrofaphane, but not everyone tolerates them well. I found the supplement BrocElite really helpful for this, as it’s the only supplement with the stabilized form of sulrofaphane. Berberine also is naturally found in herbs like barberry and Oregan grape. However, when it’s isolated and put in a supplement our body has a really hard time using it. The one exception I’ve found is BerbElite from my friends at Mara Labs. 

Keep in mind not everyone needs all of these supplements, this is just a starting point for your own research. 

I’ve also found it interesting that some traditional systems associate the liver with emotional stress, particularly frustration. While not part of conventional hepatology, nervous system regulation and emotional processing were meaningful pieces of my own recovery. The body is integrated and healing rarely happens in isolated compartments.

The Big Takeaway

The liver does not need to be forced into detox. It needs nourishment, rhythm, and reduced burden. When we supply adequate protein and choline, support bile flow, prioritize circadian alignment, hydrate well, move daily, and limit incoming stressors, the liver often responds quickly.

My biggest improvements didn’t come from dramatic cleanses. They came from steady, foundational support practiced consistently over time. It wasn’t extreme or flashy, but it was sustainable. And I’ve found over and over again that it’s the simple things that have the most lasting impact.

How do you support your liver? What have you found that really moves the needle for you? I’d love to hear about it in the comments!

Tags: , , ,
Homestead Blog Hop - Homestead tips, ideas, animal care, and recipes every Wednesday

Homestead Blog Hop 587 – DIY Restorations and Cold Weather Projects

Welcome to Homestead Blog Hop, a weekly gathering for homesteaders and simple living enthusiasts to share DIY projects, from-scratch recipes, and creative inspiration. This week’s hop features cozy homesteading tips, along with practical ideas that celebrate handmade living and self-sufficiency.

Whether you’re looking for seasonal crafts, homemade treats, or encouragement on your homesteading journey, you’ll find plenty of inspiration to carry into the new year. Grab a cup of tea, explore the featured posts, and join us in sharing your own homestead creations.

Meet Your Homesteading Hosts

We’re Kelly from Simple Life Mom, Liz from The Cape Coop, Natasha from Houseful of Nicholes, and Laurie from Ridgehaven Homestead. Together, we’re passionate about from-scratch living, simple ingredients, frugal habits, and intentional homesteading. We’re delighted to host the Homestead Blog Hop, where you can find fresh inspiration each week for DIY projects, homemade recipes, and practical simple living ideas.

Follow Us for More Homestead Inspiration

Natasha – Houseful of Nicholes
Facebook | Pinterest | X | Instagram

Laurie – Ridge Haven Homestead
Facebook | Pinterest | Instagram

Liz – The Cape Coop
Facebook | Pinterest | X | Instagram

Kelly – Simple Life Mom
Facebook | Pinterest | X | Instagram

FEATURED POSTS from the Last Homestead Blog Hop

Each week, we take turns selecting three featured posts from the Homestead Blog Hop. These features are shared across all of our social media platforms, helping spotlight the creativity and hard work of our fellow homesteaders. Here are the featured posts from last week’s hop:

1. Paint And Antique a Wood Bed from Petticoat Junktion

2. Chicken Parm Meatballs & Spaghetti from Homemade on a Weeknight

3. What to Actually Work On When It’s Too Cold to “Do Projects” from Once and Future Homestead

Congrats! Feel free to grab the featured on button for your post.

Just right click and ‘save image as…‘

Guidelines for the Homestead Blog Hop

  1. Click the “Add Your Link” button below and upload a clear, eye-catching image from your project or recipe. Please link directly to the family-friendly post itself, not your blog’s homepage.
  2. You may link up up to three posts each week.
  3. Take time to visit a few other blogs in the hop and leave a thoughtful comment to let them know you stopped by. Community support makes this hop special!
  4. Please include a link back to the Homestead Blog Hop in your post. Posts without a backlink are not eligible to be featured. All featured posts are shared across all hosts’ social media channels.
  5. Share posts that haven’t been linked to the hop before. Older posts are welcome as long as they are new to the hop.
  6. By joining the Homestead Blog Hop, you grant the hosts permission to use one image from your post, with a link back to your site, if your post is selected as a feature next week.
  7. This is a family-friendly link-up designed to encourage, inspire, and support the homesteader in all of us.

Let the Party Begin!

Which project are you excited to try this week? Leave a comment below.

Join Our Homestead Blog Hop Pinterest Board

Follow all of your hosts on Pinterest and send a message if you’d like to be added to our Homestead Blog Hop group board. This board is a great place to share your DIY projects, crafts, and from-scratch recipes with the homesteading community.

Guideline: Only pin posts that you’ve linked up to the Homestead Blog Hop.

Tags: , , , , , , ,
Best oLive
Privacy Overview

This website uses cookies so that we can provide you with the best user experience possible. Cookie information is stored in your browser and performs functions such as recognising you when you return to our website and helping our team to understand which sections of the website you find most interesting and useful.