Homestead Blog Hop - Homestead tips, ideas, animal care, and recipes every Wednesday

Homestead Blog Hop 597 – Simmer Pots and Raising Chicks

Welcome to Homestead Blog Hop, a weekly gathering for homesteaders and simple living enthusiasts to share DIY projects, from-scratch recipes, and creative inspiration. This week’s hop features cozy homesteading tips, along with practical ideas that celebrate handmade living and self-sufficiency.

Whether you’re looking for seasonal crafts, homemade treats, or encouragement on your homesteading journey, you’ll find plenty of inspiration to carry into the new year. Grab a cup of tea, explore the featured posts, and join us in sharing your own homestead creations.

Meet Your Homesteading Hosts

We’re Kelly from Simple Life Mom, Liz from The Cape Coop, Natasha from Houseful of Nicholes, and Laurie from Ridgehaven Homestead. Together, we’re passionate about from-scratch living, simple ingredients, frugal habits, and intentional homesteading. We’re delighted to host the Homestead Blog Hop, where you can find fresh inspiration each week for DIY projects, homemade recipes, and practical simple living ideas.

Follow Us for More Homestead Inspiration

Natasha – Houseful of Nicholes
Facebook | Pinterest | X | Instagram

Laurie – Ridge Haven Homestead
Facebook | Pinterest | Instagram

Liz – The Cape Coop
Facebook | Pinterest | X | Instagram

Kelly – Simple Life Mom
Facebook | Pinterest | X | Instagram

FEATURED POSTS from the Last Homestead Blog Hop

Each week, we take turns selecting three featured posts from the Homestead Blog Hop. These features are shared across all of our social media platforms, helping spotlight the creativity and hard work of our fellow homesteaders. Here are the featured posts from last week’s hop:

1. Hatching Our Own Chicks from Scratch Made Food

2. Herb Falafel with Lemon Tahini from Esme Salon

3. Tiny Homestead Habit: Keep a Simmer Pot Going from The Once and Future Homestead

Congrats! Feel free to grab the featured on button for your post.

Just right click and ‘save image as…‘

Guidelines for the Homestead Blog Hop

  1. Click the “Add Your Link” button below and upload a clear, eye-catching image from your project or recipe. Please link directly to the family-friendly post itself, not your blog’s homepage.
  2. You may link up up to three posts each week.
  3. Take time to visit a few other blogs in the hop and leave a thoughtful comment to let them know you stopped by. Community support makes this hop special!
  4. Please include a link back to the Homestead Blog Hop in your post. Posts without a backlink are not eligible to be featured. All featured posts are shared across all hosts’ social media channels.
  5. Share posts that haven’t been linked to the hop before. Older posts are welcome as long as they are new to the hop.
  6. By joining the Homestead Blog Hop, you grant the hosts permission to use one image from your post, with a link back to your site, if your post is selected as a feature next week.
  7. This is a family-friendly link-up designed to encourage, inspire, and support the homesteader in all of us.

Let the Party Begin!

Which project are you excited to try this week? Leave a comment below.

Join Our Homestead Blog Hop Pinterest Board

Follow all of your hosts on Pinterest and send a message if you’d like to be added to our Homestead Blog Hop group board. This board is a great place to share your DIY projects, crafts, and from-scratch recipes with the homesteading community.

Guideline: Only pin posts that you’ve linked up to the Homestead Blog Hop.

Tags: , , , , , ,
dill pickle dip

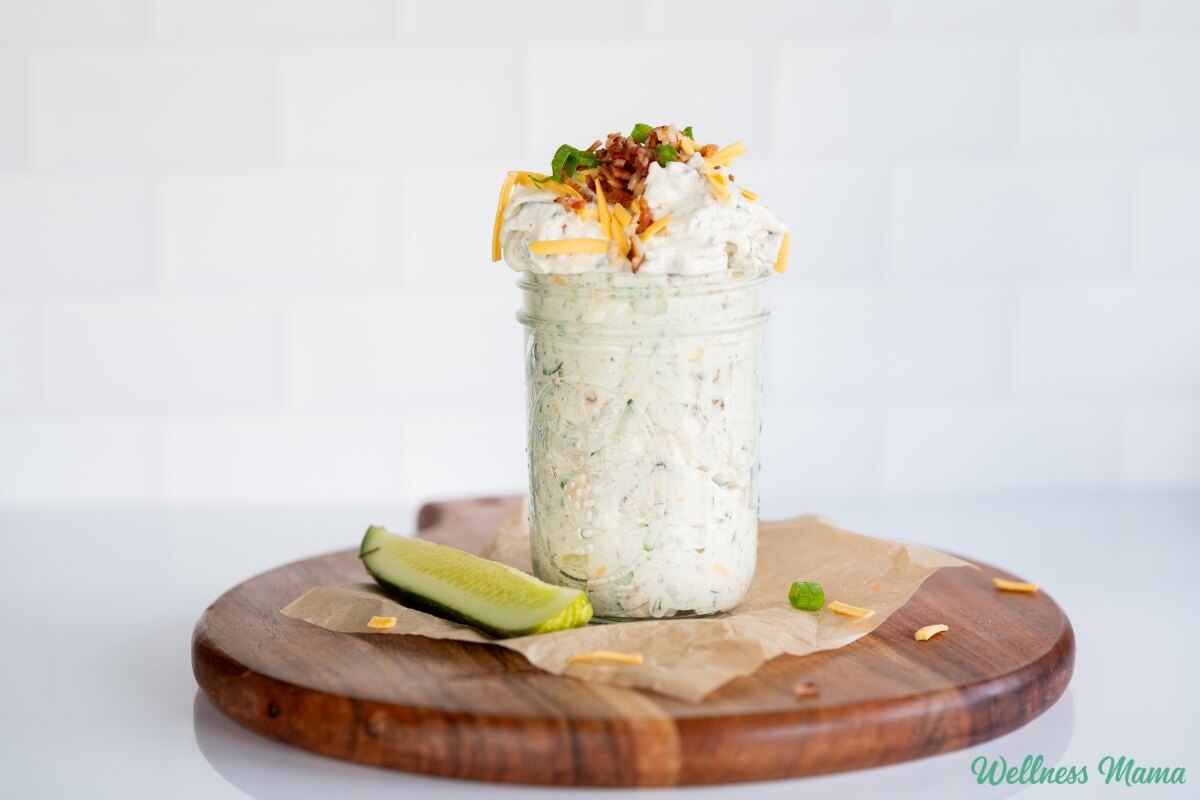
Dill Pickle Dip (With Clean Ingredients)

Summer is a time where fresh, seasonal veggies are abundant at the farmer’s market and in the garden. My kids have no problem eating their veggies, but our family enjoys them so much more with a good dip. This dill pickle dip is creamy, tangy, and everything you’d want in a dip. 

You might have seen the viral pickle dips going around on social media. While they do look delicious in the videos, they lean towards some ingredients I’m not a fan of. The good news? You can easily make your own dill pickle dip recipe with cream cheese and all of the good stuff, but with clean ingredients. 

Dill Pickle Dip (But Make it Clean)

Pickle dip made with Grillo’s dill pickles is all the vibe right now. And if you look at the ingredients list, it’s actually pretty clean. However, they’re not at every grocery store, and I prefer to use organic pickles whenever I can. 

If you’re up to making your own, fermented is hands down one of the best options. They’re naturally bubbling with healthy probiotics and are great for gut health. You can even make a more conventional homemade pickle with organic ingredients at home. Here are my recipes for both.

Don’t have the time or desire to make pickles from scratch? Bubbies brand from the refrigerator section is traditionally fermented and a good alternative. 

Dairy Options

The main ingredients in the dip are cream cheese, sour cream, and Greek yogurt. They create the smooth, creamy base for the tangy pickles. Cream cheese adds richness, sour cream and yogurt add a little tang, and the yogurt gives some lightness to the dip. 

I love this dill pickle dip with Greek yogurt, but other recipes make their dill pickle dip with cottage cheese. If you’re looking for a high protein dip made with cottage cheese, then you might like this smoked salmon dip or my radish dip. 

Probably the biggest clean ingredient swap in this dill pickle dip recipe is the ranch dressing seasoning. Sure you can grab a packet of ranch seasoning at any grocery store, but it’s hard to find one without MSG, artificial flavors, and mystery “spices.”

Years ago I came up with my own ranch seasoning recipe. I’ll make a big batch and use it as needed for dips, meats, and this pickle dip. You can also find a premade ranch powder here with pretty good ingredients if you prefer to buy it. 

Tips For Making Pickle Dip

Shredding your own cheese may seem like an unnecessary step, but I think its worth it. Most shredded cheese blends are coated in anti-caking agents like cellulose, which is basically sawdust (yes, really!). Often one of the kids will shred the cheese while I’m stirring together the rest of the dip. 

This pickle dip actually gets better the longer it sits. Make it the night before a party and it’ll be even more flavorful the next day. I like to save some extra bacon bits to sprinkle on top right before serving for extra crunch. It also keeps well in the fridge for up to 4 days.

You can also easily adjust the spice level in this dip. Keep some of the jalapeno seeds in if you like it more spicy or add more hot sauce. Don’t like the heat? Leave the hot peppers out completely. 

With pasture-raised bacon, organic dairy, fresh spices, and probiotic pickles, this clean dill pickle dip is sure to be a hit!

Dill Pickle Dip

The viral pickle dip everyone is making… made clean with real-food ingredients. No ranch packets, no seed oils, no additives. Ready in 10 minutes and gone even faster.

  • 8 ounces cream cheese (softened)
  • ½ cup sour cream (full-fat)
  • ½ cup plain whole milk Greek yogurt
  • 1½ TBSP ranch dressing mix (homemade)
  • 1½ cups dill pickles (finely chopped)
  • 2 TBSP pickle juice (reserved from jar)
  • 4 green onions (thinly sliced)
  • ½ cup cheddar cheese (freshly shredded)
  • 4 slices bacon (cooked crispy and crumbled)
  • 1 jalapeno (optional, seeded and finely diced)
  • 1 tsp hot sauce
  • 1 tsp salt (or to taste)
  • ½ tsp black pepper
  • Add the cream cheese, sour cream, and Greek yogurt to a large bowl. Beat together until smooth and creamy. A hand mixer gives the fluffiest texture, but a sturdy spoon works fine too.

  • Stir in the ranch seasoning, hot sauce, salt, and pepper until fully combined.

  • Add the chopped pickles, pickle juice, green onions, shredded cheddar, crumbled bacon, and jalapeño if using. Fold gently until everything is evenly distributed.

  • Taste and adjust as desired. Add more pickle juice for extra tang, more hot sauce for heat, or a pinch more salt if needed. Keep in mind the pickles are already salty so go slow.

  • Cover and refrigerate for at least 1 hour before serving to allow the flavors to meld.

  • Transfer to a serving bowl. Garnish with extra bacon crumbles, chopped pickles, or sliced green onion.

Nutrition Facts

Dill Pickle Dip

Amount Per Serving (1 serving)

Calories 225
Calories from Fat 171

% Daily Value*

Fat 19g29%

Saturated Fat 10g63%

Trans Fat 0.02g

Polyunsaturated Fat 1g

Monounsaturated Fat 6g

Cholesterol 52mg17%

Sodium 1005mg44%

Potassium 154mg4%

Carbohydrates 6g2%

Fiber 1g4%

Sugar 3g3%

Protein 7g14%

Vitamin A 675IU14%

Vitamin C 4mg5%

Calcium 126mg13%

Iron 0.3mg2%

* Percent Daily Values are based on a 2000 calorie diet.

  • Serve with grain-free crackers, cucumber rounds, carrot sticks, celery, or pork rinds.
  • I also like topping the dip with some fresh dill for garnish and extra flavor.

More Healthy Dip Recipes

If you’re looking for even more clean dip recipes, give some of these a try!

What are some of your favorite dips to use or make? Leave a comment and let us know!

Tags: , , , ,
exfoliate face

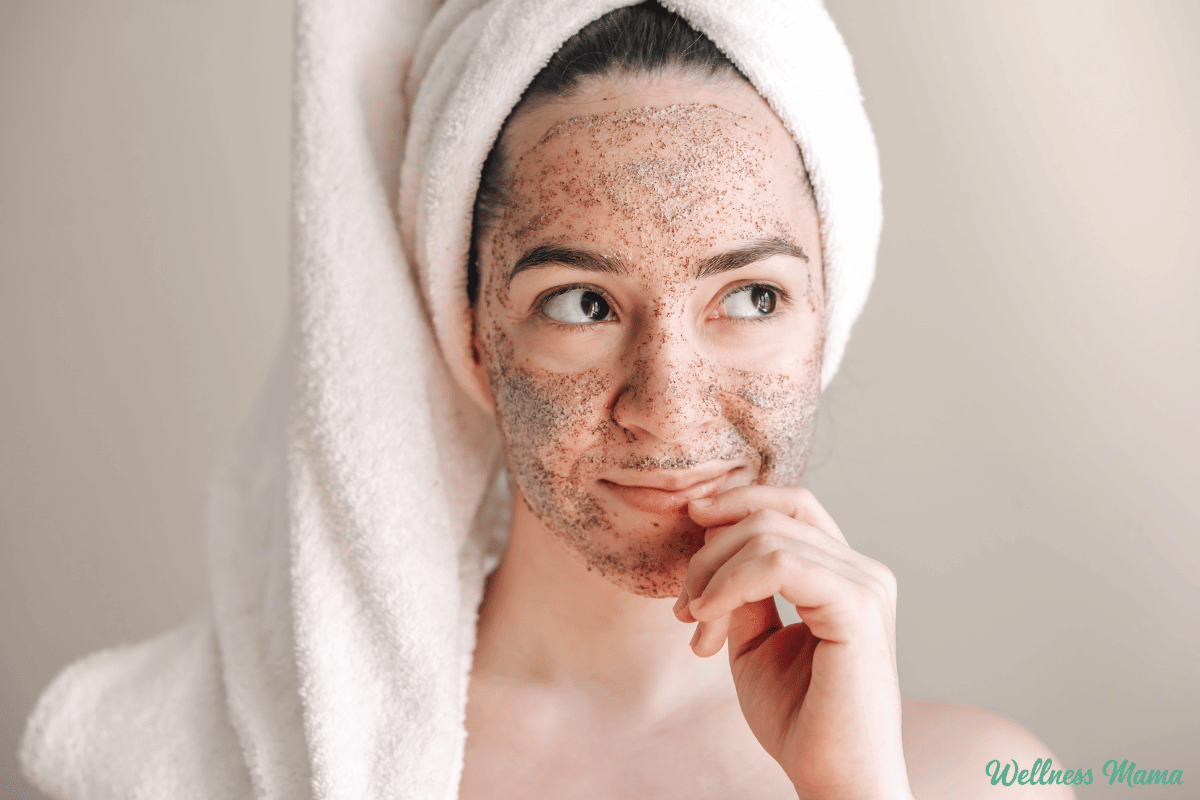
How to Naturally Exfoliate Your Face

If there’s one skincare step I misunderstood for years, it was exfoliation. I thought it meant scrubbing my face until it felt “clean.” And then I’d skip it entirely because I worried about the irritation. After digging into the research behind how to exfoliate your face, I realized it’s more about supporting the skin’s natural renewal process.

Our skin is already designed to exfoliate itself. The goal isn’t to force that process, but to gently assist it when it slows down or gets disrupted. When I shifted to a more intentional approach I noticed calmer, more resilient skin. The key was understanding what was actually happening at the cellular level. 

What Is Exfoliation (and What’s Happening Under the Surface)?

To really understand how to exfoliate your face naturally, it helps to look at what your skin is doing every single day. The skin’s outermost layer, the stratum corneum, is made up of several dozen layers of dead skin cells (called corneocytes). These cells are held together by glue like lipids and are constantly shedding in a process called desquamation.

In healthy, younger skin, this cycle takes about 28 days. As we age, or when skin is stressed, dry, or inflamed, that process significantly slows down. When dead skin cells don’t shed efficiently, a few things happen:

  • The skin starts to look dull or rough
  • Pores appear larger or more clogged
  • Skincare products can’t penetrate as effectively
  • Texture becomes uneven

Exfoliation works by helping remove these excess cells before they naturally fall away. How you remove them though is the important part. There are basically two ways to exfoliate. Either physically remove skin cells, or dissolve the bonds holding them together. 

The Best Exfoliator For The Face: Manual vs. Chemical 

Many people imagine DIY sugar scrubs when it comes to the best natural face exfoliator. However, physical exfoliators, like sugar and salt scrubs, are only part of the picture. There are also chemical peels or exfoliators. These sound harsh and unnatural, but there’s more nuance to it. 

Manual exfoliation uses friction (scrubs, cloths, or brushes) to physically remove dead skin cells. The process seems straightforward enough. You’re buffing away buildup and revealing smoother skin immediately. 

However, physical exfoliation is non-selective. It doesn’t just remove dead cells, it can also disturb living cells underneath. Studies show that aggressive physical exfoliation can cause microdamage to multiple layers of the stratum corneum and increase transepidermal water loss, weakening the skin barrier.

Once the barrier is disrupted, skin loses moisture more easily and becomes more prone to irritation. This is why the type of particles used matters. Smooth, fine particles are far less likely to create microtears than jagged materials like crushed shells or seeds.

Chemical Exfoliation: A More Targeted Approach

Chemical exfoliants work differently. Instead of scrubbing, they use acids or enzymes to break down the bonds (called desmosomes) that hold dead skin cells together. Yes, there are harsh chemical peels that can strip away the top layer, but there are also easy and gentler ways to do it naturally at home. 

This allows the cells to shed more evenly and with less stress. The benefits of chemical face exfoliants include:

  • It’s more uniform (no uneven pressure from your hands)
  • It’s more controlled (you adjust strength by concentration, not force)
  • It’s often gentler on skin’s deeper layers

Chemical exfoliants also work slightly deeper within the stratum corneum, helping to normalize the natural shedding process rather than forcing it at the surface.That said, “gentler” doesn’t always mean “risk-free.” Strong acids can still irritate or damage the skin if overused, especially at higher concentrations or when combined with other active ingredients.

I learned this the hard way when I tried layering too many exfoliating products at once. My skin didn’t glow… it protested.

Side Effects and Precautions (What Your Skin Barrier Is Telling You)

The skin barrier is made up of lipids and tightly packed cells that protect against water loss, bacteria, and environmental stress. When exfoliation is too aggressive, that barrier becomes compromised and damaged. Our skin is there to protect what’s underneath, so we don’t want to exfoliate all of that away!

Signs of over exfoliation include:

  • Redness or stinging
  • Tightness or dryness
  • Increased sensitivity
  • Breakouts or inflammation

Over-exfoliation is actually one of the most common skincare mistakes. It’s best to start gently and adjust based on your skin’s individual response.

Who Should Not Exfoliate?

Young children have a much faster skin cell turnover rate, so they really don’t need any special face exfoliants. Those with irritated skin should also skip the exfoliators. Exfoliation can cause even more damage for those with rosacea, eczema, sunburn, or otherwise damaged skin.

More exfoliation doesn’t equal better skin. In fact, the healthiest skin I’ve had came from doing less, but doing it more intentionally.

Because exfoliation affects your skin’s renewal cycle, frequency matters more than most people think. Since the natural cell turnover cycle is about 28 days (and slower as you age), exfoliation is meant to support that rhythm, not override it.

In general, exfoliation can work best:

  • 1–2 times per week for most skin types
  • Up to 2–3 times for oilier skin (with gentle methods)
  • Once a week or less for sensitive skin

Why not more? Because skin needs time to rebuild its barrier and regenerate new cells. Over-exfoliating interrupts this process and can actually slow healing and renewal. A gentle, regular routine works better than aggressive exfoliation done occasionally.

Even timing can play a role. 

Exfoliating in the evening helps remove impurities that have accumulated throughout the day and supports the skin’s regenerative process. Morning exfoliation supports skin in a different way. Our skin naturally renews while we sleep, leading to more dead skin cells on the surface. Exfoliating in the morning can help the body better remove these and absorb the beneficial ingredients of your morning skincare products. 

What to Do Before and After Exfoliating (Supporting the Process)

It’s helpful to take a step back and look at the whole picture when it comes to a healthy skincare routine. Before exfoliating it helps to first use a gentle cleanser, unless you’re cleansing and exfoliating in one step. Even slightly damp skin helps the process and protects deeper skin cells. 

Clean skin allows exfoliants to work evenly and reduces the risk of pushing debris deeper into pores.

After Exfoliating: Repair and Replenish

After exfoliating your face is a great opportunity to support the fresh, clean skin underneath. Skin is more permeable and more likely to absorb other skincare products. I like to follow it up with simple aloe vera or natural moisturizer. 

Exfoliation temporarily thins the outer layer of the skin, which can make it more vulnerable to UV damage. Supporting and protecting the skin afterward is just as important as the exfoliation itself.

How To Exfoliate Your Face With Natural Options

Here are some different DIY face exfoliants to add to your skincare routine. Some use manual exfoliants (like sugar), while others use “chemical” exfoliants, like the gentle acids in yogurt and lemon.

I’ve also included some of my favorite pre-made options if you want something quick and easy. There are several brands I rely on for clean ingredients that nourish skin deeply at a cellular level. 

DIY Face Exfoliation

Face Exfoliation Tools

Pre-Made Face Exfoliants

Gently exfoliate your face with chemical and manual exfoliants from some of my favorite skincare brands. 

Final Thoughts On Exfoliating Your Face

Learning how to exfoliate your face naturally is really about understanding your skin’s biology and working with it, not against it. Exfoliation isn’t just a cosmetic step, it’s a way to support your skin’s natural renewal process at the cellular level.

Face exfoliation can improve skin texture, brightness, and overall skin health. It’s important to find the balance to keep skin strong and resilient, not irritated though. If you’re not sure where to start, try choosing a gentle method once a week and see how your skin responds. 

How do you exfoliate your face? Any tips I missed? Leave a comment and let us know!

Tags: , ,
Homestead Blog Hop - Homestead tips, ideas, animal care, and recipes every Wednesday

Homestead Blog Hop 596 – Making Jam and Earth Day Crafts

Welcome to Homestead Blog Hop, a weekly gathering for homesteaders and simple living enthusiasts to share DIY projects, from-scratch recipes, and creative inspiration. This week’s hop features cozy homesteading tips, along with practical ideas that celebrate handmade living and self-sufficiency.

Whether you’re looking for seasonal crafts, homemade treats, or encouragement on your homesteading journey, you’ll find plenty of inspiration to carry into the new year. Grab a cup of tea, explore the featured posts, and join us in sharing your own homestead creations.

Meet Your Homesteading Hosts

We’re Kelly from Simple Life Mom, Liz from The Cape Coop, Natasha from Houseful of Nicholes, and Laurie from Ridgehaven Homestead. Together, we’re passionate about from-scratch living, simple ingredients, frugal habits, and intentional homesteading. We’re delighted to host the Homestead Blog Hop, where you can find fresh inspiration each week for DIY projects, homemade recipes, and practical simple living ideas.

Follow Us for More Homestead Inspiration

Natasha – Houseful of Nicholes
Facebook | Pinterest | X | Instagram

Laurie – Ridge Haven Homestead
Facebook | Pinterest | Instagram

Liz – The Cape Coop
Facebook | Pinterest | X | Instagram

Kelly – Simple Life Mom
Facebook | Pinterest | X | Instagram

FEATURED POSTS from the Last Homestead Blog Hop

Each week, we take turns selecting three featured posts from the Homestead Blog Hop. These features are shared across all of our social media platforms, helping spotlight the creativity and hard work of our fellow homesteaders. Here are the featured posts from last week’s hop:

1. How to Hard Boil Eggs in an Instant Pot from Ann’s Entitled Life

2. Savory Peach Rosemary Jam Recipe from Flour on my Face

3. Earth day, every day! GRAND ways to celebrate! from Our Grand Lives

Congrats! Feel free to grab the featured on button for your post.

Just right click and ‘save image as…‘

Guidelines for the Homestead Blog Hop

  1. Click the “Add Your Link” button below and upload a clear, eye-catching image from your project or recipe. Please link directly to the family-friendly post itself, not your blog’s homepage.
  2. You may link up up to three posts each week.
  3. Take time to visit a few other blogs in the hop and leave a thoughtful comment to let them know you stopped by. Community support makes this hop special!
  4. Please include a link back to the Homestead Blog Hop in your post. Posts without a backlink are not eligible to be featured. All featured posts are shared across all hosts’ social media channels.
  5. Share posts that haven’t been linked to the hop before. Older posts are welcome as long as they are new to the hop.
  6. By joining the Homestead Blog Hop, you grant the hosts permission to use one image from your post, with a link back to your site, if your post is selected as a feature next week.
  7. This is a family-friendly link-up designed to encourage, inspire, and support the homesteader in all of us.

Let the Party Begin!

Which project are you excited to try this week? Leave a comment below.

Join Our Homestead Blog Hop Pinterest Board

Follow all of your hosts on Pinterest and send a message if you’d like to be added to our Homestead Blog Hop group board. This board is a great place to share your DIY projects, crafts, and from-scratch recipes with the homesteading community.

Guideline: Only pin posts that you’ve linked up to the Homestead Blog Hop.

Tags: , , , , , , ,
night lights for kids

The Problem With Night Lights (and Better Solutions)

I’ve had the privilege of interviewing and meeting a lot of amazing health experts over the years. Not a single one has ever said that sleep isn’t important. Something as simple (and common) as night lights though are enough to sabotage sleep.

I noticed a big difference once I overhauled my sleep environment and I’ve heard from plenty of readers who say the same. Sleeping in a cool, completely dark space is so important for healthy sleep. It means better sleep quality and more energy from some simple changes (like turning off the ever present night light). 

Here’s why:

What’s the Problem With Night Lights?

Light exposure during the night is linked with an increased risk of depression, higher breast cancer risk, brain fog, and unbalanced hormones. As PhD Joyce Walseben explains, light inhibits the secretion of melatonin. And even if we do fall asleep, our brain can still detect the light through our eyelids, making it confused. 

A cool, dark nighttime environment is vital for hormone health, yet we often put lights in kids’ rooms. Only within the last 100 years has this even been possible. Before that, there was a natural cycle of light and darkness. While people might have had candles or lamps after dark, there wouldn’t have been lights on all night.

More and more research is emerging that shows a link between nighttime light exposure and health problems. A CDC report and a recent meta-analysis showed a surprising link between lack of sleep and increased cancer risk. 

The CDC found that profoundly blind women had less than half the breast cancer risk of women with normal vision. Profoundly blind men had less than half the risk of other cancers as normally sighted men. Even more interesting, those who were legally blind but could still see light didn’t have a reduced cancer risk. 

Shift workers (those who work after dark) who are exposed to artificial blue light through the night are more likely to develop cancer. Research shows shift work raises the risk of death from all causes, likely due to circadian disruption and abnormal light exposures. 

Night Light Free Zone Importance For Kids

Nighttime light exposure can decrease sleep quality, but it can also shorten the duration of sleep, leading to further problems. A 2024 study in Biomedicines reports that children who get quality sleep are less likely to struggle with obesity.  They also point to healthy sleep as having a positive impact on the epigenetics that affect the genes linked with obesity. 

Chronic sleep deprivation may cause weight gain by affecting the way our bodies process and store carbohydrates. It may also alter hormone levels that affect appetite.

Moreover, Dr. Zee, the director of the Sleep Disorders Center at Northwestern Memorial Hospital reports:

“Perhaps even more important than sleep duration is the effect of day to day variability of sleep wake timing on weight regulation.”

Why Sleep is So Critical For Kids

Sleep is important for everyone, but especially children. This is when our brains clean up from the stress of the day, organize information, and the body goes into recovery mode. 

Children who don’t get enough sleep or have disrupted sleep may experience the following: 

  • Allergies and immune system problems
  • Anxiety and depression 
  • Obesity, diabetes, and future high blood pressure
  • Poor academic performance and trouble concentrating
  • Learning and memory problems
  • ADHD like symptoms 
  • Mood swings and irritability
  • More stress hormone levels and irregular heartbeat
  • Daytime sleepiness (which leads to many of the above issues)

Blue light from screens and most night lights is especially harmful at night since they signal to the brain it’s daytime. It’s equally important to get morning sunlight to set the circadian rhythms for the day. This further sets the stage for healthy sleep. 

Practical Changes For Better Sleep

For years I’ve made getting out into the morning sunshine a daily habit and many of my kids have followed suit. I also model a positive nighttime routine for them and made practical changes in our home lighting. Not only do we use amber lights in the evening, but I also use red light in certain areas (like bathrooms) if needed at night. 

Switching to complete darkness as an adult is a relatively easy process. It isn’t so easy for children, especially those who are afraid of the dark or are used to nightlights. 

With all the research showing the importance of nighttime darkness, I felt strongly that this was something I wanted my kids to do. It took a little time to get all of the kids used to sleeping in darkness, but they finally did.

Step by Step How to Ditch the Nightlights (Mostly)

My kids’ rooms look a little different now that I have several teens (and one grown and out of the house!). The older kids have a similar setup to my bedroom. When the kids were little, here’s how I helped them transition into a healthy sleep environment for better sleep. 

  • Removed night lights, regular alarm clocks, and other things with lights. 
  • Kept the house cool and used a mattress cooling pad as needed 
  • Used blackout shades to cover artificial light from street lights and to help with heating and cooling costs.
  • Used sound machines to help them stay asleep. The “rain” sound was a favorite. We now have air filters in the bedrooms that have ambient white noise. 

My kids have lamps with these amber light bulbs in their bedrooms to use while winding down in the evening. Once it’s bedtime though, these go off. We’ve also used these Himalayan salt lamps that have a red tone in the hallway and bathrooms. This way their rooms are dark, but they can see to go to the bathroom if needed, without blue light disruption. 

The same place where I get my amber and red light bulbs from also has red light night lights. These are also a good option for hallways and bathrooms, but I’d avoid putting them in a kid’s room at night. 

Helpful Tips For Better Sleep

Years ago when I helped my kids set their rooms up like this, I did a bedtime routine with them to help them transition. First, I turned on the sound machine and read to them with the light on. Then, I turned off the light but left the door open with the salt lamp in the hallway. From here, I slowly worked up to putting them to sleep with the door closed and complete darkness.

Here are some more helpful tips to help kids avoid blue light and get better sleep: 

  • Put screens away after dark. A DIY charging drawer to store devices has been helpful! 
  • If screens are needed, use blue light glasses or the kids’ Daytime Computer that doesn’t have blue light. 
  • A cup of chamomile tea with a little raw honey and butter blended in is a restful way to wind down. The healthy fats support hormones and the chamomile soothes and calms. 
  • Use magnesium lotion on feet and legs before bed. Magnesium promotes sleep and helps with so many other things. 
  • Switching to organic mattresses also made a big difference, especially for my son with allergies. Along with diet changes, this was one way I helped him reverse his allergies. The light made a bigger difference, so I wouldn’t put new mattresses as the highest priority. 

Let Them Be A Part of the Process

I’ve found that my kids often make healthy choices when given the information to help them do so. I talked to my older kids about the reasons why nightlights weren’t good for them. This lets them be involved in the decision making process to get rid of the night lights.

I’m continually surprised by how smart and curious kids innately are and the decisions they can come up with when given the chance. Just one of the reasons behind my unconventional parenting style!

Final Thoughts on Night Lights

Sleep is so important for everyone, but especially growing children. Making the transition to a night light free room can be challenging, but very doable with the right approach. 

Have a chat with your kids about why you want to make changes, and make the process fun. Calming bedtime rituals like a cup of herbal tea and a bedtime story go a long way in helping kids ditch the night light in their rooms. 

Do your kids have night lights? Ever thought about removing them? Share below!

Tags: , , ,
Chocolate Chia Pudding

Creamy Chocolate Chia Pudding

You’d think that with lots of kids that mornings would be complete chaos around here. However, I’ve learned that taking a moment to slow down and plan ahead really reduces the chaos. I’ve got plenty of quick breakfasts and snacks in my back pocket, and this chocolate chia pudding is the newest one. 

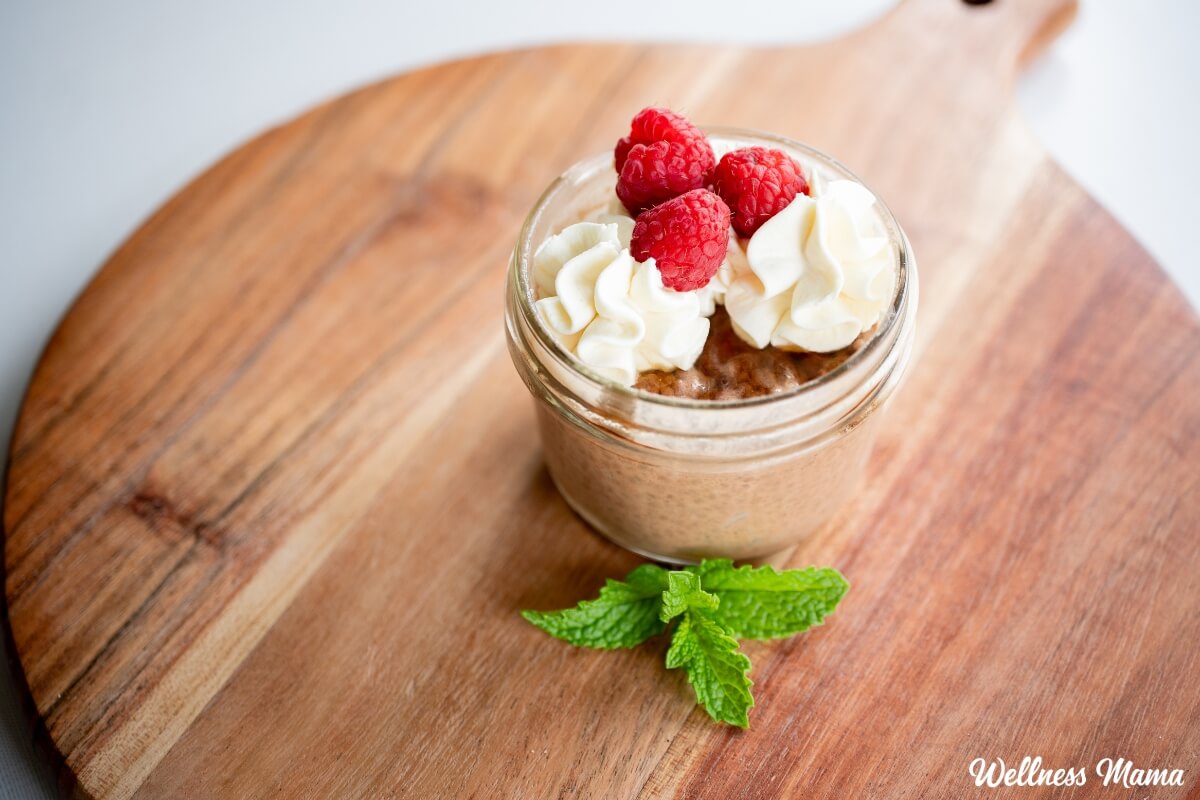
It has protein, healthy fats, natural sweetness from honey, and clean energy from cacao and chia. Chocolate chia pudding is sweet enough for dessert, but healthy enough to accompany breakfast. 

Sometimes I’ll just pop the whole bowl in the fridge after mixing, but usually I’ll put them into jars for individual servings. This way the kids (or me!) can easily grab one as needed. Chocolate chia pudding is the perfect grab-and-go snack or dessert. 

How to Make Chocolate Chia Pudding With Coconut Milk

The recipe is simple and is basically dumping and mixing ingredients together. If you’re using gelatin make sure to let it “bloom” first though to prevent clumps. Chill for several hours or leave it in the fridge for an overnight chocolate chia pudding. 

You can add whatever toppings you like before serving. Some favorites at our house are fresh berries, nuts, or cacao nibs. Shredded coconut, a spoonful of nut butter, or banana slices are also delicious!

I chose canned coconut milk because it’s extra rich and creamy. Raw milk adds extra nutrition and helps get the texture just right. If you want to make this completely dairy-free though, then unsweetened almond milk works as a raw milk substitute. I haven’t tried it, but I bet macadamia, hazelnut, or other nut milk would also be delicious! You could make chocolate chia pudding with almond milk by itself, but it’s not nearly as rich or creamy. 

Healthy Chocolate Chia Pudding

Clean ingredients make for a delicious and nutrient dense chia seed pudding. Cacao powder is rich in antioxidants and polyphenols to combat inflammation. You’ll also find minerals, including magnesium, and heart and brain health benefits. 

Coconut milk is rich and creamy and full of healthy and filling medium chain triglyceride fats (MCT). Coconut milk can also support brain health, the immune system, and reduce inflammation. 

I’ve also added gelatin for additional health benefits and a little protein boost. Gelatin is my go-to for healthier hair, skin, and nails. Plus, it’s great for gut health and digestion. Gelatin helps thicken the pudding a little (along with the chia seeds), but you can use collagen instead. Collagen won’t add thickness, but it does add some clean protein and the same health benefits as gelatin. 

Here’s how to make it!

Chocolate Chia Pudding Recipe

A delicious chocolate chia pudding that’s perfect for a snack, breakfast, or dessert. Full of nutrients, healthy fats, and rich chocolate.

  • If using gelatin, evenly sprinkle a layer of gelatin over 2 tablespoons of cold milk in a small bowl and let it sit for 2 to 3 minutes. If you’re using collagen peptides, skip this step and just add them directly in the next step.

  • In a medium bowl or large measuring cup, whisk together the coconut milk, remaining milk, cacao powder, honey, vanilla, salt, and cinnamon until smooth and fully combined. If you bloomed gelatin, whisk it in now.

  • Stir in the chia seeds and mix well to distribute them evenly. Don’t skip this step or they’ll clump at the bottom.

  • Let the mixture sit for 10 minutes, then give it one more good stir to break up any clumps that have formed.

  • Pour into individual jars or cover the bowl and refrigerate for at least 4 hours, or overnight, until thick and pudding-like.

  • Give each jar a stir before eating.

Nutrition Facts

Chocolate Chia Pudding Recipe

Amount Per Serving (1 serving)

Calories 348
Calories from Fat 261

% Daily Value*

Fat 29g45%

Saturated Fat 22g138%

Trans Fat 0.02g

Polyunsaturated Fat 3g

Monounsaturated Fat 2g

Cholesterol 4mg1%

Sodium 227mg10%

Potassium 436mg12%

Carbohydrates 21g7%

Fiber 8g33%

Sugar 11g12%

Protein 8g16%

Vitamin A 56IU1%

Vitamin C 3mg4%

Calcium 139mg14%

Iron 3mg17%

* Percent Daily Values are based on a 2000 calorie diet.

  • Top with fresh berries, a drizzle of raw honey, shredded coconut, or cacao nibs if desired. 
  • Store this pudding in the fridge and eat within 3-5 days. 

Chia Seed Variations and Toppings

There are plenty of toppings that work well with this chocolate chia pudding recipe. My kids love to customize it with their favorites. Here are a few to try:

  • Sliced bananas
  • Peanut butter or almond butter
  • Fruit jam
  • Toasted or chopped nuts
  • Chocolate chips
  • Cacao nibs
  • Berries
  • Shredded coconut

Looking for some more chia seed recipes? Here are some of our favorites:

What are some of your favorite ways to use chia seeds? Leave a comment and let us know!

Tags: , , ,
A Balanced Guide to Organic Self-Tanners

A Balanced Guide to Organic Self-Tanners

When it comes to dressing up, I am generally of the opinion that we should choose clothing that complements our skin tone.

The key word though is complement, not match.

Which brings me to graduation season.

This spring, my daughter is graduating not once but twice – first with her associate’s degree, then from high school – and that’s how I learned that graduation dresses are almost always white.

My legs are also pasty white, as are the legs of Miss High School Valedictorian, Class of 1.

The Usual Advice (And Why I Question It)

In most reviews, this is the part where someone says that we all need to avoid UV rays for our health, and the best way to achieve a healthy, sun-kissed glow is to use self-tanner.

However, there’s a growing body of research that suggests there’s a “sweet spot” for sun exposure. Too much can be harmful – but according to respected researchers including Dutch dermatologist Han J. van der Rhee – so can too little. (1)

That’s why, especially in the summer, my family makes it a goal to get sunshine every day. Now, don’t come for me – we do use sunscreen and other strategies like covering up and/or finding shade to avoid overexposure. This article is not about that, though – this one is, if you’re interested.

Now back to the special occasion situation. My daughter found a white dress that’s perfect for senior photos and graduation, and she wanted a safe sunless tanning option, so I decided now is the time to dive deep into the research on what’s available.

What I Found

Over the past couple of years, I’ve seen a lot of ads for organic self-tanners and wondered if they’re truly non-toxic and as good as reviewers say.

The short answer is that there are versions with truly non-toxic ingredients, but the actual biological impact varies depending on when (and possibly how) they’re applied.

The long answer starts with something you’ll see on almost every sunless tanner label – dihydroxyacetone.

Meet DHA, The Active Ingredient

If you’ve looked into self-tanners at all, you’ve probably come across DHA (dihydroxyacetone). It’s the most common active ingredient used to achieve a bronze glow.

DHA is a sugar molecule that reacts with amino acids on your skin’s surface to produce melanoidins, which are brown-pigmented molecules that mimic the look of a natural tan. (2) This surface-level bronzing effect essentially “stains” the top layer of skin.

Some DHA is synthetic, but the form found in organic and natural products is derived from non-GMO sugar beets or sugarcane. It’s generally considered safe for topical use, and has been approved by the U.S. Food and Drug Administration for use in self-tanning lotions.

However, there are a few nuances that don’t get talked about very often.

#1: Sunless Tanning May Reduce Vitamin D Production

Melanoidins might sound similar to melanin, but they’re functionally different.

Melanin formation happens when skin absorbs UV light – it’s a responsive biological process.

Melanoidin is formed when sugars and amino acids combine through the Maillard reaction – the same process that creates a browning effect on toast and roasted potatoes. According to one pilot study, when DHA creates a layer of melanoidins on the skin, it acts as a mild natural sunscreen that can reduce UVB penetration enough to decrease vitamin D production by an average of 24%. (3) (4)

Now, this was a small study, so we need more research to confirm and clarify the details.

However, since more than half of the U.S. adult population already has insufficient levels of vitamin D, I would personally keep an eye on my levels if I was using sunless tanning products on a consistent basis. (5)

For special occasions, when the effect will wear off after about a week, I’m 0% worried about vitamin D. However, I will be following an unofficial 24 hour rule, which leads me to an important caveat:

#2: Sunless Tanning & Sunlight Exposure

If you’re planning to apply sunless tanner before heading to the beach, you might want to do it a couple of days in advance.

Here’s why: Some studies have found that DHA-treated skin may temporarily produce more free radicals when exposed to UV light. (6) The window is estimated to be about 24 hours. (7)

Now, maybe you’re wondering whether erythrulose – a DHA alternative derived from fermented raspberries – has the same impact. The answer is . . probably. We don’t have any research on it specifically, but it works the same way that DHA does – via melanoidins and the Maillard reaction. It’s reasonable to presume that it also temporarily reduces UV tolerance, at least until we have more data.

So what does this mean in practical terms? Many experts recommend applying sunless tanner at night, allowing it to set, and using sunscreen the next day.

This is when thoughtful formulation matters – not just the active ingredient. Many brands now intentionally add antioxidant-rich ingredients to their products to help reduce and/or neutralize free radicals. (8)

#3: A Note On Spray Tans

While lotions and creams are applied topically, spray tans can introduce DHA into areas it wasn’t designed for, like the lungs or mucous membranes.

The FDA has specifically noted that DHA is not approved for inhalation, which is why protective measures (like nose plugs and eye protection) are often recommended during spray applications. I personally think this is more of a concern with commercial spray tans – which use an aerosolized mist with very fine droplets – not at home spray products in pump bottles that release larger droplets.

I personally wouldn’t take a deep breath while spraying my face, though. 🙂

What “Organic” Means (and Doesn’t Mean) in Self-Tanners

Now that we’ve talked about active ingredient, DHA, let’s talk about what else is in the bottle.

For a product to be “certified organic,” it usually needs to contain a very high percentage of organic ingredients.

Some self-tanners meet that standard. Others combine organic ingredients with naturally derived, plant-based components that aren’t certified but improve the formula (like vanilla fruit extract for scent).

Either way, the goal is the same: to create nourishing, skin-friendly blends that don’t include problematic ingredients like:

Parabens
These artificial preservatives can mimic estrogen in the body and have been linked to hormone imbalances, reproductive problems, developmental problems, and other health issues. They also cause significant ecological disruption by acting as endocrine disruptors in wildlife, especially aquatic life, where they cause reproductive and/or developmental problems. (9)

Fragrance (a.k.a. parfum)
Thanks to a loophole in U.S. labeling rules, companies can hide undisclosed chemicals under the catch-all term “fragrance.”

Formaldehyde-Releasing Preservatives
In personal care products, formaldehyde can be added to products to extend their shelf life. But if you’re like me, you’d immediately put back any product that listed formaldehyde on the label. Companies know that, which is why they use formaldehyde-releasing preservatives.

Yep, ingredients like sodium hydroxymethylglycinate don’t contain formaldehyde outright – but they slowly release small amounts over time as they break down. There’s no formaldehyde on the label, but exposure is still happening, and according to the Campaign for Safe Cosmetics even low levels – around 250 parts per million (ppm) or even 200 ppm in sensitized individuals – are cause for concern. (10)

Artificial Dyes
Many self-tanners use added colorants to create an instant “bronzed” look before the active ingredient develops.

These dyes are often petroleum-derived and can trigger redness, itching, or sensitivity.

Common examples include:

  • FD&C Red 40
  • FD&C Yellow 5
  • FD&C Blue 1
  • Coal tar–derived colorants

What I’d Want My Daughter to Know

That was a lot . . . probably more than you were looking for!

Here’s why: when my mom, sister, or daughter asks me for a recommendation, I want them to have the important details before deciding what works best for them. I want the same for you, too.

With all of that in mind, here’s what I’d say to my daughter about sunless tanners (actually, it’s what I did say):

  • They’re great for special occasions.
  • Apply them at night, then avoid heavy sun exposure the next day. Use sunscreen if you’re going to be outside.
  • Pay attention to the overall formulation, not just the active ingredient. I’d look for products that intentionally include antioxidants.
  • If you start using self-tanner often, it may be worth keeping an eye on your vitamin D levels.

My Top 3 Picks for Organic Self-Tanners

Navigating the “natural” beauty landscape can be overwhelming. Many brands greenwash, and there are so many to sift through it can be difficult to even know where to start.

To narrow down my list, I looked for:

  • High Percentage of Organic/Natural Ingredients: Obviously. Antioxidant-rich formulas were also a high priority.
  • Absence of “Red Flag” Ingredients: No parabens, phthalates, synthetic fragrances, etc.
  • Performance: The goal is sun-kissed, not orange.
  • Streak-Free Application: Nobody wants zebra stripes.
  • Positive Reviews: Does it consistently perform well for real users?

I ended up ruling out several popular “clean” self-tanners that rely on frequent reapplication or ingredient bases I wasn’t comfortable with. The ones below are the few that met my criteria for both formulation and real-world performance.

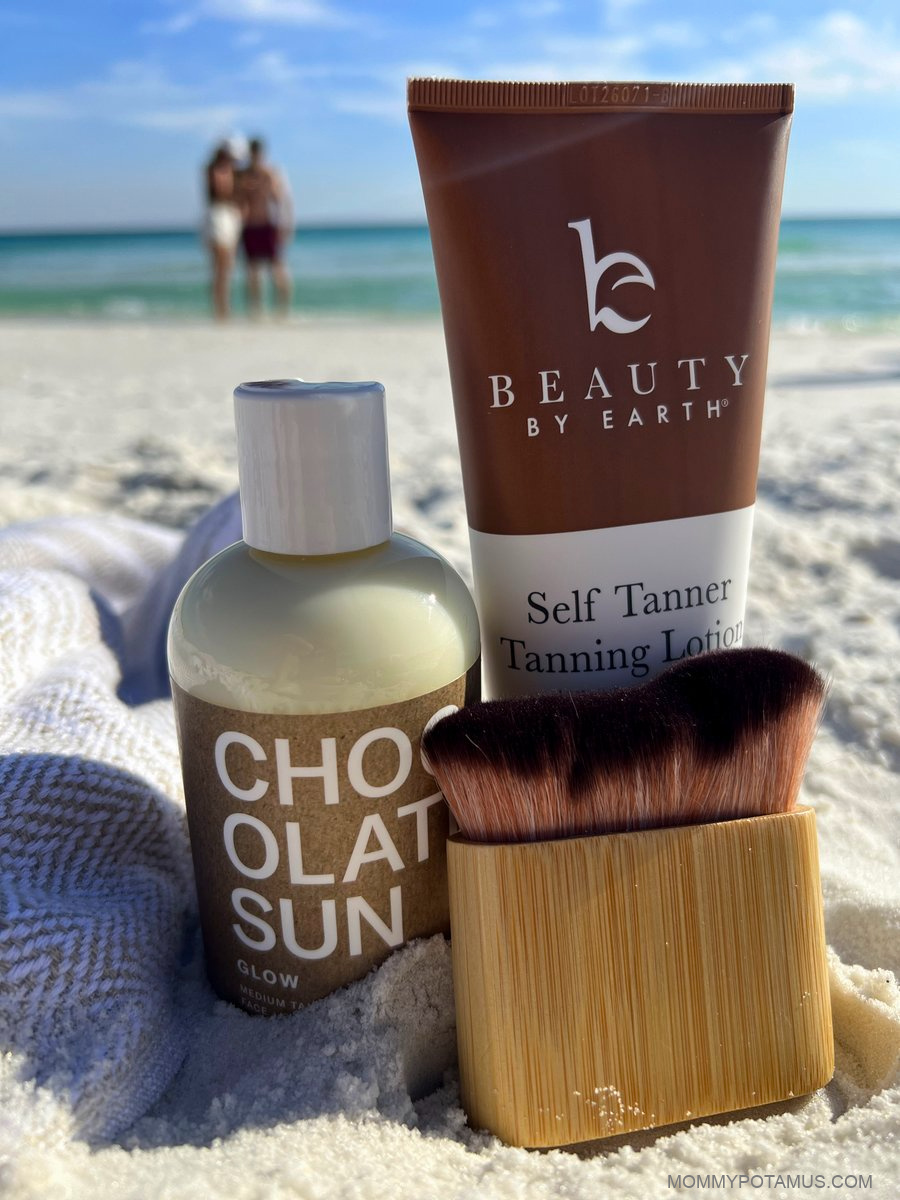
🥇 Beauty by Earth Self Tanner Body Lotion

Best overall balance of pure ingredients + performance

This body lotion is a crowd favorite for good reason. It gives skin a natural-looking glow without veering orange, and is versatile enough to be used on the face as well as the body. Beauty By Earth does make a separate face lotion for sensitive, dry, or breakout-prone skin, but to keep things simple I just used the body lotion and it worked well for me.

The organic aloe and shea butter base leaves skin feeling soft and supple – not dry – and the formula also includes antioxidants like green tea extract, pomegranate extract, and witch hazel extract.

It’s user-friendly, making it a great option for people (like me) who don’t use it enough to have expert-level applications skills. The scent is subtle and pleasant.

Why it stands out:

  • Simple ingredients
  • Good color (not orange-heavy)
  • Consistently strong user feedback
  • Pregnancy safe

Key Ingredients

  • Organic Aloe Vera: Hydrates and soothes.
  • Organic Shea Butter: Deeply moisturizes and improves skin elasticity.
  • Organic Coconut Oil: Nourishes and provides a lovely scent.
  • DHA from sugar beets: The bronzing ingredient.
  • Antioxidants: Green tea extract, pomegranate extract, and witch hazel extract.

🥈 Chocolate Sun Tanning Cream (Face & Body)

Chocolate Sun uses a moisturizing base of organic aloe, coconut oil, jojoba oil, and other skin-conditioning botanicals to support hydration while the color develops.

What I like most about it is that it doesn’t rely on repeated applications to work. You’ll typically start to see color within a few hours, with a deeper, natural-looking tan developing over time – making it a great option for occasional use rather than something you have to maintain throughout the week.

The texture is easy to work with, which makes application very forgiving (especially if you’re not using self-tanner regularly).

Why it stands out:

  • 89% Organic Ingredients
  • Designed to work well with a single application
  • Simple, botanical-focused formula
  • Good color
  • Hydrating base that supports skin during development

Key Ingredients

  • Aloe Vera: Hydrates and supports skin barrier
  • Coconut Oil: Nourishes and helps with even application
  • Jojoba Oil: Mimics skin’s natural oils for a balanced feel.
  • Sweet Almond & Sunflower Oil: Lighter oils for absorption
  • DHA (naturally derived): Active tanning ingredient
  • Antioxidant: Green Tea Leaf Extract

🥉Eco Tan Invisible Tan Cream

Best certified organic option

This brand is certified organic in Australia, where it was founded along the Gold Coast by Sonya Driver. I haven’t personally tried their highly rated Invisible Tan cream because it’s currently out of stock in many places.

However, it’s consistently one of the highest-rated options in the natural beauty space, and reviewers say it’s rich, glides on smoothly, and develops into a beautiful, natural-looking bronze overnight.

From a formulation standpoint, it checks a lot of boxes: certified organic ingredients, a nourishing base (including aloe and plant oils), and a focus on antioxidants.

They do offer other products as well, like Hempitan, but reviews are more mixed. I’m waiting for the Invisible Tan Cream to come back in stock, then I will test it out and report back.

Why it stands out:

  • Certified organic (In Australia)
  • Good mid-tone color

Key Ingredients

  • Organic Aloe Vera: Soothes and hydrates the skin.
  • Macadamia Seed Oil: High in fatty acids that are highly moisturising, and work to regenerate and soften the skin.
  • Organic Avocado Oil: Rich in vitamin E, deeply moisturizing.
  • Antioxidants: Elderberry extract, geranium oil, chamomile extract
  • DHA (Dihydroxyacetone) derived from natural sugar beet: The active bronzing agent.

How to Get the Best Results (Without Overcomplicating Things)

You don’t need a 15-step routine to get a good result, but a few small things make a big difference.

Start with smooth skin
Exfoliating ahead of time helps the color go on evenly and fade more naturally. A natural-fiber mitt (made with loofah, hemp or sisal) works well for this.

Moisturize dry areas first
Elbows, knees, ankles, and hands tend to grab more color. A light layer of moisturizer in those spots helps keep things even.

Apply like you would a body lotion
Work in sections and blend well. You don’t need perfect technique – just take your time and don’t rush it.

About mitts and brushes
Most brands recommend using an application mitt or kabuki brush for the smoothest finish. As far as I can tell, those are almost always made with synthetic fibers, which isn’t ideal from a microplastics standpoint.

That said, for occasional use, I think it’s a reasonable tradeoff if it helps you avoid streaks. If you’d rather skip it, applying with clean hands and washing thoroughly afterward works just fine.

Give it time to develop
I prefer applying at night and letting it develop while I sleep. It’s simpler, and it lines up with the earlier point about avoiding sun exposure right after application.

FREE Ebook: DIY Body Care Gifts Made Simple

Do you want to give gorgeous, handcrafted gifts for family and friends, without spending a bunch of time on them?

Then I’d love to give you a free copy of DIY Body Care Gifts Made Simple – my step-by-step guide to making gorgeous handcrafted gifts without stressing yourself out – as a gift for signing up for my newsletter. I’ll show you how to make vintage labels, luxurious lotion bars, lip balms, sugar scrubs, body sprays and more like a pro. Sign up for my newsletter and you’ll be redirected to the download page immediately!

Sources

  1. van der Rhee H, de Vries E, Coomans C, van de Velde P, Coebergh JW. (2016). Sunlight: For Better or For Worse? A Review of Positive and Negative Effects of Sun Exposure. Cancer Research Frontiers.
  2. Turner J, Schalla W, Tosca M, Rosado C. (2023). In search of the perfect tan: Chemical activity, biological effects, business considerations, and consumer implications of dihydroxyacetone sunless tanning products. Journal of Cosmetic Dermatology.
  3. Armas LAG, Fusaro RM, Sayre RM, Huerter CJ, Heaney RP. (2009). Do melanoidins induced by topical 9% dihydroxyacetone sunless tanning spray inhibit vitamin D production? A pilot study. Photochemistry and Photobiology.
  4. Laferté C, Oliel S, Pehr K. (2026). Clinical Use and Safety of Self-Tanner (Topical Dihydroxyacetone) in Dermatology: A Systematic Review. Journal of Cutaneous Medicine and Surgery.
  5. Cui A, Xiao P, Ma Y, Fan Z, Zhou F, Zheng J, Zhang L. (2022). Prevalence, trend, and predictor analyses of vitamin D deficiency in the US population, 2001–2018. Frontiers in Nutrition.
  6. Garone M, Howard J, Fabrikant J. (2015). A review of common tanning methods. Journal of Clinical and Aesthetic Dermatology.
  7. Gallagher M. (2018). Exposure to Dihydroxyacetone in Sunless Tanning Products: Understanding the Risks. Journal of the Dermatology Nurses’ Association.
  8. Dobos K. (2013). Formulating Sunless Tanning Products with DHA: Current Challenges. Cosmetics & Toiletries.
  9. Agarwal D, Bhatt U, Soni V. (2025). Ecotoxicological impacts of parabens on flora and fauna. npj Emerging Contaminants.
  10. Campaign for Safe Cosmetics. Formaldehyde and Formaldehyde-Releasing Preservatives.

Share with a friend! 👇

Tags: , , ,
mango popsicles

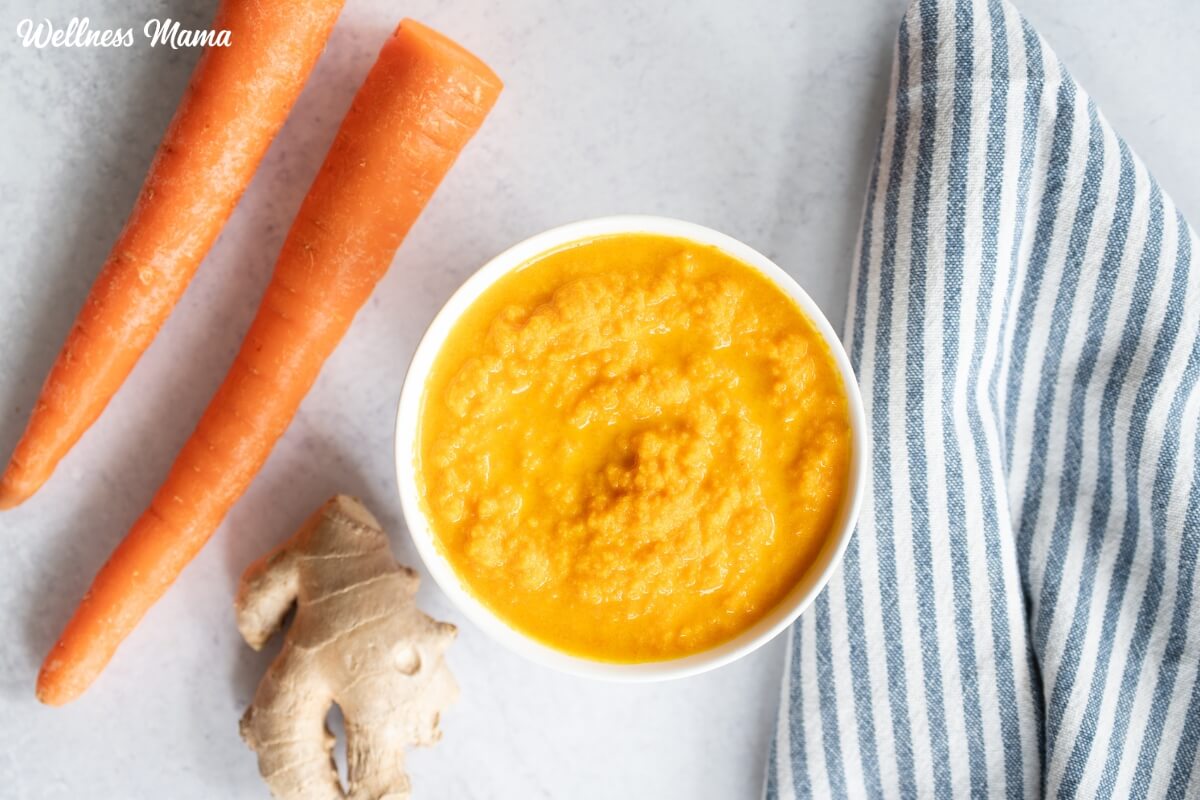
Turmeric Mango Popsicles With Coconut Milk

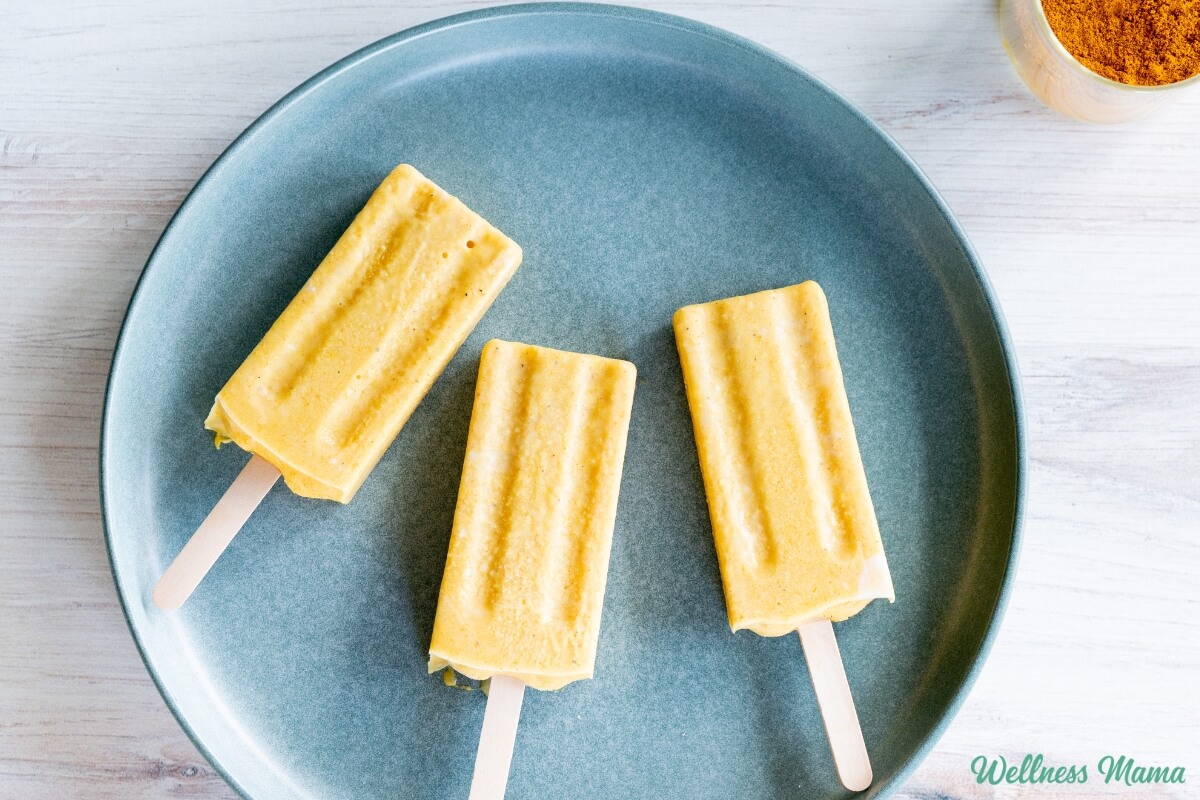
The weather has (mostly) warmed up around here, which means cold brew coffee, more salads, and the ever popular popsicles are on the menu. Popsicles are a great way to include some extra nutrition that even kids will love. These golden milk mango popsicles do just that. 

They feature creamy coconut milk, flavorful mango, and anti-inflammatory turmeric powder. The kids love how light and refreshing they are, and I’m a big fan of the antioxidants, vitamin C, and healthy fats!

Mango Popsicle Variations

A lot of mango popsicle recipes are simple with just 2-3 ingredients. While there’s nothing wrong with that (I’m all for simple!), I wanted to pack even more nutrition into this recipe. In the past, I’ve made coconut mango popsicles with probiotic water kefir grains and electrolyte rich coconut water. This version is still ultra creamy and packed with coconut flavor, but with additional flavors (and benefits) of golden milk. 

Not only do they taste amazing, but they also support the immune system and reduce inflammation. For those who struggle with seasonal allergies, they can help the body better respond to seasonal environmental threats. 

Golden Milk Mango Popsicle Ingredients

Here’s what I used to make these and why they’re so good for you.

  • Mango – Mangoes are rich in Vitamins A, C, and B6. You’ll also find good amounts of fiber, magnesium, and potassium. They help support the immune system and keep the system regular. You’ll also find antioxidants like mangiferin, which helps lower blood lipid levels and inflammation. 
  • Turmeric – This ancient spice gives these mango popsicles an even richer golden color. It’s also the anti-inflammatory staple in delicious, creamy golden milk. A 2008 review noted curcumin, found in turmeric, has antiallergic properties and inhibits histamine release from mast cells. 
  • Black pepper – I know black pepper sounds like it shouldn’t come anywhere near popsicles, but hear me out. A tiny amount of black pepper boosts the performance of the curcumin in turmeric. It contains piperine to help the body with curcumin absorption. And with the creamy coconut and sweet honey, the taste blends right in. 
  • Citrus juice –  Both lemon and lime juice are high in the antioxidant vitamin C. Vitamin C supports the immune system, and studies show it inhibits overly sensitive bronchial tissues triggered by mast cells and histamine. Both taste delicious, but lemon is higher in vitamin C. 
  • Ginger – A warming spice that packs a big antimicrobial punch to fight a variety of viruses and bacteria. It supports the immune system, fights inflammation, and aids digestion. Altogether, it’s a powerful ally for illness and seasonal allergy support. 
  • Coconut milk – Coconut is one of my favorite ingredients to work with because of its nutrition and versatility. Coconut milk makes these popsicles creamy and is full of medium chain triglycerides (MCT). MCT modulates inflammation, a key driver in allergic responses, boosts anti-inflammatory markers, and decreases pro-inflammatory cytokines. 
  • Raw honey – My go-to sweetener of choice, raw honey is full of micronutrients and is antimicrobial. While it’s often not an effective allergy treatment on its own, local and raw honey can help with seasonal allergies. If you don’t have raw honey, then maple syrup is a good mineral-rich alternative. 

How to Make Mango Popsicles

You’ll need a blender and popsicle molds, but the process is very easy. Simply dump and blend all of the ingredients, then pour into your molds. My kids love these ones, but you can even use a silicone ice cube mold if you don’t have popsicle molds. The exact number of popsicles you end up with depends on your mold size.

Golden Milk Mango Popsicles With Coconut

Golden milk meets summer treat. These creamy, anti-inflammatory popsicles are dairy-free, refined sugar-free, and kid-approved.

  • Add everything to a blender and blend on high for 60 to 90 seconds until completely smooth.

  • Taste and adjust. Add more honey if you want it sweeter, more lemon for brightness.

  • Pour into popsicle molds, leaving 1/4 inch at the top. Tap out air bubbles and insert popsicle mold top.

  • Freeze for at least 4 to 6 hours or overnight.

  • Run the mold under warm water for about 10 seconds to release. Serve immediately or wrap in parchment, place in a freezer-safe bag, and freeze for up to 3 months.

Nutrition Facts

Golden Milk Mango Popsicles With Coconut

Amount Per Serving (1 popsicle)

Calories 111
Calories from Fat 63

% Daily Value*

Fat 7g11%

Saturated Fat 6g38%

Polyunsaturated Fat 0.1g

Monounsaturated Fat 0.4g

Sodium 5mg0%

Potassium 178mg5%

Carbohydrates 14g5%

Fiber 2g8%

Sugar 12g13%

Protein 1g2%

Vitamin A 596IU12%

Vitamin C 22mg27%

Calcium 12mg1%

Iron 1mg6%

* Percent Daily Values are based on a 2000 calorie diet.

  • For a creamsicle version swap, 1/2 cup of the mango for canned pineapple.
  • For kids, try decreasing the turmeric to 1 teaspoon so it’s milder. 

For a Mexican flavor twist, try omitting the ginger and sprinkling a little Tajin chili lime seasoning in each popsicle mold before filling.

Shelf Life and Storage

Store them in the freezer (obviously) and consume within several months. I like to make a double batch and store the unmolded popsicles in a freezer-safe, silicone reusable bag to pull out when the craving strikes. You can also wrap them individually in parchment to prevent them from sticking together.

What are your favorite sweet, cool treats to enjoy? Leave a comment and let us know!

Tags: , , , ,
Homestead Blog Hop - Homestead tips, ideas, animal care, and recipes every Wednesday

Homestead Blog Hop 593 – Sourdough stuffing and Garlic Bread

Welcome to Homestead Blog Hop, a weekly gathering for homesteaders and simple living enthusiasts to share DIY projects, from-scratch recipes, and creative inspiration. This week’s hop features cozy homesteading tips, along with practical ideas that celebrate handmade living and self-sufficiency.

Whether you’re looking for seasonal crafts, homemade treats, or encouragement on your homesteading journey, you’ll find plenty of inspiration to carry into the new year. Grab a cup of tea, explore the featured posts, and join us in sharing your own homestead creations.

Meet Your Homesteading Hosts

We’re Kelly from Simple Life Mom, Liz from The Cape Coop, Natasha from Houseful of Nicholes, and Laurie from Ridgehaven Homestead. Together, we’re passionate about from-scratch living, simple ingredients, frugal habits, and intentional homesteading. We’re delighted to host the Homestead Blog Hop, where you can find fresh inspiration each week for DIY projects, homemade recipes, and practical simple living ideas.

Follow Us for More Homestead Inspiration

Natasha – Houseful of Nicholes
Facebook | Pinterest | X | Instagram

Laurie – Ridge Haven Homestead
Facebook | Pinterest | Instagram

Liz – The Cape Coop
Facebook | Pinterest | X | Instagram

Kelly – Simple Life Mom
Facebook | Pinterest | X | Instagram

FEATURED POSTS from the Last Homestead Blog Hop

Each week, we take turns selecting three featured posts from the Homestead Blog Hop. These features are shared across all of our social media platforms, helping spotlight the creativity and hard work of our fellow homesteaders. Here are the featured posts from last week’s hop:

1. Free Floral Happy Easter & He is Risen Banner Printable from Press Print Party

2. Sourdough Bread Stuffing from Mommy Hates Cooking

3. Wild Garlic Babka Bread from Food Nutters

Congrats! Feel free to grab the featured on button for your post.

Just right click and ‘save image as…‘

Guidelines for the Homestead Blog Hop

  1. Click the “Add Your Link” button below and upload a clear, eye-catching image from your project or recipe. Please link directly to the family-friendly post itself, not your blog’s homepage.
  2. You may link up up to three posts each week.
  3. Take time to visit a few other blogs in the hop and leave a thoughtful comment to let them know you stopped by. Community support makes this hop special!
  4. Please include a link back to the Homestead Blog Hop in your post. Posts without a backlink are not eligible to be featured. All featured posts are shared across all hosts’ social media channels.
  5. Share posts that haven’t been linked to the hop before. Older posts are welcome as long as they are new to the hop.
  6. By joining the Homestead Blog Hop, you grant the hosts permission to use one image from your post, with a link back to your site, if your post is selected as a feature next week.
  7. This is a family-friendly link-up designed to encourage, inspire, and support the homesteader in all of us.

Let the Party Begin!

Which project are you excited to try this week? Leave a comment below.

Join Our Homestead Blog Hop Pinterest Board

Follow all of your hosts on Pinterest and send a message if you’d like to be added to our Homestead Blog Hop group board. This board is a great place to share your DIY projects, crafts, and from-scratch recipes with the homesteading community.

Guideline: Only pin posts that you’ve linked up to the Homestead Blog Hop.

Tags: , , , , , ,
stepping off the drama triangle

Why I’m Stepping Off the Drama Triangle

Sometimes the most meaningful shifts in health don’t begin with a new supplement or a perfect diet. One of my most profound changes didn’t start in the kitchen or the gym at all. I realized that how I was showing up in my relationships, parenting, and even my work at Wellness Mama was sometimes doing myself and others a disservice. 

This awareness didn’t come all at once, and it certainly didn’t come easily. In fact, it came with a lot of humility and, at times, a surprising amount of grief. But with the hard realizations also came clarity. The self-reflection helped give me a new lens to understand not only my past choices, but how I want to show up going forward. 

At the center of that shift is something called the drama triangle. I’ll explain what I mean by that, and how it’s helped me to understand and make better relationship choices. I hope that something in this message will resonate with you and give you a fresh perspective, like it did me. Not only has this framework helped me have healthier relationships with those around me, but also with myself. 

What Is the Drama Triangle?

The drama triangle is a framework that describes three common roles people tend to rotate through in relationships. These include the victim, the perpetrator (or persecutor), and the savior (or rescuer). What struck me most as I learned about this concept isn’t just that these roles exist, but how easily (and often unconsciously) we move between them.

I used to think of these roles as fixed identities. That someone was a victim, or was controlling, or was overly helpful. However, I’ve come to understand that these aren’t static labels. They’re patterns of behavior and language we step into, sometimes multiple times a day.

And if I’m being honest, I could find examples of myself in all three.

The Victim Role: When Power Feels Outside of Us

For me, the victim role showed up most clearly during my struggle with Hashimoto’s. I remember how strongly I identified with being “sick.” That identity shaped not only how I felt, but how I spoke, to myself and to others.

My language at the time reflected this mindset in subtle but powerful ways. I often found myself saying things like “I have Hashimoto’s,” or “My body hates me.” I believed that if I could just find the right doctor or protocol, everything would change. At the time, this felt logical and even proactive.

Of course, I wanted answers and healing. But what I didn’t realize was how much I was placing the power for that healing outside of myself. I was outsourcing my agency to something external that I hoped would fix what I believed was broken.

The Perpetrator Role: When Control Creeps In

While I didn’t think of myself in the perpetrator role, I can now see how often I stepped into that role. Especially when I felt frustrated or overwhelmed.

For me, this often looked like wanting to “fight” something outside of myself. Sometimes that was big food, big pharma, government systems, or another perceived external problem. It also showed up in my language, especially in moments of stress, when phrases like “you should” or “why can’t you just…” would surface. Underneath that language was often a sense of urgency, a need for things to be done a certain way. I had a desire to be right or to correct what I perceived as wrong.

There’s often a subtle (or not so subtle) energy of control here. A belief that if others would just do things the “right” way, things would improve. And while it can feel justified in the moment, I’ve come to see how this role can create distance and disconnect us from empathy and curiosity.

The Sneaky Role I Lived In the Most

If I’m being completely honest, the role I lived in the longest, and the one that felt the most “right” at the time, was the savior.

The Savior Role: When Helping Isn’t Actually Helpful

This one is tricky because it often looks kind, sounds helpful, and even feels good in the moment. For me, it showed up as a constant tendency to offer advice, often without being asked. I liked to jump in quickly to fix problems before they even had a chance to unfold. I took on responsibilities that weren’t necessarily mine and said yes to things even when my body was signaling no.

In parenting, this meant stepping in to solve problems for my kids instead of allowing them to work through challenges. In work, it looked like micromanaging or over-functioning, believing I was helping while unintentionally limiting others’ growth. Then getting upset when I felt others weren’t pulling their weight. In relationships, it often meant carrying emotional burdens that weren’t mine to hold.

Beneath all of this was a belief I didn’t consciously recognize at the time. That if I could just help enough, fix enough, or do enough, everything would feel stable and okay. Over time, that pattern led not only to burnout and resentment but also to a subtle form of disconnection, from others and from myself.

How These Roles Keep Each Other Alive

One of the most eye-opening realizations for me was that these roles don’t exist in isolation. They actually depend on each other in a kind of ongoing loop.

Without a rescuer stepping in, the dynamic between victim and perpetrator might naturally resolve more quickly. But when someone enters as the savior, trying to help, fix, or ease discomfort, it can unintentionally prolong the cycle. This can remove the opportunity for growth or resolution.

I began to see this pattern reflected across different areas of my life. In parenting, for example, when one of my children expressed frustration or struggled with something, I often stepped in immediately to solve it. While this brought short-term relief, it also meant they didn’t always get the chance to build the skills they needed to navigate those challenges themselves. Then the same frustrations would resurface again and the cycle repeats.

In relationships, I noticed a similar rhythm. One person might feel overwhelmed or exhausted, which would prompt the other to step in and take on more responsibility. Over time, this imbalance could lead to burnout and resentment, eventually shifting into criticism or blame, and then the roles would reverse again.

Even in my work, I could see how my desire to help sometimes led me to step in too quickly. I would identify a need, take action, and then feel frustrated when others didn’t step up. All without recognizing that I hadn’t created the space for them to do so. In each of these scenarios, what seemed like a helpful intervention was often part of what kept the cycle going.

The Moment That Changed Everything

About a year ago, I had an experience that I still find difficult to fully put into words. It was one of those moments that felt both deeply personal and profoundly clarifying. I became aware (viscerally aware) of the times I had given advice without being asked.

Not just aware in a cognitive sense, but almost as if I could feel the impact of those moments. Times when I thought I was helping, but may have actually taken away someone’s autonomy or interrupted their process. There’s no other way to describe it except to say it was painful. 

And from that experience came something I now think of as the law of request.

The Law of Request: A New Way of Showing Up

At its core, the law of request is simple: Help lands best when it’s invited.

That doesn’t mean we never share, support, or offer ideas. However, it does mean we pause long enough to ask whether what we’re about to offer has actually been requested. Whether we’re sharing for the other person’s benefit or to relieve our own discomfort. If we’re honoring the other person’s agency in the process.

What This Changed for Me

This realization has shifted how I show up in almost every area of my life.

Instead of immediately offering solutions, I now try to pause and ask questions that create space rather than close it. I might ask whether someone wants ideas or simply someone to listen. I make an effort to pause before responding, to seek consent before sharing advice, and to trust that others are capable of navigating their own path. I realized that I can’t assume I know what’s best for another person, that I know their body and their situation better than they do. 

This shift has been especially meaningful in parenting. Rather than jumping in to fix, I practice asking my kids what they’ve already tried, what they think might help, or how I can support them in a way that feels most helpful to them. And while it isn’t always easy, especially when it’s someone you love who is struggling, I’ve noticed that when I step back, they often step forward in ways that surprise me.

Language Shifts That Make a Difference

One of the most practical ways I’ve been working to step out of the drama triangle is by shifting my language. This means both internally and externally. Our thoughts and ideas shape our language, and vice versa. If we want to change our feelings and behaviors, it starts with changing our language. 

From Identity to Experience

Instead of framing things as fixed identity statements like “I am anxious,” I’ve been practicing language that reflects temporary experience. As in, “I feel anxiety right now.” This subtle shift creates space between who I am and what I’m experiencing, reminding me that feelings can move and change rather than define me.

From “Should” to Choice

The word should used to appear frequently in my thoughts and conversations, often without me even noticing. Now, I see it as a signal to pause and reframe. Rather than saying “you should try this,” I might instead ask if someone would be open to an idea. This keeps the focus on choice rather than control.

From Fixing to Witnessing

This has been one of the most meaningful shifts for me. Instead of jumping in with solutions or advice, I’ve been practicing simply being present. That might look like offering a listening ear, asking a thoughtful question, or sometimes saying nothing at all and allowing space for someone else’s experience to unfold without interruption.

Learning to Repair (Instead of Being Perfect)

As I’ve become more aware of these patterns, I’ve also realized how many times in the past I showed up in ways that weren’t aligned with how I want to live now. And while I can’t change those moments, I can acknowledge them.

I’ve found it helpful to practice simple repair language in real time, especially when I notice myself slipping into old patterns. This might look like acknowledging that I jumped into fixing and apologizing for it, then asking whether the other person wants support or space. Other times, it’s as simple as asking how I can best show up for someone in that moment. There’s something deeply grounding about naming what’s happening without trying to justify it. It creates an opportunity to reconnect in a more intentional way.

Stepping Off the Drama Triangle in Everyday Life

This isn’t about becoming a completely different person overnight. It’s about noticing and becoming more aware. 

Noticing when I slip into patterns of feeling powerless and gently returning to a sense of agency. Noticing when I feel the urge to control or correct and stepping into curiosity instead. Noticing when I want to fix or rescue and pausing long enough to ask for consent.

Some of the practices that have supported me in this are surprisingly simple, though not always easy. Taking a few deep breaths before responding in moments of tension has been powerful. Allowing a few extra seconds of silence before speaking often creates space for deeper understanding. Choosing to ask questions instead of offering immediate solutions has shifted the tone of many interactions. And perhaps most challenging of all, learning to sit with silence (even when it feels uncomfortable) has helped me hear what I used to miss.

These are small shifts, but over time, they’ve begun to change the way I experience relationships and the way I show up within them.

A Personal Reflection and Moving Forward

As I’ve reflected on this journey, I can clearly see the ways I’ve shown up in each of these roles over the years. I can see how my own fears, experiences, and intentions shaped the way I communicated, especially in my earlier writing.

There were times I wrote from fear and had negative messaging. Times I overstepped in trying to help, and times I assumed I knew what was best for others. 

And for those moments, I feel a deep sense of responsibility. I’m forever grateful for all of you who have read my articles, tried my recipes, and listened to the podcast. You’ve willingly allowed me into your home and life and often sought my opinion. I don’t take that responsibility lightly. 

That said, my intention going forward is to not make assumptions and instead approach Wellness Mama from a sense of gratitude and positivity. More personal experience and fewer prescriptions of “you should” or “you have to.” To look at the positive changes we can make, and focus less on the “bad guys.”

Final Thoughts

Stepping off the drama triangle isn’t about never feeling overwhelmed, frustrated, or helpful again. It’s about becoming aware of the patterns we fall into and choosing a different way when we can.

For me, this has been less about doing more and more about doing less. Less fixing, less assuming, less controlling. More listening, noticing, and trusting. And while I’m still very much learning, I’ve found that even small shifts in awareness can create meaningful change. Not just in our relationships, but in how we experience our own lives.

What are some ways you’ve noticed these 3 roles in your life? Have you found them to be helpful or not? I’d love to hear about it in the comments!

Tags: , ,
Best oLive
Privacy Overview

This website uses cookies so that we can provide you with the best user experience possible. Cookie information is stored in your browser and performs functions such as recognising you when you return to our website and helping our team to understand which sections of the website you find most interesting and useful.