gifts for her

2025 Christmas Gifts for Her (89+ Ideas She’ll Love!)

As a mom, I’ve gotten plenty of gifts over the years. But it can be tricky to find the perfect gifts for the women in your life. This 2025 gift guide has holiday gifts for moms, sisters, aunts, wives, BFFs, and every other woman on your list. While you’re at it, don’t forget to get a few for yourself too!

Best Gifts for Women

The best gifts are ones she’ll use and love. I don’t stay on top of all the trending gifts, but I’ve discovered some tried and true presents over the years. Christmas gift ideas don’t have to be hard or complicated. Often it’s the simple things, like handmade items or DIY beauty gifts that are the most treasured.

While I love making DIY products to give out, it’s also nice to buy loved ones’ other thoughtful gifts too. And of course, they have to be as natural and healthy as possible! Thankfully there are still plenty of quality gifts I can feel good about giving to friends and loved ones!

Christmas Gifts For Her

The list below contains a lot of practical gifts that I’ve appreciated getting over the years. Coffee makers and blankets may not be sexy, but I’ve really enjoyed getting and using them. You’ll also find items to pamper her and have some fun (like a massage or art supplies). Some of the gifts are more of a splurge, but there are some cheaper options too.

Plus we can’t forget the stocking stuffers! I’ve included plenty of ideas for those below. With 90 different ideas, there’s sure to be something for every woman on your list.

Skincare and Beauty

  • Queen of the Thrones – Quality castor oil for all things beauty and wellness.
  • Purity Woods Dream Cream – Let mom pamper her face with this divine cream. Right now get up to 38% off for a limited time. 
  • Alitura Clay Mask – Or really anything from this brand. I love the clean ingredients and I really feel like I’m pampering my skin. Their clay mask features nutrient-dense ingredients that exfoliate dead skin, reduce pore openings, stimulate blood flow, and encourage new skin cell growth. 
  • Ice Roller – I love this ice roller from Skinny Confidential. It helps reduce puffiness and is like cold therapy for your face. 
  • One Skin – This brand uses the latest lab research to create one of a kind products that work. 
  • Orglamix – Non-toxic makeup and skincare so she can pamper herself. 
  • Toups and Co. – Tallow based balms, skincare, makeup, and more. Their frankincense face balm smells like Christmas and makes my skin feel so soft!

Food and Drink

  • Organifi Gold -This superfood evening drink will help her wind down and relax. Or check out any of Organifi’s other great products. 
  • Everbella – Liquid collagen that tastes like caramel. Use it on everything from homemade pancakes to ice cream… or eat it by the spoonful.
  • Real Plans Membership – My biggest time saver – this plans all of my meals and shopping lists and can handle allergies, bulk prep day, and more.
  • Hydro Flask Water Bottle – The water bottle I use that keeps water cool (or hot) for days.
  • Purity Coffee – If you’re looking for a perfect cup of joe, look no further. Team this up with a coffee maker and you have a perfect gift set for any mom, wife, or best friend. Right now they’re 20% off plus free shipping.
  • Dry Farm Wines – If she doesn’t like coffee, maybe wine is the way to her heart. I can’t recommend their natural wines enough. They’re keto, paleo-friendly, sugar-free, lower alcohol, and organic. Don’t forget to throw in some wine glasses.
  • Kasandrinos Olive Oil – Instead of a bottle of wine, how about a bottle of organic, freshly harvested olive oil? Many olive oils on store shelves are cut with cheaper oils, but this is the real deal. 
  • Cheesecake – Wonder Mondays makes delicious cheesecakes with real ingredients that’s high in protein and low sugar. 
  • Dream – Healthy hot cocoa for sleep that comes in a variety of flavors, including sea salt caramel and cinnamon cocoa. Improves sleep and helps you wake up refreshed.
  • Sip Herbals – Great replacement for coffee if you’re searching for something different!
  • Organic Tea Subscription Box – Give her the gift that keeps on giving. Choose from green tea, herbal teas, black teas, and more in this monthly tea subscription from Pique. Right now get 20% off for life with subscriptions.
  • Windowsill Garden Kit – She can grow organic herbs or flowers, even in a small space. This windowsill kit includes seeds and a beautiful planter.
  • Kombucha – Brew your own kombucha and find all the supplies, plus instructions, here. 
  • Four Sigmatic – These healthy coffees feature functional mushrooms for relaxation, focus, calm, and more. They also have delicious, plant based protein powders. 
  • Daily Harvest – Give her a high protein smoothie gift box shipped to her door. 
  • Barukas Nuts – These nuts are packed with hard to find micronutrients and a unique gift you won’t find in stores. 

Kitchen Essentials

  • Caraway Bakeware or Cookware – I have the full cookware set from Caraway as well as some of their bakeware. These are non-toxic pots and pans that have been tested safe, with fun colors to match your kitchen. Get up to 25% off for a limited time.
  • Le Creuset – Incredible cookware. Try their new sourdough bread baking pan or the classic Dutch oven. 
  • French Press Coffee Maker – Make wonderful coffee with this classic method that preserves coffee’s aromatic oils. (And see above for the perfect coffee to use with this.)
  • Xtrema – Pure ceramic cookware that’s easy to clean and care for. I’ve had my non-toxic Xtrema skillet for years!
  • Instant Pot – Revolutionize dinner! This electric pressure cooker makes roasts in about an hour and turns tough cuts of meat into deliciously tender meals. Plus it can cook beans, rice, and so much more in a fraction of the time. There’s even an option to make your own yogurt.
  • Ninja Creami – Make ice cream, sorbet, milkshakes and more. 
  • 6 in 1 Wonder Oven – This air fryer, toaster oven and more has a non-toxic coating and comes in plenty of stylish colors.
  • Always Pan – This is your all-in-one pan that makes cooking and cleanup a breeze. It comes in different colors and brings some fun into the kitchen! Right now get up to 35% off.
  • Yogurt Maker – Homemade yogurt tastes so much better than store-bought and is simple to make.
  • Ice Cream Maker – Make any kind of ice cream: dairy-free, sugar-free, etc.
  • Glass Electric Tea Kettle – Make tea in seconds with this glass electric tea kettle.

General Wellness

  • LeelaQ – Harness the power of quantum energy for better health. Right now get 25% off. 
  • Gift Card – Need I say more?
  • Shiatsu Massage Pillow – Seriously rivals an actual massage for half the price.
  • Wake-up Light Gentle Alarm Clock – Wake up gently to gradual light and sound. Help her get up on the right side of the bed!
  • White Salt Lamp – These beautiful lamps have a soothing, warm glow at night that really adds to the home decor. I like this one because it’s unique and minimalist with its square design. 
  • Blue Blocker Glasses – I wear these after dark for better sleep (some studies show avoiding blue light after dark helps melatonin levels). There are some fun colors and patterns to play with.
  • 10,000 Lux Light – Feel blue in the winter? I use this super-bright light for self-care to keep my cortisol levels healthy.
  • HigherDOSE Sauna Blanket – I’ve shared many times how sauna use can impact our health. If you don’t have the space for a full sauna, these sauna blankets are an easy and great option. BON CHARGE also has a really good sauna blanket.
  • Portable Red Light – This handy red light therapy device from Joovv gives all of the benefits of red light in a tiny package. 
  • Canopy Purifier – Their new bedside air purifier is stylish and compact. Or check out their humidifiers or aromatherapy products. 

Relax and Unwind

  • Grown-up Coloring Book and Markers – Coloring isn’t for kids anymore and studies show it may reduce stress levels. Try a “grown-up coloring book.”
  • Sleep Mask – Sit back and relax with these mulberry silk sleep masks. Or try one from Manta Sleep that’s 100% blackout with zero eye pressure.  
  • Slippers – These cozy, yet stylish barefoot slippers are like stepping on a cloud.
  • Pillow Cases – Mulberry silk pillow cases so hair doesn’t get messy during sleep. 
  • Wakewell – I use my Wakewell pillow all the time. It’s made with non-toxic and organic materials and adjusts for better sleep. 
  • Music – I love to fill our house with Christmas music this time of the year. Whether it’s on while we decorate or when we’re opening presents, it’s a must-have for our family.
  • A good book – Just off the top of my head… maybe The Wellness Mama 5-Step Lifestyle Detox or The Wellness Mama Cookbook? ? Okay, I’m biased, but it’s a great way to have all of the best recipes and health hacks on the site at your fingertips. I also put this post on my podcast guests’ most recommended books.
  • Blanket – I like this GOTS-certified organic cotton throw blanket. Winter is a time when I find myself curled up with a book and a cup of tea, and a good blanket is a necessity during the colder months.
  • Journal – Journaling has been such a great way for me to organize my thoughts for the day. These gorgeous lined journals come in plenty of colors for her to write down her thoughts and create.
  • Knitting Kit – Does she love trying new hobbies? Get her a learn-to-knit kit, complete with yarn, knitting needles, and a how-to-knit book.
  • Art Supplies – I’m a big fan of painting and drawing and love to do it with my kids. Here’s an acrylic art painting set, or you can get this mini watercolor paint set that comes in a gorgeous tin.
  • Foot Massager – This wooden foot roller massager is an affordable and easy way to get a foot massage.
  • Cork Yoga Mat – One of my must-haves for working out.

Clothing and Accessories

  • Fabletics Leggings – I love wearing a pair of cozy leggings at home, plus they’re great for working out in (see the yoga mat above).
  • Cozy Clothes – If leggings aren’t her thing, then maybe some cozy loungewear or sweats are? Or maybe she’d prefer a long sleeved cashmere sweater or a cardigan? Beat fast fashion and get quality second-hand clothing from ThredUp. Or buy new from an eco-friendly sustainable clothing brand.
  • Rose Gold Stud Earrings or these jade stud earrings make a great gift. Get her a jewelry box to store them in too!
  • Tote Bag – These stylish reusable canvas tote bags are great for shopping, on the beach, or as a carry-on bag. Or make your own from a repurposed T-shirt!
  • Crossbody Bag – This small canvas crossbody bag is perfect for tweens, teens, and older. There are tons of designs to choose from and it has zippered compartments to keep things organized.
  • Saddleback Leather – This amazing company has a 100 year warranty on their products. Find purses, wallets, boots, and more. 

Just Because

  • Keepsake Book – This story prompt program sends one thought-provoking question to mom or grandma every week for a year via email. At the end of a year, or whenever they feel ready, they will compile all their stories into a beautiful keepsake book. This personalized gift is also great for last-minute because it doesn’t require shipping!
  • Aromatherapy Foot Warmers – These colorful booties can be microwaved to release a relaxing sent from herbs like lavender. 
  • Essential Oil Diffuser – There are some really affordable diffusers that make a unique gift. Don’t forget a few essential oils to go with it! Plant Therapy also has some nice essential oil gift sets for the holiday season.
  • Beekeeping Course – Is she into homesteading skills? This course will give her everything she needs to know to start beekeeping. Pair it with some beginner beekeeping supplies. 
  • Gift Box – Not a gift in itself, but you can put a gift in this lovely red box and she can reuse it for later. 
  • Mixbook – I make a photo book for each of my kids for the year with memories and experiences. Photobooks also make a great gift for moms, sisters, wives, etc. 
  • Plant Hangers – Beautiful macrame plant hangers any plant lady would love. 

Stocking Stuffer Ideas For Her

  • Annmarie Gianni Skincare – This trial pack is one of my favorite stocking stuffers for teenagers, friends, and anyone in between. Get 74% off plus a free night serum. 
  • Just Thrive – Our family loves their probiotics and probiotic gummies – use code WELLNESSMAMA for a discount.
  • Wellnesse – My personal care line has hair care and oral care for a natural, simple clean. The mini toothpastes or floss picks make great stocking stuffers.
  • Vibrant Blue Oils – There are plenty of great essential oils out there, but Vibrant Blue’s parasympathetic blend is unique. Just smelling it helps you shift into parasympathetic mode and a more relaxed state. The holidays can come with their own stress so help her chill out and enjoy the day!
  • Plant Therapy has some amazing lotions, body butters, and essential oils! They create everything with high quality essential oils and are one of the most transparent brands I know.
  • Spring + Mulberry – Delicious chocolate bars sweetened only with dates. These come in a variety of amazing flavors like lavender rose and mango chili.
  • Pique Tea – So many great tea options from Pique. We’ve had the founder on the podcast and are impressed with the level of purity and testing they have in place for their teas. These are my favorite teas to have on hand.
  • Toups Organics – They have an incredible line of clean cosmetics, lotions, and even a baking-soda free deodorant for sensitive types.
  • Magnesium Oil – Spray on for relaxation, detox support, and even deodorant. 
  • Massage – Sometimes it’s also nice to get a massage from a professional. She’ll love a gift certificate for a local massage therapist!
  • Fontana Candles – I really like these non-toxic candles and wax melts as they don’t have any petroleum byproducts, stabilizers, fragrance oils, or harmful dyes.
  • Made On – These hard lotion bars are easy to travel with, not messy, and just as good as homemade. 

What gifts for her have you given over the years that have been a hit? Anything else you’d add to the list?
Tags: , , , ,
How To Create Diagonal Color Layers in Soap

How To Create Diagonal Color Layers in Soap

If you’ve been making melt and pour soap for a while, you’ve probably reached that point where plain, single-color bars just aren’t doing it for you anymore. Don’t get me wrong, there’s nothing wrong with simple soap. But once you get the hang of the basics, it’s natural to want to try something a little more interesting.

That’s where layering comes in.

Whether you’re going for bold stripes or a soft, stacked ombré effect, layering is one of those techniques that instantly elevates your soap game. And the best part? You don’t need any special equipment or advanced soap making skills.

Just a little patience, a spray bottle of rubbing alcohol, and a basic understanding of how temperature affects your layers. (Oh, and a good mold never hurt!)

So if you’re ready to take your melt and pour soap from basic to elevated, let’s talk about how to create layers in soap that look professional and stick together perfectly every single time.

Why Create Layers in Melt and Pour Soap?

Let’s start with the basics. Layering is exactly what it sounds like: you pour different colors or soap bases in stages, letting each one cool just enough before adding the next. It’s not rocket science, but there is a little technique involved (don’t worry, I’ll walk you through it).

The cool thing about layering is that it opens up a ton of design possibilities. You can create bold, punchy stripes. You can play around with ombré effects that fade from one color to the next (that’s a little more complicated and not covered here, but possibly in the future…). You can even alternate clear and opaque soap bases to add dimension and contrast that really makes your bars pop.

The secret to getting those clean, distinct layers? It all comes down to controlling temperature and timing.

Pour too hot and you’ll melt the layer underneath. Wait too long and your layers might not stick together at all.

Once you get the hang of it, layering is a super easy way to make soap that looks way more impressive than it actually is.

Supplies

Clear soap gives you that translucent, glassy look, while white soap makes your colors more opaque and vibrant. I like to alternate between the two so the layers really stand out.

  • Colorants–Mica powders, liquid soap dyes, or powdered herbs or botanicals all work here. Micas are my go-to because they’re skin-safe and nontoxic, though they’re a bit more subtle than traditional dyes.

If you want really bold, punchy colors, liquid soap dyes are the way to go. And if you’re keeping things natural, powders like beetroot or spirulina can give you soft, earthy tones.

  • Essential Oils–Totally optional, but this is where you can really personalize your soap.

You can use the same scent in every layer or switch it up for a more complex fragrance. Just remember to stick with skin-safe oils, especially if you’re gifting these bars (you don’t want to give the gift of a rash!)

  • Rubbing Alcohol in a Spray Bottle–Rubbing alcohol is your secret weapon.

A quick spritz before and after pouring each layer keeps them bonded together and gets rid of any surface bubbles that might mess up your design. And I’ve found that a bottle like this creates just the right amount of mist. Trust me, don’t skip this step.

Equipment

I’m partial to loaf molds because you can slice them into bars later and show off those gorgeous layers. But if you want individual soaps, cavity molds are perfect.

  • Heat-Safe Containers–You’ll need something to melt and mix your soap in.

These 16-ounce glass measuring cups with pour spouts are my favorite because they hold just enough soap for one layer and they make pouring really easy. If you’re doing multiple colors, grab one container per color to keep things moving smoothly.

  • Thermometer–Technically optional, but it makes life way easier.

Checking the temperature before you pour helps you avoid melting the layer underneath or ending up with layers that don’t stick. A basic kitchen thermometer does the trick, or you can opt for a digital instant read thermometer if you’ve got one.

  • Utensils–The usual suspects: stirring spoons, measuring spoons, and a sharp knife for cutting your finished soap into bars.

Optional Supplies

  • Chopstick or Skewer–Perfect for popping any stubborn bubbles that the rubbing alcohol doesn’t catch. Can also be used to scratch up a layer of soap that got too cold and may not bond properly to the next layer.
  • Small Ramekin or Book–These are great for tilting your mold if you want angled or diagonal layers. It’s a simple trick that adds a lot of visual interest without making things too complicated!
  • Extra Thermometers–If you’re working with several colors at once, having more than one thermometer means you can check all your containers quickly without waiting for one thermometer to cool down between checks.
  • Pipettes or Droppers–Super handy if you’re adding essential oils or colorants and want to be precise about how much goes into each layer.
  • Cutting Guide or Soap Cutter–Not essential for the layering process itself, but when it comes time to cut your loaf into bars, a soap cutter helps you get uniform slices that show off your layers perfectly.

How to Create Layers in Melt and Pour Soap

Since this post is all about technique (not a specific recipe), I’m going to walk you through the general process of layering melt and pour soap. You can adapt this to whatever colors, scents, and mold sizes you prefer. And if you want exact measurements and a step-by-step project, check out the holiday DIY Striped Soap post.

Step 1: Prepare Your Soap Base

Start by cutting your melt and pour base into small 1-inch cubes. This helps it melt evenly, prevents overheating or scorching, and saves you microwave time. Toss the cubes into a heat-safe container (one per color or layer) and pop it in the microwave.

Heat in short 30-second bursts, stirring well between each one, until the soap is just melted. The key word here is just. You don’t want to overheat it or the soap can scorch or get weirdly thick and hard to work with.

Step 2: Add Color and Fragrance

Once your soap is melted, stir in your colorant and fragrance. Go slow and gentle here because too much stirring can create bubbles, and bubbles are the enemy of clean layers.

This is also where you get to have fun. Each layer can have a different color, a different scent, or both.

Want a lavender layer that smells like lavender and a pink layer that smells like rose? Go for it. Just remember to stick with skin-safe essential oils if you’re planning to use or gift these bars.

Step 3: Pour the First Layer

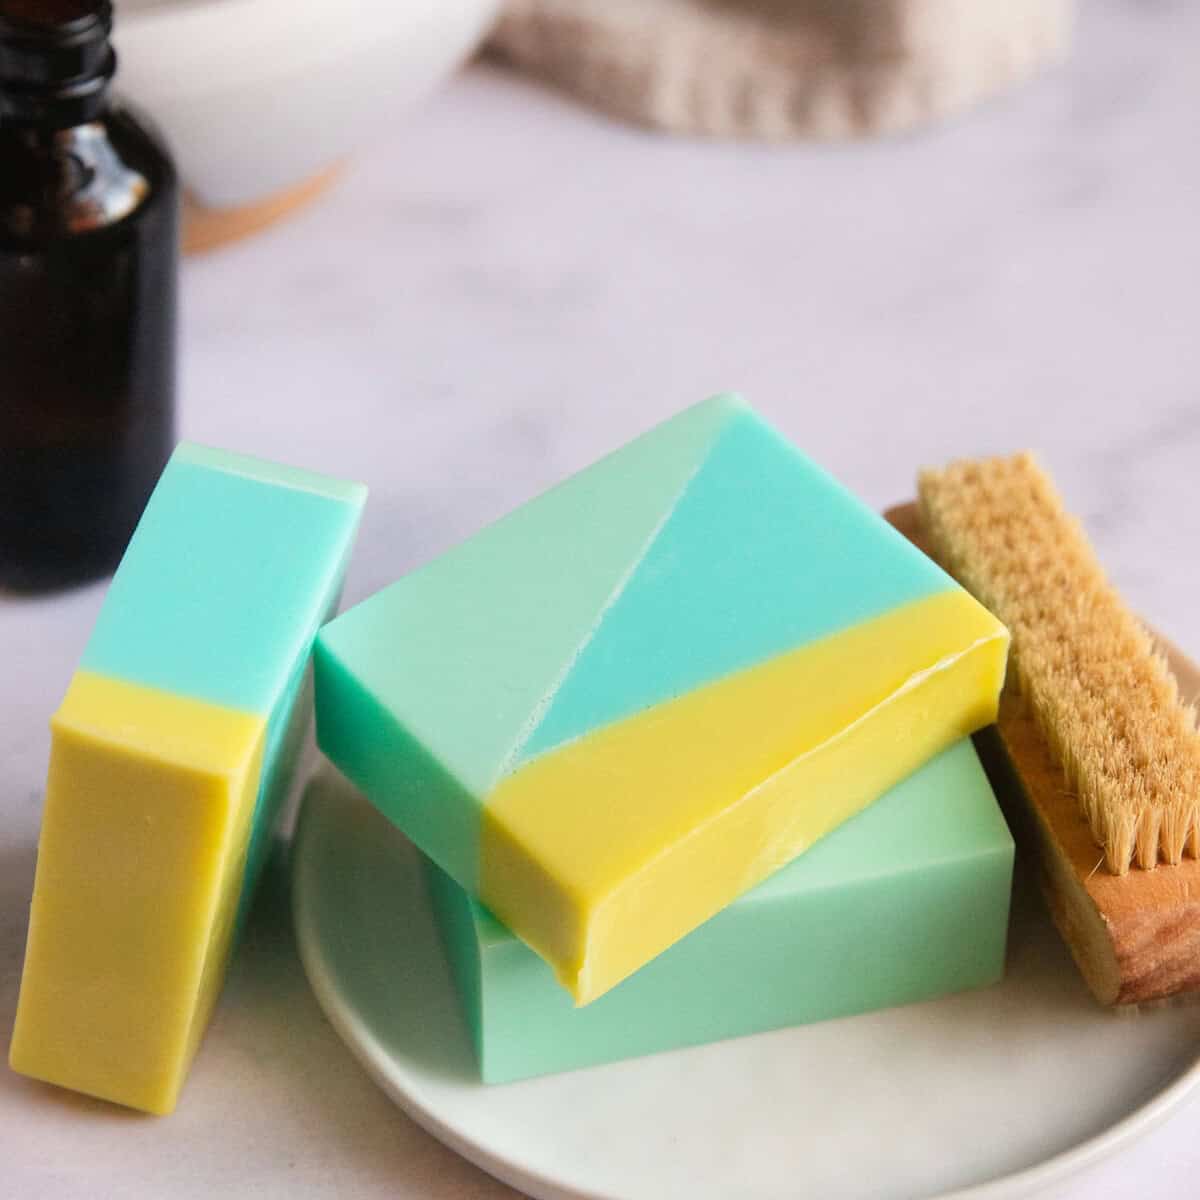
To get those fun slanted lines, tilt your mold by placing a small ramekin or a bunched up kitchen towel underneath one side.

Then pour your first layer into the mold. It doesn’t matter how hot this first layer is since there’s nothing underneath it to melt. Once it’s in the mold, give the top a light spritz with rubbing alcohol to pop any bubbles. Then let it cool.

You’ll know it’s ready for the next layer when a thin film (or “skin”) forms on top. It should feel slightly soft and warm to the touch, but not overly wobbly or like there’s liquid underneath.

This usually takes about 10-15 minutes, but it depends on how thick your layer is and how hot the soap was when you poured it.

Step 4: Pour the Next Layer

Before you pour the next layer, spritz the cooled surface again with rubbing alcohol. This is super important because it helps the new layer bond to the old one without any gaps or air pockets.

Now here’s where temperature matters. Let your melted soap cool to around 140 degrees F before pouring.

If it’s too hot, it’ll melt right through the filmy layer underneath and you’ll end up with muddy colors instead of distinct stripes. If it’s too cool, the layers might not stick together properly and could split apart when you cut the soap into bars.

Pour slowly and carefully, and then spritz the top with alcohol again to get rid of any new bubbles.

Step 5: Repeat Layers

Keep going, alternating colors, until your mold is almost full. Always spritz with alcohol before and after pouring each new layer. It might feel repetitive, but trust me, it’ll make or break your layers.

If you’ve been tilting your layers up to this point, make sure to remove the ramekin and lay the mold on a flat surface before pouring the last layer. Then give it one last spritz and let the whole thing cool completely.

I’m talking several hours or even overnight. I know it’s tempting to pop it out of the mold early, but if you try to unmold it too soon, the layers might still be soft and could separate or warp.

Once it’s fully set, you can unmold your soap and cut it into bars. And that’s it! You’ve got gorgeous, professional-looking layered soap that’s perfect for gifting or keeping all to yourself.

Tips and Tricks for Perfect Layers

Once you’ve got the basic process down, these little tricks will help you nail those clean, professional-looking layers every single time.

Keep alcohol nearby.

Seriously, keep that spray bottle within arm’s reach at all times. Spritz the surface of each layer right before you pour the next one. Think of the alcohol as the “glue” that makes your layers stick together. Then spritz again right after you pour to prevent any bubbles from cropping up. Trust me, you can’t use too much alcohol.

Create equal layers.

If you want your layers to be perfectly even, the easiest way to do it is to weigh your soap base and divide it into equal amounts before you start melting and coloring. So let’s say you’re filling a loaf mold and you want four layers. You’d divide your base into four equal portions, like 10 ounces each, and then color them separately.

But honestly? You don’t have to be that precise if you don’t want to. If you’re going for a more organic, free form look where some layers are thicker than others, just eyeball it.

Pour however much feels right for each layer and don’t stress about the measurements. Both approaches work, it just depends on the vibe you’re going for.

Don’t wait too long between layers.

Each one should be slightly soft to the touch and still warm. If you gently press your finger against it and it feels completely cool and solid, you’ve probably waited too long. 

Use contrasting bases.

Want your layers to really pop? Try alternating between clear and white soap bases. The contrast makes each layer super distinct and gives your bars a ton of visual interest. 

Tilt your mold.

This is one of my favorite tricks for taking layered soap to the next level. If you want diagonal or angled layers instead of straight horizontal ones, just prop one side of your mold up slightly while you pour.

A small ramekin or even a book works great for this. It’s such a simple thing, but it makes your soap look so much more fun and eye-catching.

Watch the temperature.

I know I already mentioned this about a thousand times already, but it’s worth repeating because temperature is ev-er-y-thing when it comes to layering.

Around 140 degrees F is the sweet spot for pouring layers. It’s cool enough that it won’t melt what’s underneath, but still warm enough to bond properly. If you don’t have a thermometer, let your melted soap sit for a few minutes after you take it out of the microwave. It should feel slightly hot to the touch.

Note: Some folks say to aim for 120-130 degrees, but I’ve found that 140 degrees keeps my layers from splitting as much, probably because it melts the layer underneath just enough to help them stick together. 

Troubleshooting Common Issues

Even with practice, layered soaps can be a little finicky. Here’s how to fix (or better yet, avoid) the most common problems you might run into.

Layers separated after cutting

This one’s frustrating because everything looks fine until you go to slice your soap and the layers just fall apart. This usually happens because you didn’t spritz with alcohol between layers, or you poured when the bottom layer was completely cold and had cooled too much.

Always, always spray alcohol between layers. And don’t wait too long between pours. The previous layer should still feel slightly warm and a little soft when you add the next one. If it’s totally firm and cool to the touch, you’ve waited too long and the layers won’t bond as well.

And if you did wait too long to pour the next layer, then I recommend pouring your next layer slightly too hot (say between 150 – 160 degrees F). Yes, it might melt the previous layer a little, but that’s what you need in order to keep your soap from splitting.

Colors bled together

Instead of clean stripes, you’ve got muddy, swirled colors where your layers should be. This happens when the soap is too hot, so it melts right through the layer underneath.

To fix this, let your melted base cool for a few minutes before pouring. Use a thermometer if you have one, or just test the temperature by touching the outside of your container. It should feel warm but not hot. 

Uneven or slanted layers

Your layers looked straight when you poured them, but now they’re all wonky and uneven. This can occur if your mold isn’t sitting level, or if the soap cools unevenly (maybe one side was closer to a window or heat source).

Before you pour each layer, take a second to make sure that your workspace is flat and level. And try to let your soap cool in a spot where the temperature is consistent, away from drafts or direct sunlight.

Air bubbles between layers

You’ve got little pockets of air trapped between your stripes, which can make the layers look cloudy or cause them to separate. When this happens it means that you didn’t spray enough alcohol, or you poured too quickly and created turbulence in the soap.

Be generous with that alcohol spray. Give each layer a good spritz before pouring the next one. And when you pour, go slowly and gently. Try pouring along the side of the mold or over the back of a spoon to help the soap flow smoothly without creating bubbles.

FAQ

Can I use any type of melt and pour base?

Yep! You can layer clear, white, or any of the specialty bases like goat’s milk, shea butter, honey, or aloe. The only thing you need to make sure of is that they’re all melt and pour soap bases. Don’t try to mix melt and pour with cold process soap or anything like that. 

Do I have to color each layer?

No, not if you don’t want to. You can absolutely alternate between colored and uncolored layers if you want a more subtle look. Or you can create an ombré effect by using different shades of the same color, going from light to dark (or vice versa). There are no rules here, so play around and see what you like.

How thick should each layer be?

Totally up to you and the look you’re going for. Thin layers have this elegant, delicate vibe. Thicker layers are bolder and more graphic. I usually aim for about a quarter to a half inch per layer to keep cooling time to a minimum, but you can go thinner or thicker depending on your mold size and how many layers you want to fit in there.

Can I add embeds between layers?

Definitely. Melt and pour soap layers are actually perfect for this. You can tuck small soap shapes, dried botanicals, or little surprises between the layers. Just make sure whatever you’re embedding is soap-safe and won’t bleed color or get gross over time.

How long should I wait between layers?

I think 15 minutes is a good rule of thumb, but it really depends on how hot the soap was when you poured it and how thick your layers are. 

Do layered soaps take longer to cure?

Nope. One of the best things about melt and pour soap is that it doesn’t need any “curing” time at all. Once your soap is fully cooled and set (which takes a few hours to overnight), you can unmold it, cut it into bars, and start using it right away. 

Can I use a single cavity mold instead of a loaf mold?

Yes, and the process is pretty much the same when you’re working with individual cavity molds instead of loaf molds. The main difference is that layers in smaller cavity molds tend to cool down faster, so you can usually move through the layering process a little more quickly.

Just remember the basics: spray each layer with rubbing alcohol before you pour the next one, and keep an eye on your temperatures. Those two things are non-negotiable, no matter what kind of mold you’re using.

0

Tags: , , , ,
Homestead Blog Hop - Homestead tips, ideas, animal care, and recipes every Wednesday

Homestead Blog Hop 575 – Turkey, Broth, and Homemade Mozzarella

I’m so excited to try our featured recipes this week: turkey brine bomb, homemade bone broth and meat broth differences, and how to make mozzarella at home.

Share your own recipes and DIYs below. I just shared how to make your own yogurt this week. Do you have an instant pot? Use the yogurt setting or use the light in your oven. You can make yogurt at home.

Welcome to the Homestead Blog Hop!

Homestead Blog Hop will take place every Wednesday and is for all things homesteading: real food recipes, farm animals, crafts, DIY, how-to’s, gardening, anything from-scratch, natural home/health, self-sufficiency, self-reliance, natural remedies, essential oils, & more! Basically, anything related to homesteading.

Meet Your Hosts!

Follow Their Blogs

Natasha – Houseful of Nicholes (Facebook | Pinterest | Twitter | Instagram)

Laurie – Ridge Haven Homestead (Facebook | Pinterest | Instagram)

Liz – The Cape Coop (Facebook | Pinterest | Twitter | Instagram)

Kelly – Simple Life Mom (Facebook | Pinterest | Instagram)

FEATURED POSTS from the Last Homestead Blog Hop

Each week we take turns choosing three posts to feature. Each post will be shared on all social media platforms by all of the hosts! Here are the features from Last Week’s Hop:

1. Bone Broth vs. Meat Broth from The Once and Future Homestead

2. Fresh Made Mozzarella Cheese from Homemade on a Weeknight

3. Brine Bomb Smoked Turkey from That Guy Who Grills

Congrats! Feel free to grab the featured on button for your post.

Just right click and ‘save image as…‘

Guidelines for this Get-Together:

  1. Click on the “Add your Link” Button below and add a great image of your project or recipe. Make sure you link to the page of your family friendly post – not the main page of your blog.
  2. Link up to three posts each week.
  3. Try to visit at least a few other blogs at the party. Be sure to leave a comment to let them know you stopped by.
  4. Link your post back to the Homestead Blog Hop. If the hop isn’t linked to your post then you cannot be featured. All featured posts will be shared on all hosts’ social media channels.
  5. Please link up posts that you haven’t linked to the hop before. You are welcome to link old posts from your blog.
  6. By joining the party, you are giving the hosts permission to use one photo from your post with a link back to your site if it is selected as one of next week’s Features.
  7. This is a family-friendly link up meant to inspire and motivate the homesteader in all of us.

Let the Party Begin!

Join Our Pinterest Board

Follow all your hosts on Pinterest and send me a message that you’d like to be added to our Homestead Blog Hop group board. The only rule is to only add posts that you’ve also added here.

Tags: , , , , , ,
Protein_Cinnamon_Rolls

Homemade Protein Cinnamon Rolls Recipe (With Greek Yogurt)

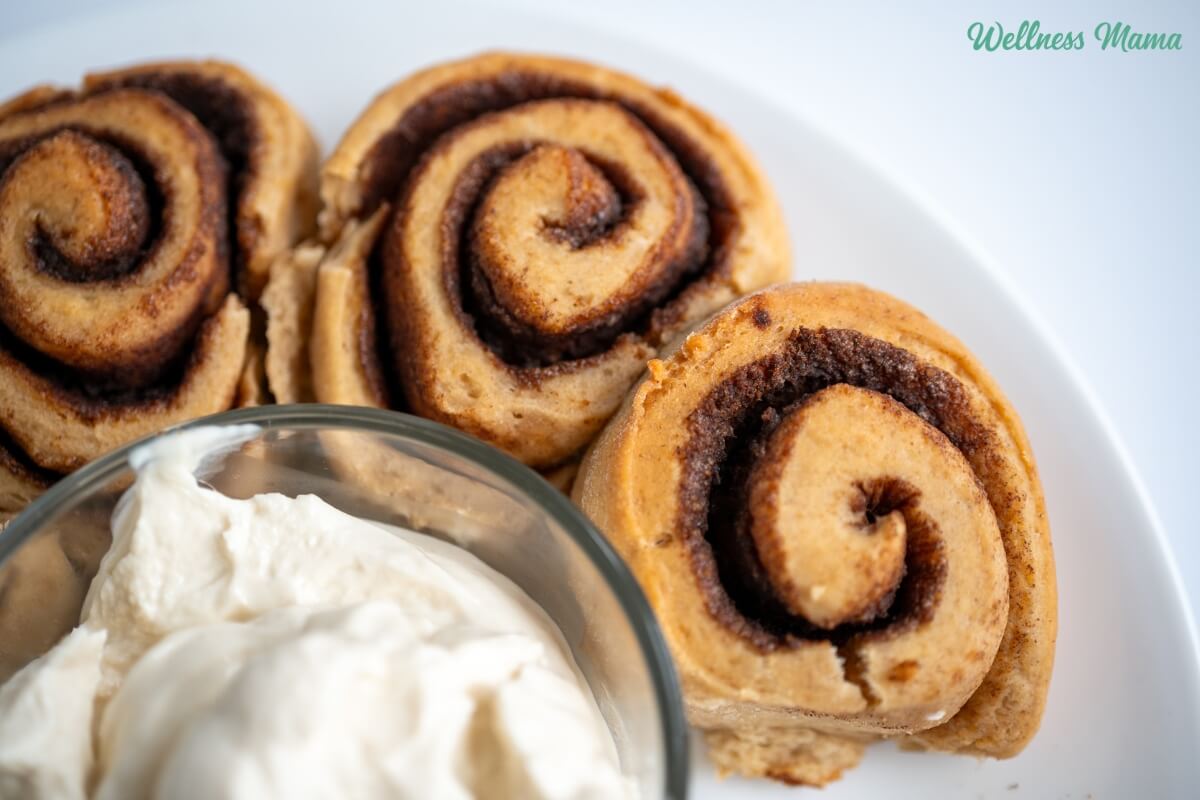
There’s something so magical about pulling some warm cinnamon rolls from the oven on a chilly morning. These high protein cinnamon rolls are an easy way to get all the magic, without all of the sugar or junky ingredients. My kids love these and because they have no yeast, they’re ready in less than an hour!

More people are focusing on protein now because of its benefits for building and maintaining muscle. You’ll find plenty of new protein bars on the market in tons of flavors and more brands are adding protein to various foods. While I’m all for more protein, the quality matters. Ingredients like GMO soy protein or whey protein from CAFO cattle may do more harm than good. 

While we’re probably a ways off from buying healthy high protein cinnamon rolls in a tube at the grocery store, you can easily make them at home!

Healthy Cinnamon Rolls

So, are cinnamon rolls healthy? They’re certainly not in the same category as pasture raised meats or organic veggies, but it is possible to make a healthier version of cinnamon rolls. Instead of gobs of sugar these protein cinnamon rolls are naturally sweetened with coconut sugar and raw honey. No sugar cinnamon roll recipes usually call for sugar alcohols that can cause digestive issues for many people. That’s not what you’ll find here, but they’re still mildly sweet and absolutely delicious. 

Protein Cinnamon Roll Ingredients

Now that my Hashimotos is gone and I’m able to eat a wider variety of healthy foods, I’ll eat gluten on occasion. I still avoid bleached, enriched, glyphosate sprayed conventional flour, but sometimes I pull out organic flour for baking. You can easily make these protein cinnamon rolls gluten free though with a gluten free flour blend. Just be sure to choose one that has clean ingredients, like this one. 

Greek yogurt is one of the main ingredients in the creamy frosting and to gives the rolls a protein boost. If you need dairy free, then a really thick coconut milk yogurt could work, but I haven’t personally tried it. 

Instead of making cottage cheese or whey protein cinnamon rolls, I used a different version of protein for these. I used Equip Prime protein which is made from beef protein, collagen, and gelatin. It’s a nose to tail protein source, but it’s not gritty or beefy tasting. If you don’t have any on hand, then collagen powder will also work. 

Protein Cinnamon Rolls with Greek Yogurt

Protein Cinnamon Roll Dough

Greek Yogurt Frosting

  • 4 oz cream cheese (softened)
  • ½ cup plain Greek yogurt (whole milk for best texture)
  • 2 TBSP raw honey (or to taste)
  • 1 tsp vanilla extract
  • 1 pinch salt
  • In a large bowl, whisk together the flour, protein powder, baking powder, salt, cinnamon, and coconut sugar.

  • Add the Greek yogurt and melted coconut oil, then stir until a soft dough forms. If the dough feels too dry, add milk or water a tablespoon at a time until it comes together.

  • Knead gently on a floured surface for 1–2 minutes, just until smooth.

  • Roll the dough into a rectangle about ¼ inch thick. Spread softened butter evenly over the surface.

  • In a small bowl, mix the coconut sugar and cinnamon, then sprinkle evenly over the dough.

  • Roll it up tightly into a log and slice into 8 even rolls.

  • Place the rolls in a greased 8×8-inch baking dish or parchment-lined skillet. Bake at 350°F for 20–25 minutes, until golden brown. Let cool slightly before frosting.

  • In a medium bowl or stand mixer bowl, beat the cream cheese until smooth. Add Greek yogurt, honey, vanilla, salt, and (optional) protein powder. Mix until thick and creamy. Spread generously over the warm, but not hot rolls.

Nutrition Facts

Protein Cinnamon Rolls with Greek Yogurt

Amount Per Serving (1 roll)

Calories 303
Calories from Fat 108

% Daily Value*

Fat 12g18%

Saturated Fat 8g50%

Trans Fat 0.1g

Polyunsaturated Fat 1g

Monounsaturated Fat 2g

Cholesterol 31mg10%

Sodium 260mg11%

Potassium 282mg8%

Carbohydrates 40g13%

Fiber 2g8%

Sugar 12g13%

Protein 10g20%

Vitamin A 283IU6%

Vitamin C 0.1mg0%

Calcium 160mg16%

Iron 2mg11%

* Percent Daily Values are based on a 2000 calorie diet.

For a thicker frosting, chill it for 10–15 minutes before spreading.

Serving High Protein Cinnamon Rolls

These taste so good when they’re still slightly warm and fresh from the oven. If you know you’re not going to eat them right away, then save the frosting for right before serving. Store any leftovers in the fridge in an airtight container for up to 4 days.

What are some of your favorite baked goods to make? I’d love to hear about it in the comments!

Tags: , , , , , ,
Step by Step, Easy, Homemade Yogurt Recipe from Simple Life Mom

How to Make Homemade Yogurt

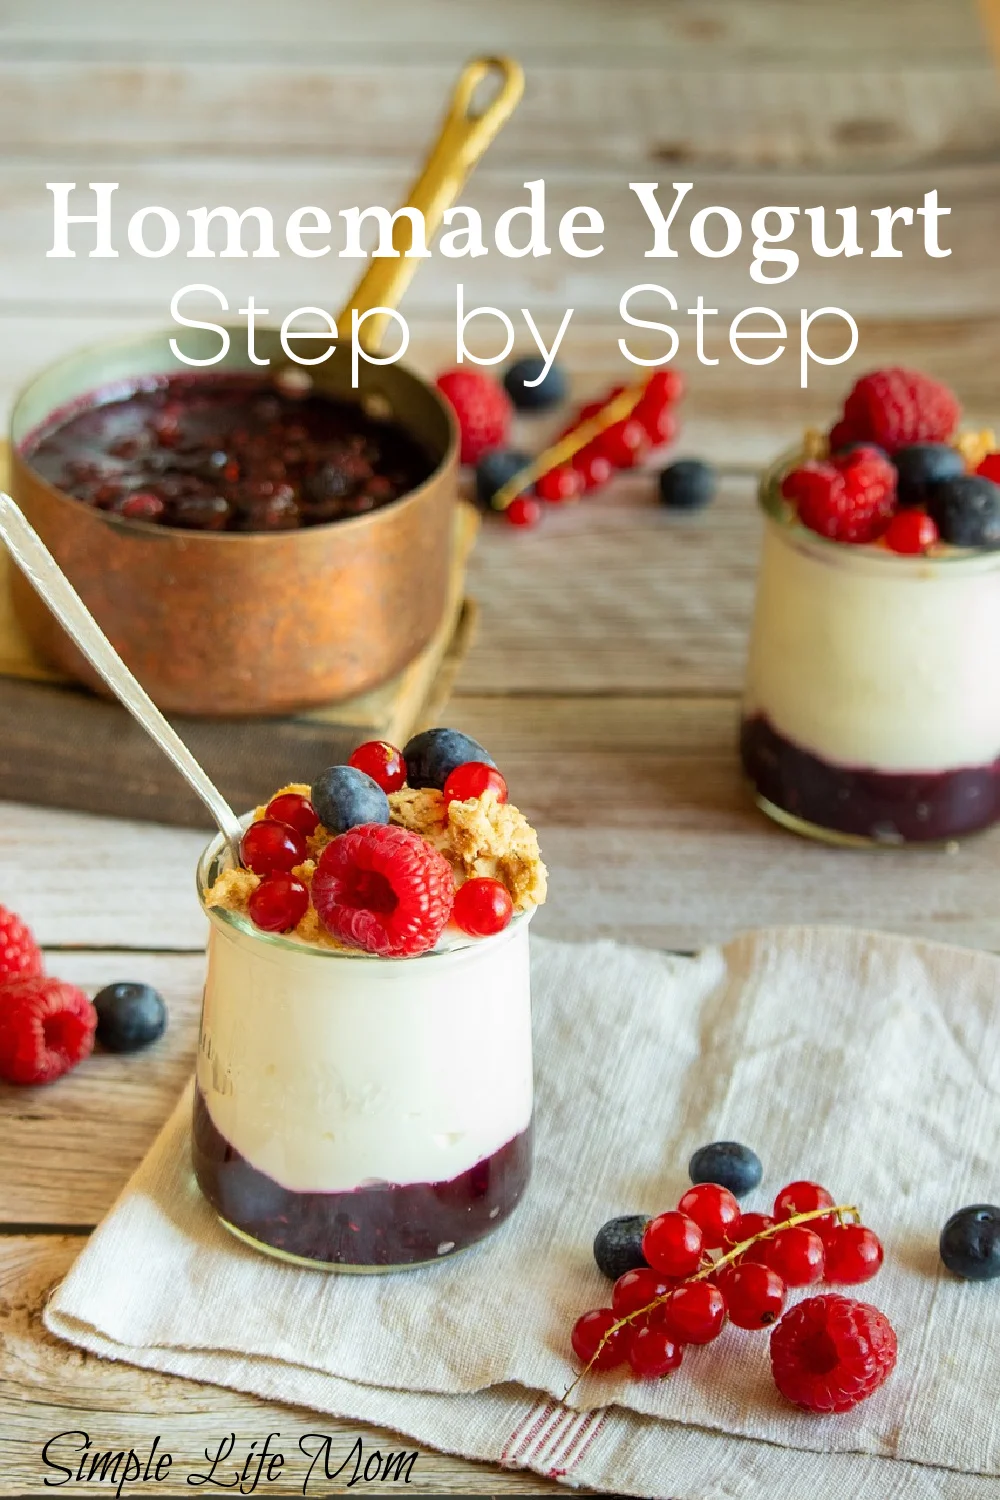
Who knew that making homemade yogurt could be so simple? Homemade yogurt is actually super easy and really versatile. Instead of dealing with extra, unneeded ingredients, you can make homemade yogurt and add fresh fruit or eat it with homemade granola.

It really is easy!

Best Milk for Homemade Yogurt

If you can get your hands on some raw milk, you will avoid the harm that occurs at the cellular level from homogenization, and you’ll retain the good bacteria that usually gets destroyed through pasteurization.  The scare from raw milk started with industrialization and people moving away from farms and into the cities.  Milk took longer to get from the cow to the people’s homes. But treated properly, it is really the only milk you should be drinking.

Raw milk is also beneficial because it already has the nutrients in it ready to make yogurt, but if you need to buy pasteurized milk that’s ok too.

What about percentage?

I’ve only made homemade yogurt with whole milk, but I have a friend who uses 2% and it sets up just fine.

4 Step Homemade Yogurt Process:

Follow these few easy steps and you’ll have fresh, delicious yogurt that you’ve learned to make yourself!

1) First, in a large pot, gently bring one gallon of milk up to 180 degrees Fahrenheit, and then remove it from heat and cool to 110 degrees Fahrenheit. 

By completing the heating process, you prepare the milk to be thicken smoothly by denaturing the whey protein. If you slowly heat it and remove it from the heat immediately, you will not kill all the good bacteria in your raw milk. You can still make good yogurt if you skip this step, but sometimes it won’t be as smooth.

2) Once the milk is cooled to 110 degrees Fahrenheit, remove 1 cup to a separate bowl and add a 1/2 cup of organic yogurt with 1 cup of the warm milk. Mix well, then pour the mixture into the saucepan with the rest of the milk. Milk well again.

It’s important to not add the yogurt when the milk is too hot or you will kill the cultures.

3) If you want to make vanilla yogurt, now is the time to add 2 tablespoons homemade vanilla extract.

4) Pour the milk into sanitized jars and put lids on loosely.  Keep at 110 Fahrenheit for 6 hours without mixing, stirring, or moving! This is important. 

There are a few ways to do this (Choose One):

  1. Put the jars into a yogurt maker that keeps them at 110 degrees Fahrenheit.
  2. Put the jars in a large pot of water on the stove that is already at 110 degrees Fahrenheit and wrap towels around it to keep warm. I’ve done this before, and it stays warm for a very long time. You just need to check occasionally and turn the burner on for a minute or two (REMOVE TOWELS FIRST) if it cools down too much. Watch carefully.
  3. Put the jars in the oven with the light on and place candy thermometer on the rack so you can see the temperature. This usually stays at 110 degrees Fahrenheit for about 4 of the 6 hours. If you turn the oven on, watch it very carefully.

Homemade Yogurt Recipe

Below is the yogurt recipe in a printable format.

Homemade Yogurt Recipe

Yogurt made from scratch

Prep Time20 minutes

Cook Time6 hours

Total Time6 hours 20 minutes

Course: Snack

Keyword: yogurt

Servings: 1 gallon

Author: Kelly

  • 1 gallon milk
  • ½ cup organic yogurt
  • In a large pot, bring the milk up to 180 degrees Fahrenheit. Remove from heat and cool to 110 degrees Fahrenheit.

    1 gallon milk

  • In a separate bowl, mix 1/2 cup organic yogurt with 1 cup of the warm milk, then pour the mixture into the rest of the milk, mixing well. If you want to make vanilla yogurt, now is the time to add 2 tablespoons homemade vanilla extract.

    1/2 cup organic yogurt

  • Pour the milk into sanitized jars and put the lids on loosely. Keep at 110 Fahrenheit for 6 hours without mixing, stirring, or moving if possible.

There are a few ways to do this (Choose one):

  • 1. Put in a yogurt maker that keeps them at 110 degrees Fahrenheit.

  • 2. OR Put the jars in a large pot of water on the stove that is already at 110 degrees Fahrenheit and wrap towels around it to keep warm. I’ve done this before and it stays warm for a very long time. You just need to check occasionally and turn the burner on for a minute or two (REMOVE THE TOWELS FIRST) if it cools down too much. Watch carefully.

  • 3. OR Put the jars in the oven with the light on and place a candy thermometer on the rack so you can see the temperature. This usually stays at 110 degrees Fahrenheit for about 4 of the 6 hours. If you turn the oven on, watch it very carefully.

Special Tips:

Looking for a way to start your yogurt without a yogurt starter culture? Heat 2 cups of milk and then cool it to 110 degrees Fahrenheit. Add 1-1/2 teaspoons of cardamom seeds and let it sit in a warm place for 10-12 hours. This will be your starter. Follow the recipe above and add 1/2 cup of this starter instead of yogurt to your milk.

Have an instant pot? Most instant pots these days have a yogurt setting. Get your milk fully ready to set for 6 hours and instead of incubating them, put them in your instant pot and turn it on to the yogurt setting and you’re done!

Tags: ,
Christmas gifts kids

Creative Christmas Gifts for Kids (With Stocking Stuffer Ideas!)

At Christmas time, our family focuses on the real joy of the season, like spending time together, giving to those in need, and finding small ways to serve others. But that doesn’t mean we skip gifts! I still love choosing thoughtful Christmas gifts for kids that bring joy without adding clutter or plastic waste.

If you’re shopping for kids who have everything, this list will help. These are the best Christmas gifts for kids. You’ll find gifts big and small, for girls and boys and many that aren’t toys in the traditional sense. Many are unique, personalized, and even free if you get creative. A few are cheap but still meaningful, and several make perfect birthday or special-occasion gifts too.

Christmas Gift Ideas For Kids

Finding the top gifts that last can be tricky. I prefer options made from natural or eco-friendly materials that encourage imagination, creativity, or movement. Over the years, I’ve found that the most loved gifts aren’t the latest fads but the ones that invite connection and discovery.

Some of our family favorites include art supplies, a balance board, a personalized apron for kitchen helpers, and an “epic backyard” (according to my ten-year-old!). These are great for kids who like to fidget or move. For girls who love to create, a simple craft or jewelry kit is always a win.

Gifts That Give Back

Each year, our kids help choose a way to give to others in need. From donating toys to making care packages or volunteering together. These moments remind us that some of the best gifts are those we share. Giving time or kindness is always free, yet it creates the biggest impact.

Sometimes the small things are what children remember most. A homemade coupon book for extra bedtime stories, a family game night, or kids cooking lessons can mean more than anything store-bought.

Whether big or small, cheap or unique, the most meaningful gifts aren’t always wrapped. This year don’t forget to focus on what matters most, connection and the simple joy of giving. The best presents for kids often aren’t toys at all, but memories that last a lifetime.

Christmas Gifts For Teens 

As my kids have gotten older (and even become adults!) their tastes in gifts have changed. These gifts encourage creativity and movement and minimize screen time. 

  1. Magnetic Pen – This fidget toy pen helps them write their thoughts and make their own unique designs. 
  2. Bonsai Tree Kit – They can grow their own Bonsai trees and care for them. 
  3. Vintage Record Player – Old school vinyl is back in style. Gift them a few records to go along with their new player. 
  4. Embroidered Corner Bookmark – A beautiful (and personalized) way to remember what page they’re on. 
  5. Ninja Creami – What kid doesn’t love ice cream? They can make their own healthy ice cream, sorbet, smoothies, and more with this machine.
  6. Book light – This rechargeable book light encourages reading. Plus it can block blue light for better sleep. 
  7. Large Backrest Pillow – Great for lounging in bed to read, color, or just relax. Can also be used on a couch or even the floor and has pockets.
  8. Adult/Teen Lego Sets – These detailed sets are popular among teens and adults alike with dozens to choose from. This orchid lego set is beautiful, or they can create their own Da Vinci flying machine. 
  9. Leather Journal – A beautiful leather journal for sketching, journaling, or even putting stickers in.
  10. Grown-Up Coloring Books – Coloring isn’t just for little kids anymore. This spiral bound “adult coloring book” is very detailed and studies show coloring is relaxing. Or this pack of 10 offers more design options. 
  11. Japanese Puzzle Box – These beautiful puzzle boxes are a unique way for older kids to keep valuable items safe and they’re fun to learn.
  12. Kindle – All the books they could desire at their fingertips. Unlike tablets, Kindle uses warm light and isn’t harsh on the eyes.
  13. Daylight Computer – A tablet that’s easy on the eyes. Take notes, use apps, write… all without blue light. 
  14. Mushroom Growing Kit – They can grow their own organic mushrooms with this kit. 

Gifts For Tweens & Big Kids

A wide variety of gifts that will appeal to both boys and girls who aren’t quite into teenhood just yet. Many of these are also good for elementary age. 

  1. Buddha Board – A relaxing way to paint with water (it evaporates and you can paint again).
  2. Taco Cat Goat Cheese Pizza– Say what?? This wacky game for kids is a hit with my tweens. They also have a holiday themed version.
  3. Spa Headband set – For teen girls. 
  4. Whirly Board – A fun balance board for better agility and to help engage full body strength. 
  5. Book light – This rechargeable book light encourages reading. Plus it can  block blue light for better sleep. 
  6. Pindaloo – This wacky looking game helps teach motor skills as kids try to keep the ball moving. 
  7. Tabletop Hockey – This tabletop version of hockey uses elastic to sling pucks towards your opponents goal. 
  8. Gaga Crazy ball – This modern twist on dodgeball is a fun game the whole family can play. 
  9. Archery Set – My kids have loved these GBG archery sets and these sets are created for kids by kids. They have some helpful videos on their website as well!
  10. Leather Journal – A beautiful leather journal for sketching, journaling, or even putting stickers in.
  11. Rubik’s Cube – The 1980s called, but we told it we’re keeping the Rubik’s Cube. Older kids love learning to solve this retro puzzle.
  12. CrateJoy Subscription Box – You can find dozens of different subscription boxes from CrateJoy from music to stickers, to art, to aliens, or baking.
  13. Build Your Own Programmable Robot Kit – This building kit was a favorite with my oldest. Build a robot and program it!
  14. Grown-Up Coloring Books – Coloring isn’t just for little kids anymore. This spiral bound “adult coloring book” is very detailed and studies show coloring is relaxing. Or this pack of 10 offers more design options. 
  15. Boogie Board – Reusable board that encourages doodling and drawing.
  16. Kindle – All the books they could desire at their fingertips. Unlike tablets, Kindle uses warm light and isn’t harsh on the eyes.
  17. KiwiCo – These subscription boxes offer a variety of learning (and fun!) activities. For tweens and teens pick from options like art, design, and STEM.
  18. Runaway Alarm Clock – Does your teen have trouble waking up? This alarm clock runs away and keeps making noise until caught!
  19. Natural Makeup Brushes – If your teen is old enough to wear makeup, these natural brushes are great!
  20. Collapsible Duffel Bag – Great bag for short trips that collapses to a tiny size, unlike some bulky backpacks.
  21. Slippers (for teenage girls) – Super comfy, barefoot slippers that are still stylish.
  22. Cash inside a Money Maze Puzzle Box – Give money so they can get what they like, but make it fun by hiding it inside this puzzle cube.
  23. No Crease Ponytail Holders – These are really popular right now. They’re gentle on hair and don’t leave a crease. Or I hear that Scrunchies and banana clips are back in style!
  24. Travel Hammock – Have an outdoorsy teen? These travel hammocks collapse small and are awesome. They’re also quite popular on some college campuses.
  25. Become a Beekeeper Course: This is an amazing Introduction to Beekeeping Course. It will help teach them everything from buying bees to harvesting honey. Use code WELLNESS for 25% off!
  26. Kids Daylight Computer – A tablet that’s easy on the eyes. Write, use apps, draw, all without blue light. 
  27. Backyard Bags (also called Cornhole) – This is always a fun game for the backyard. Whether you have guests over or it’s just the two of you, this has been a family favorite in our house.
  28. Slackline – Like a balance beam and trampoline in one. It encourages balance, gross motor skills, and coordination. Plus it’s hours of fun.
  29. Piggy Paint – Non-toxic nail polish in fun colors. 
  30. Ninjaline – Like monkey bars but tougher. A lot of people use these for Ninja Warrior training, but my kids just think it is fun!
  31. Talkbox.Mom – Do your kids want to learn another language? This is a fun way to do that at home and is great for kids of all ages – even the littles!
  32. Water Bottle – Upgrade their water bottle game with these colorful water bottles. It’s what we use to keep liquids cold (or hot) for days.

Best Gifts for Younger Kids

Gifts for kids ages preschool through elementary. Games, crafts, sensory play, audio players, and more. 

  1. Gym 1 Indoor Doorway Gym – My kids’ favorite Christmas gift of all time. It’s a gym that mounts in a door frame and they use it every day.
  2. Snap Circuits – A really neat kit that lets kids learn about electricity by building different types of basic machines like a fan, a radio, etc.
  3. Yoto Player – This screen-free player is designed especially for kids to listen to books, podcast episodes, music, radio, and more by simply inserting a card in. There are over 1,000 options or you can make your own cards. It’s rechargeable and the Bluetooth is optional so you can leave it off.
  4. Art Kit – A favorite among my girls. This art supplies kit contains markers, crayons, colored pencils, and more for arts & crafts.
  5. Personalized Storybook – This personalized gift features your little one’s first name throughout their bedtime story.
  6. Kinetic sand – Perfect for squishing and building with for sensory play.
  7. Flower Press Kit – Kids can create their own stationery, cards, and more with a flower/leaf press.
  8. Mini Trampoline for Indoor Play – We’ve had a trampoline in our house for years and it’s great for cold or rainy days. Rebounding (bouncing) is also great for adults!
  9. Spinkpong Mini Game – Bounce a ball off of a tiny net and try to catch it in the cup. Great for kids to play on their own or with siblings/friends.
  10. Sherwood Player – This player gives kids unlimited access to over 5,000 wholesome audiobooks, podcasts, low-stimulation shows, and books that encourage creativity. Use the code wellnessmama10 for a discount.
  11. Knitting Loom Kit – Kids can make their own cute animals with this craft kit. 
  12. Kids Daylight Computer – A tablet that’s easy on the eyes. Write, use apps, draw, all without blue light with their tablet for ages 3-7. 
  13. Amazon Fire – An affordable tablet with a lot of capabilities.
  14. 3-D Pen – They can design and create what they want with this 3-D pen and DesignPad mat. 
  15. Wooden Twig Colored Pencils – Wooden colored pencils made from twigs. Good size for younger kids just learning to write and draw.
  16. Wooden People and Craft Supplies – My kids loved making their own little wooden dolls and figurines with these.
  17. Grow and Make – They have kits ranging from gardening to making your own box of chocolates.
  18. Natural Paints – Made from natural earth pigments for all your arts and crafts projects.
  19. Microscope Kit – My oldest loved looking at hair, dirt, and all kinds of other things in this microscope. STEM toys (science, technology, engineering, and math) like this one are educational toys but can also be super fun.
  20. Bath Tub Crayons – These beeswax bath time crayons for toddlers are handmade in New Zealand with New Zealand beeswax and food-grade, non-toxic pigments. The jumbo crayons are perfect for toddlers, kids, and children from 2 years old and up.
  21. Doll House – This Melissa & Doug doll house is great for 4-year-old to 8-year-old kids. Fits smaller dolls.
  22. Little Passports – This subscription service tailors to your child’s age and the collection they would most be interested in. (For parents, you can filter by your budget!)
  23. Stainless Steel Play Kitchen Pots and Pans  – My daughters used to play kitchen with these for hours! Get a food play set to go with it.
  24. Beginner Piano Keyboard (and free Hoffman Academy Lessons) – These are a great way to get the kids started with music.
  25. Sun Art – Fun educational craft idea that kids love.
  26. Kendama Game – Fun interactive game that encourages movement.
  27. Weighted Blanket – Not just for kids, but a soothing gift that helps kids get into a restful state and has demonstrated benefits for sleep.
  28. Sensory Swing – If you’re looking for a sensory swing to help your child relax and de-stress, this is the swing for them. The swings are made of quality, comfortable materials your child will want to spend hours in.
  29. Kids Cook Real Food e-Course – Give the gift of quality time and kitchen skills to boot! This course was life-changing for our family.
  30. Trampoline – Not just for kids when you consider the lymphatic benefits of jumping! This makes a great outdoor toy, but we also have a small one inside our house.
  31. Swing – My kids loved this backyard swing.
  32. Logic puzzles or games to develop problem-solving skills (Logic Links and Kanoodle are two of our favorites)
  33. Word games or board games for the next family game night. (We like Boggle, Apples to Apples, Story Cubes, Madlibs Jr.)
  34. KiwiCo – From the toddler stage to preschool, to teens, they offer fun and educational subscription boxes. Choose from a variety including craft kits, science kits, geography kits, and more.
  35. When I Grow Up I Want to Be.…. book. This book is designed for kids and children to answer five or six fun questions to record their interests, talents, strengths, and achievements, and can be a fun career journal. My kids have fun reading what they wrote in their journals years ago!
  36. Playsilks – It’s a cape, it’s a scarf, it’s a dress… it’s playsilks. 
  37. Tinkerlab Book – A guide to using everyday items to create their own inventions, creations, and art projects with help from grownups.
  38. Wildcraft Herbal Board Game – A cooperative game where players learn about herbs and natural remedies. 
  39. Kids Musical Instruments – Made from natural wood to encourage rhythm and movement. 

Baby and Toddler

And of course we can’t forget the littlest ones! These gifts are appropriate for babies and even into the preschool years. If you have an older toddler, be sure to check the gifts for younger kids section above for more ideas. 

  1. Eco-friendly Baby Clothes– There aren’t many things cuter than a baby in organic dino footie pajamas. Check out all of my favorite organic brands for the best baby (and kids) clothes.
  2. Magnetic Drawing Board – Also perfect for traveling. 
  3. Natural baby toys – My favorite brand of baby toys with a wide variety of options. 
  4. Building Blocks – This wooden building set has colorful blocks that encourage building, stacking, and imagination.
  5. Scooter Board – Toys that help with movement are always a big hit around our house. This wooden scooter board is great for toddlers through elementary-age kids.
  6. Personalized Storybook – This personalized gift features your little one’s first name throughout their bedtime story.
  7. KiwiCo – From the toddler stage to preschool, to teens, they offer fun and educational subscription boxes. Choose from a variety including craft kits, science kits, geography kits, and more.
  8. Beeswax Crayons – Jumbo crayons made of natural beeswax. Or try your hand at making your own!
  9. Stainless Steel Play Kitchen Pots and Pans  – My daughters used to play kitchen with these for hours! Get a food play set to go with it.
  10. Wooden Train Set – Let their imaginations run wild with this 100 piece train set.
  11. Rock Crayons – Cute crayons for little hands to hold. Come with a drawstring storage bag. 
  12. Bath Tub Crayons – These beeswax bath time crayons for toddlers are handmade in New Zealand with New Zealand beeswax and food-grade, non-toxic pigments. The jumbo crayons are perfect for toddlers, kids, and children from 2 years old and up.
  13. Wiggle Car – My little kids loved this ride-on toy and they’re great for kids of all sizes.
  14. Wooden Blocks – They can build what they want with this set of 100 natural wooden blocks
  15. Wooden Animal Toys – Adorable and durable wooden animal toys.
  16. Canopy Nursery Air Purifier – This compact and cute air filter is specifically designed for baby’s room.  
  17. Wooden Shape Sorter Garden – An adorable Montessori shape sorter where your toddler can plant their own pretend garden.

Stocking Stuffer Ideas for Kids

  • Little Hero’s Journal for Kids – I’ve used these for years with my kids. I’ve also shared how I use journals to communicate with my daughters as they tend to open up more through writing.
  • Beef jerky or beef sticks (we love this brand)
  • Hot chocolate (I put homemade mix in a small jelly or mason jar with their name on it). A pre-made option is this amazing Cacao Bliss mix.
  • Lotion Bars – These Beesilk lotion bars are amazing for the wintertime and a fun stocking stuffer. Use code wellnessmama for a discount!
  • Lip Balm with natural essential oils in delicious scents and flavors. Check out their seasonal versions!
  • Bubble bath (or you can mix up your own DIY bubble bath in minutes with a few simple ingredients!)
  • New Toothbrush, Strawberry toothpaste, or Floss picks
  • Vitamins that taste great without added sugar or any of the junk
  • A coupon to stay up an hour late
  • Movie night with favorite dessert coupon
  • A coupon to pick the meals for a day
  • Mini photo book with family memories and inspirational quotes
  • Movie tickets or gift certificates
  • Fun Scrunchies
  • Fun plates or cups from Ahimsa. They’re plastic-free and my kids love them!
  • A card game or dice game of any kind – Zobmondo is a hit with the older kids in my house.
  • Crochet kit for kids
  • Give them “coal” in their stocking with this charcoal soap bar
  • Cash or gift card inside a Money Maze gift box
  • Hiya Vitamins – My kids love their tasty vitamin subscription and I love that it’s free of junk and fillers. 

What Christmas gifts for kids have your family enjoyed? Are there any you would add to this list? Leave a comment and let us know!

Tags: , , , , , ,
protein balls

Chai Spice Protein Balls With Adaptogens

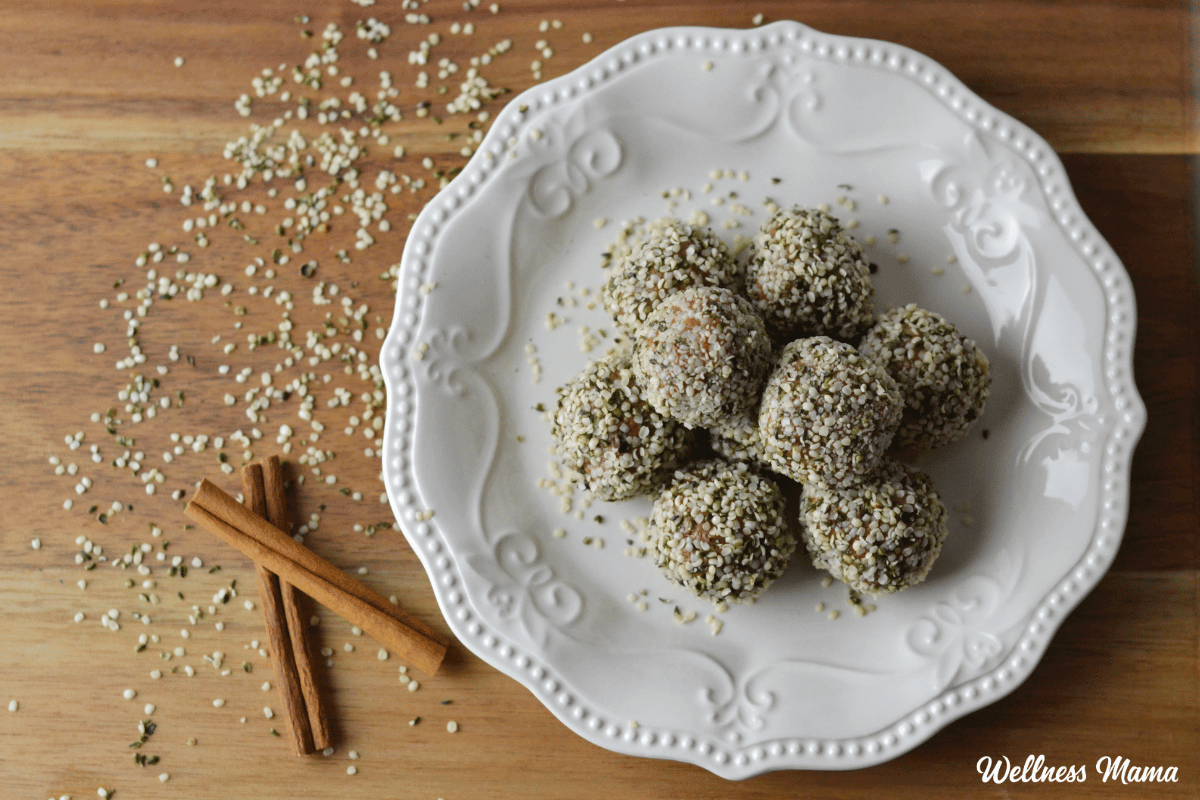
Chai tea is one of my favorites this time of year and I love incorporating chai spices into baked goods. The aroma of cinnamon, clove, and cardamom warming the kitchen feels like a cozy hug. These adaptogenic chai spice protein balls capture that same cozy flavor with the benefit of adaptogens.

They’re slightly sweet, warmly spiced, and have a soft, chewy texture that makes them feel indulgent, even though they’re packed with nutrients. Each protein ball is full of ingredients that help support energy, focus, and immune health. Especially helpful during the colder (often chaotic) months when our bodies could use an extra boost.

These are great to make ahead for snacks and they also freeze well for later. The protein balls provide healthy fats, protein, and adaptogens to help your body handle stress more effectively. Added collagen also supports gut health, healthier skin, and stronger hair and nails. 

Warming Chai Spices

Cinnamon, clove, cardamom, and ginger aren’t just tasty, they offer powerful immune system support. Cinnamon helps balance blood sugar and adds natural sweetness without needing much added sugar. Clove is rich in antioxidants and antimicrobial to help support cellular health. 

Cardamom is both soothing and invigorating, known for its ability to calm digestion while boosting circulation. And ginger brings its signature gentle heat and anti-inflammatory benefits, helping support immune and digestive health.

Together, these cozy chai spices add a delicious flavor and powerful health benefits! While I’ve included the spices separately in the recipe, you can also use 2 and ½ teaspoons of my homemade pumpkin pie spice blend. The flavor is similar, and it’s easy to use if you already have some mixed up. 

Mighty Adaptogens

Adaptogens are plants and mushrooms that help the body be more resilient to stressors. Whether its physical, emotional, or environmental. Unlike potent medicines, they help bolster the body’s cellular health and defenses to restore balance. 

There are several different true adaptogens, and some work better for different situations. I opted to use a functional mushroom blend here because it helps provide broader support than just choosing one thing. 

Adaptogenic mushrooms help support focus, sleep, energy, and calm, depending on which combination you choose. I like the adaptogenic mushroom blends from Four Sigmatic, which often include varieties like reishi, lion’s mane, and cordyceps.

  • Reishi is sometimes referred to as the “queen of mushrooms” for its calming properties. It helps with restful sleep and supports the immune system.
  • Lion’s Mane supports mental clarity and focus. Perfect for that mid-afternoon slump.
  • Cordyceps helps boost stamina and energy naturally without caffeine.

Whatever blend you go with, be sure to choose a quality blend that isn’t overly earthy or bitter so the flavor balances well with chai spices. 

More Healthy Ingredients (and Substitutions)

Collagen is one of my favorite additions to stir into drinks or even baked goods. It’s an easy way to add clean protein that supports gut health, joint health, and vibrant skin. Since collagen is flavorless, it blends seamlessly with the almond butter and spices.

Almond butter (or cashew butter) adds a nutty richness and healthy fats that help keep you full. They also make the protein balls perfectly soft and chewy. If you’re avoiding nuts, sunflower seed butter also works. I don’t recommend peanut butter here, since its strong flavor tends to overpower the delicate chai spices.

Hemp seeds add a pleasant crunch and an extra boost of omega-3s, plus a complete amino acid profile. They’re great for energy, muscle recovery, and healthy hair and skin. Honey helps bind the ingredients together and adds a touch of sweetness, plus enzymes and minerals. If you prefer, pure maple syrup works just as well.

How to Enjoy Them

These chai spice protein balls are wonderful as a quick snack for an afternoon energy boost, or even post-workout. They keep well in the fridge for about a week, and you can easily double the recipe to freeze for later.

It feels like you’re eating dessert, but they’re full of nourishing ingredients. Warming, grounding, and just a little sweet. These are a great go-to snack for supporting focus and calm while keeping your immune system strong through the changing seasons.

Chai Spice Protein Balls

These tasty, bite sized protein balls are naturally sweetened with honey and feature chai flavors. Plus, they contain functional mushrooms for better focus, sleep, and more.

  • Line a baking sheet with parchment paper and set aside.

  • Add all of the ingredients to the bowl of a stand mixer. Start with 1 teaspoon of coconut flour to thicken, and increase if needed. You can also use a hand mixer.

  • Mix thoroughly, taste, and adjust spices if desired.

  • Use a Tablespoon to scoop out the mixture and roll it into balls. Roll the balls into the hemp seeds.

  • Place the rolled balls onto the parchment paper and store in the fridge.

Nutrition Facts

Chai Spice Protein Balls

Amount Per Serving (1 ball)

Calories 145
Calories from Fat 108

% Daily Value*

Fat 12g18%

Saturated Fat 1g6%

Polyunsaturated Fat 5g

Monounsaturated Fat 5g

Sodium 5mg0%

Potassium 112mg3%

Carbohydrates 5g2%

Fiber 2g8%

Sugar 2g2%

Protein 7g14%

Vitamin A 39IU1%

Vitamin C 0.04mg0%

Calcium 63mg6%

Iron 2mg11%

* Percent Daily Values are based on a 2000 calorie diet.

  • Coconut flour helps thicken the dough, but don’t overdo it! Too much and it will get crumbly.
  • Opt for a mushroom powder that has a mild taste. Start with 1 teaspoon and gradually increase to 3 teaspoons if you’re unsure how strong the taste will be. 

More Adaptogen Recipes

We could all use a little more stress relief and resilience! Here are some more recipes that feature adaptogens for a health boost. 

Have you used adaptogens before? What are some of your favorite ways to consume them? Leave a comment and let us know!

Tags: , , , ,
The New Bridal Secret For Calm, De-Puffed, and Radiant Skin

The New Bridal Secret For Calm, De-Puffed, and Radiant Skin

Every bride dreams of walking down the aisle with glowing, fresh, and stress-free skin. But pre-wedding stress, lack of sleep, and endless preparations can make the skin look tired and puffy. To combat this naturally, home remedies infused with matcha and other kitchen-friendly ingredients can work wonders in achieving calm, de-puffed, and radiant skin — without the need for expensive treatments.

Here are some simple and effective DIY home remedies to help your skin look refreshed and wedding-ready:

1. Matcha and Aloe Vera Cooling Mask

What you need:

  • 1 teaspoon matcha powder
  • 1 tablespoon aloe vera gel
  • 1 teaspoon rose water

How to use:

Mix the ingredients into a smooth paste. Apply it evenly on your face and leave it for 15–20 minutes before rinsing with cool water.

Benefits: Matcha calms inflammation, while aloe vera hydrates and soothes the skin. This mask helps reduce redness and puffiness, leaving the skin soft and refreshed.

2. Green Tea Ice Cubes for Puffiness

What you need:

  • 1 cup brewed green tea (cooled)
  • Ice cube tray

How to use:

Pour the cooled green tea into an ice tray and freeze. Rub one cube gently on your face every morning for an instant tightening and de-puffing effect.

Benefits: The caffeine and antioxidants in green tea boost circulation and reduce puffiness, especially under the eyes.

3. Matcha and Honey Brightening Pack

What you need:

  • 1 teaspoon matcha powder
  • 1 teaspoon raw honey

Few drops of lemon juice (optional for oily skin)

How to use:

Mix well and apply evenly on your face. Leave it for 15 minutes before rinsing off with lukewarm water.

Benefits: Honey provides deep hydration, while matcha detoxifies and brightens. The lemon adds a natural glow by gently exfoliating dead skin cells.

4. Cucumber and Green Tea Toner

What you need:

  • Half a cucumber (blended)
  • 1 cup brewed green tea (cooled)

How to use:

Strain the mixture and store it in a spray bottle. Use it as a facial mist or toner twice daily.

Benefits: This refreshing toner tightens pores, reduces puffiness, and keeps the skin hydrated throughout the day.

5. Matcha and Yogurt Rejuvenating Face Pack

What you need:

  • 1 teaspoon matcha powder
  • 1 tablespoon plain yogurt

How to use:

Combine both ingredients and apply evenly to your face. Let it sit for 20 minutes, then rinse off with cold water.

Benefits: Yogurt’s lactic acid gently exfoliates the skin, while matcha detoxifies and revitalises. This pack gives your skin a smooth, radiant finish.

Bridal Skincare Tip:

Start these remedies at least 3–4 weeks before you’re wedding for visible results. Consistency and gentle care are key — avoid experimenting with too many new ingredients close to the big day.

With these simple, natural remedies, you can harness the soothing and revitalising power of matcha to reveal calm, de-puffed, and luminous skin that glows naturally when it matters most.

Tags: , , , , ,
Best oLive
Privacy Overview

This website uses cookies so that we can provide you with the best user experience possible. Cookie information is stored in your browser and performs functions such as recognising you when you return to our website and helping our team to understand which sections of the website you find most interesting and useful.