DIY Shikakai Hair Mask for Stronger, Shinier Hair

DIY Shikakai Hair Mask for Stronger, Shinier Hair

When I was a tween – which wasn’t actually a word back then – my best friend and I regularly ransacked her kitchen to make all the “magical hair mask” recipes that magazines promised would give us shiny, flowing locks.

Mashed bananas. Avocados. Kiwi.

They never delivered the results, but we kept trying. Now I wish we’d just eaten the bananas.

As you can imagine, when I first heard about a plant that literally translates to “fruit for hair,” I was skeptical. It sounded like mashed-banana-hair-mask 2.0.

I’m so glad I was wrong.

Shikakai powder has become a regular part of my natural hair care routine because it does something very rare in the world of DIY “fruit for hair” recipes.

It actually works – leaving my hair soft and shiny while nourishing my scalp.

Let’s talk about what it is, what it actually does (with research), and how to use it in a way that works for your hair type.

What Is Shikakai Powder?

Shikakai (Acacia concinna) is a climbing shrub native to India and parts of Southeast Asia. In Ayurveda – India’s traditional system of medicine – it’s been used for centuries as a natural hair cleanser and conditioner.

Shikakai comes from two Tamil words – sigai means “hair” or “tresses” and kaay means “fruit.” So, hair fruit.

The powder is made from dried shikakai pods, which are ground into a fine powder. When mixed with water, yogurt, or aloe vera, it forms a paste that can be massaged into the scalp and hair.

Shikakai Is unique because it cleanses AND conditions simultaneously. That dual action is the foundation of its traditional use – and one of the many reasons it’s still so popular today.

Benefits of Shikakai Powder for Hair

1. Natural Cleanser

Shikakai cleanses without aggressively stripping the scalp’s natural oils. It contains saponins – which are plant compounds that help lift away light buildup and debris – which are more gentle than the detergents found in conventional shampoo (and even the surfactants used in non-toxic options). (1)

It leaves hair soft, balanced and refreshed – clean, but not stripped.

That said, it’s designed for gentle cleansing, not heavy-duty clarifying. If you regularly use silicones, thick styling waxes, or heavy oil treatments, you may need a stronger cleanser to remove that type of buildup.

2. Hair Strength & Fullness

In Ayurvedic tradition, shikakai powder is highly valued for its ability to support strong, thick, resilient hair over time. While I haven’t found clinical research showing that it directly stimulates new hair growth or increases follicle density, it does contain antioxidant compounds that may help protect both the scalp and existing strands from oxidative stress.

What that can look like in real life is hair that appears fuller – not because new follicles suddenly pop up, but because the hair you already have is better supported and less prone to breakage or shedding.

In other words, it’s association with reduced hair fall and more overall fullness might be because of:

  • Reduced scalp irritation, which supports a healthier growth environment
  • Improved oil balance, which keeps follicles from becoming clogged
  • Gentle cleansing that minimizes dryness and breakage
  • Antioxidant activity that helps buffer environmental stressors

So, it’not a miracle “growth booster” – but it can help create the conditions that allow your natural growth cycle to function more optimally.

3. Dandruff Reduction & Scalp Support

Shikakai powder is a traditional Ayurvedic remedy for flaky, itchy scalps, and modern research gives us a hint as to why it has been used this way. Phytochemical analyses show that Acacia concinna extracts contain compounds with antimicrobial and antifungal activity, including saponins, flavonoids, tannins, and other plant bioactives that have been shown to inhibit the growth of various bacterial and fungal species in petri dish (in vitro) lab tests. (2) (3)

Since dandruff is often linked to an overgrowth of Malassezia yeast on the scalp, this antifungal potential offers a plausible explanation for why so many people find shikakai soothing. (4)

That said, most of the research has been conducted in lab environments rather than large human trials, and shikakai hasn’t been definitively shown to eliminate Malassezia on its own. So while it may help support a balanced, comfortable scalp – especially in mild cases – it’s best thought of as a supportive option rather than a stand-alone solution.

4. General Scalp Support

Hormonal shifts (like perimenopause) can make the scalp more reactive and sensitive, and over the past year my old routine – which I had used for many years without issue – suddenly started making my scalp itch. When I swapped in shikakai, the irritation resolved almost immediately.

Over time, as I’ve continued using shikakai alongside other herbs, I’ve noticed that my hair feels a little fuller AND my scalp remains healthy and irritation-free. Win/win.

5. Softness & Shine

When pure shikakai powder is mixed with water, it has a slightly gritty texture. The first time I applied it, I remember thinking, “Exactly how is this supposed to be moisturizing?”

My expectations didn’t improve after I rinsed it out, either. While wet, my hair didn’t feel deeply conditioned or dramatically different in any way.

That’s why I was so surprised once it dried.

It was noticeably smoother, shinier, and softer than I expected.

The shine probably has something to do with the way shikakai gently cleanses without over-stripping and its naturally slightly acidic pH, which can help the hair cuticle lie flatter. When the cuticle is smoother, each strand reflects light better – and that’s what gives hair a glossy look.

Whatever the exact mechanism, it’s one of my favorite benefits.

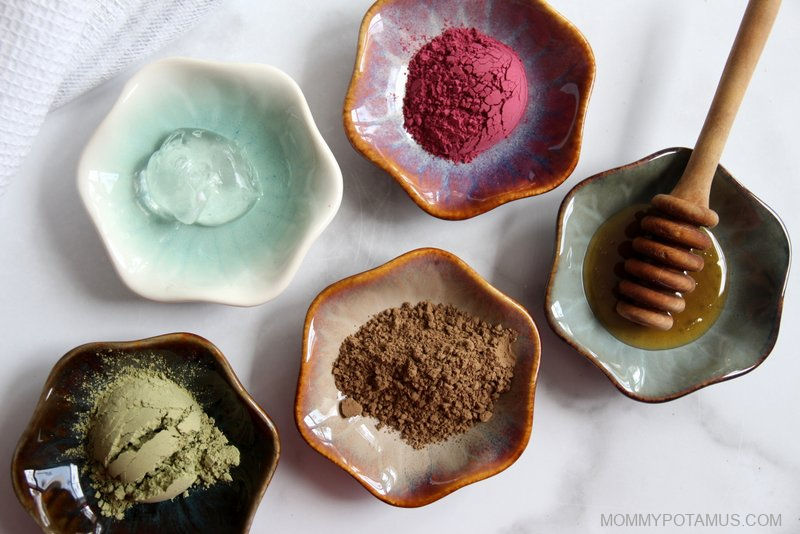
One of the best things about DIY hair care is that you can customize your blend to fit your needs. Below is a quick guide to the most common ingredients mixed with shikakai – and what each one brings to the blend.

Liquid Bases

Warm Water
Helps activate saponins and creates a smoother paste. Warm water typically creates a better consistency than cold, but temperature doesn’t significantly change cleansing ability.

Yogurt
Adds lactic acid (for clarifying), fats for moisture, and protein for temporary strengthening. Good for dry or frizz-prone hair.

Aloe Vera Gel
Adds hydration and slip. Soothes irritated scalps.

Dry Add-Ins

Aloe Vera Powder
Powdered aloe vera works like the gel form, but you only need about 1/3 of the amount.

Amla (Indian Gooseberry) Powder
Traditionally used to enhance shine and conditioning. Contains vitamin C and antioxidants.

Reetha (Soap Nuts) Powder
Boosts cleansing and foaming. Ideal if hair feels oily.

Neem Powder
Traditionally used for scalp conditions. Has antimicrobial properties.

Brahmi (Bacopa monnieri) Powder
Used in Ayurveda to support scalp health and hair thickness.

Fenugreek Seeds or Powder (Soaked & Blended)

When fenugreek seeds are soaked in water overnight and then blended, they create a gel-like substance that improves the spreadability of the hair mask, increases the conditioning properties, and adds slip for detangling. For curly or dry hair, this can make shikakai significantly more user-friendly. Fenugreek is also sold in powdered form. It can be used the same way as the seeds, but you can stir it instead of blending.

Hibiscus Powder
Traditionally used to enhance shine and softness. Also said to help hair keep its color longer reducing oxidative stress on the scalp.

Oxidative stress on the scalp is a primary factor in premature greying. It happens when free radicals (reactive oxygen species) accumulate in the hair follicle, damaging the pigment-producing cells (melanocytes).

Bhringraj (Eclipta alba) Powder
Traditionally used in Ayurveda to support hair vitality and overall scalp health. It’s often included in herbal blends aimed at strengthening hair roots and reducing shedding. While much of the evidence comes from traditional use and animal studies rather than large human trials, bhringraj is widely valued in Ayurvedic hair care for promoting thicker-looking, more resilient hair over time.

In the recipes below, you’ll notice that the amounts are usually given as a range – for example, 2–4 tablespoons. These measurements are meant to be a starting point, since the exact amount you’ll need depends on your hair’s length, thickness, and texture.

After a batch or two, you’ll quickly get a feel for what works best for you and can adjust accordingly.

Before you get started, here are some tips and guidelines:

  • Shikakai hair mask may feel drying if used alone on moisture-depleted or brittle hair → In those cases, consider adding yogurt, aloe, or fenugreek.
  • Shikakai can irritate eyes → Rinse carefully.
  • Always patch test first → I recommend this for all DIY skin and hair care recipes including backuchiol serum, magnesium oil, and butterfly pea witch hazel toner. For the recipes below, a patch test might look like this:
    • Blend a small amount of your recipe together.
    • Apply a dab to your inner wrist or just behind your ear. Wait 24 hours and check for any redness, itching, or irritation.
    • Once you’re in the clear, it’s time to treat your hair to something special.

🌸 Basic Shikakai Hair Mask

Shikakai + Water
Best for normal to oily scalps / hair.

Ingredients

  • 2-4 tablespoons shikakai powder
  • Enough warm water to create a yogurt-like texture

Instructions

Mix ingredients together until they form a yogurt-like texture. To apply, work into wet hair from your scalp to the ends of your hair.

Apply to wet hair, working from your scalp to the ends of your hair.
Leave on 10–15 minutes.
Rinse thoroughly.

Note: It will not lather like commercial shampoo. That’s normal.

🫧 Cleansing Hair Mask

Shikakai + Reetha
Best for oily scalps, moderate buildup, post-workout hair, or when your roots feel weighed down.

Ingredients

This recipe adds reetha – also known as soapberry or soap nut – for cleansing oomph. Yes, that’s the technical term. 🙂

  • 1-2 tbsp shikakai powder
  • 1-2 tbsp reetha powder
  • Warm water

Instructions

Mix the ingredients together until they form a smooth, yogurt-like paste.

Apply to wet hair, starting at the scalp and gently massaging into the hair roots to support a thorough cleanse. Then work the mixture down through the lengths of your hair to the ends.

Leave on for 10–15 minutes.

Rinse thoroughly, making sure no residue remains at the roots.

Note: This blend may create slightly more lather than shikakai alone because of the reetha, but it still won’t foam like commercial shampoo – and that’s completely normal.

🌺 Conditioning Hair Mask

Amla + Shikakai
For hair that feels dry, dull, frizz-prone, or rough.

Ingredients

  • 1-2 tbsp shikakai powder
  • 1-2 tbsp amla powder
  • Optional: 2-4 tbsp yogurt or aloe vera gel (or 2-4 tsp aloe vera powder)
  • Optional: 1-2 tsp fenugreek powder (You can make your own by grinding fenugreek seeds in a coffee grinder.)
  • Warm water

If you’re adding fenugreek and starting with the whole seeds, make sure to grind them very finely, or you may find that you have trouble rinsing seed pieces out of your hair. (I use a coffee grinder.)

In a small bowl, combine the shikakai and amla powders. Add yogurt or aloe vera gel (or aloe powder + water) and stir until you reach a smooth, slightly runny yogurt-like consistency.

If you’re adding fenugreek powder, place it in a small separate bowl and mix it with a little bit of warm water.

Let the mixtures sit for about 5 minutes to thicken slightly, then combine them.

Apply to wet hair, starting at the scalp and gently working it into the hair roots. Then smooth it down through the lengths to the ends, making sure everything is evenly coated.

Leave on for 20–30 minutes.

Rinse thoroughly, taking a little extra care to remove any herbal residue at the roots.

🌿 Hair Mask for Fewer Flakes

Shikakai + Neem + Hibiscus + Aloe
For itchy, reactive, flake-prone scalps.

Ingredients

  • 1–2 tbsp shikakai powder
  • 1 tsp–1 tbsp neem powder (start lower if sensitive)
  • Optional: 2-3 tsp hibiscus powder
  • Optional: 1-2 tbsp aloe vera gel
  • Optional: 1–2 tsp honey
  • Warm water

Instructions

In a small bowl, combine the powders.

Add aloe vera gel and honey (if using), then add a little bit of warm water. Stir and add small amounts of water as needed until a smooth, yogurt-like paste forms.

Apply to wet hair, starting at the scalp. Gently massage into the scalp and hair roots, then smooth through to the ends.

Leave on for 15–20 minutes.

Rinse thoroughly, taking extra care around the roots.

Note: Neem can have a strong scent. If you’re new to it, start with a smaller amount and increase gradually.

🌺 Shine + Conditioning Boost Hair Mask

Amla + Shikakai + Hibiscus + Yogurt or Aloe
For dull hair that needs softness and light-reflecting shine.

Ingredients

  • 1–2 tbsp shikakai powder
  • 1–2 tbsp amla powder
  • 1 tbsp hibiscus powder
  • 1-2 tbsp yogurt or aloe vera gel
  • Optional: 1–2 tsp honey
  • Warm water

Instructions

In a bowl, combine shikakai, amla, and hibiscus powders.

Add yogurt/aloe vera gel and a small amount of warm water. Stir and keep adding water in 1 teaspoon increments until the mixture is smooth and creamy.

Apply to wet hair, working first into the scalp and hair roots, then smoothing through the lengths to the ends.

Leave on for 20–30 minutes.

Rinse thoroughly.

Note: If your hair tends toward dryness, yogurt may provide more conditioning than aloe alone.

🌾 Deep Strength + Roots Hair Mask

Bhringraj + Shikakai + Fenugreek + Water/Aloe
For hair that feels fragile, sheds more than usual, or needs extra support at the roots.

Ingredients

  • 1–2 tbsp shikakai powder
  • 1–2 tbsp c powder
  • Optional: 1–2 tsp fenugreek powder
  • Water or aloe vera gel (enough to create a yogurt-like paste)
  • Optional 1-2 tbsp brahmi powder

Instructions

If you’re adding fenugreek and starting with the whole seeds, umake sure to grind them very finely, or you may find that you have trouble rinsing seed pieces out of your hair. (I use a coffee grinder.)

In a bowl, combine shikakai and Bhringraj powder (and brahmi powder, if using)

Add water or aloe vera gel until you reach a smooth, slightly runny but spreadable consistency.

If you’re adding fenugreek powder, place it in a small separate bowl and mix it with a little bit of warm water.

Let the mixtures sit for about 5–10 minutes to thicken slightly, then combine them.

Apply to wet hair, gently massaging into the scalp and hair roots first. Work through the lengths to the ends.

Leave on for 20–30 minutes.

Rinse thoroughly, ensuring all herbal residue is removed at the roots.

Note: Fenugreek adds slip and makes this blend significantly easier to apply — especially for thicker or curly hair.

Not Sure Which One to Choose?

  • If your scalp feels greasy → 🫧 Cleansing Mask
  • If your scalp feels itchy or reactive → 🌿 Scalp Soothing Mask
  • If your hair feels dry or frizzy → 🌺 Shine + Conditioning Boost
  • If your hair feels fragile or sheds easily → 🌾 Deep Strength + Roots
  • If you just want simple and gentle → 🧴 Basic Mask

More Hair Care Recipes To Try

Herbal Detangler – If there are tears over tangles in your house, here are three homemade hair detangler recipes that are inexpensive and simple to make.

Natural Hair Gel – Want to tame flyaway frizz, keep curls in check, or style short hair with a non-toxic version of your favorite store-bought stuff?

Many of the styling gels on store shelves contain hormone disrupting fragrances and formaldehyde releasers, but you can make natural hair gel with just 1-3 simple ingredients.

Sources

  1. Almeida, C., Silva, A., Ferreira, I., & Teixeira, A. (2023) Natural alternatives to synthetic surfactants for hair care: A review. National Center for Biotechnology Information, U.S. National Library of Medicine.
  2. Wuthi-udomlert, M. (2011). In vitro Effectiveness of Acacia concinna Extract against Dermatophytic Pathogens. Journal of Mycology and Pathology
  3. Sang, S.-H., Akowuah, G. A., Liew, K. B., et. al. (2023). Natural Alternatives from Your Garden for Hair Care: Revisiting the Benefits of Tropical Herbs. National Center for Biotechnology Information.
  4. Batra, R., Boekhout, T., Guého, E., Cabañes, et. al. (2005). Malassezia Baillon, emerging clinical yeasts. FEMS Yeast Research

Share with a friend! 👇

Tags: , , , , ,
hair growth serum

DIY Hair Growth Serum (and What Really Helps Hair Grow)

When our body starts to feel overwhelmed by stress, illness, or shifting hormones one of the first places we can see it is our hair. Hormones affect nearly every aspect of health, and I’ve certainly seen the connection between hormones and hair growth firsthand.

After many years of pregnancy, nursing, and thyroid challenges, my body was tired. I remember standing at the bathroom mirror after years of elevated hormones from pregnancy and nursing. The postpartum hair loss finally hit… and boy did it ever.

I addressed the stress and hormone imbalance, and the hair loss slowed. But I still wanted something to help new hair grow more quickly and protect my scalp and hair. This homemade hair growth serum is the result.

Some women go to a dermatologist or beautician for hair concerns. I tend to go to my pantry. Like my homemade sea salt spray, this DIY hair serum for growth is affordable and uses nourishing ingredients to naturally support scalp health.

What Really Causes Hair Loss 

Hair loss rarely happens in isolation. It’s often a sign that something deeper is happening in the body. Common root causes include chronic stress, hormone shifts, thyroid imbalance, postpartum changes, nutrient deficiencies, and post-viral illness. When our body doesn’t have enough resources, it prioritizes keeping us alive. And hair doesn’t make the cut. 

Supporting hair growth starts from the inside. Prioritizing protein, iron, zinc, and B vitamins helps the body rebuild hair tissue. Managing stress through sleep, gentle movement, and nervous system support can also make a noticeable difference. For hormonal hair loss, balancing blood sugar and supporting thyroid and adrenal health can be helpful. 

While addressing the root cause is key, using products topically can also help. That’s where a scalp serum for hair growth can be beneficial.

Do Hair Growth Serums Actually Work?

The answer is, it depends. A serum won’t fix hormone imbalances or chronic stress on its own, but it can support scalp health and stimulate circulation, which helps hair follicles function better.

Treatments like minoxidil are widely used, and studies show they can sometimes work, but not without risks. There are plenty of natural ingredients that can work just as well or even better than the conventional options. Rosemary oil for one. One study showed it worked as well as minoxidil for certain types of hair loss. If you want a natural approach, a homemade serum is a gentle option.

So, what stimulates hair growth best? Healthy circulation, nutrients, lowering inflammation, and a healthy scalp all play a role. A serum can provide the support your scalp needs externally while lifestyle and nutrition address the issue from the inside.

Why Use a Hair Growth Serum?

A good hair serum for growth helps:

  • Stimulate circulation to the scalp
  • Nourish follicles with vitamins and minerals
  • Soothe irritation and dryness
  • Protect hair from environmental damage

Whether you’re looking for the best hair growth serum for women or a hair growth serum for men, the goal is the same: create a healthy scalp environment that supports regrowth.

Best Hair Serum for Hair Growth: DIY Recipe

This DIY serum combines herbs and essential oils traditionally used to support hair and scalp health. It’s gentle enough for regular use and water based so it doesn’t make hair feel really oily.

Key Ingredients in This Serum For Hair Growth

  • Nettle – Rich in iron and vitamins A, C, and K, along with potassium and magnesium. These nutrients are essential for healthy hair follicles. Helps stimulate hair growth and improve scalp health.
  • Horsetail – High in silica, a mineral that supports hair strength and elasticity. Silica is linked with thicker, shinier hair.
  • Aloe Vera Gel – Aloe vera gel naturally soothes the scalp. Its the base of the serum and helps reduce irritation and dryness. Aloe also provides lightweight hydration so it’s great for most hair types.

Essential Oils for Hair Growth

Not only do they smell good, but these essential oils help stimulate circulation and promote hair growth.

  • Rosemary oil is one of the most studied essential oils for hair growth. Some research suggests it may be comparable to minoxidil for certain types of hair loss.
  • Clary sage oil is traditionally used for hormonal balance and may be helpful for hormone-related hair loss. 
  • Lavender oil supports scalp health and has antimicrobial properties, which can help maintain a healthy scalp environment.

Together, these ingredients combine to create a powerhouse hair growth serum!

Hair Growth Serum Recipe

Help stimulate hair growth with this aloe vera, herb, and, essential oil recipe.

Prep Time5 minutes

Steeping Time15 minutes

Total Time20 minutes

Yield: 8 ounces

Author: Katie Wells

  • In a small pan, bring the distilled water to a boil.

  • Remove from the heat and add the dried nettle leaf and horsetail leaf.

  • Cover the pot and let the herbs sit in the water for at least 10 minutes or until the water cools.

  • Strain the herbs out and pour the herbal tea into a spray bottle.

  • Add the aloe vera gel and essential oils and shake well.

  • Store in the refrigerator and shake well before use.

  • Spray liberally on hair roots once or more per day. I found that it was easiest and worked the best to spray on before bed each night.
  • This hair serum will last about 1 week if stored in the fridge. You can also freeze some if you want to make a bigger batch for later. 

How to Use Scalp Serum For Hair Growth

Apply a small amount of serum to the scalp and massage gently. Focus on your scalp and hair roots. Massage increases circulation, which helps deliver nutrients to follicles. I sprayed this scalp serum on every night before bed. You can use it on either wet or dry hair. 

What Is the Most Effective Hair Growth Serum?

The “most effective” serum depends on the cause of hair loss. Rosemary oil has emerging research and is a popular natural alternative. Herbal and essential oil–based serums, like this DIY recipe, work best as part of an overall approach that includes nutrition, stress management, and hormone support.

So, which hair serum can regrow hair? Regrowth actually depends on follicle health. A serum can support follicles that are dormant or weakened, but it’s much harder to revive inactive follicles. That’s why early intervention and addressing root causes are important.

Final Thoughts on Hair Growth Serum

Hair loss can feel discouraging, especially when it’s tied to postpartum changes, stress, or illness. While hair loss is common in life, we don’t have to take it lying down. It’s so important to address the root causes, but using a hair growth serum can also be really helpful in the meantime. 

I love this hair growth serum because it’s simple with nourishing ingredients and I noticed a definite difference from it. 

How do you support healthy hair? What products have you tried? Leave a comment and let us know!

Tags: , , , , ,
jerk seasoning

Homemade Jerk Seasoning Recipe

I resisted trying Jamaican jerk seasoning for years. It seemed strange to me to add cinnamon to savory dishes. Then, I was introduced to Cincinnati-style chili, which also uses cinnamon in a savory dish (along with chocolate!). I realized cinnamon really could get along with savory flavors. 

I figured if I could learn to love cinnamon in chili, I could learn to like it in chicken or other dishes as well. So I attempted to make Jamaican jerk chicken seasoning at home. My first try wasn’t successful. It turns out, cinnamon has to be kept in a very careful balance. Too much, and it overwhelms everything else.

Since then, I’ve perfected the recipe and really love the sweet, spicy, and cinnamon combination of this spice blend. These flavors can be an acquired taste, so don’t give up if they seem strange at first. A good Caribbean jerk seasoning balances heat, sweetness, and earthiness in a way that’s bold but still versatile.

What Is Jerk Seasoning?

Traditionally, it’s a bold Jamaican spice blend used to season meats, especially chicken and pork, before grilling or smoking. Authentic blends can be made as a dry powder or a paste, depending on how it’s used. This homemade jerk seasoning version uses pantry spices so it’s easy to keep on hand and customize to your tastes. 

What Is Jerk Seasoning Made Of?

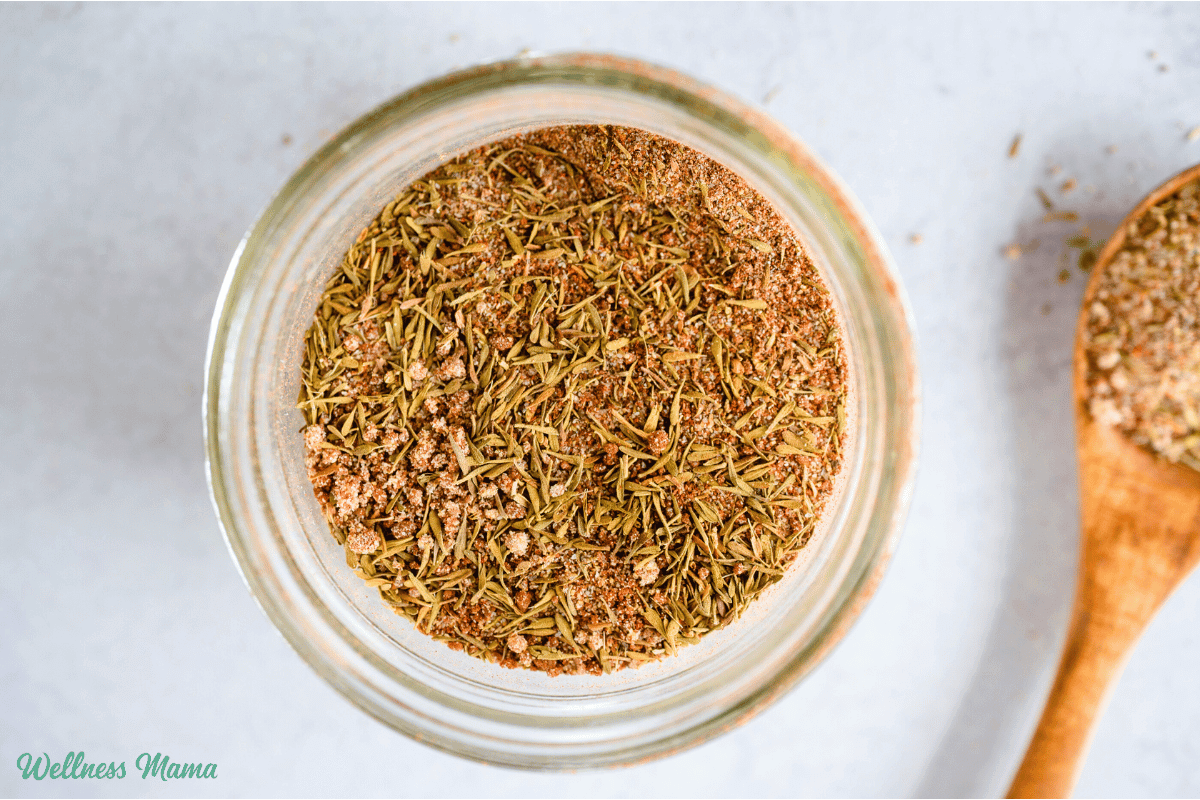
While recipes vary, classic jerk seasoning ingredients often include allspice, thyme, garlic, onion, cinnamon, nutmeg, cloves, and a spicy element like cayenne or Scotch bonnet peppers.

The three main ingredients of jerk seasoning are allspice, thyme, and hot peppers as the core flavors, with supporting spices layered in. So what gives jerk its flavor? The signature taste comes from the warm, aromatic spices (especially allspice and cinnamon) combined with heat, herbs, and a touch of sweetness. It’s that mix of spicy, savory, and slightly sweet that makes jerk seasoning so distinctive (and addictive!). 

How to Make Jerk Seasoning at Home

If you’re wondering how to make jerk seasoning, the good news is that it’s simple to mix as a dry spice powder. You can also blend the spices into a paste with oil, vinegar, and/or honey. A Jamaican jerk seasoning recipe can be customized for heat level and sweetness, depending on your family’s preferences.

This seasoning is usually added to chicken, but it’s also great on roasted vegetables, other meats, and even grilled seafood. I love mixing this seasoning with equal parts honey and coconut oil to make a marinade or rub. I’ll use it on different meats and vegetables, especially when grilling. The combo of sweet, spicy, and earthy adds a caramelized, smoky flavor that’s hard to beat.

Jerk Seasoning Recipe

Homemade Jamaican jerk seasoning recipe with onion powder, cinnamon, allspice, and other herbs provides depth and flavor to many dishes.

Nutrition Facts

Jerk Seasoning Recipe

Amount Per Serving

Calories 3

% Daily Value*

Sodium 39mg2%

Carbohydrates 0.6g0%

Fiber 0.2g1%

Sugar 0.2g0%

Protein 0.1g0%

* Percent Daily Values are based on a 2000 calorie diet.

Try mixing the seasoning with equal parts honey and coconut oil to rub onto meat or other food.

Another Variation

I’ve played around with this recipe over the years and the above is the updated version. If you’re looking for the original that has a stronger onion and cinnamon flavor, then give this a try.

What Is the Closest Thing to Jerk Seasoning?

Looking for a substitute for jerk seasoning? If you don’t have all the spices on hand, a mix of allspice, thyme, garlic powder, onion powder, and cayenne is a good starting point. It won’t be identical to an authentic blend, but it captures the general flavor profile.

If this just isn’t your thing, check out my other homemade herb and spice blends to replace pricey store-bought spice blends. Making your own lets you control the ingredients, skip fillers, and adjust the flavors. Plus, once you start experimenting with spice blends like this, it’s hard to go back to pre-made mixes.

Ever used Jamaican jerk seasoning? What are your favorite ways to use it? Leave a comment and let us know!

Tags: , , ,
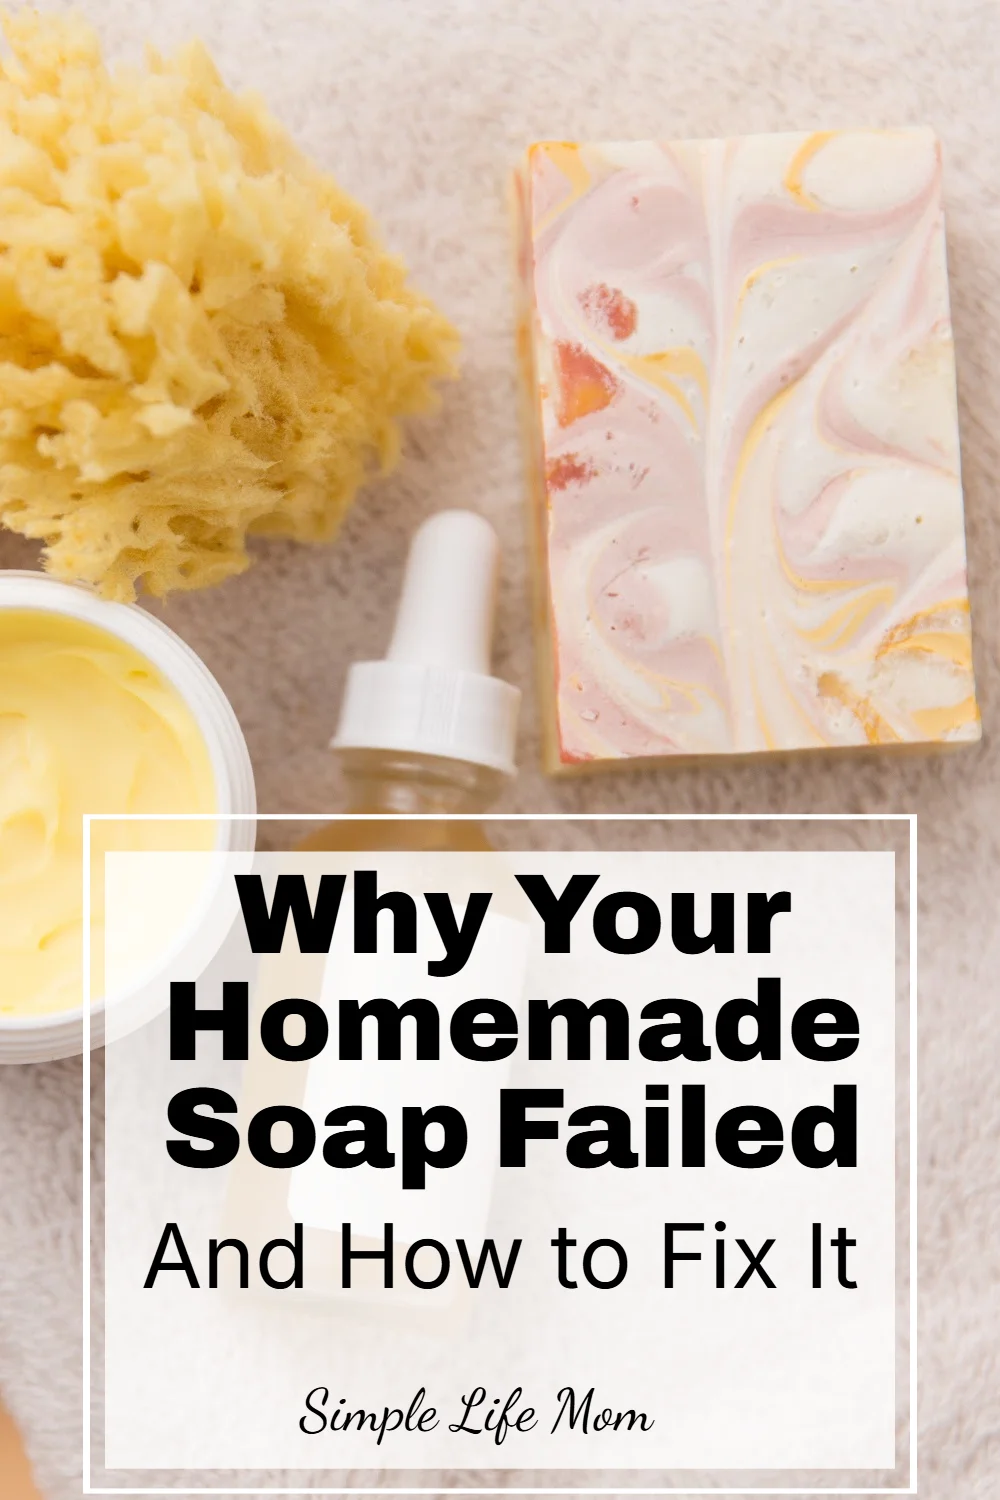
A visual guide to common soap making problems, including seizing, cracking, separation, and overheating, with natural solutions for beginners.

Soap Making Troubleshooting Guide: Why Your Soap Didn’t Turn Out Right (And How to Fix It)

Making homemade soap is such a beautiful, simple skill to learn—but if you’ve ever had a batch go wrong, you know how discouraging it can feel. One minute everything looks perfect, and the next you’re in the middle of soap making troubleshooting because your soap is thickening too fast, cracked, crumbling, or just… wrong.

Here’s the good news: every soap maker has been there. Every mistake is part of the learning process, and most problems are completely fixable—or preventable next time.

This guide will walk you through the most common soap making problems, why they happen, and how to fix them using simple, practical, real-life solutions to get you on the right path.

After all, learning homemaking skills like soap making isn’t just about the end product—it’s about stewardship, patience, and building something meaningful for your home and family. Mistakes are part of learning, and every imperfect batch is still a step toward wisdom, confidence, and self-sufficiency.

Table of Contents

  • Quick Soap Making FAQ
  • Why Did My Soap Seize?
  • Why Did My Soap Separate?
  • Why Is My Soap Too Soft?
  • Why Did My Soap Crack on Top?
  • Why Did My Soap Change Color or Fade?
  • Why Is My Soap Sweating?
  • Why Doesn’t My Soap Lather Well?
  • Why Are There Air Pockets or Tunnels?
  • Why is My Soap Chalky and Crumbly?
  • Why Does My Soap Smell Bad?
  • Gentle Reminders for New Soap Makers

Soap Making Troubleshooting Quick FAQ:

Good soap making starts with great techniques and great recipes. Make sure to read my articles on both so you start with great quality.

Here are my most common questions with rapid answers up front!

Can failed soap be saved?
Yes! Most failed soap can be re-batched or hand-milled (melted and remolded). Learn how here.

What does seizing mean in soap making?
Seizing is when soap batter thickens suddenly due to high temperatures, using fragrance oils, using hot essential oils like cinnamon and clove, or over-mixing. Change to essential oils and soap at cooler temperatures.

Why does my soap get a white powder on top?
That’s soda ash. It’s harmless and can be rinsed or gently shaved off.

Why are lye pockets in my soap after curing?
If you have liquid pockets that give you that slick feeling on your fingers when you feel it, you know it’s lye. You didn’t mix enough and then poured too cool. The oils and lye water didn’t emulsify and separated, not fully saponifying. But don’t worry. As long as you know that you used the right ingredient amounts, you can hand-mill (re-batch) the soap. Learn how here.

So, lets dive into the meat of each topic to make sure you minimize problems in the future, or at least know what to do when they happen.

Soap Making Troubleshooting Guide

Why Did My Soap Seize?

What it looks like: Soap batter suddenly turns thick, grainy, and chunky, like lumpy mashed potatoes.

Common causes:

  • Essential oils or fragrance oils that accelerate trace: Some essential oils are considered “hot” oils and will accelerate trace. If you’re going to make a Fall soap with cinnamon, clove, or nutmeg, then lower the temperature of your oils and lye water slightly more than usual to accommodate this issue.
  • Soaping at high temperatures: When soap making temperatures are above 100 degrees Fahrenheit, soap can come to trace faster.
  • Over stick blending: Using a stick blender can cause soap to come to trace a lot faster than a whisk or hand mixer. Pay close attention.
  • Heavy water discounting: If you don’t use enough water in your recipe, you can have a whole host of problems. The primary issue is lye being concentrated in a way that creates lumps of saponified oil before the other oils can be mixed evenly.

Simple fix:

  • Stop blending with the stick blender. Use a spoon if you need to finish mixing in scent or natural soap colorant but work as fast as you can.
  • Spoon the soap into your mold as quickly as you can.
  • Press firmly and texture the top for a rustic look.

How to prevent it next time:

  • Don’t use Fragrance oils. Use essential oils instead.
  • Soap cooler (80–100°F). If you’re using a recipe with a lot of hard oils like lard, cocoa butter, coconut oil, you have a higher likelihood of saponifying quickly.
  • Hand-stir essential oils into the soap instead of stick blending if you notice it came to trace quickly.
  • Always research scent behavior. There are “hot” essential oils like cinnamon and clove that will cause soap to come to trace quickly.

Why Did My Soap Separate?

What it looks like: Oil pooling, watery layers, or curdled soap batter.

Common causes:

  • False trace: False trace is rare if you measured correctly and your temperatures are right. But if your soap is too cold and you don’t stir enough, you can get results that you don’t see are messed up until you try to take the soap out of the mold.
  • Incorrect measurements: soap recipes are very precise. Measurements are scientific for a chemical reaction. If you measure precisely, you will have a lot less problems.
  • Not enough mixing: If lye water isn’t mixed enough, the water won’t be emulsified into the oils. This will cause pockets of lye water to separate as it sits in the mold.
  • Curing temperature too cold after limited mixing: If didn’t mix great, but you have warm temperatures, sometimes you can luck out and the soap turns out ok. But if you undermixed and then temperatures are too cold it’s a definite combination for lye pockets.

Simple fix:

  • If you catch it before it sets up, re-blend until fully emulsified.
  • If it’s already molded, don’t worry. It can be fixed. If you had a scale problem or forgot something, try to figure out what you did. You can always re-batch or hand mill the batch and add the missing ingredient to fix it. If you didn’t mix enough, hand-mill and mix well.

How to prevent it next time:

  • Always weigh ingredients carefully.
  • Match oil and lye temperatures to at least 80 degrees Fahrenheit.
  • Blend to emulsion. Look for light trace.

Why Is My Soap Too Soft?

What it looks like: When unmolding the soap, your hand may leave fingerprints, or the soap is extremely soft or even fully liquid.

Common causes:

  • Too much water: Double check your recipe and make sure the water amount is correct. It should be 32-38% of the oils.
  • High olive oil content and not enough hard oils: Castile and Bastille soaps can be very soft when first unmolded.
  • Superfat content too high: Too many oils compared to lye water will leave your soap slightly softer than a lower superfat content. Common amounts are 5-15%, unless you are making a salt bar recipe.
  • Not cured long enough: Most of the time, the soap just needs to sit in the mold for a little longer or be cured for a few more days.

Simple fix:

  • Leave it in the mold longer.
  • Put it in the freezer before unmolding.
  • Let it cure longer (3-4 weeks).
  • Rebatch with harder oils if needed.

How to prevent it next time:

  • Edit recipe in lye calculator with coconut oil, tallow, lard, or cocoa butter
  • Slightly reduce water if water content is too high.

Why Did My Soap Crack on Top?

What it looks like: It looks like a crack in a river bed and the soap is a lot darker than usual. When soap overheats it darkens and cracks, as if it is boiling beneath the surface and heat has to escape somehow.

Common causes:

  • Overheating due to hot essential oils or using fragrance oils.
  • Heavy insulation in an already warm room.
  • Sugars or milk cause overheating during saponification: Just like how soap curds can burn when added to water, it also speeds up saponification and creates heat quickly. Always keep this in mind when adding milks and sugars (honey, manuka, etc.)

Simple fix:

  • Cool as soon as possible when you notice it. Place it in the refrigerator for a few minutes to cool it down.
  • Gently press cracks together while warm.
  • Plane the top after curing.

How to prevent it next time:

  • Don’t heavily insulate if the room is already in the mid 70s Fahrenheit.
  • Soap at cooler temperatures if that recipe tends to harden quickly or the oils cause it to set quickly.

Why Did My Soap Change Color or Fade?

What it looks like: Soap is one color when it’s molded, but another when you unmold it. Turmeric is yellow but turns tan. Alkanet root is purple, turns blue, then turns purple again. Beet root is a beautiful pink but turns brown when added to soap.

Common causes:

  • Fading or lye effected natural colorants, especially root powders and herbs.
  • Gel phase: The gel phase is when soap warms to a consistent temperature and goes into gel phase which is a natural glycerin transition time during the first 24 hours of saponification. Gel phase will darken a white soap slightly but is good for coloring when trying to bring out more vibrant colors.

Simple fix:

  • Embrace the natural patina. Soap colors will change based on temperature and colorant used. It’s a beautiful natural process.
  • Learn what changes and how so you can change your recipe as needed for next time.

How to prevent it next time:

  • Research how essential oils change colors in soap. Some will darken the soap bar a lot more than others.
  • Use clays, oxides, and stable botanicals that don’t change color. Clays are pretty consistent. Rose clay, Moroccan clay, or even charcoal are some of my favorites. Check out my book for a full color description and chart of herbs and
  • Control gel phase by not letting it enter gel phase (let it get warm enough for saponification, and not any warmer), or make sure it fully gels for a richer, darker color and harder finished soap.

Why Is My Soap Sweating?

What it looks like: There will be little beads of “sweat” all over the soap as it’s curing. Sometimes it’s enough that there is a pool of liquid under the soap where it sits.

Common causes:

  • This is usually glycerin dew, and it’s very common in humid climates.
  • You probably have a very high glycerin soap.

Simple fix:

  • Store in a dry, cool space.
  • Wrap fully once it’s cured to keep glycerin from beading outside the soap bar.

How to prevent it next time:

  • Cure in low humidity.
  • Avoid airtight curing containers. Let your soap sit out on a table for the first week at least.

Why Doesn’t My Soap Lather Well?

What it looks like: There may be tiny bubbles, but no big lather like you wanted.

Common causes:

  • Too much olive oil. Olive oil or Castile bars don’t have much cleansing power and don’t create bubbles without additives.
  • High superfat: If your soap recipe has a very high superfat content (20% or more), the oils can be weighed down by the extra oils available in the soap bar.
  • Low bubble creating oils: Every oil in a soap recipe has a purpose. If the recipe hasn’t been put together well, it may not account for moisturizing, cleansing, or lather. Learn more about lathering oils.
  • Hard water: The minerals in hard water will kill the bubbles. They also affect your hair, so keep this in mind when switching to natural shampoo bars.

Simple fix:

  • Use a soap saver like this one.
  • Use a water filter to soften hard water.

How to prevent it next time:

  • Balance bubbly and creamy oils.
  • Make sure there’s enough coconut, babassu oil, or castor oil to create a good lather.

Why Are There Air Pockets or Tunnels?

What it looks like: When you take your soap out of the mold and cut it, there are air pockets or tunnels running through your soap.

Common causes:

  • Pouring at thick trace. If the soap is thick, air pockets can be trapped as you pour or scoop the soap into the mold.
  • Not tapping the mold. Tapping the mold gently on a table or countertop can help bubbles escape if the soap is thin enough.

Simple fix:

  • Embrace the unique bar and enjoy it!
  • Hand-mill the finished bar. Your soap will still look rustic, but it won’t have the air pockets on the inside.

How to prevent it next time:

  • Pour at light trace.
  • Tap molds firmly to get air pockets out of the soap.

Why is My Soap Chalky and Crumbly?

What it looks like: The soap is white and chalky and crumbles in your hand. It also may be chalky only on the corners of the mold but solid in the center.

Common causes:

  • Soap is lye heavy. When too much lye is used, soap can become crumbly and chalky.
  • Soap was too cold when within the mold in the first 24 hours. When I’ve poured soap in the winter time, I’ve added a space heater and covered the mold with a towel and can still have the corners get crumbly. This is because the corners became too cold and there wasn’t proper saponification.

Simple fix:

  • If the batch is crumbly only on the outside due to the cold while in the mold, cut those areas off and use the rest of the soap.
  • If the batch was lye heavy, add the soap to a slow cooker as you would when re-batching any soap, but add oil during the process. If you have no idea how much extra lye you added, this can be a risk and you can still have lye heavy soap, but I’ve usually been able to figure out what I’ve done, or I’ve added enough oils that I know the soap is now fine for home use. If you are not sure, discard the batch.

How to prevent it next time:

  • Measure everything very carefully.
  • Make sure your soap is molded warm and kept warm for the first 24 hours. 75 degrees is usually a great temperature to make sure overheating, or soaping that’s too cold doesn’t occur.

Why Does My Soap Smell Bad?

What it smells like: There’s a dusty scent. Something is off.

Common causes:

  • Old or rancid oils.
  • Improper storage. Soap was left out in a hot and humid environment or has a lot of botanicals within it, causing it to go bad faster.
  • Expired fragrance oils.

Simple fix:

  • Discard the batch. There’s nothing else to do if you have rancid oils.

How to prevent it next time:

  • Use fresh oils.
  • Only use essential oils for an indefinite shelf life while still in the bottle.
  • Store soap in a cool, dry environment and store in plastic containers if possible when cured.

Gentle Reminders for New Soap Makers

  • Measure carefully. The smaller the batch, the more specific you need to be.
  • Keep recipes simple until you learn more about ingredients and what they do in soap. You can learn more about soap making oils here.
  • Don’t rush trace. Know what trace is and what you want for your specific recipe. Some soaps you want to pour at light trace so you have time to include colors. Others need to be thicker so you can create swirls or layers.
  • Insulate for 24 hours, longer if soap is still soft. Then cure for 3 weeks so your soap is hard and lasts longer.
  • Enjoy experimenting!

Soap making isn’t about perfection; it’s about learning, growing, and building a simple, natural skill for your home or small business. Every batch teaches you something new, and even the mistakes have value.

Save this guide, come back to it when something goes wrong, and remember: you’re learning a real homestead skill, and that takes time.

If you have a question that wasn’t answered, ask it here.

Tags: , , , , , ,
winter skincare

Winter Skincare For Glowing Skin

Many of us notice itchier, flakier, and more uncomfortable skin during the colder months. Cold weather, less sunlight, and dry indoor air all have a negative impact on skin health. Here are some strategies for keeping your skin happy and healthy this winter that go beyond just using lotion!

For many of us, winter is a time of cold weather. And if you live in the far northern regions, like the Arctic Circle, then you’re dealing with even more frequent colder temperatures. Cold winter air and indoor heating dry skin out. We also experience a dip in vitamin D levels in the winter due to less sunlight. This leads to a damaged skin barrier and loss of hydration. 

The Reason Behind Winter Skincare

Using moisturizing skincare products that help add hydration back into the top layers of the skin is important. Also, using heavier creams and lotions that create more of a barrier from the elements. Winter is also a time of less sunlight and usually less sun exposure, which is what our skin needs to synthesize vitamin D. 

The lower our vitamin D levels are, the higher the risk of overall inflammation from our immune system. Low vitamin D levels also play a role in our skin health, including an increased risk of eczema and psoriasis. 

When dry air and low temperatures hit, our skin barrier doesn’t function as well and we’re more likely to notice damage. Keratinocytes make up 90% of the epidermis, our skin’s outer layer. They release pro-inflammatory cytokines and cortisol that makes skin even more reactive to irritants. This is why your normal skincare routine may not cut it once colder weather comes around. 

Increasing hydration and protecting the skin barrier are a must this time of year!

Heating Things Up

Another surprising way to increase our skin’s resilience to the elements may be to expose it to more of them. Sauna exposure increases skin circulation, boosts skin hydration, and helps maintain skin pH for more resilient skin. It helps our skin lose less moisture, especially when exposed to dry, winter air. Research shows sauna also helps our skin recover faster from water loss and skin pH disruption. 

There’s also some evidence that contrast therapy, alternating between really hot and really cold temperatures may also help. Many traditional northern cultures and even athletes alternate between sauna sessions and cold exposure. This helps our skin become more resilient and handle temperature fluctuations better. 

Tweaking Our Environment

Increasing humidity in the home with a humidifier also helps restore moisture to skin. If you have indoor heating, which is likely in most areas, this pulls moisture from the air. The dry air in turn then pulls moisture from your skin, further increasing dehydration. 

Your home can feel as dry as the desert, but it may actually be even worse. Indoor humidity can drop to 10-20% with the heater on, while the Sahara Desert hovers at about a 25% humidity level. What follows is tight, dry skin that’s more easily damaged. You can also notice more fine lines and wrinkles forming. No, thank you!

Hydration at a Cellular Level

Something else I’ve been using lately that I’ve found has made a big difference in my hydration levels is structured water. There’s some fascinating research about the molecular structure of natural water found in springs and melting glaciers. Evidence suggests that structured water hydrates us at a cellular level much more efficiently.

I’ve noticed better hydration myself since switching to structured water. If you don’t have access to a natural and clean spring in your backyard, you can also run filtered water through the Mayu Swirl, which is what I do. You can learn more about Mayu here and get a discount with code wellnessmama. 

And of course, keeping up with minerals helps cellular hydration to keep skin healthy from the inside out. I’ll rotate through different minerals and salt water depending on what I feel like that day. 

Winter Skincare Products to Get

While hydration starts from the inside, using products topically on skin at the same time can still be really helpful. I’m a big fan of making my own products, but there are some really good natural skincare products available now in stores and online. Here are some of my favorite brands to buy healthy skincare from, including lotions, serums, and balms for winter skincare.

  • Alitura  – check out their moisturizer and night cream
  • Annmarie Gianni – their herbal facial oil is a favorite
  • One Skin – this uses patented peptides for science-driven natural skincare
  • Toups & Co – their tallow face balm is a must have

DIY Winter Skincare

If you’re a DIY person, then I’ve got plenty of different skincare recipes to help your skin feel its best. While I’ve come up with tons of recipes I love over the years, here are some that work best in colder, drier weather. 

Lotions and Balms

Use these on your face and body for more moisturized skin. Oil-based products help provide a protective barrier on skin to aid in moisture retention and prevent damage from the elements. 

Face and Body Scrubs

Moisturizing is important, but you may also notice flaky skin this time of year. Scrubs can help to gently remove dead skin cells so you can start with a clean slate. The key is to use scrubs that aren’t overly harsh on skin and still provide some protection with nourishing oils. 

Love Your Lips

Lips can really take a beating, feel dry, and start to peel. Drinking lots of water with minerals helps, but sometimes you just need a trusty lip balm. I also love using a good lip scrub first to get rid of the peeling skin and that dry, gummy feeling. 

Face Moisturizing 

What works well on the rest of our skin doesn’t always work best on our delicate facial skin. Here are some of my favorites to help minimize the appearance of fine lines and rough spots and nourish the skin on my face. 

A Soothing Soak

Nothing beats a nice, relaxing soak in the tub. Be sure to use warm, but not piping hot water, which can worsen moisture loss from skin. Don’t have a bathtub? Try a foot bath!

You don’t have to do everything all at once, but pick a few skincare items you love and give them a try. It’s nice to have a little pampering session in between running kids to practices, changing diapers, cooking meals, and everything else us moms do! 

What are some of your favorite ways to care for your skin during winter? Leave a comment and let us know!

Tags: , , ,
Homestead Blog Hop - Homestead tips, ideas, animal care, and recipes every Wednesday

Homestead Blog Hop 585 – make beeswax food savers

Welcome to Homestead Blog Hop, a weekly gathering for homesteaders and simple living enthusiasts to share DIY projects, from-scratch recipes, and creative inspiration. This week’s hop features cozy homesteading tips, along with practical ideas that celebrate handmade living and self-sufficiency.

Whether you’re looking for seasonal crafts, homemade treats, or encouragement on your homesteading journey, you’ll find plenty of inspiration to carry into the new year. Grab a cup of tea, explore the featured posts, and join us in sharing your own homestead creations.

Meet Your Homesteading Hosts

We’re Kelly from Simple Life Mom, Liz from The Cape Coop, Natasha from Houseful of Nicholes, and Laurie from Ridgehaven Homestead. Together, we’re passionate about from-scratch living, simple ingredients, frugal habits, and intentional homesteading. We’re delighted to host the Homestead Blog Hop, where you can find fresh inspiration each week for DIY projects, homemade recipes, and practical simple living ideas.

Follow Us for More Homestead Inspiration

Natasha – Houseful of Nicholes
Facebook | Pinterest | X | Instagram

Laurie – Ridge Haven Homestead
Facebook | Pinterest | Instagram

Liz – The Cape Coop
Facebook | Pinterest | X | Instagram

Kelly – Simple Life Mom
Facebook | Pinterest | X | Instagram

FEATURED POSTS from the Last Homestead Blog Hop

Each week, we take turns selecting three featured posts from the Homestead Blog Hop. These features are shared across all of our social media platforms, helping spotlight the creativity and hard work of our fellow homesteaders. Here are the featured posts from last week’s hop:

Today, our features are so wonderful! Making beeswax clothes for food wrapping is sustainable and healthier. Check out how easy it is to make them. Then learn more about rooting kitchen scraps to get your summer garden or indoor herb garden going. Do this while munching on a delicious garbanzo bean salad. Enjoy!

1. Regrowing Vegetables from Kitchen Scraps from The Once and Future Homestead

2. Mary’s Garbanzo Bean Salad from Scratch Made Food

3. Simple Beeswax Food Wrap Tutorial from Our Inspired Roots

Congrats! Feel free to grab the featured on button for your post.

Just right click and ‘save image as…‘

Guidelines for the Homestead Blog Hop

  1. Click the “Add Your Link” button below and upload a clear, eye-catching image from your project or recipe. Please link directly to the family-friendly post itself, not your blog’s homepage.
  2. You may link up up to three posts each week.
  3. Take time to visit a few other blogs in the hop and leave a thoughtful comment to let them know you stopped by. Community support makes this hop special!
  4. Please include a link back to the Homestead Blog Hop in your post. Posts without a backlink are not eligible to be featured. All featured posts are shared across all hosts’ social media channels.
  5. Share posts that haven’t been linked to the hop before. Older posts are welcome as long as they are new to the hop.
  6. By joining the Homestead Blog Hop, you grant the hosts permission to use one image from your post, with a link back to your site, if your post is selected as a feature next week.
  7. This is a family-friendly link-up designed to encourage, inspire, and support the homesteader in all of us.

Let the Party Begin!

Which project are you excited to try this week? Leave a comment below.

Join Our Homestead Blog Hop Pinterest Board

Follow all of your hosts on Pinterest and send a message if you’d like to be added to our Homestead Blog Hop group board. This board is a great place to share your DIY projects, crafts, and from-scratch recipes with the homesteading community.

Guideline: Only pin posts that you’ve linked up to the Homestead Blog Hop.

Tags: , , , , ,
Samoas_Recipe

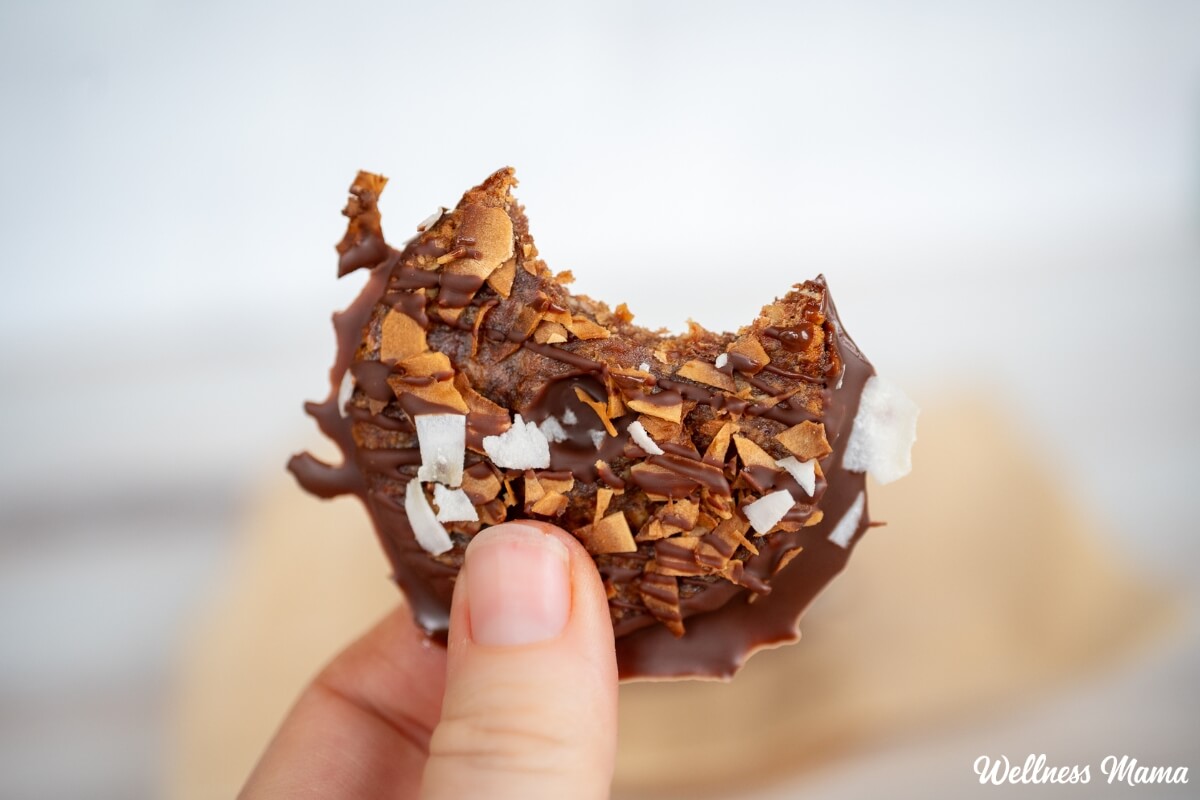
Healthier Homemade Samoas Cookies Recipe

Girl Scout cookies are popular this time of year. It’s estimated that over 200 million of those crunchy, chewy, addictive small boxes sell every year. What’s not so tasty are the ingredients and pesticide residues they contain. 

If you’re a fan of chewy coconut, caramel, and rich chocolate Samoas, then you’ll love this healthier take. It’s made with real-food ingredients but tastes even better (in my opinion). I’ve always been a big coconut fan and use it in everything from skincare to desserts for its healthy fats.  

This healthier homemade Samoas cookies version delivers on flavor and quality. It’s inspired by traditional Samoas cookies and makes an easy Samoas recipe you can enjoy year-round, not just during cookie season. Plus, it’s grain-free, uses natural sweeteners, and has a texture that’ll satisfy any coconut lover.

What Are Samoas Cookies and Why Make a Homemade Version?

Samoas are a beloved variety of Girl Scout cookies with toasted coconut, caramel, and chocolate. In some areas they’re labelled Caramel deLites or coconut Girl Scout cookies, but the flavor profile remains the same. They’re sweet, chewy, and irresistible. However, the first ingredient is sugar, the next is vegetable oil, and the ingredients list goes downhill from there. 

I don’t have a huge sweet tooth, but my kids won’t say no to homemade cookies! And I want something that’s just as nourishing as it is delicious. That’s where this healthier Samoas dupe comes in.

It features clean, simple, and absolutely delicious ingredients. These homemade Samoas use Medjool dates for caramel-like sweetness, toasted coconut for texture, and dark chocolate. The result is a coconut cookie that tastes indulgent but is made entirely with real food ingredients. 

A Nourishing Spin on a Classic

One of the best things about making homemade treats is being able to choose the ingredients and sweetness level. Many homemade Samoas recipes get bogged down in complicated caramel steps or refined sugars. This version keeps things simple and nutrient dense.

Toasted coconut adds texture, sweetness, healthy fats, and fiber. Dates provide the sticky, caramel-like feel without needing to boil sugar, plus they’re rich in nutrients. The dark chocolate drizzle ties it all together with antioxidants and minerals. You can even adjust the level of chocolate or swap in dairy-free options to fit your family’s preferences.

Tips For Making Homemade Samoas

Homemade Samoas cookies (or any cookie) isn’t just about copying what’s on the side of the box. I don’t know about you, but I don’t keep sorbitol, caramel coloring, and carrageenan in my pantry! These Samoas start with simple ingredients, but you can tweak them to fit your preferences. 

  • Customize your chocolate: Use a dark chocolate you love (70–90% cacao works well) to control the sweetness level. You can also opt for dairy-free chocolate.
  • Play with fats: Coconut cream, melted coconut oil, or even grass-fed butter all work here. Use what you have or what you like. Butter and ghee taste the most like a classic Samoa and are richer. Coconut cream gives it a softer chew, while coconut oil is firmer if you eat these chilled. 
  • Prep the dates: If your dates are dry or firm, soak them in warm water for 5–10 minutes first. Then drain and pat dry before using.

These homemade Samoas cookies are perfect for family gatherings, lunchbox treats, or a weekend project with kids. And once you’ve made this Samoas dupe, I guarantee you’ll be excited to explore other real-food dessert recipes too.

Healthier Homemade Samoas Cookies

This delicious and healthy twist on the classic Samoas cookies features nourishing fats, dates for sweetness, and a generous chocolate drizzle.

  • Preheat the oven to 400°F. Spread shredded coconut evenly on a baking sheet and toast for 3–5 minutes, watching closely, until golden. Remove and let cool slightly.

  • Add dates to a food processor and pulse until sticky and broken down. Add toasted coconut, vanilla, salt, and your chosen fat. Pulse until a thick, cohesive dough forms.

  • Scoop out about 1 tablespoon of dough, roll into a ball, and flatten slightly. I used the back of a ½ measuring cup with parchment between the cookie and the measuring cup. Use a straw or chopstick to punch a hole in the center. Reshape as needed.

  • Reduce oven temperature to 350°F.

  • Place cookies on a parchment-lined baking sheet and bake for 12–15 minutes, until edges are lightly golden and cookies feel set. Allow cookies to cool completely on the pan.

  • Transfer cooled cookies to the freezer for 5 minutes to firm up before dipping.

  • Using a double boiler, melt dark chocolate with coconut oil (or butter) until smooth.

  • Dip the bottoms of the cookies into the melted chocolate. Place back on parchment and drizzle remaining chocolate over the tops.

  • Refrigerate for 10–15 minutes, until chocolate is fully set.

Nutrition Facts

Healthier Homemade Samoas Cookies

Amount Per Serving (1 cookie)

Calories 123
Calories from Fat 72

% Daily Value*

Fat 8g12%

Saturated Fat 6g38%

Trans Fat 0.002g

Polyunsaturated Fat 0.1g

Monounsaturated Fat 1g

Cholesterol 0.1mg0%

Sodium 28mg1%

Potassium 169mg5%

Carbohydrates 13g4%

Fiber 3g13%

Sugar 10g11%

Protein 1g2%

Vitamin A 20IU0%

Vitamin C 0.2mg0%

Calcium 14mg1%

Iron 1mg6%

* Percent Daily Values are based on a 2000 calorie diet.

  • For chewier cookies, bake closer to 12 minutes
  • For crispier cookies, bake closer to 15 minutes and toast the coconut a bit darker

How to Store Homemade Samoas

We all know someone who keeps a stash of Girl Scout cookies in their freezer for later. The good news is that these homemade Samoas are also freezable! Keep leftovers in the freezer for up to 2 months or in the refrigerator for up to one week. Let the cookies come to room temperature first before eating though for the best texture. 

Does your family love Girl Scout cookies? What are some of your favorite flavors or healthier alternatives? Let us know in the comments!

Tags: , , , ,
Slow_Cooker_Boston_Butt_Recipe

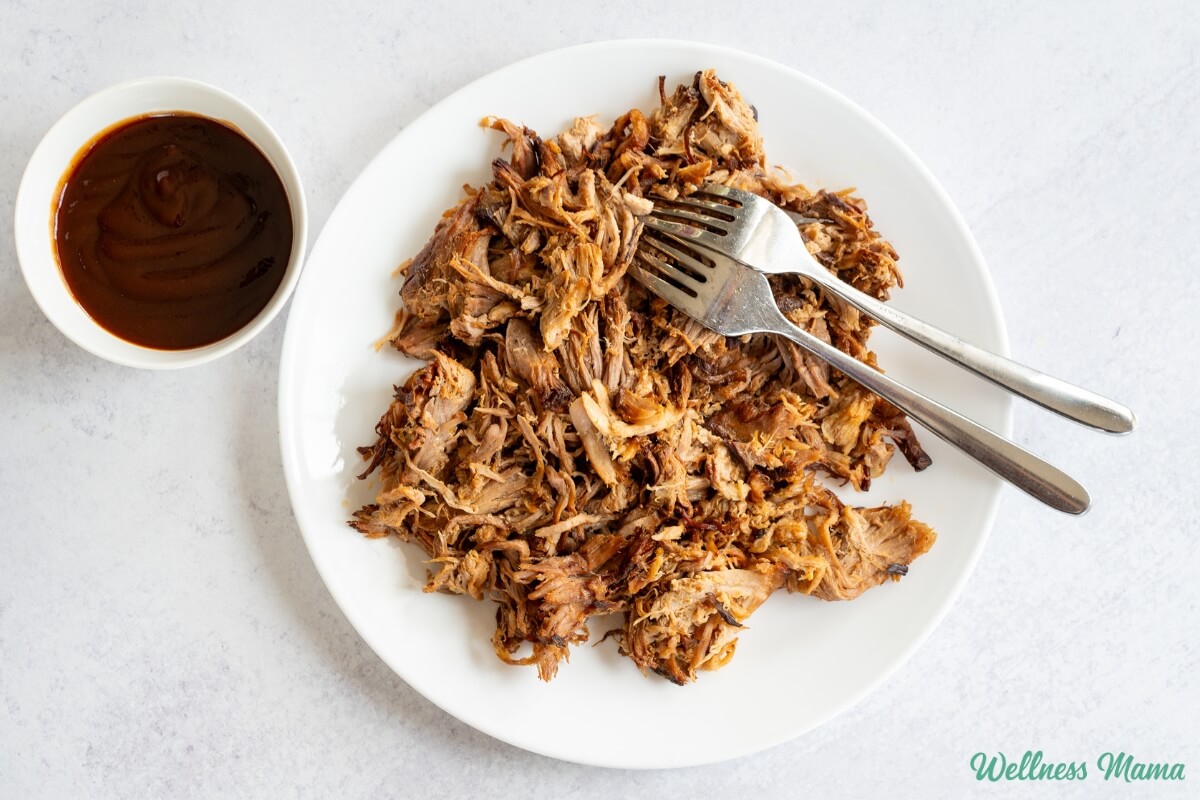
Slow Cooker Boston Butt Recipe (Instant Pot Option)

Growing up and living in the south, I’m pretty familiar with pork barbecue. I’m also familiar with the fact that most barbecue places rely on high fructose corn syrup and other non-foods in their sauce. This Boston butt pork roast recipe avoids all that and simply uses delicious, whole food ingredients for the best taste. 

Boston butt is one of the easiest cuts of pork to cut and it’s also one of the most affordable. I’ve been able to find Boston butt from pastured pork at great prices, and slow cooking this recipe makes it incredibly tender. Boston butt roast in the Crockpot is also an easy recipe on days when you’re out of the house all day and need dinner to be ready when you get home. With a houseful of kids and teens in sports that happens a lot around here!

How to Serve Boston Butt Roast

For our family, one Boston butt roast lasts for about 3 meals with all of the leftovers. It’s a tasty source of protein and tastes good on its own, or repurposed into other dishes. We’ve done barbecue omelets with the leftovers. It also tastes great in tacos or for a protein-rich salad. 

I like the roast alongside almost any kind of potato or vegetable dish. It’s also great with some sourdough bread, rice, or salad. Try it with some sweet potato fries, savory stuffed sweet potatoes, or roasted Brussel sprouts. Here’s a tip: batch cook some roasted whole sweet potatoes to pull out of the fridge for a fast meal. Throw some Boston butt roast BBQ on top and you’ve got an easy meal!

 Use leftovers for tacos, nachos, baked potatoes, lettuce wraps, or breakfast hash.

Tips For the Best Boston Butt Roast Recipe

Store any leftovers in the remaining juices for the best flavor and tenderness. If you ever need to freeze it, freeze it with the liquid too. This protects the texture when it thaws.

If there’s too much liquid for you after cooking, then there’s an easy fix. Simmer for 10–20 minutes, stirring occasionally, until it reduces and looks glossy and slightly thick. It should coat a spoon, not run like broth.

This recipe is great for meal prepping. Use leftovers for tacos, nachos, baked potatoes, lettuce wraps, or even breakfast hash.

Slow Cooker Boston Butt Recipe

An easy slow cooker Boston Butt with flavorful spices, fruity pineapple, and smoky barbecue.

  • Thinly slice the onions and place them in the bottom of a 6-quart or larger slow cooker.

  • Rinse the Boston butt and place it on top of the onions.

  • Sprinkle with spices.

  • Pour the whole can of pineapple over it. If using fresh pineapple, peel, core, and thin chop the pineapple and place over pork.

  • Add the apple cider vinegar.

  • Put the lid on the slow cooker and cook on low for 10-12 hours or until fork tender. Don’t open until at least 8 hours and then check for tenderness.

  • ?After cooking, shred the pork.

  • Spoon out ½ -1 cup cooking liquid and simmer with the BBQ sauce for 5–10 minutes. Pour the liquid back into the pork and stir to coat.

Nutrition Facts

Slow Cooker Boston Butt Recipe

Amount Per Serving

Calories 585
Calories from Fat 277

% Daily Value*

Fat 30.8g47%

Saturated Fat 11.3g71%

Cholesterol 167mg56%

Sodium 1196mg52%

Carbohydrates 30.9g10%

Fiber 1.9g8%

Sugar 23.9g27%

Protein 44.1g88%

* Percent Daily Values are based on a 2000 calorie diet.

Try leftovers on top of salads or in omelettes for breakfast!

Instant Pot Boston Butt Recipe

The recipe above is for slow cooker Boston butt, but you can easily modify it for the Instant Pot. 

Instant Pot Instructions

  1. Turn the Instant Pot to Sauté. Add a small splash of oil and cook the sliced onions for 3–4 minutes until softened. Press Cancel.
  2. Place the Boston butt roast on top of the onions. Sprinkle evenly with all the spices.
  3. Pour the crushed (or fresh chopped) pineapple and apple cider vinegar over the pork. Add ½ cup of water or broth to help the Instant Pot come to pressure.
  4. Secure the lid and set the valve to Sealing. Cook on High Pressure for 75 minutes. Let the pressure release naturally for 20–30 minutes, then release any remaining pressure.
  5. Remove the pork and shred with two forks.
  6. Turn the Instant Pot back to Sauté and simmer the cooking liquid for 10–15 minutes until slightly thickened.
  7. Stir in the barbecue sauce and simmer for 2–3 minutes.
  8. Return the shredded pork to the pot, toss to coat, and serve.

Are you a barbecue fan? What’s your secret recipe? Please share below!

Tags: , , , , , , ,
4 Herbal Skin Toners - recipes with natural ingredients for all skin types.

4 Herbal Skin Toners: How to Make Organic Astringents

These 4 herbal skin toners are beneficial for every skin type and play an important role in a natural skincare routine. Before I started using homemade skincare products, my face often felt tight and stripped after washing—especially since I’ve always had dry skin. Using a natural toner helps restore balance, refresh the skin, minimize the appearance of pores, and prepare your face to better absorb lotions or facial oils.

I especially like the last toner recipe below: Acne Astringent Toner, because it shrinks my pores lovely and goes great with my Anti-Aging Serum recipe.  I think I look younger now than I did ten years ago when my body was under so much stress.

You can also try before you make your own by checking out the ones I have in my shop: Anti-Aging Toner & Acne Toner. OR grab a cleanser and toner combo Gift Set.

Why Use Herbal Toners?

Before recipes, here’s what herbal toners can do for your skin:

  • Balance pH after cleansing (important for barrier health).
  • Hydrate and calm with natural botanicals like chamomile or aloe.
  • Minimize appearance of pores gently.
  • Prep skin for serums and moisturizers to absorb better.

Frequently Asked Questions About Herbal Skin Toners

What does a skin toner do?

A skin toner helps restore balance after cleansing by removing leftover residue, refreshing the skin, and helping pores to close. Using a toner also prepares your skin to better absorb lotions and oils applied afterward.

Are herbal skin toners good for all skin types?

Yes, herbal skin toners can benefit all skin types when made with the right ingredients. Dry skin may benefit from soothing herbs like chamomile or comfrey, while oily or acne-prone skin often responds well to astringent herbs such as mint or witch hazel.

Can I use a homemade toner every day?

Most homemade herbal toners are gentle enough for daily use, once or twice a day. If you have sensitive skin, start by using the toner once a day and monitor how your skin responds.

How long do homemade herbal toners last?

Because homemade toners do not contain preservatives, they usually last a month if kept clean. For longer shelf life, you can make smaller batches or use ingredients like the apple cider vinegar in some of the recipes below.

How do I apply a natural skin toner?

Apply toner after cleansing your face. You can use a cotton pad, reusable cloth, or gently pat it onto your skin with clean hands. Allow it to absorb before applying lotion or facial oils.

Is toner necessary if I already moisturize?

While not required, using a toner can significantly improve how well your skin absorbs moisture. Toners help prep the skin, making your lotion or oils more effective and reducing dryness or irritation.

Mint and vinegar toner – in process. Final product is strained

4 Herbal Skin Toners

1. DIY Comfrey & Oat Herbal Toner for Gentle Exfoliation

This comfrey and oat skin toner is quick and easy to prepare, making it ideal for a simple DIY skincare routine. Comfrey helps soothe and heal the skin, while oats gently absorb excess oil and remove impurities.1 Stored dry, this natural blend works as both a gentle facial scrub and an herbal toner, leaving skin clean, balanced, and refreshed.

Best for: Dry to normal skin
Benefits: Oats calm irritation; comfrey supports healing and softness.

Ingredients:

Instructions:

  1. Blend the comfrey and oats in a mixer until they make a fine powder. Store this in an airtight jar.
  2. Place 1 tablespoon of the scrub on the palm of your hand.  Pour about 1/2 tablespoon of rose water (or yogurt) on top and mix with your finger until it is a creamy paste.
  3. Rub onto your face with your hands, or a soft, wet cloth or sponge. Gently scrub face.
  4. Rinse with water.
  5. Store and use for 10 months by keeping sterile.  Always use a clean dry tablespoon to dip it out and never your hand.

2. DIY Apple Cider Vinegar & Chamomile Herbal Skin Toner

This apple cider vinegar and chamomile toner goes a long way, making it an easy and mess-free addition to your natural skincare routine. Apple cider vinegar helps tone and balance the skin without over-drying, while gently conditioning the complexion. Chamomile adds powerful soothing benefits by reducing inflammation, calming irritated skin, and helping relieve puffiness and acne.2

Best for: Sensitive or redness-prone skin
Benefits: Chamomile eases puffiness and irritation; apple cider vinegar tones.

Ingredients:

• 2 cups filtered water
• 1/2 cup raw apple cider vinegar
• 1/2 cup dried chamomile flowers

Instructions:

  1. Heat water in a kettle until it is hot.  It does not need to boil.
  2. Pour water into a jar and add chamomile flowers.
  3. Screw on an airtight lid and shake.
  4. Allow mixture to cool.
  5. Add vinegar and place in a warm, dark place for 1 week, shaking daily.
  6. After the one week, strain the toner through a mesh strainer and discard chamomile leaves.
  7. I pour about 1 Tablespoon into the palm of my hand after washing my face, rub my hands together and rub all over my face. You can also put it in a spray bottle and spray your face after washing.

3. DIY Mint & Vinegar Toner for Refreshing Skin

This vinegar and mint toner helps restore the skin’s natural balance. Vinegar works well for all skin types, helping oily skin stay clear while also easing dryness and flakiness, so I really like to use it as part of my toner recipes. The fresh mint adds a light, cooling feel that leaves your skin refreshed without being harsh.

Best for: Combination to oily skin
Benefits: Mint cools, vinegar helps control oil and restore skin acidity.

Ingredients:

Instructions:

  1. Mix together all ingredients, then pour into a clean container and let sit for 3 days.
  2. Strain or filter out all solids and pour into a clean bottle with a tight-fitting lid.
  3. To use: Apply to clean skin with a cotton pad or put it in a spray bottle.

4. Homemade Witch Hazel Toner with Healing Herbs

I love this toner because it works well for just about any skin type. The witch hazel acts as a gentle astringent, helping to tighten and close pores, while the herbs work to heal, soothe, and naturally purify the skin. It’s a simple, well-rounded option that’s easy to use and easy on your skin.

Best for: Acne-prone or blemish-forming skin
Benefits: Witch hazel tightens pores; herbs help purify and soothe.

Ingredients:

Instructions:

  1. Combine all ingredients in an airtight jar and shake.
  2. Place jar in a dark, warm place and shake daily for 2 to 3 weeks.
  3. The mixture will be the color of iced tea when ready. Strain.
  4. Apply astringent with a cotton ball, up to twice daily. Use for 6 months to 1 year.

Bonus Recipe:

Herbal Geranium Facial Toner for All Skin Types

Ingredients:

Instructions:

  • Combine the apple cider vinegar and rose water.
  • Add the essential oils.
  • Keep in a jar and dip a clean cotton ball into it for application on a clean face each time.

How to Use Herbal Toners (Best Practices)

✔ After cleansing: Apply toner before serums or oils to help absorption.
✔ Patch test first: You could be allergic to anything. Always test new ingredients on a small area like your wrist before using all over your face.
✔ Store safely: Homemade toners lack preservatives—keep airtight and refrigerate when needed.

Try my Other Specialized Toners

For acne-prone skin, try our homemade acne toner.

For anti-aging benefits, see our rose water anti-aging toner.

Tags: , , , ,
baby balm

Homemade Baby Balm Skin Cream Recipe

When I was pregnant with my first child, my friends and relatives literally gave me 11 bottles of baby lotion. The smell reminded me of my own childhood. I loved that it was specially formulated for babies, so of course, the ingredients had to be natural and safe. Right?

… and then I actually read the ingredients.

What’s in Baby Lotion?

Ingredients like petroleum, artificial fragrances, and propylene glycol weren’t something I wanted on my baby’s skin. I searched for natural baby balm options and found a few great ones. There are even more options available now if you’re not in the DIY mood. 

This Everyday Baby Balm from Motherlove or this one from Badger have clean ingredients and work well. I still preferred making my own baby balm though because I could easily customize the ingredients and it was a lot cheaper. 

Choosing Natural Ingredients For Baby Balm

I decided to make my own from food-safe ingredients. And I even had many of the ingredients on hand already for my homemade lotion bars and other beauty products.

This baby balm recipe uses:

  • Cocoa Butter – High in antioxidants and skin moisturizing fatty acids. It leaves a barrier on the skin to help prevent moisture loss and keep things like urine from irritating sensitive skin. 
  • Shea Butter – A natural source of vitamin A and other nutrients, shea butter is highly nourishing and protective to the skin.
  • Olive Oil– Attracts moisture to the skin and repairs damaged skin. It’s also a major source of plant-based squalene, a lipid our skin cells make to lubricate and protect the skin. 
  • Castor Oil– High in ricinoleic acid and skin protective. 
  • Essential Oils – You can use any diluted baby-safe essential oils you prefer, but I use frankincense, chamomile, and rose. 

Important Note on Essential Oil Safety and Babies

I love essential oils and use them daily for cleaning, aromatherapy, skincare, and more. They are highly concentrated though and not every essential oil is safe or appropriate for every purpose. 

Frankincense, lavender, chamomile, and rose are all gentle options and generally considered safe for babies 3 months and older. Essential oils should always be diluted for little ones and generally should not be more than .25% of the recipe. For this recipe that translates to about 7 drops of essential oils total. 

Herbal Infused Oil

If you have a baby under 3 months or just prefer to skip the essential oils, then an herb-infused baby balm is a great alternative. Here are detailed instructions for how to make an herbal infused oil. 

Lots of herbs will work in a baby balm, but here are some of my favorites. They have natural skin soothing and healing properties and are safe for babies (barring any allergies).

Here’s how to make my favorite homemade baby balm!

Homemade Baby Balm Recipe

This moisturizing baby balm helps protect baby’s delicate skin with natural ingredients.

Prep Time5 minutes

Active Time10 minutes

Cooling Time2 hours

Total Time1 hour 15 minutes

Yield: 5 ounces

Author: Katie Wells

  • Heat all of the ingredients (except essential oils) in a double boiler or in a glass jar or bowl over a small pan of boiling water.

  • Stir carefully until melted.

  • Remove from heat and add essential oils if using.

  • Pour into a glass jar and let it cool in the fridge for several hours or until firm.

  • Store at room temperature and use a small amount as needed for baby’s skin (or adult skin)

Use herb infused olive oil to make the recipe if desired. Check the article for ideas of what to use.

Shelf Life and Storage

Since this baby balm is oil based it has a much longer shelf life than baby lotion with water-based ingredients. It should last 1-2 years when stored away from direct light and heat. 

The baby balm takes a few minutes to absorb into the skin and you only need to use a tiny bit. I’ve had friends say it was incredibly helpful for eczema and skin problems as well.

What did you use on your little ones? Ever made your own? Share below!

Tags: , , , , ,
Best oLive
Privacy Overview

This website uses cookies so that we can provide you with the best user experience possible. Cookie information is stored in your browser and performs functions such as recognising you when you return to our website and helping our team to understand which sections of the website you find most interesting and useful.