Homestead Blog Hop - Homestead tips, ideas, animal care, and recipes every Wednesday

Homestead Blog Hop 582 – DIY Lights, Vases, and Garlands

Welcome to Homestead Blog Hop, a weekly gathering for homesteaders and simple living enthusiasts to share DIY projects, from-scratch recipes, and creative inspiration. This week’s hop features cozy homesteading tips, along with practical ideas that celebrate handmade living and self-sufficiency.

Whether you’re looking for seasonal crafts, homemade treats, or encouragement on your homesteading journey, you’ll find plenty of inspiration to carry into the new year. Grab a cup of tea, explore the featured posts, and join us in sharing your own homestead creations.

Meet Your Homesteading Hosts

We’re Kelly from Simple Life Mom, Liz from The Cape Coop, Natasha from Houseful of Nicholes, and Laurie from Ridgehaven Homestead. Together, we’re passionate about from-scratch living, simple ingredients, frugal habits, and intentional homesteading. We’re delighted to host the Homestead Blog Hop, where you can find fresh inspiration each week for DIY projects, homemade recipes, and practical simple living ideas.

Follow Us for More Homestead Inspiration

Natasha – Houseful of Nicholes
Facebook | Pinterest | X | Instagram

Laurie – Ridge Haven Homestead
Facebook | Pinterest | Instagram

Liz – The Cape Coop
Facebook | Pinterest | X | Instagram

Kelly – Simple Life Mom
Facebook | Pinterest | X | Instagram

FEATURED POSTS from the Last Homestead Blog Hop

Each week, we take turns selecting three featured posts from the Homestead Blog Hop. These features are shared across all of our social media platforms, helping spotlight the creativity and hard work of our fellow homesteaders. Here are the featured posts from last week’s hop:

1. Upcycled Painted Glass Jar to Shimmery Flower Light Display from Steph Creates Things

2. How To Make a Vintage Linens Garland from Petticoat Junktion

3. How to Make DIY Crackle Glass Vase from Sonata Home Design

Congrats! Feel free to grab the featured on button for your post.

Just right click and ‘save image as…‘

Guidelines for the Homestead Blog Hop

  1. Click the “Add Your Link” button below and upload a clear, eye-catching image from your project or recipe. Please link directly to the family-friendly post itself, not your blog’s homepage.
  2. You may link up up to three posts each week.
  3. Take time to visit a few other blogs in the hop and leave a thoughtful comment to let them know you stopped by. Community support makes this hop special!
  4. Please include a link back to the Homestead Blog Hop in your post. Posts without a backlink are not eligible to be featured. All featured posts are shared across all hosts’ social media channels.
  5. Share posts that haven’t been linked to the hop before. Older posts are welcome as long as they are new to the hop.
  6. By joining the Homestead Blog Hop, you grant the hosts permission to use one image from your post, with a link back to your site, if your post is selected as a feature next week.
  7. This is a family-friendly link-up designed to encourage, inspire, and support the homesteader in all of us.

Let the Party Begin!

Which project are you excited to try this week? Leave a comment below.

Join Our Homestead Blog Hop Pinterest Board

Follow all of your hosts on Pinterest and send a message if you’d like to be added to our Homestead Blog Hop group board. This board is a great place to share your DIY projects, crafts, and from-scratch recipes with the homesteading community.

Guideline: Only pin posts that you’ve linked up to the Homestead Blog Hop.

Tags: , , , , , ,
Crockpot_Chicken_Tacos

Easy Crockpot Chicken Tacos Recipe

There are seasons when life feels (extra) full. Meals still need to happen, kids still get hungry (often earlier than expected), and having a plan for dinner can make the whole day feel more grounded. That’s where dependable recipes like crockpot chicken tacos can be a lifesaver.

These crock pot chicken tacos are simple, flexible, and made with real ingredients you probably already have on hand. They’re the kind of dinner that works just as well for a busy Tuesday as it does for feeding a crowd on the weekend—and the leftovers somehow taste even better the next day.

Why Crockpot Shredded Chicken Tacos Work So Well

One reason crockpot shredded chicken tacos are so popular is that slow cooking does all the hard work. The chicken is tender enough to easily shred, and it soaks up the spices and juices without drying out. This means no babysitting the stove and no last-minute scrambling.

Another bonus is how forgiving this recipe is. You can use chicken breasts or thighs, adjust the spices to your family’s heat tolerance, and choose your own toppings. Unlike my easy salsa chicken recipe, these are crockpot chicken tacos without salsa. Instead I rely on diced tomatoes, onion, garlic, and spices for flavor. It’s a great option if you’re avoiding added sugars or just prefer a cleaner ingredient list.

How to Make Crockpot Chicken Tacos

Years ago I actually took a look at the taco seasoning packets and was shocked by what I saw. I’ve since made my own taco seasoning that’s quick and easy. The spice blend here is simple but effective—chili powder, cumin, smoked paprika, and oregano create that classic taco flavor without needing a packet. Smoked paprika adds depth, while optional chipotle in adobo gives a subtle smoky heat if you want it.

You can swap out the spices in these Crockpot chicken tacos for homemade taco seasoning though if preferred. 

I also add bell peppers and onions near the end of the cooking time. This keeps them from turning to mush and makes it more of a fajita-style filling. A squeeze of fresh lime at the end brightens everything and makes the flavors pop.

Practical Tips for Real Life

This is one of those recipes that works whether you’re home all day or out running errands. Cook it on low if you’re gone most of the day, or on high if you’re starting later. It also adapts well to the Instant Pot when time is especially tight.

For serving, set out tortillas and a few toppings and let everyone build their own tacos. Avocado, cilantro, shredded cheese, or a simple taco slaw all work well. We love adding homemade guacamole and pico, and sometimes a sprinkle of homemade Tajín for extra flavor.

While we don’t always have dinner at home, it is a priority in our home to share a healthy meal together. This one checks all the boxes. It’s protein-rich, customizable, and incredibly low effort. Crockpot chicken tacos are a delicious way to get dinner on the table without adding more stress!

Crockpot Chicken Tacos

These delicous Crockpot chicken tacos are easy to make and great for busy nights. Customize them with your favorite toppings!

  • Add chicken, diced tomatoes, onion, garlic, and all spices to the crockpot. Stir gently.

  • Cover and cook on low for 6–7 hours or on high for 3–4 hours, until chicken is tender.

  • Optional Fajita Vegetables: Add sliced peppers and onion during the last 30–40 minutes of cooking.

  • Remove chicken and shred with two forks. Return to the crock pot and stir.

  • Squeeze fresh lime juice over the top and serve in tortillas with desired toppings.

Nutrition Facts

Crockpot Chicken Tacos

Amount Per Serving (1 serving)

Calories 262
Calories from Fat 45

% Daily Value*

Fat 5g8%

Saturated Fat 1g6%

Trans Fat 0.02g

Polyunsaturated Fat 1g

Monounsaturated Fat 1g

Cholesterol 116mg39%

Sodium 568mg25%

Potassium 1034mg30%

Carbohydrates 13g4%

Fiber 3g13%

Sugar 5g6%

Protein 41g82%

Vitamin A 1273IU25%

Vitamin C 91mg110%

Calcium 66mg7%

Iron 2mg11%

* Percent Daily Values are based on a 2000 calorie diet.

  • Try topping your chicken tacos with avocado, cilantro, shredded cheese, salsa, Greek yogurt, or slaw. 


Instant Pot Instructions

If you want to make these in the Instant Pot instead, here’s an easy way to do it. This recipe version takes less than 30 minutes for when you need dinner on the table fast!

  1. Add all ingredients except the fajita vegetables and lime to the Instant Pot.
  2. Seal the lid and cook on High Pressure for 12 minutes.
  3. Allow a natural pressure release for 10 minutes, then manually release remaining pressure.
  4. Shred chicken and stir back into the sauce.
  5. Add sliced peppers and onions if using. Turn on sauté mode and cook 3–5 minutes, just until tender.
  6. Finish with fresh lime juice if desired and serve.

What are your favorite taco night toppings? Leave a comment and let us know!

Tags: , , , ,
Homestead Blog Hop - Homestead tips, ideas, animal care, and recipes every Wednesday

Homestead Blog Hop 581- DIY, Crafts & From-Scratch Recipes

Welcome to Homestead Blog Hop, a weekly gathering for homesteaders and simple living enthusiasts to share DIY projects, from-scratch recipes, and creative inspiration. This week’s hop features cozy homesteading tips, along with practical ideas that celebrate handmade living and self-sufficiency.

Whether you’re looking for seasonal crafts, homemade treats, or encouragement on your homesteading journey, you’ll find plenty of inspiration to carry into the new year. Grab a cup of tea, explore the featured posts, and join us in sharing your own homestead creations.

Meet Your Homesteading Hosts

We’re Kelly from Simple Life Mom, Liz from The Cape Coop, Natasha from Houseful of Nicholes, and Laurie from Ridgehaven Homestead. Together, we’re passionate about from-scratch living, simple ingredients, frugal habits, and intentional homesteading. We’re delighted to host the Homestead Blog Hop, where you can find fresh inspiration each week for DIY projects, homemade recipes, and practical simple living ideas.

Follow Us for More Homestead Inspiration

Natasha – Houseful of Nicholes
Facebook | Pinterest | X | Instagram

Laurie – Ridge Haven Homestead
Facebook | Pinterest | Instagram

Liz – The Cape Coop
Facebook | Pinterest | X | Instagram

Kelly – Simple Life Mom
Facebook | Pinterest | X | Instagram

FEATURED POSTS from the Last Homestead Blog Hop

Each week, we take turns selecting three featured posts from the Homestead Blog Hop. These features are shared across all of our social media platforms, helping spotlight the creativity and hard work of our fellow homesteaders. Here are the featured posts from last week’s hop:

1. What Makes a Homestead Real (Even When It’s Tiny) from The Once and Future Homestead

2. Lemon Chicken and Rice from Recipe Ideas Shop

3. How to create a vision board and manifest the life you want from Our Tiny Nest

Congrats! Feel free to grab the featured on button for your post.

Just right click and ‘save image as…‘

Guidelines for the Homestead Blog Hop

  1. Click the “Add Your Link” button below and upload a clear, eye-catching image from your project or recipe. Please link directly to the family-friendly post itself, not your blog’s homepage.
  2. You may link up up to three posts each week.
  3. Take time to visit a few other blogs in the hop and leave a thoughtful comment to let them know you stopped by. Community support makes this hop special!
  4. Please include a link back to the Homestead Blog Hop in your post. Posts without a backlink are not eligible to be featured. All featured posts are shared across all hosts’ social media channels.
  5. Share posts that haven’t been linked to the hop before. Older posts are welcome as long as they are new to the hop.
  6. By joining the Homestead Blog Hop, you grant the hosts permission to use one image from your post, with a link back to your site, if your post is selected as a feature next week.
  7. This is a family-friendly link-up designed to encourage, inspire, and support the homesteader in all of us.

Let the Party Begin!

Which project are you excited to try this week? Leave a comment below.

Join Our Homestead Blog Hop Pinterest Board

Follow all of your hosts on Pinterest and send a message if you’d like to be added to our Homestead Blog Hop group board. This board is a great place to share your DIY projects, crafts, and from-scratch recipes with the homesteading community.

Guideline: Only pin posts that you’ve linked up to the Homestead Blog Hop.

Tags: , , , , , ,
triggers as teachers

How Triggers Can Become Teachers (and Bring More Peace)

I used to think being triggered meant someone else was doing something wrong. Someone interrupted me, showed up late again, or spoke too loudly. My irritation felt justified. After all, the problem was clearly outside of me. Or at least that’s what I told myself.

Over time, though, I began to notice a pattern that was much harder to sit with. The things that bothered me most in other people often pointed back to something unresolved within me. Not in a neat or obvious way, and definitely not in a way I initially enjoyed examining.

Once I started paying attention, I noticed those moments of irritation became effective teachers.

“If You Spot It, You’ve Got It”

Maybe you’ve heard the phrase “if you spot it, you’ve got it.” I didn’t invent it, and I’m certainly not the first person to explore this idea. It shows up in Carl Jung’s work around the “shadow,” in modern psychology through concepts like projection. And in traditions that emphasize contemplative self-inquiry.

The idea is that strong emotional reactions to others can act like mirrors. When something really bothers us, it may be touching on something unhealed or suppressed in ourselves. That doesn’t mean we’re exactly like the other person. It doesn’t mean their behavior is acceptable or that we should tolerate harm. It simply means there’s something resonating.

This distinction matters. “If you spot it, you’ve got it” isn’t about blame or self-criticism. It’s about curiosity. It’s an invitation to look inward rather than outsourcing all discomfort to the outside world. And that shift, while uncomfortable at first, can be surprisingly freeing.

Triggers Are a Human Thing 

We all have people who push our buttons. The interrupter. The know-it-all. The chronically late friend. The loud talker. The person who seems to take up all the space in the room. These reactions aren’t a personal failing but part of being human.

Our brains are wired to notice threats and negatives as a protective mechanism. Research suggests we have a strong negativity bias, meaning we’re far more likely to notice what irritates us than what delights us. While it can serve a survival purpose, it often just leaves us feeling tense and reactive.

Studies on self-reflection and emotional regulation consistently show benefits when people are willing to examine their internal responses. People who engage in self-inquiry tend to report lower stress and better emotional regulation. In other words, the work may be uncomfortable, but it’s not without payoff.

Projection and the Psychology Behind It

One useful framework for understanding this pattern is psychological projection. Projection is a defense mechanism where we attribute traits we’ve disowned or suppressed in ourselves onto someone else. Instead of saying, “I struggle with this,” we unconsciously say, “They are the problem.”

A 2001 study published in the Journal of Personality and Social Psychology found that people who denied being aggressive were more likely to see aggression in others. When we refuse to acknowledge something internally, we’re more likely to see it externally.

This doesn’t mean every annoyance is a projection. But when a reaction feels disproportionate, repetitive, or emotionally charged, it’s often worth asking why. Why this behavior? Why this person? Why this intensity?

The Mirror In Our Brains

There’s also a biological layer to this conversation. Humans have mirror neurons, which help us recognize and reflect the emotional states and behaviors of others. These neurons play a pivotal role in empathy, learning, and social connection.

Sometimes the discomfort we feel around others isn’t judgment so much as recognition. We’re seeing something familiar. Something we’ve buried, avoided, or never fully accepted. That recognition can feel threatening, especially if we’ve worked hard to suppress that trait in ourselves.

When we encounter someone openly expressing what we’ve pushed down, it can destabilize that internal balance. The irritation is less about them and more about the cost of maintaining our own internal rules.

Everyday Examples of the Mirror Effect

This shows up in subtle ways. If we’re really bothered by someone acting arrogant, it might be because we’ve suppressed our own confidence or learned that being visible wasn’t safe. If laziness triggers us, perhaps we’re overworked and resentful because we don’t allow ourselves to rest. If attention-seeking behavior irritates us, maybe there’s an unmet need for recognition we’ve never allowed ourselves to name.

Often, there’s more than one layer at play. Human behavior is rarely simple. A trigger could show both a suppressed desire and a deep fear. That complexity is why curiosity matters more than trying to come to quick conclusions.

The mirror isn’t about labeling ourselves as bad or flawed. It’s about understanding where our reactions come from and what they might be asking us to integrate.

A Personal Lesson in the Online World

I’ve spent nearly two decades working online, which still feels strange to say. I’ve lived through the early forum days, the rise of social media, and the many phases of public commentary that came with it. Over those years, my body has changed through pregnancies, health challenges, healing journeys, and seasons of stress.

Along the way, I’ve received comments that were deeply hurtful. At one point, I discovered entire online spaces dedicated to criticizing my appearance. For weeks, I replayed those words in my head and seriously considered stepping away from my work entirely.

What eventually helped wasn’t pretending those comments didn’t hurt. It was getting radically honest about why they hurt. There was an element of truth they touched on, and it mirrored insecurities I already carried. More uncomfortable still, I realized my own inner critic used similar language toward myself, and sometimes toward others in my head.  

Facing that reality wasn’t easy. I realized that while I can’t control what strangers say about me on the internet, I can work on my internal dialogue. Over time, as I softened that inner voice and practiced more kindness (to myself and others), I noticed a shift. I started to see more of the positive in my own life. 

The Positive Flip Side of the Mirror

This principle doesn’t only apply to negative traits. We often spot positive qualities in others because they exist within us, too. Admiration can be a mirror just as much as irritation.

When we intentionally notice generosity, courage, creativity, or kindness in others, we strengthen our ability to recognize and adopt those traits ourselves. What we practice noticing grows.

Over time, I found that training myself to see the good in others made life feel lighter. It wasn’t about ignoring reality or forcing positivity. It was about choosing where to place my attention. And that choice changed how I experienced the world.

A Simple but Powerful First Step: Pause

One of the most practical tools I’ve found is also the simplest. Stop and pause. When something triggers you, take a breath before responding. Ask what this could be showing you about yourself. 

This simple question can interrupt reactive patterns. It creates space between what’s triggering us and our response in order to offer insight. 

Pausing has been especially impactful as a parent. Children are incredible mirrors. They reflect our impatience, our unhealed wounds, and our unspoken expectations. Pausing allows us to meet their reality rather than defending our own.

Choosing Curiosity Over Being Right

Dr. Kelly Brogan shared a story about asking her daughters what they needed from her and what felt unhealed in their relationship. She expected glowing reviews of her job as a mom. Instead, she received honest feedback that was painful to hear.

Her instinct, like most of ours, was to defend herself, explain, and justify. Instead, she chose curiosity. She asked questions and listened. And that choice deepened the relationship with her kids rather than fracturing it.

Being right often feels safer in the moment. Being curious, though, creates connection. This applies far beyond parenting. Most conflicts soften when someone is willing to stay present with another person’s experience rather than correcting it.

The 3-2-1 Shadow Process

When a trigger feels confusing, a structured approach can help. One tool that’s been useful for me is the 3-2-1 shadow process, often attributed to Ken Wilber.

  1. Identify the issue in the third person. What bothers you about them? Name it clearly.
  2. Address it in the second person. In your mind, speak directly to the person and express what’s coming up.
  3. Finally, bring it into the first person. Own the trait in some way. This doesn’t mean labeling yourself harshly. It might sound like, “There’s a part of me that struggles with this,” or “I notice this pattern in myself, too.”

When the issue lives in the first person, you have the power to work with it.

Curiosity Instead of Judgment

One of my favorite reminders comes from a scene in Ted Lasso, my favorite TV show. It references the quote, “Be curious, not judgmental.” It’s a simple but profound reminder.

Judgment shuts down learning while curiosity opens it up. When we replace “I hate when people do this” with “I wonder why this affects me?” we reclaim agency. We move from reaction to reflection.

This shift doesn’t excuse harmful behavior. It simply recognizes that our peace doesn’t have to depend on others changing.

Practicing Self-Compassion Along the Way

It’s important to approach this work with self-compassion. Noticing isn’t about fixing or blaming, but about integrating.

Blame tends to create more fragmentation, while compassion allows for healing. When we stay curious and kind with ourselves, even uncomfortable truths become manageable. I’ve found journaling to be a really helpful tool for this. Here are some prompts to get you curious:

  • What bothers me most in others?
  • Where does this show up in me, even subtly?
  • How might this trait serve me if it were integrated?
  • What would it feel like to be less affected by this?

What Changes Over Time

This work hasn’t been linear or easy, but over time, it’s helped soften my reactions and bring peace. It’s increased empathy and freed up energy that used to be tied up in irritation and judgment.

When triggers become teachers, painful moments turn into guides. They point us toward parts of ourselves asking for attention, healing, or acceptance. The things we judge in others are often the things we’re still learning to hold gently within ourselves.

Final Thoughts on Triggers

The idea that triggers can be teachers isn’t meant to be dogma. It’s an invitation to get curious and as a result find more peace. For me, it’s been a powerful shift from feeling at the mercy of external circumstances to reclaiming internal agency.

“If you spot it, you’ve got it” isn’t about shame but opportunity. It’s about returning our power to ourselves and choosing curiosity over judgment, reflection over reaction.

As Rumi wrote, “The wound is the place where the light enters you.” Sometimes our strongest reactions point directly to the places where growth is waiting, if we’re willing to look.

What are some triggers you’ve noticed in your life? How do you think you can turn these around and be more curious? I’d love to hear about it in the comments!

Tags: , , ,
Homestead Blog Hop - Homestead tips, ideas, animal care, and recipes every Wednesday

Homestead Blog Hop 580 – Make New Year’s Crafts and Truffles

Welcome to the Homestead Blog Hop!

Homestead Blog Hop will take place every Wednesday and is for all things homesteading: real food recipes, farm animals, crafts, DIY, how-to’s, gardening, anything from-scratch, natural home/health, self-sufficiency, self-reliance, natural remedies, essential oils, & more! Basically, anything related to homesteading.

Meet Your Hosts!

Follow Their Blogs

Natasha – Houseful of Nicholes (Facebook | Pinterest | Twitter | Instagram)

Laurie – Ridge Haven Homestead (Facebook | Pinterest | Instagram)

Liz – The Cape Coop (Facebook | Pinterest | Twitter | Instagram)

Kelly – Simple Life Mom (Facebook | Pinterest | Instagram)

FEATURED POSTS from the Last Homestead Blog Hop

Each week we take turns choosing three posts to feature. Each post will be shared on all social media platforms by all of the hosts! Here are the features from Last Week’s Hop:

1. FREE New Years Banner Printable (For Any Year from Press Print Party

2. Caramel Truffles from Yummi Haus

3. Toilet Paper Roll DIY New Year’s Noisemakers with Printable Template from Hunny I’m Home

Congrats! Feel free to grab the featured on button for your post.

Just right click and ‘save image as…‘

Guidelines for this Get-Together:

  1. Click on the “Add your Link” Button below and add a great image of your project or recipe. Make sure you link to the page of your family friendly post – not the main page of your blog.
  2. Link up to three posts each week.
  3. Try to visit at least a few other blogs at the party. Be sure to leave a comment to let them know you stopped by.
  4. Link your post back to the Homestead Blog Hop. If the hop isn’t linked to your post then you cannot be featured. All featured posts will be shared on all hosts’ social media channels.
  5. Please link up posts that you haven’t linked to the hop before. You are welcome to link old posts from your blog.
  6. By joining the party, you are giving the hosts permission to use one photo from your post with a link back to your site if it is selected as one of next week’s Features.
  7. This is a family-friendly link up meant to inspire and motivate the homesteader in all of us.

Let the Party Begin!

Join Our Pinterest Board

Follow all your hosts on Pinterest and send me a message that you’d like to be added to our Homestead Blog Hop group board. The only rule is to only add posts that you’ve also added here.

Tags: , , , , ,
Homestead Blog Hop - Homestead tips, ideas, animal care, and recipes every Wednesday

Homestead Blog Hop 579 – Candy Cane Games and Pizza

Welcome to the Homestead Blog Hop!

Homestead Blog Hop will take place every Wednesday and is for all things homesteading: real food recipes, farm animals, crafts, DIY, how-to’s, gardening, anything from-scratch, natural home/health, self-sufficiency, self-reliance, natural remedies, essential oils, & more! Basically, anything related to homesteading.

Meet Your Hosts!

Follow Their Blogs

Natasha – Houseful of Nicholes (Facebook | Pinterest | Twitter | Instagram)

Laurie – Ridge Haven Homestead (Facebook | Pinterest | Instagram)

Liz – The Cape Coop (Facebook | Pinterest | Twitter | Instagram)

Kelly – Simple Life Mom (Facebook | Pinterest | Instagram)

FEATURED POSTS from the Last Homestead Blog Hop

Each week we take turns choosing three posts to feature. Each post will be shared on all social media platforms by all of the hosts! Here are the features from Last Week’s Hop:

1. Candy Cane Games Your Family Will Love! from Our Grand Lives

2. Mini Caprese Pizzas from Shoreline Journeys

3. Lace Cookies from Yummi Haus

Congrats! Feel free to grab the featured on button for your post.

Just right click and ‘save image as…‘

Guidelines for this Get-Together:

  1. Click on the “Add your Link” Button below and add a great image of your project or recipe. Make sure you link to the page of your family friendly post – not the main page of your blog.
  2. Link up to three posts each week.
  3. Try to visit at least a few other blogs at the party. Be sure to leave a comment to let them know you stopped by.
  4. Link your post back to the Homestead Blog Hop. If the hop isn’t linked to your post then you cannot be featured. All featured posts will be shared on all hosts’ social media channels.
  5. Please link up posts that you haven’t linked to the hop before. You are welcome to link old posts from your blog.
  6. By joining the party, you are giving the hosts permission to use one photo from your post with a link back to your site if it is selected as one of next week’s Features.
  7. This is a family-friendly link up meant to inspire and motivate the homesteader in all of us.

Let the Party Begin!

Join Our Pinterest Board

Follow all your hosts on Pinterest and send me a message that you’d like to be added to our Homestead Blog Hop group board. The only rule is to only add posts that you’ve also added here.

Tags: , , , , , ,
herbal tea benefits

Delicious Herbal Tea Recipes and Their Benefits

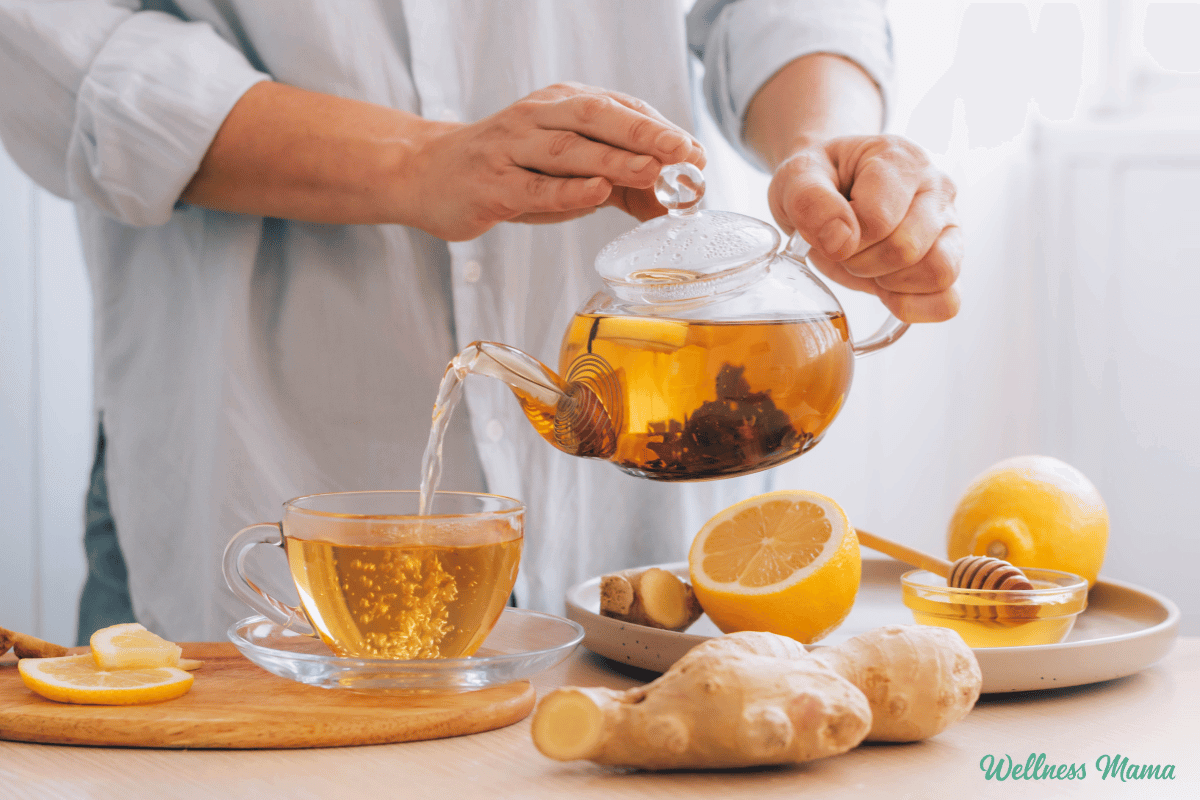
Herbal teas are a delicious and easy way to boost fluid intake and sneak in some extra nutrients. Unlike coffee and other teas that have caffeine, herbal tea benefits the body without keeping you awake or jittery. And while I love healthy coffee, I don’t drink it every day. Instead, I keep a big pitcher of herbal tea in my fridge to always have on hand. 

There are thousands of herbal tea recipes, so there’s something for every palate. Herbal teas can be very inexpensive if you buy the ingredients in bulk and you can mix up your own combinations!

Whether you’re already an avid herbal tea drinker or curious, here are some delicious combinations to try. 

1. Iced Dandelion Lime Tea

Dandelions are high in a variety of nutrients and are a great addition to recipes, including tea. Dandelion lime tea is a refreshing way to get the benefits. This recipe also includes raspberry leaf for even more nutrition and stevia for sweetness. Be sure to remove the petals from the green base to avoid a bitter flavor. 

2. Chamomile

Sweet and simple, chamomile flower is one of the most popular teas worldwide. Chamomile flowers have a naturally sweet taste with a hint of apple flavor. It’s known for its calming and soothing properties and has a variety of vitamins and minerals. 

While it’s often nicknamed the children’s herb thanks to its gentle nature, chamomile is still a powerful ally to keep on hand. I’ve used it for sleep, colicky babies, and even pink eye. Try it as a tincture for a longer shelf life.

3. Mint

Peppermint tea soothes the digestive tract and can be helpful for nausea, and indigestion. Some people find it helps with acid reflux, while others find it irritates their reflux. Hot peppermint tea stimulates circulation and helps open the airways. I drink it daily in early pregnancy to help alleviate nausea and use it in my homemade digestive tincture.

Mint is also known as an “activator herb” that helps boost the effectiveness of other herbs in a blend. 

4. Raspberry Leaf

Raspberry leaf is my favorite tea and I drink it almost daily. It’s highly nutritious and especially beneficial for women as it helps balance hormones and is good for the skin. It’s also popular during pregnancy to strengthen the uterus and is a good source of vitamins and minerals pregnant mamas need.

It tastes similar to black tea and I like mixing it with stevia leaf to make a naturally sweet tea. I drink it hot in the winter and cold during the summer months and my kids like it iced (and sometimes with chia seeds in it). Herbalists often recommend raspberry leaf tea or tincture to women suffering from infertility, PCOS, endometriosis, or painful menses.

5. Sleep Easy Blend

My go-to tea when I’m having trouble sleeping is an equal mixture of chamomile, mint, and catnip herbs. Catnip is naturally relaxing and soothing. It’s also one of the ingredients in my Sweet Dreams Sleep Tincture, to help the whole family relax and sleep better, especially during illness.

To make it, mix one teaspoon each of chamomile, mint, and catnip herbs in 16 ounces of hot water. Steep for 5 minutes, then strain and drink. 

6. Lavender Tea

Lavender is my favorite scent and essential oil but it’s too strong to be used alone in a tea. Lavender is calming, relaxing, and helps with better sleep. My favorite lavender tea recipe is:

Mix all and store in an airtight container. Use 1-2 tsp per cup of water to make hot or iced tea.

7. Chai Tea

Chai tea is a favorite around our house and we usually make it with raspberry leaf tea instead of black tea and with coconut milk instead of regular milk. Here’s my basic recipe but play with the ingredients to see what spices you like. 

When I don’t feel like making my own, I love this caffeine free Firefly Chai that’s slightly sweeter than regular chai and is great for nighttime. Add some chamomile and catnip for a delicious evening drink for kids.

8. Herbal Coffee

Have trouble kicking the coffee habit? While I still love coffee, herbal coffee is a great caffeine-free alternative. Sip Herbals is a robust, earthy herbal tea that’s reminiscent of your favorite cuppa Joe. Made with clean ingredients like chicory, carob, and dandelion root. 

9. Stomach Soother Herbal Tea

For stomach aches or for those prone to digestive troubles, this is my go-to tea recipe. Plus it’s easy to make. Mint stimulates digestion, fennel helps expel gas, and ginger combats nausea. 

Pour 1 cup of boiling water over the herbs, steep, covered for 5 minutes, then strain and drink. You can also add a tablespoon of  grass-fed gelatin powder for extra gut soothing. 

10. Pregnan-Tea

During pregnancy I drink a special tea to helps keep nausea and digestive troubles at bay and strengthen the uterus. The nettle also provides vitamin K, an essential nutrient for pregnancy and birth to help with clotting.

Many women report having easier and faster labors from using this tea. My labors are typically 24+ hours even though I go natural, so I may not be the best example! This tea is delicious anytime, but especially during pregnancy.

Mix and use 1 Tablespoon per 8 ounces or 1 cup per gallon. Here’s another pregnancy tea recipe I like to make with even more nutrient rich herbs. 

11. Nursing Mama Tea

Another favorite to have on hand during pregnancy and postpartum. The herbs in this tea soothe digestion, boost milk supply, and supply much needed nutrition. Get the recipe here. 

12. Herbal Wassail Tea

Wassail is a festive drink our family (and many others!) love to drink during the holidays. My herbal wassail version has a base of herbal tea with added fruit and spices. Make a big batch for guests or to keep in the fridge! 

13. Iced Lavender Peach Tea

I’ve already mentioned how much I love lavender tea, but it’s worth bringing up again. This lavender peach tea is refreshing and delicious to have on hand in the warmer months. A great way to upgrade your sweet tea. 

14. Elderberry Tea

I’m known for my elderberry syrup recipe, but I also enjoy making elderberry tea. It has all of the same benefits and flavors, but in tea form. Great for cold and flu season. 

15. Cumin, Coriander, and Fennel Tea

Probably not something you’ve tried before, but this tea blend is one of my favorites for improving digestion. It helps expel excess gas and is also good for nausea or constipation. Try the recipe here. 

16. Calendula Tea

While I love calendula flowers in soothing salves and skincare, it’s equally as good internally. Calendula tea is soothing to the digestive tract and the gut lining. I’ve grown calendula for a long time, but I also buy it in bulk. 

What’s your favorite herbal tea? Do you make any of your own? Share below!

Tags: , , , ,
How To Make Color Swirl Melt + Pour Soap

How To Make Color Swirl Melt + Pour Soap

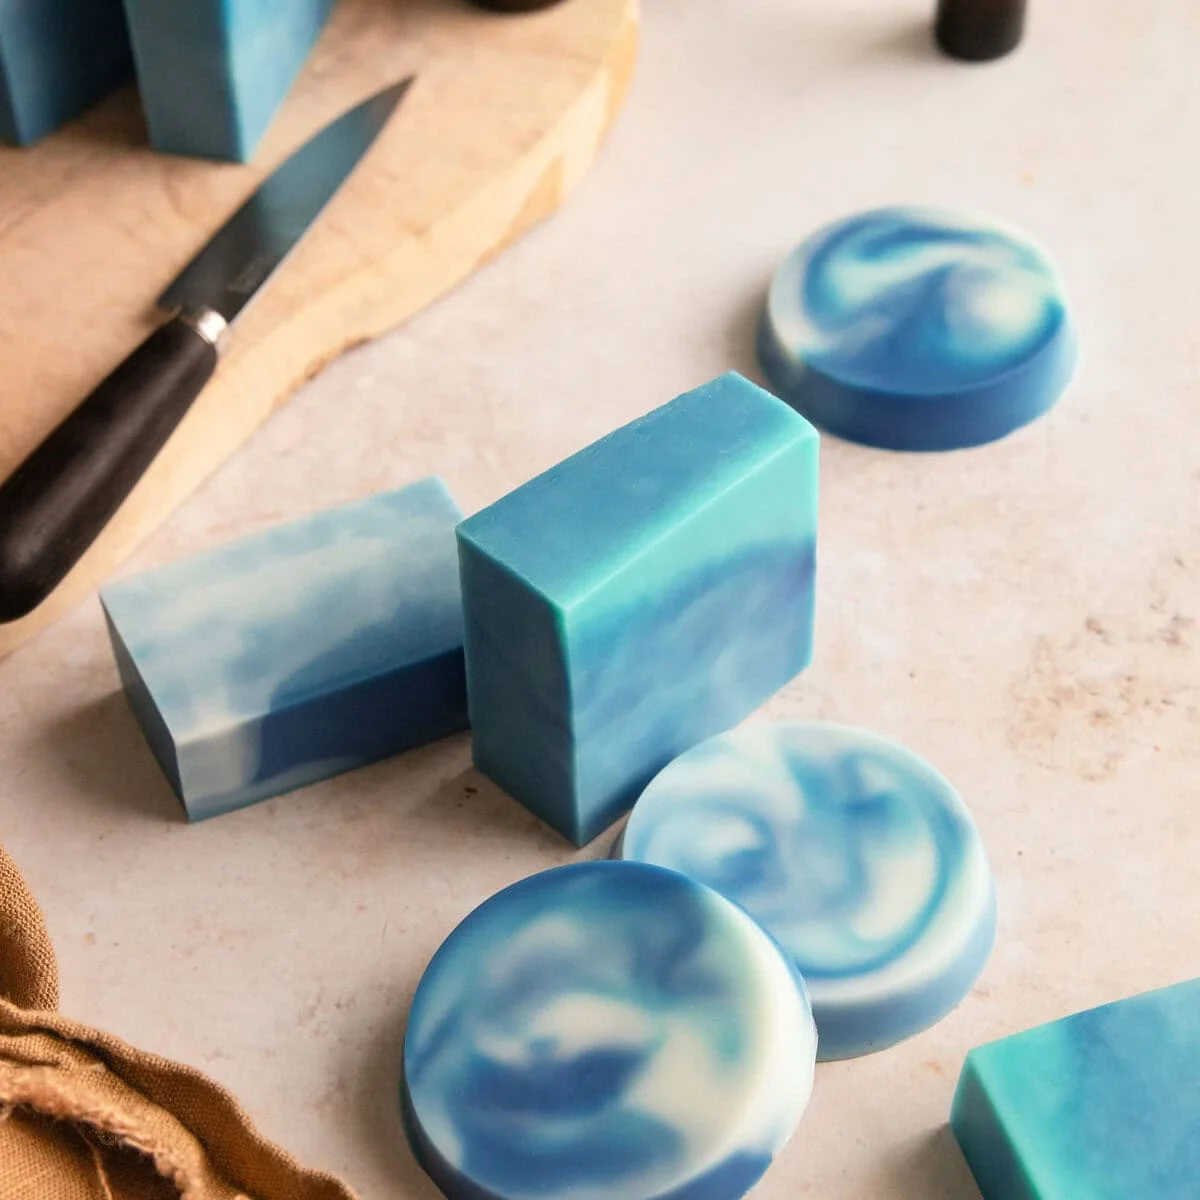
Color swirl melt and pour soap is one of my favorite projects. It’s beautiful, beginner-friendly, and always feels a little bit magical when you unmold it and slice into it. But getting those crisp, clean swirls does require understanding a few key techniques that are unique to melt and pour.

If you’re coming from the cold process soap world, you might think swirling melt and pour soap is going to be the same deal. But here’s the thing… it’s a totally different beast.

Melt and pour soap cools and thickens way faster than cold process, and it doesn’t reach “trace” (a pudding-like consistency that’s perfect for swirling). So your swirl window is pretty limited. You’ve got to work quickly and strategically or you’ll end up with a solid block before you even get your skewer in there.

But don’t let that scare you off! With a few key tricks in your back pocket, creating swirls in melt and pour (like these dreamy cloud lavender soaps) becomes totally doable.

]]>Jump to:

Supplies

Before you dive in, let’s get your supplies together. Having everything prepped and ready to go is crucial since melt and pour soap sets quickly and you won’t have time to scramble for a thermometer or skewer once you’re in the middle of swirling.

Ingredients:

  • Soap Base: You’ll need either white or clear soap base. The clear base gives you that translucent effect, while white provides opacity. While you can use either type of base, I recommend sticking with just on type and not mixing them together! Different brands and types have different weights, and if you mix them together you may find that one sinks to the bottom, leaving you with layers as opposed to swirls.
  • Mica powder: You want to use non-bleeding colorants for crisp, clean swirl lines. Mica is my go-to, but you can also use color blocks or liquid soap dye.
  • Essential oils: Totally optional, but if you’re planning to scent your soap, have the oils measured out and ready to add right after you melt the base. A good rule of thumb is roughly 1-2 teaspoons essential oil per pound of soap base.

Tools:

  • Molds: Loaf molds are super common for swirl designs since they give you those beautiful cross-sections when you slice the soap. Silicone molds also make unmolding way easier, so you don’t risk ruining your pretty swirls trying to wrestle the soap out. Feel free to use single cavity silicone molds (like we did in this post (link to swirled Sleepy Time Soap post)) if you prefer.
  • Microwave-safe containers (preferably with a spout): You’ll use these for melting your soap base and then keeping each color separate. Having multiple containers on hand means you can work with several colors at once.
  • Spoon or spatula: This is for stirring your melted soap base and mixing in your colorants and oils. A heat-safe silicone spatula works great since it can handle the heat and won’t scratch your containers.
  • Skewers: These are your swirling tools! Gently drag one through the soap to create those beautiful marbled patterns. If you don’t have a bamboo skeewer, you can also use a butter knife or chopstick.
  • Thermometer: A kitchen thermometer lets you know exactly when your soap hits that perfect swirling temperature, which makes all the difference between crisp swirls and muddy blobs.
  • Rubbing alcohol in a spray bottle: This eliminates those pesky surface bubbles after pouring. Just a few quick spritzes will pop the bubbles, leaving you with a smooth, professional-looking top.
  • Divider material: While I had a hard time making dividers work, many tutorials recommend using wax-coated dividers, stiff paper, or even a manila folder to get more controlled swirls. You’ll cut these down to size and place them in your mold to keep colors separated until you’re ready to pull the divider out and start swirling. Even though I had a hard time getting them to work, it doesn’t hurt to play around with these when making swirls your soap.

How to Swirl Melt and Pour Soap

1. Prep & Melt

Start by cutting your soap base into small, evenly-sized cubes and divide it into separate microwave-safe containers (one for each color you’re planning to use). This helps it melt more quickly and evenly.

You can melt it in the microwave in short bursts. I usually do 30 seconds at a time, stirring in between. Or use a double boiler if that’s more your style.

2. Add Color and Essential Oil

Once your soap is fully melted, add your mica powder and essential oil to each container, stirring well to make sure everything is evenly distributed.

3. Let Cool

Watch the temperature. Temperature control is everything. And I mean everything. Get that right, and you’re 90% of the way there.

You need to cool your soap until it hits the “sweet spot” for swirling (about 120°F). If your soap is too hot (around 135°F or above), the colors will blend together and your colors will blend together into a muddy mess. Too cool, and the soap will start to set before you can create your swirls. 

For more defined swirls, you want to pour around 120°F. But here’s the catch: at that temperature, the soap sets quickly, so you’ve got to work fast.

Tip: Use a thermometer. Guessing just doesn’t cut it when you’re working with such a narrow window. You need to know exactly how hot your soap is before pouring.

4. Pour into Molds

When it comes to pouring, you’ve got two main options:

Option A: Use dividers to control where each color goes and prevent premature blending. This is great if you want really structured, distinct swirls. To be totally honest though, I couldn’t get this trick to work for me.

Even with a sturdy divider, the soap simply leaked around the edges and flooded the mold. But I’m sure different types of dividers and/or dividers types of soap base will work better than others and are worth testing out.

Option B: Pour free-form, alternating colors and pouring from different heights to create a more organic, unpredictable pattern.

Vary your pour technique. Don’t just pour all your colors in the same spot or from the same height. Pour from different heights and into different parts of the mold to create interesting patterns. High pours create more movement, while low pours keep things more contained.

4. Swirl

Now for the fun part!

Drag a skewer or chopstick through the soap. You’re not stirring. You’re just gliding the tool through to pull one color into another.

A light touch is key here.

Tips: Only drag the skewer 1-2 times, max. I know it’s tempting to keep swirling and swirling to get that perfect pattern, but over-swirling will just muddle the colors. Often, just a couple gentle passes are enough.

5. Spritz with Alcohol and Let Cool

Immediately spritz the top of your soap with 99% isopropyl alcohol to get rid of any surface bubbles. Then let the soap harden fully before you unmold and cut it.

I know it’s tempting to peek early, but trust me, let it set completely so you don’t mess up your design.

Tips & Tricks

Stick to one base brand and type. We touched on this earlier, but it’s worth repeating: different bases can have different densities, even within the same brand. If you mix them, one color might sink while another floats, and your swirl definition will suffer. To avoid this, use the same soap base for all your colors.

Control the bubbles. Spritzing with 99% rubbing alcohol right after you pour helps eliminate surface bubbles. Just a few quick spritzes and those bubbles will pop right away.

Don’t move the mold until the soap has cooled completely. Even just bumping your mold can cause your swirls to mix. So once you’ve put the skewer down, don’t touch the mold! 

Cut your cooled soap based on the swirl. Sometimes you’ll end up with better swirl definition where you least expect it. If you don’t see much swirl action in the middle of the soap loaf but you do on the sides or ends, then cut your soap to highlight where the swirls are.

Troubleshooting

Even with the best techniques, sometimes things don’t go quite right. Here are some common issues and how to fix them.

Colors look muddy or blended together. This usually happens when the soap is too hot when you pour it. The heat causes the colors to mix and lose their definition, creating that muddy look.

To fix this, let your melted base cool to around 120°F before pouring. The cooler temperature helps the colors stay separate and crisp.

Swirl lines look faint or washed out. If your swirls are barely visible, you’ve probably dragged your tool through the soap too many times. Over-swirling blends the colors together and weakens those beautiful lines. A few slow, deliberate passes are usually enough to create gorgeous patterns without muddying things up.

One color sinks or rises above the others. This frustrating issue typically happens when you use bases with different densities, for example, mixing goat’s milk base with clear glycerin base. Since they have different weights, one will naturally settle above or below the other.

To avoid this, use the same melt and pour base for all your colors, or at least make sure all your bases are from the same brand and product line.

Lots of bubbles. Air gets trapped during pouring, especially if you’re pouring from a height or pouring quickly. The good news is this is one of the easiest problems to fix: simply spritz the top of your soap with 99% isopropyl alcohol right after you pour. The alcohol breaks the surface tension and those bubbles will pop almost instantly.

Soap thickens before you can pour or swirl. To prevent this, work a little quicker, or keep your containers on a heating pad or in a warm water bath so the soap stays fluid long enough to swirl.

If the soap gets chunky before you’ve had a chance to pour it, pop it in the microwave for 15 seconds. Keep heating and stirring until it’s a pourable consistency once again.

Sharp lines disappear after the soap sets. You created perfect swirls, but a day later they’ve blurred or bled into each other. This happens to the best of us. The fix is to use non-bleeding colorants like micas or color blocks specifically formulated for melt and pour soap. They’ll stay put and keep your swirls looking sharp.

FAQ

Do I need a loaf mold to swirl?

No, you can use loaf molds or single-cavity silicone molds to make swirl patterns in soap. Whichever mold you choose, the process is the roughly same.

Can I swirl with more than two colors?

Yes, many swirls use three or more colors. With more colors, dividers or careful pouring help maintain definition so everything doesn’t just blend together.

How long do I wait to unmold and cut?

Let the soap fully harden. Depending on your base and the temperature, this may take a few hours up to overnight. It’s better to wait too long than not long enough.

Will the swirl fade or bleed over time?

If you use non-bleeding colorants, you’re less likely to see bleeding later. Also, store your soap in dry, cool places to minimize sweating or color migration.

Is it normal for my soap to sweat as it sits?

Melt and pour soap can attract moisture from the air, which creates those little clear beads on the surface. To reduce sweating, wrap your soap once it’s fully set, store it in a cool, dry place, or adjust your base or additives accordingly.

0

Tags: , , , ,
greek yogurt bagels

High Protein Greek Yogurt Bagels (Perfect For Breakfast!)

My kids are old enough that they can make their own breakfast now, but we still enjoy eating together as a family. Learning how to cook is a great skill for kids to learn that benefits the whole family! These simple Greek yogurt bagels are easy enough that even kids can make them, and they’re perfect for a quick breakfast.  

Bagels are one of those foods on store shelves that are stuffed full of artificial ingredients. And if you’re lucky enough to have a made-from-scratch artisan bagel shop near you, they can get pricey. Homemade bagels give you the option of having great taste with high quality ingredients. And they taste so much better!

Greek Yogurt Bagel Ingredients

We don’t eat a ton of grains in our house, but I’ve incorporated some organic grains into my diet. Some Greek yogurt bagel recipes are made with bread flour or with almond flour. This particular recipe uses Einkorn flour. It’s naturally a little higher in protein and lower in carbs than modern, hybridized wheat. 

You can buy Einkorn online, but many health food stores and grocery stores sell it too. If you don’t have any, then regular organic, all-purpose flour will also work. And if you need a gluten-free bagel option, then go with your favorite gluten-free flour blend. 

Regular bagels are made with yeast to give them some rise. These are much faster to make since they skip the yeast and the rising time. Greek yogurt is naturally acidic and reacts with the baking powder to give the dough that familiar bagel texture. 

I use an egg wash on top to give the bagels a better texture and color. However, if you need to avoid eggs, you can omit them and make the bagels without. 

How To Use Greek Yogurt Bagels

Greek yogurt bagels are really easy to whip up, but I’ll often make a batch the night before. Try them along with breakfast or as part of a breakfast sandwich. We like toasting them for sandwiches or eating them slathered with some grass-fed butter or cream cheese. 

They also make great BLTs, sausage egg and cheese sandwiches, or try some sliced meat, cheese, and lettuce for lunch. My kids like these so much, they were all gone before they had even cooled! 

Greek Yogurt Bagel Recipe

These delicious bagels are simple and quick to make. Great for sandwiches, breakfast, or slathered with cream cheese.

  • Preheat the oven to 375°F and line a baking sheet with parchment paper.

  • In a large bowl, whisk together flour, baking powder, and salt.

  • Add in the Greek yogurt and mix with a fork until crumbly.

  • Knead with your hands until it forms a smooth dough (about 1–2 minutes).

  • Transfer the dough to a floured surface.

  • Divide into 6 equal pieces. Each should weigh roughly 120–130 grams for full-size bagels.

  • Roll each piece into a 7–8 inch rope and connect the ends to form a bagel shape.

  • Place on the baking sheet and brush with the beaten egg for shine and browning.

  • Bake for 22–26 minutes, or until golden and puffed. Optional: Broil for 1–2 minutes for extra color.

  • Let cool for at least 10 minutes. This helps the bagels finish setting and improves the texture.

Nutrition Facts

Greek Yogurt Bagel Recipe

Amount Per Serving (1 bagel)

Calories 176
Calories from Fat 9

% Daily Value*

Fat 1g2%

Saturated Fat 0.3g2%

Trans Fat 0.01g

Polyunsaturated Fat 0.1g

Monounsaturated Fat 0.3g

Cholesterol 30mg10%

Sodium 418mg18%

Potassium 363mg10%

Carbohydrates 29g10%

Fiber 0.04g0%

Sugar 2g2%

Protein 11.3g23%

Vitamin A 42IU1%

Calcium 146mg15%

Iron 1mg6%

* Percent Daily Values are based on a 2000 calorie diet.

  • If the dough is too sticky, add 1–2 tablespoons of flour while kneading. If it’s dry, add 1 tablespoon of yogurt at a time.

Different Bagel Flavor Options 

You can really play with the base recipe and make lots of different bagel flavors. Here are some of our favorites!

  • Everything Bagel – Sprinkle everything seasoning on top before baking.
  • Cinnamon Raisin – Add 1 TBSP coconut sugar, ½ tsp cinnamon, and  ? cup raisins to the dough.
  • Garlic & Herb – Add 1 tsp dried Italian seasoning and  ½ tsp garlic powder.
  • Cheddar Chive – Fold in ½ cup shredded cheese and 1 tbsp chopped chives.
  • Jalapeño Cheddar – Fold in 1–2 finely diced jalapeños (seeds optional)  and ½ cup shredded cheddar.

What Kind of Yogurt Should I Use? 

Greek yogurt is naturally thicker and higher in protein than regular yogurt. I prefer to use whole milk or full-fat Greek yogurt in these to give the dough a better texture. You can use no-fat or 2% Greek yogurt, but the dough won’t be quite as good

How Much Protein is in Greek Yogurt Bagels?

The protein content is a little over 11 grams of protein per bagel if you use organic or Einkorn flour. Gluten-free flour blends will vary in their protein content. Einkorn is also naturally lower in carbs than the typical, modern wheat flour. 

Cooking and Storage Tips

These bake in the oven in about 22-26 minutes. You can also use the air fryer and cook them at 350 degrees for 10-12 minutes or just until they start to turn golden brown. 

Their shelf life is about 3 days when stored in an airtight container. They also taste just as good the next day and you can freeze them for later.

What are your favorite bagel flavors? Leave a comment and let us know!

Tags: , , , , , ,
experience gifts (2)

53+ Ways to Give Experience Gifts Instead of Stuff This Year

With 6 kids, multiple business ventures, and an indoor plant obsession, it’s easy for things to pile up around the house. Amidst the holiday season gift-giving these gifts can lead to more stress for both the giver and receiver. Over the years we’ve embraced more of a minimalist lifestyle, including giving experience gifts.

After some trial and error, it’s now the norm… and the results are amazing!

An experience gift can be easy to arrange and thoughtful, even if it’s last minute. They’re also rewarding to both the giver and receiver. And you don’t have to live near Chicago or NYC and see a Broadway play to have a unique experience. Going to the movies as a family, taking art classes, or learning to scuba dive are priceless memories or skills that last a lifetime.

I still give a few material presents out at Christmas (you can find many of those unique gifts in this ultimate gift guide). However, the focus has shifted from piles of gifts to experiences that often the whole family can enjoy.

Do We Have Too Much Stuff?

Joshua Becker is my favorite expert on the topic of clutter and minimalism. He shares some sobering trends on his Becoming Minimalist blog.

Consider this:

  • The average American home has over 300,000 items in it.
  • At least 4 in 10 of us have a storage unit to store our excess stuff.
  • There’s enough physical space for every man, woman, and child in America to stand in U.S. storage facilities—all at the same time!

Why Give Experiences and Not Stuff?

Those staggering statistics wouldn’t worry me if it seemed the excess stuff somehow improved our lives. But that isn’t the case. Statistically, we’re not happy. Over 54% of us report being overwhelmed with clutter, and 78% of us have no idea how to overcome it! There are tons of topics on organizing and decluttering out there to help us deal with all of our stuff and the stress it causes us.

Thomas Gilovich, a researcher at Cornell University, spent more than a decade on the subject. He explored why experiences contribute more to happiness than stuff. He found that experiences are a uniting factor. You’re more likely to bond with someone who enjoys the same hobby or has traveled to the same places as you.

Even the anticipation leading up to a family trip, event, or experience has the potential to give happiness. This makes it the gift that keeps on giving! Happiness in anticipation, during the experience, and in the memories. Beats the heck out of a pile of toys you trip over while tucking the kids in at night!

Experience Gifts: The Importance for Kids

Shared family time (even at family dinners) is drastically important for a child’s well-being. Much more important than the toys we give them or the dozens of extracurricular activities we often neglect family time for.

There are lots of reasons to have shared family time and experiences, including:

  • bonding within the family
  • fewer behavioral problems in children
  • a stronger sense of identity and sense of security
  • higher rates of academic success
  • lower rates of violence

These shared experiences can be as simple as time spent together during meals, while driving, or reading stories before bed. Prioritizing shared experiences as gifts helps reduce unwanted material items while fostering family bonding. These ideas are great for Christmas or as a birthday gift.

53+ Ways to Give Experiences This Year

The average parent spends over $460 per child on toys and gifts each year! And about half of Americans are willing to go into debt over Christmas gifts. That just adds to our clutter and stress.

Experience gifts are great because they reduce clutter, give kids something to look forward to, and promote bonding.

Experience Gift Ideas For Parents and Families

Bigger experiences, like memberships or vacations, are often family gifts. It’s a fun way to check a few things off of your bucket list. Or try a new activity as a family, ranging from kayaking or rafting to setting up a zipline at home in the backyard. Feeling adventurous? Schedule a hot air balloon ride!

Season Passes or Memberships

  • Museum Memberships – Look into which local museums offer annual memberships near you. Some even offer discounts for local residents or have programs for kids.
  • Science Center Memberships – Many cities have an interactive children’s museum or science center with an annual pass option. Sometimes these end up costing less than one visit.
  • Orchestra Season Tickets – We have a local orchestra that performs every few months. I found children’s season tickets to be extremely affordable (less than $8 a show). It’s now a fun family activity.
  • Community Theater Tickets – If you have a local theater, buy season tickets. If you can’t buy one for each member of your family, buy two. Parents can go to the more grown-up plays as date nights, and then Mom or Dad can alternate taking the kids for special nights.
  • Sporting Events – Any professional or college teams in your area? Purchase season tickets to your favorite sport. Or if that’s too expensive, buy tickets to one game. My family loves baseball, and it’s been a great outing that lasts all summer.
  • Nature Center Tickets – Check for local nature preserves or nature centers in your area and see if they offer an annual pass. I’ve found these for nature centers, a local cave, and state parks.
  • The Zoo – Many zoos offer season passes and some have exclusive benefits for members.
  • Local Attraction Season Passes – Any other local attraction with a season pass can be a great gift. Check for other types of museums, historical sites, or local attractions.

Family Activities

  • Camping Tent – Sometimes, a material gift leads to an experience. This tent was a family gift a couple of years ago, and we’ve used it quite a few times. I picked this one because it’s easy to set up!
  • New Family Hobbies – Get the necessary equipment or passes to take up a new family hobby. Try hiking, camping, card games, a sport, or another fun activity.
  • Escape Room – This is an ideal group activity that Mom, Dad, and older kids can do with extended family for some fun quality time. Check to make sure the theme is family-friendly.
  • Be Puzzled – Feeling brave? This 33,600-piece puzzle is the world’s largest. It might take you the whole year to put together and will foster a LOT of family time!
  • Fun Family Outing– You don’t have to go all the way to the Grand Canyon or New York City to have a fun family trip. Visit an amusement park, take a local food tour, or plan a family staycation. Remember, looking forward to an experience makes the experience more fun and fosters happiness on its own!
  • Volunteer – Truly a gift that keeps on giving. If your kids are old enough, volunteer at a local food pantry or charity. Give your kids (and yourself) the gift of helping others!
  • Give to Charity – Another favorite in our family. We designate $100 per child, and they decide where to give it. They love choosing gifts like farm animals, fruit trees, or educational supplies for those in need around the world through programs like Food for the Poor.

Best Experience Gifts for Kids

Kids love learning new things or spending time doing their favorite activities. It’s always special to spend one-on-one time with their parents. Experiences are a great way to give them both!

Learn or Perfect a Skill

  • Local Pottery Painting – An absolute favorite with my girls. Our local pottery place has dozens of options to paint. This has been a fun activity for the kids (and me!).
  • Pottery Making – For older kids, some places offer pottery-making lessons or classes.
  • New Skill – Does your child want to try horseback riding, cooking, sewing, painting, or another similar activity? Give them classes for a new hobby or skill. You can even buy virtual classes through sites like Udemy. Or, to keep costs down, look at your local recreation center, or ask a family member to teach your child. Here are my favorite cooking classes for kids.
  • Rock Climbing – Have a local rock-climbing gym? See if they offer annual passes or pick-up gift certificates for a climbing outing with older kids. Bonus: It’s a great way to get exercise too!
  • Learning Magazine Monthly Subscription – Our kids love getting “real mail” in the mailbox. This is one gift my extended family members often get for them. They look forward to it coming each month and doing the activities.
  • Craft Bucket – One of my favorite Christmas gifts as a child: a basket of craft activities that lasted me all year! My aunt filled a large basket with scissors, paper, glue, string, and every craft supply imaginable. It led to hours of fun for me. My kids love getting these baskets, plus books about how to draw, art kits, sticker pads, construction paper, and other craft kits.
  • Musical Instrument – A favorite gift one Christmas was a steel drum for my kids. Though I admit, on a couple of especially loud days, I have regretted the idea! This is the one I got, and they’ve loved learning to play it. I also ordered mini musical instrument kits.
  • Music Lessons – Along with their new instrument, you can gift them some music lessons. Piano or guitar lessons are popular, but there’s also violin, harp, and even ukulele!
  • Subscription Box – The gift that keeps on giving! Kids love getting these regularly in the mail and you can choose from a wide variety of activities. KiwiCo has art, STEM, or geography boxes, while CrateJoy offers everything from arts and crafts to gardening or alien paraphenalia!

Active Experiences

  • Local Jump Gym – Another fun activity that helps kids stay active. See if you have a local jump gym or indoor trampoline center and get annual passes or gift cards.
  • Batting Cage Membership – For a child who loves baseball, look for a local batting cage. Some offer year-long memberships or bulk discounts on packages. This is a great way to stay active and have a fun outing together.
  • Bowling or Skate Tickets – If you have a local bowling alley or skating rink, ask about family passes or gift certificates. Roller skating and ice skating are both fun.
  • Every Kid in a Park – If you have a fourth grader, there’s no excuse not to get this one. It’s a free year-long park pass to all the national parks. It provides access to everyone in your immediate family, not just the fourth grader. (Here’s how to get it.)
  • Treasure Hunt – If you’re giving a material gift, make it a fun experience. Instead of wrapping it up, create a scavenger hunt for the child to find the final gift. This is especially fun for a larger gift or experience.
  • Geocaching – Speaking of treasure hunts, geocaching is a fun, free way to go on a treasure hunt with your kids almost anywhere in the world. You can learn more about it here.

Family Time

  • Lunch Dates – Give vouchers to a favorite breakfast or lunch place to a child and plan a one-on-one date with them.
  • Movie Tickets – We don’t go to the movies often, but sometimes there are some great family movies coming out around Christmastime.
  • Question Book – My kids all love this Question A Day Book, and it gives us a fun conversation starter each day.
  • Garden Kit – Just like crafts, gardening is a great activity to do with children. If you have a budding gardener (pun intended), wrap up some seeds and gardening supplies and let your child help you garden all year!
  • Movie Night Packages – My children don’t watch much TV, but we love family movie nights. To make it even more fun, I wrap up a new DVD and some healthy snacks for each child to let them “host” the movie night.
  • Game Night Packages – Giving each child one game is a fun way to expand our collection. And they love playing “their game” when we have a game night. Some favorites are Apples to Apples, Tsuro, Sequence, and basic card games.
  • DIY Kits – My kids enjoy getting the supplies to make DIY items together (like this DIY Christmas garland) or give them as gifts. This paper-making kit was an especially big hit. Bonus: they’re learning new skills too!
  • Learn a Language – Learn Spanish, Italian, or even Japanese together. Programs like Talk Box offer an easy and natural way to learn together as a family through everyday conversation.

Experience Gifts for Men

Check out this post for ideas of usable, practical gifts that dads will enjoy (and that help them be healthier, sleep better, etc.). In my experience, guys are the toughest to find experience-based gifts for. But here are a few ideas that have been a hit over the years:

  • Home Brewing – For the guy who loves beer, give him an organic (or at least non-GMO) home brewing kit. There are pre-made brewing kits but go to a local homebrew store if possible to find out what supplies and ingredients he’ll need.
  • Sports – Tickets to see his favorite teams play can be a big hit. These tend to be more expensive, so you may have to save for a while, but they can make for an amazing and memorable experience!
  • Outdoor Activities – This will vary depending on the guy, but finding outdoor experiences he already loves is a great gift idea. This might be finding time to camp as a family or for him to go hunting, hiking, or playing sports like golf.
  • Scuba Certification – Why not give each other scuba certifications as a gift? Go through the process together and then enjoy a great hobby together.
  • Skydiving – Is your guy adventurous? Skydiving is a ton of fun, and many cities have a local place you can go. They can also do indoor skydiving if they’re not feeling quite as adventurous.

Experience Gifts for Women

Memes abound online about moms enjoying going to the bathroom alone. Here’s a fun list of material gifts for mom for the perfect gift. But moms also love experiences too!

  • Day(s) Off – One of my favorite gifts ever was a series of “days off” that I didn’t have to cook, clean, or have any household responsibilities (and it included a gift card to go out for coffee!). Instead, other family members can take over mom’s tasks.
  • Dance Lessons – If you have a local dance studio or ballroom dance club she might like taking lessons there. Ballroom dance is a fun way to connect as a couple. Adult ballet or tap is also making a comeback if she prefers to go solo.
  • Painting Session – These sessions are a great way to learn and have fun while being creative. Treat mom to a night of painting, even better if it’s with a few best friends.
  • Wine Tasting – It would be great to get her a trip to Napa or Italy, but not everyone can do that. Instead, arrange an in-home wine tasting. Dry Farm Wine has wine gift boxes that will ship straight to your door.
  • Spa Day – All moms can use some pampering! Plus, it’s something mom may only do if it’s a gift. Massages are my favorite!
  • Date Nights – A couples getaway or time alone can be tough with kids. Give mom a pre-planned date night and handle all the arrangements, line up a sitter, and make the plans.
  • Craft or Hobby Supplies – Some new yarn, drawing supplies, or even an adult coloring book are all great experience gifts for moms. You can get art supplies here.
  • Meal Kit Subscription – While I love my meal planner app, some days I don’t feel like cooking. For the healthy foodie, I like the meals from The Good Kitchen and Daily Harvest.
  • Nap or Getting to Sleep In – This may be one of the toughest gifts to pull off, but definitely one of the most appreciated. If you can figure out how to do it, she’ll be grateful!
  • Any Family Gifts – Any of the family gifts listed above are also a great option to get for moms. They’ll enjoy the family bonding and the idea of an activity to do with the kids.

Gifts for Grandparents + Extended Family

Often our loved ones don’t need any more material gifts or just really appreciate experiences. I’ve found these to be really popular options with my family members.

  • Day Out with Kids – The kids pick a fun activity to do with grandparents and give it as a gift. It could be something like going out for smoothies, playing at the park, or going to the store to gather ingredients to cook a meal together.
  • Window Garden – Sometimes it’s harder for grandparents to get down in the dirt like they used to. A windowsill garden with herbs is a great way to have flavorful spices all year long and have fun gardening. My kids and I love this countertop version from Aerotop.
  • Memory Book – I love making a photo book with a company like Mixbook that showcases favorite memories with the giftee. Or let your kids make a homemade scrapbook by printing and cutting out pictures and writing captions.
  • Membership Add-Ons – For grandparents who live close by, add them to any of the family memberships listed above. This lets them come for free and spend time with the kids. And as a bonus, you have extra eyes to help with the kids.

Experience Gifts: The Bottom Line

Even if you’ve already purchased gifts this year, consider adding some experiences as well. Or slowly transition to more experience-based gifts. Family time and memories are worth so much more than piles of toys.

Have you given experiences instead of gifts in the past? What other suggestions would you add to this list?

Tags: , , , , ,
Best oLive
Privacy Overview

This website uses cookies so that we can provide you with the best user experience possible. Cookie information is stored in your browser and performs functions such as recognising you when you return to our website and helping our team to understand which sections of the website you find most interesting and useful.