Homestead Blog Hop - Homestead tips, ideas, animal care, and recipes every Wednesday

Homestead Blog Hop 609 – Homemade Mozzarella, Pickles, and Salmon

Welcome to Homestead Blog Hop, a weekly gathering for homesteaders and simple living enthusiasts to share DIY projects, from-scratch recipes, and creative inspiration. This week’s hop features cozy homesteading tips, along with practical ideas that celebrate handmade living and self-sufficiency.

Whether you’re looking for seasonal crafts, homemade treats, or encouragement on your homesteading journey, you’ll find plenty of inspiration to carry into the new year. Grab a cup of tea, explore the featured posts, and join us in sharing your own homestead creations.

Meet Your Homesteading Hosts

We’re Kelly from Simple Life Mom, Liz from The Cape Coop, Natasha from Houseful of Nicholes, and Laurie from Ridgehaven Homestead. Together, we’re passionate about from-scratch living, simple ingredients, frugal habits, and intentional homesteading. We’re delighted to host the Homestead Blog Hop, where you can find fresh inspiration each week for DIY projects, homemade recipes, and practical simple living ideas.

Follow Us for More Homestead Inspiration

Natasha – Houseful of Nicholes
Facebook | Pinterest | X | Instagram

Laurie – Ridge Haven Homestead
Facebook | Pinterest | Instagram

Liz – The Cape Coop
Facebook | Pinterest | X | Instagram

Kelly – Simple Life Mom
Facebook | Pinterest | X | Instagram

FEATURED POSTS from the Last Homestead Blog Hop

Each week, we take turns selecting three featured posts from the Homestead Blog Hop. These features are shared across all of our social media platforms, helping spotlight the creativity and hard work of our fellow homesteaders. Here are the featured posts from last week’s hop:

1. Grandma’s No Cook Refrigerator Pickles from Recipe Idea Shop

2. Quick Homemade Mozzarella Cheese from The Once and Future Homestead

3. Garlic Butter Salmon from Yummi Haus

Congrats! Feel free to grab the featured on button for your post.

Just right click and ‘save image as…‘

Guidelines for the Homestead Blog Hop

  1. Click the “Add Your Link” button below and upload a clear, eye-catching image from your project or recipe. Please link directly to the family-friendly post itself, not your blog’s homepage.
  2. You may link up up to three posts each week.
  3. Take time to visit a few other blogs in the hop and leave a thoughtful comment to let them know you stopped by. Community support makes this hop special!
  4. Please include a link back to the Homestead Blog Hop in your post. Posts without a backlink are not eligible to be featured. All featured posts are shared across all hosts’ social media channels.
  5. Share posts that haven’t been linked to the hop before. Older posts are welcome as long as they are new to the hop.
  6. By joining the Homestead Blog Hop, you grant the hosts permission to use one image from your post, with a link back to your site, if your post is selected as a feature next week.
  7. This is a family-friendly link-up designed to encourage, inspire, and support the homesteader in all of us.

Let the Party Begin!

Which project are you excited to try this week? Leave a comment below.

Join Our Homestead Blog Hop Pinterest Board

Follow all of your hosts on Pinterest and send a message if you’d like to be added to our Homestead Blog Hop group board. This board is a great place to share your DIY projects, crafts, and from-scratch recipes with the homesteading community.

Guideline: Only pin posts that you’ve linked up to the Homestead Blog Hop.
Tags: , , , , , ,
Smash_Chicken_Caesar_Tacos

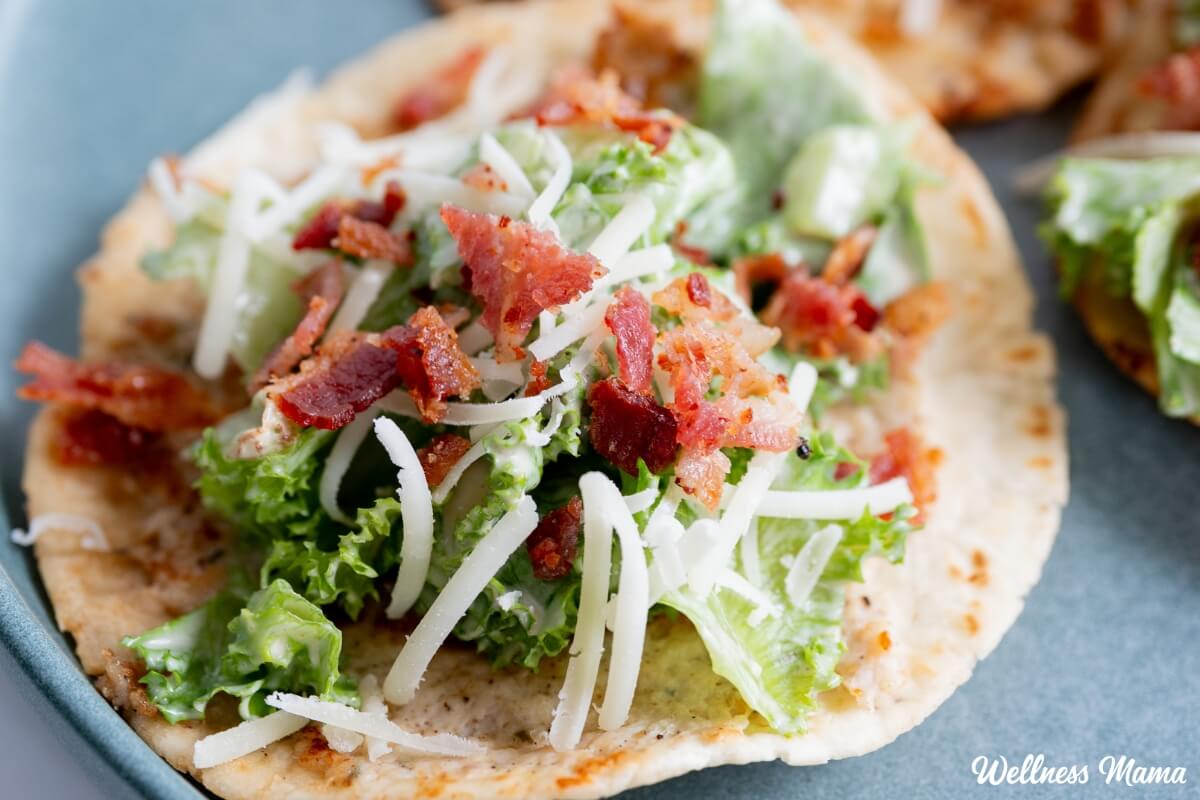
Smash Chicken Caesar Tacos

This is one of those recipes that may seem a little strange and unconventional, but it’s absolutely delicious! It’s full of protein, healthy fats, and veggies, and packed with flavor. My kids wolfed these down, they’re that good.

You’ve more than likely heard of Caesar salad before. I have a recipe on the site plus several variations of Caesar salad dressing. These tacos combine those flavors for a crunchy, mouthwatering version. They’re best served fresh, but you can mix the ingredients up beforehand to meal prep.

Smash Chicken Caesar Tacos

The traditional Caesar salad features a creamy dressing made from anchovies, garlic, mustard, and more. Plus crunchy romaine lettuce leaves and large croutons. It’s certainly evolved over the years, but the flavors and ingredients have largely remained the same. And while I still love a good Caesar salad, these smash chicken Caesar tacos are a nice spin on the classic.

Like most tacos, these use a tortilla shell for the base. You can use whatever you prefer, but I used organic flour tortillas. Almond flour, cassava flour, or other tortillas would work too. Just pick something that’s not too big so they’re easier to flip.

Here’s the twist: we’re smashing a seasoned chicken mixture onto the tortilla and cooking it until golden and crispy. This packs in some serious protein and adds a yummy flavor. The chicken is seasoned with a blend of Italian seasoning, lemon pepper, garlic, and onion.

Caesar Dressing

What really makes a good Caesar salad though is the dressing. I have a quick version here and a more traditional Caesar dressing here. This recipe uses a blend of mayo and yogurt to get a tangy, creamy dressing. The worcestershire sauce and anchovy paste adds some earthy flavors. Lemon adds brightness and tang, while herbs and Parmesan add another layer of flavor and creaminess.

I’ll often use homemade mayo since it’s healthy and easy to make. Many times though I’ll reach for avocado oil mayonaisse from Primal Kitchen. Making your own mayo and sauces is simple, but sometimes with 7 kids grabbing a pre-made jar is just easier. Thankfully there are some pretty good store-bought mayo options now. Thrive Market is another way I do an easy stock up on healthy pantry essentials.

Making Ahead

Once the tacos are cooked and assembled they really taste best fresh. You can mix up the chicken mixture and dressing beforehand though for easier meal prep. I doubled the recipe so we had enough for 2 meals. The dressing really tastes better after its been in the refrigerator for awhile to allow the flavors to better combine.

These smash chicken Caesar tacos are fresh, crunchy, and offer a balanced meal I can get behind. Here’s how to make them.

Smash Chicken Caesar Tacos

Crunchy, protein-packed tacos with all of the flavors of a classic Caesar salad. Full of veggies, healthy fats, and absolutely delicious!

For the Taco Assembly

  • 7 small tortillas (cassava flour, almond flour, sourdough, or traditional flour tortillas)
  • 1 TBSP butter (or ghee, or avocado oil)
  • 1 head romaine lettuce (finely shredded)
  • extra Parmesan cheese for serving
  • fresh parsley (chopped)
  • In a medium bowl, whisk together the mayonnaise, yogurt, lemon juice, Worcestershire sauce, garlic, mustard, anchovy paste, parsley, and black pepper until smooth.

  • Stir in the Parmesan cheese and refrigerate while preparing the tacos. The flavors deepen as the dressing chills.

  • Combine the ground chicken, Italian seasoning, lemon pepper, garlic powder, onion powder, sea salt, and black pepper in a bowl. Mix gently until just combined.

  • Avoid overmixing to keep the chicken tender.

  • Spread about ¼ cup of the chicken mixture onto each tortilla, pressing it into an even layer that reaches the edges. If the chicken sticks to your hands, lightly oil your fingers or use parchment paper to press it into place.

  • Heat a large skillet over medium-high heat and add the butter, ghee, or avocado oil.

  • Place the tacos chicken-side down in the pan and cook for 2–3 minutes until the chicken develops a golden crust. Flip the tacos and reduce the heat slightly. Continue cooking another 2–3 minutes until the tortilla becomes lightly crisp and the chicken reaches an internal temperature of 165°F. Transfer to a plate and repeat with the remaining tacos.

  • Toss the shredded romaine with enough Caesar dressing to lightly coat.

  • Top each taco with the dressed romaine, extra Parmesan, fresh parsley, and a drizzle of additional dressing.

  • Serve immediately while the chicken is crispy and the lettuce is cold and crunchy.

Nutrition Facts

Smash Chicken Caesar Tacos

Amount Per Serving (1 taco)

Calories 475
Calories from Fat 324

% Daily Value*

Fat 36g55%

Saturated Fat 9g56%

Trans Fat 0.2g

Polyunsaturated Fat 16g

Monounsaturated Fat 9g

Cholesterol 80mg27%

Sodium 914mg40%

Potassium 665mg19%

Carbohydrates 20g7%

Fiber 3g13%

Sugar 3g3%

Protein 19g38%

Vitamin A 7935IU159%

Vitamin C 5mg6%

Calcium 190mg19%

Iron 3mg17%

* Percent Daily Values are based on a 2000 calorie diet.

Try adding some bacon to the dressing for even more flavor!

What are some of your favorite taco fillings? Leave a comment and let us know!

Tags: , , ,
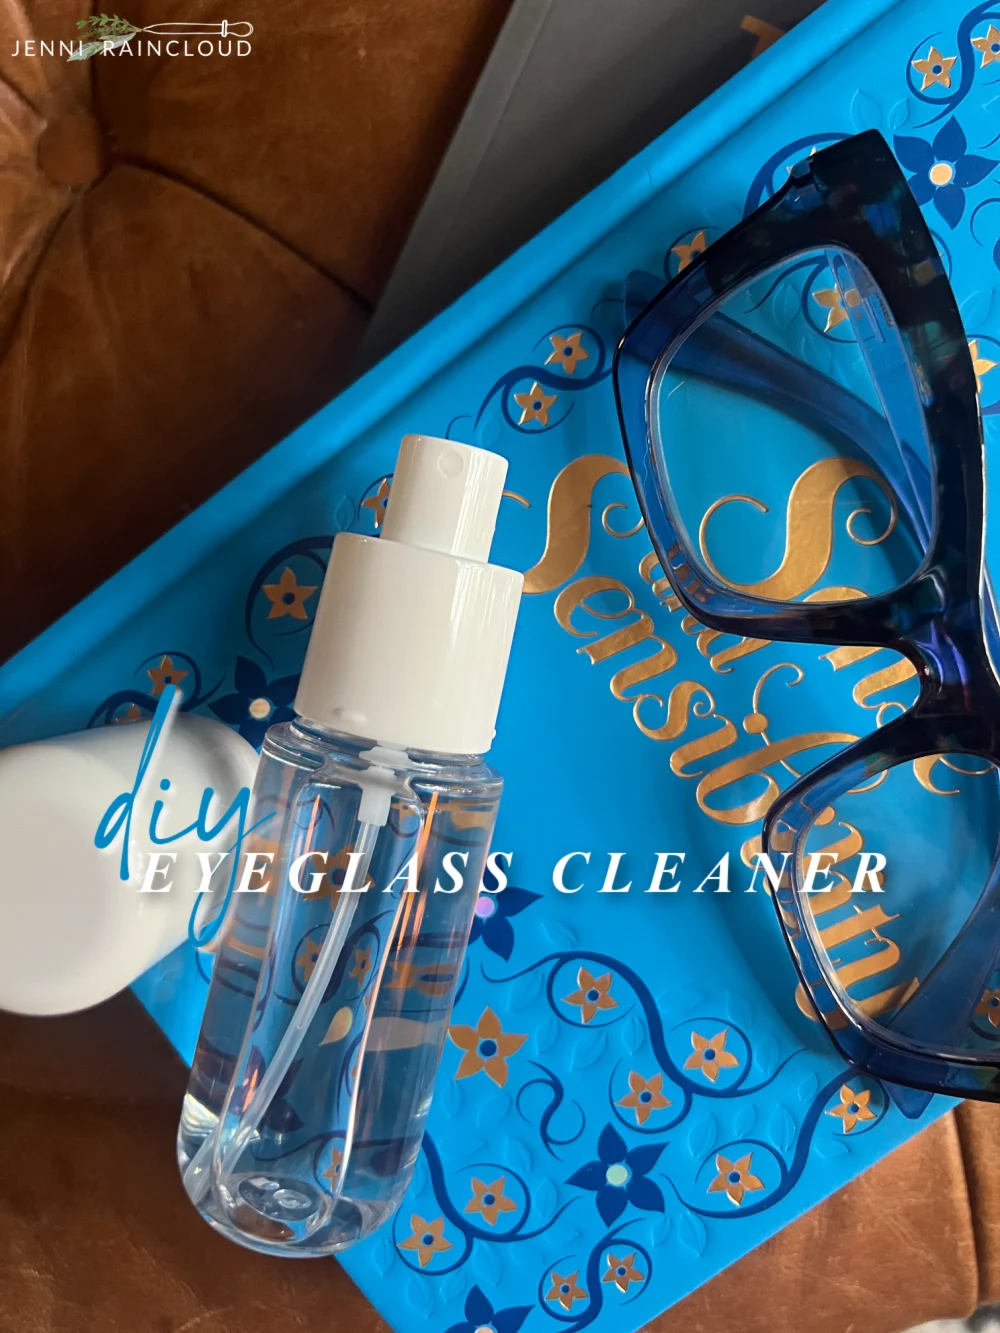
DIY Eyeglass Cleaner - Jenni Raincloud

DIY Eyeglass Cleaner – Jenni Raincloud

I’ve officially entered into the world of readers. Readers are everywhere-I have at least 4 pairs in different places including the top of my head! I haven’t worn glasses since the 1980s so keeping up with them is a bit of a chore! What’s even a bigger chore is keeping them clean! I mean, we wear glasses to correct the blurriness and more often than not I’m trying to see through smudges on my glasses! I realized that good ole vinegar does not fix smudges well so I started experimenting with a few concoctions to find the best glasses cleaner. I’ve landed on a good recipe and I thought I’d share in case you are in need of a DIY eyeglass cleaner! 

This is a simple recipe that involves water, alcohol and Castile soap. It’s cheap and you can make it in seconds. The most expensive thing about it is finding a spray bottle!

DIY Eyeglass Cleaner Recipe:

  • Fill a spray bottle 3/4th full with alcohol.
  • Add 2-3 drops of Castile soap. (you can use Dawn dish soap if you do not have Castile soap)
  • Top off with distilled water. 
  • Spray Bottle

This recipe isn’t limited to just glasses! You can use either recipe to clean:

  • Eyeglasses
  • Sunglasses
  • Cell phone screens
  • Laptop and tablet screens
  • Camera lenses

For a really deep clean I do use my ultrasonic jewelry cleaner every 1 or 2 weeks. I will say, this little cleaner works amazing on anything you can fit in it. It’s nice to have on hand for jewelry and glasses. However, picking up a book to read or working a puzzle requires immediate clear vision and this DIY eyeglass spray comes in extremely handy and is something I will make over and over again. 

As per usual, I blog about what is relevant in my world. I needed to figure out a solution for my grimy glasses so I thought I’d share! Hope you enjoyed this super easy DIY! 

xx, Jenni

Jennifer Phillips

Jennifer Phillips worked as a licensed aesthetician for over 8 years before creating the DIY skincare blog, Jenni Raincloud and her natural skin care line, J. Raincloud Organics. Jennifer has been blogging full time for 16 years and loves to gain and share knowledge on how to achieve beautiful skin the natural way.

Find me on: Instagram | Facebook

Tags: , , , ,
Makeup habits that could be ageing your skin

Makeup habits that could be ageing your skin

Picture: Getty Images/Peathegee Inc

Makeup can enhance your natural beauty, but certain everyday habits may be doing your skin more harm than good. While cosmetics themselves don’t necessarily cause premature ageing, poor application techniques, unhygienic tools and skipping skincare can contribute to fine lines, dullness and irritation.

Here are some common makeup mistakes to avoid for healthier, younger-looking skin.

Also see: Signs your body is ageing faster than it should

Wearing makeup to bed 

One of the biggest skincare mistakes is going to bed without removing your makeup. According to Everyday Health, nighttime is when your skin heals itself, and sleeping in makeup disrupts this process.

Foundation, sunscreen and pollution build up on the skin throughout the day, clogging pores and preventing your skin from repairing itself overnight. Double cleansing before bed helps keep your complexion fresh and healthy.

Using dirty brushes and sponges

Makeup brushes and beauty sponges collect oil, bacteria and dead skin cells. When they’re not cleaned regularly, they can trigger breakouts and skin irritation, leaving your complexion looking tired. Wash brushes weekly and replace sponges every few months.

Also see: Hand-care routine for ageing hands

Applying too much powder

Powder can control shine, but overusing it may settle into fine lines and make skin appear drier and older. Instead, apply a light dusting only where needed and choose finely milled formulas for a more natural finish.

Skipping moisturiser before makeup

Hydrated skin provides the best canvas for makeup. Applying foundation to dry skin can emphasise texture, flaky patches and wrinkles. Use a moisturiser suited to your skin type before applying primer or foundation.

According to Beauty Collective, moisturiser maintains skin hydration throughout the day and therefore assists in fighting premature fine lines and wrinkles too.

Keeping expired makeup

Old makeup products can harbour bacteria and lose their performance over time. Mascara should typically be replaced every three months, while other products have varying shelf lives. Check expiry symbols and discard anything with an unusual smell or texture.

Indeed, healthy skin starts with good habits. By combining proper skincare with smart makeup practices, you can enjoy flawless-looking makeup while helping your skin maintain a radiant, youthful appearance for years to come.

Also see: Prevention is better than cure – ways to address an ageing neck

Be the first to know – Join our WhatsApp channel for content worth tapping into. Click here to join!

Tags: , , ,
Best oLive
Privacy Overview

This website uses cookies so that we can provide you with the best user experience possible. Cookie information is stored in your browser and performs functions such as recognising you when you return to our website and helping our team to understand which sections of the website you find most interesting and useful.