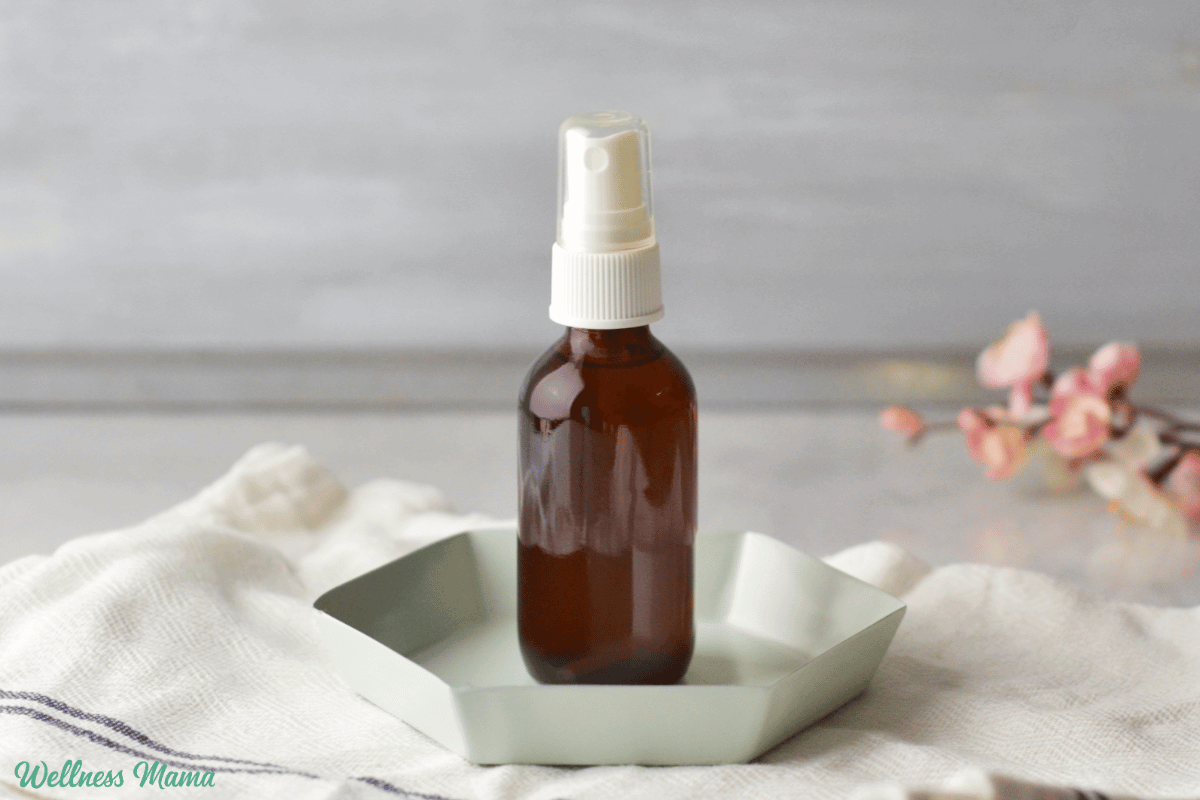
face steam with herbs

Rejuvenating Herbal Face Steam

I’ve been known for my unconventional skincare methods. They often involve herbs or essential oils and sometimes rubbing ice or even mud on my face. There are so many plants in nature that provide a wide variety of skin benefits. This herbal face steam is a great way to get some of those benefits!

I’ve done steams before, mainly for congestion or upper respiratory support. An herbal face steam makes for a wonderful all natural facial. It’s really simple to do and doesn’t require any fancy equipment.

You can even pick and choose which herbs you want to use. Just use one, or use a combination of whatever you have on hand that will work. 

The Best Herbs For a Face Steam

There are lots of different plants that work well in a face steam and you probably already have some in your pantry. Feel free to mix and match from this list or use something completely different. Just be sure it’s not something that will irritate your skin. 

Here are some of my favorite herbs to use in herbal face steams.

  • Rose petals – Rose has long been used for glowing, more youthful skin. The fragrant petals also have potent aromatherapy benefits that soothe heartache. A 2015 study noted rose helped improve skin elasticity, moisture, and reduced wrinkles. 
  • Lavender flowers – Soothing and calming to skin, lavender is a skincare favorite. It’s naturally anti-inflammatory and helps repair damaged skin. 
  • Mint leaves – Refreshing and invigorating, hot mint relaxes arteries and stimulates circulation for faster healing. It’s also a rich source of vitamins and minerals that thirsty skin craves!
  • Calendula flowers – Anti-inflammatory, anti-microbial, calendula has a wide and long history of use for healing wounds and damaged skin. 
  • Chamomile – The flowers and leaves have a floral, apple-like scent that’s calming and relaxing. It has the same effect on skin and is great for soothing irritation and damaged skin. 
  • Comfrey – This plant is another favorite of mine for skincare. Both the flowers and leaves are very efficient at healing damaged skin and even bone. It stimulates tissue repair and cell proliferation. 
  • Echinacea – People use the flowers or leaves topically for a variety of skin complaints, including damaged skin, eczema, varicose veins. Echinacea is anti-inflammatory, antibacterial, and anti-viral so it’s also helpful for acne. 
  • Helichrysum –  This herb has cheery yellow flowers with potent skin benefits. It’s drying, warm, and astringent, so pair it with a demulcent herb like violet or marshmallow if you have really dry skin. A 2020 study looked at a nightcream that contained helichrysum and found it significantly improved wrinkles, hyperpigmentation, and UV spots
  • Horsetail – A wonder herb that is full of micronutrients, including silica for more resilient skin. It’s also anti-inflammatory and anti-microbial and is traditionally used for improving wrinkles, acne, and moisturizing the skin. 
  • Lemon – Not just for lemonade, lemon has so many uses for skin too. The juice is high in vitamin C and acids, while the peel has volatile essential oils that uplift the mood and brightens dull and damaged skin. A 2013 study found lemon juice was even more effective for acne than the conventional option tested. 

How to Do an Herbal Face Steam

I prefer to use herbs that are more gentle on the skin and don’t have strong volatile oils that can irritate my skin or eyes. Cinnamon and oregano come to mind! 

You might have seen some of the face steamer machines in stores or online. Companies usually use plastic to make facial steamers, so you’re getting steam heated in plastic directly on your pores. A pot on the stove isn’t as fancy, but sometimes simpler is better (and cheaper!). 

You also can’t add herbs into the face steamer tank or it can cause damage. Again, another win for doing it the old fashioned way. 

Step by Step Face Steam Directions

  1. Simply place the herbs you’re using in a pot of very hot, filtered or distilled water. Be sure it’s not boiling hard or you could burn yourself.
  2. Turn the stove off and/or move the pot to a countertop. Drape a towel over your head and lean over the steam. 
  3. You want to be close enough for the steam to wash over your face, but not so close you get a steam burn. 

If you’re looking for a more specific recipe, here’s one to start with.

Rejuvenating Herbal Face Steam

A relaxing way to open pores, moisturize skin, and improve blemishes and signs of aging.

Prep Time3 minutes

Steam Time10 minutes

Total Time13 minutes

Yield: 1 face steam

Author: Katie Wells

  • Place the water, lemon, and herbs in a clean pot and gently bring it to a boil with the lid on. This helps preserve more of the volatile oils.

  • Turn the heat off and lean over the pot with your eyes closed. Be sure not to get too close or you’ll get a steam burn! I’ve found that as the water cools I’ll edge closer. You can also drape a towel over your head to trap more of the steam in.

  • Once the pot is done steaming, compost your herbal face steam.

The herbs I used here can be mixed and matched with any skincare friendly herbs. Just aim for about 1/3 cup of herbs total.

You can save some time and mix the herbs up in bulk for later. Just add 1/4 cup of each (or however much you want) and store in a large glass jar. Scoop out 1/3 cup when you’re ready to use. Then you’ll just need to add the freshly sliced lemon and water to make your face steam!

What are some of your favorite herbs to use for skincare? Have you done a steam before? Leave a comment and let us know!

Tags: , , ,
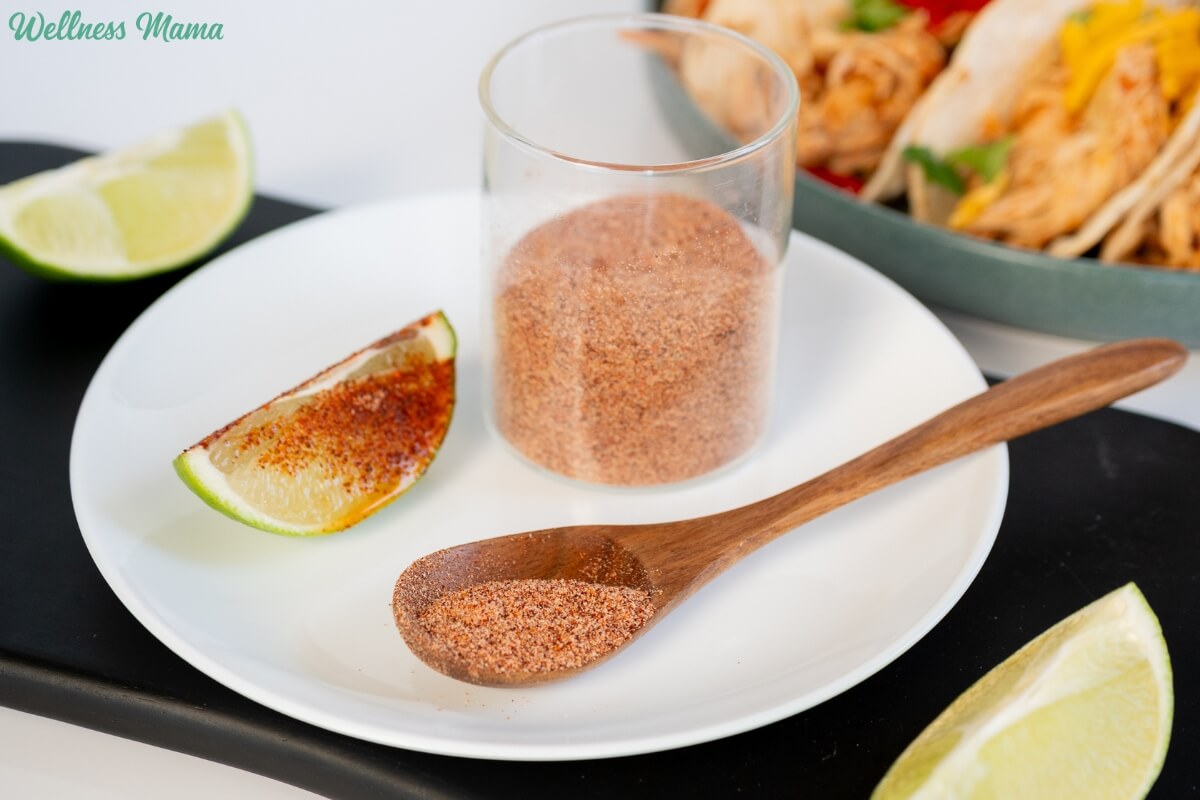
Homemade_Chili-Lime_Seasoning

Chili Lime Seasoning Recipe

Chili lime seasoning is one of those things I didn’t think much about until it became something we used all the time. It’s simple, easy to make, and somehow works with a wide range of foods. Once it’s in the pantry, it tends to get sprinkled on everything.

I started making a homemade chili lime seasoning after noticing how often we reached for it. Store-bought versions can be convenient, but many include added ingredients I’d rather skip. Making it at home takes just a few minutes and (mostly) uses ingredients I already keep on hand.

Why Chili Lime Seasoning Works

There’s a reason chili and lime show up together in so many traditional foods. The warming heat of chili and cayenne wake up the taste buds and stimulate digestion. The lime adds some tang and brightness, while salt ties it all together.

This balance is what makes lime and chili seasoning so useful. It adds flavor without covering up the food itself. It works just as well on fresh produce as it does on cooked dishes.

One Seasoning, Lots of Uses

We’ve been sprinkling it on pretty much everything. Fruit like mango, watermelon, and pineapple is an easy favorite. The contrast of sweet, salty, and spicy makes even simple fruit feel more interesting. It’s a great way to get some more variety, especially for picky kids!

I’ve also been adding it to avocado and eggs, and even roasted sweet potatoes. I’ll mix a little into olive oil for taco bowls or roasted veggies, and it’s become our go-to popcorn topping for movie nights. I’ve even been throwing a pinch on cucumber slices after sports. It’s oddly refreshing and a simple way to make sliced veggies more appealing.

Skip the Fillers

One of the reasons I like this homemade chili lime seasoning is how straightforward it is. There’s no long ingredient list and nothing extra added in.

Some popular store-bought blends, including Tajín, contain silicon dioxide. It’s naturally found in sand and quartz as silica. In food, it’s used as an anti-caking agent to keep powders from clumping and to extend shelf life.

While silicon dioxide is widely used in packaged foods, it’s not really necessary in a homemade seasoning blend. When you’re mixing small batches and storing them properly, clumping usually isn’t an issue. Skipping it is an easy way to keep the ingredient list simple and focused on flavor, not fillers.

This chili lime seasoning recipe uses just four ingredients: salt, lime powder, chili powder, and cayenne pepper (to taste). The chili powder adds warmth without overwhelming heat. And if your family is like mine and likes a little heat, then add some cayenne. Lime powder gives it a citrus flavor without the moisture of lime juice, and salt brings out the flavor in everything.

How to Make Chili Lime Seasoning

Making DIY chili lime seasoning is more about adjusting to taste than following exact measurements. Start with the chili and lime powder as the base, then add salt to taste. If you like a little more heat, then add cayenne slowly, tasting as you go.

Once it’s mixed, taste and adjust. A little more lime powder adds more tang. A pinch more cayenne increases the heat. Store the finished seasoning in a glass jar away from heat and light, and it will keep well for months. If it does start to clump up, just give it a good shake or break it up with a fork. 

Everyday Ways to Use Lime and Chili Seasoning

This is one of those blends that’s earned a place on my spice shelf because it actually gets used. It adds flavor without needing sauces, marinades, or extra prep. Even though I still like whipping up a good sauce now and then. 

Sprinkle it on fruit or vegetables, use it on eggs or potatoes, or stir it into olive oil for a quick dressing. It’s an easy way to make simple, real foods more enjoyable, especially on busy days when complicated recipes just aren’t happening.

Here’s how to make it!

Homemade Chili-Lime Seasoning

This tangy and spicy seasoning is perfect for fruit, popcorn, and everything else. Quick and easy without any unecessary additives.

  • Combine all ingredients in a small bowl and mix until well combined.

  • Taste the blend on a piece of fruit or cucumber and add more salt, lime, or chili powder as desired.

  • Store in an airtight container.

Nutrition Facts

Homemade Chili-Lime Seasoning

Amount Per Serving (0.5 tsp)

Calories 2
Calories from Fat 1

% Daily Value*

Fat 0.1g0%

Saturated Fat 0.01g0%

Polyunsaturated Fat 0.04g

Monounsaturated Fat 0.02g

Sodium 241mg10%

Potassium 11mg0%

Carbohydrates 0.3g0%

Fiber 0.2g1%

Sugar 0.05g0%

Protein 0.1g0%

Vitamin A 162IU3%

Vitamin C 0.1mg0%

Calcium 2mg0%

Iron 0.1mg1%

* Percent Daily Values are based on a 2000 calorie diet.

  • Store the seasoning in an airtight container or a glass jar. Storing it properly prevents clumping and maintains freshness for up to several months.

Do you use chili lime seasoning? What are your favorite ways to use it? Leave a comment and let us know!

Tags: , , ,
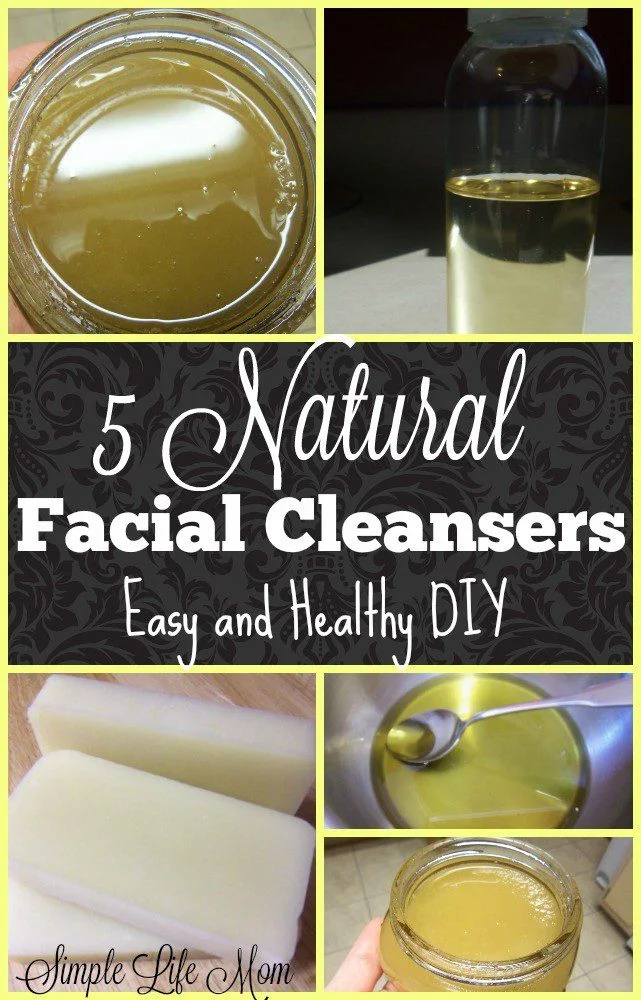
How to Make 5 All-Natural Facial Cleansers for Every Skin Type

How to Make 5 All-Natural Facial Cleansers for Every Skin Type

Making your own natural facial cleansers is a simple, affordable way to care for your skin without unhealthy ingredients. These homemade facial cleanser recipes use gentle, natural ingredients to cleanse effectively while supporting healthy, balanced skin. Whether you have sensitive, dry, or oily skin, these DIY natural face wash recipes are easy to make and perfect for a simple, non-toxic skincare routine.

I’ve used natural facial cleansers in my own skincare routine for years, especially simple ingredients like honey, oils, and oats. These recipes are ones I’ve personally tested and rotated depending on the season and my skin’s needs.

What Are Natural Facial Cleansers?

A natural facial cleanser is a face wash made with natural, organic, and healthy ingredients that clean the skin without synthetic fragrances, sulfates, or harsh chemicals. Homemade facial cleansers are also customizable. Whether you have oily, combination, or dry skin, you can customize your cleanser recipe for your specific needs and know that you are using healthy ingredients.

Why Choose Natural Homemade Facial Cleansers?

There are a lot of facial cleansers out there with lots of dangerous ingredients like petroleum, artificial dyes and fragrances, and propylparaben (which mimics estrogen and messes up your hormone balance whether you are male or female).  Making sure you use natural cleansers, makes sure you know exactly what your skin is absorbing.

Benefits of Using Homemade Natural Facial Cleansers

  1. Avoids harsh chemicals and synthetic fragrances
  2. Gentle on sensitive and acne-prone skin
  3. Affordable and easy to make at home
  4. Customizable for dry, oily, or combination skin
  5. Supports a simple, natural skincare routine

5 DIY Natural Facial Cleansers

I sell 2 liquid facial cleansers in my shop: Anti-Aging & Acne Facial Cleansers. They are similar in ingredients, except vary by what essential oils I use in them. But if you would like to make your own, then you want to look for ingredients that will cleanse your skin without stripping it completely of its natural oils.  Here are a few recipes and methods to get you going.

Oil Cleansing Method for Dry Skin

Try oil based facial scrubs to exfoliate and cleanse your skin while deeply nourishing at the same time.  Oils are also great for removing makeup.

Using oil as a cleanser is an age old method that does not clog pores. Instead, it beautifully enters pores and pulls out all impurities. You can also try these 21 amazing beauty recipes with coconut oil.

Lemon and Rosemary Facial Sugar Scrub

Ingredients:

Directions:

  1. Mix the ingredients together and store in a glass jar.
  2. To use, place 1 Tbsp in your hand and massage onto your face.
  3. Rinse and pat dry.

Gentle Castile Soap Face Wash

I did not put the recipes for cold processing here, since it is a large process for those who have never made soap before. However, Castile soaps are often made from 90-100% Olive oils instead of a mixture of fats like other soaps.  This makes the soap softer, but very gentle on the skin.  A great soap to try as a beginner and wonderful for the skin.

Another Homemade Soap that is gentle on the skin is a shampoo bar, due to the great nourishing oils within the recipe and because it usually has more readily available oils that were not converted to soap by the lye.  I know many people who use shampoo bars as a shaving bar.

Also find these shampoo bars in my SHOP

Honey Cleanser for Sensitive Skin

Raw Honey is very hydrating, kills bacteria, and nourishes skin, replenishing moisture and vitamins. That’s why you will often see it being used in natural beauty recipes. Here is a simple recipe using honey to help cleanse pores.

Ingredients:

Directions:

  1. Combine ingredients and keep in a sterile container and use a clean utensil each time.
  2. Wet face with warm water.
  3. Rub 1 tsp. between fingers and massage into face to loosen dirt and makeup.
  4. Rinse.

Oatmeal Facial Cleanser for Irritated Skin

Ingredients:

  • 1/4 cup yogurt
  • 1/4 cup pulverized oats

Directions:

  1. Pulverized oats in blender (optional).
  2. Mix yogurt and oats together.
  3. Keeps in fridge for one week, depending on how sterile you keep it.
  4. To use: wet face with warm water.  Rub 1 Tbsp between fingers and massage into face to loosen dirt and makeup.  Rinse.

Clay Cleanser for Oily or Acne-Prone Skin

I really like this cleanser, but some people are sensitive to using baking soda directly on their skin.  I know of a few people who cannot use homemade deodorant because of this.  So, like with every recipe on my site, test on a small area and make sure you have no reaction. Use it with just bentonite clay if needed.

Ingredients:

Directions:

  1. Mix all three ingredients together and massage into face to remove dirt and makeup, staying away from eyes.
  2. Rinse.

Always patch test new skincare products. If you have skin conditions or allergies, consult a qualified professional before trying new skincare products. Remember, you can become allergic to literally anything as your body changes over time.

Frequently Asked Questions About Homemade Facial Cleansers

  • Are homemade facial cleansers effective?
    • Yes! They work just as well as store bought cleansers but can be even more tailored to your specific needs.
  • Can natural facial cleansers work for acne?
    • Yes, frankincense is very anti-inflammatory, while other essential oils like rosemary, carrot, and tea tree can benefit the skin in powerful ways. Knowing your ingredients puts the power of homemade skincare in your own hands.
  • How long do DIY facial cleansers last?
    • It’s important to use water-based cleansers within a few days. Bacteria will grow quickly. Oil based cleansers can last 2-3 months, depending on how sterile they are kept.
  • Are homemade face washes safe for sensitive skin?
    • Yes, you can use gentle ingredients like honey, clays, aloe, and oils to cleanse pores. These are gentle, cleansing, and hydrating ingredients that are great for sensitive skin.

Follow up with one of 4 Herbal Skin Toners and Homemade Lotion and Anti-Wrinkle Serum. Click the links to get the recipes or go to my shop to try them before you make them.

For a full simplified skincare routine, see these Best Homemade Skincare Recipes for Healthy Skin.

Tags: , , , ,
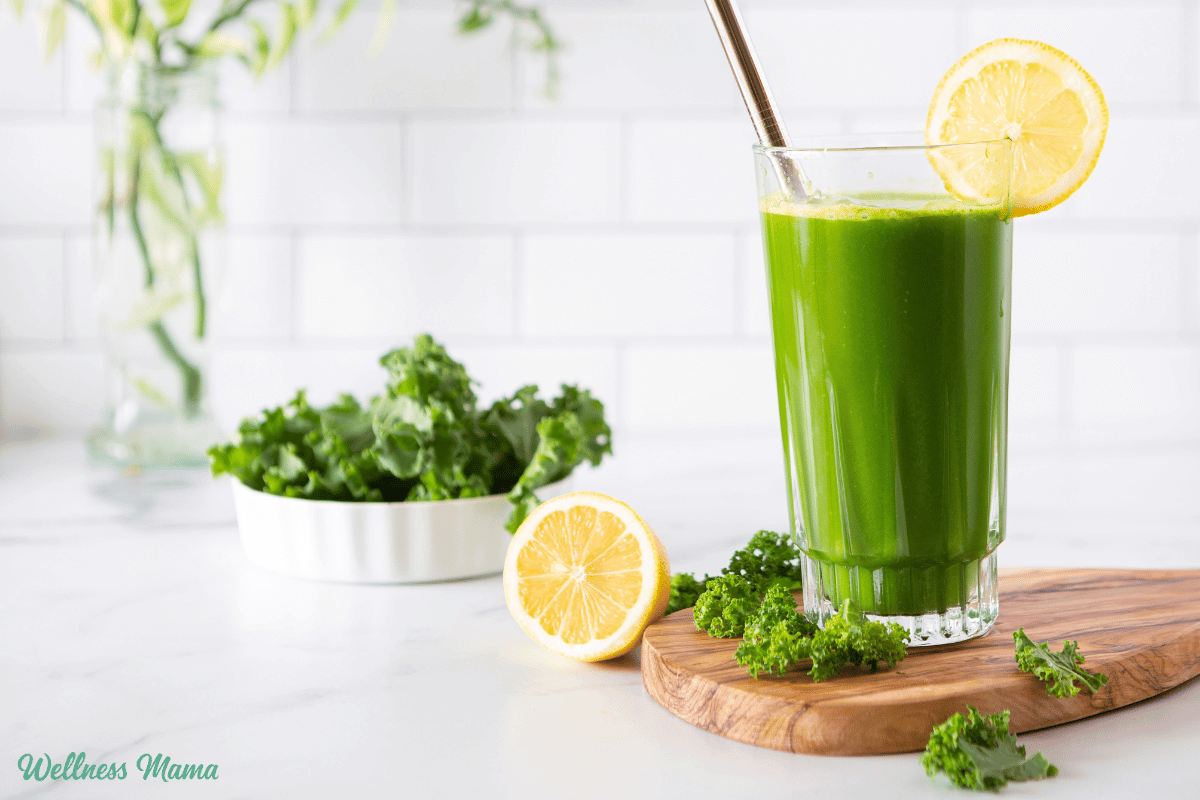
green juice

Refreshing Green Juice Recipe

Green juice has become more popular in recent years, especially during fasting or detox. It’s one of those wellness trends people either swear by or completely write off. For some it’s a daily habit that brings energy, while others just notice blood sugar spikes and get hangry (hungry + angry). 

I’ve experimented with green juice for years. And while they’re not a magical cure all, they can have some very real benefits. It depends on how you use it, what you put in it, and when you drink it. 

Instead of framing it as simply a detox or a meal replacement, I look at green juice as a healthy addition. When used intentionally as a nutrient boost (not a nutritional crutch) it can be a really helpful addition to a whole-foods lifestyle.

Green Juice as a Meal Replacement

One of the most common ways people use green juice is as a breakfast replacement or as part of a juice fast. It sounds great: flood the body with vitamins and give your digestion a “break.” But in reality, that approach can backfire.

Juicing removes most of the insoluble fiber from fruits and vegetables. Fiber plays an important role in slowing down sugar absorption, feeding beneficial gut bacteria, and helping us feel full. Without it, juices, especially fruit juice, can quickly raise blood sugar. Sugary juice for breakfast means higher cortisol levels, energy crashes, sugar cravings later in the day, and disrupted hunger hormones. 

This is why I’m not a huge fan of drinking only juice for breakfast. I like to front-load my hydration and protein early in the day to stabilize blood sugar and support hormones. Research consistently shows that higher-protein breakfasts keep us feeling fuller longer. They also help with insulin sensitivity and overall metabolic health compared to carbohydrate-heavy ones. Starting the day with juice alone doesn’t offer those benefits.

That said, a green juice doesn’t have to be sugary or metabolically disruptive.

Green Juice as a Nutrient Boost

I prefer to think of green juice as concentrated nourishment. A well-made green juice is naturally lower in sugar than most juicing recipes. Plus you get a large amount of vitamins, minerals, and phytonutrients that are easily absorbed.

According to the CDC, about 90% of Americans don’t eat enough veggies. Even with the best intentions, getting several cups of leafy greens, herbs, and hydrating vegetables into meals every single day is a challenge. Green juice is an easy way to get more veggie nutrition without all of that chewing. 

Another benefit is hydration. Green juices contain potassium, magnesium, sodium, and trace minerals that help water actually move into cells. This is why many people find green juice more hydrating than plain water alone. Proper hydration isn’t just about fluid, it’s about electrolytes, and vegetables naturally provide them in balanced amounts. 

Of course, eating whole fruits and veggies is still important!

Juicing vs. Smoothies: Why Both Have a Place

I love smoothies, especially ones that combine fruit, vegetables, protein, and healthy fats. They’re filling, support healthy blood sugar, and taste refreshing. Sometimes drinking a thick smoothie feels like too much though. It can be heavy, especially if digestion is sluggish or appetite is low. Juicing is a great alternative.

By removing most of the insoluble fiber, you’re able to get the nutrients without getting full so fast. Vitamins and antioxidants are absorbed quickly in liquid form since our body doesn’t have to work as hard to digest them. For someone recovering from illness, dealing with low appetite, or just looking for an easy nutrient boost, juicing can be incredibly helpful.

Juicing isn’t better than blending, it’s just different. Smoothies are more complete and filling. Juices are lighter and more concentrated. Having both tools gives you flexibility instead of forcing one approach to fit every situation. 

Hydration at the Cellular Level

Hydration is about more than drinking enough water. Our cells need minerals for proper fluid balance, nerve signaling, and muscle function. When we don’t have enough minerals, water doesn’t hydrate as effectively.

Vegetables like celery and cucumber are naturally rich in electrolytes, especially potassium and sodium. Coconut water adds additional potassium and small amounts of magnesium. Together, these ingredients support cellular hydration.

Studies on electrolyte balance show that fluids with minerals are retained better than plain water, especially during physical activity or periods of stress. While green juice isn’t a replacement for water, it can be a meaningful complement to hydration. Especially for anyone struggling to drink enough fluids throughout the day.

The Benefits of Green Juice Ingredients

I’ll get to the actual recipe in just a second, but first I wanted to explain why I chose these ingredients. You’ll notice there’s a whole lot of veggies and not a lot of fruit here. And the fruits I do use are naturally very low in sugar. This combination offers hydration, micronutrients, antioxidants, and gentle digestive support.

Celery

I’m a big fan of celery juice even by itself. Celery is high in water, potassium, and sodium, which is great for hydration and electrolyte balance. Unlike conventional sports drinks, celery provides these minerals in a whole-food form our body recognizes and uses more efficiently. It’s great for anyone who feels dehydrated despite drinking water. 

Celery also has antioxidant flavonoids like apigenin and luteolin, which have been studied for their anti-inflammatory effects. You’ll also get vitamins A, C, and K, calcium, and iron with celery. 

Cucumber

Next to celery, cucumbers are one of the most hydrating vegetables, with over 95% water content. They also provide small but meaningful amounts of potassium and vitamin K to support fluid balance and normal blood clotting. Their high water content also helps dilute some of the stronger flavors in green juice.

Beyond hydration, cucumbers have antioxidants like cucurbitacins and flavonoids. Researchers have found that the compounds in cucumbers have anti-inflammatory, antimicrobial, anticancer, and antidiabetic effects. Plus, cucumber is just so refreshing. 

Green Apple

Green apples add just enough natural sweetness to balance out the bitter greens without adding too much sugar. Compared to sweeter apple varieties, green apples are lower in fructose and have a more gradual impact on blood sugar when used in small amounts.

They also have polyphenols like quercetin, an antioxidant that helps support the immune system. Not only does quercetin show anti-cancer activity, but it’s also antiviral and supports healthy blood vessels. And with potassium, B vitamins, and vitamin K, it’s a delicious and healthy addition to green juice. 

Kale

Most green juice recipes feature leafy greens like spinach, kale, or chard. Kale is really nutrient-dense, providing vitamins A, C, and K, along with folate and manganese. These nutrients support immune function, collagen production, and normal blood clotting, all of which are essential for overall health.

More importantly, kale is low in oxalates compared to greens like spinach and Swiss chard. It also has calcium, which can bind to oxalates in the digestive tract and reduce absorption. Not everyone has issues with high oxalate foods, but over time, especially in large amounts, they can cause problems. 

Lemon Juice

Lemon adds brightness and some tang from vitamin C, a key nutrient for immune health and collagen synthesis. Vitamin C also enhances the absorption of certain minerals, including non-heme iron from plant foods. Lemon stimulates digestion and can help green juice feel lighter, especially when combined with mineral-rich vegetables. 

Some recipes call for adding a peeled lemon to the juicer, but I don’t want to bother with peeling a lemon. Instead, I just cut it in half and squeeze the lemon juice in. It’s also great for grip strength!

Ginger

Ginger has been used for thousands of years to support digestion, circulation, and immune health. Modern researchers have looked at its active compounds for their anti-inflammatory and antioxidant effects. Ginger can help calm nausea and move food from the stomach into the intestines for better digestion. 

It’s warming and I love the bit of a spicy kick it adds.

Parsley

When you think of parsley, garnishes on restaurant plates and hospital food may come to mind. In reality though, parsley is a nutritional powerhouse. It’s rich in vitamins C and K and chlorophyll to support immune function, detox, and blood health.

Parsley also has apigenin, a flavonoid known for its antioxidant and cell-protecting properties. Traditionally, parsley has been used to support kidney and urinary health.

Coconut Water

Optional, but I like adding this sometimes for more electrolytes. Coconut water naturally contains potassium, magnesium, and sodium to support electrolyte balance and hydration. These minerals are vital for regulating nerve signaling, muscle contraction, and fluid movement into cells.

When used in moderation, coconut water gives the green juice an extra hydration boost without overdoing it on the sugar. Be sure to look for coconut water without added sugar!

Oxalates, Greens, and Context 

Oxalates are naturally occurring and found in many plant foods. They often get labeled as bad, but it’s not so simple. We only absorb about 2–5% of oxalates in our food. When we eat high-oxalate foods on an empty stomach or in large amounts (especially in liquid form) absorption can increase to around 10–12%.

Too many oxalates can irritate the kidneys and contribute to kidney stones for some people. It’s also important to note that only about 20% of our oxalates come from food. The rest are produced in our bodies naturally through metabolism and other factors.

This is one reason I prefer kale over spinach in green juice. Kale is low in oxalates and also contains calcium. Oxalates carry a negative charge and readily bind to positively charged minerals like calcium, magnesium, and iron. When we eat oxalate-rich foods alongside calcium, it reduces the absorption.

Who Should Drink Green Juice?

Green juice can be especially helpful for people who:

  • Struggle to eat enough vegetables 
  • Have low appetite or difficulty digesting large meals
  • Need extra hydration and electrolytes
  • Want a light, nutrient-dense snack between meals
  • Want a nutrition boost

Green juice that’s heavy on fruit isn’t ideal for anyone with unstable blood sugar or as a meal replacement. Like most wellness tools, it’s about using it intentionally.

Green Juice Recipe

This delicious green juice has a pleasant earthy taste with a sour twist from the lemon.

  • 4 stalks celery (leaves removed)
  • 1 green apple (cut in quarters)
  • 1 cucumber
  • 6 leaves kale
  • 2 inches fresh ginger
  • ½ cup fresh parsley
  • ½ lemon
  • ¼ cup coconut water (optional)
  • Add all of the ingredients except lemon and coconut water to the juicer.

  • Once the juice is pressed, squeeze in the lemon juice and add the coconut water if desired.

  • Keep in the fridge for up to 72 hours.

Nutrition Facts

Green Juice Recipe

Amount Per Serving (1 serving)

Calories 113
Calories from Fat 9

% Daily Value*

Fat 1g2%

Saturated Fat 0.2g1%

Polyunsaturated Fat 0.4g

Monounsaturated Fat 0.1g

Sodium 127mg6%

Potassium 849mg24%

Carbohydrates 25g8%

Fiber 4g17%

Sugar 15g17%

Protein 4g8%

Vitamin A 5083IU102%

Vitamin C 78mg95%

Calcium 178mg18%

Iron 2mg11%

* Percent Daily Values are based on a 2000 calorie diet.

  • Opt for organic produce as much as possible.
  • Add more or less of certain ingredients to suit your tastes.
  • With my juicer, I found it worked best to add the leafy greens first before adding the other veggies. 

How To Make Green Juice Without a Blender

If you don’t have a juicer, you can still make green juice. Add all of the ingredients to your blender and add just enough water or coconut water to get the mixture to blend. After you’ve blended it to a smooth consistency, use a fine mesh strainer to remove the fiber.

How Long Does Fresh Green Juice Last?

I’m a big fan of bulk meal prepping whenever I can for faster meals. Juicing doesn’t always work well with that strategy though. Low-acid green juices (like this recipe) will last for 24-72 hours in the fridge before they start to go bad. I like to drink it fresh as soon as I make it, but you can make a few days’ worth at a time if you prefer.

Final Thoughts on Green Juice

While green juice does help our bodies detox and function better, you don’t need to go on a full green juice cleanse. It is however a great way to pack in some extra nutrition from fruits and veggies. When used thoughtfully, it can support hydration, boost nutrition, and overall vitality without sabotaging blood sugar. 

Using green juice alongside real food and prioritizing protein and healthy fats helps support the body rather than overwhelm it. Play with the ingredients and the amounts to suit your tastes! 

Are you a fan of green juice? What are some of your favorite ways to use it? Leave a comment and let us know!

Tags: , , ,
Simple, Natural, and Frugal: The Best Homemade Skincare Recipes for Healthy Skin

Simple, Natural, and Frugal: The Best Homemade Skincare Recipes for Healthy Skin

For years, I thought taking care of my skin meant buying more products. More bottles. More steps. More money spent. But the deeper I went into simple living and natural health, the more I realized something surprising:

Healthy skin thrives on simplicity.

Once I started making my own skincare products, my routine became easier, my skin became calmer, and my budget finally breathed a sigh of relief. Homemade skincare isn’t about perfection or luxury—it’s about using real ingredients, reducing toxins, and caring for your body in a way that supports overall health.

This post brings together my best homemade skincare recipes – the ones I’ve relied on again and again. These recipes are simple, affordable, effective, and perfect for anyone who wants a natural beauty routine without the overwhelm.

Don’t fall for fads and ads that slowly convince you that you have to spend a ton of money to get good results with your skin. I’ve been there! The ads are simply doing their job, but you can do the same thing with simple, organic ingredients.

Why Homemade Skincare Recipes are Better for Your Skin (and Your Life)

Before diving into recipes, let’s talk about why homemade skincare fits so well into a simple, natural lifestyle.

Homemade skincare helps you:

  • Avoid unnecessary toxic chemicals and fragrances
  • Reduce clutter in your bathroom
  • Save significant money over time
  • Support your skin’s natural balance
  • Simplify your daily routine

Your skin is an organ. What you put on it matters. When you nourish it with real ingredients and a natural homemade skincare routine without harsh chemicals, it responds with better tone, texture, and resilience. That natural glow that you want? Yes, it’s possible with even easier to get with homemade skincare products.

A Simple Natural Skincare Routine at Home

You don’t need 25 steps. Most skin does best with just:

  1. Step 1 – Gentle Homemade Facial Cleanser (and Toner if desired)
  2. Step 2 – Nourishing Homemade Face Moisturizer
  3. Step 3 – Weekly Exfoliation with a Homemade Sugar Scrub
  4. Step 4 – Any extras as needed like Deodorant and Lip Balm.

Everything below fits into that simple framework. These recipes create easy homemade skincare for beginners, but simple doesn’t mean ineffective.

Like I said above, our skin THRIVES on nourishing simplicity.

1) Gentle Homemade Facial Cleanser for Balanced Skin

Recipe: 5 Organic Homemade Facial Cleansers

Cleansing should clean—not strip. These gentle homemade cleansers remove dirt and makeup while respecting your skin’s natural oils. Win-Win!

Why it’s amazing for your skin:

  • Helps prevent dryness and irritation
  • Supports acne-prone or sensitive skin
  • Simple ingredients you can trust, because you made it!

Many people struggle with breakouts because of an overproduction of oils (hormonal issue), a bacterial buildup from touching the face or having a dirty pillowcase, or an allergic reaction to products such as detergents and makeup.

These recipes simplify everything by working with your skin instead of against it. They cleanse gently and organically.

Instructional tip: Massage gently for 30–60 seconds, then rinse with warm (not hot) water.

You can also try my acne liquid cleanser or my anti-aging liquid cleansers from my shop.

2) Simple Homemade Facial Toner for Balanced Skin

Recipe: Homemade Facial Toner for Acne Prone Skin

A simple homemade facial toner can gently refresh the skin, balance pH, and prepare it for moisture without adding unnecessary steps or products.

Benefits of a homemade facial toner include:

  • Helps remove leftover residue after cleansing
  • Supports skin’s natural pH
  • Calms irritation and redness
  • Closes pores and prepares skin to better absorb moisturizer

Unlike store-bought toners, homemade versions skip alcohol, synthetic fragrance, and harsh preservatives.

I like to use witch hazel, rose water, and aloe. They are wonderful at closing pores and soothing irritated skin. You can use the link above or buy some from my shop.

3) Homemade Face Moisturizer That Actually Works

Recipe: Homemade Face Cream with Rose and Sandalwood

I have perpetually dry skin. I’ve tried every product imaginable before making my own. It’s obviously an internal issue that I’ve been working on, but in the meantime, my shea lotion moisturizers are simply amazing. Not only do they keep my face (and body) moisturized throughout the winter, but it doesn’t clog my pores like so many face creams.

So that being said, this is one of my most foundational recipes — for good reason. Most lotions are full of alcohol and preservatives. This recipe uses beeswax and cocoa butter, which are both a humectant, trapping moisture near the skin.

Why this moisturizer is so effective:

  • Locks in moisture naturally with beeswax (a humectant)
  • Supports skin elasticity (thank you!)
  • No water, no preservatives, no chemicals

Because it’s oil-based, you only need a tiny amount. One batch lasts months, making it incredibly frugal. This is the moisturizer I reach for daily—and it’s replaced every store-bought cream I once relied on.

I have an Anti-Aging Face cream and body lotions in my shop that are so incredibly luxurious!

4) Homemade Sugar Scrub for Glowing Skin

Recipe: 5 Easy Homemade Sugar Scrub Recipes

Sugar is one of the most underrated skincare ingredients. It exfoliates gently while drawing moisture into the skin. There’s a reason your skin feel’s silky smooth after using one.

Why this scrub works so well:

  • Removes dead skin without damage
  • Improves circulation
  • Leaves skin smooth, not tight

This recipe is perfect for face, lips, or body, and it takes just minutes to make. No fancy exfoliants required.

Instructional tip: Use once a week—more is not better when it comes to exfoliation. Also, be careful using in the shower or bathtub! The oils make for a SLIPPERY surface.

Try one with organic sugar and essential oils from my shop.

5) Natural Homemade Deodorant

Recipe: The Best, Easy Homemade Deodorant

This is a really big one! Deodorants can be extremely toxic, and even if you try to buy healthy, most “natural” deodorants still sneak in some toxic ingredients. Switching to a natural homemade deodorant is one of the simplest ways to reduce daily toxin exposure (and I have a number of recipes if you have an aversion to certain ingredients). These recipes really work!

This particular recipe uses coconut oil, baking soda, and arrowroot powder to control odor naturally. Add the essential oil of choice for scent, but you can leave it unscented and it will still work wonderfully.

Why it’s so beneficial:

  • No aluminum or artificial fragrance
  • Gentle and customizable
  • Supports the natural detox process but allowing you to sweat lightly
  • Does not clog lymph nodes

This recipe fits perfectly into a healthy, natural lifestyle without unnecessary toxins like aluminum.

Need a non baking soda recipe? Try this one.

If you’d like to buy a baking soda or non-baking soda version, you can get them in my shop.

6) Simple Homemade Lip Balm

Recipe: Easy Lip Balm Recipe with Herbs and Essential Oils

Most store-bought lip balms actually make lips drier over time. This simple homemade version heals instead of masking the problem.

Why this lip balm works:

  • Nourishes deeply with natural oils
  • No petroleum or synthetic ingredients
  • Safe for kids and adults

This is a great beginner recipe and a reminder that skincare doesn’t need to be complicated to be effective. If you need to leave out the herbs, because it just seems overwhelming, that’s ok! It still makes a wonderful lip balm.

The cocoa butter and beeswax are a humectant that traps moisture close to the skin. They naturally heal lips heal and hydrate while protecting from wind and cold dry air.

I have clear and red tinted lip balm for that small color boost that I sell in my shop.

How Homemade Skincare Recipes Simplify Daily Life

One of the biggest benefits of making your own skincare is how much mental space it frees up. Fewer products. Fewer decisions. Less stress.

Instead of chasing trends, you build a routine that:

  • Supports long-term skin health
  • Fits naturally into your day
  • Aligns with frugal, intentional living

Your beauty routine should align with your values.

Simple living isn’t about doing without—it’s about choosing what truly matters.

Every recipe above costs just a fraction of commercial products. Many use ingredients you already have at home. Over time, the savings add up!

Final Thoughts: Start Small and Keep It Simple

If you’re new to homemade skincare, don’t try everything at once. Start with:

  • One cleanser
  • One moisturizer

Give your skin time to adjust. Simplicity allows your body to do what it was designed to do.

Homemade skincare isn’t about perfection—it’s about stewardship, health, and intentional living (including what you eat and drink). And that’s what simple life is all about.

Tags: , , , , , , ,
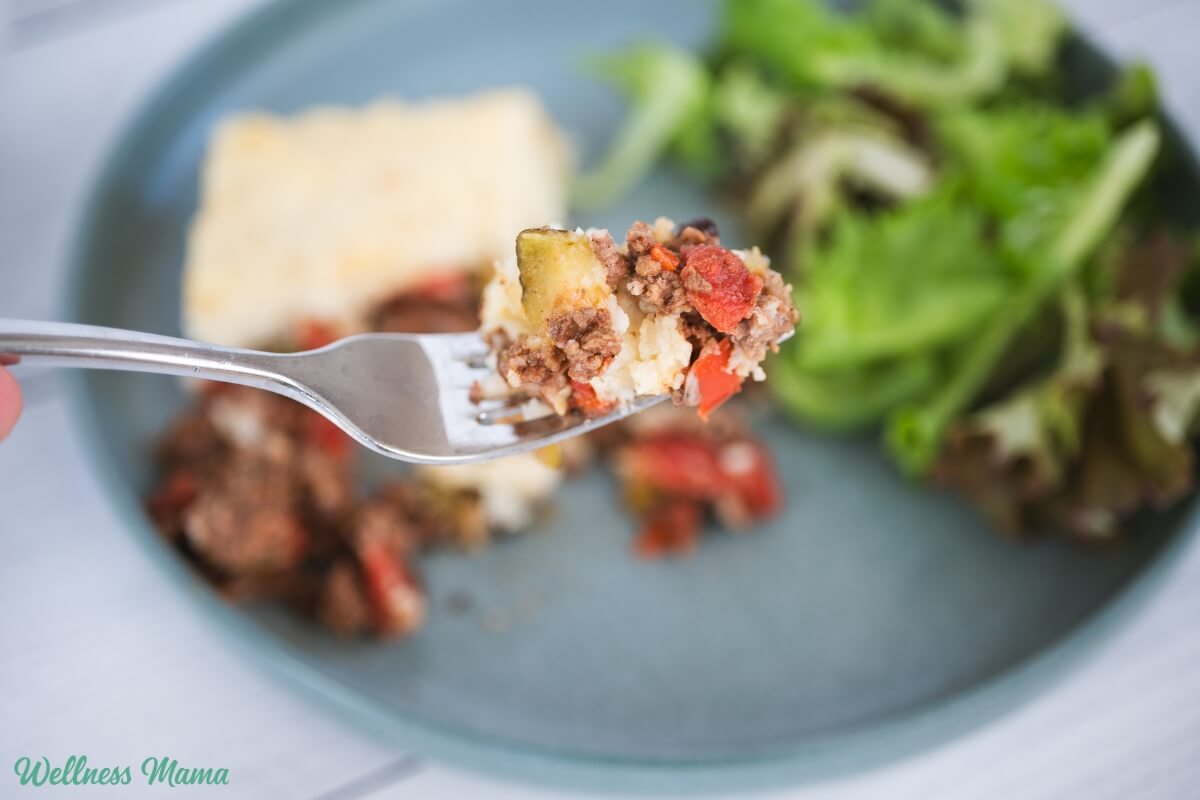
Southwest_Shepherds Pie

Southwest Shepherd’s Pie Recipe

Growing up in Texas, I have a special place in my heart for Tex-Mex recipes. Simple dishes like these Tex-Mex lettuce wraps and southwest shepherd’s pie make a regular appearance on our family menu. It’s a delicious twist on the classic shepherd’s pie recipe.

It’s similar to a taco casserole, but with a creamy potato topping. You can also make this easy Southwest shepherd’s pie recipe ahead of time and pop it in the oven for an easy supper. The toppings are customizable, but cilantro and chopped jalapenos are some of our favorites. 

Southwest Shepherd’s Pie Ingredients

This recipe uses a variety of southwestern style ingredients. Instead of the classic carrots, celery, and peas, we’re using zucchini, tomatoes, and bell peppers. And the spices get an upgrade too with spicy oregano and chili powder, flavorful cumin, and smoky paprika. 

You can even choose your favorite potato for the topping. I like using Russet potatoes since they’re more starchy and give it a good texture. Creamy yellow or red potatoes work well too. Or switch it up and try a southwestern sweet potato shepherd’s pie with orange or white sweet potatoes. 

For the meat, I use grass-fed ground beef. It has a better nutrient profile than grain-fed beef (plus it’s overall healthier). I also like to cook ground beef in bulk at the beginning of the week to make meal prep easier. If you prefer, ground chicken or ground turkey work just as well. 

Why You’ll Love Southwest Shepherd’s Pie

In addition to the delicious flavor, I love that this recipe has 21 grams of protein per serving. It’s cozy and satisfying for chilly nights when I want something warm for supper. Even though there are a few steps involved, it pulls together fairly quickly with only 20 minutes of prep time. 

Sometimes I’ll make a double batch and freeze some for later. Simply place the completely cooled casserole in the freezer (in a freezer-safe container). Once you’re ready to reheat, let it thaw and then pop it in the oven until warmed through and bubbly. Southwest shepherd’s pie tastes even better the next day if you have leftovers. This gives the ingredients some more time to meld. 

Here’s how to make it!

Southwest Shepherd’s Pie

For the Topping

  • 2 medium potatoes of choice (peeled and chopped)
  • 2 TBSP grass-fed butter (or avocado oil)
  • ¼ cup unsweetened almond milk (or milk of choice)
  • ½ tsp garlic powder
  • salt to taste
  • Preheat the oven to 375°F.

  • Boil the chopped potatoes in salted water until soft, about 12–15 minutes. Drain and mash with butter, almond milk, garlic powder, and salt. Set aside.

  • Brown the meat in a large skillet over medium heat.

  • Add onion, garlic, bell pepper, and zucchini and sauté 5–7 minutes until softened.

  • Stir in spices, tomatoes, and black beans. Add broth if the mixture looks dry and simmer for 5 minutes.

  • Transfer the filling to a greased 9×9 or medium casserole dish. Spread the mashed potato mixture evenly on top.

  • Bake for 20–25 minutes, until bubbling and lightly golden on top.

Nutrition Facts

Southwest Shepherd’s Pie

Amount Per Serving (1 serving)

Calories 298
Calories from Fat 108

% Daily Value*

Fat 12g18%

Saturated Fat 6g38%

Trans Fat 1g

Polyunsaturated Fat 1g

Monounsaturated Fat 4g

Cholesterol 59mg20%

Sodium 480mg21%

Potassium 793mg23%

Carbohydrates 27g9%

Fiber 5g21%

Sugar 4g4%

Protein 21g42%

Vitamin A 1324IU26%

Vitamin C 35mg42%

Calcium 79mg8%

Iron 4mg22%

* Percent Daily Values are based on a 2000 calorie diet.

  • Top and serve: Garnish with cilantro, avocado, or a dollop of Greek yogurt.
  • Use any potato you’d like here. Russet, sweet potatoes, or white sweet potatoes are all great options!

Customize the Toppings

My kids like to choose their own toppings when I make this. You can even make a toppings bar (kind of like a taco bar). Have a few options on the table for the family to choose from, so everyone can tweak the flavors to their liking. Here are some ideas:

  • A dollop of sour cream or Greek yogurt
  • Pickled onions
  • Chopped cilantro
  • Chopped bacon pieces
  • Avocado slices or guacamole
  • Extra cheese
  • Sliced black olives
  • Chopped jalapeno or poblano peppers

What are some of your favorite casserole-style dishes to make? Leave a comment and let us know!

Tags: , , ,
daily habits

The Daily Health Habits I Can’t Live Without

For a long time, I believed feeling my best required complex routines and constant optimization. Instead of spreadsheets to track all my supplements, I’ve learned that health is built through simple, daily habits. While I don’t follow them perfectly and I vary as needed, there are some things that I consider to be my non-negotiables.

When people ask about my daily habits, they often expect advanced biohacks or expensive tools. The reality is much simpler. Most of what I do is free or low-cost and rooted in nature. Light, minerals, movement, sleep, and time outdoors aren’t trends, but foundational needs. This post breaks down the habits I practice most consistently and explains why they matter.

The idea isn’t for you to copy everything I do exactly, but see what resonates with you. Use it as a springboard to create your own healthy routines.

Why I Rely On Minerals (and So Do You)

Hydration is one of the few things I consider close to a true non-negotiable, but it’s not just about drinking more water. You might have heard that we’re 80% water, but actually we’re 80% salt water. Our bodies are intricate electrical systems that need minerals for cellular communication, nerve signaling, muscle contraction, and energy. Water alone won’t do the job.

Our ancestors drank from streams and rivers that washed over rocks and minerals, but our modern water sources are less ideal. I’ve noticed a huge difference in my hydration since adding minerals and salt first thing in the morning.

After hours of sleep, the body naturally wakes up mildly dehydrated from water lost through breathing and perspiration. I rotate different sources, including mineral water, electrolytes, or water with plenty of quality salt. I even travel with my own salt and minerals!

Most of us are mineral deficient from depleted soil and filtered water. Add sweating, sauna use, or exercise, and those needs increase significantly. I also prefer to front-load hydration earlier in the day so I’m not trying to catch up at night. This supports better sleep and steadier energy throughout the day.

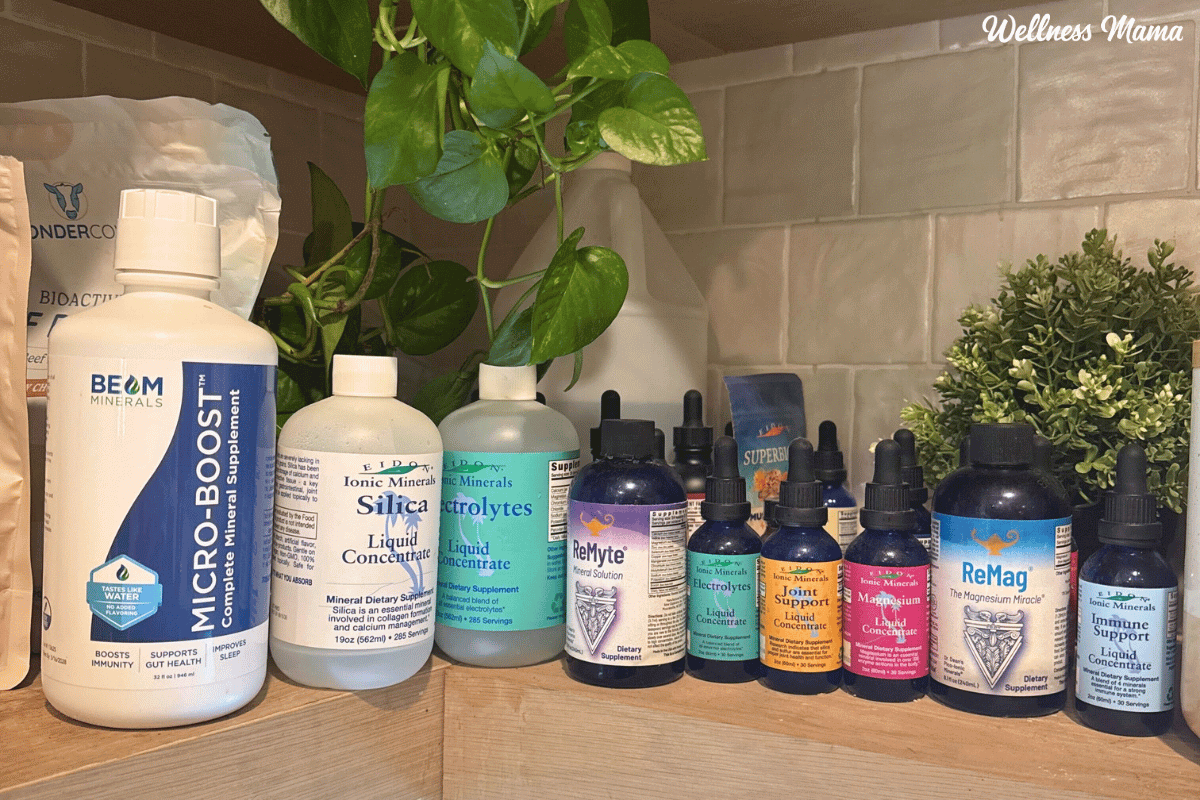
The Minerals I Take Daily

I mention several different mineral sources on the podcast and blog and that’s because I like to rotate my minerals. Right now my go-to minerals are :

Supplements I’m Loving Right Now

I don’t take supplements every single day, and I don’t even take the same ones every day. I’ll reach for what I feel like my body needs in the moment. There are a few however that I do take most days. While my genetic testing showed these are especially helpful for me, they’re also great for most people. I rotate others as needed, but these are the steady ones.

• Phosphatidylcholine (for methylation, nervous system health, and focus)
• Glycine (for sleep, blood sugar support, collagen production)
• Inositol (for mood, metabolic support, and restorative sleep)

Getting Morning Sunlight to Set Circadian Rhythm

Morning light exposure is one of the most impactful daily habits I’ve adopted. As soon as I roll out of bed and grab my jar of salt water, I step outside for some morning sunlight. If you can’t get out at sunrise, aim to get outside within an hour of it. I’m not staring at the sun, just being outdoors and letting natural light do its work.

Light exposure regulates circadian rhythm, cortisol patterns, and hormone signaling. Morning light also supports melatonin production later in the day, which directly impacts sleep quality. Even on cloudy days, outdoor light is far stronger and more beneficial than indoor lighting.

I often habit stack this with hydration and grounding, standing barefoot outside while drinking mineral water. When possible, I also try to see sunrise and sunset. These times offer natural red light that supports mitochondrial health, skin health, and eye health.

Light is one of the simplest and most overlooked health tools available, and it’s completely free.

Make Sleep a True Priority

Quality sleep is foundational. I’ve never interviewed a single health expert who said sleep doesn’t matter. Without enough quality sleep, every other aspect of our health suffers. But a good night’s sleep starts long before bedtime.

Morning light exposure, hydration, and daytime movement all support better sleep at night. Our sleep environment also plays a big role. I prioritize darkness with full blackout shades and eliminate artificial light exposure in the bedroom. I literally can’t see my hand in front of my face once the shades go down!

Temperature is another key factor. Sleeping in a cooler environment supports deeper and longer sleep. Instead of cooling the entire house, I use my ChiliPad to cool my bed and mimic natural sleeping conditions. I notice a big difference when I travel and don’t have it with me!

My Favorites For Sleep

While many of my health habits are free, my sleep area and nighttime routine is one area I’ve invested a little more in. And things like a sound machine, bedroom air filter, and blackout shades are things I can set up once and just keep using. It’s an easy way to automate my health habits.

It’s completely optional, but I’ve also been liking Tranq Dart from Wizard Sciences at night for winter sleep. Sometimes I’ll alternate this with my other favorite evening beverage, Cacao Calm.

Better Breathing With Mouth Taping

This is another nighttime habit, but deserves it’s own mention. Mouth taping is one of my more unconventional habits, and it’s not for everyone. It helps support nasal breathing during sleep, which promotes slower, deeper breaths and better oxygenation.

Chronic mouth breathing can contribute to dry mouth, cavities, brain fog, sleep issues, and so much more. Gently taping the lips closed encourages nasal breathing and I notice I wake up more refreshed. You can get more details on mouth taping (and if you should try it) here.

Grounding For a Happier Nervous System

Grounding (aka earthing) means spending time barefoot on grass or dirt. It’s another daily staple in my healthy habit routines. Whether it’s grass, dirt, or sand, direct contact with the earth has a calming effect on the nervous system and helps align our body’s natural electrical signals. These can easily become disrupted from too much time indoors and using devices (like cell phones).

Research suggests grounding may help regulate cortisol rhythms, reduce inflammation, and improve heart rate variability over time. Subjectively, it feels grounding and stabilizing, especially when paired with sunlight and fresh air. I’ll often ground in the mornings and evenings when I’m getting light exposure and it’s another free habit.

Using Hot and (Sometimes) Cold Therapy

Sauna is one of my favorite and most powerful wellness tools I use. Heat exposure creates a short-term stress that teaches the body to become more resilient. Regular sauna use is linked with cardiovascular benefits, better detox, and a longer life span.

I aim for sessions around 20 minutes and use my sauna several times per week whenever possible. Cold exposure can also be beneficial, either on its own or paired with sauna in contrast therapy. While this one isn’t free, it can be a great addition to your health routine. If I could only keep one wellness modality in my home, sauna would be it.

Starting the Day With Protein

After hydration and light exposure, I prioritize morning protein. Getting at least 40 grams of protein early in the day helps stabilize blood sugar, support muscle health, and promote steady energy.

From a hormonal perspective, protein-first mornings send safety signals to the body. This helps reduce junk food cravings later in the day and help avoid energy crashes. I’ve noticed I focus better and feel fuller when I get morning protein in.

It’s not about eating the same foods on repeat, but prioritizing nourishment so our body is getting those safety signals.

Timing Is Everything

When possible, I try to stop eating around sunset. This isn’t a strict rule, and I recognize it doesn’t work for everyone or every location. For me, eating earlier supports better digestion and deeper sleep.

By aligning meals with daylight hours this works with our circadian biology. It gives the body a break from digestion and instead allows more energy for repair and recovery during sleep. Even shifting dinner a bit earlier so that you’re done eating 3-4 hours before bed can make a difference.

This is one habit that’s flexible and depends on the seasonal rhythms.

Why I Hang (Almost) Every Day

Hanging from a bar or sturdy surface is one of the simplest movement habits I practice. Even short intervals throughout the day can decompress the spine, stretch the shoulders, and support grip strength.

Researchers are increasingly recognizing how grip strength plays a big role in our longevity and overall health. Hanging supports joint health, posture, and functional movement without requiring a formal workout. I aim for a total of about three minutes per day, broken up as needed. This habit fits easily into daily life and offers benefits far beyond the time invested.

Getting Red Light From Nature First

Red light therapy devices can be helpful, but nature offers a free version every day at sunrise and sunset. This gentle light supports mitochondrial health, skin health, and circadian rhythm regulation.

I have red light panels that I use often, but I still prioritize natural red light whenever possible. This keeps the focus on foundational habits rather than tools or technology. Simply being outside at sunrise and sunset is an easy way to get the free benefits of red light. And again, I’ll habit stack this with grounding and minerals!

I prioritize the simple things, but I’ve also noticed benefits from other wellness tools. I love my acupressure mat for muscle tension relief, and things like PEMF and BioCharger tech. While I don’t consider them essential basics, they’re a nice addition to a solid health routine.

These tools are layered on top of foundational daily habits and the basics matter far more than any advanced tech. You can still be really healthy without access to specialized equipment.

Final Thoughts on Building Your Own Daily Habits

Over time, I’ve found consistency matters more than intensity. Most of the habits I rely on are simple and accessible. They don’t require perfection or rigid schedules but instead support the body’s natural rhythms day after day.

Health builds quietly, much like compound interest. The small choices you make most days shape how you feel over time. You don’t need to adopt every habit at once. Start with baby steps and build from there. Often, the simplest daily habits create the biggest and most lasting change.

Which health habits do you rely on to feel your best? Any you would add to this list? Leave a comment and let us know!

Tags: , , ,
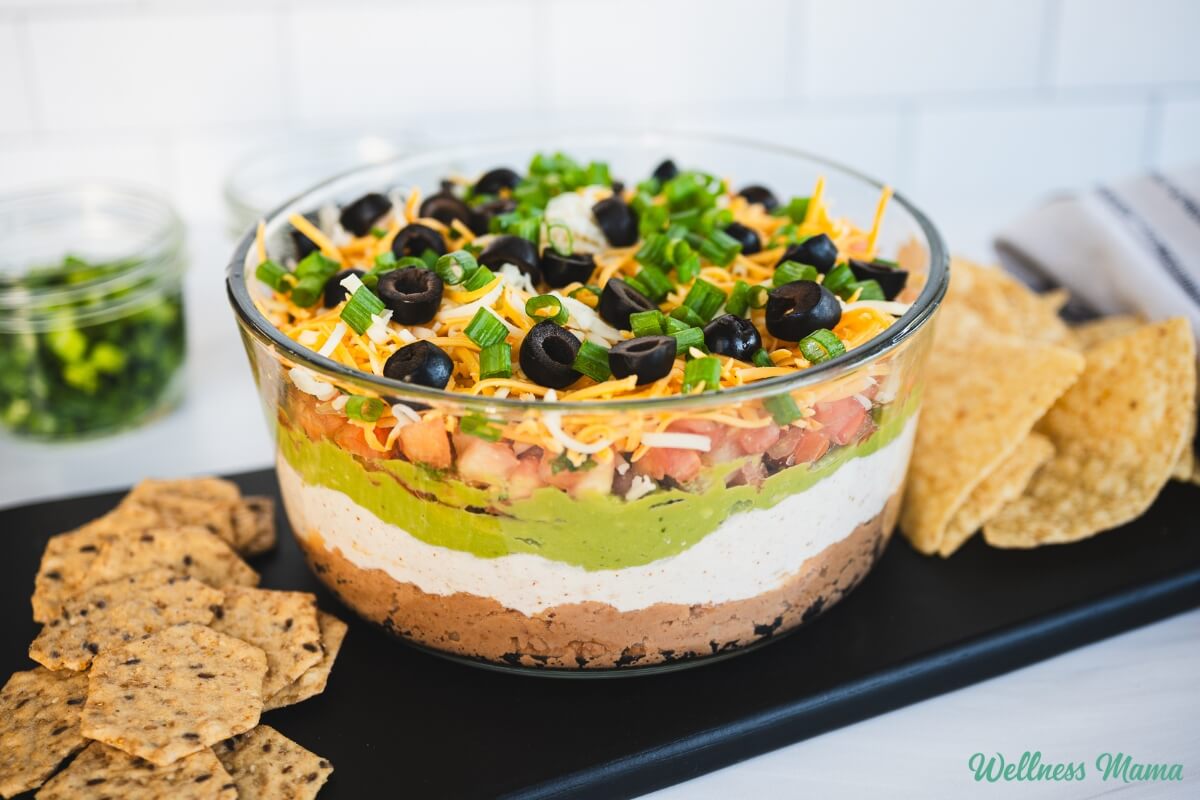
7 layer dip

7 Layer Dip (Protein Packed)

While I have my favorite stand-by appetizers, I’m always looking for something new to try. Especially when it involves making a traditional dish even healthier. This 7 layer dip recipe is packed with protein thanks to a few, easy ingredient swaps. Serve it with chips, crackers, or veggies for the perfect snack or appetizer. 

I brought this dip to a gathering recently and it was a big hit judging by the empty dish I brought home. My kids also love snacking on it and I’ll often make it ahead of time for easy meal prep.

7 Layer Dip Ingredients

So what’s in a 7 layer bean dip recipe? While there have been some different variations over the years, the basic ingredients have largely stayed the same. What’s in 7 layer dip depends on who you ask, but there’s usually refried beans, sour cream, cheese, guacamole, olives and salsa or pico de gallo. 

My recipe is a 7 layer dip with taco flavors and uses Greek yogurt and cottage cheese instead of sour cream. This decreases the fat (even though I’m pro-healthy fats!), but it also really ups the protein. 

How to Make a 7 Layer Dip

The order of the ingredients doesn’t matter too much, but of course you’ll want toppings like olives and green onions on the top. Each layer is spread evenly into a clear dish to showcase the individual layers. The traditional 7 layer dip ingredients are ordered as follows:

  • Refried beans
  • Sour cream (or in this case cottage cheese and Greek yogurt)
  • Guacamole
  • Shredded cheese
  • Tomato (I use pico de gallo) 
  • Green onion 
  • Olives

This creates a beautifully layered dip that looks great at any gathering. It’s simple enough to keep in the fridge for snacktime too. 

And if you want to increase the protein even more you can add meat. Ground beef works really well and can go on top of the bean layer. I like adding meat when I make this ahead for a simple lunch. Fresh ingredients make for great flavor!

Here’s how to make the ultimate 7 layer dip that’s packed with protein.

7-Layer Protein Dip

A healthy, high-protein twist on the classic 7-layer dip! Perfect for game day, snacks, or a quick protein boost. Kid-approved and full of flavor.

  • Spread the refried beans evenly on the bottom of a serving dish.

  • Combine cottage cheese and Greek yogurt with taco seasoning. Spread this mixture evenly over the beans.

  • Add guacamole by spreading over the protein layer.

  • Layer pico de gallo evenly on top of the guacamole.

  • Sprinkle shredded cheese over the pico layer.

  • Spread black olives evenly over the top.

  • Sprinkle sliced green onions over the dip.

Nutrition Facts

7-Layer Protein Dip

Amount Per Serving (1 serving)

Calories 173
Calories from Fat 90

% Daily Value*

Fat 10g15%

Saturated Fat 3g19%

Trans Fat 0.002g

Polyunsaturated Fat 1g

Monounsaturated Fat 5g

Cholesterol 12mg4%

Sodium 599mg26%

Potassium 288mg8%

Carbohydrates 14g5%

Fiber 4g17%

Sugar 6g7%

Protein 9g18%

Vitamin A 407IU8%

Vitamin C 7mg8%

Calcium 116mg12%

Iron 1mg6%

* Percent Daily Values are based on a 2000 calorie diet.

Optional Toppings

Technically this is a 7 layer dip, but who’s counting? If you want to add some more toppings for more flavor, here are a few ideas.

What are some of your favorite appetizer recipes? Leave a comment and let us know!
Tags: , , ,
health risk assessment

What My Health Risk Assessment Showed Me (and How It Can Help You Too)

I used to think that serious disease was either genetic, unavoidable, or something that appeared suddenly later in life. You went to the doctor when something felt wrong, ran tests, and reacted from there. I never thought that there was a better way to do health risk assessment. 

Over the last decade, that view has changed dramatically. I’ve since learned that most of the diseases that impact us the most are not sudden at all. They develop quietly over years or even decades, often without obvious symptoms. What’s different now is that we finally have tools that allow us to see those risks early and respond long before our body reaches a crisis point.

Lately I’ve been taking a deep dive into data backed, noninvasive ways to identify disease risk early and how to actually reduce that risk. It’s something I’ve personally explored, invested in, and used. I truly think it represents a major shift in how we think about our health.

The Four Horsemen 

You might think chronic disease is really diverse and complicated, but there are a lot of similarities. Just four health categories account for about 85% of deaths over age 50. Often referred to as the four horsemen they include heart disease, cancer, metabolic diseases (like type two diabetes), and Alzheimer’s dementia. 

Even more concerning is that the rates of all four are increasing. Not just in older adults but in younger populations and even children. So what do all of them have in common?

They’re not sudden and they don’t appear overnight. Instead, they develop slowly as the result of a build up of lifestyle choices, environmental exposures, and biological changes. Symptoms can start to slowly develop and creep up on us years or decades before a diagnosis. 

Despite this, most of our medical system is built around reaction rather than prevention. We typically wait until a disease is so far along that we can get a diagnosis before taking action. By then our body has often been stressed and sending us subtle (or not so subtle) signals for a very long time. I was struggling with hypothyroid symptoms for many years and felt off, yet couldn’t get a diagnosis until I’d hit a crisis point. 

Understanding this shared pattern is important because it reframes disease not as an inevitable outcome, but as a process. And when we can see the process early through a health risk assessement, we have a chance to change its direction.

Why Waiting For Symptoms Doesn’t Work

One of the biggest challenges of chronic disease is that the early stages are often subtle. There may be quiet changes happening beneath the surface, but nothing that clearly signals a problem.

For heart disease, the first symptom for many people is a heart attack. And about half of heart attacks happen in people who had no prior warning signs. Cancer is frequently detected only once it’s progressed to a later stage, even though we know outcomes are dramatically better when it’s found early. Alzheimer’s disease can begin twenty to thirty years before noticeable memory loss, yet we rarely screen for risk during that window.

Standard screening approaches don’t do much to address this gap either. Heart disease risk is often calculated using a narrow ten year model. Cancer risk for the average person is not routinely assessed at all. And Alzheimer’s risk typically isn’t evaluated unless someone is already showing symptoms. 

Many people have experienced the frustration of knowing something feels off, seeking answers, and being told everything looks normal. Years later, a diagnosis appears that confirms what the body had been signaling all along. This isn’t a failure of intuition. It’s a limitation of a system that wasn’t designed to catch early risk.

The Most Empowering Truth About Disease Risk

When I realized we can often change our chronic disease risk, it completely changed how I think about health. Depending on the condition, we can influence about 60 and 90 percent of our disease risk. For cancer specifically, less than 10 percent of risk is purely genetic. The rest is shaped by lifestyle, environment, and daily habits over time.

That means risk isn’t fixed, it’s flexible. Early detection makes an enormous difference. When cancer is caught early, survival rates can approach 90 percent. When it’s found late, survival rates drop dramatically. Similar patterns exist for heart disease and cognitive decline.

Lifestyle isn’t just a vague concept here, it’s measurable. Small choices made consistently compound over time, either increasing or decreasing risk. This is where early, personalized data becomes so powerful. It helps identify which levers matter most for each individual instead of relying on broad, one size fits all advice.

How Data and AI Are Changing Early Detection

Until recently, assessing early disease risk at an individual level wasn’t realistic. Each condition is influenced by dozens or even hundreds of variables that interact and change over time. No human could track or interpret that complexity accurately.

With advances in data analysis and AI, that’s changed. Large datasets from thousands of studies can now be analyzed together to identify meaningful patterns and calculate personalized risk.

This is why I became involved with a company called Catch. They use data from over ten thousand studies to analyze hundreds of individual variables and generate personalized lifetime cancer risk profiles. These profiles show which factors increase risk, which reduce it, and which changes are likely to have the greatest impact. Even though this just covers cancer right now, it offers insight into positive changes we can make for overall better health too. 

They also help prioritize screening in a more personalized way, focusing on what actually matters for an individual instead of just age based guidelines. This approach doesn’t replace medical care, but it adds a layer of insight that simply didn’t exist before.

Lifestyle Factors That Quietly Shape Risk

One of the most fascinating parts of reviewing this kind of data is seeing how specific lifestyle factors influence risk in ways that aren’t always intuitive.

For example, adding even a modest amount of extra vegetables to our daily diet is linked with a lower risk of multiple cancers. Eating oily fish once per week is linked to lower stomach cancer risk. Adding just one more serving of fruit a day, especially berries, is linked with a lower risk of lung cancer risk.

Some associations are more surprising. Drinking coffee regularly (not full of sugar and vegetable oils!) is linked to a lower risk of several cancers. A history of asthma or allergies appears to reduce the risk of certain brain cancers, possibly due to differences in immune system activity.

On the other hand, certain risk factors often go unnoticed. Head injuries and concussions can significantly increase lifetime brain cancer risk. Radon exposure in homes is a major contributor to lung cancer that many people never test for. Poor sleep, circadian disruption, and indoor air pollution are all linked to higher disease risk.

When these factors are viewed together, it becomes clear that risk is rarely random. It’s the cumulative result of small inputs adding up over time.

What My Own Risk Assessment Revealed

Using a personalized health risk assessment model taught me several things I didn’t expect. Despite having a family history of cancer, my overall risk was lower than the population average. That reinforced how much lifestyle and environment matter.

I also learned that having children at a younger age, having multiple children, and breastfeeding all reduced my risk for certain cancers, including breast and uterine cancer. My blood type slightly increased risk for a few cancers, something I had never considered. My height increased risk marginally (something I can’t change), while my activity level offset that increase.

Some recommendations were simple and practical. Increasing vegetable intake, especially fermented vegetables, adding more colorful plant foods, and increasing weekly intake of oily fish were all identified as meaningful levers for me.

What stood out most was how achievable these changes felt. I didn’t need to overhaul my life. A few targeted adjustments could meaningfully reduce lifetime risk, which made the process feel empowering rather than overwhelming. And these were already things I was doing, I just decided to bump it up a little. 

Why Nuance and Personal Discernment Matter

While I found Catch to be very insightful, there was one area where I disagreed with my health risk assessement. When it comes to sun exposure, sunscreen, and skin cancer, I have a different opinion than some. Many health experts suggest sunscreen helps prevent or reduce skin cancer risk, but there’s more to it.

The data does not show a clear link between moderate, non-burning sun exposure and increased skin cancer risk. It does show a strong link between sunburn and cancer risk. Healthy vitamin D levels are linked with the reduced risk of several cancers, and for me personally, sunlight is essential for maintaining those levels. Sunlight is also crucial for so many other healthy biological functions in our body!

This isn’t a recommendation for or against sunscreen. It’s an example of why data should guide curiosity, not replace discernment. Tools like this provide information, but it’s still important to ask questions, understand context, and listen to your own body. So even though Catch said my risk of skin cancer is higher than average due to my health sun exposure, I respectfully disagree. 

Taking a Peak at Heart Disease and Alzheimer’s

What excites me most about this approach to health risk assessment is that it doesn’t stop with cancer. The same principles apply to heart disease and Alzheimer’s dementia.

Heart disease risk isn’t fully captured by cholesterol numbers alone. Inflammation, calcification, metabolic markers, mineral balance, and even light exposure play significant roles. Half of people who experience heart attacks have normal LDL levels, which highlights how incomplete our current models are.

Alzheimer’s disease begins decades before symptoms appear, and lifestyle is one of the strongest drivers of risk. AI driven models can identify early patterns long before traditional screening methods would detect a problem.

This is where proactive health truly becomes protective health, giving us time and space to make changes that matter.

Final Thoughts on Health Risk Assessment 

We don’t have a shortage of health information, but a lack of clarity and personalization. Generic advice and fear based messaging leave many people overwhelmed or disconnected from their own bodies. Personalized data helps bridge that gap by showing which factors actually matter for each individual and where small changes can have the greatest impact.

The good news is that our health future isn’t random. It’s shaped daily by choices, environments, and habits that compound over time and that are largely within our control. Early detection gives us the opportunity to change outcomes before disease takes hold.

That’s not to say that if we eat healthy and try to avoid toxins that nothing bad will ever happen to us. However, there is a lot we can do to mitigate that risk, and personalized and actionable health recommendations have never been more available. 

When we change and tweak our habits, we change our future health story. 

What steps and daily habits do you take to lessen your chronic disease risk? Have you ever used a health risk assessment tool before? Leave a comment and let us know!
Tags: , , ,
herbal throat spray

DIY Herbal Throat Spray Recipe

Once upon a very terrible time, all my kids got a stomach bug at the same time… while I was gone. We don’t get sick often, but it was terrible and I wasn’t on hand to use all of our natural remedies.

Thankfully, that was the first and last stomach bug they’ve all gotten at once. However, at least one child gets a stuffy nose or cough sometime during the winter. Or I dust my closet and get a cough/congestion/nasal drip for a few days.

In those cases, I like to have this herbal throat spray on hand. It’s great for sore throat, cough or congestion.

Herbal Throat Spray Ingredients

This herbal throat spray is essentially a strong herbal tincture mixed with raw honey. The herbs provide both immediate relief and longer-lasting benefits for beating illness. You can use many different immune boosting and throat soothing herbs, but I prefer the following:

  • Echinacea root – Naturally antimicrobial and anti-inflammatory. Eases sore throat and cough and supports the immune system. Helps soothe throat pain and is great for strep throat or tonsillitis in a tea or throat spray. 
  • Ginger – Warming and stimulates circulation. Its antimicrobial and helps thin mucus and get it out of the body. Helps ease inflammation, pain, and muscle spasms. Ginger also stimulates white blood cells, helps prevent viruses from attaching to cells, and destroys viruses. 
  • Marshmallow root – A soothing demulcent herb that coats and soothes inflamed, dry, or damaged tissues. Reduces inflammation, supports white blood cells, and is an expectorant. 
  • Elderberry – Traditionally used for throat inflammation and may help reduce swelling in the mouth and throat. It also supports better drainage, less nasal congestion, and is an expectorant. It’s especially great for cough and congestion from viral infections. 
  • Thyme – Not just for Italian food! Thyme herb is excellent at breaking up stuck congestion and mucus in the lungs and getting it out. It’s antimicrobial, anti-inflammatory, and helps with better breathing. 
  • Peppermint – This adds a refreshing flavor and is warming and stimulating when used internally. It’s antimicrobial and helps fight a variety of viral, bacterial, and fungal infections. 
  • Cayenne – Cayenne is warming, stimulating, and boosts circulation to improve healing. It’s been traditionally used for sore throats, coughs, and illness prevention. It does add a spicy kick though, so reduce or skip if preferred. 

You don’t need every single herb on this list to make an herbal throat spray. If you don’t have some of them on hand, then just use more of the ones you do. I make an herbal tincture with the herbs and then mix with raw honey for a strong spray. When it’s made this way the herbal throat spray will last for months in the refrigerator.

Premade Herbal Throat Spray

Don’t feel like making it or don’t have the herbs you need? I also like this pre-made herbal throat spray that includes echinacea and propolis. This propolis throat spray is also a family favorite. 

Herbal Throat Spray Tincture

To make the tincture, I combine 1 tablespoon each of these dried herbs: Echinacea, Ginger, Marshmallow Root, Elderberry, Thyme and Mint and 1 teaspoon of dried cayenne pepper (optional) in a pint-size mason jar.

Fill the rest of the jar with a strong food-grade liquor like rum or vodka (must be at least 80-proof alcohol). Put on an airtight lid and let it sit for at least two weeks or up to eight weeks (the longer it sits the stronger it will be). Store in a cool dark place. I make this once a year and have enough to last at least the year.

Here’s my full tutorial on making herbal tinctures if you’re new to herbal remedies.

If you get a cough, sore throat or cold this winter, try this herbal throat spray to get some relief and feel better soon! Here’s how to make the standard tincture version.


DIY Herbal Throat Spray Recipe

Prep Time5 minutes

Active Time5 minutes

Steeping Time14 days

Total Time14 days 10 minutes

Author: Katie Wells

  • Add the herbs to a pint-size Mason jar.

  • Pour alcohol over the herbs, leaving a ½ inch headspace.

  • Cap tightly with the lid and let the tincture steep for 2-4 weeks, shaking occasionally.

  • Once the tincture is done, strain out the herbs and reserve the liquid.

  • For every 6 Tablespoons of tincture add 2 Tablespoons of raw honey.

  • Shake well to combine and store in the fridge for up to 6 months.

  • I pour some into a small spray bottle for easy use as needed.

You don’t have to use every single herb on the list. If you want/need to omit some of the herbs, just replace them with more of the others. 
 

Two Hour Herbal Throat Spray Tincture

If you want to use the full herbal mixture and don’t have weeks to sit around waiting for the tincture, you can make a two-hour version with this method:

  1. Combine 1 teaspoon of all of the herbs (2 Tablespoons total) in a pint size glass jar.
  2. Pour enough boiling water on them to just cover the herbs with water.
  3. Let steep for 20 minutes until the water cools.
  4. Strain out the herbs and mix with equal parts of 80-proof or higher liquor. I use rum or vodka.
  5. For every 3 parts of herbal liquid, add 1 part of honey. 

This version should last for a few weeks in the fridge. 

More Throat Spray Variations

If you prefer not to make a tincture with alcohol, you can make a glycerite with vegetable glycerin instead. Glycerites aren’t as potent and generally don’t extract the herbal properties as well as alcohol. It will still be helpful though and you’ll just need to use a little more of the spray on the throat. 

You can also make a strong herbal tea and mix with honey. This won’t last nearly as long and should be used within a week. 

 Do you ever get a sore throat or cough? What remedies do you use?

Tags: , , , ,
Best oLive
Privacy Overview

This website uses cookies so that we can provide you with the best user experience possible. Cookie information is stored in your browser and performs functions such as recognising you when you return to our website and helping our team to understand which sections of the website you find most interesting and useful.