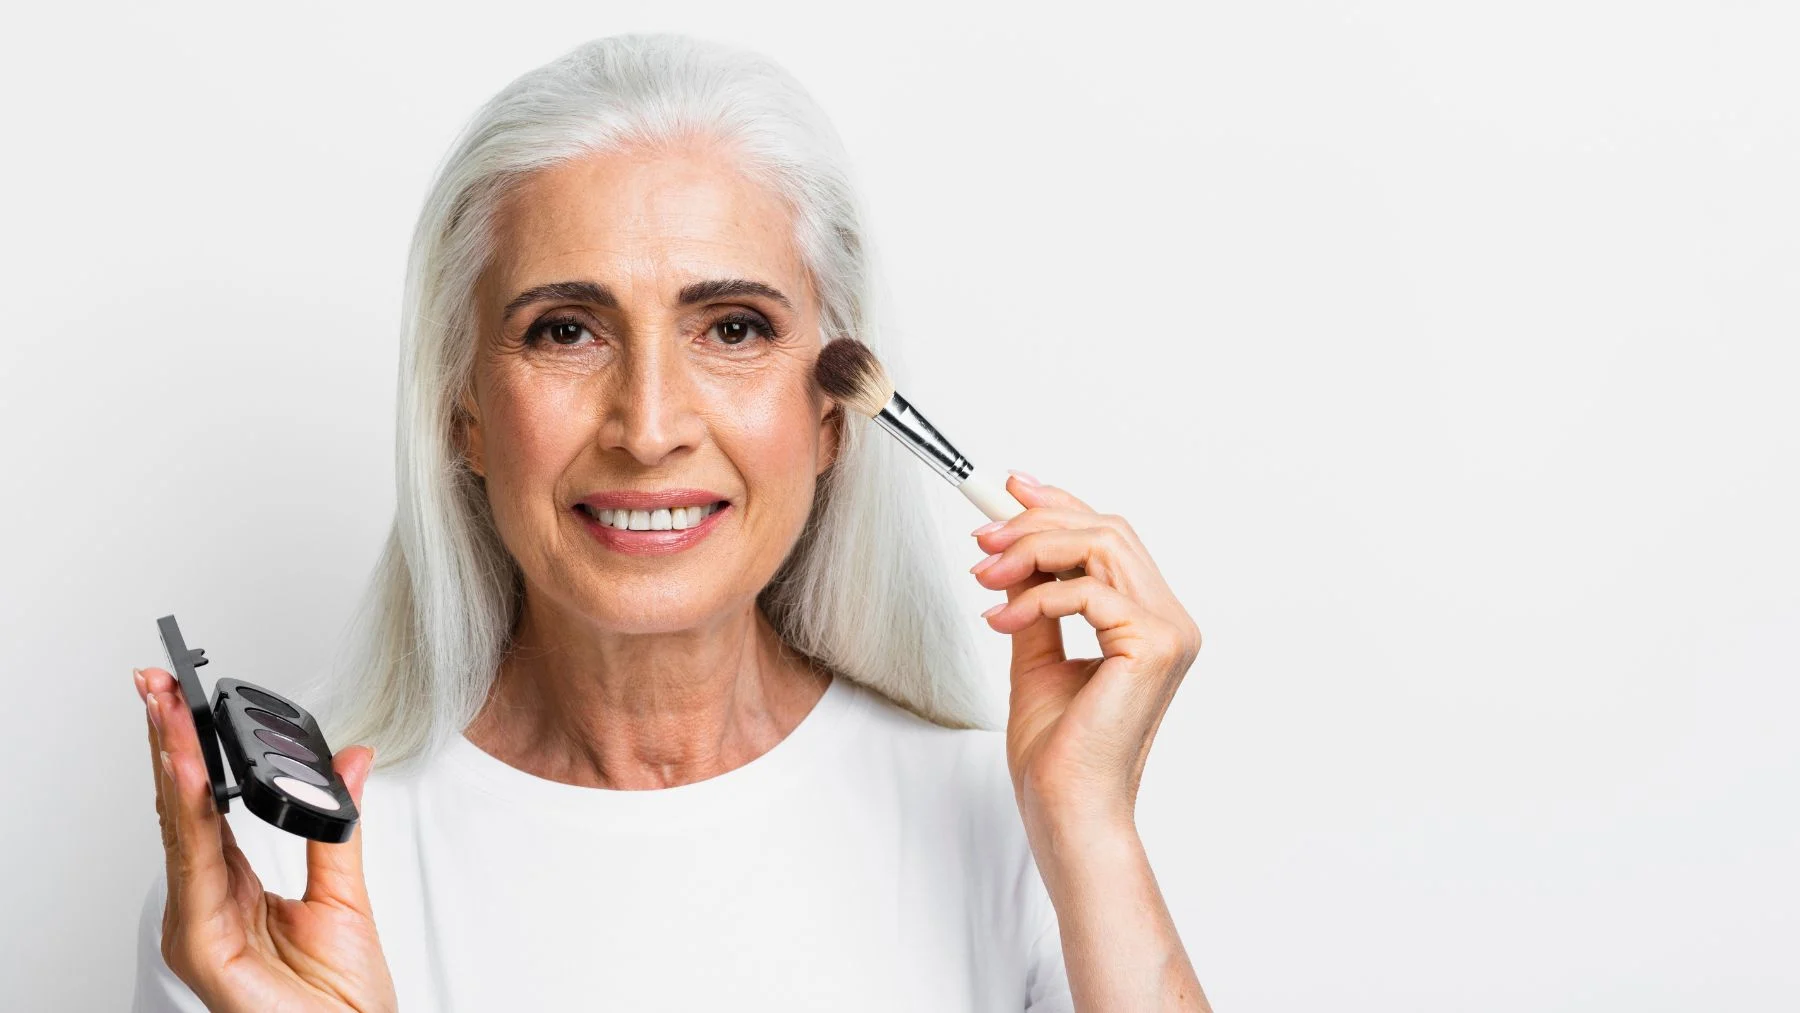
Οι καλύτερες κρέμες με ρετινόλη και υαλουρονικό

Οι καλύτερες κρέμες με ρετινόλη και υαλουρονικό

Για μια πιο “γεμάτη” και σφριγηλή επιδερμίδα

Δεν είναι όλα τα skincare συστατικά απλώς trends. Υπάρχουν και κάποια που είναι διαχρονικές αξίες, σχεδόν απαραίτητες σε κάθε ρουτίνα περιποίησης που σέβεται τον εαυτό της. Ανάμεσά τους ξεχωρίζουν η ρετινόλη και το υαλουρονικό οξύ, δύο συστατικά ποτ έχουν κερδίσει δικαίως τη φήμη τους ως οι πιο αποτελεσματικοί σύμμαχοι για μια υγιή, φωτεινή και σφριγηλή επιδερμίδα.

Γιατί να εντάξεις τη ρετινόλη και το υαλουρονικό στη ρουτίνα σου;

Η ρετινόλη, γνωστή και ως το “ιερό δισκοπότηρο” της αντιγήρανσης, δρα βαθιά στα κύτταρα του δέρματος. Ενισχύει την κυτταρική ανανέωση, βελτιώνει την υφή και τον τόνο της επιδερμίδας, και βοηθά στη μείωση λεπτών γραμμών, δυσχρωμιών και ατελειών. Παράλληλα, συμβάλλει στη σύνθεση κολλαγόνου, χαρίζοντας μια πιο σφριγηλή και λεία επιδερμίδα.

Το υαλουρονικό οξύ από την άλλη θεωρείται ένα από τα κορυφαία ενυδατικά συστατικά, αφού έχει τη “μαγική” ικανότητα να συγκρατεί έως και 1000 φορές το βάρος του. Αποκαθιστά τη χαμένη υγρασία, λειαίνει τις λεπτές γραμμές και προσφέρει μια αίσθηση δροσιάς και ελαστικότητας που κάνει το δέρμα να δείχνει πιο φρέσκο και λαμπερό.

Μαζί τα δύο αυτά συστατικά συνθέτουν το απόλυτο skincare power couple για μια πιο νεανική και σφριγηλή επιδερμίδα με τη ρειτνόλη να καταπολεμά τα σημάδια γήρανσης και το υαλουρονικό οξύ να “ακυρώνει” τις παρενέργειές της, ενυδατώνοντας και προστατεύοντας την επιδερμίδα.

Από ανάλαφρες έως πλούσιες κρέμες, οι σύγχρονες φόρμουλες αξιοποιούν τη δύναμη της ρετινόλης και του υαλουρονικού για να προσφέρουν άμεσα και αισθητά αποτελέσματα. Ιδού εκείνες που σίγουρα αξίζει να δοκιμάσεις:

Οι καλύτερες κρέμες με ρετινόλη και υαλουρονικό

Redermic Retinol, La Roche-Posay-Απόκτησέ την εδώ

Η Redermic Retinol μειώνει τις βαθιές ρυτίδες, λειαίνει την επιδερμίδα, χαρίζει ομοιομορφία στον τόνο του δέρματος και απαλύνει τις κηλίδες γήρανσης, ενώ παράλληλα μειώνει τυχόν ερεθισμούς κι ενυδατώνει σε βάθος χάρη στο υαλουρονικό οξύ στη σύνθεσή του.

Blue Pro-Retinol Multi-Correct Cream, Biotherm-Απόκτησέ την εδώ

Η Biotherm Blue Pro-Retinol Multi-Correct προσφέρει συνεχή επανόρθωση στην επιφάνεια της επιδερμίδας. Μειώνει τις ρυτίδες, βελτιώνει την υφή και δημιουργεί πιο ομοιόμορφο χρωματικό τόνο. Η σύνθεση περιέχει προ-ρετινόλη, η οποία επιταχύνει με απαλό τρόπο την ανανέωση της επιδερμίδας, σε συνδυασμό με υαλουρονικό οξύ και εκχύλισμα φύκων, που ενισχύει τη γενική αντιγηραντική δράση της.

Revitalift Laser Pressed Night Cream With Retinol & Niacinamide, L’Oréal Paris-Απόκτησέ την εδώ

Η Revitalift Laser Pressed Night Cream είναι εμπλουτισμένη με ρετινόλη, νιασιναμίδη, αλλά και υαλουρονικό οξύ, κι έτσι μειώνει τα σημάδια του χρόνου, χαρίζει λάμψη, λειαίνει και ενυδατώνει σε βάθος την επιδερμίδα.

FAB-Skin Lab Retinol & Hyaluronic Acid Eye Cream, First Aid Beauty-Απόκτησέ την εδώ

Αυτή η κρέμα ματιών πολλαπλών δράσεων με ρετινόλη και υαλουρονικό ενυδατώνει την επιδερμίδα, βοηθά στη βελτίωση της όψης των λεπτών γραμμών και ρυτίδων και λειαίνει το ευαίσθητο δέρμα γύρω από τα μάτια.

Avocado Melt Eye Cream, Glow Recipe-Απόκτησέ την εδώ

Εμπλουτισμένη με ενθυλακωμένη ρετινόλη, υαλουρονικό οξύ, αβοκάντο και κόκκους καφέ, η Avocado Melt Eye Cream συσφίγγει και λειαίνει ορατά τις λεπτές γραμμές γύρω από τα μάτια και μειώνει την εμφάνιση των μαύρων κύκλων.

Retinol Reboot Night Cream, Youth Lab-Απόκτησέ την εδώ

Χάρη στη νέας γενιάς βιταμίνη Α στη σύνθεσή της, αυτή η κρέμα μειώνει ορατά γραμμές και βαθιές ρυτίδες, ενισχύει τη σφριγηλότητα,την ελαστικότητα και την ανθεκτικότητα της επιδερμίδας, ενώ εξισορροπεί τα επίπεδα υγρασίας της. Περιέχει επίσης νιασιναμίδη για μείωση της λιπαρότητας και της όψης των πόρων, αλλά και υαλουρονικό οξύ για ενυδάτωση.

Tags: , , , , , ,
Winter Skincare For Indian Skin: Why Body Care Matters And How Vitamin E Helps | Beauty News

Winter Skincare For Indian Skin: Why Body Care Matters And How Vitamin E Helps | Beauty News

Last Updated:November 20, 2025, 07:46 IST

Discover how winter impacts Indian skin and why body care is essential. Learn expert-backed tips, Vitamin E benefits, and how to protect your skin from dryness.

True winter beauty is not just about what you apply, it’s about how well your skin protects, repairs, and renews itself every day.

As winter sets in, the crisp air and falling temperatures bring much-needed relief from the heat but for your skin, it’s often a different story. The drop in humidity, coupled with indoor heating and longer hot showers, can strip the skin of its natural oils, leaving it dry, tight, and flaky. While most people focus primarily on facial skincare, the body often gets overlooked, even though it experiences the same if not more seasonal damage.

How Winter Affects Indian Skin

According to the Dermafique Indian Skin Health Report, Indian skin has a weaker barrier function and lower moisture retention compared to Caucasian skin, making it more vulnerable to dryness during colder months. In fact, 80% of Indian women experience dryness due to environmental factors, while 87% report under-eye dryness even after moisturising, highlighting that hydration loss runs deeper than the surface.

“Indian skin is unique because it tends to have a higher baseline oil content compared to Caucasian skin,” explains Dr Aparna Santhanam, dermatologist and skin expert, ITC Dermafique. “However, even this natural resilience doesn’t protect it completely during winter. The lower humidity and cold air pull moisture from the upper layers of the skin, weakening the skin barrier. As a result, you may notice increased dryness, dullness, and sometimes even itching or flakiness.”

This loss of moisture is not just a surface concern, it affects the skin barrier, the invisible shield that keeps irritants out and hydration in. Once compromised, the skin becomes more susceptible to environmental aggressors, leading to long-term issues such as premature aging and uneven texture.

Why Body Care Needs Equal Attention

While most people diligently switch their facial moisturisers during winter, the same level of care rarely extends to the body. Yet the skin on the body especially the arms, legs, and back is constantly exposed to friction from clothing and dryness from hot water.

“People often forget that body skin requires the same nourishment and repair as facial skin,” says Dr Aparna. “Neglecting it during winter can lead to issues like rough patches, dullness, and loss of elasticity. Using the right body care products helps maintain skin integrity and restores the suppleness that’s lost during colder months. A consistent body care ritual, starting with gentle cleansing followed by deep moisturisation, can replenish lipids and lock in hydration, ensuring your skin stays healthy and radiant from head to toe.”

Vitamin E: The Hero Ingredient for Winter Skin

When it comes to protecting and repairing winter-stressed skin, Vitamin E stands out as a true multitasking ingredient. It not only replenishes moisture but also strengthens the skin barrier and prevents further dehydration.

“Vitamin E is an antioxidant powerhouse,” explains Dr Aparna. “It neutralises free radicals caused by environmental stress and supports the regeneration of skin cells. When used topically, it enhances the skin’s ability to retain moisture and helps soothe irritation, making it especially valuable during dry, cold months.”

Vitamin E–enriched body lotions or serums help deeply nourish the skin, reduce roughness, and improve overall texture. These formulations also repair microdamage, keeping the skin soft, smooth, and resilient even in harsh winter weather.

Building a Winter Body Care Routine

Transitioning your body care routine for winter doesn’t need to be complicated, it simply needs to be intentional. For those with extremely dry skin, adding a body serum can provide an extra layer of nourishment. Its lighter texture allows deeper penetration of actives like Vitamin E, helping repair the skin barrier and restore a healthy glow.

Winter may be synonymous with cozy layers and cool breezes, but it also demands a shift in how you care for your skin. As Dr. Aparna Santhanam puts it, “Your skin mirrors your environment. When the air turns cold and dry, your body care routine must evolve to compensate for that loss of moisture.”

By embracing Vitamin E–rich formulations and a consistent winter body care ritual, you can protect your skin from seasonal dryness and keep it soft, supple, and radiant all winter long, because true skincare doesn’t stop at the face.

About the Author

Swati Chaturvedi

Swati Chaturvedi is a seasoned media professional with over 13 years of experience in journalism, digital content strategy, and editorial leadership across top national media houses. An alumna of Lady Shri Ram …Read More

Swati Chaturvedi is a seasoned media professional with over 13 years of experience in journalism, digital content strategy, and editorial leadership across top national media houses. An alumna of Lady Shri Ram … Read More

First Published:

November 20, 2025, 07:46 IST

News lifestyle beauty Winter Skincare For Indian Skin: Why Body Care Matters And How Vitamin E HelpsDisclaimer: Comments reflect users’ views, not News18’s. Please keep discussions respectful and constructive. Abusive, defamatory, or illegal comments will be removed. News18 may disable any comment at its discretion. By posting, you agree to our Terms of Use and Privacy Policy.

Tags: , , , , , , , , , ,
Shay Mitchell defends children's skincare line Rini after controversy

Shay Mitchell defends children’s skincare line Rini after controversy

Critics have weighed in on Shay Mitchell’s skincare line for children, and now she’s giving us the barefaced truth.

The actress and wellness entrepreneur, who previously sparked controversy with her cosmetic brand tailored to kids, Rini, addressed the scrutiny during an appearance on the “Today” show Wednesday, Nov. 19.

“I was a little surprised,” Mitchell, 38, told “Today” host Jenna Bush Hager and guest cohost Olivia Munn. “Anything that involves kids, there should be a conversation around it. I have a lot of questions, as I’m sure you both do, when anything involves our kids — with what they eat and what they put on their skin — so I didn’t think this would be anything different.”

Mitchell, mother of daughters Atlas (6) and Rome (3), launched Rini on Nov. 6. The line features various face masks for youth ages 4 and up, which Mitchell said meets a growing demand of interest in skincare among children. The brand boasts dermatologist-tested, hypoallergenic and vegan products.

However, Mitchell’s kid-friendly beauty venture drew mixed reactions on social media, with some criticizing the appropriateness of marketing skincare products to young children.

Face masks aren’t “necessary for kids. I also don’t think masks are necessary for us,” Mitchell reflected on the “Today” show. “But are they great for added comfort and extra hydration? Yes, and that’s all it is.”

Shay Mitchell defends children’s skincare line

The launch of Mitchell’s skincare line comes at a time when parents, dermatologists and lawmakers are expressing caution about children’s use of adult-like products.

In 2024, the “Sephora Kids” trend gained traction on social media, featuring children running through Sephora aisles, shopping for skincare products to try out at home. The number of young creators sharing beauty routines has skyrocketed over the past year.

During Mitchell’s “Today” show appearance, Bush Hager asked the “Pretty Little Liars” alum about the potential for Rini to contribute to the cultural trend of children focusing on their physical appearance.

“Skincare starts from birth,” Mitchell said. “We moisturize, we soothe, we comfort their skin as newborns. This is the same thing. It’s just in a different format that’s more fun and I feel very age-appropriate.”

Mitchell added that she doesn’t view the use of face masks as a “beauty thing,” touting the products’ potential for encouraging self-care among children and family quality time.

“Kids don’t look at masks and think about fixing [their appearance],” Mitchell said. “They think about it being a cooling sensation and a shared moment.”

Is Rini safe for kids? What experts are saying about Shay Mitchell’s skincare brand

Marisa Garshick, a dermatologist at MDCS Dermatology: Medical Dermatology and Cosmetic Surgery in New York, previously told USA TODAY that while it is good to acknowledge the importance of skincare, even at an early age, young children don’t need to use face masks.

A gentle cleanser, moisturizer and sunscreen are all they need, she said.

Garshick added that while the ingredients in the Rini face masks are not “necessarily harsh” and can be safe for occasional use, they are not necessary for routine use.

“Too many ingredients, even if not individually harmful, may still contribute to skin irritation and sensitivity,” she said.

Contributing: Greta Cross, USA TODAY

Tags: , , , , , , ,
How To Embed Shapes in Melt + Pour Soap

How To Embed Shapes in Melt + Pour Soap

For the past several years, I’ve been diving into the world of soap making. While I love making it from scratch, I find that melt and pour soap making can be equally cathartic. Especially once I learned how to embed colorful shapes and create fun scenes without it taking days on end, like with cold process soap.

While embedding shapes in soap might seem simple (and it is!) there’s a bit of a learning curve that comes with the process. Little things you might not think about, like soap type, temperature or cooling time, can make or break your designs.

I learned that the hard way. But in this guide I’ll show you how to embed shapes in melt and pour soap like a pro, so you can get right to the fun part.

Which Melt and Pour Soap Base To Use?

Melt and pour soap base is a special kind of soap that’s meant to be cut into pieces and heated in the microwave. Once melted, you can then add scents, colors or other ingredients to tailor the soap to your own needs. You’ll then pour the melted soap into a custom mold and let it harden before cutting and storing it.

While melt and pour soap comes in a variety of types (glycerin, goat milk, oatmeal, etc.), there’s really only two types you need to be aware of when embedding shapes:

1. White soap base (goat milk, shea butter, oatmeal, etc.)

White soap base is opaque and somewhat soft. It usually contains oils or other ingredients that are good for skin, such as honey, oatmeal or shea butter. Because it’s soft (it has a lower melting point than glycerin soap), it’s often used as the out layer of soap, rather than for embedded shapes.

2. Clear soap base (glycerin)

Clear soap has a higher concentration of glycerin, a moisturizer derived from plant and animal fats. It’s not quite as soft as white soap, which means it gets hotter, cools more slowly, and holds its shape better.

Colors also appear more vibrant and pop more in clear soap base, making it ideal for embedded shapes. This isn’t a hard rule though, and once you’ve mastered the basics of melt and pour soap making, you can easily use either type of base for your shapes.

  • Rubbing Alcohol in a Spray Bottle – Rubbing alcohol is used to help layers and shapes stick together in melt and pour soap. A quick spritz before pouring helps the new layer bond to the one below it. It also helps remove bubbles from the surface of freshly poured soap for a smoother finish.
  • Thermometer – A thermometer helps you keep track of your soap’s temperature so it doesn’t melt your embedded shapes. It’s especially useful when layering, since the pour temperature affects how well the soaps bond. Keeping it within the right range makes for clean, defined designs.
  • Large Knife for Cutting Shapes – A large knife helps you slice the soap base into manageable chunks before melting and cut larger pieces into simple shapes once it’s set. It gives you control over the size and thickness of each embedded piece.
  • Small Knife or Potato Peeler for Cleaning Up Shapes – A small knife or potato peeler helps refine your shapes by smoothing edges or trimming away extra bits. It’s great for small adjustments that make your designs look a little more polished.

Ways to Make Shapes with Molds

Molds give your soap and embeds their shape. You can use traditional block molds for larger bars or smaller silicone molds for the embedded shapes themselves. Flexible molds make it easy to release the soap once it’s fully cooled.

When it comes to creating your shapes, there are 3 different ways to make them. The one you choose depends on your personal preference and/or how you’ll be embedding the shape.

1. Column Molds

This is the most common way to make embedded shapes. These flexible silicone molds have an interlocking seal the snaps together to form a long “column.”

You then pour your liquid soap base in the center, let it cool, and peel away the sides, leaving you with one long shape you’ll then embed into a rectangular mold.

2. Silicone Cake Decorating Molds

If you plan to make soap bars one at a time as opposed to in a large rectangular mold, you can use silicone cake decorating molds to make your shapes. The end result will be small shapes that you can embed on top of individual soap bars rather than inside the soap prior to cutting.

3. Non Soap Eembeds

You don’t have to make your own shapes to embed in soap. Try other ideas like these:

Molds for Pouring Soap

1. Rectangular Molds

Rectangular or block molds are large, loaf-style molds that hold several bars’ worth of soap in one pour. Once the soap hardens, you remove the whole block and cut it into individual bars with a knife. You’ll pair these molds with column molds or hand cut shapes to get the embedded-shape effect.

2. Single Bar Molds

Unlike rectangular molds, single bar molds have individual cavities that you fill separately. Once the soap cools, you can simply pop each bar out, no cutting required. You’ll often use these molds with shapes made from silicone cake decorating molds.

Preparing the Soap

Melt and pour soap is made to be heated in the microwave. While this is a rather quick and painless method, it often results in hot spots, clumps, bubbles or other issues.

Here’s how to prepare your soap so as to avoid these common pitfalls.

  • Always cut your soap into 1” cubes before putting in the microwave.
  • Heat it in 30-second intervals, stirring thoroughly between each round. This helps prevent hot spots and ensures uniform melting.
  • Once melted, let the soap base cool to about 140°F before using. To cool it more quickly, put a thermometer in the melted soap and put it in the fridge. Check it every 5 minutes, peeling the hardened soap on the top to the side and gently stirring the melted soap to even out the temperature.
  • Its important that you don’t mix the cooled crust that forms on top of the soap back into the melted soap. If you do that, it’ll make the soap chunky when you pour it into your molds.
  • When it reaches 140°F, it’s ready to pour! If you miss the mark you can always put the soap back in the microwave and heat for another 5-10 seconds to liquify it again.

3 Techniques for Embedding Shapes

I rely on three main methods for embedding shapes. You can definitely get creative and come up with your own versions later, but mastering these three first will give you the skills to handle just about any soap design you dream up.

1. Using Column Shapes in a Rectangular Soap Mold

This method uses long, cylindrical shapes made with a column mold. Once your shapes have fully set, you place it inside a rectangular loaf mold and pour melt and pour soap around it. When the soap hardens, you’ll slice it into bars, revealing the embedded design running through the center of each one. It’s a simple and effective way to create a repeating pattern that looks striking from every angle.

We have a whole post explaining how to do this step-by-step with this pink peppermint soap.

2. Embedding Shapes in Single-Bar Molds

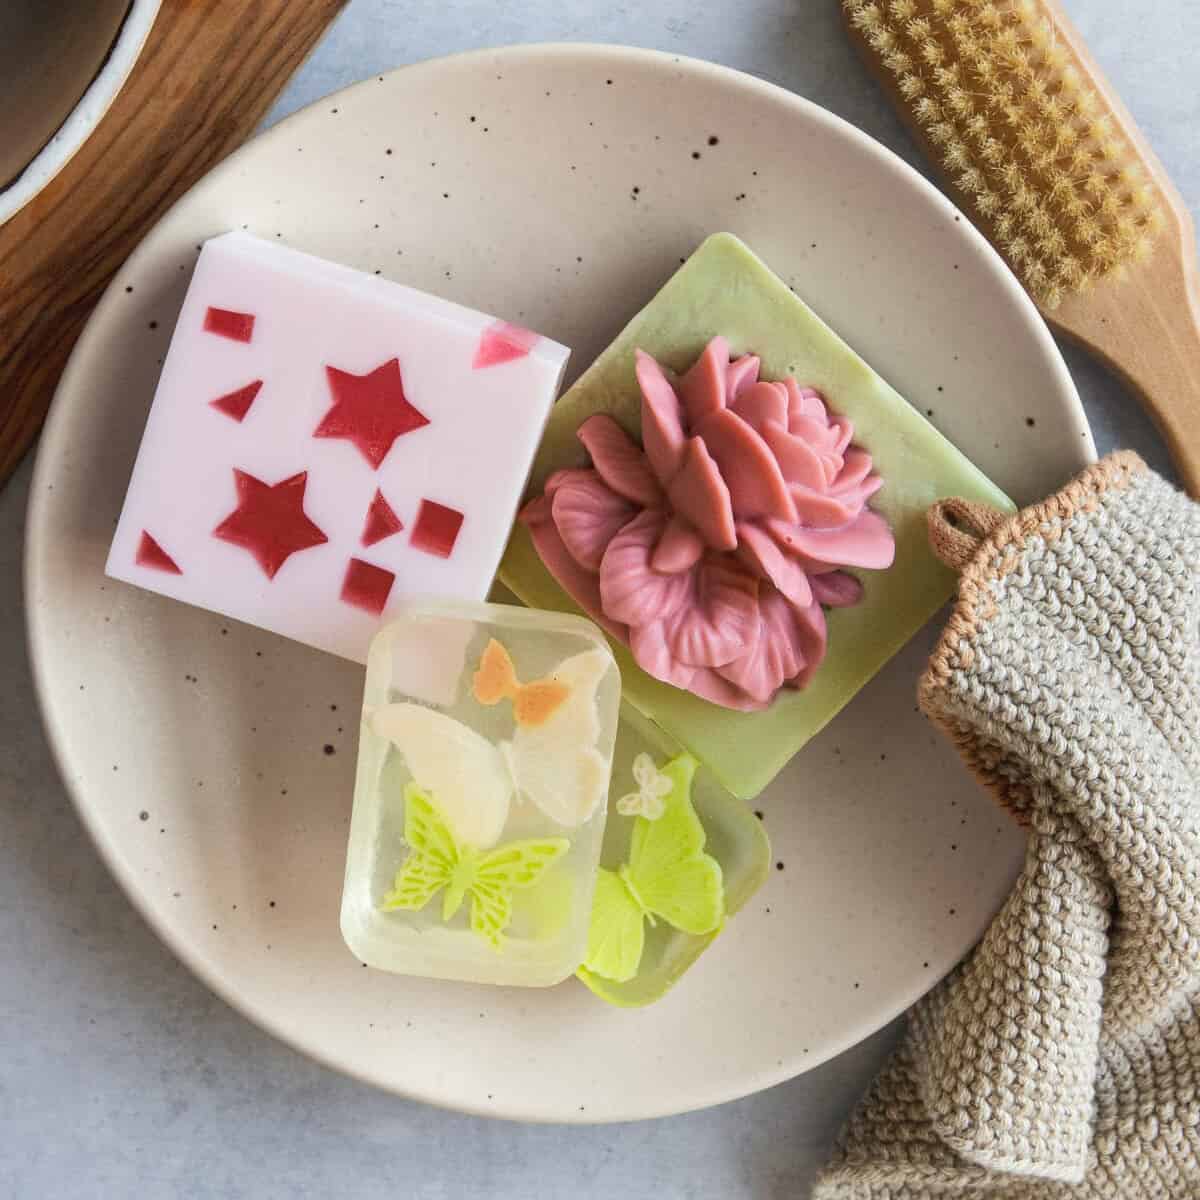
With this technique, you’ll use small silicone cake-decorating molds to make thin, flat-ish shapes. Once your shapes are ready, pour a thin layer of clear soap into each cavity of a single-bar mold, let it set slightly, then place your shape on top.

Finish by pouring more clear soap over it to encase the design in the middle. This layering method gives your soap a clean, professional look and works well for colorful or detailed designs.

Melt white soap base and add mica for color. Then pour into your silicone butterfly molds and let cool.

Melt clear soap base. Fill the cavity of a single-bar soap mold about halfway.

Spritz with alcohol and let cool for about 20 minutes.

Arrange 2-3 butterfly shapes in each mold cavity.

Make sure the temperature of your clear soap base is between 130°F and 140°F (if it’s too hot it will melt the butterfly shapes) before pouring your second layer. Spritz with alcohol.

Let cool completely before removing from the mold

3. Embedding 3D Shapes

If you want your shapes to stand out and look artsy, this is your method. You’ll create three-dimensional shapes using silicone molds, then embed them in single-bar molds so part of the shape extends beyond the soap’s surface.

The finished bar has a sculptural, playful look that makes it feel extra special. It’s a fun way to experiment with texture and depth while showing off your creativity.

Melt the white soap base and add a little red mica for color. Pour the melted soap into a silicone flower mold.

Spritz the top of the soap with rubbing alcohol to prevent any lumps or bubbles.

Allow it to cool for 1 hour before removing from the mold and cutting the soap in half.

Heat another batch of soap base in the microwave and add green mica for color. Fill the cavity of a single-bar soap mold until it’s ¾ full and spritz it with rubbing alcohol. Let cool for 10-15 minutes.

Check that the soap is 140°F or less. Then pour a thin, second layer of green soap on top of the cooled layer. Working quickly, embed the 3D shape on top.

Let cool completely before removing from the mold.

Tips for Successful Embedded Shapes

Control the temperature

When working with melt and pour soap, temperature is everything. If the soap is too hot when you pour it, it can cause your molds to warp, melt your embeds or create air bubbles. If it’s too cool, it may not fill out the mold properly.

Always use a thermometer to check the temperature before you pour. While a lot of tutorials recommend a temperature somewhere around 125°F, I’ve found that to be too cold. Instead I recommend pour the soap when it reaches about 140°F.

Don’t let the soap overheat

Always heat your soap base slowly, in short intervals if you’re using a microwave. Overheating can cause scorching, reduce clarity, or make the soap lose moisture and harden too quickly.

Keep your embeds in place

Let your first soap layer cool and form a sturdy skin before adding the next layer. This helps keep your embeds in place instead of floating or shifting.

If you find that your shapes are melting or bleeding when you add the layers, chill them in the refrigerator for a few minutes before embedding to prevent them from softening when the warm soap is poured around them.

Use rubbing alcohol generously

Keep a spray bottle of rubbing alcohol on hand and give everything a good spritz before and after pouring your layers. This makes a huge difference in the final look.

Rehydrate the soap before reheating

If you have to reheat the soap multiple times and it’s become too thick, add ½ teaspoon of water per pound of soap base each time you reheat it.

Troubleshooting Common Problems

Embeds sinking or melting

If your embeds keep sinking or shifting around, your soap base is probably too warm or too thin when you pour. Let the first layer cool until it forms a solid film on top (I usually touch it with my finger to make sure it’s nice and sturdy) before adding more embeds. That gives them something to rest on.

For lighter pieces, pour the next layer a little cooler so it thickens faster and holds everything in place.

If your embeds look a little melty, your soap is too hot. Try keeping it in the 130-140°F range to be safe.

Bubbles or cloudy layers

Two things can cause bubbles: either the air gets trapped or the soap is poured too hot. Always spray rubbing alcohol on the embeds before you pour to help the layers stick and keep bubbles from forming.

If your clear soap turns cloudy, it’s a sign it was overheated. Always microwave the soap slowly and stir well before each interval.

Cracks or separation between layers

Cracks or peeling is frustrating but easily avoidable. Cracks usually happen when the soap has cooled too much before adding the next layer. Try pouring the next layer while the bottom is still slightly warm but not soft. A light mist of rubbing alcohol before each pour can also help prevent this.

FAQ

How long does it take for melt and pour soap to set?

For large designs, it’s best to let it sit for at least 4 hours before cutting. If you’re in a hurry, you can pop it into the refrigerator for about 30 minutes, but avoid the freezer, which can cause condensation and sweating after you take it out.

How long to wait between layers of melt and pour soap?

I recommend waiting 15-20 minutes after pouring a layer to see if it’s sturdy enough for another. You want it to feel firm when you touch it, but not completely cold. If you wait too long you might get noticeable lines between layers, which can affect the look of your finished design. 

Can I add things to melt and pour soap?

Some people say you shouldn’t add extra oils or ingredients to melt and pour soap because it might affect the texture once it cools. But I’ve found that, when used in moderation, additives don’t make a noticeable difference to the soap’s quality. Just don’t go overboard or your soap could get lumpy or greasy.

Print

]]>]]>

3 Ways to Embed Shapes in Melt and Pour Soap

Prep Time4 hours

Total Time4 hours

Course: Bath and Body Soap

Keyword: DIY, soap

Yield: 6 soaps

Author: Stephanie Pollard

Cost: $15

Materials

For 3D Shapes That Stick Out

For Shapes in Single-Bar Molds

Instructions

Embedding 3D Shapes That Stick Out

  • Melt the white soap base and add a little red mica for color. Pour the melted soap into a silicone flower mold.

  • Spritz the top of the soap with rubbing alcohol to prevent any lumps or bubbles.

  • Allow it to cool for 1 hour before removing from the mold and cutting the soap in half.

  • Heat another batch of soap base in the microwave and add green mica for color. Fill the cavity of a single-bar soap mold until it’s ¾ full and spritz it with rubbing alcohol. Let cool for 10-15 minutes.

  • Check that the soap is 140°F or less. Then pour a thin, second layer of green soap on top of the cooled layer. Working quickly, embed the 3D shape on top.

  • Let cool completely before removing from the mold.

Embedding Shapes in Single-Bar Molds

  • Melt white soap base and add mica for color. Then pour into your silicone butterfly molds and let cool.

  • Melt clear soap base. Fill the cavity of a single-bar soap mold about halfway.

  • Spritz with alcohol and let cool for about 20 minutes.

  • Arrange 2-3 butterfly shapes in each mold cavity.

  • Make sure the temperature of your clear soap base is between 130°F and 140°F (if it’s too hot it will melt the butterfly shapes) before pouring your second layer. Spritz with alcohol.

  • Let cool completely before removing from the mold.

Notes

If your embeds look a little melty, your soap is too hot. Try keeping it in the 130-140°F range to be safe.

0

Tags: , , , ,
Pregnancy-safe skincare starts with understanding what your skin actually needs

Pregnancy-safe skincare starts with understanding what your skin actually needs

Pregnancy-safe skincare can get confusing fast. What was once a reliable routine can suddenly feel like a minefield of ingredients to avoid. Between hormonal acne, sudden sensitivity, obsessive Google-ing and family members’ paranoia, finding products that balance effectiveness and caution can feel overwhelming.

Here’s an expert-approved guide on what to use and what to avoid.

What ‘pregnancy-safe’ really means

According to Dr Geetika Mittal Gupta, founder of Isaac Luxe, India’s market for pregnancy-safe skincare is expanding quickly, but regulation hasn’t caught up. “Many of these labels act as marketing tools rather than verified medical standards,” she says. “Unlike food or pharmaceutical safety, there’s no single authority assessing these claims.”

“One ingredient may be safe in isolation,” says Dr Geeta Mehra Fazalbhoy, founder of Skin & You Clinic, “but skincare is about the whole list of ingredients working together in tandem. Unless the full product has been evaluated, the label alone doesn’t mean much.” Always read ingredient lists and discuss any actives, especially retinoids, hydroquinone, high-strength salicylic acid or strong peels with your doctor before use.

Common skin changes during pregnancy

Hormones overhaul the skin’s behaviour, sometimes mildly, sometimes dramatically. Expectant mothers often experience melasma, acne, dryness, itching or heightened sensitivity. “Even women who’ve never had breakouts may suddenly deal with oiliness or pigmentation,” says Dr Gupta. Gentleness is the way to go: fragrance-free cleansers, barrier-repair moisturisers and diligent sunscreen to prevent worsening pigmentation.

The ingredients dermatologists trust

Dr Gupta recommends niacinamide, azelaic acid, ceramides, vitamin C, squalane and peptides. Gentle, yet effective actives that support the skin barrier.

Dr Fazalbhoy adds that simplicity wins, “Ceramides to support the barrier, hyaluronic acid for hydration and oat extract for calming. For acne, azelaic acid and low-strength benzoyl peroxide can be used with care.”

The biggest pregnancy-safe skincare myths

Myth 1: Natural means safe.

Not always. Some essential oils can irritate or cause allergic reactions.

Myth 2: Avoid all chemicals.

“Dermatologist-approved actives are safe when used correctly,” says Dr Gupta.

Myth 3: Expensive equals effective.

The goal isn’t luxury. Choose nourishment over fear.

Myth 4: Nothing is really pregnancy-safe.

“Most regulated products use actives in small, safe concentrations,” Dr Fazalbhoy explains. “Gentle consistency, hydration and sun protection go further than switching your entire routine.”

Pregnancy is the time to simplify your routine and strip it down to the basics. As Dr Fazalbhoy puts it, “Not every new mark or pigment patch needs correction. Many of these changes fade naturally postpartum. Gentle care often outperforms constant intervention.”

Also read:

Can the right diet really slow the signs of ageing?

The skincare sandwich method may be your skin’s saviour this winter

6 ways you might be sabotaging your skincare routine

Tags: , , , ,
How To Create Diagonal Color Layers in Soap

How To Create Diagonal Color Layers in Soap

If you’ve been making melt and pour soap for a while, you’ve probably reached that point where plain, single-color bars just aren’t doing it for you anymore. Don’t get me wrong, there’s nothing wrong with simple soap. But once you get the hang of the basics, it’s natural to want to try something a little more interesting.

That’s where layering comes in.

Whether you’re going for bold stripes or a soft, stacked ombré effect, layering is one of those techniques that instantly elevates your soap game. And the best part? You don’t need any special equipment or advanced soap making skills.

Just a little patience, a spray bottle of rubbing alcohol, and a basic understanding of how temperature affects your layers. (Oh, and a good mold never hurt!)

So if you’re ready to take your melt and pour soap from basic to elevated, let’s talk about how to create layers in soap that look professional and stick together perfectly every single time.

Why Create Layers in Melt and Pour Soap?

Let’s start with the basics. Layering is exactly what it sounds like: you pour different colors or soap bases in stages, letting each one cool just enough before adding the next. It’s not rocket science, but there is a little technique involved (don’t worry, I’ll walk you through it).

The cool thing about layering is that it opens up a ton of design possibilities. You can create bold, punchy stripes. You can play around with ombré effects that fade from one color to the next (that’s a little more complicated and not covered here, but possibly in the future…). You can even alternate clear and opaque soap bases to add dimension and contrast that really makes your bars pop.

The secret to getting those clean, distinct layers? It all comes down to controlling temperature and timing.

Pour too hot and you’ll melt the layer underneath. Wait too long and your layers might not stick together at all.

Once you get the hang of it, layering is a super easy way to make soap that looks way more impressive than it actually is.

Supplies

Clear soap gives you that translucent, glassy look, while white soap makes your colors more opaque and vibrant. I like to alternate between the two so the layers really stand out.

  • Colorants–Mica powders, liquid soap dyes, or powdered herbs or botanicals all work here. Micas are my go-to because they’re skin-safe and nontoxic, though they’re a bit more subtle than traditional dyes.

If you want really bold, punchy colors, liquid soap dyes are the way to go. And if you’re keeping things natural, powders like beetroot or spirulina can give you soft, earthy tones.

  • Essential Oils–Totally optional, but this is where you can really personalize your soap.

You can use the same scent in every layer or switch it up for a more complex fragrance. Just remember to stick with skin-safe oils, especially if you’re gifting these bars (you don’t want to give the gift of a rash!)

  • Rubbing Alcohol in a Spray Bottle–Rubbing alcohol is your secret weapon.

A quick spritz before and after pouring each layer keeps them bonded together and gets rid of any surface bubbles that might mess up your design. And I’ve found that a bottle like this creates just the right amount of mist. Trust me, don’t skip this step.

Equipment

I’m partial to loaf molds because you can slice them into bars later and show off those gorgeous layers. But if you want individual soaps, cavity molds are perfect.

  • Heat-Safe Containers–You’ll need something to melt and mix your soap in.

These 16-ounce glass measuring cups with pour spouts are my favorite because they hold just enough soap for one layer and they make pouring really easy. If you’re doing multiple colors, grab one container per color to keep things moving smoothly.

  • Thermometer–Technically optional, but it makes life way easier.

Checking the temperature before you pour helps you avoid melting the layer underneath or ending up with layers that don’t stick. A basic kitchen thermometer does the trick, or you can opt for a digital instant read thermometer if you’ve got one.

  • Utensils–The usual suspects: stirring spoons, measuring spoons, and a sharp knife for cutting your finished soap into bars.

Optional Supplies

  • Chopstick or Skewer–Perfect for popping any stubborn bubbles that the rubbing alcohol doesn’t catch. Can also be used to scratch up a layer of soap that got too cold and may not bond properly to the next layer.
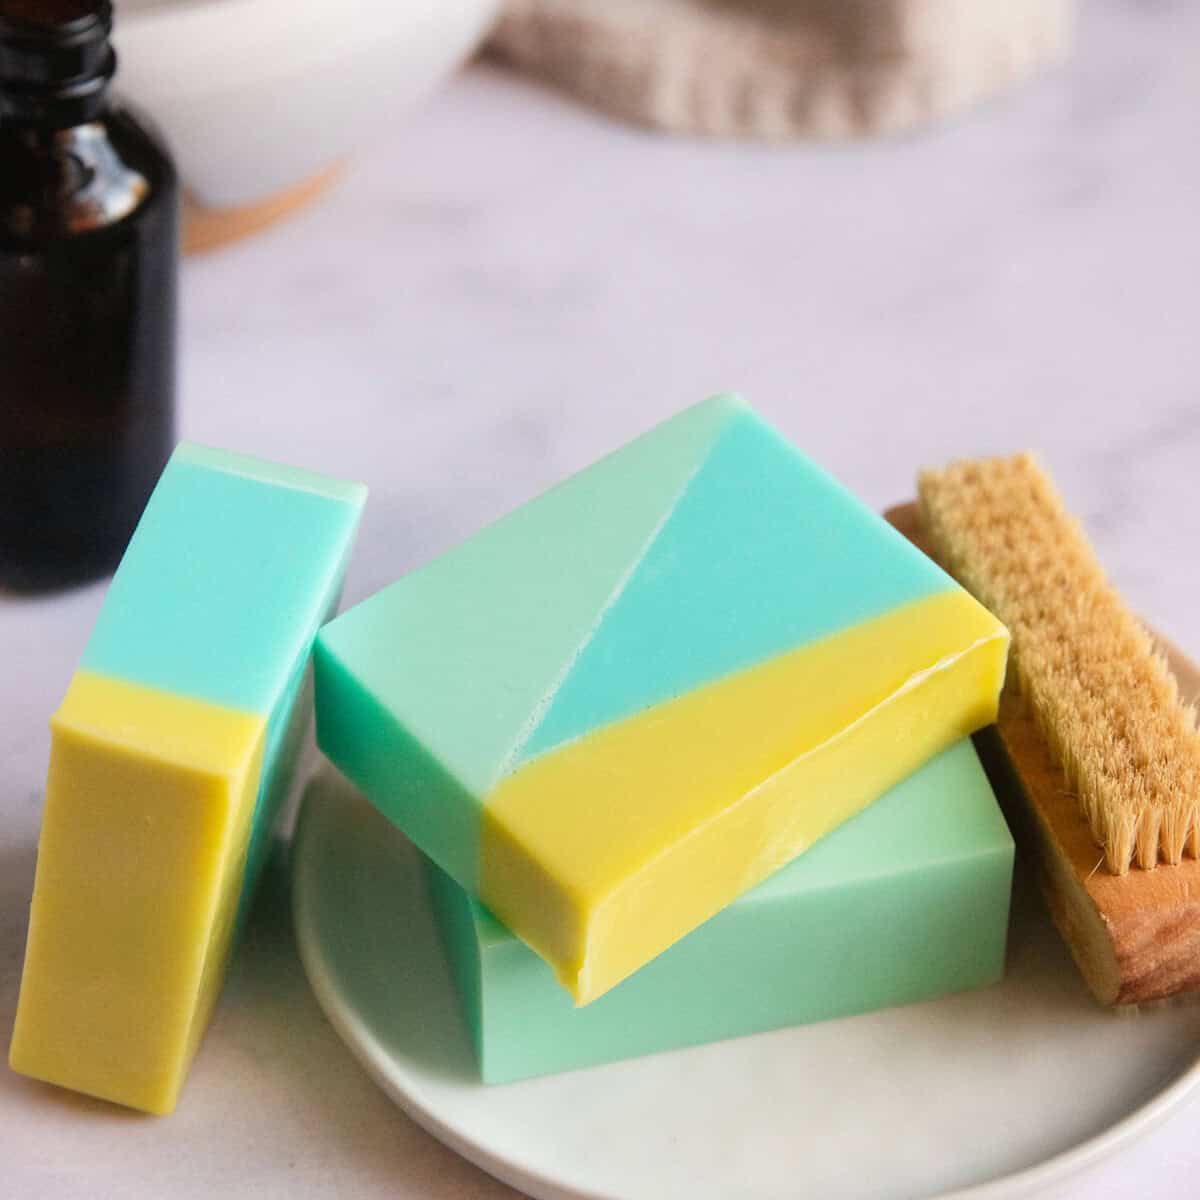
  • Small Ramekin or Book–These are great for tilting your mold if you want angled or diagonal layers. It’s a simple trick that adds a lot of visual interest without making things too complicated!
  • Extra Thermometers–If you’re working with several colors at once, having more than one thermometer means you can check all your containers quickly without waiting for one thermometer to cool down between checks.
  • Pipettes or Droppers–Super handy if you’re adding essential oils or colorants and want to be precise about how much goes into each layer.
  • Cutting Guide or Soap Cutter–Not essential for the layering process itself, but when it comes time to cut your loaf into bars, a soap cutter helps you get uniform slices that show off your layers perfectly.

How to Create Layers in Melt and Pour Soap

Since this post is all about technique (not a specific recipe), I’m going to walk you through the general process of layering melt and pour soap. You can adapt this to whatever colors, scents, and mold sizes you prefer. And if you want exact measurements and a step-by-step project, check out the holiday DIY Striped Soap post.

Step 1: Prepare Your Soap Base

Start by cutting your melt and pour base into small 1-inch cubes. This helps it melt evenly, prevents overheating or scorching, and saves you microwave time. Toss the cubes into a heat-safe container (one per color or layer) and pop it in the microwave.

Heat in short 30-second bursts, stirring well between each one, until the soap is just melted. The key word here is just. You don’t want to overheat it or the soap can scorch or get weirdly thick and hard to work with.

Step 2: Add Color and Fragrance

Once your soap is melted, stir in your colorant and fragrance. Go slow and gentle here because too much stirring can create bubbles, and bubbles are the enemy of clean layers.

This is also where you get to have fun. Each layer can have a different color, a different scent, or both.

Want a lavender layer that smells like lavender and a pink layer that smells like rose? Go for it. Just remember to stick with skin-safe essential oils if you’re planning to use or gift these bars.

Step 3: Pour the First Layer

To get those fun slanted lines, tilt your mold by placing a small ramekin or a bunched up kitchen towel underneath one side.

Then pour your first layer into the mold. It doesn’t matter how hot this first layer is since there’s nothing underneath it to melt. Once it’s in the mold, give the top a light spritz with rubbing alcohol to pop any bubbles. Then let it cool.

You’ll know it’s ready for the next layer when a thin film (or “skin”) forms on top. It should feel slightly soft and warm to the touch, but not overly wobbly or like there’s liquid underneath.

This usually takes about 10-15 minutes, but it depends on how thick your layer is and how hot the soap was when you poured it.

Step 4: Pour the Next Layer

Before you pour the next layer, spritz the cooled surface again with rubbing alcohol. This is super important because it helps the new layer bond to the old one without any gaps or air pockets.

Now here’s where temperature matters. Let your melted soap cool to around 140 degrees F before pouring.

If it’s too hot, it’ll melt right through the filmy layer underneath and you’ll end up with muddy colors instead of distinct stripes. If it’s too cool, the layers might not stick together properly and could split apart when you cut the soap into bars.

Pour slowly and carefully, and then spritz the top with alcohol again to get rid of any new bubbles.

Step 5: Repeat Layers

Keep going, alternating colors, until your mold is almost full. Always spritz with alcohol before and after pouring each new layer. It might feel repetitive, but trust me, it’ll make or break your layers.

If you’ve been tilting your layers up to this point, make sure to remove the ramekin and lay the mold on a flat surface before pouring the last layer. Then give it one last spritz and let the whole thing cool completely.

I’m talking several hours or even overnight. I know it’s tempting to pop it out of the mold early, but if you try to unmold it too soon, the layers might still be soft and could separate or warp.

Once it’s fully set, you can unmold your soap and cut it into bars. And that’s it! You’ve got gorgeous, professional-looking layered soap that’s perfect for gifting or keeping all to yourself.

Tips and Tricks for Perfect Layers

Once you’ve got the basic process down, these little tricks will help you nail those clean, professional-looking layers every single time.

Keep alcohol nearby.

Seriously, keep that spray bottle within arm’s reach at all times. Spritz the surface of each layer right before you pour the next one. Think of the alcohol as the “glue” that makes your layers stick together. Then spritz again right after you pour to prevent any bubbles from cropping up. Trust me, you can’t use too much alcohol.

Create equal layers.

If you want your layers to be perfectly even, the easiest way to do it is to weigh your soap base and divide it into equal amounts before you start melting and coloring. So let’s say you’re filling a loaf mold and you want four layers. You’d divide your base into four equal portions, like 10 ounces each, and then color them separately.

But honestly? You don’t have to be that precise if you don’t want to. If you’re going for a more organic, free form look where some layers are thicker than others, just eyeball it.

Pour however much feels right for each layer and don’t stress about the measurements. Both approaches work, it just depends on the vibe you’re going for.

Don’t wait too long between layers.

Each one should be slightly soft to the touch and still warm. If you gently press your finger against it and it feels completely cool and solid, you’ve probably waited too long. 

Use contrasting bases.

Want your layers to really pop? Try alternating between clear and white soap bases. The contrast makes each layer super distinct and gives your bars a ton of visual interest. 

Tilt your mold.

This is one of my favorite tricks for taking layered soap to the next level. If you want diagonal or angled layers instead of straight horizontal ones, just prop one side of your mold up slightly while you pour.

A small ramekin or even a book works great for this. It’s such a simple thing, but it makes your soap look so much more fun and eye-catching.

Watch the temperature.

I know I already mentioned this about a thousand times already, but it’s worth repeating because temperature is ev-er-y-thing when it comes to layering.

Around 140 degrees F is the sweet spot for pouring layers. It’s cool enough that it won’t melt what’s underneath, but still warm enough to bond properly. If you don’t have a thermometer, let your melted soap sit for a few minutes after you take it out of the microwave. It should feel slightly hot to the touch.

Note: Some folks say to aim for 120-130 degrees, but I’ve found that 140 degrees keeps my layers from splitting as much, probably because it melts the layer underneath just enough to help them stick together. 

Troubleshooting Common Issues

Even with practice, layered soaps can be a little finicky. Here’s how to fix (or better yet, avoid) the most common problems you might run into.

Layers separated after cutting

This one’s frustrating because everything looks fine until you go to slice your soap and the layers just fall apart. This usually happens because you didn’t spritz with alcohol between layers, or you poured when the bottom layer was completely cold and had cooled too much.

Always, always spray alcohol between layers. And don’t wait too long between pours. The previous layer should still feel slightly warm and a little soft when you add the next one. If it’s totally firm and cool to the touch, you’ve waited too long and the layers won’t bond as well.

And if you did wait too long to pour the next layer, then I recommend pouring your next layer slightly too hot (say between 150 – 160 degrees F). Yes, it might melt the previous layer a little, but that’s what you need in order to keep your soap from splitting.

Colors bled together

Instead of clean stripes, you’ve got muddy, swirled colors where your layers should be. This happens when the soap is too hot, so it melts right through the layer underneath.

To fix this, let your melted base cool for a few minutes before pouring. Use a thermometer if you have one, or just test the temperature by touching the outside of your container. It should feel warm but not hot. 

Uneven or slanted layers

Your layers looked straight when you poured them, but now they’re all wonky and uneven. This can occur if your mold isn’t sitting level, or if the soap cools unevenly (maybe one side was closer to a window or heat source).

Before you pour each layer, take a second to make sure that your workspace is flat and level. And try to let your soap cool in a spot where the temperature is consistent, away from drafts or direct sunlight.

Air bubbles between layers

You’ve got little pockets of air trapped between your stripes, which can make the layers look cloudy or cause them to separate. When this happens it means that you didn’t spray enough alcohol, or you poured too quickly and created turbulence in the soap.

Be generous with that alcohol spray. Give each layer a good spritz before pouring the next one. And when you pour, go slowly and gently. Try pouring along the side of the mold or over the back of a spoon to help the soap flow smoothly without creating bubbles.

FAQ

Can I use any type of melt and pour base?

Yep! You can layer clear, white, or any of the specialty bases like goat’s milk, shea butter, honey, or aloe. The only thing you need to make sure of is that they’re all melt and pour soap bases. Don’t try to mix melt and pour with cold process soap or anything like that. 

Do I have to color each layer?

No, not if you don’t want to. You can absolutely alternate between colored and uncolored layers if you want a more subtle look. Or you can create an ombré effect by using different shades of the same color, going from light to dark (or vice versa). There are no rules here, so play around and see what you like.

How thick should each layer be?

Totally up to you and the look you’re going for. Thin layers have this elegant, delicate vibe. Thicker layers are bolder and more graphic. I usually aim for about a quarter to a half inch per layer to keep cooling time to a minimum, but you can go thinner or thicker depending on your mold size and how many layers you want to fit in there.

Can I add embeds between layers?

Definitely. Melt and pour soap layers are actually perfect for this. You can tuck small soap shapes, dried botanicals, or little surprises between the layers. Just make sure whatever you’re embedding is soap-safe and won’t bleed color or get gross over time.

How long should I wait between layers?

I think 15 minutes is a good rule of thumb, but it really depends on how hot the soap was when you poured it and how thick your layers are. 

Do layered soaps take longer to cure?

Nope. One of the best things about melt and pour soap is that it doesn’t need any “curing” time at all. Once your soap is fully cooled and set (which takes a few hours to overnight), you can unmold it, cut it into bars, and start using it right away. 

Can I use a single cavity mold instead of a loaf mold?

Yes, and the process is pretty much the same when you’re working with individual cavity molds instead of loaf molds. The main difference is that layers in smaller cavity molds tend to cool down faster, so you can usually move through the layering process a little more quickly.

Just remember the basics: spray each layer with rubbing alcohol before you pour the next one, and keep an eye on your temperatures. Those two things are non-negotiable, no matter what kind of mold you’re using.

0

Tags: , , , ,
makeup

The best age-defying makeup tip from a 50+ influencer that keeps skin glowing

Aging gracefully doesn’t mean giving up on beauty—it means redefining it. For many women over 50, the focus shifts from covering up to enhancing what already shines through. Finding makeup and skincare habits that truly lift and brighten can make all the difference, and one 50+ influencer has revealed the age-defying tip she swears by.

Over time, beauty routines evolve, and the goal becomes more about balance and authenticity than perfection. That’s exactly the message shared by a group of mature influencers who are redefining what beauty after 50 looks like. Among them, Gillianne Fuller stands out for her timeless advice that proves radiance isn’t about fighting age—it’s about nurturing it.

What’s the age-defying makeup tip women over 50 swear by?

According to Fuller, the most powerful beauty secret is also the simplest one: stay hydrated. She insists that drinking plenty of water not only boosts energy but also transforms how your skin looks and feels. “Hydration shows up in your skin, in your energy, and in how you carry yourself,” she told New Beauty, noting that avoiding soda and drinking water daily has kept her complexion fresh and luminous.

It’s not just about quenching thirst—it’s a foundation for beauty. Fuller believes hydration gives skin its natural glow and firmness, helping makeup blend seamlessly and preventing dryness that can highlight fine lines. Her philosophy? Take care of your skin from the inside out, and the results will follow.

Keep your beauty routine simple and intentional

Fuller’s approach to skincare is refreshingly minimalist. “Keep it simple,” she says. Instead of chasing every new trend, she sticks to what works. She credits her mother and grandmother for teaching her that less is more, noting that their natural, consistent routines kept their skin beautiful through the years.

Her advice aligns with a broader message shared by other influencers: mindful simplicity beats overcomplication. Mature beauty influencer Kat James stresses the importance of being conscious about what goes on your skin. After eliminating harsh ingredients from her routine, she noticed visible improvements in both her skin and overall health.

Don’t forget sunscreen—and balance

Lori Altermann adds a practical yet vital reminder: never skip sunscreen, even indoors. “If plants can get sun inside a house, so can your skin,” she jokes, noting that daily SPF is non-negotiable. She also emphasizes maintaining a healthy weight that works for your body, pointing out that extremely thin faces can look older. When that happens, makeup can be a subtle tool to restore softness and fullness.

For Fuller, though, beauty goes beyond appearances. She rarely wears makeup unless it’s for a special occasion, preferring to let her skin “breathe and hydrate.” Her secret to feeling beautiful? Being at peace with her face as it is and caring for it with intention.

In the end, these over-50 influencers share a unified message: beauty doesn’t fade—it evolves. Whether it’s staying hydrated, protecting your skin, or simplifying your routine, every tip points toward the same truth—radiance comes from taking care of yourself in ways that feel natural and empowering.

Tags: , , , , ,
Discover Trader Joe’s Newest Skincare Essentials

Discover Trader Joe’s Newest Skincare Essentials

Looking for fresh skincare items or fun stocking stuffers for the beauty lovers in your life?

Trader Joe’s beauty aisle has you covered with a mix of hydrating, nourishing, and delightfully scented options.

Marine Radiance Set

This brand new set was spotted by popular Instagram account, @traderjoesobsessed and fans are already buzzing about it.

This set includes everything you need to brighten up dull skin for the wintertime, like  body oil, a body brush to exfoliate dead skin cells and a body scrub packed with golden seaweed, sea fennel and algae extracts. 

Lip Butter Balm Duo

This duo is perfect for keeping in your car or purse for on-the-go hydration. Smooth, nourishing, and convenient, it’s ideal for soft, kissable lips anytime, anywhere. Plus, the two scents smell divine. 

Cinnamon Roll Flavored Lip Mask

Treat your lips to this sweet, seasonal mask that moisturizes while filling the air with a cozy cinnamon roll scent. Use it overnight or as a nourishing chapstick throughout the day for soft, indulgent lips.

Berry Glow Body Set

Perfect for treating yourself or gifting to someone who loves indulgent, skin-loving treats, this set includes:

  • Berry Glow Scented Body Mist – A 6 fl oz mist with aloe and fruit extracts to hydrate and gently brighten skin.
  • Berry Glow Scented Body Wash – A 3 fl oz pump that cleanses gently while leaving a fresh, fruity scent.
  • Berry Glow Scented Body Butter – A 3 oz tub of rich, creamy lotion with a bright, fruity-vanilla aroma reminiscent of Trader Joe’s classic Body Butters.

Tags: , , , , ,
Best oLive
Privacy Overview

This website uses cookies so that we can provide you with the best user experience possible. Cookie information is stored in your browser and performs functions such as recognising you when you return to our website and helping our team to understand which sections of the website you find most interesting and useful.