Homestead Blog Hop - Homestead tips, ideas, animal care, and recipes every Wednesday

Homestead Blog Hop 595 – Canning Blueberries and Red Sauce

Welcome to Homestead Blog Hop, a weekly gathering for homesteaders and simple living enthusiasts to share DIY projects, from-scratch recipes, and creative inspiration. This week’s hop features cozy homesteading tips, along with practical ideas that celebrate handmade living and self-sufficiency.

Whether you’re looking for seasonal crafts, homemade treats, or encouragement on your homesteading journey, you’ll find plenty of inspiration to carry into the new year. Grab a cup of tea, explore the featured posts, and join us in sharing your own homestead creations.

Meet Your Homesteading Hosts

We’re Kelly from Simple Life Mom, Liz from The Cape Coop, Natasha from Houseful of Nicholes, and Laurie from Ridgehaven Homestead. Together, we’re passionate about from-scratch living, simple ingredients, frugal habits, and intentional homesteading. We’re delighted to host the Homestead Blog Hop, where you can find fresh inspiration each week for DIY projects, homemade recipes, and practical simple living ideas.

Follow Us for More Homestead Inspiration

Natasha – Houseful of Nicholes
Facebook | Pinterest | X | Instagram

Laurie – Ridge Haven Homestead
Facebook | Pinterest | Instagram

Liz – The Cape Coop
Facebook | Pinterest | X | Instagram

Kelly – Simple Life Mom
Facebook | Pinterest | X | Instagram

FEATURED POSTS from the Last Homestead Blog Hop

Each week, we take turns selecting three featured posts from the Homestead Blog Hop. These features are shared across all of our social media platforms, helping spotlight the creativity and hard work of our fellow homesteaders. Here are the featured posts from last week’s hop:

1. Chicken Bake Alfredo from Yummi Haus

2. Red Sauce – 10 Ways from Homemade on a Weeknight

3. Blueberry Recipes for Canning from Flour on My Face

Congrats! Feel free to grab the featured on button for your post.

Just right click and ‘save image as…‘

Guidelines for the Homestead Blog Hop

  1. Click the “Add Your Link” button below and upload a clear, eye-catching image from your project or recipe. Please link directly to the family-friendly post itself, not your blog’s homepage.
  2. You may link up up to three posts each week.
  3. Take time to visit a few other blogs in the hop and leave a thoughtful comment to let them know you stopped by. Community support makes this hop special!
  4. Please include a link back to the Homestead Blog Hop in your post. Posts without a backlink are not eligible to be featured. All featured posts are shared across all hosts’ social media channels.
  5. Share posts that haven’t been linked to the hop before. Older posts are welcome as long as they are new to the hop.
  6. By joining the Homestead Blog Hop, you grant the hosts permission to use one image from your post, with a link back to your site, if your post is selected as a feature next week.
  7. This is a family-friendly link-up designed to encourage, inspire, and support the homesteader in all of us.

Let the Party Begin!

Which project are you excited to try this week? Leave a comment below.

Join Our Homestead Blog Hop Pinterest Board

Follow all of your hosts on Pinterest and send a message if you’d like to be added to our Homestead Blog Hop group board. This board is a great place to share your DIY projects, crafts, and from-scratch recipes with the homesteading community.

Guideline: Only pin posts that you’ve linked up to the Homestead Blog Hop.

Tags: , , , , , ,
How to get out of Fight or Flight

How to Get Out of Fight or Flight

For years I exercised daily, did plenty of cardio, and restricted my calories to the point I was way undereating. Yet the stubborn weight still held on, my thyroid wasn’t functioning well, and my lab numbers weren’t where I wanted them. If you’d told me then that the answer wasn’t a stricter diet or more supplements, I wouldn’t have believed you. 

Looking back, I realized that my body was in fight or flight mode for over a decade. I had to step back and ask the hard questions. Not “how do I force my body to listen,” but “how can I learn how to listen to my body”? Here’s how to get out of fight or flight and a deep dive from my personal experience. 

I learned through trial and error how the nervous system drives healing, and the simple, foundational ways we can begin sending safety signals to the body again.

Why Fight or Flight Keeps Us Stuck

One of the most helpful reframes for me was understanding that my body isn’t broken, it’s protective. What we often call fight or flight is simply the activation of the sympathetic nervous system, a built-in response designed to keep us alive. Our body sends us messages, sometimes not so subtly. I’ve found from personal experience that when we don’t listen to the whispers our body is giving, they can turn into shouts. 

When the sympathetic system is activated, the body shifts priorities. Digestion slows down, detox becomes less efficient, hormone production changes, and inflammation increases. Sleep is often disrupted, and processes like reproduction and long-term repair are deprioritized. From a survival standpoint, this is incredibly intelligent. If the body believes it’s in danger, it will focus on immediate survival rather than long-term healing.

The challenge is that many of us live in a chronic, low-grade version of this state. Not because of immediate physical danger, but because of constant inputs like blood sugar fluctuations, artificial light at night, environmental toxins, emotional stress, overstimulation, and even undernourishment. Even if we don’t consciously feel stressed, the body can still perceive danger.

This realization changed everything for me. You cannot force the body to heal from a place of stress. You don’t heal your way into safety. Once you create the safety signals, healing follows.

The Nervous System as the Gatekeeper of Healing

At the center of this is the nervous system, which sets the conditions for what the body is willing to do at any given time. A key player is the limbic system, which constantly scans for safety or danger, often faster than conscious thought. This means the body can react before we’re even aware of it.

For me, this explained why I could do so many things “right” physically and still not feel better. I had cleaned up my diet, taken targeted supplements, and run labs, yet my body was still stuck. It wasn’t until I addressed the nervous system layer that those efforts began to work.

Symptoms are not random or meaningless, but communication. When the body is stuck in fight or flight, it’s essentially saying that it doesn’t feel safe enough to prioritize healing. That message can show up in many forms, including anxiety, sleep issues, hormonal imbalances, chronic pain, burnout, or weight that won’t shift despite dietary changes.

Understanding this shifted my focus away from overriding symptoms and toward listening to them.

Emotional and Mental Safety Signals

When people think about stress, they often think of mental or emotional stress. While that’s only part of the picture, it’s still a powerful influence on the nervous system.

Unresolved emotional patterns can keep the body in a constant state of alertness. In my own experience, chronic stress, overwhelm, and patterns that had been in place for years all played a role. I tried many different approaches, including therapy modalities like Internal Family Systems, EMDR, hypnosis, and traditional talk therapy. Some were helpful, some were not (like talk therapy), but none were a complete solution on their own.

What made the biggest difference was the consistent, daily work of gently retraining my nervous system responses. Over time, the small changes compounded into big results. 

Putting It Into Practice

There are also certain experiences that signal safety to the brain. Feeling seen and understood, having supportive relationships, and maintaining healthy boundaries all play a role. Slower mornings and evenings, predictable routines, and reducing multitasking can also help the body feel more regulated. Even things like play, joy, and pleasure are not optional extras. They’re biological signals that the body is safe.

There are simple ways to begin shifting the nervous system in this direction. Breathwork is one of the easiest places to start. Something as simple as extending the exhale longer than the inhale can begin to calm the body. The physiological sigh, which involves a deep inhale, a second short inhale, and then a long exhale, is another tool that mimics a natural calming response we see in babies and young children.

Practices that stimulate the vagus nerve, such as humming, singing, or even gargling, can also support a more relaxed state. Journaling and gratitude practices can shift mental and emotional patterns over time. Gentle movement and time in nature help regulate the body in a more physical way.

For me, the key wasn’t doing any of these perfectly. It was showing up consistently and allowing the nervous system to gradually learn a new baseline.

Safety Signals and What the Body Needs

One of the most important shifts I had to make was realizing that safety isn’t just emotional. It’s also physical and biochemical. The body is constantly interpreting signals from its environment, and certain inputs can either reinforce a sense of safety or reinforce stress.

Light is one of the most powerful signals. Morning sunlight especially plays a critical role in regulating circadian rhythms. These rhythms in turn influence cortisol timing, energy levels, and sleep quality. During my healing phase, I made it a point to get outside at sunrise each day and to take short breaks throughout the day to get natural light. Now, it’s become a daily habit I can’t live without. 

Just as important is reducing artificial light at night. Exposure to blue light after sunset can suppress melatonin production, which is not only important for sleep but also for repair and recovery. When melatonin is disrupted, it affects far more than just how quickly we fall asleep.

Minerals and nutrients are another foundational piece. The body interprets adequate nourishment as a sign of safety. Minerals like magnesium support relaxation, sleep, and hundreds of biochemical processes. Sodium and potassium help regulate fluid balance and cellular communication. When the body is low in these essential nutrients, it can interpret that deficiency as a stress signal.

This was a major shift for me. Instead of focusing on restriction or perfect macros, I began asking how I could maximize nourishment in each meal. Prioritizing protein, healthy fats, and nutrient-dense foods helped signal to my body that it had the resources it needed to repair and rebuild.

Sleep is another critical safety signal. During deep sleep, the body reduces inflammation, repairs tissues, regulates hormones, and clears waste from the brain. When sleep is consistently disrupted, the body remains in a state of alertness. Prioritizing sleep became one of the most impactful changes I made, even when it wasn’t perfect.

Reducing Environmental Stressors

Another layer that often goes overlooked is the role of the environment. The body is constantly processing inputs from the air we breathe, the water we drink, and the products we use.

Things like synthetic fragrances, mold, poor air quality, and chemical exposures can all act as subtle stressors. Even if we don’t consciously notice them, the body does.

The goal isn’t to create a perfect environment (which we can’t do anyway!). Instead, it’s about reducing the overall load. Simple changes like opening windows for fresh air, using an air filter, using a good water filter, and minimizing synthetic products can make a meaningful difference over time.

One important concept that changed my approach was understanding that detox isn’t something we force. It’s something the body does when it feels safe and supported. Trying to push detox pathways while the body is already stressed can create more problems rather than solving them.

Daily Rhythms That Support a Calm Nervous System

The small rhythms of daily life have a surprisingly large impact on the nervous system. The body thrives on predictability, and chaos is often interpreted as stress. Easier said than done as a mom, but it’s about making progress, not doing things perfectly. 

Creating a slower start to the day, with natural light before screens, helps set the tone for a more regulated nervous system. Eating a nourishing meal before caffeine helps stabilize blood sugar and energy levels. Taking short movement breaks throughout the day, even just a brief walk, supports circulation, lymphatic flow, and mental clarity.

Walking, in particular, became one of the simplest and most effective tools I used. It doesn’t require special equipment or intense effort, yet it supports multiple systems in the body at once.

Consistent routines, especially in the evening, can also signal to the body that it’s safe to wind down. Over time, these patterns help retrain the nervous system to expect periods of rest and recovery.

Another piece that’s often overlooked is the role of enjoyment. Moments of pleasure, creativity, or connection aren’t just nice to have. They actively shift the body out of a stress response and into a healing state.

The Connection Between Stress and Hormones

One of the most fascinating aspects of this journey was realizing how closely hormones follow the nervous system. When the body feels safe, hormone production starts to move toward balance. When it feels stressed, hormones shift accordingly.

This can show up in many ways, including irregular cycles, increased PMS symptoms, thyroid imbalances, and changes in mood, energy, and sleep. In my own experience, addressing nervous system safety was a missing piece that allowed other hormone-supporting strategies to finally work.

Even during natural transitions like perimenopause, increasing safety signals can make a noticeable difference. Many women experience improvements in sleep, mood, energy, and overall stability when the nervous system is supported.

It Starts With a Single Step

One of the most important things I’ve learned is that getting out of fight or flight isn’t about doing everything at once. In fact, trying to overhaul everything can create more stress.

Instead, it’s about consistently sending small, meaningful safety signals. This might look like getting outside for a few minutes in the morning, eating a more nourishing breakfast, or taking short breaks to move and breathe throughout the day.

Over time, these small actions add up. They help the nervous system shift from a constant state of alertness to one where healing becomes possible again. Some of the biggest needle movers for me have been getting morning sunlight, enough protein and minerals, and winding down at night. 

Final Thoughts on How to Get Out of Fight or Flight

Looking back, I can see that for years I was trying to build health on top of a stressed foundation. It wasn’t that the tools I was using were wrong. My body just wasn’t in a place where it could fully benefit from them.

When I shifted my focus to creating safety, physically, emotionally, and environmentally, everything else began to fall into place. Healing no longer felt forced, but felt supported.

If you feel stuck or like nothing is working, it may be worth asking where your body might not feel safe yet. It might need more rest, more nourishment, more light, or simply a slower pace. The body knows how to heal; we just have to get out of the way sometimes and let it. 

What are some ways you’ve found to help send safety signals to your body? Anything I missed? Leave a comment and let us know!

Tags: ,
natural remedies for seasonal allergies

Powerful Natural Remedies for Seasonal Allergies

Oh, seasonal allergies. They truly can make life miserable. The good news is, there are things we can do! Many unnecessarily suffer from seasonal allergies when a few simple natural remedies can offer allergy relief, even without medicine. 

According to the CDC, over 30% of the population deals with some kind of allergy. And over 25% have seasonal allergies specifically. Common triggers include pollen from grass and trees, dust mite fecal particles, animal dander, certain foods, air pollution, personal care products, or even insect bites.

These triggers can lead to allergic reactions with a variety of symptoms, including a runny nose, itchy eyes, and watery eyes. 

As prime allergy season is here (at least in our area), I’m sharing the natural remedies I’ve used and that work for my family when needed. These aren’t as fast or immediately effective as medication, but over the long term, these methods have lessened my seasonal allergies greatly. Some people even see permanent reversal. 

What Causes Seasonal Allergies?

Diet, strong gut health, and overall health can make a big difference when it comes to seasonal allergies. That’s because an allergic response has everything to do with the immune system.

I like to describe the body as a bathtub. Every time anything enters our bodies — be it from food, water, air, etc. — our body reacts. This is a good thing and nature’s way of keeping the body in a state of balance (homeostasis).

At a certain point, if too much goes into the bathtub, it’s going to overflow. Overloaded and overstimulated, the immune system responds to normally harmless substances as if they’re a foreign invader.

How Allergy Symptoms Start

Clemens von Pirquet first coined the word “allergen” and helped pioneer the field of immunology in 1906. Since then, scientists have learned a lot about allergies. 

“It may sound ridiculous at first that antibodies (which should protect against disease) are also responsible for disease. ” Pirquet

Allergic disorders are basically an overreaction by the body’s immune system. They happen when the body treats a harmless substance like a threat and responds by making more IgE antibodies. These IgE molecules then stick to mast cells. At the same time, T helper cells (specifically Type 1, called Th1) become involved, triggering the allergic response.

The immune system mistakenly goes into attack mode against things that aren’t really dangerous. The reactions can include a tight feeling in the bronchial tubes, more mucus, and more vascular permeability. Sometimes within minutes. 

If the exposure is strong enough to get past the body’s first line of defense, the reaction then triggers more leukocytes and Type 2 T helper cells (Th2). This creates a stronger immune response that the body normally uses to fight off things like parasites and other physical invaders.

The reaction manifests in different ways depending on the person’s genetics and where the body perceives the invasion. Symptoms may include:

  • fatigue (sometimes extreme)
  • hay fever (runny nose, itchy eyes, congestion)
  • nasal drip
  • digestive upset and nausea
  • eczema
  • asthma
  • even anaphylaxis

When Allergies Become Chronic

And the more the person is exposed to the trigger, the more the body will chronically have the inflammatory response. A 2008 journal article explains how the system’s inflammatory response and the misery allergy sufferers feel is very real and more than a case of the sniffles!

Allergy testing can help show what’s triggering the issue, but conventional treatments are almost always the same, no matter the cause. This includes taking an antihistamine or corticosteroid, which can have unwanted side effects. 

If you want to tackle allergies naturally, there are two main approaches:

  1. Limit exposure to possible allergens (like putting less in the bathtub)
  2. Support a strong, healthy immune system (like increasing the size of our bathtub)

This isn’t an either/or problem, but a both/and solution. 

Natural Remedies For Seasonal Allergies

My kids and I don’t really have seasonal allergies anymore after doing the GAPS diet to strengthen our gut and immune system health. However,  I still occasionally get hit with an allergy attack from dust after cleaning (a reason not to clean? I think yes!).

We’ve found these simple natural remedies to be very effective for allergy relief. Different people seem to benefit from different remedies depending on certain genetic factors and which allergens they react to. It might be worth trying more than one of these natural remedies for allergies to see which works best for you. 

Simple tips like using an air purifier with a HEPA filter reduce indoor allergens, like dust mites and pollen. Essential oils can also offer support during peak allergy season. A popular diffuser blend is lavender (antihistamine), peppermint (opens nasal passages), and lemon (thins mucus). Even these anti-inflammatory golden milk mango popsicles are a yummy way to lessen allergies!

Here are some other ways to tackle your allergies for good!

1. Apple Cider Vinegar

Apple cider vinegar is an age-old remedy that’s often used for a variety of health issues. I’ve used it for allergy relief (and heartburn relief) with great success. The theory is that it can help reduce mucus and cleanse the lymphatic system, both of which are helpful for allergies. 

There’s also some research to suggest ACV can help reduce inflammatory responses and support the immune system. While there isn’t a ton of research behind this remedy, many feel it’s worth a try. 

What I did: When allergies hit, I mixed a teaspoon of organic, raw, and unfiltered apple cider vinegar into a glass of water. I drank this three times a day. This kind of vinegar has “the mother” in it, a colony of beneficial bacteria. Check the label, it should list if it has it.

I use this brand, but it’s easy enough to make your own. Apple cider vinegar helped me relieve acute allergy symptoms and seemed to help avoid allergy attacks as well when I do it daily. If you suffer from allergies at a certain time of year, you may want to start taking ACV well before. 

2. Wash Your Nostrils

This remedy works by hindering the offending allergen from entering your airways and reducing nasal congestion.

Neti Pot

It took me a while to try the Neti Pot simply because I’m a big scaredy cat about pouring things in my nose. I’m glad I took the leap though because it’s not half as bad as it sounds! The basic theory is that you use a Neti Pot filled with a sterile saline solution to flush allergens out of the sinuses. It also helps prevent pathogens from invading during cold and flu season. 

I was surprised to find that both conventional and holistic practitioners recommend nasal rinses. Be sure to use boiled and cooled or distilled water, not water from the tap (because parasites….ewww). 

To use: Either use a pre-made saline rinse or make your own. Once at body temp, fill the Neti Pot, pour through one nostril, and let it drain out the other. Get full instructions here.

Saline Spray

An option for Neti Pot sissies like me. I like this natural saline spray with xylitol for extra help with soothing inflammation and opening airways. One of my kids with large tonsils uses it to help keep post-nasal drip and sore throats away. Regularly using a nasal spray can help reduce irritation from allergens. 

To use: Spray saline into the nostrils a few times a week or even daily for routine maintenance.

3. Quercetin

Quercetin is a natural bioflavonoid that helps stabilize mast cells to keep them from releasing histamine. It’s also a potent anti-inflammatory that can help reduce overall allergy symptoms. It’s best used as a long-term remedy and many people start taking it about 4-6 weeks before allergy season.

To use: Although quercetin is naturally found in foods like citrus and broccoli, it’s very difficult to get enough to relieve allergies from food alone. Quercetin supplements can help prevent allergies and help with acute symptoms. 

4. Nettle Leaf

Stinging nettle leaf is another natural antihistamine that can be very effective. It works by naturally blocking the body’s ability to make histamine. You can use nettle tea, tincture, or capsules for allergy relief. It’s available online, but grows wild in many places. 

You can also combine nettle with other herbs to make a soothing herbal tea. Peppermint, raspberry leaf, and nettle make a refreshing allergy relief tea. Lavender is another powerful antihistamine that pairs well with nettle in tea. 

What I do: I often include nettle in homemade anti-inflammatory tea during allergy season and use capsules for acute relief.

5. Probiotics

Allergies are the result of an imbalance in the immune system that causes the body to react too strongly. Research shows that when the gut has a good balance of healthy bacteria, people notice fewer allergies. There’s even emerging evidence linking a pregnant mother’s gut bacteria to their child’s likelihood of getting allergies throughout life. Not getting enough exposure to dirt and some germs can also negatively impact the immune system. 

While we can’t do much about our mothers’ diets while they were pregnant, there’s still hope. Balancing gut bacteria now and getting enough beneficial bacteria can have a positive effect on allergies.

What I do: We eat a varied diet that includes plenty of fermented foods and drinks, which can help boost gut bacteria. We also take a quality probiotic.

6. Local Honey

Eating raw honey that’s produced near your home may help your body adapt to local allergens, like pollen. Some compare it to a natural version of allergy shots, but without the side effects. There isn’t much scientific evidence to back this one, but there seems to be a lot of anecdotal evidence from people who have tried it. 

Research shows raw honey has anti-inflammatory effects and can suppress inflammatory IgE levels and modulate mast cell response. A 2013 study also found honey had anti-histamine effects in those with allergic rhinitis. 

What I do: Eat a teaspoon (or more) of raw, locally produced honey once or more a day. Some suggest starting this a month or so before allergy season. 

7. Anti-Inflammatory Foods

Anti-inflammatory foods, teas, and spices may help reduce unpleasant allergy symptoms. A 2016 animal study found that ginger reduced sneezing and congestion as well as lowered mast cell response. Researchers have also looked at green tea for calming allergies and inflammation with good results. 

What I do: Serve plenty of herbs and spices with meals, as well as green and herbal teas. This ginger switchel drink combines raw honey, ACV, and anti-inflammatory ginger for a delicious probiotic drink. It’s a powerhouse of support for allergies. 

8. Homeopathics and Herbal Remedies

I’ve already mentioned some different herbs to take, but there are several really good pre-made allergy blends now. Homeopathics and herbal supplements are different modalities, but both can work well for allergies. These can often work faster for acute symptom relief than long-term solutions, like diet changes. 

Want something quick and easy in pill form? Genexa offers natural homeopathic remedies that work well for allergies without the OTC or prescription meds. 

9. Addressing the Root Cause of Seasonal Allergies

Going back to the bathtub analogy: some of us are born with a smaller bathtub due to genetics and early environmental exposures. Things like mold exposure, Lyme disease, and past trauma can also cause our bathtubs to fill up fast. Identifying and addressing underlying health issues that are stressing the body and immune system helps bail out our tub. 

This is where working with a qualified practitioner for personalised dietary advice and testing can be really helpful. 

Diet Changes

Often, our gut health is the key to truly reversing allergy symptoms. This deeper healing can reduce chronic inflammation and support long-term immune balance. Elimination diets and bone broth are a good place to start. Those with histamine issues often find that meat stock is a better option than bone broth at first (which is high in histamines). 

I’ve found that addressing gut health is key for severe allergies and gut healing/rebalancing.

What we did: We followed the GAPS diet for several months and had success improving our seasonal allergies. One of my kids even reversed some rather severe food allergies with this approach. 

Gut Testing

If you truly suffer from allergies and suspect you have a compromised gut, consider testing. This helps give a clear picture of what’s going on in your body and how to fix it.

Yes, this literally means mailing poop to a lab (kids may find this one fun!), but I learned so much from this test. I still continue to benefit from knowing specific ways to improve my individual gut. Advances in at-home testing mean you don’t need to go to a doctor or a lab.

What I use: Viome is the company I use and trust. See the results of my gut health test here. 

Final Thoughts on Natural Remedies For Seasonal Allergies

Getting faster symptom relief while working on the root causes of seasonal allergies was key for our family. After implementing these changes, I hardly deal with allergies anymore!

Don’t feel like you need to try all of these natural remedies at once, but see what works best for you. Speaking from personal experience, they can work really well!

Do you have allergies? What’s helped you the most? Share below!

Tags: , , , ,
Homestead Blog Hop - Homestead tips, ideas, animal care, and recipes every Wednesday

Homestead Blog Hop – Crafts and Delicious Simple Desserts

Welcome to Homestead Blog Hop, a weekly gathering for homesteaders and simple living enthusiasts to share DIY projects, from-scratch recipes, and creative inspiration. This week’s hop features cozy homesteading tips, along with practical ideas that celebrate handmade living and self-sufficiency.

Whether you’re looking for seasonal crafts, homemade treats, or encouragement on your homesteading journey, you’ll find plenty of inspiration to carry into the new year. Grab a cup of tea, explore the featured posts, and join us in sharing your own homestead creations.

Meet Your Homesteading Hosts

We’re Kelly from Simple Life Mom, Liz from The Cape Coop, Natasha from Houseful of Nicholes, and Laurie from Ridgehaven Homestead. Together, we’re passionate about from-scratch living, simple ingredients, frugal habits, and intentional homesteading. We’re delighted to host the Homestead Blog Hop, where you can find fresh inspiration each week for DIY projects, homemade recipes, and practical simple living ideas.

Follow Us for More Homestead Inspiration

Natasha – Houseful of Nicholes
Facebook | Pinterest | X | Instagram

Laurie – Ridge Haven Homestead
Facebook | Pinterest | Instagram

Liz – The Cape Coop
Facebook | Pinterest | X | Instagram

Kelly – Simple Life Mom
Facebook | Pinterest | X | Instagram

FEATURED POSTS from the Last Homestead Blog Hop

Each week, we take turns selecting three featured posts from the Homestead Blog Hop. These features are shared across all of our social media platforms, helping spotlight the creativity and hard work of our fellow homesteaders. Here are the featured posts from last week’s hop:

1. How to Turn a Flat Sheet into a Full Kitchen Linen Set from The Once and Future Homestead

2. Easy Christmas Coffee Filter Wreath Craft for Kids from Darcy and Brian

3. Vegan Banana Chocolate Mousse from Esme Salon

Congrats! Feel free to grab the featured on button for your post.

Just right click and ‘save image as…‘

Guidelines for the Homestead Blog Hop

  1. Click the “Add Your Link” button below and upload a clear, eye-catching image from your project or recipe. Please link directly to the family-friendly post itself, not your blog’s homepage.
  2. You may link up up to three posts each week.
  3. Take time to visit a few other blogs in the hop and leave a thoughtful comment to let them know you stopped by. Community support makes this hop special!
  4. Please include a link back to the Homestead Blog Hop in your post. Posts without a backlink are not eligible to be featured. All featured posts are shared across all hosts’ social media channels.
  5. Share posts that haven’t been linked to the hop before. Older posts are welcome as long as they are new to the hop.
  6. By joining the Homestead Blog Hop, you grant the hosts permission to use one image from your post, with a link back to your site, if your post is selected as a feature next week.
  7. This is a family-friendly link-up designed to encourage, inspire, and support the homesteader in all of us.

Let the Party Begin!

Which project are you excited to try this week? Leave a comment below.

Join Our Homestead Blog Hop Pinterest Board

Follow all of your hosts on Pinterest and send a message if you’d like to be added to our Homestead Blog Hop group board. This board is a great place to share your DIY projects, crafts, and from-scratch recipes with the homesteading community.

Guideline: Only pin posts that you’ve linked up to the Homestead Blog Hop.

Tags: , , , , , ,
amber light bulbs

The Exact Lighting I Use at Home to Sleep Better (Amber Light Bulb Guide)

I spent years doing everything right for sleep. Taking magnesium, no screens, cool bedroom, and still waking at 3 am wondering what I was missing. It wasn’t until I started obsessing over my outdoor light exposure and the wavelengths coming out of my home lighting that things actually shifted. In fact, this is one of the most impactful changes I’ve ever made.

If you’re just looking for the products I mentioned in a video or podcast:

Why I Choose Amber Light Bulbs 

Light is the most powerful signal your body receives all day. Not just as light to see, but the information our cells are reading from the light. The spectrum of light entering your eyes tells your hypothalamus what time it is. This determines whether melatonin rises on schedule or gets suppressed for another 90 minutes while you lie in bed wondering why you can’t fall asleep.

The problem: standard LED lighting, including “warm white” bulbs, emits the same wavelengths of blue light as noon sunlight. Your overhead lights, your lamp, and your bathroom vanity are telling your cells it’s midday at 9 pm. Every night.

After years of testing (and a house that now glows like a very cozy campfire after 6 pm), here’s exactly what I use, why it works, and where to get it. And pro tip: I use timers in my house so the right lighting goes on in lamps at sunset and off around bedtime without any extra work. Those are all linked below.

In This Post

Why “Warm White” LEDs Still Aren’t Enough

This was the thing that surprised me most when I first started researching this properly. A 2700K “warm white” LED looks yellowish and feels softer than a daylight bulb. However, it still emits a measurable spike in the blue wavelength range (440–480nm) that suppresses melatonin. The warmth you see is partially filtered. The circadian-disrupting portion of the spectrum is still very much present.

What your body actually needs in the evening is light with no emissions below 530nm, in the amber/red spectrum with no blue and no green wavelengths. This is what’s called a true amber or low-blue spectrum, and it’s genuinely different from a warm white LED.

Your eyes contain specialized cells called melanopsin receptors. These cells have nothing to do with vision; they exist only to signal your master clock about what time it is. They’re exquisitely sensitive to short-wavelength blue light around 480nm. When they detect it, they signal the suprachiasmatic nucleus to suppress melatonin output.

Even dim light can interfere with a person’s circadian rhythm and melatonin secretion. A mere eight lux — about the level of most bedside lamps — has an effect. (Harvard Medical School)

A true amber bulb engineered to have zero emissions below 530nm can’t trigger those receptors. Your brain reads it as firelight. This triggers safe, post-sunset, begin repair mode.

The Exact Amber Bulbs and Lamps I Use

Evening Amber Light Bulbs (the Most Important Swap)

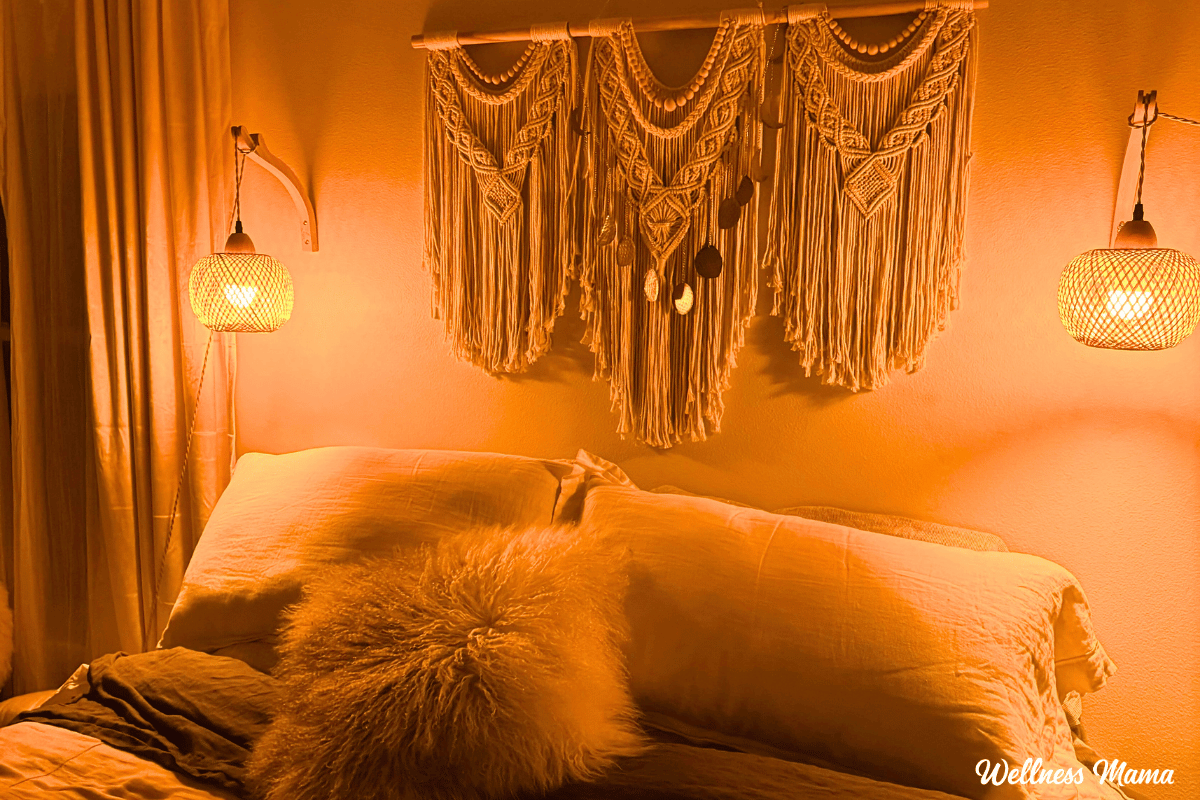
The body is used to and primed for bright overhead light during the day, so overhead lighting wasn’t my first priority in auditing my home light environment. I researched to find circadian-friendly bulbs for evening and put these in lamps so they’re always at eye level or below.

These go in every lamp in my main living spaces and any rooms we’re in after about 6 pm. Namely, the kitchen, living room, and dining room. This is where most circadian disruption happens, and it’s where the change makes the fastest difference. I also have these in our bedrooms.

You can get the lightbulbs I use from Healthy Home Lighting here (and use code wellnessmama to save 10%). 

The bulbs I chose from Healthy Home are no-flicker, no-EMF, and have the right light wavelengths. They come with three modes: daylight, sunset, and campfire. I have our evening bulbs set to campfire mode automatically and they all come on at sunset. So we simply turn off any overhead light and switch to “night mode” in our home.

  • Zero blue light emissions — not just reduced, eliminated
  • Flicker-free and low EMF
  • Bright enough for everyday tasks, not just reading
  • Standard E26 base, which fits most lamps and fixtures

I also use digital timers, so these come on automatically. All the timers and lamps I use are linked here.

Red Bulbs For the Bedroom and Bathroom

In the bedroom and bathroom, I go further. I opt for true red light, which contains no blue or green wavelengths at all. Red light above 600nm has essentially zero effect on the circadian system. It’s what photographers use in darkrooms. I use these in bedside lamps and the bathroom vanity for the hour before sleep.

Find the flicker-free red light bulbs I use here. 

Note that these are different than red light therapy panels. While the light is still beneficial, those are their own category, and I actually don’t recommend using them at night or right before sleep.

The Three-Setting Bulb (Easiest Option to Start With)

If you want one bulb that does it all without swapping, a circadian lightbulb that cycles through daylight, amber, and deep red with your existing light switch is the simplest entry point. No app, no smart home setup, no Wifi or Bluetooth, you just flip the switch.

I don’t think the full red light bulbs are necessary unless you really want to go low light in the evening. The three settings of the Healthy Home Bulbs will work in most cases.

The Lamps Themselves

Bulbs are only half of the equation. Overhead lighting is actually the worst offender because it enters your eyes from above, the same angle as a high-noon sun. In our house, we turn off all overhead lights by around 6 or 7 pm and switch to floor and table lamps, positioning them below eye level. The angle matters as much as the spectrum.

My Daily Lighting Schedule

The goal is to treat light as a biological input throughout the day, not just something that helps you see. Here’s how our household actually runs this.

  • Morning (wake – 9 am): Outside within 30 minutes of waking, no sunglasses, glasses, contacts, or windows. If I can’t get outside, I open all the curtains and stand near an open window. Full-spectrum or bright indoor lights are fine for this part of the day.
  • Daytime (9 am – ~5 pm): Natural light is always preferred. Standard indoor lighting for workspaces is fine. Screens are no issue during daylight hours.
  • Early evening (~6 pm): Overhead lights off. Amber lamps on. If I’m using screens, I have a blue-light filter enabled.
  • Late evening (8 pm – bed): Red or deep amber only in the bedroom and bathroom. No overhead lighting. This is the window where melatonin should be rising and I protect it carefully.
  • Overnight: Complete darkness. Blackout curtains. A dim red nightlight only if needed for kids navigating to the bathroom.

You don’t have to do all of this at once. The single highest-leverage starting point is swapping the bedroom and living room lamps to amber light bulbs before your usual bedtime. That’s where I started. Most people notice a difference within a few nights.

What to Look for When Buying (So You Don’t Waste Money)

I’ve tested enough amber bulbs to know that not all of them do what they claim. Here’s what actually matters:

  • Zero emissions below 530nm. This is the actual threshold for melatonin-safe light. Look for this in the spectral data, not just in marketing copy. If a brand doesn’t publish its spectral chart, that’s a red flag.
  • Flicker-free certification. Cheap bulbs flicker at frequencies your eye can’t consciously detect, but that may contribute to headaches, eye strain, and nervous system load. Confirm the bulb is tested and confirmed flicker-free.
  • Low EMF. Smart color-changing bulbs that use WiFi or Bluetooth to shift their spectrum emit significantly higher EMF than standard bulbs. I avoid them in bedrooms specifically.
  • Color temperature alone isn’t enough. A 2700K rating means the light looks warm; it doesn’t mean it’s low-blue. Demand actual spectral data, not just a Kelvin number.
  • Avoid the “colored shell” trick. A standard LED inside an amber or red plastic bulb will filter some blue light, but it won’t eliminate it. You want a bulb engineered at the spectral level, not just painted.

The Science: Why Light Is a Cellular Input, Not Just a Convenience

I’ve written about blue light and circadian rhythm in detail before, but here’s the condensed version for anyone coming to this fresh:

Your circadian clock, housed in the suprachiasmatic nucleus of the hypothalamus, runs on a roughly 24-hour cycle, but it needs daily calibration from light to stay synchronized with the actual day. Morning light, especially the blue-wavelength spike at sunrise, resets the clock and triggers the cortisol pulse that wakes you up properly.

Everything downstream, including hormone production, immune function, overnight cellular repair, and metabolism, is organized around that signal.

In the evening, the same clock is meant to detect the absence of blue light as a sunset cue. Melatonin rises. Cortisol drops. Growth hormone prepares to pulse. Your brain’s glymphatic system begins clearing waste. Your body runs a very specific repair sequence overnight, and it depends entirely on melatonin starting on time.

When your home lighting keeps emitting blue wavelengths after sunset, melatonin is delayed, sometimes by 90 minutes or more. You’re not just staying up late. You’re postponing the entire repair cascade that should have started hours ago.

Switching your lights doesn’t solve everything. But it removes one of the most consistent nightly disruptors of the system that heals you while you sleep. For me personally, it was one of the highest-leverage changes I made, and one of the least expensive.

Frequently Asked Questions

Should I change every bulb in the house?

You don’t have to. I started with the rooms we’re in during the two to three hours before bed, like the living room, bedroom, and bathroom. The garage, laundry room, and spaces we use briefly don’t need to change. I wanted to get those three spaces right first.

Is amber light bright enough to actually see by?

Yes! Good-quality amber bulbs provide enough light for cooking, reading, and normal evening activities. Colors render slightly differently (reds and yellows look rich, blues and greens go flat), but it’s perfectly functional. If you need more brightness for detailed work, a dedicated desk lamp with a red-spectrum bulb placed close to your task works well too. I like this option better than increasing overhead lighting.

What about blue-light blocking glasses… can I just use those instead?

Glasses help, but they’re a partial solution since they only protect the eyes. Your skin also contains photoreceptors that communicate with the circadian system. Glasses alone don’t give the full benefit of changing the light source itself. I use both: amber glasses when I have to be on screens in the evening, and amber bulbs for the general environment.

Can I just use a dimmer with my existing bulbs?

Dimming reduces total light intensity, which helps, but it doesn’t change the wavelength composition. A dimmed standard LED still emits the same proportion of blue light, just less of it. It’s better than full brightness, but not the same as a true amber spectrum.

What about smart bulbs that change color temperature?

Color-tunable smart bulbs can help, but most still emit residual blue wavelengths even at their warmest setting. And they use WiFi or Bluetooth, which I prefer to minimize in bedrooms. The dedicated amber and red bulbs I use are simpler, have lower EMF, and, in my testing, work better.

Is this safe for kids?

Yes! Honestly, I think it’s especially important for kids, whose circadian systems are still developing and who are often more sensitive to the stimulating effects of blue light before bed. My kids have had amber bedroom lamps for years. The warm light genuinely seems to help them wind down, which tracks with what the science says.

How quickly will I notice a difference?

Most people notice changes in how easily they fall asleep within a few nights of consistent amber lighting in the two hours before bed. If you’re already doing the other sleep fundamentals (no food close to bedtime, a cool room, total darkness), this is often the missing piece that makes them all click into place.

Shop the Full List

Have you switched to amber lighting? What difference did you notice, and what products do you love? Leave a comment and let me know. I read every single one.

Tags: , , , , , , ,
carrot cake

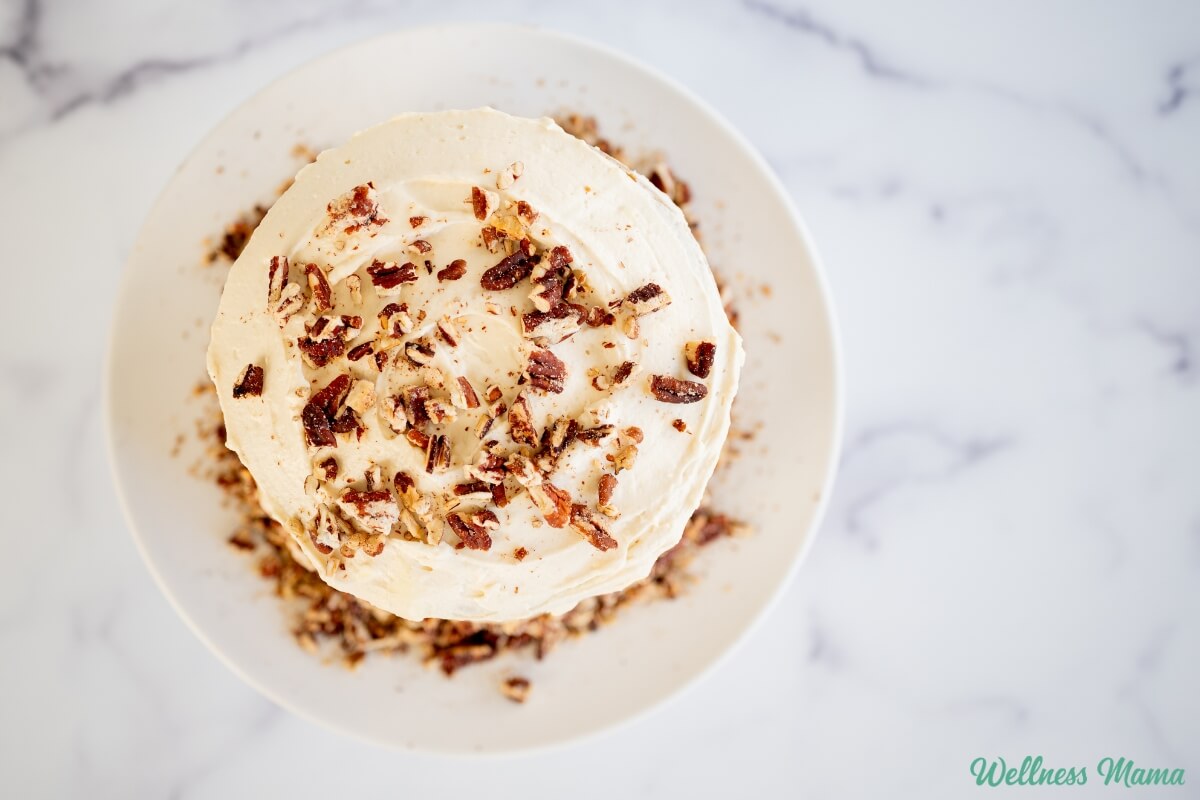
Brown Butter Carrot Cake with Honey Cream Cheese Frosting

Carrots are one of our favorite vegetables and I’ll often make recipes like carrot coulis, carrot salad, or roasted carrots. This homemade carrot cake is another way to enjoy all that carrots have to offer. It’s simple to make, moist, and full of delicious flavors. 

Years ago I came up with a grain and gluten-free carrot cake with pineapple. That recipe used coconut flour and lots of eggs for protein. While I still like that recipe and make it on occasion, I wanted to have another carrot cake recipe on hand that was more traditional. 

Carrot Cake Ingredients

Now that our family includes some organic flour on occasion, I’ve been making more baked goods with it. It’s an easy way to make a healthier dessert that has the same taste and texture as traditional desserts. That doesn’t mean it’s packed with sugar, vegetable oils, or other ingredients I prefer to avoid though!

Carrot cake ingredients typically include flour, sugar, carrots, spices, oil, and eggs. Then there are the optional mix-ins like raisins, pineapple, and shredded coconut. This recipe is very similar, but I’ve opted for raw honey instead of sugar. And it uses butter instead of vegetable oil. Applesauce adds a little more moisture and natural sweetness. 

Need a gluten-free carrot cake? Simply substitute a 1:1 gluten-free flour blend for the organic all-purpose flour. 

How to Make Carrot Cake

The long list of ingredients can be intimidating at first, but this really is a simple recipe. You’re basically combining all of the wet ingredients, then combining all of the dry ingredients, then adding them together. Finally, you’ll stir in the mix-ins like carrots, raisins, and coconut. 

There is the additional step of browning the butter first, which really adds an extra layer of flavor to the cake. Browned butter tastes a lot like caramel, but without the extra sugar. 

Tip: When you’re browning the butter, be sure to keep a close eye on it. It needs to be removed from the stove after it’s browned, but before it’s gotten really dark brown (aka burnt). Because burnt butter carrot cake is not delicious. 

Cream Cheese Frosting For Carrot Cake (Without Refined Sugar)

Carrot cake wouldn’t be what it is without the iconic cream cheese frosting. It adds a nice tang to the sweetness, so the dessert isn’t overwhelmingly sweet. Most cream cheese frosting recipes call for powdered sugar to help thicken and make it spreadable. My version uses raw honey for sweetness and butter for a buttercream frosting consistency.  I prefer honey in this recipe, but maple syrup would taste good too. 

Instead of powdered sugar to thicken, I used arrowroot starch (also known as arrowroot flour). It helps to thicken without making the frosting super sweet. Start with 2 Tablespoons of arrowroot and add more as needed to get the right consistency. You want it to be thick enough it won’t fall down the cake, but not so thick that it’s difficult to spread. 

Different Pan Options

This cake is 4 layers high because I like the look of the extra layers. If you don’t have four 6-inch cake pans, then two 9-inch round pans will also work. Simply change the bake time to 30-35 minutes if using 9-inch pans. If you want to make cupcakes, then bake for 18-22 minutes.

You could also make a sheet pan carrot cake, but I haven’t personally tried it. Let me know if you do! If you’re craving carrot cake or need a fancy (but easy!) spring dessert, then give this carrot cake a try. 

Brown Butter Carrot Cake With Honey Cream Cheese Frosting

This delicious carrot cake is moist and naturally sweetened with honey and

Honey Cream Cheese Frosting

  • Melt the butter over medium heat, swirling occasionally, until it foams and turns golden with a nutty aroma. Remove from heat and pour into a large mixing bowl, allowing it to cool for about 5 minutes.

  • Grate the carrots using the medium holes of a box grater.

  • Preheat the oven to 350°F and grease and line four 6-inch cake pans (or see notes for other pan options).

  • To the cooled brown butter, whisk in the honey or maple syrup, applesauce, eggs, coconut milk, and vanilla extract until smooth and fully combined.

  • In a separate bowl, whisk together the flour, cinnamon, ginger, nutmeg, cardamom, baking powder, baking soda, and salt.

  • Add the dry ingredients to the wet ingredients and stir until just combined, being careful not to overmix. Fold in the grated carrots, chopped nuts, raisins, and shredded coconut if using.

  • Divide the batter evenly between the prepared pans and bake for 24–28 minutes, or until a toothpick inserted in the center comes out clean.

  • Allow the cakes to cool in the pans for about 10–15 minutes before transferring to a wire rack to cool completely.

  • To make the frosting, beat the cream cheese and butter together until smooth. Add the honey, vanilla, salt, and arrowroot starch, and continue beating until light, fluffy, and spreadable. Start with 2 Tablespoons of arrowroot and increase as needed to thicken the frosting to the desired consistency.

  • Place one cake layer on a serving plate and spread a layer of frosting on top. Repeat with the remaining layers. Apply a thin crumb coat over the entire cake. Refrigerate for 20–30 minutes to set before finishing with the remaining frosting.

Nutrition Facts

Brown Butter Carrot Cake With Honey Cream Cheese Frosting

Amount Per Serving (1 serving)

Calories 399
Calories from Fat 234

% Daily Value*

Fat 26g40%

Saturated Fat 15g94%

Trans Fat 0.4g

Polyunsaturated Fat 3g

Monounsaturated Fat 6g

Cholesterol 86mg29%

Sodium 306mg13%

Potassium 254mg7%

Carbohydrates 39g13%

Fiber 2g8%

Sugar 20g22%

Protein 6g12%

Vitamin A 3410IU68%

Vitamin C 2mg2%

Calcium 70mg7%

Iron 2mg11%

* Percent Daily Values are based on a 2000 calorie diet.

  • Garnish with toasted nuts, a sprinkle of cinnamon, or a drizzle of honey if desired.
  • Serve at room temperature for the best flavor and texture.
  • You can also make this in two 9-inch round cake pans.

Does Carrot Cake Need to Be Refrigerated?

Since this recipe uses cream cheese, any leftovers should be refrigerated. I’ve also found that cakes/muffins made with applesauce or other fruit as a sweetener spoil faster at room temperature. How long does it last in the refrigerator? Well, as long as your family doesn’t eat it right away, it will last for up to a week!

It tastes best at room temperature though, so I like to pull it out and let the slice warm up before eating. 

Can You Freeze Carrot Cake? 

Yes, and no. Some recommend freezing the unfrosted and cooled cake layers or individual slices. They’ll last for about 2-3 months in the freezer this way. It is not recommended to freeze a whole, frosted carrot cake. The frosting can crack and it may not look as pretty, but it will still be tasty. Just be sure to use an airtight container to prevent freezer burn. 

What are some of your favorite carrot recipes? Leave a comment and let us know!

Tags: , , , , , , ,
hyaluronic acid niacinamide

Hydrating Hyaluronic Acid and Niacinamide Moisturizer

Once upon a time I created a hyaluronic acid serum in my kitchen, then later made a niacinamide moisturizer. I’m a big fan of DIY kitchen concoctions (as you can tell by now!). One of the most asked questions I got on those recipes was how to combine the two active ingredients.

This HA and niacinamide moisturizer does just that. You get all of the hydrating benefits of HA and the skin boosting benefits of niacinamide in one easy lotion.

Marrying Hyaluronic Acid and Niacinamide

Niacinamide is a form of the water soluble vitamin B3. We need it in our diets, but it also has some impressive skin benefits. Research has found niacinamide can help with hyperpigmentation to make skin tone more even. Other studies show it improved the skin barrier and rosacea symptoms. 

It also decreases moisture loss and improves acne and blemishes. A 2005 study found that women who used niacinamide on skin had significant skin benefits. They had better skin tone, fewer lines and wrinkles, and better elasticity. 

Our skin naturally contains hyaluronic acid (HA) and it’s a big part of our skin and dermal metabolism. HA plays a key role in wound healing and tissue repair and stimulates growth. 

Both hyaluronic acid and niacinamide add moisture to skin, lower inflammation and stimulate collagen. They complement each other well and are often combined or layered together. Hyaluronic acid is a good humectant, while niacinamide also improves overall skin health. 

More Skin Loving Ingredients

While hyaluronic acid and niacinamide are the active ingredients, they need a little help to become a moisturizer. I’ve opted for a blend of oils, shea butter, beeswax and water that makes skin feel soft and moisturized. 

Carrier oil – this provides the bulk of the lotion. Sweet almond, grapeseed, olive, or avocado are some good options. I like avocado and olive oil for drier skin types. 

Shea butter – Smooth and creamy, shea butter is full of essential fatty acids, softens skin, and reduces inflammation. 

Hydrosol or distilled water – This helps to thin the lotion and incorporate the water soluble HA and niacinamide. Hydrosols are the plant waters leftover from essential oil distillation. They offer many of the same skin benefits but are much gentler on skin. 

Tamanu oil – Tamanu is a dark, rich color and is great for acne prone skin or aging skin. It has skin regenerative properties and its rich in antioxidants. If you don’t have any, then jojoba, apricot kernel, or any other skin oil will work. The idea is to give the cream an extra boost of concentrated active ingredients.

Adding Essential Oils

I love adding essential oils to my DIY products. They not only smell nice but they’re antimicrobial, improve skin health, and uplift the mood. Some of my favorite skin-friendly essential oils include lavender, wild orange, frankincense, and geranium. 

The essential oils are diluted to about 2% in this recipe, but you can cut the amount in half if you have more sensitive skin. 

Tips for Making Hyaluronic Acid and Niacinamide Moisturizer

I’ll often stick to easy oil based “lotions” like my favorite basic lotion recipe. While they’re technically not lotion since they don’t have any water, they do last much longer. That won’t work for this recipe though since both hyaluronic acid and niacinamide dissolve in water, not oil. 

Unfortunately, water based products have a much shorter shelf life. This moisturizer combines the best of both worlds and uses mostly oils, waxes, and butters with enough water to dissolve the active ingredients. Water also helps it to feel lighter on the skin so it sinks in beautifully. 

I’ve also opted for some emulsifying wax to help combine the water and oils together. Without it the moisturizer separates and doesn’t work. Beeswax helps to thicken the lotion, but it doesn’t replace the emulsifying wax. 

An Important Note on Preservatives

Since this recipe includes water, it does need a preservative. Bacteria can start to grow in water within minutes under the right conditions. By storing the item properly, using distilled water (or better yet, hydrosol), and a natural preservative, it greatly extends the shelf life. 

Leucidal Plus is a good broad spectrum preservative I’ve used before. A lot of people ask about using rosemary extract or vitamin E instead, but those aren’t actually preservatives. They help slow oxidation and preserve the shelf life of oils, but they won’t prevent microbes from growing in water. 

If you don’t want to use the preservative, then store the lotion in the fridge and use it within 2 weeks. That said, a preservative is the safer option. 

Here’s how to make it!

Hydrating Hyaluronic Acid and Niacinamide Moisturizer

This silky smooth lotion helps hydrate skin and lock in moisture. And it doesn’t feel heavy or greasy!

Active Time20 minutes

Cooling Time10 minutes

Yield: 4 ounces

Author: Katie Wells

  • To the top of the double boiler add: shea butter, tamanu, avocado oil, emulsifying wax, and beeswax. Heat over medium heat until completely melted, stirring ocassionally.

  • Add the water or hydrosol, niacinamide powder, Leucidal Plus, and hyaluronic acid powder to another bowl and whisk to combine. Set aside.

  • Once the oil based ingredients are melted, pour the mixture into the bowl of the stand mixer. Cool in the freezer for about 10 minutes or until firm, but not frozen.

  • Add the essential oil. Using the whisk attachment on your mixer, whisk the oil based ingredients until smooth, creamy, and white.

  • Slowly add the water mixture to the mixer as it’s whisking. Whisk for about 1 minute or until thoroughly combined.

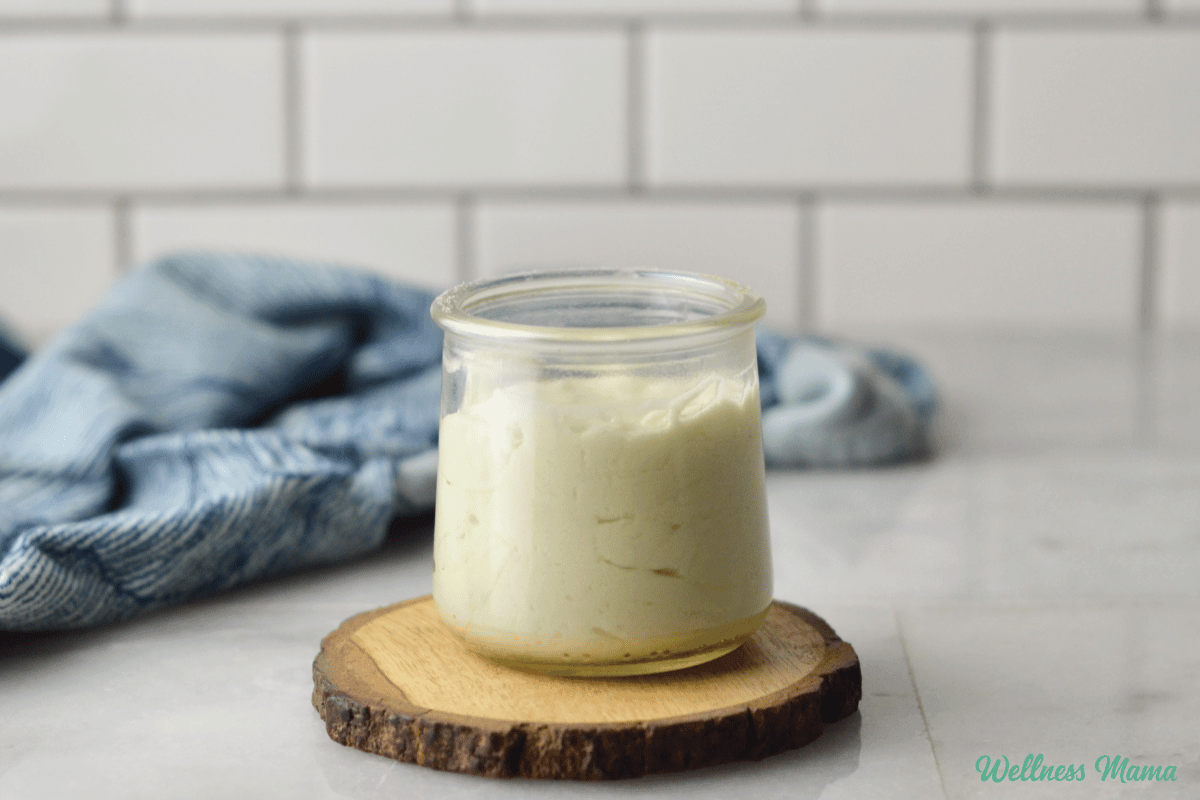
  • Pour the lotion into a clean jar.

This recipe is versatile. Use your favorite skin-friendly essential oil and carrier oils to customize the skin benefits!

Shelf Life and Storage

Like any skincare product this needs to be stored away from direct light and heat. Aka not next to a steamy shower or in the car! Also, be sure to use clean, dry hands when scooping any out of the jar to help prevent contamination. 

You can store the lotion in a pump lotion bottle or a squeeze bottle with a large enough opening. This helps to reduce any germs from hands getting in the jar.

What are some of your favorite DIY skincare items to make? Leave a comment and let us know!

Tags: , , , ,
Homestead Blog Hop - Homestead tips, ideas, animal care, and recipes every Wednesday

Homestead Blog Hop 592 – Yummy Easter Desserts

Welcome to Homestead Blog Hop, a weekly gathering for homesteaders and simple living enthusiasts to share DIY projects, from-scratch recipes, and creative inspiration. This week’s hop features cozy homesteading tips, along with practical ideas that celebrate handmade living and self-sufficiency.

Whether you’re looking for seasonal crafts, homemade treats, or encouragement on your homesteading journey, you’ll find plenty of inspiration to carry into the new year. Grab a cup of tea, explore the featured posts, and join us in sharing your own homestead creations.

Meet Your Homesteading Hosts

We’re Kelly from Simple Life Mom, Liz from The Cape Coop, Natasha from Houseful of Nicholes, and Laurie from Ridgehaven Homestead. Together, we’re passionate about from-scratch living, simple ingredients, frugal habits, and intentional homesteading. We’re delighted to host the Homestead Blog Hop, where you can find fresh inspiration each week for DIY projects, homemade recipes, and practical simple living ideas.

Follow Us for More Homestead Inspiration

Natasha – Houseful of Nicholes
Facebook | Pinterest | X | Instagram

Laurie – Ridge Haven Homestead
Facebook | Pinterest | Instagram

Liz – The Cape Coop
Facebook | Pinterest | X | Instagram

Kelly – Simple Life Mom
Facebook | Pinterest | X | Instagram

FEATURED POSTS from the Last Homestead Blog Hop

Each week, we take turns selecting three featured posts from the Homestead Blog Hop. These features are shared across all of our social media platforms, helping spotlight the creativity and hard work of our fellow homesteaders. Here are the featured posts from last week’s hop:

1. Bunny Butt Chocolate Covered Easter Oreos from Hunny I’m Home

2. Easter Pudding Cups from Walking on Sunshine

3. Lemon Cheesecake Rice Krispie Treats from Crystal and Co

Congrats! Feel free to grab the featured on button for your post.

Just right click and ‘save image as…‘

Guidelines for the Homestead Blog Hop

  1. Click the “Add Your Link” button below and upload a clear, eye-catching image from your project or recipe. Please link directly to the family-friendly post itself, not your blog’s homepage.
  2. You may link up up to three posts each week.
  3. Take time to visit a few other blogs in the hop and leave a thoughtful comment to let them know you stopped by. Community support makes this hop special!
  4. Please include a link back to the Homestead Blog Hop in your post. Posts without a backlink are not eligible to be featured. All featured posts are shared across all hosts’ social media channels.
  5. Share posts that haven’t been linked to the hop before. Older posts are welcome as long as they are new to the hop.
  6. By joining the Homestead Blog Hop, you grant the hosts permission to use one image from your post, with a link back to your site, if your post is selected as a feature next week.
  7. This is a family-friendly link-up designed to encourage, inspire, and support the homesteader in all of us.

Let the Party Begin!

Which project are you excited to try this week? Leave a comment below.

Join Our Homestead Blog Hop Pinterest Board

Follow all of your hosts on Pinterest and send a message if you’d like to be added to our Homestead Blog Hop group board. This board is a great place to share your DIY projects, crafts, and from-scratch recipes with the homesteading community.

Guideline: Only pin posts that you’ve linked up to the Homestead Blog Hop.

Tags: , , , , ,
Homestead Blog Hop - Homestead tips, ideas, animal care, and recipes every Wednesday

Homestead Blog Hop 591 – Seed Bombs and Spring Projects

Welcome to Homestead Blog Hop, a weekly gathering for homesteaders and simple living enthusiasts to share DIY projects, from-scratch recipes, and creative inspiration. This week’s hop features cozy homesteading tips, along with practical ideas that celebrate handmade living and self-sufficiency.

Whether you’re looking for seasonal crafts, homemade treats, or encouragement on your homesteading journey, you’ll find plenty of inspiration to carry into the new year. Grab a cup of tea, explore the featured posts, and join us in sharing your own homestead creations.

Meet Your Homesteading Hosts

We’re Kelly from Simple Life Mom, Liz from The Cape Coop, Natasha from Houseful of Nicholes, and Laurie from Ridgehaven Homestead. Together, we’re passionate about from-scratch living, simple ingredients, frugal habits, and intentional homesteading. We’re delighted to host the Homestead Blog Hop, where you can find fresh inspiration each week for DIY projects, homemade recipes, and practical simple living ideas.

Follow Us for More Homestead Inspiration

Natasha – Houseful of Nicholes
Facebook | Pinterest | X | Instagram

Laurie – Ridge Haven Homestead
Facebook | Pinterest | Instagram

Liz – The Cape Coop
Facebook | Pinterest | X | Instagram

Kelly – Simple Life Mom
Facebook | Pinterest | X | Instagram

FEATURED POSTS from the Last Homestead Blog Hop

Each week, we take turns selecting three featured posts from the Homestead Blog Hop. These features are shared across all of our social media platforms, helping spotlight the creativity and hard work of our fellow homesteaders. Here are the featured posts from last week’s hop:

1. Creamy Lemon Chicken Orzo Soup from Recipes Simple

2. Upcycle A Coffee Can: Painted Vase for Spring Flowers from Petticoat Junktion

3. Seed Bombs- Simple Pre-Spring Project Kids Can Do from Once and Future Homestead

Congrats! Feel free to grab the featured on button for your post.

Just right click and ‘save image as…‘

Guidelines for the Homestead Blog Hop

  1. Click the “Add Your Link” button below and upload a clear, eye-catching image from your project or recipe. Please link directly to the family-friendly post itself, not your blog’s homepage.
  2. You may link up up to three posts each week.
  3. Take time to visit a few other blogs in the hop and leave a thoughtful comment to let them know you stopped by. Community support makes this hop special!
  4. Please include a link back to the Homestead Blog Hop in your post. Posts without a backlink are not eligible to be featured. All featured posts are shared across all hosts’ social media channels.
  5. Share posts that haven’t been linked to the hop before. Older posts are welcome as long as they are new to the hop.
  6. By joining the Homestead Blog Hop, you grant the hosts permission to use one image from your post, with a link back to your site, if your post is selected as a feature next week.
  7. This is a family-friendly link-up designed to encourage, inspire, and support the homesteader in all of us.

Let the Party Begin!

Which project are you excited to try this week? Leave a comment below.

Join Our Homestead Blog Hop Pinterest Board

Follow all of your hosts on Pinterest and send a message if you’d like to be added to our Homestead Blog Hop group board. This board is a great place to share your DIY projects, crafts, and from-scratch recipes with the homesteading community.

Guideline: Only pin posts that you’ve linked up to the Homestead Blog Hop.

Tags: , , , , , ,
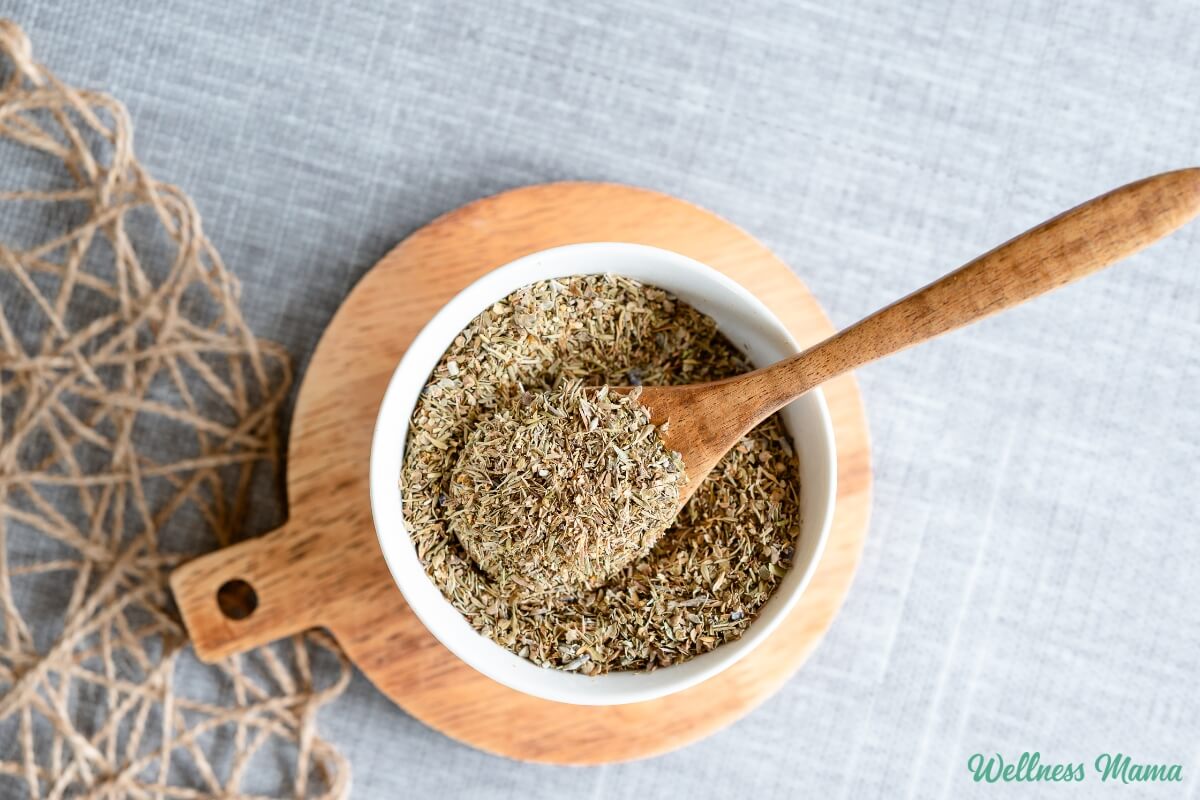
How to Make Herbes de Provence at Home

Homemade Herbes de Provence Spice Mix Recipe

I’m never without homemade herbes de Provence in our kitchen. Abundant in the south of France, this spice mix really speaks to my love of French cooking. I use it in just about anything I can!

My mom’s French heritage was a big influence growing up, and because of her, I will always have a soft spot for French dishes like boeuf bourguignon and pâté. I’m no Julia Child (or even Martha Stewart for that matter!), but I do try to incorporate French recipes in our meal plan whenever possible.

Many people think French cooking is fussy or difficult, but it doesn’t have to be. 

The French Cure for Picky Eaters

I’ve always been fascinated by French food culture and how even children in France typically like a wide variety of foods. We can learn a lot from the French, especially in how we teach our children to view food. I actually devoted a part of my Wellness Mama Cookbook to this topic!

A big part of raising non-picky eaters is exposing kids to well-rounded, varied flavors—like those in this seasoning blend. 

What is Herbs de Provence?

The blend originated in the south, or Provence region, of France, and is made up of herbs that naturally grow in that area. The original blend of herbs de Provence ingredients contained summer savory, thyme, marjoram, and rosemary. Later on, lavender, fennel, and even orange zest were added to certain versions. Many of the herbs de Provence spice blends at the grocery stores include lavender and other herbs. 

Not only do they taste good, but these herbs have strong antimicrobial properties to help the immune system do its job. Among many other things, rosemary helps with memory, thyme is great for the lungs, and marjoram helps relax nervous tension. Lavender is also good for stress relief, orange zest is uplifting, and fennel helps aid digestion. Together, they make for a powerful and tasty spice blend. 

Herbs de Provence vs Italian Seasoning

While I love both seasonings, they definitely have some differences. Italian seasoning also includes thyme and rosemary, but you’ll often find spicy oregano and basil in there too. And most versions of Italian seasoning don’t include marjoram or summer savory (and certainly not lavender)!

If you need an herbs de Provence substitute, the simplest recipe is summer savory, thyme, marjoram, and rosemary.

How to Make Herbs de Provence

It’s very simple, but it does require an extra step compared to many of my spice blend recipes. Usually I just add all of the herbs to a jar, shake, and voila… done. Since these herbs are often whole, like fennel seeds or lavender buds, I do a quick run through the food processor first. Not only does it make them easier to use in recipes, but freshly ground herbs are more fragrant and flavorful. Blending or chopping herbs releases more of their volatile oils so they taste fresher. 

So what is herbes de Provence for anyway, besides sounding fancy? The answer is a lot!

How to Use This Homemade Seasoning

Herbes de Provence is very versatile. It can be described as bold, woodsy, and a little bit floral. It pairs well with almost any cut of meat (especially pork and chicken recipes) and really complements most fish and seafood. I often add it to homemade soups and broths too.

We love to pre-mix a little into grass-fed butter and keep it at the ready for topping veggies, sourdough bread, or cauliflower rice. It also makes a great addition to breakfast dishes like my favorite sous vide egg bites or homemade breakfast sausage.

Try adding herbs de Provence compound butter to a roast chicken before putting it in the oven. Since the herbs are chunkier, not quite powdered, they work best when added to the beginning of recipes. This gives them a chance to infuse their flavors into the dish. It’s equally delicious on roasted vegetables or potatoes. 

A bonus… not only is it healthy and tastes good, but it fills the kitchen with amazing smells!

You can certainly buy it from the store, but this homemade herbes de Provence spice blend and other homemade spice blends are a great way to save time and money. And this way, you know exactly how long it’s been sitting on the shelf! It’s also a fun and easy kitchen project kids can help make.

Homemade Herbs de Provence Recipe

Homemade herbs de Provence combines herbs like thyme and marjoram with lavender, fennel, and orange zest for a savory and flavorful spice blend.

  • Use a mortar and pestle or a food processor to lightly grind any herbs that are whole, such as the rosemary, lavender flowers, or fennel. The herbs should be coarse, not finely ground.

  • If you are zesting the orange yourself, remove the zest of one organic orange and dry it in an oven on lowest setting or a dehydrator until completely dry.

  • Combine all ingredients in a jar or bowl and mix.

  • Store in an airtight container away from heat and light.

Nutrition Facts

Homemade Herbs de Provence Recipe

Amount Per Serving (1 tsp)

Calories 9
Calories from Fat 2

% Daily Value*

Fat 0.2g0%

Saturated Fat 0.1g1%

Polyunsaturated Fat 0.04g

Monounsaturated Fat 0.01g

Sodium 2mg0%

Potassium 28mg1%

Carbohydrates 2g1%

Fiber 1g4%

Sugar 0.04g0%

Protein 0.3g1%

Vitamin A 131IU3%

Vitamin C 2mg2%

Calcium 60mg6%

Iron 3mg17%

* Percent Daily Values are based on a 2000 calorie diet.

  • Mix a teaspoon or two of this flavorful herb blend into softened butter for topping vegetables, season chicken or seafood, or use it to make your own breakfast sausage. 
  • The total yield for this recipe is about 1/2 cup plus 2 teaspoons of herbs de Provence. 

Herbs de Provence Alternate Recipe

I’ll often buy my herbs in bulk online, but sometimes savory can be difficult to find at your local store. If you’re looking for a recipe without summer savory or just something new to try, I like this blend too. Simply process, mix, and store like the above recipe. All of the following herbs are dried:

  • 2 TBSP thyme
  • 2 TBSP rosemary
  • 1 TBSP basil
  • 1 TBSP oregano
  • 1 TBSP summer savory (optional but traditional)
  • 1 tsp marjoram (optional)
  • 1 tsp lavender buds (optional)

Have you ever used herbes de Provence? What French flavors do you love?

Tags: , , , , ,
Best oLive
Privacy Overview

This website uses cookies so that we can provide you with the best user experience possible. Cookie information is stored in your browser and performs functions such as recognising you when you return to our website and helping our team to understand which sections of the website you find most interesting and useful.