DIY Ayurvedic Shampoo for Strong, Healthy Hair

DIY Ayurvedic Shampoo for Strong, Healthy Hair

My journey to creating homemade shampoo involved a lot of trial and error. There were countless mixtures of liquid castile soap, coconut milk, essential oils, and the occasional splash of olive oil – all of which left my scalp and hair a confused mix of dry, oily, and limp.

Eventually I created this pure coconut oil shampoo bar, which worked beautifully for many years.

Until it didn’t.

Why My Hair Routine Needed a Reset

Over the past year or so, my scalp started changing in ways I didn’t expect. Hormonal shifts during perimenopause can make the scalp more reactive and sensitive, and almost overnight my old routine – which I had used for many years without issue – suddenly started making my scalp itch.

Nothing seemed to help – not my shampoo bar, not the non-toxic, professionally formulated shampoos I tried, and not changing how frequently I washed.

So I started experimenting again.

That eventually led me to the Ayurvedic hair mask recipes I shared recently → you can find them here.

They soothed my scalp and left my hair feeling soft and light, but they also had a couple of drawbacks: they could be a little messy to apply (and sometimes left me rinsing the shower afterward), and they took a bit of time to wash out completely. If I rushed it, I’d sometimes find a little dried mask in my hair later.

So I began experimenting with a simplified version that could be used more like shampoo.

The result is the recipe below.

It takes a little preparation, but it’s still very simple overall and rinses out easily, with no extra cleanup needed.

Is This Really Shampoo?

Sometimes when I share a recipe, like this gluten-free “cornbread,” I’ll get a few comments saying “but that doesn’t have any corn in it!” And it’s true.

I love corn, but it doesn’t love me back, so I developed the recipe to get as close to the taste and texture of cornbread as possible without actually using corn. That’s what the quotation marks are for: it’s cornbread-ish, but not technically cornbread.

So . . . is this really shampoo?

Oddly enough, yes.

In fact, some variation of this recipe is very close to the original shampoo.

The earliest forms of shampoo were likely developed in ancient India – sometime during the Indus Valley Civilization – by boiling herbs such as soapberries (reetha), shikakai – which literally translates to “fruit for hair” – and Indian gooseberry (amla), all ingredients that appear in this recipe.

The word shampoo itself comes from the Hindi word chāmpo, meaning “to massage” or “to press.” British traders encountered the practice of hair washing and scalp massage in India and eventually brought “champing” to Europe in the 1700s.

A Simple Herbal “Hair Tea”

This recipe doesn’t have the thick, goopy texture of commercial shampoo – some people even describe it as a “hair tea.”

However, the herbs in this blend are well known for helping to cleanse, moisturize, and volumize hair.

Several contain saponins, which are natural plant compounds that act as mild surfactants – gently lifting away dirt and oil. That’s why this recipe creates suds – but not the dramatic foam that commercial detergents produce.

So while it may feel unusual compared with modern shampoo and doesn’t lather the way most of us are used to, it actually resembles the original versions much more closely.

And in my experience, it cleans hair just as well – better, in fact. My hair feels light, soft, and shiny, without the buildup that many modern shampoos can leave behind.

And unlike some DIY shampoo formulas, this recipe is completely beginner-friendly.

No complicated formulation.
No soapmaking skills required.

Just herbs, hot water, and something to strain with.

A Quick Note About Hair Color

Amla and shikakai have traditionally been used as natural pigment enhancers, meaning they may gradually deepen hair color over time.

I naturally have very dark hair and haven’t noticed any change in color.

However, if you have lighter hair (and want to keep it that way), you may want to:

  • omit the amla powder
  • reduce the shikakai slightly
  • increase the reetha powder a bit

One thing to keep in mind, though, is that reetha contains more natural saponins than shikakai and provides stronger cleansing, so too much can feel slightly drying.

Experiment and Find What Works for You

Everyone’s hair is a little different, so think of this recipe as a starting point rather than a rigid formula.

It’s what works best for my hair after a lot of trial and error, but you should feel completely free to adjust it based on what your hair needs.

If your hair tends to feel dry, try adding a little more aloe or amla. If it leans oily, you can increase the reetha slightly.

A little experimenting goes a long way, so feel free to play with the ratios and see what your hair loves most.

About the Ingredients

Here’s a quick look at what each ingredient brings to the recipe.

Shikakai Powder
Shikakai (Acacia concinna) has been used in Ayurvedic hair care for centuries as a gentle cleanser and conditioner. It contains natural saponins that help remove light buildup without stripping the scalp’s natural oils, and may help create the conditions that allow your natural hair growth cycle to function more optimally.

Many people find it leaves hair soft, smooth, and easy to detangle. It’s also a traditional Ayurvedic remedy for dandruff. One important note: avoid getting shikakai in your eyes, as it can be very irritating.

Reetha (Soapnuts)
Also called soapberry or soapnut, reetha is one of nature’s richest sources of saponins. In traditional hair care it’s often paired with shikakai to balance cleansing with conditioning.

Flax Seeds or Fenugreek Seeds
These seeds release a natural gel when steeped in hot water. That gel adds slip and conditioning to the shampoo, making it easier to spread through the hair. I prefer flax seeds in this recipe, but fenugreek also has a long history in Ayurvedic hair care for supporting scalp health and helping hair feel stronger.

Aloe Vera Powder
Aloe adds hydration and conditioning while helping soothe irritated scalps. It can also add a little shine and smoothness to the hair.

Amla Powder
Amla (Indian gooseberry) is rich in antioxidants and is traditionally used in Ayurvedic hair care to support scalp health and enhance shine.

Two Ways To Make This Herbal Shampoo

You can make this shampoo two different ways depending on how strong or thick you want it to be.

Method 1 is the simplest version. It uses boiling water to extract the beneficial compounds from the herbs and works well for most people.

Method 2 simmers the herbs on the stovetop, which pulls out more of the natural saponins and the moisturizing gel-like compounds released by the seeds. The result is a slightly thicker, more “activated” shampoo that some people find provides a little more cleansing or conditioning power.

DIY Natural Shampoo Recipe

Here’s how to make your own shampoo with Ayurvedic herbs and hot water.

Prep Time 5 minutes Cook Time 20 minutes Cooling time 30 minutes Total Time 55 minutes

Author Heather Dessinger, FDN-P

Method 1: Quick Infusion (No Stovetop)

  • Line a mason jar or measuring cup with a nut milk bag. If you don’t have one, you can use a mesh strainer and cheesecloth to strain it after infusion.

  • Place the shikakai powder, reetha powder, and flax seeds inside the nut milk bag.

  • Bring 1¼ cups water to a boil, then pour it over the herbs and stir to combine.

  • Allow the mixture to cool for about 20 minutes, then stir in the aloe vera powder and amla powder if using.

  • Let the mixture infuse for another 10 minutes.

  • Strain through the nut milk bag. If you don’t have one, you can also strain by pouring the mixture over bowl that contains a mesh strainer lined with cheesecloth.

  • Once it has fully cooled, your shampoo is ready to use.

Method 2: Simmered Herbal Shampoo (Stovetop)

  • Place the shikakai powder, reetha powder, and flax seeds in medium pot. Add 1.5 cups water and stir to combine.

  • Bring mixture to a boil, then reduce heat and simmer for 20 minutes.

  • While the mixture is simmering, line a mason jar or measuring cup with a nut milk bag. If you don’t have one, you can use a mesh strainer and cheesecloth to strain it after infusion.

  • Remove the mixture from heat and pour it into the nut milk bag, using a spoon transfer any herbs that have settled at the bottom. If you don’t have a nut milk bag, you can pour the mixture into a mason jar.

  • Allow the mixture to cool for about 20 minutes, then stir in the aloe vera powder and amla powder if using.

  • Let the mixture infuse for another 10 minutes.

  • Strain through the nut milk bag. The mixture becomes thicker as it cools, so I recommend straining while it’s warm yet comfortable to touch. If you don’t have a nut milk bag, you can also strain by pouring the mixture over bowl that contains a mesh strainer lined with cheesecloth.

  • Your shampoo is ready to use.

Some people apply variations of this recipe to dry hair. Personally, I prefer to wet my hair first, then wring it out until it’s damp.

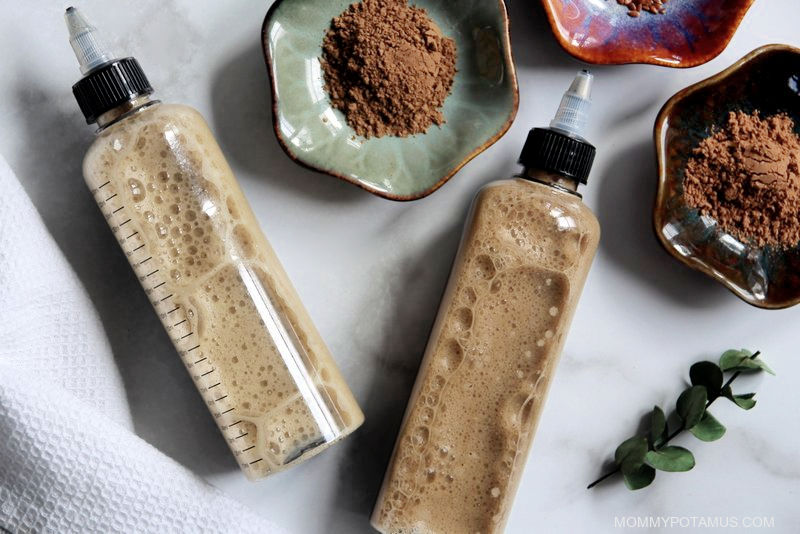
I shake the bottle a little, then apply about 3/4 of the shampoo to my scalp and roots – focusing mostly on the scalp. After application, I massage gently and let it sit for a few minutes. I have found that an application bottle (like this one made with PET plastic) helps distribute the shampoo more evenly, but you can use a measuring cup or something similar if you’d like.

Then I rinse while continuing to massage my scalp.

After that, I add some water to the remaining shampoo in the bottle and shake it to get a lot of suds going. I apply that all over my scalp and hair, let it sit for a couple minutes, and then rinse.

I typically use this recipe 1-3 times per week.

Is this good for all hair types?

Generally yes, although you may need to adjust the ratios.

For example, if your hair tends to be dry, adding aloe or amla can help increase conditioning.

If your hair tends to be oily, slightly increasing the reetha may help.

One thing to keep in mind: if you currently use products that coat the hair with silicones or dimethicone, your hair may go through a short transition period while that buildup gradually washes away.

What is the shelf life?

This recipe doesn’t contain preservatives, so I usually make it fresh.

However, once you’ve confirmed the recipe works well for your hair, you can freeze small batches and thaw them as needed.

Do I need to follow this with an apple cider vinegar rinse?

Not necessarily.

Unlike shampoo bars, which are alkaline and often require an acidic rinse to rebalance hair pH, this recipe is already within a hair-friendly pH range.

That said, some people enjoy following shikakai-based cleansers with a diluted ACV rinse. If that’s something you already like, feel free to experiment.

Do I need to use conditioner?

I don’t usually, but I do use the herbs above – plus a few more – in different ratios to whip up a moisturizing hair mask every week or two as needed.

In the summer, when I spend a lot of time in the sun/saltwater at my local beach, my ends will get a little dry. When that happens, I apply the shampoo recipe above and then dip my ends in a little coconut milk (guar gum-free) while I’m letting it sit. That adds a little moisture without weighing my hair down. This leave-in conditioner recipe also works really well for dry ends.

More Body & Hair Care Recipes To Try

Hair Gel – Tame flyaway frizz, keep curls in check, or style short hair with a non-toxic version of your favorite store-bought stuff. Many of the styling gels on store shelves contain hormone disrupting fragrances and formaldehyde releasers, but you can make natural hair gel with just 1-3 simple ingredients.

Body Wash – The rich, bubbly lather of this homemade body wash recipe cleanses while moisturizing. You probably have everything you need to make it in your pantry right now.

Bakuchiol Skincare Serum – If you’re looking for a gentle, effective way to support skin elasticity and firmness, even out skin tone and protect your skin barrier, bakuchiol is a bioactive compound worth getting excited about. Often called a natural alternative to retinol, it works with your skin’s natural regenerative processes to create change over time.


Share with a friend! 👇

Tags: , , , , ,
Homestead Blog Hop - Homestead tips, ideas, animal care, and recipes every Wednesday

Homestead Blog Hop 590 – Irish Soda Bread and Printables

Welcome to Homestead Blog Hop, a weekly gathering for homesteaders and simple living enthusiasts to share DIY projects, from-scratch recipes, and creative inspiration. This week’s hop features cozy homesteading tips, along with practical ideas that celebrate handmade living and self-sufficiency.

Whether you’re looking for seasonal crafts, homemade treats, or encouragement on your homesteading journey, you’ll find plenty of inspiration to carry into the new year. Grab a cup of tea, explore the featured posts, and join us in sharing your own homestead creations.

Meet Your Homesteading Hosts

We’re Kelly from Simple Life Mom, Liz from The Cape Coop, Natasha from Houseful of Nicholes, and Laurie from Ridgehaven Homestead. Together, we’re passionate about from-scratch living, simple ingredients, frugal habits, and intentional homesteading. We’re delighted to host the Homestead Blog Hop, where you can find fresh inspiration each week for DIY projects, homemade recipes, and practical simple living ideas.

Follow Us for More Homestead Inspiration

Natasha – Houseful of Nicholes
Facebook | Pinterest | X | Instagram

Laurie – Ridge Haven Homestead
Facebook | Pinterest | Instagram

Liz – The Cape Coop
Facebook | Pinterest | X | Instagram

Kelly – Simple Life Mom
Facebook | Pinterest | X | Instagram

FEATURED POSTS from the Last Homestead Blog Hop

Each week, we take turns selecting three featured posts from the Homestead Blog Hop. These features are shared across all of our social media platforms, helping spotlight the creativity and hard work of our fellow homesteaders. Here are the featured posts from last week’s hop:

1. Oven Roasted Sweet Potato Steak Fries – Clean Eating & Paleo Fry Recipe from 3 Boys and a Dog

2. 10 St. Patrick’s Day Coloring Pages Full of Irish Charm from Press Print Party

3. Easy Irish Soda Bread Recipe with Simple Ingredients from Mommy Hates Cooking

Congrats! Feel free to grab the featured on button for your post.

Just right click and ‘save image as…‘

Guidelines for the Homestead Blog Hop

  1. Click the “Add Your Link” button below and upload a clear, eye-catching image from your project or recipe. Please link directly to the family-friendly post itself, not your blog’s homepage.
  2. You may link up up to three posts each week.
  3. Take time to visit a few other blogs in the hop and leave a thoughtful comment to let them know you stopped by. Community support makes this hop special!
  4. Please include a link back to the Homestead Blog Hop in your post. Posts without a backlink are not eligible to be featured. All featured posts are shared across all hosts’ social media channels.
  5. Share posts that haven’t been linked to the hop before. Older posts are welcome as long as they are new to the hop.
  6. By joining the Homestead Blog Hop, you grant the hosts permission to use one image from your post, with a link back to your site, if your post is selected as a feature next week.
  7. This is a family-friendly link-up designed to encourage, inspire, and support the homesteader in all of us.

Let the Party Begin!

Which project are you excited to try this week? Leave a comment below.

Join Our Homestead Blog Hop Pinterest Board

Follow all of your hosts on Pinterest and send a message if you’d like to be added to our Homestead Blog Hop group board. This board is a great place to share your DIY projects, crafts, and from-scratch recipes with the homesteading community.

Guideline: Only pin posts that you’ve linked up to the Homestead Blog Hop.

Tags: , , , , , ,
Chocolate_Chunk_Cookies

Brown Butter Pistachio Chocolate Chunk Cookies

The kids and I have been on a cookie testing spree lately. These brown butter chocolate chunk cookies with pistachios have made the cut. They’re sweet and savory in every bite and have layers of flavor. A fresh batch doesn’t last long around here!

Brown butter chocolate chunk cookies are thick and chewy with crispy edges and a soft center. I’ve made a few ingredient swaps to make this dessert a little healthier, but they’re still a treat we enjoy in moderation. 

Brown Butter Chocolate Chunk Cookies

Salty, sweet, crunchy, chewy… you get all of the flavors and textures in one bite. Instead of brown sugar I used coconut sugar here. It has a similar flavor, but coconut sugar is a less processed option and has unique caramel undertones that really add to the cookie. I also added some collagen powder for a subtle protein boost. 

Dark chocolate chunks offer a bittersweet bite in every mouthful and add some healthy polyphenol antioxidants, magnesium, and micronutrients. They’re made with sea salt which offers electrolytes and a nice contrast to the sweet cookie. And the pistachio pieces are just the icing on top. They’re also salty but give it such a unique flavor. 

One of the biggest differences you’ll notice is that these use browned butter instead of regular. It offers such a richer depth of flavor, almost like caramel. Brown butter is easy enough to make, but you do want to keep a close eye on it as it cooks. You want to cook it (stirring constantly!) until you notice browned bits and it smells fragrant. Pull it off the stove at this point or you’ll have burnt butter, which does not taste as nice!

Tips For Making Salted Pistachio Chocolate Chunk Cookies

I recommend using chopped chocolate bars since it’s easier to find ones with 70% or more cocoa content. Bagged chocolate chunks also work. The taste of a good chocolate chunk cookie relies heavily on having good quality chocolate!

When you’re mixing the dough be sure not to overmix the flour, as this can overwork the gluten proteins and make for tough, hard cookies. If the dough feels too soft after mixing, chill it for 15–20 minutes before baking to prevent excess spreading. For even thicker cookies, chill the dough for 30 minutes before scooping.

Brown Butter Pistachio Chocolate Chunk Cookies

These delicious chocolate chunk cookies have an extra depth of flavor thanks to the crunchy pistachios and flavorful browned butter.

  • Melt the butter over medium heat, stirring constantly until it foams and turns golden brown (about 4–5 minutes), then remove from heat and let cool for 20–30 minutes.

  • Preheat the oven to 350°F and line a baking sheet with parchment paper.

  • Whisk together the cooled browned butter, coconut sugar, and maple syrup, then add the egg and vanilla and whisk until smooth.

  • Stir in the flour (all-purpose or 1:1 gluten-free), collagen if using, baking soda, and salt until just combined, then fold in the chopped pistachios and dark chocolate.

  • Scoop dough onto the prepared baking sheet (about 2 Tablespoons each), chilling for 15–20 minutes first if the dough feels soft.

  • Bake for 10–13 minutes until the edges are golden and the centers look slightly underdone. Sprinkle with flaky sea salt and cool on a rack before serving.

Nutrition Facts

Brown Butter Pistachio Chocolate Chunk Cookies

Amount Per Serving (1 cookie)

Calories 217
Calories from Fat 117

% Daily Value*

Fat 13g20%

Saturated Fat 7g44%

Trans Fat 0.3g

Polyunsaturated Fat 1g

Monounsaturated Fat 4g

Cholesterol 31mg10%

Sodium 394mg17%

Potassium 139mg4%

Carbohydrates 21g7%

Fiber 2g8%

Sugar 8g9%

Protein 4g8%

Vitamin A 244IU5%

Vitamin C 0.2mg0%

Calcium 20mg2%

Iron 2mg11%

* Percent Daily Values are based on a 2000 calorie diet.

For thicker cookies, chill the dough for 30 minutes before scooping.

Shelf Life and Storage

I made a double batch of these to save some for later.  The dough freezes well. Scoop into balls and freeze, then bake straight from frozen, adding 1–2 minutes to bake time. 

Store the cookies in an airtight container at room temperature for up to 3 days, or refrigerate for up to 1 week.

Looking for some more healthier cookie recipes? Here are some of our favorites!

What are your favorite cookies to make or eat? Leave a comment and let us know!

Tags: , , , , ,
get rid of ants

How to Get Rid of Ants Naturally

Ants, ants, everywhere! Those pesky insects have a way of finding every little crack and opening right into your home. When spring comes around I’ll see an ant scout here and there and I want to nip it in the bud before they take over my life (and my kitchen counter).

Every spring I start getting questions about how to get rid of ants in the house, especially when they show up quickly and seem to multiply overnight. Sometimes they’re tiny and barely noticeable. Sometimes they’re small black ants marching in a perfect line. Occasionally they even have wings.

With little kids and pets spending plenty of time on the floor, I’m not about to sprinkle a pesticide around my home that will put them in danger.

But the ants…

Thankfully there are plenty of ways to get rid of ants without putting your family at risk. I’ve talked before about natural pest control, but today I am going to focus specifically on ants. How to get rid of ants in the kitchen, how to get rid of ants permanently, and even how to get rid of carpenter ants (if you suspect a larger infestation).

How Do Ants Come Into the House?

Ant colonies send out scouts to locate food sources. Those little bugs will zig and zag and probe their way until they find food to bring back to their colony, leaving a trail of pheromones behind them. Other ants will follow the trail leaving their own pheromones, making the trail stronger. Eventually all the little foragers are marching along, back and forth, taking all your goodies back to their home.

Fascinating and annoying all at once.

If you’ve ever wondered why you see one ant and then suddenly dozens, this is why. That single scout found something appealing on your counter, under the stove, or even tucked behind a plant on the windowsill. Soon, the whole crew is trekking inside your house like they’ve decided to move in. 

And it isn’t always obvious what they’re after. Sugar ants are often blamed for invading our honey jars or maple syrup, but ants are opportunistic. They’ll go after crumbs in the carpet, sticky spots on the floor, pet food bowls, and even residue left in the bathroom. I’ve found them near toothpaste drips and damp areas more than once.

Understanding how they operate is the first step in learning how to get rid of ants in the house for good.

How to Get Rid of Ants (Naturally, of Course!)

There are several approaches to naturally get rid of ants. First, repel them from coming into your home in the first place, then control and eradicate them once they are in. Finally, kill them at their source.

If you’re dealing with a larger species like carpenter ants (which can damage wood in bedroom walls or other structural areas), your strategy may need to be more aggressive. I’ll touch more on how to get rid of carpenter ants specifically below. For most common household ants, though, prevention is the best place to start. 

How to Repel Ants

The first step is to make sure any sweet ingredients in your home are sealed tight. Clean up the dribbles down the side of the honey jar and make sure your maple syrup lid is on tight. It’s also recommended to keep floors swept and all counters free of any food or drips, but that’s not usually practical or possible in a busy home like mine. Just do the best you can with this one.

When I’m focused on how to get rid of ants in kitchen, I pay special attention to:

  • Crumbs under appliance
  • Sticky cabinet handles
  • Pet food dishes
  • The trash can area
  • Any food prep areas on the counter

Even a small smear can attract a line of tiny visitors. Some ants are attracted to oils or proteins, so pay attention to all food, not just sugary ones. Here are some more ideas to prevent ants from coming into your home:

Create a Barrier

Many people have luck creating a barrier of something ants generally don’t like or won’t cross. Some examples would be drawing a chalk line or sprinkling cinnamon, cayenne pepper, or coffee grounds along common entry points.

This works especially well along door thresholds, window sills, and baseboards. If you’ve noticed ants coming in from the yard or from cracks that lead outside, treat those spots first.

  • Citrus Peels – Ants are also repelled by citrus (plus it smells great!). Oranges, lemons, grapefruits, etc. contain D-limonene, which is effective at killing ants. I like to save my orange or lemon peels and dry them out. I’ll then pulse them in the food processor to make a powder and sprinkle this along entry points in the home. You can also sprinkle these around your garden or near plants outside.
  • Essential Oils – I’ve had good results deterring ants that were determined to come in under my screen door with an essential oil spray. Fill a small spray bottle with water and add about 20 drops of peppermint oil. Shake well and spray along doorways and window sills. It repels the ants and covers the scent of any food and pheromones.
  • Cotton Balls – You can also put several drops of peppermint, orange, or lemon oil on a cotton ball and place it in cabinets to deter ants from snooping around in search of food. This is one of my go-to methods when I want to deal with the problem quickly, especially if I notice them trailing across the kitchen floor.
  • Vinegar – Spraying vinegar along doorways and window sills is another option. This has the same effect as the peppermint oil spray. Mix vinegar 50/50 with water in a spray bottle. Add peppermint oil or a citrus oil to make it even more effective. You can also soak citrus peels in the vinegar for a few weeks, strain, then use this vinegar to spray with. Vinegar is especially helpful for erasing pheromone trails so other black ants or sugar ants can’t follow the same path.

What if Ants Are Already In Your Home?

The ants are already in. Now what?

First, find out where they’re coming in from and where they’re going so you can figure out the best way to tackle their removal. Something attracted them and that will need to be cleaned up. Then find their entry point so that you can use one of the tips from above.

If you’re trying to figure out how to get rid of ants in the house, this detective work is essential. Are they in the kitchen? The bathroom? Crawling along a baseboard in the bedroom? I once found a trail disappearing behind a bookshelf in the living room, and sure enough, there was a tiny gap in the trim that led to the outside.

Once you’ve found point A and point B, move on to clean up. You’ll obviously need to remove the ants from your counter, floor, cabinet or wherever they are. You can wipe them up with a cloth (or paper towel if you don’t want to try to remove them from your cloth).

It’s also really important to remove the pheromone trail. You can use soapy water, a 50/50 water and vinegar mix, or the essential oil spray. If you don’t clean up the trail, other ants will be able to find the same food source.

How to Get Rid of Ants Permanently (By Targeting the Colony)

I don’t know about you, but my first instinct is to kill any bugs I see in my house (or call for my adventurous daughter to do it for me). However, this may not always be the most effective way to rid your home of ants in the long term.

If you truly want to know how to get rid of ants permanently, you have to think bigger than the few crawling across your floor. The real goal is eliminating the colony. Although, there are some reports that if an ant smells another ant that’s been squished, they’ll alert the colony of the danger and stay away. 

The most effective way is to make an ant poison they will take back to their colony and feed to all of their friends. It requires a little bit of patience but pays off in the end.

Option 1: Borax Ant Trap

This doesn’t immediately remove the ants from your kitchen, but it works well in the long term. It may seem like it attracts more at first, which is actually a good thing here Borax helps eliminate the entire colony and not just the ants entering your home.

Mix equal parts Borax and corn syrup and spread it on an index card. The ants are attracted to the corn syrup and carry it back to their nest. All the ants that feed on the corn syrup mixture will be killed by the Borax. I’ll put this in a location away from curious pets and kids. (I cover the safety of using Borax here.)

If you’re searching for how to get rid of carpenter ants, this method can also be helpful, though carpenter ants sometimes require locating and directly treating their nest in wood structures as well.

Option 2: Baking Soda

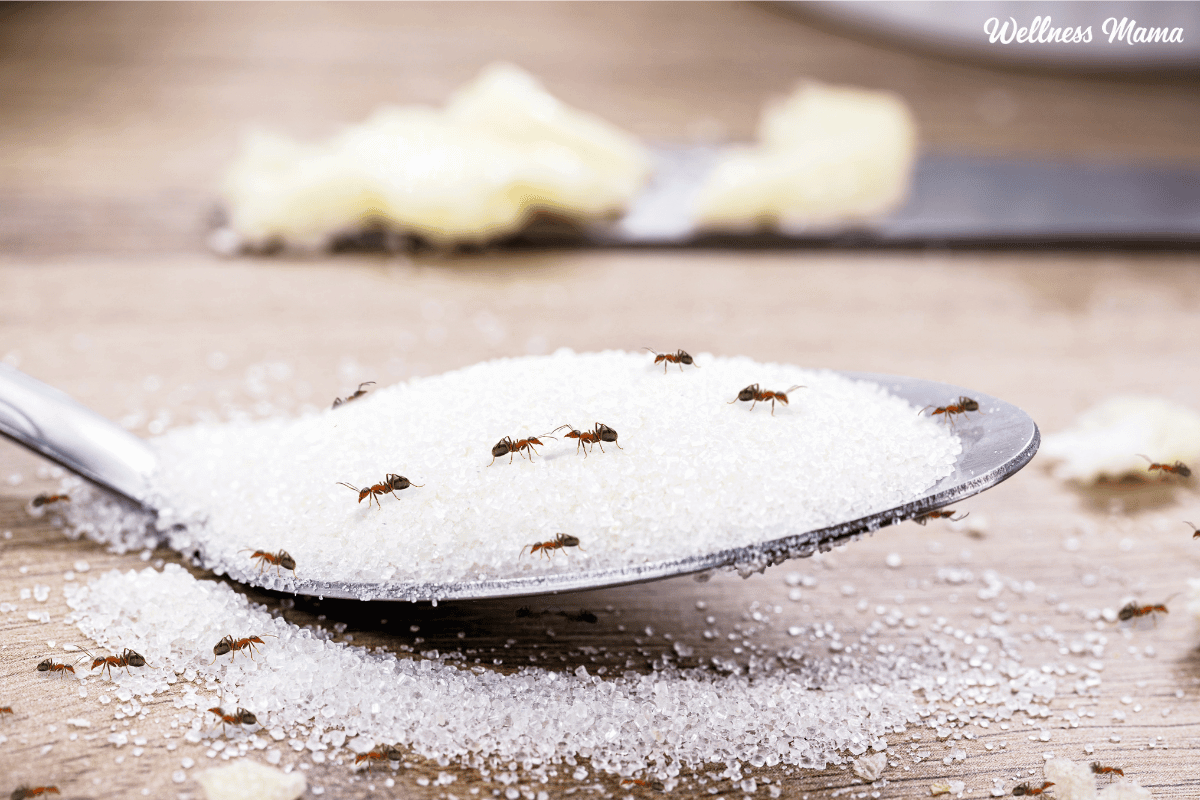
If you’re uncomfortable with Borax, you can try baking soda. Mix equal parts baking soda and powdered sugar and place it in a lid near where you think the ants are coming in. The powdered sugar will attract them, but since they’re unable to differentiate between the sugar and the baking soda, they will carry both back to their nest.

When ants eat baking soda it reacts with the acidic substance in their bodies and is fatal to them. Again, not an immediate fix, but very beneficial in the long term.

Other Ant Killing Tips to Try

Castile soap will also compromise the waxy coating that protects the ants. Make a spray with 1 quart water and 1/4 cup liquid castile soap. Spray along doorways and window sills and anywhere else you see ants coming in. Repeat several times a day until the problem is resolved.

Diatomaceous Earth

Food grade diatomaceous earth is highly effective at getting rid of ants and other pests that crawl, rather than fly. This includes most black ants and other small household varieties, though not typically flying ant scouts until they land.

DE is a fine powder made from the fossilized remains of diatoms, a type of algae. Because it’s so fine, it’s perfectly safe for humans and animals and is actually beneficial to consume. Ants, however, become dehydrated when they come into contact with DE because it damages their waxy coating which will kill them. They won’t take it back to their colony but it will stop them from making any progress into your home.

Sprinkle DE along doorways and window sills, and any other points of entry, in trash cans, and along cabinets and baseboards. I have also sprinkled it liberally on my carpet during a particularly bad ant invasion. After a few days the ants were gone and I just vacuumed up the DE.

Use extreme care if you will be using this outside and avoid any areas that may have honey bees. The DE will stick to their legs and they will consume it when they’re grooming. DE is sharp to small insects and will kill them. We want to kill the ants and fleas, but NOT the honey bees!

A Quick Note on Flying Ants and Wings

If you notice ants with wings gathering near windows or light fixtures, you may be seeing reproductive ants. These can sometimes be confused with termites. If you’re unsure, it may be worth having a professional identify them, especially if you suspect structural damage.

In many cases, though, it means the colony is reproducing and taking out the whole colony will resolve the issue (see methods above).

Dealing With More Than Ants?

If you have other pests plaguing you there are other natural pest control options for your home and some organic ideas for your garden and yard.

Ants are persistent, but they’re not invincible. With a bit of patience, you can learn how to get rid of ants in the house and kitchen, and even how to get rid of ants permanently without compromising your family’s health. If you’ve ever dealt with ants popping up in the house, these tried and true methods can really make a difference. 

How do you deal with ants? Did I miss any effective tips that have worked for you? Leave a comment and let us know!

Tags: , ,
Jalapeno salt recipe, how to make jalapeno salt, homemade jalapeno salt Jalapeno salt seasoning, for margaritas, smoked jalapeno salt

Homemade Jalapeño Salt (Easy Mineral-Rich Spicy Seasoning)

Sometimes you just need to spice things up a little. This jalapeno salt recipe will do just that. With simple ingredients it’s full of healthy minerals and the perfect seasoning for meats, veggies, or even fruit.

You can easily control the spice level here and either use a little or a lot on your foods. Even my older kids like sprinkling some on their meals.

How to Make Jalapeno Salt

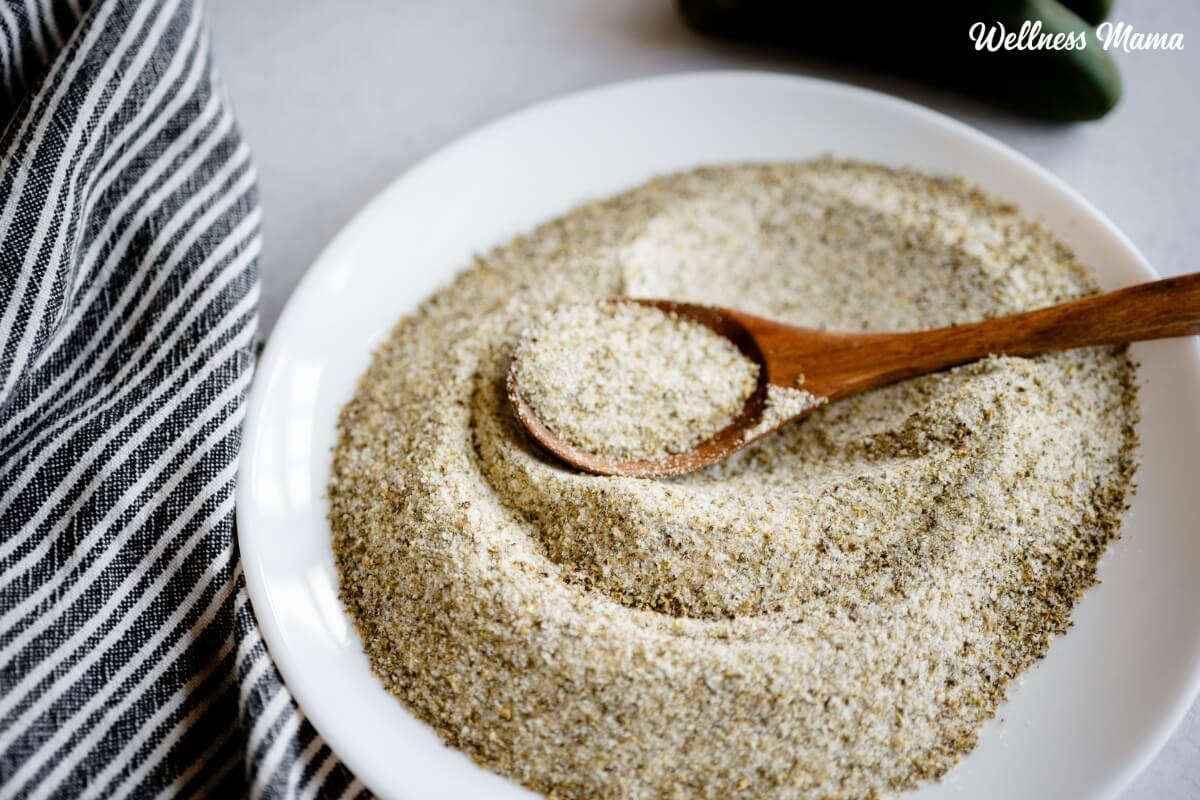
This homemade jalapeno salt is exactly what it sounds like: mineral-rich salt blended with dried jalapeños for a simple but flavorful seasoning. It’s one of those small kitchen upgrades that makes everyday meals feel special without adding extra work.

The process is surprisingly straightforward. Slice the peppers, dry them completely until they’re brittle, then blend with salt until finely ground. That’s it. The salt pulls the flavor from the jalapenos and also helps keep the peppers dry. 

Homemade Jalapeno Salt Seasoning

Jalapeno seasoning is like an all-purpose finishing salt with a kick. I love it sprinkled over grilled chicken, roasted vegetables, scrambled eggs, or sliced avocado. It’s also delicious on fresh fruit like mango or watermelon if you like that sweet-and-spicy combination.

You can try it for margaritas too. If you’re the type who likes margaritas, it makes a great rim salt before serving. You can also stir a small amount into soups or taco meat for an easy flavor boost without needing multiple spices. 

The nice thing about homemade jalapeno salt is that it’s easy to be in control. For a milder blend, remove the seeds and membranes before drying the peppers. If you prefer more heat, keep them in. 

And if you’re sensitive to spice, wear a mask while blending since the fine jalapeño dust can be surprisingly strong. I also recommend wearing gloves when cutting up the peppers! The oils from the hot peppers can quickly start to burn your hands. Also, don’t touch your eyes when cutting. That’s never a fun thing to experience!

If you’re using Celtic sea salt, keep in mind that it’s naturally more moist than other mineral salts. If it feels damp, spread it on a baking sheet to air dry for several hours or warm it gently in the oven on the lowest setting for 10–15 minutes before blending. Excess moisture can lead to clumping and shorten shelf life.

Jalapeno salt is an easy and delicious way to turn up the heat on your favorite foods!

Jalapeno Salt

Jalapeno salt is a delicious spicy seasoning that adds a flavorful kick to meat, veggies, and even fruits like watermelon and mango.

  • Wash and dice fresh jalapeños. Spread evenly on dehydrator trays and dehydrate at 125°F for 6–10 hours, until fully dry and brittle.

  • Add dried jalapeños to a food processor and pulse 2–3 times to break them into smaller pieces. (Skip if you prefer a very fine salt.)

  • Add mineral salt to the processor.

  • Pulse until fully combined and the texture is to your liking. Less blending keeps it chunky; more blending creates a finer seasoning.

  • Transfer to an airtight container and store in a cool, dark place.

Nutrition Facts

Jalapeno Salt

Amount Per Serving (0.5 tsp)

Calories 0.4

% Daily Value*

Fat 0.004g0%

Polyunsaturated Fat 0.002g

Sodium 786mg34%

Potassium 3mg0%

Carbohydrates 0.1g0%

Fiber 0.01g0%

Sugar 0.1g0%

Protein 0.02g0%

Vitamin A 9IU0%

Vitamin C 1mg1%

Calcium 1mg0%

Iron 0.02mg0%

* Percent Daily Values are based on a 2000 calorie diet.

  • If you’re starting with already dehydrated jalapenos, then use 1/2 cup. 
  • This recipe yields about 1 and 1/2 cups of jalapeno salt.

Flavor Twist Options

Once you know how to make jalapeno salt, it’s easy to customize. Here are some more flavor options to try. 

  • Smoked jalapeno salt –  To make smoky jalapeno salt, lightly roast the jalapeños at 250°F for 20–30 minutes before dehydrating for deeper flavor.
  • Garlic jalapeno salt – Add 1–2 teaspoons of garlic powder after blending.
  • Citrus jalapeno salt –  Mix in 1 teaspoon of fully dried lemon or lime zest for brightness
  • Herbal jalapeno salt – Mix in ½–1 teaspoon dried oregano or cilantro

Storage and Shelf Life 

Store the finished salt in an airtight container in a cool, dark cupboard. Thanks to salt’s natural preserving qualities, it keeps well for over a year when stored properly.

What are your favorite seasonings to use on food? Leave a comment and let us know!

Tags: , , , , , ,
My Thoughts After 18+ Months

My Thoughts After 18+ Months

Recently my teenage son started – and won – a negotiation over bedtime with one sentence. He inherited my old Oura ring last year, and he used the data he’d collected to show me that delaying by 30-45 minutes would align better with his circadian rhythm.

My husband smirked as “sleep latency” casually rolled out of our son’s mouth, because data is one of my love languages.

That’s not to say I prefer graphs over personal experience, I pay close attention to my body’s cues – what helps me feel strong, rested, and nourished – but I also value objective markers and high quality research to help me make decisions.

So when Jaspr announced a sleep study that used Oura ring data to track the impact of their air scrubber, I immediately volunteered to participate. I love data, I love sleep, and I’m always up for a good experiment.

Plus, it’s not every day you see a company willing to test their product in real-world bedrooms where people actually sleep. That’s the kind of transparency I respect.

Jaspr sent me an air scrubber – which is different than an air purifier, as I’ll explain soon – to use throughout the study. I was allowed to keep it as a “thank you” for participating, and after using it for 18+ months, I’m seriously impressed.

Here are seven ways it stands out:

#1 – Independently Tested

Jaspr has undergone multiple rounds of independent testing, with consistently strong results. In one lab test, it achieved:

✅ 97.1% mold removal in 1 hour

✅ 99.8% mold removal in 2 hours

✅ 100% elimination in 3 hours​

The results are available on this page if you want to check them out.

Jaspr also filters a wide range of everyday air pollutants, including

  • Microplastics
  • Dust, pollen, & other allergens
  • Smoke particles (wildfire, cigarette, incense/candles)
  • Pet dander
  • Volatile Organic Compounds (VOCs) from everyday things like cooking, furniture off-gassing, cleaning products, paint, and building materials

Also, in the sleep study I mentioned above – participants (that’s me!) on average fell asleep faster, stayed asleep longer, and got more deep sleep.

#2- Adapts To Your Environment​

Jaspr doesn’t just run on autopilot – it adjusts as your environment changes. It uses built-in sensors to continuously monitor indoor air quality, including microscopic airborne particles (often called PM2.5 – things like cooking smoke, dust, and fine pollution) and VOCs, which are gases released from furniture, building materials, cleaning products, and everyday life.

When the air changes, Jaspr adjusts automatically. The display shifts from green to yellow or red and shows a number that reflects how many tiny particles it’s detecting in real time.

My kids love watching the light turn yellow when we cook, then drift back to green as the air clears. We love bacon – Jaspr doesn’t. 🙂

One quick note: Although this feature is technically called Smart Mode, it doesn’t increase EMF exposure. There’s no need to connect to an app via bluetooth or Wifi – the purifier doesn’t need any of those things to work.

And if you prefer more control, you can manually adjust the fan speed to whatever level feels right.

#3 – Whisper Quiet

Most of the time, Jaspr runs on its quietest setting, which is very quiet. If you’re like me you’ll barely know it’s on – which is perfect if you’re using it in a bedroom, office, or anywhere quiet matters.

#4 – Dark Mode For Sleep

As someone who put these LED light dimming stickers on all the bright indicator lights that seem to be standard on electronics these days, I appreciate that Jaspr comes with a built-in dark mode.

At night, one quick touch will turn off the display lights so that they don’t disrupt your sleep. One small area stays very dimly lit so you can find the button to turn the lights back on. If you want complete darkness, just cover it with a quarter or something similar.

#5 – Durable, Clean Design

Unlike most purifiers, which are pretty clunky, it has a minimalist design that blends into just about any decor style. 

The exterior is steel, which can be endlessly recycled without losing strength (unlike plastic, which often ends up in landfills).

Also, it uses a 360° air intake, pulling air from all sides so you can place it against a wall without restricting airflow.

#6 – More Than A Typical Air Purifier

When you go to Jaspr’s site, you’ll see it’s described as an air scrubber, not an air purifier. If you’re thinking, “So . . . what exactly does that mean?” here’s how they explain it:

Air purifiers vary widely in quality. Most are made of plastic and designed to be compact, lightweight, and affordable. They often market large square footage coverage, but without clear context. These numbers frequently overlook critical variables like ceiling height, airflow efficiency, or actual air changes per hour (ACH) – a measure hub how often the air in a room is completely replaced.

For example, a purifier might claim to cover 1500 square feet but only deliver one air change per hour, which may not be sufficient in environments with ongoing pollutant sources. This lack of transparency is a common issue in the consumer air purifier market.

An air scrubber, by contrast, is a much more robust system originally designed for industrial and commercial use. Air scrubbers are built to handle high, contaminant loads, such as during . . . wildfire cleanup, or renovation projects.

They operate using high-powered fans and heavy duty filters to rapidly cycle and clean large volumes of air – often achieving multiple air changes per hour.

#7 – Lifetime Warranty (With filter subscription)

Maintenance is easy – the filter only needs to be replaced about every six months, and it takes less than a minute. If you prefer not to think about it, their subscription automatically sends a new filter on schedule and includes a discount.

The subscription also activates their lifetime warranty. If your purifier ever has an issue, they send a replacement and cover the return – no extra fees, no complicated process.

And I really do mean that.

Earlier this year, my husband and I bought a Jaspr for a space outside our home where our boys spend a lot of time. After a while it developed a slight noise, so he reached out to ask about an exchange.

They shipped a replacement quickly and paid to have the original returned.

My husband placed the order and handled the support request through his own account, so Jaspr had no idea I was paying attention – or that I would eventually write about the experience.

That mattered to me, because their FAQ page says, “Your Jaspr is covered for as long as your filter subscription is active. No catches, no hidden costs, ever.”

A promise like that only means something if it’s kept for every customer – not just when a company knows the interaction might end up in a review.

Air purifiers are an investment, so it’s not a small thing to have a warranty that actually feels like a warranty.

#8 – Free Shipping + Money Back Guarantee

Jaspr air scrubbers come with a 30-day money back guarantee, so you get to try it out and – if it’s not the right fit – you can send it back. (Just hang on to the box!)

Shipping is also free in the continental U.S. and Canada.

What does Jaspr’s 3-in-1 filter include?

Jaspr keeps things simple with a single, easy-to-replace filter that handles three stages of filtration, so you get strong air purification without juggling multiple parts.

The heavy-duty filter (about four pounds) combines three layers designed to work together:

Stage 1: The Pre-Filter

This outer layer captures larger particles like dust and pet hair. It also protects the layers underneath, helping the main filter last longer and maintain performance over time.

Stage 2: High-Efficiency Particulate Air (HEPA) Filter

Jaspr uses a HEPA filter that captures mold spores, pollen, pet dander, and other airborne irritants.

HEPA filters trap a minimum of 99.97% of particles that are 0.3 microns in diameter. For reference, a human hair is about 70 microns thick.

Here’s how Jaspr explains that in terms of real-world performance:

If an intake of air containing 10,000 particles of 0.3 microns in diameter passed through a HEPA filter, a maximum of only 3 out of the 10,000 particles would be allowed to pass through the filter.”

Stage 3: Carbon Filter

This is the part of the filter that targets VOCs – the invisible chemicals that can come from cooking, furniture off-gassing, cleaning supplies, or paint (though I always recommend choosing non-toxic paint options like ECOS whenever possible).

The carbon filter is interlaced within the HEPA filter, capturing and binding to pollutants like formaldehyde while also neutralizing odors.

When I first saw that they use about a pound of carbon, I wanted to know why. Some brands use more, so I wanted to understand the thinking behind the design.

I found a voice note from Jaspr’s founder explaining their approach – including why they chose that carbon load and why they use an H12 filter instead of an H13 or higher.

If you want behind-the-scenes insight into the tradeoffs (airflow, noise, and real-world performance), you can listen to it HERE.

The short version: they prioritized strong airflow, quieter operation, and the ability to clear fine particles quickly – the things most people notice day to day.

If you’re considering a Jaspr

After using Jaspr for more than a year – through a sleep study, controlled burns in nearby forests, everyday cooking, and normal family life – I’ve been consistently impressed with both the air scrubber and the company behind it.

That’s why when my daughter moves to college next year, she’ll be bringing her own Jaspr with her.

If indoor air quality is something you’ve been meaning to prioritize, this is a well-built, performance-focused option that’s designed to last.

One of the biggest reasons I feel comfortable recommending Jaspr is their warranty. A truly good air purifier / scrubber is an investment, but as long as your filter subscription is active, your unit stays covered under their lifetime support policy.

In our experience, the process is refreshingly easy when you actually need it. If you decide it’s a fit for your home, use code MP to save $250.

Share with a friend! 👇

Tags: ,
enzymes

What They Do and Why We Need Them

The kids, work deadlines, what’s for dinner… these are the kinds of things that often occupy our thoughts. What’s going on inside our cells? Not so much. However, our cellular health is the key to a healthy body, and enzymes play an important role in the entire process. 

This article is a deep dive into enzymes, what they really are, how I use them, and how they can help with energy, digestion, and more. While I don’t take lots of supplements or even take them every day, enzymes are one of the few exceptions. I used enzymes in my journey to recover from Hashimoto’s autoimmune disease and I still use them now for other reasons. 

After 7 years of taking them and plenty of trial and error, I’m sharing what I’ve found!

What Are Enzymes?

Enzymes are like a precision tool our bodies use to break things down and build them back up. From a scientific perspective enzymes are protein catalysts that lower activation energy and speed up our reactions, all without being consumed in the body. Different ones serve different purposes, like a key only fitting a certain lock. For example lipase helps digest fats and only fats, while amylase only digests carbs. 

They also work differently under different conditions which is why they can function differently depending on how they’re used. Things like pH, temperature, co-factors, and minerals all play a role in pulling the trigger for enzymes to do their job. 

In theory we get them from food, especially produce. Our body also makes many enzymes, like amylase in our saliva to break down carbs, or gastric enzymes for proteins in our digestive tract. These enzymes break down most of the macronutrients in our body so we can actually use what we eat. 

However with declining soil quality and nutrient density and disrupted gut microbiomes and absorption, many of us can use some extra help in this area. In hindsight I finally realized that my body wasn’t making and using enzymes well and I really wasn’t absorbing all the healthy food I was eating. Enzymes are just as important as minerals and light in my book when it comes to foundational health.

They’re especially helpful during times of stress, inflammation, and gut issues. Enzymes are also key when it comes to dealing with heavy metals, parasites, and general recovery.

The Best Way To Take Enzymes

If our bodies aren’t effectively making all the enzymes we need, then the next best thing is to take a quality enzyme supplement. How you take them though also makes a difference. When we take enzymes with food they work to help us digest, absorb, and break down the compounds of our food more efficiently. These are especially helpful for reducing bloating and gas after eating. Digestive enzymes also help with that heavy, overly full feeling when food is just sitting around and not being broken down well. 

Taking enzymes on an empty stomach works entirely differently. Away from food enzymes work in a more systemic way, like proteolytic enzymes. So while they have multiple uses, the timing matters here. Research has explored enzymes like serrapeptase and nattokinase for circulation and inflammatory support. Nattokinase has been studied for breaking down blood clots, while serrapeptase has been researched for swelling after surgery. 

You can find enzymes derived from plant and microbes that help the body fill in the gaps of what it’s already doing. I’ve learned the hard way that the best way to support the body is to work within the body’s natural systems. The idea isn’t to bypass or overload the body’s natural systems, which can lead to problems down the road. 

Different Kinds of Enzymes

I mentioned that different enzymes do different things, so what are the different kinds of enzymes? First up there are the lipases that deal with breaking down fats, like glycerol and fatty acids. Next are amylases like glucoamylase and lactase. These deal with carbs, starches, lactose oligosaccharides, and other forms of carbohydrates. There are even some enzymes that target fiber to help make it more digestible, meaning less gas and bloating. 

Specialty enzymes like serrapeptase and nattokinase perform other functions in the body. 

Deciphering Enzyme Supplement Labels 

Turn over an enzyme supplement bottle and you’re sure to see different abbreviations and lingo on the label. For example, protease may be labelled with HUT, PC, and SAPU, which are related to how much enzymes there are and their activity amounts. 

These units matter more than milligrams, which don’t tell you much about what it’s actually going to do for you. There are a lot of different terms to consider here, but the main idea is to look beyond the grams and milligrams and look at the activity units. 

Who Should Take Enzymes?

Not every supplement is the best option or necessary for every person. Those who can benefit the most from taking an enzyme supplement include anyone with compromised gut function or digestive issues. Research shows benefits for those with low stomach acid and pancreatic insufficiency, both of which can happen with age. 

And if the problem isn’t addressed we tend to make less stomach acid and pancreatic enzymes as we get older. Anyone on a high protein or high fat diet can also see benefits, since we’re asking for more digestive power from our body and it could use the extra boost.

Another time I prioritize enzymes is when I’m traveling and eating out or during the holidays. Since I’m breaking my routine during these times I’ve found enzymes are helpful for keeping my digestion on track. 

How to Make Enzymes More Effective

If there’s one theme you’ve probably heard me repeat over and over, it’s that supplements work best when they’re layered onto a strong foundation. Enzymes are no exception. Before adjusting doses or experimenting with timing, I focused on simple foundational habits that support the body’s own enzyme production and activity.

Chew More Than You Think You Need To

Carb digestion begins in the mouth thanks to salivary amylase. When we rush through meals, we skip that first important step. Digestion starts before we even swallow.

Slowing down also shifts us into a parasympathetic (“rest and digest”) state. When we eat stressed or distracted, digestive secretions can decrease. For me, something as simple as taking three slow breaths before eating noticeably improves how I feel afterward.

Support Stomach Acid (If Needed)

Low stomach acid becomes more common with age and can impair protein digestion and nutrient absorption. Having enough stomach acid is essential for breaking down proteins. Betaine HCl or bitters can be helpful for this, but check with your provider first. This is very individual, and anyone with ulcers, reflux, GI bleeding, or on certain medications should work with a professional before experimenting.

Don’t Water Things Down

Hydration matters, but large amounts of liquid during meals can dilute stomach acid and enzymes. I drink most of my fluids between meals rather than with them. For some people, that small shift alone reduces bloating and the overly full feeling after eating.

Move After Meals

Even light walking after meals has been shown to support digestion and blood sugar regulation. I’ll often go for a short walk after meals (especially in the sunshine!). Movement also supports lymphatic flow. A short walk, gentle stretching, or simply staying active can support both digestion and recovery without needing an intense workout.

Minerals Matter

Enzymes rely on cofactors like magnesium, zinc, and sodium. Zinc in particular plays a role in digestive enzyme production and stomach acid function. This is why I see minerals as foundational. When we have enough minerals, enzymes, both the ones we make and the ones we supplement, tend to work better.

Enzymes and Autoimmune Recovery: My Experience

During my recovery from Hashimoto’s, I often felt congested inside, like things weren’t moving well. Stiff joints in the morning, puffy fingers, and low energy were all too common for me. I started with the foundational basics like minerals, nervous system work, sunlight, sleep, and a focus on eating protein. I then layered in both digestive and systemic enzymes.

The changes were gradual, but over time I noticed:

  • My rings were looser in the morning
  • My joints felt less stiff
  • Digestion felt smooth instead of heavy
  • My sleep deepened

Enzymes aren’t a magic pill, but I’ve definitely noticed how using them helped my body have what it needed to reach my health goals. And the consistency helped more than doing something intensely. 

Enzymes for Performance and Recovery

While this is discussed more in fitness circles, it’s worth mentioning. Especially since more people are realizing how much better they feel physically and mentally with a focus on healthy proteins. 

Digestive enzymes can support higher protein intake by improving nutrient breakdown and reducing bloating. Proteolytic enzymes (taken away from food) have also been studied for supporting muscle recovery and reducing delayed-onset muscle soreness (DOMS).

While performance wasn’t my original reason for using enzymes, I’ve seen consistent anecdotal benefits here, especially among strength athletes. My older teen athletes now take enzymes without any prompting from me because they’ve noticed a difference too. 

The Best Enzyme Options

As with any supplement, quality and context matter. Be sure to discuss with your healthcare provider if you take anticoagulants, have a bleeding disorder, are post-surgery, or have ulcers or active GI bleeding. Children may benefit from specific enzymes, but you can always check with their provider for targeted advice. 

When choosing an enzyme look for something that has clearly labeled activity units (not just milligrams). Third-party safety testing when available is also something I reach for. I also want formulations that are designed to remain active at appropriate pH levels so my body can actually use the enzymes. 

My favorite enzymes that check all the boxes for me are these:

Practical Tips If You Want to Experiment

If you’re considering enzymes, here’s the approach that worked for me:

  1. Start low (one capsule)
  2. Track how you feel (digestion, energy, stiffness, sleep, etc.)
  3. Increase gradually if needed
  4. Be intentional about timing (with meals vs. away from meals)
  5. Keep foundations strong: minerals, protein, sunlight, movement, stress regulation

I found that timing and consistency mattered far more for me than high doses.

Final Thoughts on Enzymes

Enzymes may not be flashy or trendy, but they’re the quiet catalysts working hard behind the scenes. For me, they were a needle mover when layered onto sleep, minerals, sunlight, nervous system safety, and nutrient density.

I don’t take many supplements daily. Enzymes are one of the few I rotate in regularly because I’ve seen enough benefit to keep them in my toolkit. Our bodies are incredibly intelligent, but sometimes they just need the right support to function how they were designed. 

Have you ever experimented with enzymes before? I’d love to hear about it in the comments!

lip butter

Ultra Creamy Lip Butter

Lip balm, lip gloss, lip stick, and now lip butter. I’ve created lots of different natural lip products over the years to replace all the tubes of lip products I used to buy. This lip butter is so simple to make with just a few ingredients and melts like butter on your lips, hence the name!

It’s a little more nourishing than some lip balms so it’s perfect for when you need the extra hydration.

Lip Butter vs Lip Balm

When I first heard the words lip butter I thought it was just a strange name for lip balm. It turns out there are some differences between the two (even if they are more subtle). Lip balm uses a blend of waxes and oils to moisturize the lips. A lip butter can also use some wax and oil, but it also adds in more creamy lip butters. 

Shea butter, mango butter, cocoa butter, and cupuacu seed butter are some of the top favorites here. Butters are thicker than liquid oils but they’re not as hard or waxy as beeswax or candelilla wax. They also have a unique fatty acid profile that’s great for skin and lips. 

Lip Butter Ingredients

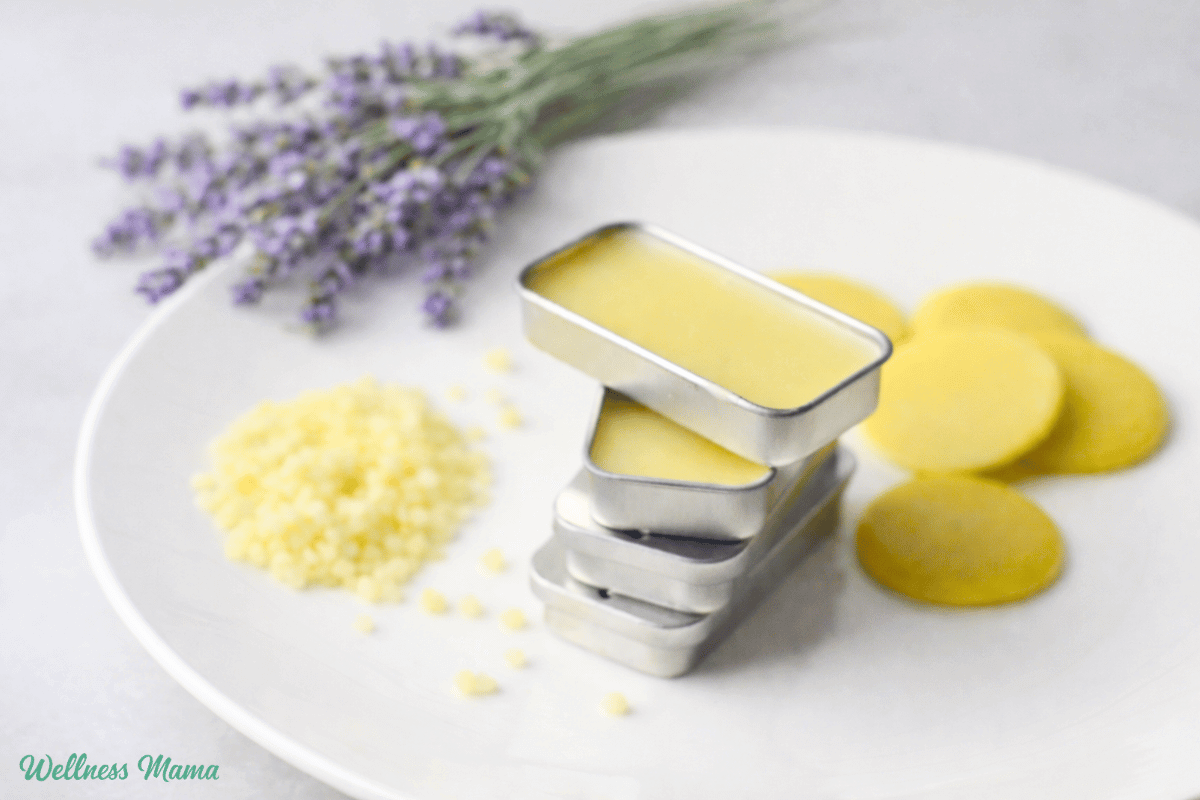
I’ve kept the ingredients list simple so you don’t have to buy a ton of different oils and butters to make this. Beeswax helps thicken, while cocoa butter and mango butter add that luxurious emollient feeling. I’ve also included some meadowfoam seed oil to make it spreadable and essential oil for scent and added lip benefits.

Mango Butter

First up we have mango butter. I love how smooth and creamy it feels without being too thick. It’s softer than cocoa butter and feels more like shea butter. Mango butter is one of the few butters that has some astringency, so it doesn’t leave skin or lips feeling overly greasy. 

You can substitute shea butter, but shea butter does have more of a tendency to get gritty once it’s cooled down. A good way to prevent this from happening is to cool any product made with shea butter in the fridge, instead of room temperature. 

Cocoa Butter

I chose cocoa butter because it’s harder and gives the lip butter more thickness without over relying on beeswax. Cocoa butter is high in saturated stearic and palmitic fatty acids and creates a lipid barrier to prevent moisture loss. It also smells amazing with it’s slightly chocolate scent!

Meadowfoam Seed Oil

This liquid carrier oil may not be one you’ve worked with before. It adds a nice lightness to the blend and makes the creamy butters more spreadable on the lips. Meadowfoam seed oil is an emollient to lock in moisture, but is more easily absorbed than heavier carrier oils like olive or avocado oil. If you don’t have any on hand you use any liquid carrier oil you prefer, but it will affect the overall absorption and texture of the lip butter. 

Essential Oil 

Not only do essential oils make this smell amazing, but they add additional soothing and aromatherapy benefits. Just be sure to choose lip safe essential oils that won’t irritate this delicate area! Oils like cinnamon, lemongrass, clove, and ginger may smell great, but they can cause burns or sensitivity in lip products. And others like lemon and lime can cause phototoxicity (aka burns when exposed to sunlight). 

Here are some of my favorite lip safe essential oils to use:

  • Lavender
  • Sweet orange
  • Geranium
  • Mandarin
  • Neroli
  • Rose
  • Spearmint
  • Peppermint 

Since the cocoa butter gives this lip butter a chocolatey scent I like using essential oils that smell good with white chocolate. For this batch I used lavender, but peppermint and orange are also really nice with the cocoa butter. 

Another important safety note when it comes to essential oils is dilution. In general how much essential oil you use for lip products depends on the exact essential oil. Nothing in the above list is overly harsh, so a good rule of thumb is .5 to 1 percent. This comes to about 5-10 drops in this recipe. It may be tempting to add a whole lot more, but less is usually better when it comes to essential oils!

Here’s how to make your very own lip butter. 

Ultra Creamy Lip Butter

This creamy lip butter is super moisturizing and melts on contact to lock in hydration.

Prep Time3 minutes

Active Time5 minutes

Cooling Time30 minutes

Total Time38 minutes

Yield: 2 ounces

Author: Katie Wells

  • Add all of the ingredients except essential oils in the top of the double boiler. Heat and stir occasionally until completely melted.

  • Turn off the heat and add the essential oils.

  • Immediately pour into your lip balm containers and let cool completely.

  • Store in a cool, dry place for the best shelf life. This will last about 6-12 months when stored properly. 
  • This recipe yields about 13 regular size lip balm tubes. 

Tips For Making Lip Butter

Really we’re just adding everything together, melting, and pouring into containers. No multiphase formulas or complicated steps. I have a heat safe glass bowl that I use only for making DIY products and I’ll use that like a double boiler. You can also melt the ingredients in a dedicated Mason jar for easier pouring. 

I’ve found that it’s easy to wipe out the wax/butter residue with paper towels after I’ve poured the product into my containers. Don’t go straight for soap and a washcloth to clean up or you’ll have a waxy mess! 

Avoid storing your lip butter in hot or humid conditions which will degrade the ingredients faster. This includes leaving it in a hot car or in a bathroom with a steamy shower.

Have you made your own lip butters or balms before? What are your favorite scents to use? Leave a comment and let us know!

Tags: , , ,
Protein Brownie Batter Bites

High Protein Brownie Batter Bites

In high school and college I was addicted to all the processed junk food and sweets. Since then I’ve swapped out the mini snack cakes for real food options that are much healthier and way more delicious! These brownie batter bites are the latest creation to come out of my kitchen.

They’re a good source of protein and healthy fats for steady energy. Plus, they’re naturally sweetened, no highly processed sugar necessary! My kids love these and they’re gone pretty quickly once the batch is done. 

Healthy Brownie Batter Bites

One of the best things about making brownies isn’t even the brownies, but getting to lick the bowl. While I’m not afraid of raw egg from pastured chickens, there are other things lurking in most brownie recipes I’m not a fan of. Not only is this version packed with protein, but it skips the flour entirely. They’re also egg free for anyone who needs to avoid eggs. 

The nut butter gives it a creamy base and adds healthy fats. Then of course there’s antioxidant rich cocoa powder for a rich, chocolatey taste. My kids like mini chocolate chips too for extra chocolate. The maple syrup or raw honey add a touch of sweetness without overdoing it. And even better, these natural sweeteners are full of minerals and micronutrients for cellular health and energy that won’t give you a crash. 

Protein Packed

I’m all about prioritizing protein. After years of undereating my metabolism was much happier when I started nourishing my body. Part of that includes making sure I hit my protein goals. While I like to eat at least 40 grams of protein for breakfast, I want my snacks (and even desserts!) to support my goals. 

Here are some more protein rich desserts if you’re looking for more options!

These brownie batter bites taste like you’re eating a spoonful of sugary brownie batter, but they’re actually good for you. We’ll eat them as a dessert or snack. And if you’re packing them for lunches, freeze them before popping them into the lunch container so they keep their shape.

High Protein Brownie Batter Bites

A rich, chocolatey snack that tastes like a treat but fuels like a real-food meal.

  • Line a baking sheet with parchment paper and set aside.

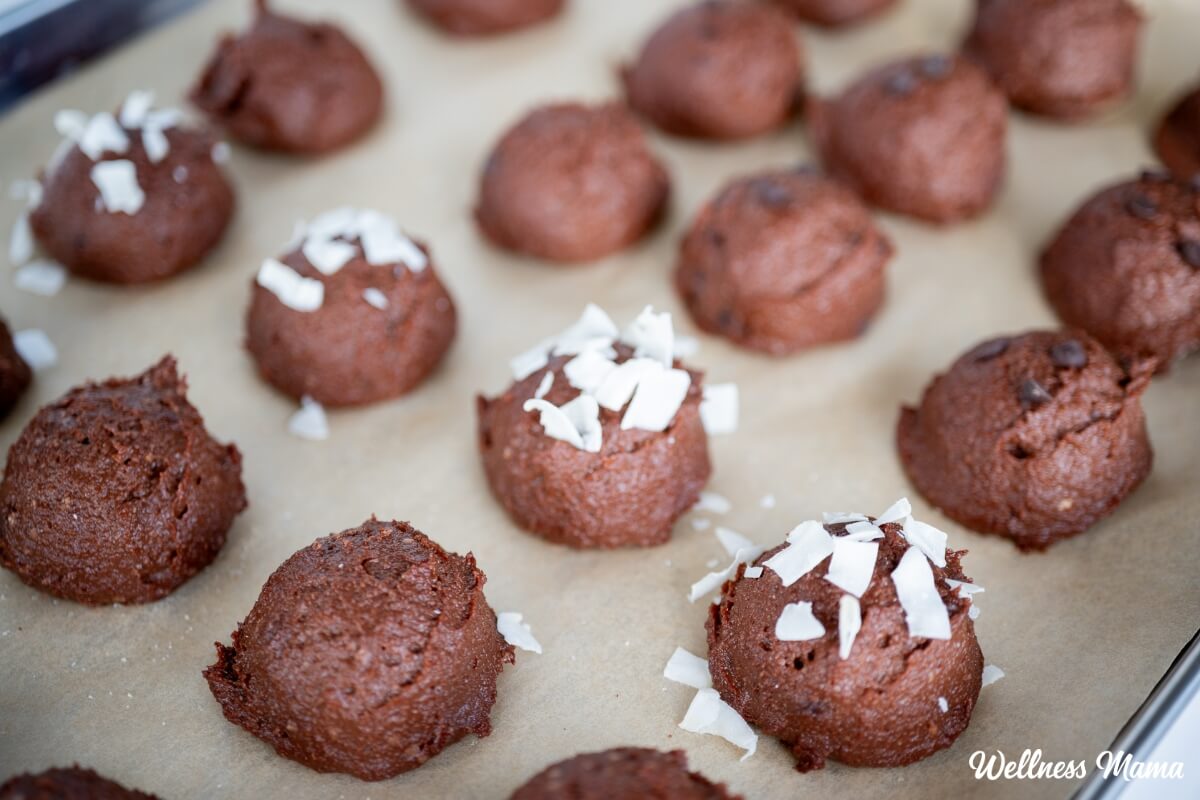
  • Blend cottage cheese, protein powder, cocoa powder, nut butter, maple syrup, and vanilla in a blender or food processor until smooth and thick.

  • Transfer to a bowl and stir in almond flour until the mixture is firm enough to scoop. Fold in chocolate chips if using.

  • Scoop and roll into 12–16 brownie batter bites. Place the dough onto the parchment lined baking tray and chill for at least 30 minutes before serving. If your dough is really soft, then chill the bowl for about 10–15 minutes first before scooping.

Nutrition Facts

High Protein Brownie Batter Bites

Amount Per Serving (1 bite)

Calories 65
Calories from Fat 27

% Daily Value*

Fat 3g5%

Saturated Fat 1g6%

Trans Fat 0.004g

Polyunsaturated Fat 0.3g

Monounsaturated Fat 1g

Cholesterol 7mg2%

Sodium 61mg3%

Potassium 69mg2%

Carbohydrates 6g2%

Fiber 1g4%

Sugar 3g3%

Protein 5g10%

Vitamin A 23IU0%

Vitamin C 0.01mg0%

Calcium 47mg5%

Iron 0.2mg1%

* Percent Daily Values are based on a 2000 calorie diet.

If your house is like mine, rolling them smaller helps stretch the batch. I’ll often make 16 mini bites so everyone gets one and the older kids can grab seconds.

Storage and Shelf Life

These brownie batter bites will keep in the fridge for up to 5 days or the freezer for up to 2 months. Whenever I make a batch they’re usually gone the same day! You can also double or triple the batch to freeze for later.

What are some of your favorite healthier treats to make? Leave a comment and share below!

Tags: , , , ,
coconut oil pulling chews

Oil Pulling With Coconut Oil Chews

I’m a big fan of oil pulling. I’ve shared before how I started this age-old practice and why I started oil pulling with coconut oil instead. I decided to give my oral routine an upgrade with these coconut oil pulling chews with essential oils!

Coconut Oil Pulling Benefits

Not familiar with oil pulling? It’s simply swishing oil (usually sesame or coconut oil) in your mouth, then spitting it out in the trash. There’s some research, and plenty of anecdotal evidence, that shows it can reduce plaque. Coconut oil is also naturally a mild antibacterial and can help keep oral bacteria in check. 

Coconut oil pulling for teeth is an old practice, but more people are starting to pick it back up. How long you swish the coconut oil depends on your tolerance, but 5-20 minutes is a good goal. So how often do you do coconut oil pulling? I aim for once a day, or at least several times a week. 

What kind of coconut oil you use also plays a role. I recommend using organic, virgin (or unrefined) coconut oil. MCT oil will also work. 

Oil Pulling With Coconut Oil For Teeth 

The idea is that the oil can reach and help remove harmful substances in the mouth, like bacteria and plaque. Unlike alcohol-based mouthwashes and toothpaste, oil may be able to get to hard to reach parts of the gum. And the naturally antibacterial properties of oils like coconut may help break down bacteria.

Many report their teeth and gums feel much cleaner when regularly using oil pulling. Others notice bad breath goes away. Personally, I saw less gum swelling and plaque on my teeth. My dentist even commented how clean and plaque-free my teeth were after I added oil pulling to my oral health routine.

While oil pulling isn’t a miracle cure, there’s a good chance it promotes healthier teeth and gums. Especially if used in combination with other good oral health practices. If you want to read more, I’ve written about coconut oil pulling in more detail here. 

Coconut Oil Pulling With Essential Oils

These coconut oil pulling chews were inspired one day when I made homemade chocolate in little molds. I realized I could make my routine simpler by making bite-size oil pulling chews. 

Adding essential oils like peppermint, clove, and tea tree improve the taste and the health benefits. My favorites so far are mint and clove. Just make sure that the oils you choose are safe for oral use and don’t interact with any of your meds or health conditions. 

Here are some essential oils that work well with oil pulling:

I keep these chews in the fridge so they maintain their shape. Keeping them cool also helps with the texture at the beginning. For my kids who have trouble with the texture of coconut oil, keeping these in the fridge so they can “chew” them first helps a lot.

Coconut Oil Pulling Chews

These pre-made chews make oil pulling easy. Customize the flavors and add health benefits with your favorite essential oils!

Prep Time5 minutes

Cooling Time30 minutes

Yield: 12 chews

Author: Katie Wells

  • Melt the coconut oil until just barely liquid.

  • Remove from heat and add the essential oils.

  • Pour into silicone candy molds and put in the fridge or freezer to harden.

  • Once hardened, remove from the molds and store in a jar.

  • Use one chew per day as needed for oil pulling.

  • Want a pre-made essential oil blend? I love this Balanced Mouth Blend from Wellnesse.
  • The molds I used held about 2 teaspoons each. If your molds are a little smaller or larger than mine then you’ll get a different yield. 

Other Healthy Mouth Recipes

I’ve always been fascinated by oral health. I was even able to use a combination of diet, supplements and oral health products to reverse a cavity. Since then I’ve made these methods a priority for our whole family. These are some of the other recipes and methods we use:

 Ever tried coconut oil pulling? How did it work for you? Leave a comment and let us know!

Tags: , , ,
Best oLive
Privacy Overview

This website uses cookies so that we can provide you with the best user experience possible. Cookie information is stored in your browser and performs functions such as recognising you when you return to our website and helping our team to understand which sections of the website you find most interesting and useful.