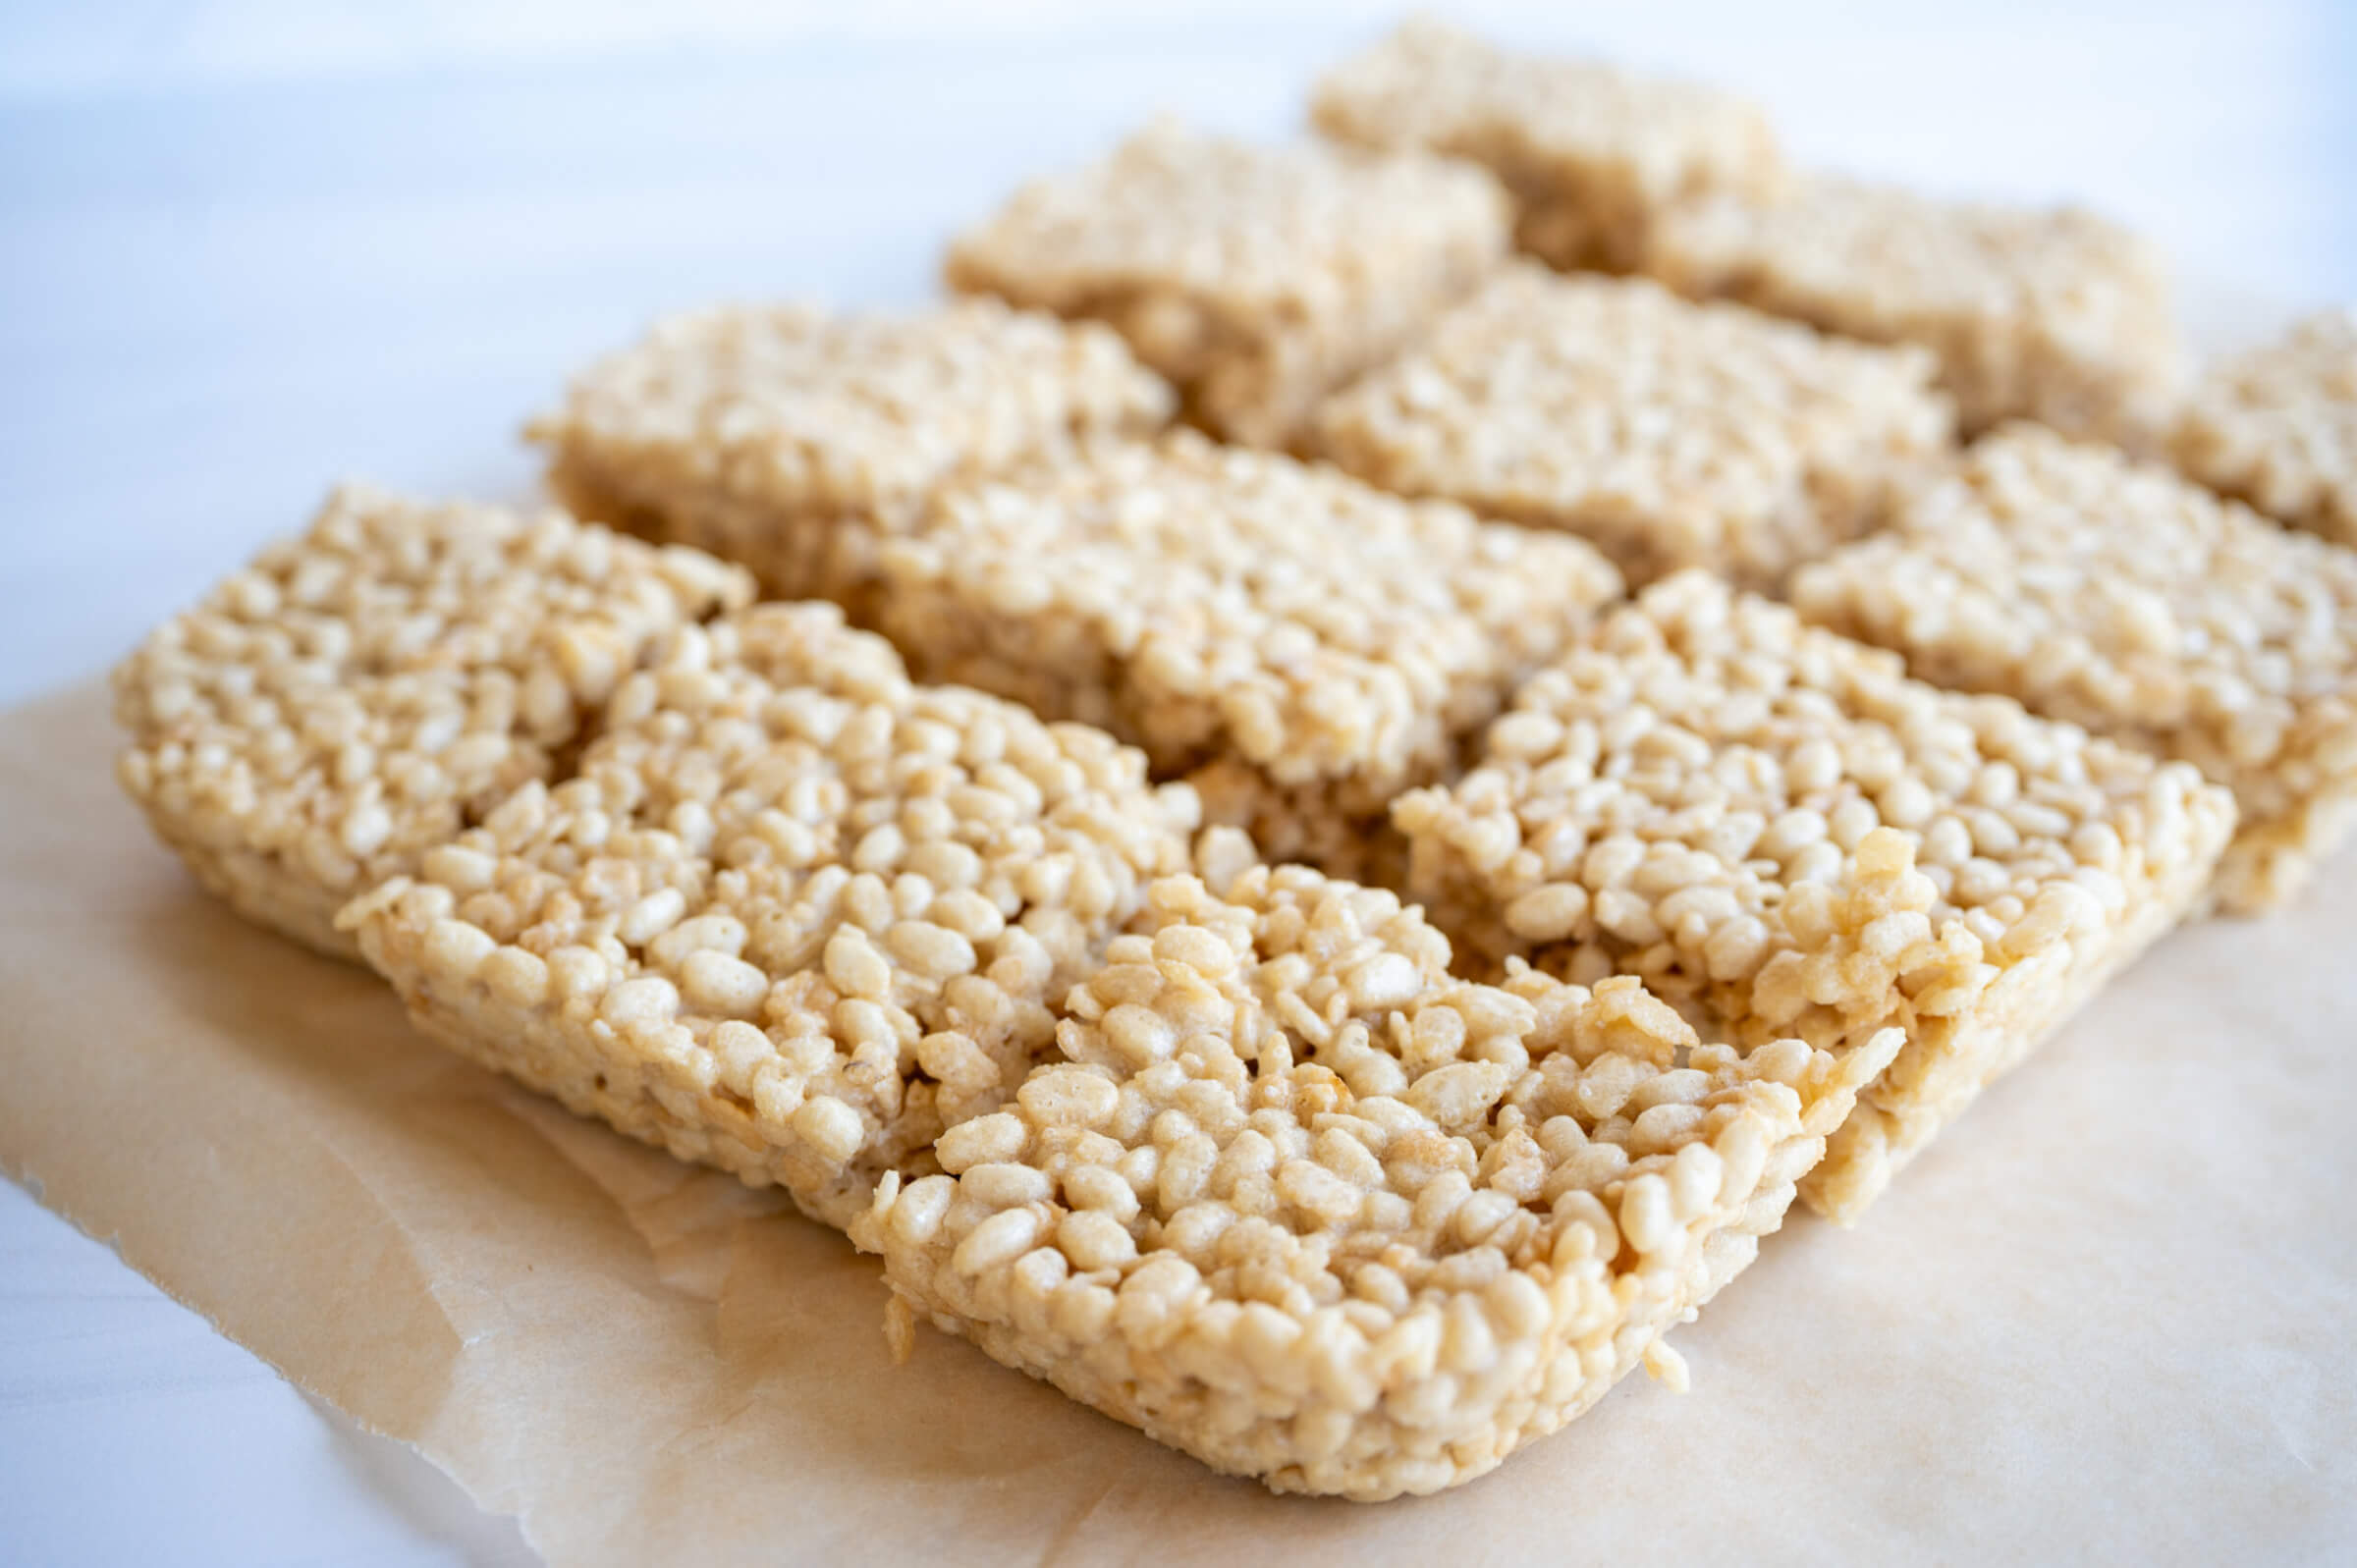
Smash_Chicken_Caesar_Tacos

Smash Chicken Caesar Tacos

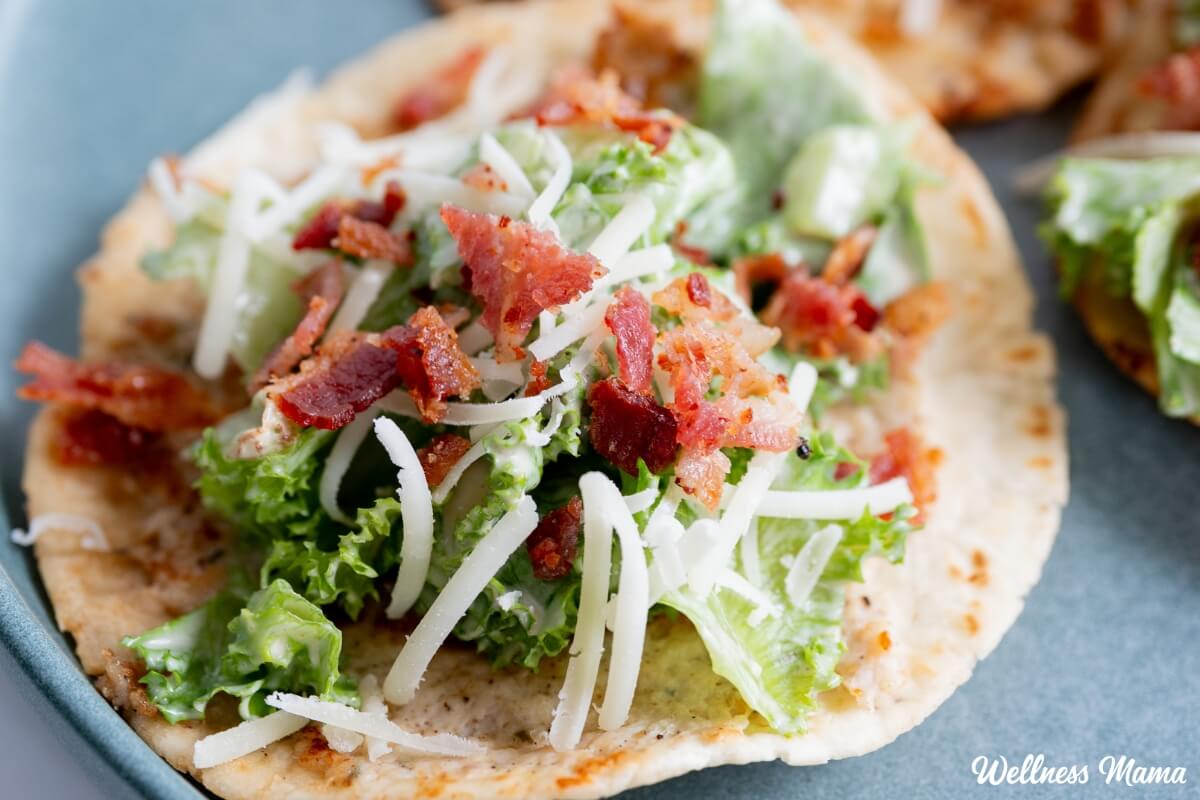
This is one of those recipes that may seem a little strange and unconventional, but it’s absolutely delicious! It’s full of protein, healthy fats, and veggies, and packed with flavor. My kids wolfed these down, they’re that good.

You’ve more than likely heard of Caesar salad before. I have a recipe on the site plus several variations of Caesar salad dressing. These tacos combine those flavors for a crunchy, mouthwatering version. They’re best served fresh, but you can mix the ingredients up beforehand to meal prep.

Smash Chicken Caesar Tacos

The traditional Caesar salad features a creamy dressing made from anchovies, garlic, mustard, and more. Plus crunchy romaine lettuce leaves and large croutons. It’s certainly evolved over the years, but the flavors and ingredients have largely remained the same. And while I still love a good Caesar salad, these smash chicken Caesar tacos are a nice spin on the classic.

Like most tacos, these use a tortilla shell for the base. You can use whatever you prefer, but I used organic flour tortillas. Almond flour, cassava flour, or other tortillas would work too. Just pick something that’s not too big so they’re easier to flip.

Here’s the twist: we’re smashing a seasoned chicken mixture onto the tortilla and cooking it until golden and crispy. This packs in some serious protein and adds a yummy flavor. The chicken is seasoned with a blend of Italian seasoning, lemon pepper, garlic, and onion.

Caesar Dressing

What really makes a good Caesar salad though is the dressing. I have a quick version here and a more traditional Caesar dressing here. This recipe uses a blend of mayo and yogurt to get a tangy, creamy dressing. The worcestershire sauce and anchovy paste adds some earthy flavors. Lemon adds brightness and tang, while herbs and Parmesan add another layer of flavor and creaminess.

I’ll often use homemade mayo since it’s healthy and easy to make. Many times though I’ll reach for avocado oil mayonaisse from Primal Kitchen. Making your own mayo and sauces is simple, but sometimes with 7 kids grabbing a pre-made jar is just easier. Thankfully there are some pretty good store-bought mayo options now. Thrive Market is another way I do an easy stock up on healthy pantry essentials.

Making Ahead

Once the tacos are cooked and assembled they really taste best fresh. You can mix up the chicken mixture and dressing beforehand though for easier meal prep. I doubled the recipe so we had enough for 2 meals. The dressing really tastes better after its been in the refrigerator for awhile to allow the flavors to better combine.

These smash chicken Caesar tacos are fresh, crunchy, and offer a balanced meal I can get behind. Here’s how to make them.

Smash Chicken Caesar Tacos

Crunchy, protein-packed tacos with all of the flavors of a classic Caesar salad. Full of veggies, healthy fats, and absolutely delicious!

For the Taco Assembly

  • 7 small tortillas (cassava flour, almond flour, sourdough, or traditional flour tortillas)
  • 1 TBSP butter (or ghee, or avocado oil)
  • 1 head romaine lettuce (finely shredded)
  • extra Parmesan cheese for serving
  • fresh parsley (chopped)
  • In a medium bowl, whisk together the mayonnaise, yogurt, lemon juice, Worcestershire sauce, garlic, mustard, anchovy paste, parsley, and black pepper until smooth.

  • Stir in the Parmesan cheese and refrigerate while preparing the tacos. The flavors deepen as the dressing chills.

  • Combine the ground chicken, Italian seasoning, lemon pepper, garlic powder, onion powder, sea salt, and black pepper in a bowl. Mix gently until just combined.

  • Avoid overmixing to keep the chicken tender.

  • Spread about ¼ cup of the chicken mixture onto each tortilla, pressing it into an even layer that reaches the edges. If the chicken sticks to your hands, lightly oil your fingers or use parchment paper to press it into place.

  • Heat a large skillet over medium-high heat and add the butter, ghee, or avocado oil.

  • Place the tacos chicken-side down in the pan and cook for 2–3 minutes until the chicken develops a golden crust. Flip the tacos and reduce the heat slightly. Continue cooking another 2–3 minutes until the tortilla becomes lightly crisp and the chicken reaches an internal temperature of 165°F. Transfer to a plate and repeat with the remaining tacos.

  • Toss the shredded romaine with enough Caesar dressing to lightly coat.

  • Top each taco with the dressed romaine, extra Parmesan, fresh parsley, and a drizzle of additional dressing.

  • Serve immediately while the chicken is crispy and the lettuce is cold and crunchy.

Nutrition Facts

Smash Chicken Caesar Tacos

Amount Per Serving (1 taco)

Calories 475
Calories from Fat 324

% Daily Value*

Fat 36g55%

Saturated Fat 9g56%

Trans Fat 0.2g

Polyunsaturated Fat 16g

Monounsaturated Fat 9g

Cholesterol 80mg27%

Sodium 914mg40%

Potassium 665mg19%

Carbohydrates 20g7%

Fiber 3g13%

Sugar 3g3%

Protein 19g38%

Vitamin A 7935IU159%

Vitamin C 5mg6%

Calcium 190mg19%

Iron 3mg17%

* Percent Daily Values are based on a 2000 calorie diet.

Try adding some bacon to the dressing for even more flavor!

What are some of your favorite taco fillings? Leave a comment and let us know!

Tags: , , ,
Detox bath recipes

5 Simple & Natural Detox Bath Recipes

Nothing is more relaxing than a warm bath… except a relaxing detox bath. These are a great option for anyone who struggles with skin issues or other signs of toxin overwhelm. It’s also an inexpensive way to boost health.

I’m always up for a warm bath, and these natural add-ons help improve health while you chill out. Don’t have time for a full soak? You can also do a foot bath with these and get some of the benefits. 

I’ve found that detoxing usually makes me tired, so I like to do this as part of an evening/bedtime routine. They’re also good for kids to give their body’s natural defenses some natural support. If you have any health conditions or are pregnant or nursing, be sure to check with your healthcare professional first! 

Natural Detox Bath Recipes

Over the years my opinions on what detox even is have changed. I now see detox as something our body innately knows how to do on its own. Our liver, kidneys, skin, and other organs all work to remove toxins on a regular basis. 

However, with modern life, sometimes they need a little more targeted support.  

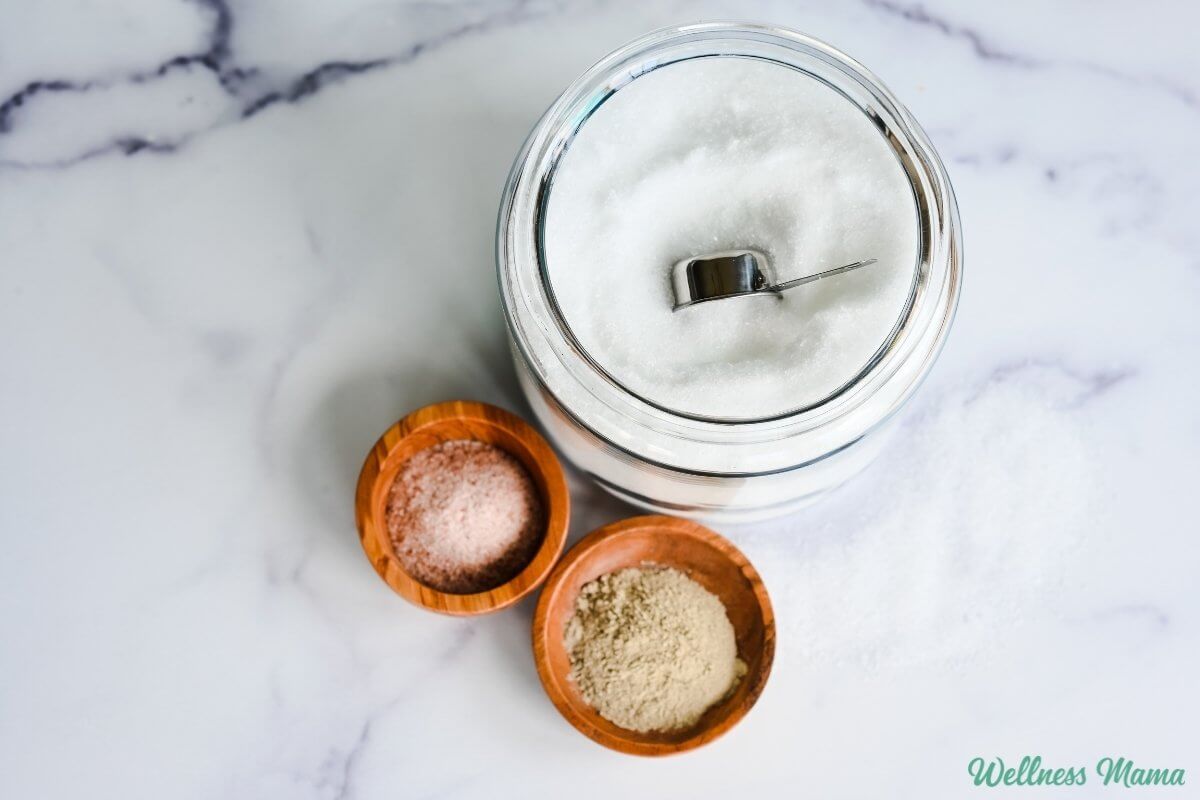
You may have heard of an Epsom salt bath (and that is our base recipe here), but what about a clay bath, vinegar bath, or even a mustard bath?! You’ll find many of these ingredients already in your pantry, but they serve more than one purpose. Ingredients like salt, baking soda, essential oils, and vinegar boost circulation, aid detox and provide soothing relaxation. I also like using Epsom salts as a way to boost magnesium stores. 

You only need a few simple ingredients to make some or all of these detox bath recipes:

  • Epsom salt
  • apple cider vinegar
  • baking soda
  • bentonite clay (it also has lots of other uses, so consider stocking up!)
  • mustard powder or ginger powder
  • essential oils (mix with powder or salt rather than directly to the bath)

These recipes are also safe and soothing for kids too! (But choose your essential oils wisely.)

Basic Epsom Salt Detox Bath Recipe

Here’s my basic detox bath recipe. Find the other variations below. Mix and match, or find your favorite!

Salt Detox Bath Recipe

This simple salt bath recipe is great for soothing skin irritation, boosting magnesium levels, and overall detoxing.

Yield: 1 bath

Author: Katie Wells

  • In a small pan, bring 2 cups of water to a boil.

  • Add the sea salt, Epsom salt, and baking soda to a quart-size Mason jar.

  • SLOWLY pour the hot water into the jar. The mixture will foam up, so be sure to do this slowly and do not hold the jar to avoid burning.

  • Fill the bathtub with warm/hot water.

  • Add the apple cider vinegar.

  • Pour the salt mixture in and add essential oils if using.

  • Soak in the bath for 30 minutes or as long as desired.

  • With any detox bath, you may feel tired or lightheaded when you get out. I don’t recommend doing this while home alone or before going somewhere in case you are tired or need help.
  • Avoid essential oils that are harsher on mucous membranes, like mint, cinnamon, oregano, or lemongrass. They can cause an unpleasant burning sensation. 

Clay Detox Bath Recipe

Bentonite clay is an ingredient I use in a lot of different recipes, from face masks to toothpaste. It does a really good job of absorbing heavy metals that can accumulate in our body.

It’s recommended to use a drain filter or cloth filter in the drain when doing a clay bath. This helps prevent the bentonite from accumulating in the pipes and potentially causing a clog. 

Clay Detox Bath Instructions

Dissolve the Epsom salts in a warm/hot bath and add essential oils if desired. For the clay, there are two options:

  1. Vigorously mix the clay into a small amount of water until the clumps are mostly dissolved.  Bentonite can react to metal, so I use plastic or wooden spoons to mix. Add the clay mix to the bath and soak for at least 20 minutes.
  2. Mix that clay with a small amount of water to make a paste. Stand in the tub full of water and rub the clay mix all over your body to create a skin mask and let it dry for 5 minutes before sitting down. This provides direct contact with the skin and effectively pulls toxins from the skin. Soak in the bath for at least 20 minutes or as long as desired. While soaking, use a washcloth to scrub any remaining clay off the skin.

This bath is great for removing a lot of toxins as the clay binds to heavy metals. The Epsom salts help pull a variety of toxins from the body while replenishing magnesium levels.

Oxygen Detox Bath Recipe

This bath is especially helpful during illness. Ginger helps clear congestion, alleviate body aches, and stimulate circulation for faster healing times. It can also be helpful for allergies or skin irritation. You can also make a strong tea with the ginger, strain after 15 minutes, then add the ginger tea to the bath. 

Oxygen Detox Bath Instructions

  1. Fill the tub with warm/hot water and add the hydrogen peroxide and dried ginger.
  2. Soak in tub for 30 minutes or as long as desired.

Vinegar Detox Bath Recipe

This is an excellent bath for soothing skin problems since vinegar balances the skin’s pH. While I don’t love the smell of vinegar, if anyone in the family has sunburn, eczema, dandruff, or dry itchy skin, we take a vinegar bath.

Apple cider vinegar has a whole host of benefits, and I find it not only leaves me with soft skin, but shiny hair as well.

Vinegar Bath Instructions

  1. Once or twice a week, I fill a tub with warm to hot water and add 1-2 cups of apple cider vinegar.
  2. I soak for 20-30 minutes, using a washcloth to clean my face and making sure to get my hair wet as well.

After bathing, I rinse off in a cool shower, though some recommend letting the vinegar water dry on the skin.

Mustard Detox Bath Recipe

I know, I’ve lost my mind, right? If it helps, I’m talking about organic mustard powder, not the yellow stuff in a bottle! Ancient cultures often used this spice in preparations to soothe colds, flus, and sore muscles, thanks to its circulation-stimulating properties.

Magnesium and essential oils make this bath both detoxifying and aromatic.

Mustard Bath Instructions

I use this recipe which uses organic mustard powder, Epsom salts, and a mix of essential oils.

Additional Detox Bath Notes

  • The warmer the water, the more powerful the detox effect will be.
  • If you have chlorine and fluoride in your water, I recommend adding a few tablespoons of bentonite clay to any of these baths to help absorb the chemicals so they aren’t absorbed into the skin. A home filter or bath filter are good options too. 
  • Any of these natural ingredients can be used alone or in combination for a cleansing effect.
  • All recipes can be doubled or tripled, but this will increase the detox effect.

More Bath Recipes for Natural Detoxification

I recommend starting slowly with these bath detox recipes or any health change. To help, I’ve compiled all of my ideas for detoxing your body and your home in my book The Wellness Mama 5-Step Lifestyle Detox.

If you need a high-quality bathtub filter for safer bath water, I use Canopy.

This article was medically reviewed by Madiha Saeed, MD, a board certified family physician. As always, this is not personal medical advice and we recommend that you talk with your doctor.

Ever taken a detox bath? Got a different recipe you use? Share below!

Tags: , , , ,
asian cabbage rolls

Healthy Sesame Ginger Cabbage Rolls

Once upon a time I was addicted to Chinese food. And I don’t mean real Chinese food; I mean the processed, Americanized version at places like Panda Express. Since switching to real food years ago, I’ve experimented with plenty of delicious and healthy Asian inspired recipes. These sesame ginger cabbage rolls are my latest obsession

They’re packed with veggies and protein and bursting with Asian flavors like toasted sesame oil, ginger, and coconut aminos (like soy sauce). I’ll serve them as appetizers, or more often as part of the main meal. They take just minutes of hands on time and you can make a big batch and store the leftovers for later. 

Sesame Ginger Cabbage Rolls

If you love the flavors of dumplings or pot stickers but don’t love the extra work of making wrappers, these cabbage rolls are a great alternative. And while the premade wonton wrappers are fast, they’re not always the cleanest. Napa cabbage is surprisingly tender after a quick blanch and makes a wrapper that’s light and easy to work with. It also adds another serving of vegetables without changing the classic savory filling. 

You can use other meats, but I like ground chicken since it doesn’t overpower the other flavors, like ginger and garlic. Plus, it adds a healthy dose of protein. Finely diced shiitake mushrooms blend right into the filling to add an earthy flavor and extra moisture so the chicken stays moist as it cooks. 

My favorite part is the dipping sauce though. It brings everything together for a salty, savory dip. Coconut aminos taste like soy sauce, but slightly sweeter (and without the soy). Then there’s the earthy ginger, sesame and chili crisp for a bit of spiciness. Every bite has so much flavor without the ultraprocessed sauces or MSG. 

Tips for the Best Cabbage Rolls

One of the biggest tricks to making these is choosing the right cabbage. Napa cabbage has softer, flexible leaves that roll easily after a quick blanch. If the thick white stem feels stiff, simply remove it before filling and rolling. This makes the leaves easier to work with and helps prevent tearing.

You also don’t want to overfill the rolls. About one-third cup of filling is plenty for each leaf and makes rolling much easier. If a leaf does split, it’s an easy fix. Simply overlap another cabbage leaf around it before cooking. Once they’re steamed, no one will notice.

After browning the bottoms for a couple of minutes, I add a little water and cover the pan to let the cabbage steam while the filling cooks through. Remove the lid for the last minute or two to let any remaining liquid evaporate and give the bottoms a little extra texture.

Easy to Customize

These cabbage rolls are easy to adapt with whatever you have on hand. Ground turkey or pork both work well in place of chicken, and shredded carrots add a little natural sweetness and color. If you like more crunch, stir in some finely chopped water chestnuts before rolling everything up.

Leftovers also reheat well, making these a great meal prep option. I store them in the refrigerator for a few days and warm them gently in a covered skillet with a splash of water. They’re just as delicious the next day for lunch or a quick dinner.

We love making homemade pot stickers, but these sesame ginger cabbage rolls have become one of our favorite shortcuts. They have all the savory flavors we love, and the tender cabbage creates a surprisingly satisfying substitute for traditional wonton wrappers.

Healthy Sesame Ginger Cabbage Rolls

These flavorful cabbage rolls feature protein, veggies, and real food ingredients like garlic, ginger, and toasted sesame.

For the Sesame Napa Cabbage Rolls

For the Sesame Coconut Aminos Dipping Sauce

  • Bring a large pot of water to a boil. Carefully separate 8-10 large Napa cabbage leaves and blanch them for about 1 minute, just until softened and flexible enough to roll without tearing. Transfer the leaves to an ice bath or a plate to cool and pat dry with paper towels. If needed, trim the thickest portion of the stem with a knife so the leaves roll more easily.

  • In a large mixing bowl, combine the ground chicken, shiitake mushrooms, garlic, green onions, coconut aminos, toasted sesame oil, ginger, rice vinegar, and white pepper. Mix until everything is evenly incorporated, being careful not to overwork the meat.

  • Lay a cabbage leaf flat on your work surface. Place approximately 1/3 cup of filling near the stem end of the leaf. Fold the sides inward and roll tightly, similar to a burrito or spring roll. Repeat with the remaining cabbage leaves and filling.

  • Heat the avocado oil in a large skillet over medium heat. Arrange the cabbage rolls seam-side down in the pan and cook for about 2 minutes until lightly golden on the bottom. Add ¼ cup water to the skillet and immediately cover with a lid. Steam for 10 to 12 minutes, or until the chicken is fully cooked and reaches an internal temperature of 165°F. Remove the lid and continue cooking for another 1 to 2 minutes to allow any remaining liquid to evaporate and the bottoms to crisp slightly.

  • While the rolls cook, whisk together the coconut aminos, rice vinegar, toasted sesame oil, chili crisp, honey, ginger, garlic, and sesame seeds.

  • Serve immediately with the dipping sauce on the side.

Nutrition Facts

Healthy Sesame Ginger Cabbage Rolls

Amount Per Serving (1 cabbage roll)

Calories 139
Calories from Fat 81

% Daily Value*

Fat 9g14%

Saturated Fat 2g13%

Trans Fat 0.03g

Polyunsaturated Fat 2g

Monounsaturated Fat 5g

Cholesterol 39mg13%

Sodium 200mg9%

Potassium 332mg9%

Carbohydrates 5g2%

Fiber 1g4%

Sugar 2g2%

Protein 9g18%

Vitamin A 95IU2%

Vitamin C 7mg8%

Calcium 26mg3%

Iron 1mg6%

* Percent Daily Values are based on a 2000 calorie diet.

For extra heat, add a teaspoon of chili crisp directly to the filling mixture

Storage and Shelf Life

Keep any leftovers in the fridge in an airtight container for up to 3 days. Reheat on the stove with a little water to steam.

More Asian Inspired Recipes

These delicious recipes are a healthier spin on typical fast food and Asian inspired dishes.

Have you made wraps or cabbage rolls before? What are your favorite flavors to use? Leave a comment and let us know!

Tags: , , , ,
tinted lip sunscreen

DIY Natural Tinted Lip Sunscreen

For many years now I’ve preached about the benefits of safe sun exposure. The keyword here is safe! And while it has a lot of benefits, sometimes on occasion, I’ll pull out the homemade sunscreen. Many of you have asked for a lip sunscreen with SPF, so I finally got to work in the kitchen and came up with one. 

Why You Should Not (and Should) Use Lip Sunscreen

I’m not usually a fan of sunscreen for several reasons. We need the sun to make the hormone vitamin D, have a strong immune system, regulate hormones, and so much more. Even something as seemingly simple as sunglasses can interfere with that signalling by blocking light receptors in the eyes. 

Most of the time I’ll either seek shade or cover up once my body has had enough sun for the day. While I think the science is clear on the sun’s benefits, it’s also clear that sunburns are damaging! However, if you live in a really sunny climate and you’re outside a lot, out on the boat, surfing, etc., then sunscreen can be helpful sometimes. 

My homemade sunscreen recipe is a fan favorite, but many of you have asked if it can be used on lips. Technically yes, but it might leave a white cast, be hard to apply, and taste kind of funky. Even if you’re not eating it (the ingredients are clean though), small amounts of lip balm still end up in the mouth. But we probably all knew that one kid in grade school who liked eating Chapstick…

Mineral Lip Balm With Sunscreen Ingredients

A lot of the store-bought brands use a whole slew of synthetic ingredients I really don’t want in my mouth (or in my kids’!). Certain UV-blocking ingredients go smoothly onto skin and absorb quickly, which sounds great. However, these sunscreen ingredients like oxybenzone and avobenzone are also toxic to coral reefs, which are essential to ocean life and life on Earth. Not to mention what they do to us once they’re absorbed. 

This lip sunscreen instead uses non-nano and uncoated zinc oxide. It creates a skin barrier and sits on top of skin/lips, reflecting UV rays. It’s one of the safest UV barriers out there. In fact, it’s one of only two that the FDA considers safe and effective for sunscreen. I don’t always agree with the FDA, but I’m with them on this one. The zinc oxide is at 20%, which translates to roughly 10 SPF when you add up all of the ingredients. 10 SPF may not sound like much, but it blocks about 90% of UV rays.

I’ve also added red raspberry seed oil. It has a slight SPF and it’s full of antioxidants that protect the lips from sun damage. You’ll also find this ingredient in my homemade sunscreen recipe. Shea butter is smooth and creamy, nourishes lips, and helps firm up the lip balm. Beeswax provides a protective layer over the lips. 

Lastly, avocado oil provides the bulk of the lip balm and supports collagen to prevent weakened skin cells. Avocado oil also helps calm inflammation, regenerate skin cells, and protect the skin barrier. It’s also rich in carotenoids that offer some UV ray protection. 

Tinted Sunscreen Lip Balm

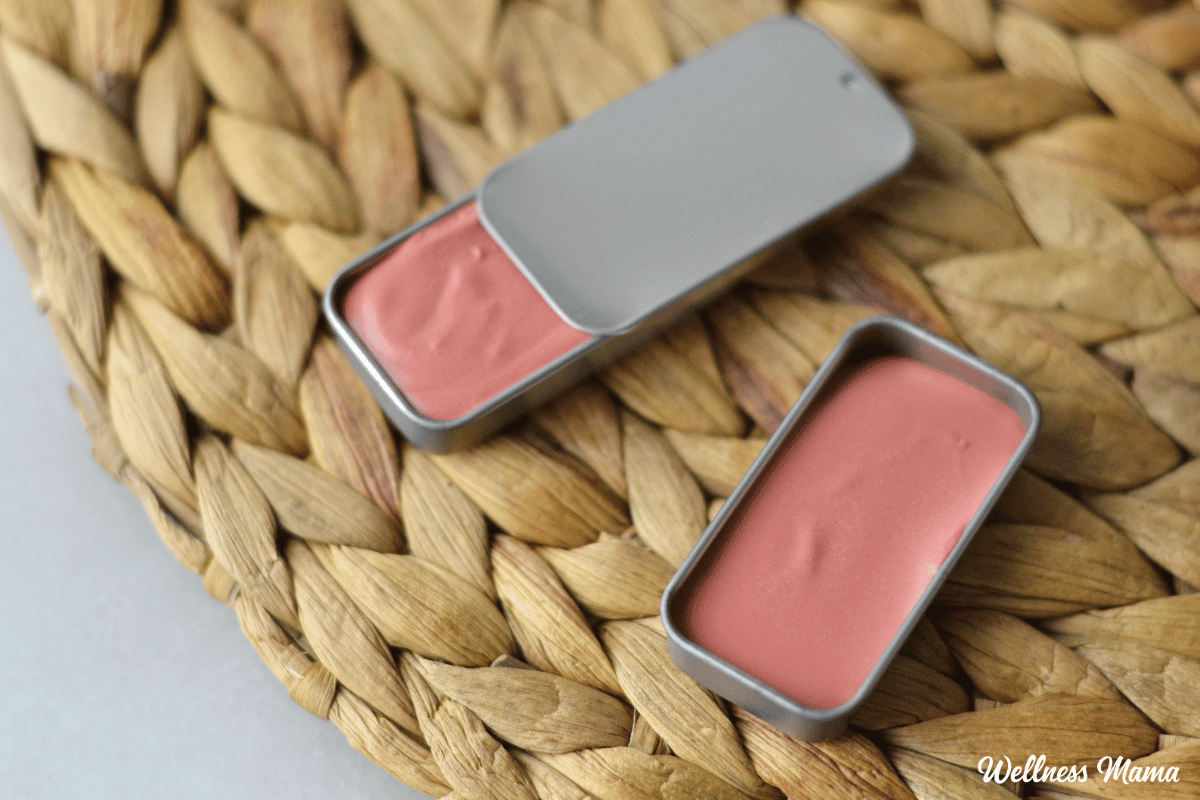
My original sunscreen recipe is white due to the zinc oxide. Some people are ok with a white cast on their lips, but there’s an easy fix. You can add iron oxide and/or mica to give it a bit of color. Mica reflects light so it will give it a little sparkle.

Iron oxides are nature-identical pigments that lend a rich, burgundy red color. Oxides that naturally come straight from the soil also come with lead and other heavy metal contaminants. Things I don’t want in a lip balm! That’s why iron oxides are now made in a lab to be nature-identical. 

If you don’t have iron oxide on hand, rose kaolin clay offers a similar effect.

DIY Natural Lip Sunscreen

This smooth and creamy lip sunscreen helps protect lips from UV damage.

Prep Time5 minutes

Active Time12 minutes

Cooling Time2 hours

Total Time2 hours 17 minutes

Yield: 1.7 ounces

Author: Katie Wells

  • Add the beeswax, shea butter, and avocado oil to the top of the double boiler or glass bowl. Stir occasionally until melted.

  • Turn off the heat and add the raspberry seed oil and essential oils.

  • Whisk in the powders: zinc oxide, iron oxide, and mica.

  • Remove from heat and stir occasionally as it cools. The powders will want to sink to the bottom so they’ll need to stay mixed in.

  • Once the lip sunscreen is mostly cooled, but still soft enough to pour, pour the mixture into your containers.

The iron oxide adds a pink color and the mica adds a little sparkle. You can use both or neither, but it will have a white cast without any iron oxide. 

Important Note on Photoxic Essential Oils

Certain essential oils can increase the risk of sunburn and skin damage. Needless to say, they should not be used in lip balms! Photoxic essential oils include bergamot, lime, lemon, and grapefruit. Learn more about this topic here.

More Sun Protection

Here are some more DIY sunscreen recipes, plus info on sunscreen pros and cons.

What’s your approach to sun exposure? Leave a comment and let us know!

Tags: , , , ,
Homestead Blog Hop - Homestead tips, ideas, animal care, and recipes every Wednesday

Homestead Blog Hop 607 – Air Fryer Recipes and Crafts

Welcome to Homestead Blog Hop, a weekly gathering for homesteaders and simple living enthusiasts to share DIY projects, from-scratch recipes, and creative inspiration. This week’s hop features cozy homesteading tips, along with practical ideas that celebrate handmade living and self-sufficiency.

Whether you’re looking for seasonal crafts, homemade treats, or encouragement on your homesteading journey, you’ll find plenty of inspiration to carry into the new year. Grab a cup of tea, explore the featured posts, and join us in sharing your own homestead creations.

Meet Your Homesteading Hosts

We’re Kelly from Simple Life Mom, Liz from The Cape Coop, Natasha from Houseful of Nicholes, and Laurie from Ridgehaven Homestead. Together, we’re passionate about from-scratch living, simple ingredients, frugal habits, and intentional homesteading. We’re delighted to host the Homestead Blog Hop, where you can find fresh inspiration each week for DIY projects, homemade recipes, and practical simple living ideas.

Follow Us for More Homestead Inspiration

Natasha – Houseful of Nicholes
Facebook | Pinterest | X | Instagram

Laurie – Ridge Haven Homestead
Facebook | Pinterest | Instagram

Liz – The Cape Coop
Facebook | Pinterest | X | Instagram

Kelly – Simple Life Mom
Facebook | Pinterest | X | Instagram

FEATURED POSTS from the Last Homestead Blog Hop

Each week, we take turns selecting three featured posts from the Homestead Blog Hop. These features are shared across all of our social media platforms, helping spotlight the creativity and hard work of our fellow homesteaders. Here are the featured posts from last week’s hop:

1. 40+ Best Air Fryer Summer Recipes from Air Fryer Fanatics

2. How To Make a Seashell Wreath from Petticoat Junktion

3. Red, White, and Blue Caprese Salad Recipe from Ann’s Entitled Life

Congrats! Feel free to grab the featured on button for your post.

Just right click and ‘save image as…‘

Guidelines for the Homestead Blog Hop

  1. Click the “Add Your Link” button below and upload a clear, eye-catching image from your project or recipe. Please link directly to the family-friendly post itself, not your blog’s homepage.
  2. You may link up up to three posts each week.
  3. Take time to visit a few other blogs in the hop and leave a thoughtful comment to let them know you stopped by. Community support makes this hop special!
  4. Please include a link back to the Homestead Blog Hop in your post. Posts without a backlink are not eligible to be featured. All featured posts are shared across all hosts’ social media channels.
  5. Share posts that haven’t been linked to the hop before. Older posts are welcome as long as they are new to the hop.
  6. By joining the Homestead Blog Hop, you grant the hosts permission to use one image from your post, with a link back to your site, if your post is selected as a feature next week.
  7. This is a family-friendly link-up designed to encourage, inspire, and support the homesteader in all of us.

Let the Party Begin!

Which project are you excited to try this week? Leave a comment below.

Join Our Homestead Blog Hop Pinterest Board

Follow all of your hosts on Pinterest and send a message if you’d like to be added to our Homestead Blog Hop group board. This board is a great place to share your DIY projects, crafts, and from-scratch recipes with the homesteading community.

Guideline: Only pin posts that you’ve linked up to the Homestead Blog Hop.

Tags: , , , , , ,
Homestead Blog Hop - Homestead tips, ideas, animal care, and recipes every Wednesday

Homestead Blog Hop 606 – Patriotic Crafts and Desserts

Welcome to Homestead Blog Hop, a weekly gathering for homesteaders and simple living enthusiasts to share DIY projects, from-scratch recipes, and creative inspiration. This week’s hop features cozy homesteading tips, along with practical ideas that celebrate handmade living and self-sufficiency.

Whether you’re looking for seasonal crafts, homemade treats, or encouragement on your homesteading journey, you’ll find plenty of inspiration to carry into the new year. Grab a cup of tea, explore the featured posts, and join us in sharing your own homestead creations.

Meet Your Homesteading Hosts

We’re Kelly from Simple Life Mom, Liz from The Cape Coop, Natasha from Houseful of Nicholes, and Laurie from Ridgehaven Homestead. Together, we’re passionate about from-scratch living, simple ingredients, frugal habits, and intentional homesteading. We’re delighted to host the Homestead Blog Hop, where you can find fresh inspiration each week for DIY projects, homemade recipes, and practical simple living ideas.

Follow Us for More Homestead Inspiration

Natasha – Houseful of Nicholes
Facebook | Pinterest | X | Instagram

Laurie – Ridge Haven Homestead
Facebook | Pinterest | Instagram

Liz – The Cape Coop
Facebook | Pinterest | X | Instagram

Kelly – Simple Life Mom
Facebook | Pinterest | X | Instagram

FEATURED POSTS from the Last Homestead Blog Hop

Each week, we take turns selecting three featured posts from the Homestead Blog Hop. These features are shared across all of our social media platforms, helping spotlight the creativity and hard work of our fellow homesteaders. Here are the featured posts from last week’s hop:

1. Patriotic Brownie Bites from Recipes Simple

2. Retro Patriotic Pinwheel Craft with Free Printable Template from Press Print Party

3. How to Handle Toxic Emotions from Tea with Jennifer

Congrats! Feel free to grab the featured on button for your post.

Just right click and ‘save image as…‘

Guidelines for the Homestead Blog Hop

  1. Click the “Add Your Link” button below and upload a clear, eye-catching image from your project or recipe. Please link directly to the family-friendly post itself, not your blog’s homepage.
  2. You may link up up to three posts each week.
  3. Take time to visit a few other blogs in the hop and leave a thoughtful comment to let them know you stopped by. Community support makes this hop special!
  4. Please include a link back to the Homestead Blog Hop in your post. Posts without a backlink are not eligible to be featured. All featured posts are shared across all hosts’ social media channels.
  5. Share posts that haven’t been linked to the hop before. Older posts are welcome as long as they are new to the hop.
  6. By joining the Homestead Blog Hop, you grant the hosts permission to use one image from your post, with a link back to your site, if your post is selected as a feature next week.
  7. This is a family-friendly link-up designed to encourage, inspire, and support the homesteader in all of us.

Let the Party Begin!

Which project are you excited to try this week? Leave a comment below.

Join Our Homestead Blog Hop Pinterest Board

Follow all of your hosts on Pinterest and send a message if you’d like to be added to our Homestead Blog Hop group board. This board is a great place to share your DIY projects, crafts, and from-scratch recipes with the homesteading community.

Guideline: Only pin posts that you’ve linked up to the Homestead Blog Hop.

Tags: , , , , ,
rice krispie treats recipe

Rice Krispie Treats Recipe (With Homemade Marshmallow)

There’s something just so nostalgic about biting into a gooey Rice Krispie treat. And while I remember them from my childhood, they’re not something that I’ve had in many years. Until now that is. This homemade, healthy Rice Krispie treat recipe is a new favorite in our house. 

The Rice Krispie treats from the store are usually a little hard and not so fresh tasting. You’ll find ingredients like corn syrup, GMO soybean oil, artificial flavors, and acetylated monoglycerides… whatever that is. And many of the homemade Rice Krispies treats, while they taste good, aren’t much healthier. 

An Upgraded Rice Krispies Treat Recipe 

One of the questions I get all the time is how to use my homemade marshmallows recipe to make Rice Krispie treats. And honestly that’s not something I’d ever tried. For years my family avoided grains as I was in a healing phase. Now that grains are back in my diet on occasion, that means I’ve been experimenting with more grain-based recipes. 

Of course, this doesn’t mean I’m eating glyphosate covered, artificially fortified white flour all the time. It’s about balance, but I still choose healthier options when I can. So for this recipe that means the name brand (or store brand) rice crispy cereal is out. Instead I used sprouted brown rice cereal. 

Yes, it’s still cereal and not as nutritious as a grass-fed steak, but I’m ok with it for the occasional treat. Sprouted grains are easier for our body to digest. This cereal is organic, non-GMO, and sweetened with just a touch of coconut sugar. I’ve linked to the kind I used in the recipe below, but you can also use organic rice cereal from your local store if that’s all they have. 

Homemade Marshmallows

My marshmallow recipe base is sweetened with honey instead of sugar. They feature gut healthy, grass-fed gelatin and real marshmallow root for more gut soothing benefits. I’ve experimented over the years with variations like elderberry, matcha, and even hibiscus rose marshmallows. 

The marshmallow portion of the Rice Krispie treats recipe is very similar, but you don’t have to press them into a pan and let them set first. After whipping up the marshmallow mixture, simply add it to melted butter and stir in the cereal. 

Homemade Rice Krispie Treat Variations

The kids and I love this recipe as is. In fact, the first time I made a batch the kids devoured them within minutes! However, you can also add some ingredients if you want a different flavor. 

Try sprinkling some flaky sea salt on the top for a salty, sweet treat. Or drizzle the top with melted dark chocolate (and then sprinkle with salt!). Sometimes I’ll gently press mini chocolate chips onto the top before they’ve really hardened. Work quickly with this one though or you’ll just end up with melted chocolate all over your hand! I haven’t tried it here, but some people like adding ¼ cup of creamy peanut butter when stirring in the marshmallows to the butter. 

For another depth of flavor, try browning the butter first before adding the marshmallows. It gives it a caramel-like taste! I give more details on how to brown butter in this pistachio chocolate chunk cookie recipe. 

Here’s how to make healthier, naturally sweetened rice treats with homemade marshmallow!

Rice Krispie Treats Recipe (With Homemade Marshmallow)

This healthier, naturally sweetened version of rice krispie treats is a kid (and parent!) favorite.

Homemade Marshmallow Base

  • Line a 9×13-inch baking dish with parchment paper and set aside.

  • Pour ½ cup of the cold water into the bowl of a stand mixer. Sprinkle the gelatin evenly over the water and let it sit while you prepare the honey syrup.

  • In a small saucepan, combine the remaining ½ cup of water, honey, and sea salt.

  • Bring the mixture to a gentle boil over medium heat. Simmer for 7-8 minutes, until slightly thickened.

  • Turn the mixer on low speed. Carefully and slowrly pour the hot honey syrup into the gelatin mixture.

  • Gradually increase the mixer speed to high. Whip for 8-10 minutes, until thick, glossy, fluffy, and marshmallow-like. Add the vanilla extract during the last minute of mixing.

  • While the marshmallow is whipping, melt the butter in a large pot over low heat.

  • Add the whipped marshmallow mixture to the melted butter and stir until combined.

  • Fold in the crispy rice cereal until evenly coated.

  • Transfer the mixture to the prepared baking dish. Using lightly buttered hands or a piece of parchment paper, gently press into an even layer.

  • Sprinkle with flaky sea salt if desired. Let cool for about 30 minutes before slicing into squares and serving.

Nutrition Facts

Rice Krispie Treats Recipe (With Homemade Marshmallow)

Amount Per Serving (1 square)

Calories 135
Calories from Fat 27

% Daily Value*

Fat 3g5%

Saturated Fat 2g13%

Trans Fat 0.1g

Polyunsaturated Fat 0.2g

Monounsaturated Fat 1g

Cholesterol 8mg3%

Sodium 118mg5%

Potassium 26mg1%

Carbohydrates 26g9%

Fiber 0.1g0%

Sugar 18g20%

Protein 2g4%

Vitamin A 786IU16%

Vitamin C 7mg8%

Calcium 4mg0%

Iron 3mg17%

* Percent Daily Values are based on a 2000 calorie diet.

  • The optional flaky sea salt turns this into an amazing salty sweet treat. 
  • Try drizzling the top with some melted dark chocolate for a more decadent dessert.

How to Store Homemade Rice Krispie Treats

Homemade Rice Krispie treats store best at room temperature. Keep them in an airtight container and enjoy within 4-5 days. However, if your house is like mine, they won’t last long!

What are your favorite Rice Krispie treat flavors? Ever made them before? Leave a comment and share below!

Tags: , , , , ,
resilience and health

How I Discovered Real Health is About Resilience

For years, I thought health was something I could perfect. During my struggle with Hashimoto’s, I was really strict about food, supplements, and my environment. At one point, I was down to about 10 safe foods, and I spent a lot of time trying to avoid anything that might trigger symptoms. The more I restricted, the healthier I was… right?

And while the strict diet plans and handfuls of supplements had their place at the time, I realized something important. I started questioning the way I think about health. Is the goal really only to feel good if I was able to control every factor and input?

I realized that I didn’t need perfection, but resilience. Having a body that could adapt to real life and still thrive. I wanted to enjoy dinner with friends, travel without anxiety, recover from an occasional late night, and trust that my body could handle it. That shift from pursuing perfect health to building resilience became one of the most important lessons of my healing journey. 

This perspective continues to shape how I approach what health really means. 

When Health Becomes a Very Small Box

For years, I measured progress by how well I could follow the rules I’d made for myself. Thankfully I was able to work with some really phenomenal doctors and healthcare experts while working through autoimmune disease. And while their guidance, the elimination diets, and supplements helped, I knew I didn’t want to stay there.

I kept detailed records of supplements, symptoms, and foods. I was doing everything I knew to do, and in some ways it worked since I often felt better than I had before.

The problem was that I only felt good within a very narrow range of inputs. If I stepped outside that range, whether through travel, stress, lack of sleep, or eating something unexpected, I worried about the consequences. Eventually, I realized that while I was disciplined, I wasn’t necessarily becoming more resilient.

I had a reframe and discovered that true health isn’t fragility wrapped in discipline. Health isn’t about feeling good only when every variable is perfectly controlled. True health includes adaptability, flexibility, and the ability to recover when life doesn’t go according to plan.

I began to see that I didn’t want to spend the rest of my life shrinking my world to accommodate symptoms. I wanted to expand my capacity so I could participate fully in life without constantly worrying about what might happen next. That didn’t mean abandoning healthy habits. It simply meant recognizing that the goal wasn’t perfection. The goal was building a system that could thrive under a wider variety of circumstances.

Today, I still prioritize the habits that support my health. I still focus on nutrient-dense foods, quality sleep, sunlight, minerals, and movement. I choose healthy inputs whenever possible, but I don’t freak out if sometimes I can’t do the “perfect” thing.

The Hidden Trap of Perfect

I think this is one of the less talked about challenges within the health and wellness world. Sometimes we can become so focused on optimizing that we unintentionally create a version of health that’s restrictive, not freeing.

It’s easy to start believing that thriving means having the perfect diet, the perfect routine, and the perfect environment. We can begin to think that every deviation is a problem to solve or a setback to avoid. While awareness can be helpful, there’s a point where hypervigilance starts to look a lot like stress.

For me, that realization was uncomfortable because I genuinely believed I was doing everything in the name of health. However, I eventually recognized that fear was driving some of my behaviors, rather than confidence. I wasn’t always making choices because they felt supportive. Sometimes I was making them because I was afraid of what would happen if I didn’t.

This is where many healing tools can be misunderstood. Restrictive diets, elimination protocols, and targeted interventions can be incredibly valuable. They certainly were for me and  removed major stressors and gave my body a chance to reset. But they’re meant to be tools, not destinations.

Even many of the practitioners I respect most emphasize that healing protocols are meant to be temporary. The goal is not to stay on a restrictive plan forever. The goal is to create enough capacity that the body can handle more over time. That distinction changed everything because it shifted the focus away from managing symptoms and toward building resilience.

When Healthy Didn’t Feel Like Freedom

One of the biggest turning points in my journey came when I realized healthy didn’t feel like freedom. It felt like management.

I was very skilled at planning meals, researching ingredients, and controlling variables. Yet despite all that effort, there was still a sense that I was constantly managing my health rather than fully living my life. That awareness led me to ask a deeper question: Was I actually moving toward greater health, or was I simply becoming more efficient at navigating limitations?

I had spent years supporting certain aspects of my body while largely overlooking others. I’d focused heavily on nutrition, supplements, and detoxification. Those things mattered, but I hadn’t given nearly as much attention to my nervous system, my mindset, or the stories I was telling myself about my health.

I’d internalized beliefs like “my body is broken,” “my body is attacking itself,” or “I can’t tolerate certain things.” Even when I wasn’t consciously thinking those thoughts, they shaped how I viewed myself and my future.

You’ve probably heard the saying, “You are what you eat,” but I think a more powerful realization is that we become what we think.

Gradually, I began experimenting with a different narrative. Instead of saying, “I’m sick,” I started saying, “I’m healing.” Instead of focusing on what I couldn’t have, I focused on what I could do to nourish my body. Rather than seeing symptoms as evidence that my body was failing, I began viewing them as messages from my body.

It may sound simple, but those shifts had a profound impact on the way I experienced healing.

The Missing Piece: Safety Signals

If there was one lesson that transformed my recovery more than almost anything else, it was understanding the role of the nervous system. For a long time, I approached healing from a biochemical perspective. I focused on nutrients, hormones, supplements, and food. While those things are important, I eventually realized that healing is also neurological, emotional, and mental.

The body can only expand its capacity when it feels safe.

Looking back, I don’t think I fully understood how many stress signals my system was receiving. Even while doing all the “right” things, my body often felt like it was operating in a constant state of vigilance. Once I started prioritizing safety signals, I noticed changes that surprised me.

Morning sunlight became a non-negotiable. Even when I was exhausted, I would get outside shortly at sunrise, often falling asleep in the natural light. I focused on creating strong circadian rhythm cues and protecting sleep as much as possible. Instead of intense exercise, I did gentle movement for a time. I spent more time outdoors, prioritized rest, practiced breathwork, and reduced unnecessary stress whenever I could.

None of those interventions are particularly complicated. Most are free, yet they have an enormous impact.

Over time, I noticed more energy, better digestion, more calm, and a stronger sense of trust in my body. Instead of feeling like I was constantly fighting against myself, I began to feel like I was working with my body rather than against it. That partnership became one of the most important foundations of healing.

Expanding Capacity One Step at a Time

As my nervous system became more regulated, something interesting happened. My body began tolerating more. I slowly started experimenting with foods I hadn’t eaten in years, even grains and dairy! Travel without feeling completely exhausted became possible. I ate at restaurants and didn’t worry if I accidentally ate something I normally wouldn’t. I loosened some of the rigid rules that had become part of my daily life.

None of this happened overnight, and it certainly wasn’t without fear. When you’ve experienced symptoms, flare-ups, and years of uncertainty, the idea of expanding beyond familiar boundaries can feel intimidating.

I remember having genuine concerns about relapse. There was a part of me that worried one wrong choice would undo all the progress I had made. However, over time, I learned that fear itself can become a limiting factor. Instead of approaching new experiences with anxiety, I tried approaching them with curiosity.

I reminded myself that my body was different than it had been before. I practiced trusting the feedback I was receiving rather than assuming the worst. When I noticed a response to something, I treated it as information instead of evidence that I’d failed.

In many ways, I started viewing resilience like physical training. We don’t build strength by avoiding all challenges. We build strength through appropriate stress followed by recovery. The body adapts because that’s what it was designed to do.

I found the same principle applied to adaptability. Gradually introducing new inputs gave my body opportunities to learn, adjust, and expand its capacity.

What Resilience Looks Like Now

When I think about health today, resilience is one of the first qualities that comes to mind. Resilience means being able to recover from stress more quickly. It means occasionally eating foods that aren’t perfect and trusting that my body can handle them. It means bouncing back from disrupted sleep (hello newborn phase!), intense workouts, or unexpected life events without feeling completely derailed.

I no longer spend significant mental energy wondering how my body will respond to every situation. I don’t feel the need to micromanage every meal or maintain perfect conditions in order to feel well. That emotional freedom has been every bit as valuable as the physical improvements.

This perspective is also one of the reasons I continue talking about foundational practices like sunlight, sleep, minerals, hydration, movement, and nervous system support. They aren’t flashy or trendy, but they’re tried and true. They helped me build the capacity and foundation that allowed everything else to be easier.

Over time, I also noticed that changing my identity played an important role in the process. I stopped identifying as someone who was sick and started identifying as someone who was healing. And my behaviors naturally began to align with that reality. In my experience, identity often drives behavior more effectively than willpower ever could.

A Return to Wholeness

One of the biggest lessons from my journey is that restriction can be a valuable therapeutic tool, but it isn’t the destination. Sometimes the body genuinely needs a season of extra support, fewer stressors, and more structure. The key is remembering that those tools are meant to create healing, not become a permanent way of life.

Healing isn’t just not having symptoms, but it’s about freedom, flexibility, and trusting your body. It’s being able to participate fully in life without constantly worrying about what might happen next. It’s knowing that your body is adaptive, intelligent, and capable of far more than you may realize in difficult seasons.

Even if you’re dealing with a narrow tolerance range right now, there’s hope that it won’t always be this way. I’ve seen firsthand how remarkable the human body can be when given the right conditions. And one of the deepest beliefs I hold today is that our bodies are always working for us, not against us. Healing may not always happen on the timeline we want, but resilience is possible. 

What has your healing journey looked like? How have you been able to find more freedom and resilience? Leave a comment and share below!

Tags: , , ,
honey tallow balm

Clarifying Honey Tallow Balm

I’ve been researching and using tallow more in recent years, and it turns out so have many of you. My whipped tallow balm is a fan favorite because it feels so silky on skin. One of the questions I get asked most often though is how to add honey to the recipe. This honey tallow balm does just that. 

I’ve also added other ingredients that are great for clearing up skin and diminishing blemishes. 

When it comes to skincare, I’ve found that sometimes the simplest ingredients are the most effective. While there are countless products designed to target blemishes and support clearer skin, many of them can be harsh, drying, or filled with ingredients I’d rather not use. Traditional ingredients that have been used for generations though are worth reaching for. 

Honey Tallow Balm Ingredients

This honey tallow balm combines several skin-loving ingredients into one simple formula. It nourishes the skin barrier while also supporting a clearer complexion. Instead of stripping skin or trying to force it into compliance, this balm focuses on giving skin what it needs. Tallow honey balm not only moisturizes, but gives skin beneficial compounds so it can function as designed. 

Tallow

One of the star ingredients in this balm is grass-fed beef tallow. Tallow has a unique fatty acid profile that closely resembles the natural oils in our skin. This means it sinks right into skin and helps restore our natural moisture barrier. 

Raw Honey

Another favorite ingredient that has a long history in natural skincare. Honey is rich in beneficial compounds that keep skin looking healthy and smooth. It also acts as a humectant, attracting and retaining moisture. This is especially helpful for skin that feels irritated, dry, or out of balance. I also love raw honey for acne and blemishes since it’s naturally antimicrobial. 

Beeswax

Beeswax helps to thicken the balm and creates a breathable protective layer on the skin. Some creams use petroleum jelly as an occlusive to trap moisture. These don’t feed skin though and can feel heavy or greasy. Rather than sealing the skin completely, beeswax helps lock in moisture while still allowing the skin to breathe.

Tamanu Oil

In my classic tallow balm recipe I use olive oil as the carrier oil. It’s full of healthy fats and anti-inflammatory Omega-3s. In this version though I opted for tamanu oil.

Skincare experts note how tamanu helps support skin healing and recovery. It’s often used in products for improving the appearance of blemished and damaged skin. Research shows it can help reduce redness and inflammation while improving marks left from acne damage. It’s one of my favorite oils to use in skincare for damaged or blemish-prone skin.

Essential Oils

These are optional, but really helpful to add more skin benefits. Plus they can add a nice scent. I like using tea tree essential oil for blemish or acne prone skin. It’s an effective but gentle anti-fungal and is well known for it’s skin cleansing properties. 

Sweet or wild orange is another favorite. It has a bright, uplifting scent and can also help improve skin’s appearance. Lavender, geranium, frankincense, and cedarwood are also great skin-friendly options. 

Benefits of Honey Tallow Balm

Anything that can address several skincare concerns at once is a win in my book. Instead of focusing solely on blemishes, honey tallow balm supports overall skin health.

Many people unknowingly damage their skin barrier through over-cleansing, harsh treatments, or excessive exfoliation. When the skin barrier becomes compromised, it can sometimes lead to more irritation, dryness, and breakouts. Ingredients like tallow, honey, and tamanu oil help nourish and support the skin while maintaining moisture balance.

This balm can help soothe redness, boost healing from blemishes, and keep skin feeling soft and moisturized. Because it contains nutrient-rich fats, it’s also useful for skin that feels rough, dry, or irritated. Overall, honey tallow balm helps the skin to balance out.

How to Use Honey Tallow Balm

A little goes a long way with this balm. I like to apply a small amount to clean skin and rub a thin layer over my face. If you’re using it as part of your skincare routine, then do it after cleansing and toning. Your body heat softens the balm so it easily glides over skin. 

I use this on my face to moisturize or other areas that need a little extra love. You can also use it as a spot treatment for blemishes and red skin. If your skin feels greasy or looks oily afterwards, then you used too much! 

How To Render Tallow and FAQ

I explain how to render tallow so you don’t smell like a walking hamburger here. I also cover a lot of tallow balm making questions and tips in that post. Be sure to check it out for more info.

Honey Tallow Balm

This simple honey tallow balm uses clean ingredients for a nourishing and hydrating lotion. Helps skin feel smoother and reduces blemishes.

Prep Time3 minutes

Active Time13 minutes

Cooling Time15 minutes

Total Time31 minutes

Yield: 5 ounces

Author: Katie Wells

  • Add tallow and beeswax to the top of a double boiler and melt over low heat.

  • Once it’s completely liquid add the tamanu or other carrier oil, essential oils, and honey and stir.

  • Pour the tallow balm into a mixing bowl and let it cool in the fridge until it’s hardened some, but not rock hard.

  • Use a mixer to cream the tallow balm until it’s smoothed and whipped looking.

  • Transfer the tallow balm into glass jars to store.

  • Store the honey tallow balm in a cool, dry place.
  • The honey may want to separate as the product cools. Stirring as it cools and mixing well helps prevent this. 

A Simple Approach to Skincare

Healthy skincare often comes down to the simple things and clean ingredients. Supporting the skin barrier and using quality ingredients goes a long way toward helping skin look and feel its best.

This honey tallow balm is one of those simple recipes that combines traditional ingredients with modern skincare insights. It’s easy to make, uses just a handful of ingredients, and can be a great addition to a natural skincare routine for anyone looking to support clearer, healthier-looking skin.

It’s clean, easy, and has earned a permanent spot on my countertop. 

Have you used tallow before? Leave a comment and share below!
Tags: , , ,
Homestead Blog Hop - Homestead tips, ideas, animal care, and recipes every Wednesday

Homestead Blog Hop 604 – Father’s Day Crafts and Foods

Welcome to Homestead Blog Hop, a weekly gathering for homesteaders and simple living enthusiasts to share DIY projects, from-scratch recipes, and creative inspiration. This week’s hop features cozy homesteading tips, along with practical ideas that celebrate handmade living and self-sufficiency.

Whether you’re looking for seasonal crafts, homemade treats, or encouragement on your homesteading journey, you’ll find plenty of inspiration to carry into the new year. Grab a cup of tea, explore the featured posts, and join us in sharing your own homestead creations.

Meet Your Homesteading Hosts

We’re Kelly from Simple Life Mom, Liz from The Cape Coop, Natasha from Houseful of Nicholes, and Laurie from Ridgehaven Homestead. Together, we’re passionate about from-scratch living, simple ingredients, frugal habits, and intentional homesteading. We’re delighted to host the Homestead Blog Hop, where you can find fresh inspiration each week for DIY projects, homemade recipes, and practical simple living ideas.

Follow Us for More Homestead Inspiration

Natasha – Houseful of Nicholes
Facebook | Pinterest | X | Instagram

Laurie – Ridge Haven Homestead
Facebook | Pinterest | Instagram

Liz – The Cape Coop
Facebook | Pinterest | X | Instagram

Kelly – Simple Life Mom
Facebook | Pinterest | X | Instagram

FEATURED POSTS from the Last Homestead Blog Hop

Each week, we take turns selecting three featured posts from the Homestead Blog Hop. These features are shared across all of our social media platforms, helping spotlight the creativity and hard work of our fellow homesteaders. Here are the featured posts from last week’s hop:

1. Easy Air Fryer Okra Recipe (Gluten-Free) from Air Fryer Fanatics

2. Red Wine Vinegar Coleslaw from Yummi Haus

3. Basketball Father’s Day Craft for Kids [Free Printable Template] from Simple Everyday Mom

Congrats! Feel free to grab the featured on button for your post.

Just right click and ‘save image as…‘

Guidelines for the Homestead Blog Hop

  1. Click the “Add Your Link” button below and upload a clear, eye-catching image from your project or recipe. Please link directly to the family-friendly post itself, not your blog’s homepage.
  2. You may link up up to three posts each week.
  3. Take time to visit a few other blogs in the hop and leave a thoughtful comment to let them know you stopped by. Community support makes this hop special!
  4. Please include a link back to the Homestead Blog Hop in your post. Posts without a backlink are not eligible to be featured. All featured posts are shared across all hosts’ social media channels.
  5. Share posts that haven’t been linked to the hop before. Older posts are welcome as long as they are new to the hop.
  6. By joining the Homestead Blog Hop, you grant the hosts permission to use one image from your post, with a link back to your site, if your post is selected as a feature next week.
  7. This is a family-friendly link-up designed to encourage, inspire, and support the homesteader in all of us.

Let the Party Begin!

Which project are you excited to try this week? Leave a comment below.

Join Our Homestead Blog Hop Pinterest Board

Follow all of your hosts on Pinterest and send a message if you’d like to be added to our Homestead Blog Hop group board. This board is a great place to share your DIY projects, crafts, and from-scratch recipes with the homesteading community.

Guideline: Only pin posts that you’ve linked up to the Homestead Blog Hop.

Tags: , , , , , ,
Best oLive
Privacy Overview

This website uses cookies so that we can provide you with the best user experience possible. Cookie information is stored in your browser and performs functions such as recognising you when you return to our website and helping our team to understand which sections of the website you find most interesting and useful.