Makeup Mantras: 7 makeup tips to steal from Katrina Kaif to get a perfectly dewy and glossy glow

Makeup Mantras: 7 makeup tips to steal from Katrina Kaif to get a perfectly dewy and glossy glow

Katrina Kaif is one of Bollywood’s few actors who manage to look radiant yet effortless on and off screen. That is one obvious reason why we continue to turn to her Instagram and red-carpet looks for beauty inspiration. Over the years, the actor has shared her signature makeup hacks that are simple, refined, and totally worth replicating.

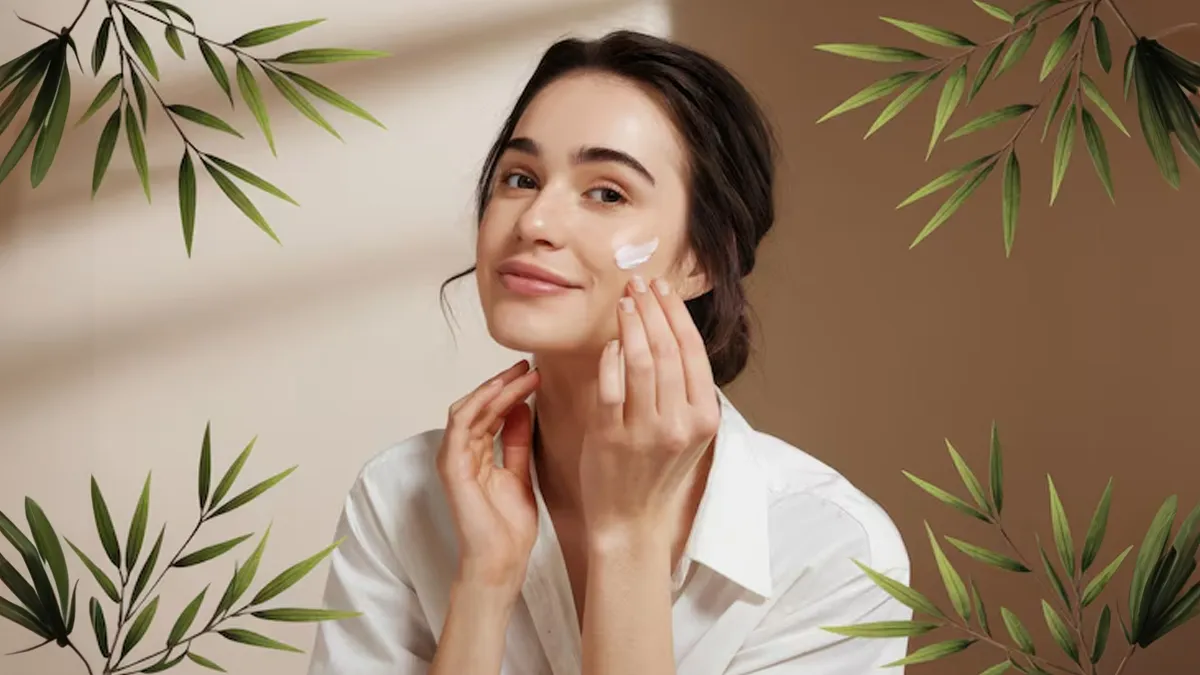
7 makeup tips by Katrina Kaif for a flawless look(Instagram)

For Makeup Mantras by HT Shop Now, we skimmed through Katrina Kaif’s social media videos for her go-to makeup tricks, and how to adapt them for everyday confidence-boosting glam.

1. Highlight your features right

Katrina emphasises that highlighters should be used strategically and not used everywhere. She insists on applying highlighter on the natural high points of your face (cheekbones, upper cheeks, bridge of the nose, maybe cupid’s bow). This can beautifully sculpt features and create a soft, glowing structure. Overdoing, may make your face look fluffy and plump. After foundation and blush, use a cream or liquid highlighter, and dab (don’t drag) lightly on cheekbones, nose bridge, and inner corners of brow bones. It must be blended gently so it melts into the skin and does not sit on top of it.

2. Blend foundation like a second skin

Katrina swears by “buffing, not painting” when applying foundation. In an interview with Vogue, she says, “To ensure the foundation looks as natural as possible, my secret hack is to buff the formula onto my skin, as opposed to painting it on, which gives a smoother coverage and avoids streakiness. The final step is to seal it all in with a setting powder and blend.” Rather than layering thick makeup, she uses a sponge or brush to buff the base until it seamlessly melts into the skin — smooth, even, and totally natural. Finally, dab some setting powder to avoid streaks.

3. Getting a glossy and dewy look is easy

Katrina’s secret to achieving a glossy and dewy look is quite simple. She insists on moisturising the skin first with a good moisturiser to avoid makeup from looking cakey. Then apply a few drops of illuminating primer on your well-moisturised face. She then dabs on a bit of foundation on the face. You can also choose to use a cream blush to add a rosy flush.

4. Amp up your eyes

One of Katrina’s go-to hacks to accentuate eye makeup is to apply kajal close to the lash line. Then either smudge the kohl or press a thin flat brush dipped in black eyeshadow over the line. This seals the kajal and adds depth. To add more depth and volume to your eyes, you can also apply mascara to your lower lashes. She also recommends using a gel pencil in the inner corners of your eyes for that extra glam look.

If you want a softer look, she suggests smudging the liner on the upper lid too, creating a naturally diffused effect that opens up the eyes without harsh lines.

5. Katrina’s tips to make your lipstick stay longer

Though Katrina loves to experiment when it comes to her lip makeup, she prefers neutral and soft lips, usually, a nude or dusty-rose matte or balm finish. Her trick to keeping your lipstick stay put for long hours is pretty simple. She recommends starting with a lip liner on your lips to prepare and give them a perfect shape. Next, apply a lipstick shade of your choice on your pout to add more detail. Finally, take a tissue paper, put it on your lips, dab some setting powder using a brush and then, apply it to your lips. This makes your lipstick transfer-proof, allowing it to stay on for hours.

6. Fresh blush + subtle highlighter = youthful glow

Katrina loves a soft peachy-pink blush on the apples of her cheeks. Gentle, natural, blushing-healthy, not overdone. When blended properly and paired with minimal highlighter, it creates a dewy, fresh-faced glow that works well for day-wear or softer glam.

7. Lip and cheek tint for subtle lips and rosy blush

Katrina swears by a lip and cheek tint that complements her makeup hack of getting moisturised lips. She also doubles it as a blush for that rosy glow, with minimal effort.

Similar articles for you

5 retinol myths that dermatologists wish you’d stop believing: From skin thinning to making skin sun sensitive

Rakul Preet Singh believes in ghar ke nuskhe, says she uses banana, besan and kaccha doodh as DIY skincare hacks

8 Top-rated tinted lip balms that deliver nourishing care and a pop of colour

Give your skin a blemish-free look with these 7 top-rated waterproof foundations

Tags: , , , , , , , , ,
DIY Gift Box Soap | Hello Glow

DIY Gift Box Soap | Hello Glow

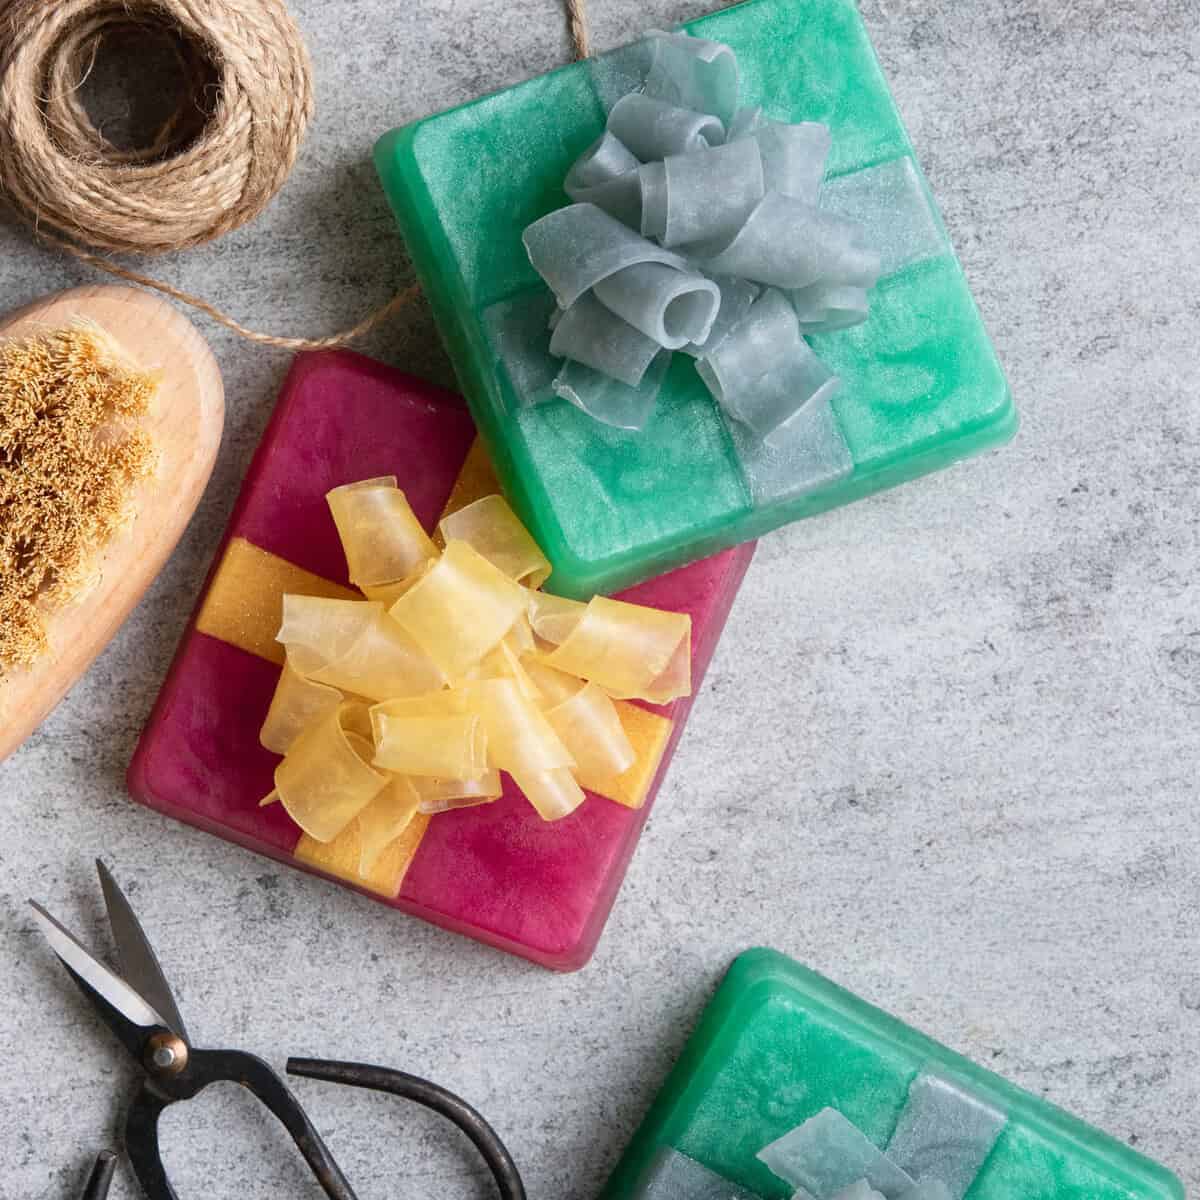
There’s something so satisfying about giving handmade gifts during the holidays, and these DIY gift box soaps are my new favorites to make. They look like tiny wrapped presents, complete with a “bow” made from soap curls on top. Not to mention, they’re adorable, they smell amazing, and they’re super easy to whip up, even if you’re not the “crafty” type.

The best part? These soaps are basically just melt and pour base and mica, which makes them totally beginner-friendly and inexpensive (say it with me: we’re keeping the holidays simple this year).

You don’t need any fancy equipment or special skills, just a few supplies and a bit of patience. The soap curls on top are what really make them stand out, and once you get the hang of it (this post will help!), you can customize them with different colors and scents to match your holiday theme.

  • Clear melt and pour soap base — I like using clear base because it gives you a translucent, glassy look that lets you see the colors and glitter inside.
  • Mica — A non-toxic colorant, mica is safe for skin and blends really well into melt and pour soap base. It also creates a swirly, marble-like effect as the soap cools. I used purple-red and a dark turquoise for mine.
  • Glitter — While not totally necessary, glitter adds extra shimmer to your soap curls so they look like fancy ribbons. I used mica-based glitter rather than traditional plastic glitter because I thought it would less scratchy and it wouldn’t pollute our waterways once it goes down the drain. 
  • Essential oils — Cinnamon, clove, pine, cedarwood, sweet orange, peppermint or vanilla essential oils make for perfect holiday scents, but you can use any fragrance that makes you happy.
  • Spray bottle with rubbing alcohol — Spritz this on freshly poured soap to get rid of air bubbles and between layers to help everything stick together.
  • Vegetable peeler — It’s the easiest tool for getting those thin, ribbon-like curls. If you don’t have a vegetable peeler, check out this post [insert link for to How to Make Curls post] for different methods you can use to make your curls. 
  • Square silicone mold — You’ll need square single-cavity soap molds to create the gift box shape.
  • Heat-proof measuring cup — A glass measuring cup with a pour spout makes melting and pouring your soap a lot easier.
  • Large microwave-safe bowl — This is handy if you’re melting a bigger batch of soap or if you need extra room to mix in your mica and fragrance.
  • Kitchen thermometer — It’s important to know how hot your soap is when working in layers. I recommend keeping the soap aroun 140 F to prevent it from melting the ribbons or curls.

Instructions

Step 1: Make the Ribbons

Start by melting clear soap base and adding gold mica to create one thin square of soap for cutting into ribbon strips, plus one thicker block that you’ll use later when peeling the curls.

Step 1: Cut Soap

Cut 3 ounces of clear soap base into 1-inch cubes and place them in a microwave-safe measuring cup.

Step 2: Melt & Add Glitter

Melt the soap in the microwave in 30-second bursts, stir after each. When melted, add the glitter and stir again.

Step 3: Pour Soap

Pour about 0.5 ounce of soap into one of the mold compartments. This thin square will make the ribbon strips. Pour the rest of the soap into another mold compartment to make a thicker block for the curls you’ll make later.

Step 4: Remove Bubbles

Spritz everything with rubbing alcohol to get rid of surface bubbles, then let the soap harden completely.

Step 5: Cut Ribbon Strips

Once everything is set, cut the thin square into four strips.

Step 6: Add Ribbon to Soap Mold

Take 2 of the strips and place one on top of the other to make a plus sign. Trim off the part where they overlap in the middle so they’ll lay flat in the mold (don’t worry, the seam will get covered up by soap curls).

Step 2: Make the Boxes

The soap “boxes” require two separate pours, which helps keep the ribbons in place and prevents them from floating around.

Step 1: Melt + Color Soap

Melt 4 ounces of clear soap base in the microwave. Stir in your mica color and add essential oil.

Step 2: Cover Ribbons

Let the soap cool to about 140 degrees F. Press the ribbon strips firmly into the bottom of your mold so they stay put, then pour just enough soap to cover them.

Step 3: Remove Bubbles + Cool

Spritz with alcohol and let cool. Once that first layer has cooled, spray with alcohol again.

Step 4: Fill Soap Mold

Pour in the remaining soap to fill the rest of the mold. You might need to heat it again to remelt it. Spritz one more time, then let it cool completely.

Step 3: Attach the Soap Curls

Use a vegetable peeler to shave thin curls from the thick gold block you made earlier and stack them on top of your gift box to create a clustered ribbon effect.

Step 1: Shave Soap

Take the thick gold square you set aside earlier and use a vegetable peeler to shave off thin ribbons of soap.

Step 2: Curl Soap

If they don’t naturally curl on their own, roll them with your fingers to create the curled ribbon shape.

Step 3: Attach Curls

Melt about 1 ounce of clear soap in a shallow glass or bowl. Dip the corner of one curl into the melted soap and place it on top of the gift box. Keep stacking curls until you’ve built a little cluster that looks like a bow.

You can also pour clear melted soap base over the curl cluster or dip the curl cluster in melted soap to create a protective shell over it and help the curls hold their shape.

Substitutions

  • Clear melt and pour base — You don’t have to use clear soap if you don’t want to. You can swap it for white, goat milk, shea butter, or aloe bases depending on the look you’re going for. Each one will give you a slightly different finish and feel.
  • Soap curls — You don’t need to make fresh curls every time. Any leftover soap scraps can be shaved with a peeler and turned into curls. You can also use premade embeds if you want to save time.
  • Vegetable peeler — Use a paring knife or a cheese planer instead. They’ll give you slightly different curl shapes, but they both work.
  • Kitchen thermometer — Just rely on visual cues (or a finger, if you’re brave). If the soap is warm but not steaming, and it hasn’t formed a skin on top yet, you’re good to go.
  • Rubbing alcohol spray — Gently tap the mold on the counter to release bubbles. It’s not as effective as alcohol, but it works in a pinch.

Top Tip

Prep all your curls and tools before you start making the boxes. Melt and pour soap cools fast and forms a thin film on top pretty quickly, so this project moves at warp speed once you get going.

Storage

Once your DIY gift box soaps are finished, wrap each one individually in plastic wrap to keep humidity out and prevent the colorant from smudging or bleeding. Store them in a cool, dry cupboard away from direct light. Light can fade the colors over time, especially if you used brighter micas.

For long-term storage, place the wrapped soaps in an airtight container (preferably with silica packets to keep sweating to a minimum). 

If you’re planning to gift them later and notice the soap has developed condensation, just unwrap it and polish the surface with a soft cloth before wrapping it back up.

FAQ

Can I use cold process soap instead?

Not for this specific project. Cold process soap behaves differently, and the curls won’t work the same way. Melt and pour is really the best option here.

How long do these soaps last?

They’ll last up to a year when wrapped and stored correctly. Just keep them away from heat and humidity.

Do I have to add fragrance?

No, fragrance is totally optional. If you’d rather keep your soaps unscented, that’s perfectly fine.

Print

]]>]]>

DIY Melt and Pour Gift Box Soaps

These festive gift box soaps look like tiny wrapped presents, complete with overlapping gold ribbons and soap curl bows on top. And since they’re made with melt and pour soap, they make perfect last-minute holiday gifts.

Prep Time1 hour

Cooling Time4 hours

Total Time5 hours

Course: Bath and Body Soap

Keyword: DIY, holiday gifts, soap

Yield: 2 soaps

Author: Stephanie Pollard

Cost: $10

Instructions

Step 1: Make the Ribbons

  • Cut 3 ounces of clear soap base into 1-inch cubes and place them in a measuring cup.

  • Melt the soap in the microwave, then stir in the glitter until it’s fully mixed.

  • Pour about 0.5 ounces of soap into one of the mold compartments. Pour the rest of the soap into another mold compartment to make a thicker block.

  • Spritz everything with rubbing alcohol to get rid of surface bubbles, then let the soap harden completely.

  • Take the thin square and cut it into 4 strips.

  • Take 2 of the strips and place one on top of the other to make a plus sign. Trim off the part where they overlap in the middle so they’ll lay flat in the mold (don’t worry, the seam will get covered up by soap curls).

Step 2: Make the Boxes

  • Melt 4 ounces of clear soap base in the microwave. Stir in your mica color and add essential oil if you’re using it.

  • Let the soap cool to about 140 degrees F. Press the ribbon strips firmly into the bottom of your mold so they stay put, then pour just enough soap over them to cover.

  • Spritz with alcohol and let cool.

  • Once that first layer has cooled, spray it with alcohol again and fill the rest of the cavity with soap. Spritz one more time, then let it cool completely.

Step 3: Make Soap Curls

  • Take the thick gold square you set aside earlier and use a vegetable peeler to shave off thin ribbons of soap.

  • Use your fingers to roll the soap into curls.

  • Melt about 1 ounce of clear soap in a shallow glass or bowl. Dip the corner of one curl into the melted soap and place it on top of the gift box. Keep stacking curls until you’ve built a little cluster that looks like a bow.

Notes

Pour clear melted soap base over the curl cluster or dip the curl cluster in melted soap to create a protective shell over it and help the curls hold their shape.

0

Tags: , , , ,
How to ace a dewy makeup look: A step-by-step guide to radiant, fresh-faced glow

How to ace a dewy makeup look: A step-by-step guide to radiant, fresh-faced glow

Dewy makeup has become one of the most sought-after beauty looks in recent years. It is fresh, youthful, and radiant look gives the impression of healthy, well-hydrated skin. Although doing dewy makeup appears effortless, achieving a luminous finish requires the right combination of skincare, perfect products, and application techniques. Whether you want a subtle, everyday glow or a high-shine, editorial finish, here’s a complete guide to mastering dewy makeup.

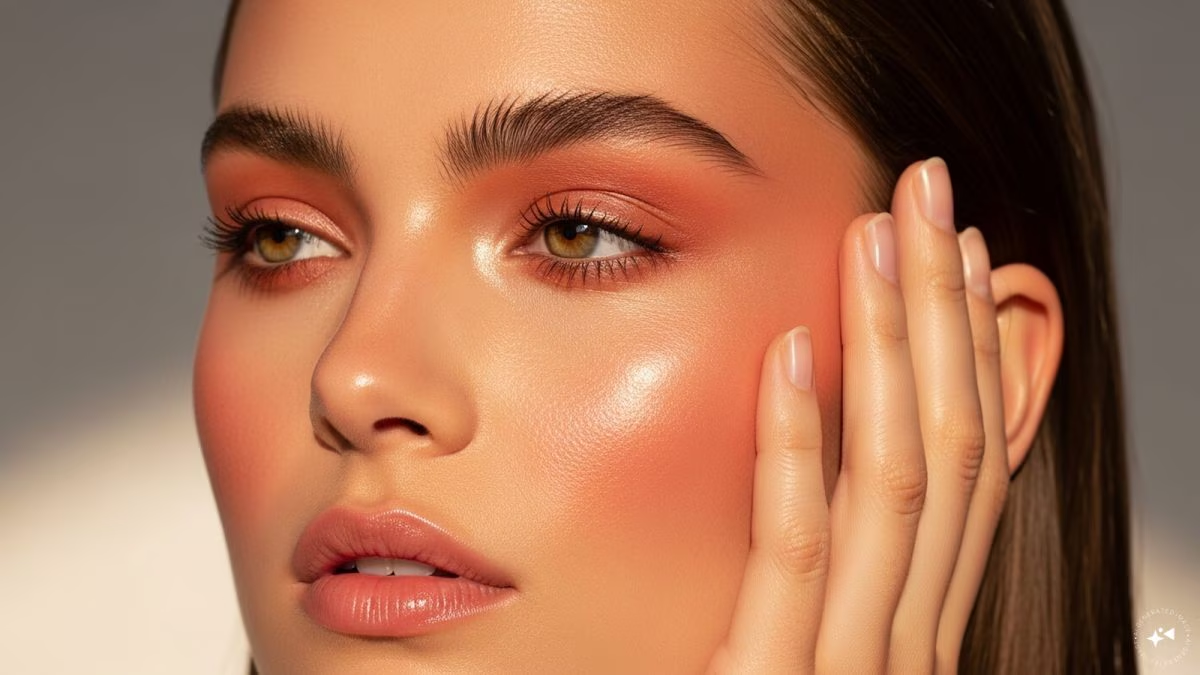
Get dewy makeup look with these tips(AI-Generated)

How to get dewy makeup look

Follow these skincare steps to get glowing skin, followed by dewy makeup tips:

1. Start with skin prep:

A dewy look begins long before makeup touches your face. The key is creating a smooth, hydrated base to add that glowy touch. According to dermatologist Dr Madhuri Agarwal, Founder and Medical Director of Yavana Skin and Hair Clinic, “Achieving dewy, glowing skin requires a focused and well-planned skincare approach. Start by identifying your skin concerns and consulting a dermatologist to build a simple yet effective routine that includes a cleanser, chemical exfoliant, targeted serums, and sunscreen. These products can be customised based on your skin’s needs.”

Cleanse gently: Use a non-stripping cleanser to avoid drying out your skin. Dewy makeup sits best on supple skin, not tight or over-cleansed skin.

Exfoliate regularly: Dullness is often caused by dead skin buildup. A gentle chemical exfoliant—like lactic acid or a mild AHA—removes that layer and reveals fresher skin beneath. Avoid harsh scrubs that can cause irritation, which can disrupt a luminous finish.

Hydrate deeply: Use a hydrating serum with ingredients like hyaluronic acid, glycerin, or niacinamide to plump the skin. Follow with a moisturiser that suits your skin type. Even oily skin needs moisture for a dewy look; choose a lightweight gel formula if you’re prone to shine.

Apply a natural-finish sunscreen: Sun Protection Factor (SPF) is non-negotiable. Opt for a dewy or satin-finish sunscreen to enhance your glow instead of mattifying it.

2. Use primer for glow

Primers help makeup apply more smoothly and also influence the finish. For a dewy look, select a radiance-boosting primer with light-reflecting particles or hydrating ingredients. Apply a primer to the high points of your face, the cheekbones, the bridge of the nose, and the chin, to enhance the natural glow.

If you have combination skin, you can use two primers: a hydrating primer on dry areas and a mattifying one on the T-zone to prevent excessive shine.

3. Choose the right foundation

The foundation you pick will make or break the dewy look. Heavy, matte formulas tend to emphasise texture and dryness, while light, hydrating bases give the skin a natural sheen.

Opt for these types of products:

  • A tinted moisturiser for a barely-there glow
  • Skin tints for sheer, breathable coverage
  • Dewy-finish foundations with light-reflecting ingredients

Apply foundation with a damp sponge or fingers; both techniques help the product melt seamlessly into the skin. For the most radiant finish, avoid heavy powdering; embrace the skin’s natural sheen.

4. Conceal strategically

Instead of covering your entire face, conceal only where needed: under the eyes, around the nose, or over blemishes. Use a creamy, hydrating concealer rather than a matte one. Blend well so it appears seamless and skin-like. This targeted approach keeps the complexion looking fresh instead of overdone.

5. Liquid and cream products are your best friends

Dewy makeup is all about products that enhance your skin’s natural luminosity. Powder products can dull the sheen, so opt for cream or liquid formulas.

Cream blush: Choose shades that mimic a natural flush—soft pinks, peaches, and warm corals. Apply to the apples of your cheeks and blend upward toward the temples.

Cream bronzer or contour: Look for balmy or gel-cream formulas that add warmth without texture. Apply lightly and blend to avoid harsh lines.

Liquid highlighter: Focus on the high points: cheekbones, brow bone, Cupid’s bow, and the bridge of the nose. For a subtle glow, mix a drop into your foundation or moisturiser.

6. Minimal Powder

While the goal is to glow, you don’t want to look greasy. Instead of dusting powder all over, apply a small amount only where needed. Apply it around the nose, under the eyes, and at the centre of the forehead. Use a finely milled, translucent powder and a light hand. The goal is to control shine, not eliminate the dewy effect.

7. Set with a dewy mist

Finish your makeup with a hydrating setting spray. These mists lock in makeup while boosting radiance. They prevent powder from looking cakey and help all layers melt together.

At the end, dewy makeup celebrates natural skin; hydrated, luminous, and full of life. With the right prep, glowing base products, and thoughtful finishing touches, you can achieve the radiant look, whether for everyday wear or a special event. Focus on hydration, choose creamy formulas, and remember: glow comes from within, and makeup simply enhances it.

Beyond makeup: Lifestyle tips for dewy skin

Apart from these makeup tips, Dr Agarwal adds that in-clinic dermatological treatments can help address deeper concerns and improve overall skin tone and texture. She suggests a healthy diet, going to bed early, and drinking enough water every day. Staying hydrated supports liver function and helps regulate hormones.

She also recommends incorporating regular exercise and stress-relieving practices into your routine. “One of the simplest ways to boost your natural glow is through proper breathing and mindfulness. Meditation and yoga poses like Pranayama and Anulom Vilom help improve blood circulation and reduce stress.”

(Note to readers: This article is for informational purposes only and not a substitute for professional medical advice. Always seek the advice of your doctor with any questions about a medical condition.)

Similar articles for you

5 DIY hair oils for winter 2025: Nourish dry, rough tresses with these at-home blends

Nat Habit Tikta Ubtan Face Wash and All-Day Malai Moisturiser: Is it worth it for sensitive skin? My honest review

Winter skincare alert: 8 morning habits that may be drying out your skin and causing premature ageing

Tags: , , , , , , ,
The Bridal Glow Shift: Why Full-Body Skincare Is The New Pre-Wedding Essential | Beauty News

The Bridal Glow Shift: Why Full-Body Skincare Is The New Pre-Wedding Essential | Beauty News

Last Updated:December 02, 2025, 11:26 IST

Before the wedding, face care gets all the attention, but with 90 per cent of your skin on the body, it’s time to rethink your bridal skincare routine.

Experts recommend starting body care routines 3-4 months before the wedding.

For today’s bride, beauty prep goes far beyond facials and sheet masks. With modern outfits spotlighting the back, shoulders, arms, and decolletage, the body has become just as central to the wedding-day glow as the face. Multiple outdoor events, harsh sunlight, and hours of photography mean that skincare must extend to every inch of skin on display. As bridal beauty evolves, industry experts agree: body care is now a non-negotiable part of the pre-wedding ritual.

Riya Sehgal, Senior Brand Manager, Heliocare, Skinspired, “Brides spend months perfecting their facial skincare, but body care is still often pushed to the back burner even as modern outfits highlight the arms, back, shoulders, and décolletage more than ever.” Arshia Kaur, Founder, Tint Cosmetics, shares a similar sentiment: “Everyone talks about face care, but the body makes up almost 90 per cent of your skin and somehow it gets the least attention.”

Why Brides Are Expanding Their Skincare Approach

Sun exposure, back-to-back ceremonies, and long outdoor shoots make body protection more crucial than ever. As Sehgal explains, “With multiple outdoor events and constant photography under the Indian sun, protecting the skin on your body is no longer a choice; it’s a must.” She recommends starting a routine at least three to four months in advance for visible, lasting results.

Body Care As Self-Care, Not Correction

While bridal prep often becomes performance-driven, experts urge brides to shift the narrative. “Body care isn’t about fixing anything. It’s just about giving the rest of your body the same small moments of care you already give your face,” says Kaur. She emphasises that regular exfoliation, moisturising, and barrier support are not meant to erase texture or marks. They’re meant to keep skin healthy and comfortable through the chaos of wedding planning.

The Ritual, Not The Rush

Aashka Goradia Goble, Co-founder, RENEE Cosmetics, says that bridal body care is a grounding ritual. “Starting your complete skincare routine early allows time for products to work, offers stress reduction through daily self-care, and gives your skin ample time to heal before the wedding,” she says.

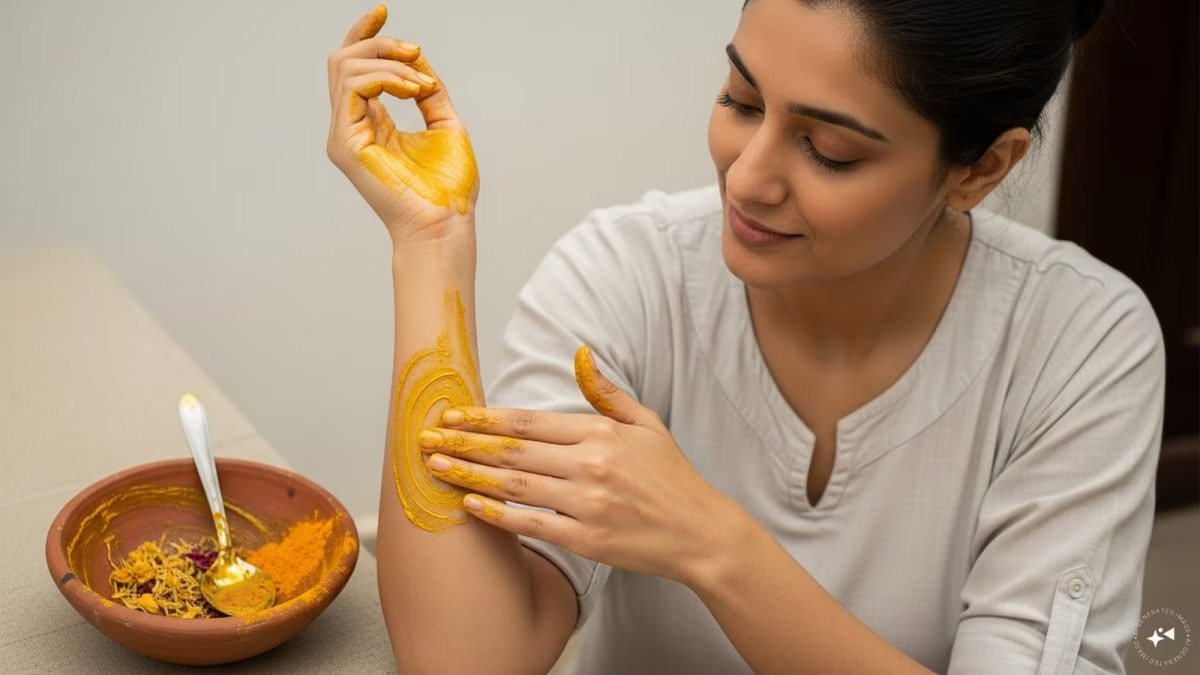
Brides drawn to natural, fresh ingredients will resonate with Swagatika Das, CEO & Co-founder, Nat Habit, who explains, “The skin on your shoulders, arms, back, and neck undergoes the same fatigue, dryness, and dullness as the face.” She champions nutrient-rich formulations such as ubtans, malai masks, and cold-pressed oils to restore softness and radiance. “Even a weekly exfoliation or daily moisturisation can transform the skin’s texture and tone,” she adds.

A luminous bridal look doesn’t come from the face alone. It’s the harmony of hydrated shoulders, glowing arms, a smooth back, and nourished skin from head to toe. With expert-approved routines and early preparation, every bride can achieve a naturally radiant, photo-ready finish that feels as good as it looks.

Click here to add News18 as your preferred news source on Google. Location :

Delhi, India, India

First Published:

December 02, 2025, 11:26 IST

News lifestyle beauty The Bridal Glow Shift: Why Full-Body Skincare Is The New Pre-Wedding EssentialDisclaimer: Comments reflect users’ views, not News18’s. Please keep discussions respectful and constructive. Abusive, defamatory, or illegal comments will be removed. News18 may disable any comment at its discretion. By posting, you agree to our Terms of Use and Privacy Policy.

Tags: , , , , , , , ,

Bengaluru dermatologist reacts to women smearing period blood on face for glow: Is this bizarre beauty trend safe?

Menstrual masking is a DIY skincare trend that has been seen on social media, where in women apply their menstrual blood to their face as a face mask, claiming it gives them glowing, healthy-looking skin. Also read | Beauty influencers are using lube as primer for glowing skin: Here’s what experts say about this bizarre skincare trend

Have you heard of the DIY skincare trend that involves applying menstrual blood to your face? What is ‘menstrual masking’ and is it safe? Find out. (Representative picture: Freepik)

The idea behind this trend is that menstrual blood contains stem cells, proteins, and cytokines that can help repair skin, reduce inflammation, and boost collagen production. However, dermatologists and experts are warning against this trend, citing several risks.

Menstrual masking trend: what’s the hype?

In an interview with HT Lifestyle, Dr Shireen Furtado, senior consultant in medical and cosmetic dermatology at Aster CMI Hospital, Bengaluru, strongly advised against blindly following this beauty trend.

She said, “Menstrual masking is a trend where people use their own period blood as a face mask, but as doctors we strongly warn against this practice because it is not safe, not clean, and not backed by scientific proof, since menstrual blood is not sterile and can contain bacteria, fungi, and other germs that may cause skin infections, breakouts, irritation, or even more serious complications when applied on the face, especially on pimples, open pores, small cuts, or sensitive areas.”

Dr Furtado explained: “In reality, raw menstrual blood also contains dead tissue, inflammatory cells, and waste products that can actually cause more irritation and worsen skin problems instead of improving them, and unlike medically approved treatments like PRP, where a person’s blood is drawn, processed, and applied safely using sterile tools, menstrual masking has no clear method, no clinical research, and no safety guidelines for how much blood to apply, how long to leave it on, or how often to use it, which makes the trend unpredictable and potentially harmful.”

Why it’s not worth the risk

According to Dr Furtado, it’s essential to prioritise skin safety and hygiene over viral trends. Instead, consider using science-backed skincare products and consulting with a dermatologist for personalised advice, she added.

“The risks are much higher than any expected benefit, and there is no strong evidence to show that this practice can brighten the skin, reduce acne, or slow aging in any meaningful way, so from a medical point of view, menstrual masking is simply not worth trying because the chances of infection, irritation, and long-term skin damage are too high, and people who want healthy, glowing skin should rely on proven skincare treatments, good hygiene, and guidance from qualified dermatologists instead of unsafe DIY trends that can put their skin and overall health at risk,” she shared.

Note to readers: This article is for informational purposes only and not a substitute for professional medical advice. Always seek the advice of your doctor with any questions about a medical condition.

Tags: , , , , , , , , , , , ,
Skincare tips for grooms to be: Pre-wedding tips to match your bride's glow on your big day

Skincare tips for grooms to be: Pre-wedding tips to match your bride’s glow on your big day

Weddings are not just about vibrant decor or stunning outfits. It is also a time to invest in a proper skincare routine to wear the best glow for your special day. Gone are the days when grooms would just show up clean shaved, wearing the wedding outfit. Today’s man indulges in a proper skincare ritual to look their best on their D-Day, and match their bride’s glow.

Skincare tips for grooms to be(Pexels)

If your wedding is just a couple of weeks away, it’s the perfect time to start investing in your skin to make a noticeable difference.

Pre-wedding skincare tips every groom-to-be

“Grooms like to keep the skincare simple. Start with a good exfoliating face wash once a day, follow it up with a light ceramide-based moisturiser and don’t forget a water-based sunscreen. For eye care, go for a thick moisturiser, and keep the beard area soft with gentle shaving,” dermatologist and aesthetic medicine specialist Dr Geeta Mehra, founder of Skin & You Clinic, tells HT ShopNow.

Start early: At least 2–3 months before the wedding

Good skin takes time. Begin your skincare routine early, so your skin has enough time to heal, adjust to new products, and glow naturally. Consistency is key, so, don’t expect results overnight.

Follow the basic CTM routine

Cleansing, toning, and moisturising is not just meant for women. Men should also follow this basic skincare ritual, whether they are getting married or not. This skincare routine twice a day helps maintain clear and healthy skin.

Cleanser: A cleanser is one of the most crucial skincare products. Use a gentle face wash suitable for your skin type.

Toner: A toner helps minimise pores and control oil without drying your skin. Make it a point to cleanse your face with a toner to remove excess dirt, grime, giving you a clearer looking skin.

Moisturiser: Never skip a moisturiser, come what may. A moisturiser keeps your skin supple and prevents dullness or flaking. Choose a moisturiser as per your skin type or skin concerns. Choose an oil-free moisturiser if you have acne-prone or oily skin, and go for a hydrating moisturiser if your skin in dry and flaky.

Never skip sunscreen

If you thought that sunscreens are not for you, it’s time to rethink! Sun exposure accelerates tanning, dark spots, and premature ageing. Apply a broad-spectrum SPF 30 or higher every morning, especially if your wedding events include outdoor shoots or ceremonies. Sunscreen ensures your skin tone remains even and photogenic.

Get regular exfoliation

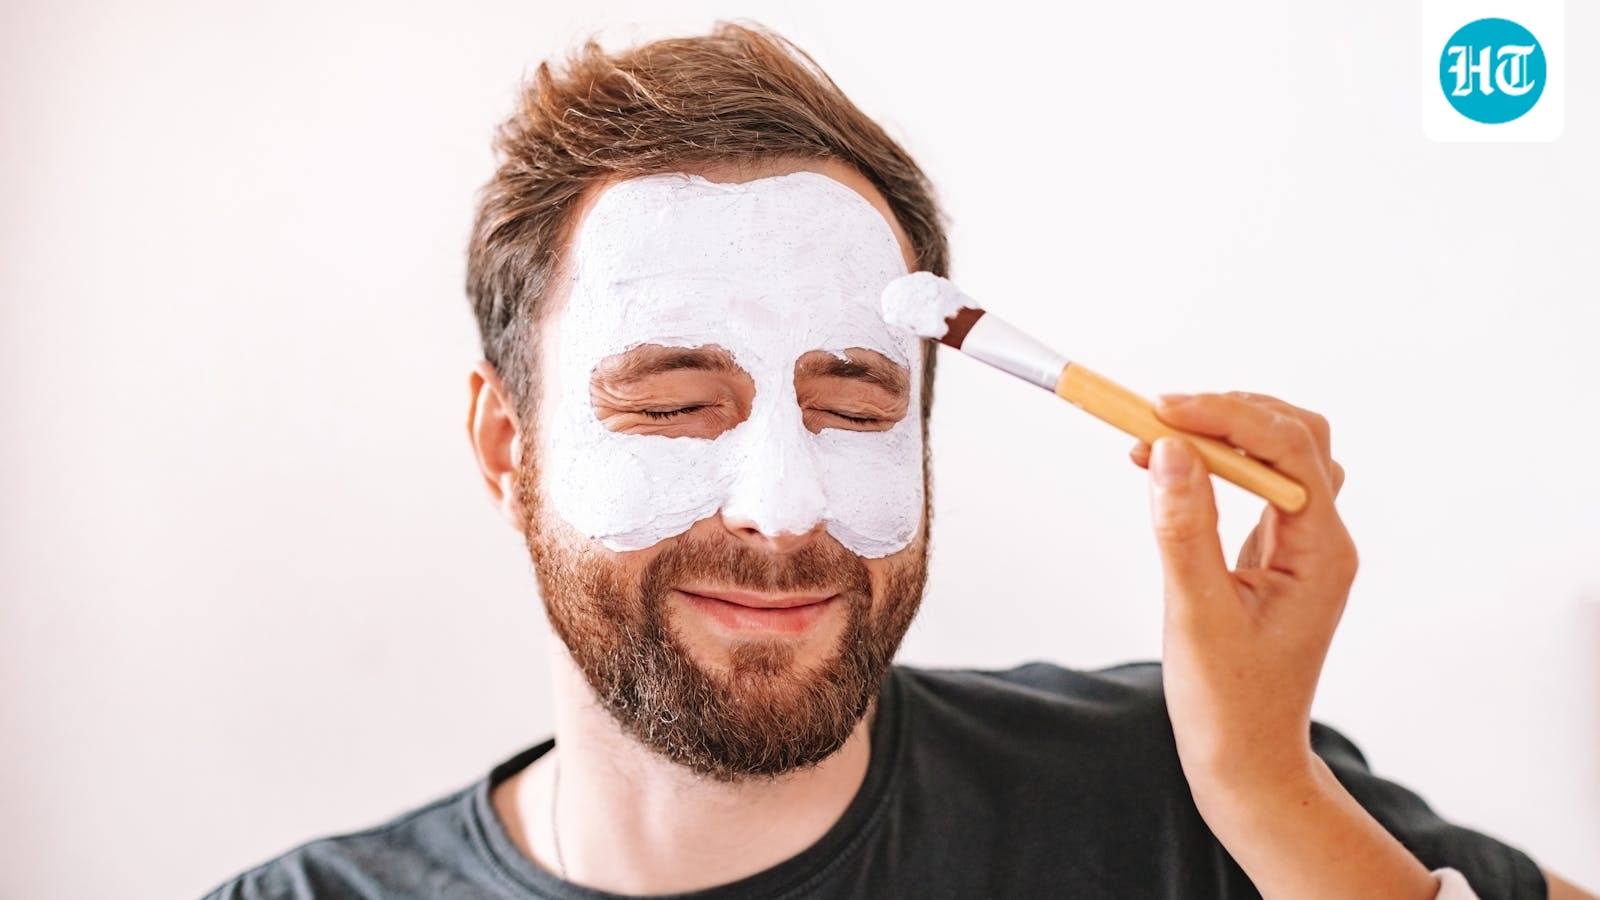
Dead skin cells can make your face look rough and tired. So, exfoliate your skin at least twice a week to brighten your skin and prevent clogged pores. You can opt for face scrubs from the list below:

  • Physical scrubs for normal or oily skin
  • Chemical exfoliants (AHA/BHA) for sensitive or acne-prone skin
  • Avoid over-exfoliation to prevent irritation.

“A good facial goes a long way on looking good the wedding day, you can also use a hydrating or lightening face pack as needed”, Dr Fazalbhoy says.

Keep yourself hydrated

Keeping yourself hydrated is a solution to most of your skin problems. Hydrated skin appears firmer, smoother, and more radiant. Increase your daily water intake and include water-rich foods like cucumbers, citrus fruits, and melons. Limit caffeine and alcohol, as they dehydrate the skin, especially during pre-wedding celebrations.

Manage facial hair thoughtfully

Grooming matters. Whether you’re planning to flaunt a full-grown, or a subtle beard, make it a point to tame your whiskers to look your best. Here are a couple of pointers you need to take care of to manage your facial hair:

  • Trim regularly to maintain shape
  • Use a beard oil or balm to soften facial hair
  • Consider a pre-wedding professional shave or grooming session

A pro tip is if you’re prone to razor bumps, switch to a gentler razor or try shaving creams suitable for sensitive skin.

Also read: From beard to body: Top 8 grooming tools for men that every contemporary man needs

Prioritise sleep and stress management

Wedding planning can be stressful. But lack of sleep leads to puffy eyes, dull skin, and breakouts. Try to take adequate rest and sleep at least for 7–8 hours. You can also incorporate relaxation techniques such as deep breathing, meditation, light exercise or yoga. After all, healthy lifestyle habits show on your skin more than you think.

“Lastly, it is also crucial to avoid too much sugar and alcohol and stay hydrated,” Dr Fazalbhoy asserts.

Similar articles for you:

Korean skincare routine: 10-steps to get perfect glass-like glowing skin

Makeup forecast 2026: Minimal and natural looks will rule, say celebrity makeup artists

Truth about sunscreen you wish you knew earlier: 7 common myths busted by a skin expert

How to do smokey eye makeup: Our step-by-step guide to flaunt bold, shimmery eyes

Disclaimer: At Hindustan Times, we help you stay up-to-date with the latest trends and products. Hindustan Times has an affiliate partnership, so we may get a part of the revenue when you make a purchase. We shall not be liable for any claim under applicable laws, including but not limited to the Consumer Protection Act, 2019, with respect to the products. The products listed in this article are in no particular order of priority.

Tags: , , , , , , , ,
Glow beyond skin deep: Facial treatments gain popularity as essential self-care ritual

Glow beyond skin deep: Facial treatments gain popularity as essential self-care ritual

Daijiworld Media Network – Mumbai

Mumbai Nov 19: Once considered an occasional luxury, facial treatments have now emerged as a regular self-care routine for many, driven by rising awareness about skin health and holistic wellness. Salons, spas, and dermatology clinics across the country report a significant spike in demand as people increasingly prioritise skincare in their busy lifestyles.

Experts say a facial is no longer just a beauty procedure but a therapy that rejuvenates the skin, improves circulation, and reduces stress. From simple clean-ups to advanced dermal treatments, the options have expanded to cater to every skin type.

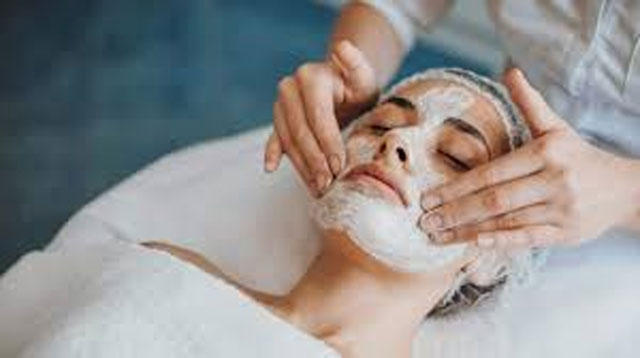
Dermatologists emphasize that a well-done facial helps remove dead skin cells, clears clogged pores, and hydrates the skin, restoring its natural glow. “Regular facials improve skin texture and delay early signs of ageing. Choosing the right treatment based on one’s skin condition is important,” say skincare specialists.

Today, customers prefer customised sessions—be it fruit facials for sensitive skin, gold facials for radiance, or hydra facials for deep hydration. With weddings, festivals, and corporate events around the corner, beauty chains across metros and tier-2 cities say appointment slots are quickly filling up.

Industry experts also attribute the trend to social media influence and growing awareness of dermatology-backed skincare routines.

As the demand grows, professionals advise clients to seek services from trained therapists, follow post-facial care, and avoid overdoing treatments. A good facial, they say, should leave the skin refreshed, not irritated.

With wellness becoming a priority, the humble facial has transformed into an essential component of modern grooming—a ritual that promises not just brighter skin, but also a brighter mood.


Tags: , , , , , , , , ,
Herzindagi

7-Step Simple Skincare Routine For A Flawless Glow Through Every Wedding Function

The wedding season is all about celebrations, merrymaking and an endless list of functions. But between the celebrations, everyday makeup, late nights and photo clicking, don’t forget about your skin as it may show signs of stress or fatigue. When you keep a simple routine skincare regime that is simple, you can achieve a healthy glow all throughout the wedding season. Let us explore a seven-step skincare plan that helps to keep the skin calm, radiant and photo-ready.

7-Step Simple Skincare Routine For A Flawless Glow Through Every Wedding Function

Double cleansing of the face

A single face wash is never sufficient when we apply makeup regularly and get exposed to high levels of pollution. Begin by using a gentle oil or micellar water for cleansing the face and removing foundation, sunscreen or dirt. The next step is using a mild foam-based cleanser to remove the remaining residue. This keeps the skin pores clear and prevents breakouts. 

Toner or mist

Long days and late nights can dehydrate the skin. A refreshing toner or facial mist balances your skin’s pH and instantly perks up dullness. Look for ingredients like rose water, hyaluronic acid, or green tea to calm and hydrate.

Radiant shine giving serum 

Add a Vitamin C or niacinamide serum in the morning to brighten and even out your complexion. These antioxidants help fight dullness and protect against free radical damage from makeup, lights and long outdoor events.

Generous moisturization 

Whether your skin is oily or dry, moisturiser is non-negotiable. Use a lightweight gel in the daytime and a nourishing cream at night. This helps maintain elasticity and ensures your makeup sits flawlessly.

Sunscreen both indoors and outdoors 

From haldi mornings to cocktail nights, you’ll face harsh lighting, camera flashes, and sun exposure. A broad-spectrum SPF 30+ protects against tanning, pigmentation, and premature ageing. Reapply every few hours during daytime functions.

Don’t Miss: Top 5 Hyaluronic Acid Serums For Dry Skin

Instant glow with sheet masks

The secret to last-minute radiance! Keep a few hydrating sheet masks handy. Use one before your makeup routine; it preps your skin, reduces puffiness, and gives that dewy glow brides (and guests!) love.

Quality sleep, hydration and clean pillow covers

This trio is the ultimate hack for flawless skin – adequate glasses of water, 6-7 hours of sleep and changing pillowcases every 2-3 days. It keeps acne at bay and helps the skin heal naturally overnight. 

Just be mindful of avoiding any new treatments or skin actives just before the wedding day because experimenting can turn out to be bad. Opt for gentle and hydrating products, after doing a patch test, and you get a timeless bridal glow!

Image credits: Freepik

Don’t Miss: 6 Winter Night Creams for Deep Moisturization And Repair

For more such stories, stay tuned to HerZindagi.

Tags: , , , , , , ,
Hydrafacial Images - Free Download on Freepik

Top 5 Cosmetologist-Approved Treatments To Get That Bridal Glow

It’s the dream of every bride to have flawless skin on her D-day for that dreamy, confident look. But for achieving that bridal glow, you need a consistent skincare regimen. Cosmetologists highly recommend home-based skincare along with professional treatments in advance. Let us explore some of the top cosmetologist-approved treatments for every bride-to-be.

5 Cosmetologist-Approved Treatments For Your Big Day

Here are five cosmetologist-approved facial treatments perfect for brides on their big day.

Instant radiance with hydrafacial 

According to Dr Geeta Grewal, Cosmetologist, Founder of 9Muses Wellness Clinic, “Hydrafacial is the most loved treatment by the brides as it deeply cleanses, exfoliates and hydrates the skin. It makes use of a patented vortex technology, which assists in removing the dead skin cells by the infusion of antioxidants and peptides. This makes the face look plump and glowing.” Regular sessions once a month, at least 3-4 months before the wedding day, help to improve skin texture.

Even skin tone with chemical peels

If pigmentation, tanning, or dullness are your concerns, mild chemical peels can work wonders. Peels with lactic acid, glycolic acid, or mandelic acid help resurface the skin and promote collagen renewal. Your cosmetologist will customise the strength based on your skin type and schedule them a few weeks apart for a smooth, even glow.

Laser treatments

“Laser treatments, such as Q-switched or carbon toning, target deep pigmentation, acne scars, and uneven tone. They also boost collagen production, giving the skin a firm, youthful finish,” says Geeta Grewal. These are usually spaced over multiple sessions and should ideally start at least 2–3 months before the big day.

Don’t Miss: Top 7 Facial Oils For Added Glow During Winters

Hydration with boosters or mesotherapy 

Skin booster injections such as mesotherapy, hyaluronic acid, etc., help to infuse vitamins, minerals and moisture directly under the skin to restore skin suppleness, elasticity and freshness. It gives a perfect glow to the bride from within.

Skin rejuvenation with PRP facials

Making use of the body’s own plasma helps to repair the body cells and stimulate the synthesis of collagen, as it contains growth factors. It helps to improve skin texture and reduce the appearance of fine lines and scars, making the skin look healthy and glowing.

Pro Tip – Not alone treatments work, you need a wholesome diet, quality sleep, adequate hydration and personalised skincare for that magic glow. You need a prior routine of three months at least, and watch your skin heal and glow on your special day.

Don’t Miss: Best Ways To Remove Facial Hair, According To Experts

If you liked this story, then please share it. To read more such stories, stay connected to HerZindagi.

Tags: , , , ,
Best oLive
Privacy Overview

This website uses cookies so that we can provide you with the best user experience possible. Cookie information is stored in your browser and performs functions such as recognising you when you return to our website and helping our team to understand which sections of the website you find most interesting and useful.