Beyond the Spa: Naturopathica’s Guide to Healthy Skin and Everyday Balance

Beyond the Spa: Naturopathica’s Guide to Healthy Skin and Everyday Balance

Naturopathica in East Hampton

Summer in the Hamptons often means long days in the sun, packed schedules, and a constant balance between activity and relaxation. At Naturopathica, with spa locations in East Hampton and Bridgehampton, wellness is approached as an ongoing practice—one that extends beyond time spent in the treatment room, and into everyday routines.


Known for its line of botanical skincare and results-driven treatments, Naturopathica has become a trusted destination for those looking to restore, reset, and maintain healthy skin throughout the season. How you care for your skin, body, and mind after a facial or massage is just as important as the treatment itself, especially when it comes to protecting and prolonging results.


Spa Director Cassie Pahel shared her go-to tips for post-treatment care, daily skincare rituals, and simple wellness habits that help support balance all summer long, whether you’re visiting the spa regularly or looking to bring those benefits into your everyday routine.


What are your top post-treatment tips to help maintain results after a facial or massage?


CP: The most important thing is to protect and support the skin or body while it’s in a receptive state. After a facial, I always recommend avoiding heavy makeup, excessive sun exposure, and heat (like saunas or hot yoga) for at least 24 hours. Hydration is key, both internally and topically, as the skin is primed to absorb nutrients.


After a massage, it’s about keeping the body in a relaxed, parasympathetic state. Gentle movement, hydration, and allowing yourself time to rest can help extend the therapeutic effects.


Are there any common mistakes people make after spa treatments that they should avoid?


CP: One of the most common mistakes is overstimulating the skin too soon. Using exfoliants, retinoids, or active ingredients immediately after a facial can disrupt the results and lead to sensitivity.


Another is jumping right back into a high-stress routine after a treatment. The body and nervous system have just been reset, and giving yourself even a few hours to stay grounded can make a meaningful difference.


What are a few simple daily rituals you recommend for maintaining healthy skin and overall wellness?


CP: Consistency is everything. I always come back to a few core rituals:


– Mindful cleansing morning and evening to support the skin barrier

– Daily SPF, which is non-negotiable for long-term skin health

– A moment of intentional breathing or stillness, even just a few minutes, to regulate the nervous system


How can clients extend the benefits of a spa treatment at home between visits?


CP: Think of your home routine as a continuation of what we do in the treatment room. Using targeted, high-quality products that support your specific skin concerns is essential, but so is how you apply them.


Simple techniques like facial massage, lymphatic drainage, or dry brushing can help stimulate circulation and maintain that post-treatment glow. Creating a calming ritual—rather than rushing through your routine—also reinforces the benefits on a deeper level.


Are there specific ingredients, products, or practices you find especially effective for long-term skin and body care?


CP: I tend to focus on ingredients that strengthen and support the skin over time, rather than just delivering quick results. Botanical actives, antioxidants, and barrier-repair ingredients are foundational.


Equally important are practices like regular exfoliation (done gently and appropriately), consistent hydration, and supporting lymphatic flow. Long-term skin health is really about balance and resilience.


Beyond skincare, what are your go-to wellness habits for feeling balanced and restored day to day?


CP: For me, it always comes back to nervous system regulation. Whether that’s breathwork, time outdoors, or simply stepping away from screens, those moments of reset are essential.


I also prioritize movement that feels restorative rather than depleting, and staying connected to the rhythms of sleep and hydration that support overall balance and nourishment.


True wellness isn’t about intensity; it’s about consistency, intention, and listening to what your body needs.


To learn more about Naturopathica, click here.

Tags: , , , , , ,
London's Best Facialists

London’s Best Celebrity Facialists: The Ultimate Guide to Glowing Skin in 2026

City life is no friend to the complexion. Pollution, stress, broken sleep, central heating all take their toll. London gives a lot, but your skin quietly keeps the receipts.

The good news is that the capital is home to some of the world’s most exceptional facialists. These are practitioners who blend ancient techniques with cutting-edge technology to deliver results that range from deeply relaxing to genuinely transformative.

Whether you are booking your first serious facial or investing in treatments that make people ask if you have just returned from holiday, this is your definitive guide to London’s best.

1. Vaishaly Patel

The name beauty editors mention when they are being completely honest. Vaishaly Patel has spent over 20 years refining complexions at her Marylebone clinic, working with clients including Gwyneth Paltrow and Elle Macpherson.

Her philosophy centres on less product and more technique, yet the results are striking. The Signature Facial blends deep cleansing, extraction, microdermabrasion, high-frequency treatment and craniosacral massage, targeting tension held in the scalp, brows and jaw.

The treatment is tailored to each client, delivering both immediate radiance and longer-term improvement. Her Mesotox treatment, a no-needle approach to skin tightening, has quickly become one of London’s most talked-about innovations.

Signature Facial from £200 for 55 minutes with Vaishaly, also available with trained aestheticians.

Vaishaly Clinic, 51 Paddington St, London W1U 4HR
vaishaly.com

2. Dija Ayodele — West Room Aesthetics

Skincare expert Dija Ayodele is the author of Black Skin: The Definitive Skincare Guide and founder of the award-winning Black Skin Directory. Her clinic was built on a clear and necessary principle: that Black women and women of colour deserve expert skincare from practitioners who understand their skin.

Each treatment is bespoke, typically taking place over 60 minutes and incorporating techniques such as chemical peels, mesotherapy, microneedling and LED therapy, alongside thorough cleansing and extraction.

Her profile continues to rise through media work and industry recognition, and appointments are consistently in high demand.

Bespoke facials from £156.

West Room Aesthetics, Maida Vale, London W9
westroomaesthetics.com

3. The Facial Goddess — Donna Ryan

Donna Ryan’s journey into skincare began with her own experience of acne, leading her to study homoeopathy, traditional Chinese medicine and facial reflexology. That lived experience informs every treatment.

Based in Fitzrovia, she specialises in lymphatic drainage and holistic facials designed to deliver results without invasive methods. Her Gua Sha Fusion facial combines traditional Gua Sha massage with a Thai herbal poultice to clear congestion, improve circulation and encourage cell renewal.

The result is brighter, calmer, more sculpted skin with a noticeable reduction in puffiness.

Signature facial from £150 for 90 minutes.

7 Charlotte Place, London W1T 1SQ
thefacialgoddess.com

4. Sarah Chapman — Skinesis Clinic

Sarah Chapman’s reputation grew through word of mouth before evolving into one of London’s most sought-after skincare destinations. The Skinesis Clinic near Sloane Square now houses a team trained in her signature techniques.

Her approach combines her renowned facial massage method with advanced aesthetic technology. Treatments range from bespoke facials to high-performance procedures such as radio frequency, Morpheus8, IPL and laser resurfacing.

With a client list that includes Victoria Beckham, Gigi Hadid and Meghan Markle, the clinic also holds Care Quality Commission registration, giving it a medical distinction.

Skinesis Bespoke Facial from £195 for 60 minutes.

259 Pavilion Road, London SW1X 0BP
sarahchapman.com

5. Su-Man

Su-Man’s facials operate on a deeper level, working on both the skin and the underlying structure of the face. Her background in dance, Shiatsu and Pilates informs a treatment that feels as physical as it is cosmetic.

Following a detailed skin analysis, the facial includes cleansing, extraction, exfoliation and hydration using her own product line. This is followed by an intensive massage that extends to the neck, arms, hands and feet.

Often described as a facelift in an hour, her treatments are known for delivering both visible lift and full-body relaxation.

Bookings can be made via So SPA on +44 20 7747 2204.

So SPA, Sofitel London St James, 6 Waterloo Place, London SW1Y 4AN
su-man.com

6. Jasmina Vico

Jasmina Vico is known for her clinical precision and deeply personalised approach. Her treatments focus on identifying and addressing the root causes of skin concerns rather than simply treating surface symptoms.

Her Fitzrovia clinic offers a range of advanced options, including peels, needling, laser and LED therapy. The Vicoglow facial is tailored to concerns such as acne, rosacea, pigmentation and dehydration, combining deep cleansing with lymphatic drainage and intensive hydration.

The result is skin that looks clearer, calmer and noticeably revitalised.

Vicoglow facial £250 for 60 minutes.

6 Percy St, Fitzrovia, London W1T 1DQ
jasminavico.com

7. Alexandra Soveral

Consistently named among the best facialists in the UK, Alexandra Soveral has built a reputation that speaks for itself. Her treatments take place at Violet Hill Studios in St John’s Wood.

Her method combines deep tissue work, dry brushing, hot stones and ice-cold quartz to stimulate circulation and release deeply held tension in the face.

Clients often describe the results as a natural lift, with firmer, more energised skin and a visible reduction in stress.

Soveral signature facial from £120 for 60 minutes.

Violet Hill Studios, 6 Violet Hill, London NW8 9EB
alexandrasoveral.com

8. Pietro Simone

With over two decades of experience, Pietro Simone specialises in treating problem skin and supporting post-procedure recovery. His work focuses on restoring balance and structure rather than surface-level enhancement.

His signature approach incorporates deep tissue massage alongside his Italian Bella Complex formulations, which use natural ingredients sourced from regions such as Puglia and Vesuvio.

The treatments are grounding, effective and particularly suited to acne-prone or congested skin.

Facials from £150.

Pietro Simone Clinic, Flemings Mayfair Hotel, London W1J 7BH
pietrosimone.com

9. Adeela Crown

Adeela Crown works at the intersection of skincare and medical aesthetics, collaborating with leading plastic surgeons to support skin before and after procedures.

Now based at The Dorchester Spa, her treatments combine advanced technology with holistic techniques, including lymphatic drainage and lifestyle guidance.

Her Skincredible facial is designed to deliver long-term transformation, improving hydration, brightness and overall skin quality across multiple sessions.

Skincredible facial from £390.

The Dorchester Spa, Park Lane, London W1K 1QA
adeelacrown.com

10. Sarah Bradden

With over 20 years of experience, Sarah Bradden specialises in cosmetic acupuncture. Her Bradden Method blends traditional Chinese medicine with modern skincare practices.

Each treatment begins with a detailed consultation covering lifestyle, stress and overall health, followed by cleansing, acupuncture, LED therapy and oxygen treatment.

The results extend beyond the skin, delivering a noticeable sense of calm alongside a brighter, more luminous complexion.

Treatments from £120 for 30 minutes.

Hershesons, 8A West Halkin St, London SW1X 8JE

What to Look for When Booking a Facial in London

With so many options available, choosing the right facialist requires a considered approach. It is always worth checking whether a consultation is offered before treatment, as the best practitioners will assess your skin in detail before recommending anything.

If you have specific concerns such as hyperpigmentation, acne scarring, sensitivity or rosacea, look for a specialist with proven experience in that area. Waiting lists should not be seen as a drawback. In many cases, they are a strong indicator of quality and demand.

Tags: , , , , , ,
A Balanced Guide to Organic Self-Tanners

A Balanced Guide to Organic Self-Tanners

When it comes to dressing up, I am generally of the opinion that we should choose clothing that complements our skin tone.

The key word though is complement, not match.

Which brings me to graduation season.

This spring, my daughter is graduating not once but twice – first with her associate’s degree, then from high school – and that’s how I learned that graduation dresses are almost always white.

My legs are also pasty white, as are the legs of Miss High School Valedictorian, Class of 1.

The Usual Advice (And Why I Question It)

In most reviews, this is the part where someone says that we all need to avoid UV rays for our health, and the best way to achieve a healthy, sun-kissed glow is to use self-tanner.

However, there’s a growing body of research that suggests there’s a “sweet spot” for sun exposure. Too much can be harmful – but according to respected researchers including Dutch dermatologist Han J. van der Rhee – so can too little. (1)

That’s why, especially in the summer, my family makes it a goal to get sunshine every day. Now, don’t come for me – we do use sunscreen and other strategies like covering up and/or finding shade to avoid overexposure. This article is not about that, though – this one is, if you’re interested.

Now back to the special occasion situation. My daughter found a white dress that’s perfect for senior photos and graduation, and she wanted a safe sunless tanning option, so I decided now is the time to dive deep into the research on what’s available.

What I Found

Over the past couple of years, I’ve seen a lot of ads for organic self-tanners and wondered if they’re truly non-toxic and as good as reviewers say.

The short answer is that there are versions with truly non-toxic ingredients, but the actual biological impact varies depending on when (and possibly how) they’re applied.

The long answer starts with something you’ll see on almost every sunless tanner label – dihydroxyacetone.

Meet DHA, The Active Ingredient

If you’ve looked into self-tanners at all, you’ve probably come across DHA (dihydroxyacetone). It’s the most common active ingredient used to achieve a bronze glow.

DHA is a sugar molecule that reacts with amino acids on your skin’s surface to produce melanoidins, which are brown-pigmented molecules that mimic the look of a natural tan. (2) This surface-level bronzing effect essentially “stains” the top layer of skin.

Some DHA is synthetic, but the form found in organic and natural products is derived from non-GMO sugar beets or sugarcane. It’s generally considered safe for topical use, and has been approved by the U.S. Food and Drug Administration for use in self-tanning lotions.

However, there are a few nuances that don’t get talked about very often.

#1: Sunless Tanning May Reduce Vitamin D Production

Melanoidins might sound similar to melanin, but they’re functionally different.

Melanin formation happens when skin absorbs UV light – it’s a responsive biological process.

Melanoidin is formed when sugars and amino acids combine through the Maillard reaction – the same process that creates a browning effect on toast and roasted potatoes. According to one pilot study, when DHA creates a layer of melanoidins on the skin, it acts as a mild natural sunscreen that can reduce UVB penetration enough to decrease vitamin D production by an average of 24%. (3) (4)

Now, this was a small study, so we need more research to confirm and clarify the details.

However, since more than half of the U.S. adult population already has insufficient levels of vitamin D, I would personally keep an eye on my levels if I was using sunless tanning products on a consistent basis. (5)

For special occasions, when the effect will wear off after about a week, I’m 0% worried about vitamin D. However, I will be following an unofficial 24 hour rule, which leads me to an important caveat:

#2: Sunless Tanning & Sunlight Exposure

If you’re planning to apply sunless tanner before heading to the beach, you might want to do it a couple of days in advance.

Here’s why: Some studies have found that DHA-treated skin may temporarily produce more free radicals when exposed to UV light. (6) The window is estimated to be about 24 hours. (7)

Now, maybe you’re wondering whether erythrulose – a DHA alternative derived from fermented raspberries – has the same impact. The answer is . . probably. We don’t have any research on it specifically, but it works the same way that DHA does – via melanoidins and the Maillard reaction. It’s reasonable to presume that it also temporarily reduces UV tolerance, at least until we have more data.

So what does this mean in practical terms? Many experts recommend applying sunless tanner at night, allowing it to set, and using sunscreen the next day.

This is when thoughtful formulation matters – not just the active ingredient. Many brands now intentionally add antioxidant-rich ingredients to their products to help reduce and/or neutralize free radicals. (8)

#3: A Note On Spray Tans

While lotions and creams are applied topically, spray tans can introduce DHA into areas it wasn’t designed for, like the lungs or mucous membranes.

The FDA has specifically noted that DHA is not approved for inhalation, which is why protective measures (like nose plugs and eye protection) are often recommended during spray applications. I personally think this is more of a concern with commercial spray tans – which use an aerosolized mist with very fine droplets – not at home spray products in pump bottles that release larger droplets.

I personally wouldn’t take a deep breath while spraying my face, though. 🙂

What “Organic” Means (and Doesn’t Mean) in Self-Tanners

Now that we’ve talked about active ingredient, DHA, let’s talk about what else is in the bottle.

For a product to be “certified organic,” it usually needs to contain a very high percentage of organic ingredients.

Some self-tanners meet that standard. Others combine organic ingredients with naturally derived, plant-based components that aren’t certified but improve the formula (like vanilla fruit extract for scent).

Either way, the goal is the same: to create nourishing, skin-friendly blends that don’t include problematic ingredients like:

Parabens
These artificial preservatives can mimic estrogen in the body and have been linked to hormone imbalances, reproductive problems, developmental problems, and other health issues. They also cause significant ecological disruption by acting as endocrine disruptors in wildlife, especially aquatic life, where they cause reproductive and/or developmental problems. (9)

Fragrance (a.k.a. parfum)
Thanks to a loophole in U.S. labeling rules, companies can hide undisclosed chemicals under the catch-all term “fragrance.”

Formaldehyde-Releasing Preservatives
In personal care products, formaldehyde can be added to products to extend their shelf life. But if you’re like me, you’d immediately put back any product that listed formaldehyde on the label. Companies know that, which is why they use formaldehyde-releasing preservatives.

Yep, ingredients like sodium hydroxymethylglycinate don’t contain formaldehyde outright – but they slowly release small amounts over time as they break down. There’s no formaldehyde on the label, but exposure is still happening, and according to the Campaign for Safe Cosmetics even low levels – around 250 parts per million (ppm) or even 200 ppm in sensitized individuals – are cause for concern. (10)

Artificial Dyes
Many self-tanners use added colorants to create an instant “bronzed” look before the active ingredient develops.

These dyes are often petroleum-derived and can trigger redness, itching, or sensitivity.

Common examples include:

  • FD&C Red 40
  • FD&C Yellow 5
  • FD&C Blue 1
  • Coal tar–derived colorants

What I’d Want My Daughter to Know

That was a lot . . . probably more than you were looking for!

Here’s why: when my mom, sister, or daughter asks me for a recommendation, I want them to have the important details before deciding what works best for them. I want the same for you, too.

With all of that in mind, here’s what I’d say to my daughter about sunless tanners (actually, it’s what I did say):

  • They’re great for special occasions.
  • Apply them at night, then avoid heavy sun exposure the next day. Use sunscreen if you’re going to be outside.
  • Pay attention to the overall formulation, not just the active ingredient. I’d look for products that intentionally include antioxidants.
  • If you start using self-tanner often, it may be worth keeping an eye on your vitamin D levels.

My Top 3 Picks for Organic Self-Tanners

Navigating the “natural” beauty landscape can be overwhelming. Many brands greenwash, and there are so many to sift through it can be difficult to even know where to start.

To narrow down my list, I looked for:

  • High Percentage of Organic/Natural Ingredients: Obviously. Antioxidant-rich formulas were also a high priority.
  • Absence of “Red Flag” Ingredients: No parabens, phthalates, synthetic fragrances, etc.
  • Performance: The goal is sun-kissed, not orange.
  • Streak-Free Application: Nobody wants zebra stripes.
  • Positive Reviews: Does it consistently perform well for real users?

I ended up ruling out several popular “clean” self-tanners that rely on frequent reapplication or ingredient bases I wasn’t comfortable with. The ones below are the few that met my criteria for both formulation and real-world performance.

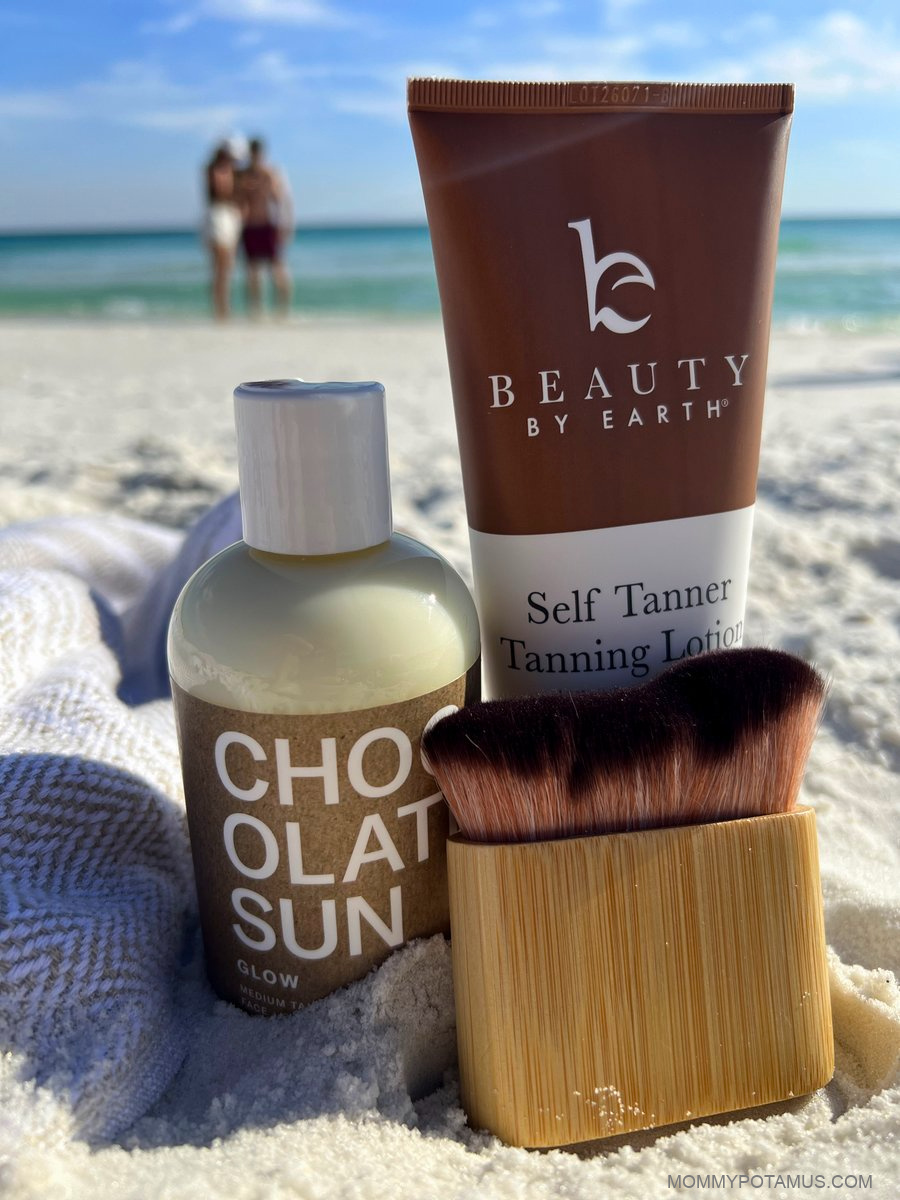
🥇 Beauty by Earth Self Tanner Body Lotion

Best overall balance of pure ingredients + performance

This body lotion is a crowd favorite for good reason. It gives skin a natural-looking glow without veering orange, and is versatile enough to be used on the face as well as the body. Beauty By Earth does make a separate face lotion for sensitive, dry, or breakout-prone skin, but to keep things simple I just used the body lotion and it worked well for me.

The organic aloe and shea butter base leaves skin feeling soft and supple – not dry – and the formula also includes antioxidants like green tea extract, pomegranate extract, and witch hazel extract.

It’s user-friendly, making it a great option for people (like me) who don’t use it enough to have expert-level applications skills. The scent is subtle and pleasant.

Why it stands out:

  • Simple ingredients
  • Good color (not orange-heavy)
  • Consistently strong user feedback
  • Pregnancy safe

Key Ingredients

  • Organic Aloe Vera: Hydrates and soothes.
  • Organic Shea Butter: Deeply moisturizes and improves skin elasticity.
  • Organic Coconut Oil: Nourishes and provides a lovely scent.
  • DHA from sugar beets: The bronzing ingredient.
  • Antioxidants: Green tea extract, pomegranate extract, and witch hazel extract.

🥈 Chocolate Sun Tanning Cream (Face & Body)

Chocolate Sun uses a moisturizing base of organic aloe, coconut oil, jojoba oil, and other skin-conditioning botanicals to support hydration while the color develops.

What I like most about it is that it doesn’t rely on repeated applications to work. You’ll typically start to see color within a few hours, with a deeper, natural-looking tan developing over time – making it a great option for occasional use rather than something you have to maintain throughout the week.

The texture is easy to work with, which makes application very forgiving (especially if you’re not using self-tanner regularly).

Why it stands out:

  • 89% Organic Ingredients
  • Designed to work well with a single application
  • Simple, botanical-focused formula
  • Good color
  • Hydrating base that supports skin during development

Key Ingredients

  • Aloe Vera: Hydrates and supports skin barrier
  • Coconut Oil: Nourishes and helps with even application
  • Jojoba Oil: Mimics skin’s natural oils for a balanced feel.
  • Sweet Almond & Sunflower Oil: Lighter oils for absorption
  • DHA (naturally derived): Active tanning ingredient
  • Antioxidant: Green Tea Leaf Extract

🥉Eco Tan Invisible Tan Cream

Best certified organic option

This brand is certified organic in Australia, where it was founded along the Gold Coast by Sonya Driver. I haven’t personally tried their highly rated Invisible Tan cream because it’s currently out of stock in many places.

However, it’s consistently one of the highest-rated options in the natural beauty space, and reviewers say it’s rich, glides on smoothly, and develops into a beautiful, natural-looking bronze overnight.

From a formulation standpoint, it checks a lot of boxes: certified organic ingredients, a nourishing base (including aloe and plant oils), and a focus on antioxidants.

They do offer other products as well, like Hempitan, but reviews are more mixed. I’m waiting for the Invisible Tan Cream to come back in stock, then I will test it out and report back.

Why it stands out:

  • Certified organic (In Australia)
  • Good mid-tone color

Key Ingredients

  • Organic Aloe Vera: Soothes and hydrates the skin.
  • Macadamia Seed Oil: High in fatty acids that are highly moisturising, and work to regenerate and soften the skin.
  • Organic Avocado Oil: Rich in vitamin E, deeply moisturizing.
  • Antioxidants: Elderberry extract, geranium oil, chamomile extract
  • DHA (Dihydroxyacetone) derived from natural sugar beet: The active bronzing agent.

How to Get the Best Results (Without Overcomplicating Things)

You don’t need a 15-step routine to get a good result, but a few small things make a big difference.

Start with smooth skin
Exfoliating ahead of time helps the color go on evenly and fade more naturally. A natural-fiber mitt (made with loofah, hemp or sisal) works well for this.

Moisturize dry areas first
Elbows, knees, ankles, and hands tend to grab more color. A light layer of moisturizer in those spots helps keep things even.

Apply like you would a body lotion
Work in sections and blend well. You don’t need perfect technique – just take your time and don’t rush it.

About mitts and brushes
Most brands recommend using an application mitt or kabuki brush for the smoothest finish. As far as I can tell, those are almost always made with synthetic fibers, which isn’t ideal from a microplastics standpoint.

That said, for occasional use, I think it’s a reasonable tradeoff if it helps you avoid streaks. If you’d rather skip it, applying with clean hands and washing thoroughly afterward works just fine.

Give it time to develop
I prefer applying at night and letting it develop while I sleep. It’s simpler, and it lines up with the earlier point about avoiding sun exposure right after application.

FREE Ebook: DIY Body Care Gifts Made Simple

Do you want to give gorgeous, handcrafted gifts for family and friends, without spending a bunch of time on them?

Then I’d love to give you a free copy of DIY Body Care Gifts Made Simple – my step-by-step guide to making gorgeous handcrafted gifts without stressing yourself out – as a gift for signing up for my newsletter. I’ll show you how to make vintage labels, luxurious lotion bars, lip balms, sugar scrubs, body sprays and more like a pro. Sign up for my newsletter and you’ll be redirected to the download page immediately!

Sources

  1. van der Rhee H, de Vries E, Coomans C, van de Velde P, Coebergh JW. (2016). Sunlight: For Better or For Worse? A Review of Positive and Negative Effects of Sun Exposure. Cancer Research Frontiers.
  2. Turner J, Schalla W, Tosca M, Rosado C. (2023). In search of the perfect tan: Chemical activity, biological effects, business considerations, and consumer implications of dihydroxyacetone sunless tanning products. Journal of Cosmetic Dermatology.
  3. Armas LAG, Fusaro RM, Sayre RM, Huerter CJ, Heaney RP. (2009). Do melanoidins induced by topical 9% dihydroxyacetone sunless tanning spray inhibit vitamin D production? A pilot study. Photochemistry and Photobiology.
  4. Laferté C, Oliel S, Pehr K. (2026). Clinical Use and Safety of Self-Tanner (Topical Dihydroxyacetone) in Dermatology: A Systematic Review. Journal of Cutaneous Medicine and Surgery.
  5. Cui A, Xiao P, Ma Y, Fan Z, Zhou F, Zheng J, Zhang L. (2022). Prevalence, trend, and predictor analyses of vitamin D deficiency in the US population, 2001–2018. Frontiers in Nutrition.
  6. Garone M, Howard J, Fabrikant J. (2015). A review of common tanning methods. Journal of Clinical and Aesthetic Dermatology.
  7. Gallagher M. (2018). Exposure to Dihydroxyacetone in Sunless Tanning Products: Understanding the Risks. Journal of the Dermatology Nurses’ Association.
  8. Dobos K. (2013). Formulating Sunless Tanning Products with DHA: Current Challenges. Cosmetics & Toiletries.
  9. Agarwal D, Bhatt U, Soni V. (2025). Ecotoxicological impacts of parabens on flora and fauna. npj Emerging Contaminants.
  10. Campaign for Safe Cosmetics. Formaldehyde and Formaldehyde-Releasing Preservatives.

Share with a friend! 👇

Tags: , , ,
amber light bulbs

The Exact Lighting I Use at Home to Sleep Better (Amber Light Bulb Guide)

I spent years doing everything right for sleep. Taking magnesium, no screens, cool bedroom, and still waking at 3 am wondering what I was missing. It wasn’t until I started obsessing over my outdoor light exposure and the wavelengths coming out of my home lighting that things actually shifted. In fact, this is one of the most impactful changes I’ve ever made.

If you’re just looking for the products I mentioned in a video or podcast:

Why I Choose Amber Light Bulbs 

Light is the most powerful signal your body receives all day. Not just as light to see, but the information our cells are reading from the light. The spectrum of light entering your eyes tells your hypothalamus what time it is. This determines whether melatonin rises on schedule or gets suppressed for another 90 minutes while you lie in bed wondering why you can’t fall asleep.

The problem: standard LED lighting, including “warm white” bulbs, emits the same wavelengths of blue light as noon sunlight. Your overhead lights, your lamp, and your bathroom vanity are telling your cells it’s midday at 9 pm. Every night.

After years of testing (and a house that now glows like a very cozy campfire after 6 pm), here’s exactly what I use, why it works, and where to get it. And pro tip: I use timers in my house so the right lighting goes on in lamps at sunset and off around bedtime without any extra work. Those are all linked below.

In This Post

Why “Warm White” LEDs Still Aren’t Enough

This was the thing that surprised me most when I first started researching this properly. A 2700K “warm white” LED looks yellowish and feels softer than a daylight bulb. However, it still emits a measurable spike in the blue wavelength range (440–480nm) that suppresses melatonin. The warmth you see is partially filtered. The circadian-disrupting portion of the spectrum is still very much present.

What your body actually needs in the evening is light with no emissions below 530nm, in the amber/red spectrum with no blue and no green wavelengths. This is what’s called a true amber or low-blue spectrum, and it’s genuinely different from a warm white LED.

Your eyes contain specialized cells called melanopsin receptors. These cells have nothing to do with vision; they exist only to signal your master clock about what time it is. They’re exquisitely sensitive to short-wavelength blue light around 480nm. When they detect it, they signal the suprachiasmatic nucleus to suppress melatonin output.

Even dim light can interfere with a person’s circadian rhythm and melatonin secretion. A mere eight lux — about the level of most bedside lamps — has an effect. (Harvard Medical School)

A true amber bulb engineered to have zero emissions below 530nm can’t trigger those receptors. Your brain reads it as firelight. This triggers safe, post-sunset, begin repair mode.

The Exact Amber Bulbs and Lamps I Use

Evening Amber Light Bulbs (the Most Important Swap)

The body is used to and primed for bright overhead light during the day, so overhead lighting wasn’t my first priority in auditing my home light environment. I researched to find circadian-friendly bulbs for evening and put these in lamps so they’re always at eye level or below.

These go in every lamp in my main living spaces and any rooms we’re in after about 6 pm. Namely, the kitchen, living room, and dining room. This is where most circadian disruption happens, and it’s where the change makes the fastest difference. I also have these in our bedrooms.

You can get the lightbulbs I use from Healthy Home Lighting here (and use code wellnessmama to save 10%). 

The bulbs I chose from Healthy Home are no-flicker, no-EMF, and have the right light wavelengths. They come with three modes: daylight, sunset, and campfire. I have our evening bulbs set to campfire mode automatically and they all come on at sunset. So we simply turn off any overhead light and switch to “night mode” in our home.

  • Zero blue light emissions — not just reduced, eliminated
  • Flicker-free and low EMF
  • Bright enough for everyday tasks, not just reading
  • Standard E26 base, which fits most lamps and fixtures

I also use digital timers, so these come on automatically. All the timers and lamps I use are linked here.

Red Bulbs For the Bedroom and Bathroom

In the bedroom and bathroom, I go further. I opt for true red light, which contains no blue or green wavelengths at all. Red light above 600nm has essentially zero effect on the circadian system. It’s what photographers use in darkrooms. I use these in bedside lamps and the bathroom vanity for the hour before sleep.

Find the flicker-free red light bulbs I use here. 

Note that these are different than red light therapy panels. While the light is still beneficial, those are their own category, and I actually don’t recommend using them at night or right before sleep.

The Three-Setting Bulb (Easiest Option to Start With)

If you want one bulb that does it all without swapping, a circadian lightbulb that cycles through daylight, amber, and deep red with your existing light switch is the simplest entry point. No app, no smart home setup, no Wifi or Bluetooth, you just flip the switch.

I don’t think the full red light bulbs are necessary unless you really want to go low light in the evening. The three settings of the Healthy Home Bulbs will work in most cases.

The Lamps Themselves

Bulbs are only half of the equation. Overhead lighting is actually the worst offender because it enters your eyes from above, the same angle as a high-noon sun. In our house, we turn off all overhead lights by around 6 or 7 pm and switch to floor and table lamps, positioning them below eye level. The angle matters as much as the spectrum.

My Daily Lighting Schedule

The goal is to treat light as a biological input throughout the day, not just something that helps you see. Here’s how our household actually runs this.

  • Morning (wake – 9 am): Outside within 30 minutes of waking, no sunglasses, glasses, contacts, or windows. If I can’t get outside, I open all the curtains and stand near an open window. Full-spectrum or bright indoor lights are fine for this part of the day.
  • Daytime (9 am – ~5 pm): Natural light is always preferred. Standard indoor lighting for workspaces is fine. Screens are no issue during daylight hours.
  • Early evening (~6 pm): Overhead lights off. Amber lamps on. If I’m using screens, I have a blue-light filter enabled.
  • Late evening (8 pm – bed): Red or deep amber only in the bedroom and bathroom. No overhead lighting. This is the window where melatonin should be rising and I protect it carefully.
  • Overnight: Complete darkness. Blackout curtains. A dim red nightlight only if needed for kids navigating to the bathroom.

You don’t have to do all of this at once. The single highest-leverage starting point is swapping the bedroom and living room lamps to amber light bulbs before your usual bedtime. That’s where I started. Most people notice a difference within a few nights.

What to Look for When Buying (So You Don’t Waste Money)

I’ve tested enough amber bulbs to know that not all of them do what they claim. Here’s what actually matters:

  • Zero emissions below 530nm. This is the actual threshold for melatonin-safe light. Look for this in the spectral data, not just in marketing copy. If a brand doesn’t publish its spectral chart, that’s a red flag.
  • Flicker-free certification. Cheap bulbs flicker at frequencies your eye can’t consciously detect, but that may contribute to headaches, eye strain, and nervous system load. Confirm the bulb is tested and confirmed flicker-free.
  • Low EMF. Smart color-changing bulbs that use WiFi or Bluetooth to shift their spectrum emit significantly higher EMF than standard bulbs. I avoid them in bedrooms specifically.
  • Color temperature alone isn’t enough. A 2700K rating means the light looks warm; it doesn’t mean it’s low-blue. Demand actual spectral data, not just a Kelvin number.
  • Avoid the “colored shell” trick. A standard LED inside an amber or red plastic bulb will filter some blue light, but it won’t eliminate it. You want a bulb engineered at the spectral level, not just painted.

The Science: Why Light Is a Cellular Input, Not Just a Convenience

I’ve written about blue light and circadian rhythm in detail before, but here’s the condensed version for anyone coming to this fresh:

Your circadian clock, housed in the suprachiasmatic nucleus of the hypothalamus, runs on a roughly 24-hour cycle, but it needs daily calibration from light to stay synchronized with the actual day. Morning light, especially the blue-wavelength spike at sunrise, resets the clock and triggers the cortisol pulse that wakes you up properly.

Everything downstream, including hormone production, immune function, overnight cellular repair, and metabolism, is organized around that signal.

In the evening, the same clock is meant to detect the absence of blue light as a sunset cue. Melatonin rises. Cortisol drops. Growth hormone prepares to pulse. Your brain’s glymphatic system begins clearing waste. Your body runs a very specific repair sequence overnight, and it depends entirely on melatonin starting on time.

When your home lighting keeps emitting blue wavelengths after sunset, melatonin is delayed, sometimes by 90 minutes or more. You’re not just staying up late. You’re postponing the entire repair cascade that should have started hours ago.

Switching your lights doesn’t solve everything. But it removes one of the most consistent nightly disruptors of the system that heals you while you sleep. For me personally, it was one of the highest-leverage changes I made, and one of the least expensive.

Frequently Asked Questions

Should I change every bulb in the house?

You don’t have to. I started with the rooms we’re in during the two to three hours before bed, like the living room, bedroom, and bathroom. The garage, laundry room, and spaces we use briefly don’t need to change. I wanted to get those three spaces right first.

Is amber light bright enough to actually see by?

Yes! Good-quality amber bulbs provide enough light for cooking, reading, and normal evening activities. Colors render slightly differently (reds and yellows look rich, blues and greens go flat), but it’s perfectly functional. If you need more brightness for detailed work, a dedicated desk lamp with a red-spectrum bulb placed close to your task works well too. I like this option better than increasing overhead lighting.

What about blue-light blocking glasses… can I just use those instead?

Glasses help, but they’re a partial solution since they only protect the eyes. Your skin also contains photoreceptors that communicate with the circadian system. Glasses alone don’t give the full benefit of changing the light source itself. I use both: amber glasses when I have to be on screens in the evening, and amber bulbs for the general environment.

Can I just use a dimmer with my existing bulbs?

Dimming reduces total light intensity, which helps, but it doesn’t change the wavelength composition. A dimmed standard LED still emits the same proportion of blue light, just less of it. It’s better than full brightness, but not the same as a true amber spectrum.

What about smart bulbs that change color temperature?

Color-tunable smart bulbs can help, but most still emit residual blue wavelengths even at their warmest setting. And they use WiFi or Bluetooth, which I prefer to minimize in bedrooms. The dedicated amber and red bulbs I use are simpler, have lower EMF, and, in my testing, work better.

Is this safe for kids?

Yes! Honestly, I think it’s especially important for kids, whose circadian systems are still developing and who are often more sensitive to the stimulating effects of blue light before bed. My kids have had amber bedroom lamps for years. The warm light genuinely seems to help them wind down, which tracks with what the science says.

How quickly will I notice a difference?

Most people notice changes in how easily they fall asleep within a few nights of consistent amber lighting in the two hours before bed. If you’re already doing the other sleep fundamentals (no food close to bedtime, a cool room, total darkness), this is often the missing piece that makes them all click into place.

Shop the Full List

Have you switched to amber lighting? What difference did you notice, and what products do you love? Leave a comment and let me know. I read every single one.

Tags: , , , , , , ,
Ultimate South African Self-Care Guide

Ultimate South African Self-Care Guide

Life in South Africa can be a beautiful whirlwind. From the bustling streets of Johannesburg to the calm seaside towns of the Western Cape, our days are filled with work, family, and the constant buzz of modern life. But amid all this energy, taking care of yourself — truly caring for your mind, body, and soul, often gets pushed to the bottom of the list.

Self-care isn’t just bubble baths and scented candles (though we love those too). In South Africa, self-care is about blending modern wellness habits with local traditions and nature’s healing power. Here’s your ultimate guide to self-care, South African style.

1. Understanding Self-Care in South Africa

Self-care is personal. It’s the daily choices that help you feel centred, healthy, and happy. In South Africa, it also has a cultural dimension — drawing from traditions, nature, and community. Think sipping a calming Rooibos tea while listening to a live mbaqanga performance, or taking a weekend hike up Table Mountain to reconnect with yourself.

Local wellness practices, like herbal remedies (umhlonyane for stress relief) or visiting traditional healers (sangomas), can be incorporated alongside modern routines like yoga, meditation, or journaling.

2. Daily Self-Care Habits That Work

Self-care doesn’t have to take hours. Even small, intentional habits can make a big difference:

Morning Rituals:
Start your day with a calming routine. Brew a cup of Rooibos tea from the Cederberg region, practise mindfulness for five minutes, or jot down a gratitude list. If you’re in Cape Town, a sunrise walk along Sea Point promenade is pure magic.

Physical Wellness:
Exercise is a cornerstone of self-care. Whether it’s cycling in Johannesburg’s parks, hiking the Drakensberg, or surfing in Durban, moving your body in nature is restorative. Even a brisk walk around your neighbourhood can help reset your mind.

Mindful Eating:
Eat local, seasonal foods. Fresh fruits from a nearby farmers’ market, a wholesome bobotie for lunch, or a smoothie with indigenous ingredients like baobab powder can nourish both body and soul. Remember, self-care is also about enjoying your food without guilt.

3. Weekend Wellness Rituals

Weekends are prime time to recharge fully:

  • Spa Days: Treat yourself at a Cape Town spa or a boutique retreat in Stellenbosch. Hot stone massages or traditional treatments can work wonders for stress relief.
  • Nature Retreats: Head to the Drakensberg or the Lowveld for a weekend digital detox. Hiking, meditating, or simply listening to the wind through the trees reconnects you with yourself.
  • Cultural Self-Care: Engage with your community. Attend a local music festival, art workshop, or storytelling circle. Celebrating local culture is a joyful way to nourish your spirit.

4. Mental Health and Community

Self-care isn’t just about what you do alone; it’s about the people and support around you. South Africa has a growing wellness and mental health scene. Apps like Mindful Gnani or local therapists provide guidance if you’re feeling overwhelmed.

Balancing work, family, and social life is key. Don’t hesitate to say no when needed, and prioritise “you time” guilt-free. Even a 10-minute meditation before bed counts.

5. Quick Self-Care Tips for Urban Life

Life in cities like Johannesburg, Durban, or Pretoria can be hectic. Here are simple ways to weave self-care into your routine:

  • Take coffee breaks at local cafés like Father Coffee in Joburg or Truth Coffee in Cape Town.
  • Stretch during office hours or do a short guided yoga session online.
  • Explore nearby nature reserves for a weekend escape — think Walter Sisulu Botanical Gardens or Kloof Gorge.
  • Incorporate South African music into your day — whether it’s amapiano, kwaito, or jazz — for a quick mood boost.

Make Self-Care a South African Lifestyle

Self-care is more than a trend; it’s a lifestyle. The beauty of South Africa is that we have a unique mix of modern wellness resources and natural, cultural practices to draw from. Whether it’s a morning Rooibos ritual, a hike up Table Mountain, or a weekend spa retreat, the key is intentionality.

Start small. Choose one ritual today — a sunset walk at the V&A Waterfront, five minutes of meditation, or a calming herbal tea — and make it yours. With consistent self-care, your mind, body, and soul will thank you, South African style.

Also see: Lamiez Holworthy opens up about challenges of growing up in an Indian family

Be the first to know – Join our WhatsApp channel for content worth tapping into. Click here to join!

Tags: , , , ,
A Practical Guide to Building a Skincare Routine with Image Skincare

A Practical Guide to Building a Skincare Routine with Image Skincare


Published:
Wed 1 Apr 2026, 3:26 PM

Having great skin is a goal for many people, but it can be hard to feel that way when there are so many skincare options to choose from.

With hundreds of different cleansers, serums, moisturisers and sunscreens, picking the right products to ensure your skin stays healthy can be challenging.

In reality, it’s a lot less confusing; if you use an ingredient-based routine and professional skincare products that have been formulated to target certain skin concerns, you’ll probably be spot on.

An option to potentially take is Image Skincare, which is a professional skincare range stocked by retailers such as Millies.

A brand that is known to provide an effective fusion of clinical-grade ingredients with those found in nature, it has since amassed a large customer base in both salons and skin clinics globally.

Product solutions are easily available to search through its website, Image Skincare available on Millies, providing a variety of options including cleansers, treatments, balms, moisturisers and much more.

Why Skincare Routines Matter

Keeping a proper skin care routine is more than just a vain commitment. Through cleansing, hydrating and protecting, the skin barrier is maintained. Without which, the skin barrier would be compromised easily, causing skin irritations, dry skin and early wrinkles. Dermatologists often remind patients that the best products are less useful if their protocols are not followed religiously.

Indeed, it is. The majority of these professional skin care brands are generally a whole system, making skin care easier and more efficient. These systems are developed to help several skin conditions, including acne, ageing, dark spots, etc.

What Makes Professional Skincare Different?

Professional skincare is developed using higher levels of active ingredients than everyday high-street products. Many will be the work of skincare experts or dermatologists and will be tried and tested when it comes to the visible results they can deliver.

Image skincare, for example, was formulated by an aesthetician and a Plastic Surgeon, all with the aim of creating effective, active, rich formulas that contain established ingredients and botanicals.

The branding philosophy revolves around “clean clinical skincare”, which generally means products are developed to reflect a balance between product efficacy and the health safety of its ingredients.

While many items might not include parabens, phthalates or harsh chemicals, they will feature skin-benefitting actives such as antioxidants, retinol and peptides.

It’s a good middle ground for someone wanting something more performance-driven and less intense than medical-grade.

Step One: Gentle Cleansing

As with most good things in life, an effective skincare routine starts with a thorough cleanse. Over the course of a day, our skin — the body’s largest organ — gets covered in dirt, oils, makeup, and pollutants, and a cleanser is responsible for taking the day off and allowing our other products to penetrate the different layers of gunk that seal our pores.

You want something that’s both powerful and nurturing to your skin, so going with anything that strips layers off of your face will only work against the rest of your routine.

If you have dry or sensitive skin, usually a hydrating or cream-based cleanser helps, while those who are prone to more oil or acne prefer something a little more clarifying or gel. Overall, the real magic is in the habit: stick to twice a day, both morning and night.

It helps maintain balance and get skin ready for the next phase.

Step Two: Targeted Treatments

Serums and treatments are products that are designed to target a specific skin concern. They contain a high concentration of active ingredients that work deep in the skin.

Common treatment ingredients include:

  • Vitamin C, a brightening antioxidant that provides protection from pollution
  • Retinol, a cell regenerator that contributes to the reduction of fine lines
  • Hyaluronic, a humectant that provides hydration by pulling water into the skin

Most professional skincare brands offer these treatments in ranges to help with a variety of concerns. For example, there will be anti-ageing, brightening or acne products.

You normally only need one or two treatments. Sometimes, using too many at the same time can upset the skin.

Step Three: Moisturising for Skin Balance

Whether you have dry skin, oily skin, or anything in between, you should be using a moisturiser. They help maintain the lipid barrier of the skin (which serves as that all-important gatekeeper of all of your cells), and are effective in keeping skin hydrated and balanced.

Not all are created equal. Gel moisturisers are great for those who have oily or combination skin, while those with extremely dry or mature skin may prefer a thicker, more substantial cream. Still others are

formulated with antioxidant or anti-ageing peptides for a continued amount of care for the health of the skin.

Using moisturiser after a serum can help keep the actives in your serum from just evaporating in the atmosphere. It also helps to make sure that your skin is soothed, properly hydrated, and comfortable the whole day.

Step Four: Daily Sun Protection

If there’s a single step that every dermatologist would agree on, this would be sun protection. Ultraviolet (UV) radiation from the sun is one of the leading causes of skin ageing.

Applying a broad-spectrum sunscreen with a Sun Protection Factor (SPF) of 30 or higher every day helps protect skin from the harmful effects of sun damage. This is especially important if you are using active ingredients like retinol or exfoliating acids, which make your skin more sensitive to the sun.

Rain or shine, using daily SPF is probably the simplest thing you can do for your skin.

Choosing the Right Products for Your Skin

Given the huge choice offered by professional skincare, the real selection of products can usually be resolved by the client in terms of how they relate to their skin type and lifestyle. In some cases, they may choose to consult a skin care therapist or a dermatologist before including more active products.

When choosing, one should also look at consistency, rather than complexity. Combining cleansing, treating, hydrating and protecting is often more efficient than constantly changing products.

A Balanced Approach to Skincare

Skincare fads come and go, but certain skincare philosophies are timeless. Most experts can agree on one simple fact, and that is, beautiful skin doesn’t happen overnight.

For this reason, professionally recommended brands such as Image Skincare have become widely sought after. This is due to the fact that brands of this nature rack up the skin benefits, all while keeping it simple with routines you can afford and sustain every day. Simply put, by focusing on the 4 core principles: Cleanse, Treat, Hydrate, Protect, you’re only scratching the surface as to how amazing your skin can be when performing these simple steps daily.

After all, the best skincare is the one you USE!

Published:
Wed 1 Apr 2026, 3:26 PM

Tags: , , , , ,
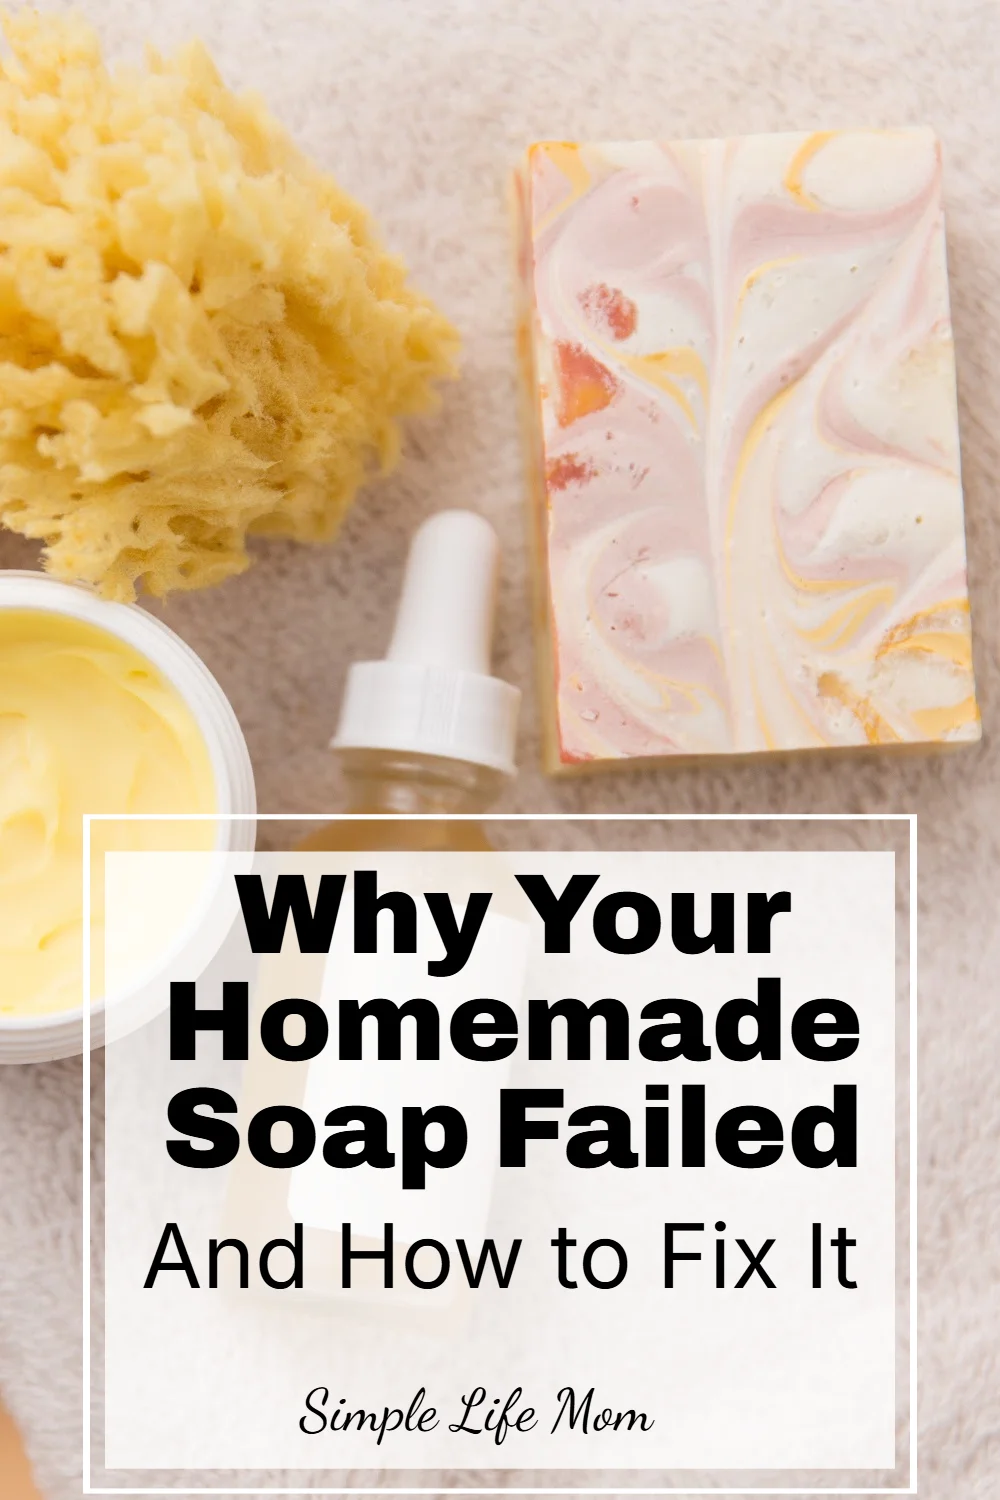
A visual guide to common soap making problems, including seizing, cracking, separation, and overheating, with natural solutions for beginners.

Soap Making Troubleshooting Guide: Why Your Soap Didn’t Turn Out Right (And How to Fix It)

Making homemade soap is such a beautiful, simple skill to learn—but if you’ve ever had a batch go wrong, you know how discouraging it can feel. One minute everything looks perfect, and the next you’re in the middle of soap making troubleshooting because your soap is thickening too fast, cracked, crumbling, or just… wrong.

Here’s the good news: every soap maker has been there. Every mistake is part of the learning process, and most problems are completely fixable—or preventable next time.

This guide will walk you through the most common soap making problems, why they happen, and how to fix them using simple, practical, real-life solutions to get you on the right path.

After all, learning homemaking skills like soap making isn’t just about the end product—it’s about stewardship, patience, and building something meaningful for your home and family. Mistakes are part of learning, and every imperfect batch is still a step toward wisdom, confidence, and self-sufficiency.

Table of Contents

  • Quick Soap Making FAQ
  • Why Did My Soap Seize?
  • Why Did My Soap Separate?
  • Why Is My Soap Too Soft?
  • Why Did My Soap Crack on Top?
  • Why Did My Soap Change Color or Fade?
  • Why Is My Soap Sweating?
  • Why Doesn’t My Soap Lather Well?
  • Why Are There Air Pockets or Tunnels?
  • Why is My Soap Chalky and Crumbly?
  • Why Does My Soap Smell Bad?
  • Gentle Reminders for New Soap Makers

Soap Making Troubleshooting Quick FAQ:

Good soap making starts with great techniques and great recipes. Make sure to read my articles on both so you start with great quality.

Here are my most common questions with rapid answers up front!

Can failed soap be saved?
Yes! Most failed soap can be re-batched or hand-milled (melted and remolded). Learn how here.

What does seizing mean in soap making?
Seizing is when soap batter thickens suddenly due to high temperatures, using fragrance oils, using hot essential oils like cinnamon and clove, or over-mixing. Change to essential oils and soap at cooler temperatures.

Why does my soap get a white powder on top?
That’s soda ash. It’s harmless and can be rinsed or gently shaved off.

Why are lye pockets in my soap after curing?
If you have liquid pockets that give you that slick feeling on your fingers when you feel it, you know it’s lye. You didn’t mix enough and then poured too cool. The oils and lye water didn’t emulsify and separated, not fully saponifying. But don’t worry. As long as you know that you used the right ingredient amounts, you can hand-mill (re-batch) the soap. Learn how here.

So, lets dive into the meat of each topic to make sure you minimize problems in the future, or at least know what to do when they happen.

Soap Making Troubleshooting Guide

Why Did My Soap Seize?

What it looks like: Soap batter suddenly turns thick, grainy, and chunky, like lumpy mashed potatoes.

Common causes:

  • Essential oils or fragrance oils that accelerate trace: Some essential oils are considered “hot” oils and will accelerate trace. If you’re going to make a Fall soap with cinnamon, clove, or nutmeg, then lower the temperature of your oils and lye water slightly more than usual to accommodate this issue.
  • Soaping at high temperatures: When soap making temperatures are above 100 degrees Fahrenheit, soap can come to trace faster.
  • Over stick blending: Using a stick blender can cause soap to come to trace a lot faster than a whisk or hand mixer. Pay close attention.
  • Heavy water discounting: If you don’t use enough water in your recipe, you can have a whole host of problems. The primary issue is lye being concentrated in a way that creates lumps of saponified oil before the other oils can be mixed evenly.

Simple fix:

  • Stop blending with the stick blender. Use a spoon if you need to finish mixing in scent or natural soap colorant but work as fast as you can.
  • Spoon the soap into your mold as quickly as you can.
  • Press firmly and texture the top for a rustic look.

How to prevent it next time:

  • Don’t use Fragrance oils. Use essential oils instead.
  • Soap cooler (80–100°F). If you’re using a recipe with a lot of hard oils like lard, cocoa butter, coconut oil, you have a higher likelihood of saponifying quickly.
  • Hand-stir essential oils into the soap instead of stick blending if you notice it came to trace quickly.
  • Always research scent behavior. There are “hot” essential oils like cinnamon and clove that will cause soap to come to trace quickly.

Why Did My Soap Separate?

What it looks like: Oil pooling, watery layers, or curdled soap batter.

Common causes:

  • False trace: False trace is rare if you measured correctly and your temperatures are right. But if your soap is too cold and you don’t stir enough, you can get results that you don’t see are messed up until you try to take the soap out of the mold.
  • Incorrect measurements: soap recipes are very precise. Measurements are scientific for a chemical reaction. If you measure precisely, you will have a lot less problems.
  • Not enough mixing: If lye water isn’t mixed enough, the water won’t be emulsified into the oils. This will cause pockets of lye water to separate as it sits in the mold.
  • Curing temperature too cold after limited mixing: If didn’t mix great, but you have warm temperatures, sometimes you can luck out and the soap turns out ok. But if you undermixed and then temperatures are too cold it’s a definite combination for lye pockets.

Simple fix:

  • If you catch it before it sets up, re-blend until fully emulsified.
  • If it’s already molded, don’t worry. It can be fixed. If you had a scale problem or forgot something, try to figure out what you did. You can always re-batch or hand mill the batch and add the missing ingredient to fix it. If you didn’t mix enough, hand-mill and mix well.

How to prevent it next time:

  • Always weigh ingredients carefully.
  • Match oil and lye temperatures to at least 80 degrees Fahrenheit.
  • Blend to emulsion. Look for light trace.

Why Is My Soap Too Soft?

What it looks like: When unmolding the soap, your hand may leave fingerprints, or the soap is extremely soft or even fully liquid.

Common causes:

  • Too much water: Double check your recipe and make sure the water amount is correct. It should be 32-38% of the oils.
  • High olive oil content and not enough hard oils: Castile and Bastille soaps can be very soft when first unmolded.
  • Superfat content too high: Too many oils compared to lye water will leave your soap slightly softer than a lower superfat content. Common amounts are 5-15%, unless you are making a salt bar recipe.
  • Not cured long enough: Most of the time, the soap just needs to sit in the mold for a little longer or be cured for a few more days.

Simple fix:

  • Leave it in the mold longer.
  • Put it in the freezer before unmolding.
  • Let it cure longer (3-4 weeks).
  • Rebatch with harder oils if needed.

How to prevent it next time:

  • Edit recipe in lye calculator with coconut oil, tallow, lard, or cocoa butter
  • Slightly reduce water if water content is too high.

Why Did My Soap Crack on Top?

What it looks like: It looks like a crack in a river bed and the soap is a lot darker than usual. When soap overheats it darkens and cracks, as if it is boiling beneath the surface and heat has to escape somehow.

Common causes:

  • Overheating due to hot essential oils or using fragrance oils.
  • Heavy insulation in an already warm room.
  • Sugars or milk cause overheating during saponification: Just like how soap curds can burn when added to water, it also speeds up saponification and creates heat quickly. Always keep this in mind when adding milks and sugars (honey, manuka, etc.)

Simple fix:

  • Cool as soon as possible when you notice it. Place it in the refrigerator for a few minutes to cool it down.
  • Gently press cracks together while warm.
  • Plane the top after curing.

How to prevent it next time:

  • Don’t heavily insulate if the room is already in the mid 70s Fahrenheit.
  • Soap at cooler temperatures if that recipe tends to harden quickly or the oils cause it to set quickly.

Why Did My Soap Change Color or Fade?

What it looks like: Soap is one color when it’s molded, but another when you unmold it. Turmeric is yellow but turns tan. Alkanet root is purple, turns blue, then turns purple again. Beet root is a beautiful pink but turns brown when added to soap.

Common causes:

  • Fading or lye effected natural colorants, especially root powders and herbs.
  • Gel phase: The gel phase is when soap warms to a consistent temperature and goes into gel phase which is a natural glycerin transition time during the first 24 hours of saponification. Gel phase will darken a white soap slightly but is good for coloring when trying to bring out more vibrant colors.

Simple fix:

  • Embrace the natural patina. Soap colors will change based on temperature and colorant used. It’s a beautiful natural process.
  • Learn what changes and how so you can change your recipe as needed for next time.

How to prevent it next time:

  • Research how essential oils change colors in soap. Some will darken the soap bar a lot more than others.
  • Use clays, oxides, and stable botanicals that don’t change color. Clays are pretty consistent. Rose clay, Moroccan clay, or even charcoal are some of my favorites. Check out my book for a full color description and chart of herbs and
  • Control gel phase by not letting it enter gel phase (let it get warm enough for saponification, and not any warmer), or make sure it fully gels for a richer, darker color and harder finished soap.

Why Is My Soap Sweating?

What it looks like: There will be little beads of “sweat” all over the soap as it’s curing. Sometimes it’s enough that there is a pool of liquid under the soap where it sits.

Common causes:

  • This is usually glycerin dew, and it’s very common in humid climates.
  • You probably have a very high glycerin soap.

Simple fix:

  • Store in a dry, cool space.
  • Wrap fully once it’s cured to keep glycerin from beading outside the soap bar.

How to prevent it next time:

  • Cure in low humidity.
  • Avoid airtight curing containers. Let your soap sit out on a table for the first week at least.

Why Doesn’t My Soap Lather Well?

What it looks like: There may be tiny bubbles, but no big lather like you wanted.

Common causes:

  • Too much olive oil. Olive oil or Castile bars don’t have much cleansing power and don’t create bubbles without additives.
  • High superfat: If your soap recipe has a very high superfat content (20% or more), the oils can be weighed down by the extra oils available in the soap bar.
  • Low bubble creating oils: Every oil in a soap recipe has a purpose. If the recipe hasn’t been put together well, it may not account for moisturizing, cleansing, or lather. Learn more about lathering oils.
  • Hard water: The minerals in hard water will kill the bubbles. They also affect your hair, so keep this in mind when switching to natural shampoo bars.

Simple fix:

  • Use a soap saver like this one.
  • Use a water filter to soften hard water.

How to prevent it next time:

  • Balance bubbly and creamy oils.
  • Make sure there’s enough coconut, babassu oil, or castor oil to create a good lather.

Why Are There Air Pockets or Tunnels?

What it looks like: When you take your soap out of the mold and cut it, there are air pockets or tunnels running through your soap.

Common causes:

  • Pouring at thick trace. If the soap is thick, air pockets can be trapped as you pour or scoop the soap into the mold.
  • Not tapping the mold. Tapping the mold gently on a table or countertop can help bubbles escape if the soap is thin enough.

Simple fix:

  • Embrace the unique bar and enjoy it!
  • Hand-mill the finished bar. Your soap will still look rustic, but it won’t have the air pockets on the inside.

How to prevent it next time:

  • Pour at light trace.
  • Tap molds firmly to get air pockets out of the soap.

Why is My Soap Chalky and Crumbly?

What it looks like: The soap is white and chalky and crumbles in your hand. It also may be chalky only on the corners of the mold but solid in the center.

Common causes:

  • Soap is lye heavy. When too much lye is used, soap can become crumbly and chalky.
  • Soap was too cold when within the mold in the first 24 hours. When I’ve poured soap in the winter time, I’ve added a space heater and covered the mold with a towel and can still have the corners get crumbly. This is because the corners became too cold and there wasn’t proper saponification.

Simple fix:

  • If the batch is crumbly only on the outside due to the cold while in the mold, cut those areas off and use the rest of the soap.
  • If the batch was lye heavy, add the soap to a slow cooker as you would when re-batching any soap, but add oil during the process. If you have no idea how much extra lye you added, this can be a risk and you can still have lye heavy soap, but I’ve usually been able to figure out what I’ve done, or I’ve added enough oils that I know the soap is now fine for home use. If you are not sure, discard the batch.

How to prevent it next time:

  • Measure everything very carefully.
  • Make sure your soap is molded warm and kept warm for the first 24 hours. 75 degrees is usually a great temperature to make sure overheating, or soaping that’s too cold doesn’t occur.

Why Does My Soap Smell Bad?

What it smells like: There’s a dusty scent. Something is off.

Common causes:

  • Old or rancid oils.
  • Improper storage. Soap was left out in a hot and humid environment or has a lot of botanicals within it, causing it to go bad faster.
  • Expired fragrance oils.

Simple fix:

  • Discard the batch. There’s nothing else to do if you have rancid oils.

How to prevent it next time:

  • Use fresh oils.
  • Only use essential oils for an indefinite shelf life while still in the bottle.
  • Store soap in a cool, dry environment and store in plastic containers if possible when cured.

Gentle Reminders for New Soap Makers

  • Measure carefully. The smaller the batch, the more specific you need to be.
  • Keep recipes simple until you learn more about ingredients and what they do in soap. You can learn more about soap making oils here.
  • Don’t rush trace. Know what trace is and what you want for your specific recipe. Some soaps you want to pour at light trace so you have time to include colors. Others need to be thicker so you can create swirls or layers.
  • Insulate for 24 hours, longer if soap is still soft. Then cure for 3 weeks so your soap is hard and lasts longer.
  • Enjoy experimenting!

Soap making isn’t about perfection; it’s about learning, growing, and building a simple, natural skill for your home or small business. Every batch teaches you something new, and even the mistakes have value.

Save this guide, come back to it when something goes wrong, and remember: you’re learning a real homestead skill, and that takes time.

If you have a question that wasn’t answered, ask it here.

Tags: , , , , , ,
Herzindagi

Vitamin C Serum: Benefits & Step-by-Step Application Guide This Summer

Summer can be tricky to manage your skin. One day it looks fresh and glowy, the next it feels oily, dull, or uneven despite the same routine. Heat, sweat, sun exposure, and pollution are common concerns during this season. So your skin needs to work with summer and not fight it.

Vitamin C Serum becomes a staple in such seasons. Summer is the time to see the best results if you ever wonder what its use is or whether it’s really worth using every day. All you need to do is use it correctly to protect your skin and keep dullness in check.

Benefits of Vitamin C Serum

Vitamin C is one of the most researched skincare ingredients for a reason. It addresses multiple skin concerns simultaneously, making it ideal for daily use.

  1. Brightens Skin

A brighter complexion is one of the most visible benefits of using a vitamin C serum. A 10 Vitamin C Serum  reduces dullness caused by sun exposure and dehydration, keeping your skin fresh and even-toned. It also helps fade dark spots and mild pigmentation with regular use.

  1. Fights Free Radicals

Sunlight and pollution release free radicals every day that damage your skin. Vitamin C neutralises their effects and reduces long-term damage. It slows early signs of ageing, such as fine lines and loss of firmness.

  1. Boosts Collagen Production

Collagen keeps your skin firm and elastic. Vitamin C supports collagen synthesis, helping your skin remain smooth and resilient as summer sun breaks it down.

  1. Reduces Redness and Inflammation

Vitamin C helps reduce inflammation if your skin becomes irritated or flushed in the heat. It can also improve the appearance of post-acne marks over time.

How to Apply Vitamin C Serum: Step-by-Step Guide

You can get the desired results if you know how to apply vitamin C serum correctly in summer, when your skin is already under stress.

Morning Routine (Best Time for Vitamin C)

Step 1: Cleanse

This is the basis of any skincare routine. Wash your face with a gentle cleanser to remove sweat, oil, and overnight buildup. Clean skin allows better absorption.

Step 2: Tone (Optional)

Apply it now to balance your skin and prep it for serum, if you use one.

Step 3: Apply Vitamin C Serum

Take 2–3 drops on your fingertips and gently pat them onto your face and neck. Avoid rubbing harshly.

Step 4: Moisturise

Use a lightweight, non-greasy moisturiser suited to summer weather. This seals in hydration without clogging pores.

Step 5: Sunscreen Is Mandatory

Vitamin C boosts your skin’s defence, but sunscreen seals the deal. Always use SPF 50+ during the day, even if you’re indoors or it’s cloudy.

When should I apply Vitamin C serum? The answer is morning because it protects your skin throughout the day.

Which Vitamin C Serum Is Best

You can look away from the claims on the label if you’re trying to figure out which Vitamin C serum for face benefits is best. Pay attention to the practical details that actually affect results.

Concentration Matters

Most Vitamin C serums are effective at 10–20% concentration. You can start with 10–15% if you are new to vitamin C or your skin tends to react easily. It does not cause any skin irritation.

Choose the Correct Form

L-ascorbic acid is the most researched form of vitamin C. It penetrates deep into your skin to fight dullness, dark spots, and early signs of ageing. 

Support of Other Ingredients Can Make a Difference

Vitamin C works best when it is not doing all the work alone. Ingredients such as Vitamin E and Ferulic acid stabilise the formula and enhance its antioxidant capacity.  

Packaging Is Not Optional

Vitamin C breaks down quickly when exposed to air and light. Dark, opaque, airtight bottles are ideal for storage, as they protect the formula. If your serum changes colour or smells odd, it is a sign of oxidation.

Pro Tips for Summer Use

  1. Store It Properly

Heat and light degrade vitamin C, so keep your serum in a cool, dark place. Some people even store it in the fridge.

  1. Avoid Certain Pairings

Don’t use Vitamin C at the same time as Retinol or strong exfoliating acids (AHAs/BHAs). Use them at night instead.

  1. Start Slow

Begin using vitamin C every other day if your skin is sensitive. Increase its frequency as your skin adjusts.

  1. Watch for Oxidation

If your serum turns dark yellow or brown, it may have oxidised and may not work well.

Conclusion

Vitamin C serum is the smartest addition to your summer routine. It protects your skin in harsh environments, reduces dullness caused by sun exposure, and supports long-term skin health.

The results feel natural when you understand how to apply vitamin C serum, choose the right formula, and use it consistently. Summer glow doesn’t have to be temporary. It can be a part of how your skin looks every day with the right routine.

Image credits: Freepik

For more such stories, stay tuned to HerZindagi. 

Herzindagi video

Tags: , , , , , ,
Ultimate guide to layering serums for glowing skin

Ultimate guide to layering serums for glowing skin

Get expert tips on layering serums to improve your skincare routine. Find out which serums you can mix for the best results.

Serums are highly concentrated products formulated to deliver active ingredients into the skin to address specific skin concerns, including pigmentation, fine lines, loss of firmness, and dull skin. Although the benefits of using serums are well established, layering them to achieve these benefits poses significant challenges due to chemical interactions and the skin’s tolerance.

What is the best layering of serums?

The overall strategy for layering serums is to apply them from thinnest to thickest and to identify the right time of day for each active ingredient. “Water-based serums, such as Vitamin C or Niacinamide, should be applied first. The slightly thicker products will follow”, Dermatologist Dr Varshini Reddy tells Health Shots. These may include peptides or oil-based serums. The layering order must be correct for each active.

Try using vitamin C and glycerin to get a glass-like look. Image courtesy: Adobe Stock

  1. Vitamin C

An antioxidant that has skin-lightening properties and protects the skin from oxidation. By far the best time to use vitamin C is in the morning, when the skin has the opportunity to shield itself from environmental factors. “To reduce sensitivity, a beginner may use a low concentration that they can gradually increase”, says Dr Reddy. In addition, alternative skin antioxidants are available for those sensitive to vitamin C.

2. Niacinamide (Vitamin B3)

It has numerous benefits for the skin, from barrier repair to sebum control. “Its use will not interact adversely with other creams or serums containing other actives, such as Vitamin C”, says the doctor. Niacinamide works very well both during the day and at night.

3. Retinoids

They are the gold standard for anti-ageing. Retinoids promote skin cell turnover, stimulate collagen production, and help reduce fine lines and hyperpigmentation. “Retinoids should be used in the evening because they are photosensitive. They should also be used cautiously to minimise irritation,” says the doctor. We recommend starting with twice to three times a week. A chemical exfoliant should not be used on the same day as the use of retinoids.

4. Peptides

They are short chains of amino acids that signal the skin to synthesise collagen and support firmness. “They are generally light and can be mixed with most serums, such as antioxidants and retinoids”, says the expert. They may be used either for morning or night care.

Peptides may be used in the morning or at night. Image courtesy: Adobe Stock

Layer serums from thinnest to thickest, and remember to seal them with a moisturiser to keep the active ingredients locked in. “Introduce only one new active ingredient at a time so you can monitor your skin’s tolerance and minimise potential irritation”, suggests Dr Reddy.

How to layer your skin care routine?

A sample layering routine could be: Vitamin C, Niacinamide, and peptides in the morning, followed by moisturiser and broad-spectrum sunscreen. “Then, one might use Niacinamide, retinoids (two to three times per week), AHA/BHA-based toners or serums, peptides, and a hydrating moisturiser”, says the expert. Hydration is key, as water-based serums enhance the penetration and effectiveness of other actives.

What are the benefits of layering skincare?

Overall, layering serums can significantly improve skin outcomes when applied in the correct order, at appropriate concentrations, and at the proper timing. “Being informed about the properties of each active and following principles of evidence-based layering safely optimises the routine for improving texture, brightness, and overall skin health in the patient,” says the dermatologist.

Tags: , , , , ,
Prioritizing Self-Care: A Guide for Black Women to Enhance Well-Being

Prioritizing Self-Care: A Guide for Black Women to Enhance Well-Being

Overview:

Prioritizing mental and emotional well-being is essential for a balanced and fulfilling life, especially for Black women who often face unique societal pressures and expectations. Embracing natural beauty, setting healthy boundaries, cultivating a supportive community, investing in personal growth, and engaging in self-care practices can help boost self-esteem and enhance overall well-being and happiness. Self-love is not a destination but an ongoing process that requires intentional effort and commitment.

Self-love and maintaining self-esteem can be challenging, especially for Black women who often face unique societal pressures and expectations. Prioritizing mental and emotional well-being is essential for a balanced and fulfilling life. Here are five practical ways to practice self-love and boost self-esteem tailored specifically for Black women.

1. Embrace Your Natural Beauty

One of the most empowering steps towards self-love is embracing your natural beauty. This includes accepting and celebrating your unique physical features, skin tone, and hair texture. Here’s how you can do it:

  1. Ditch the Eurocentric Beauty Standards: Understand that beauty comes in all shapes, sizes, and shades. Focus on what makes you unique rather than trying to conform to societal standards that may not represent your true self.
  2. Care for Your Hair and Skin: Invest time in finding hair and skincare routines that work for you. Celebrate your curls, coils, and kinks, and use products that enhance your natural beauty.
  3. Positive Affirmations: Start your day with positive affirmations about your appearance and capabilities. Remind yourself that you are beautiful, worthy, and enough.

2. Set Healthy Boundaries

Setting healthy boundaries is crucial for protecting your mental and emotional well-being. It involves recognizing your limits and communicating them effectively to others.

  1. Learn to Say No: Understand that it’s okay to say no to things that don’t serve your interests or well-being. Prioritize your needs without feeling guilty.
  2. Communicate Clearly: Be assertive in expressing your boundaries to friends, family, and colleagues. Clear communication helps others understand your limits and respect them.
  3. Self-Respect: Setting boundaries is a form of self-respect. It shows that you value your time, energy, and well-being enough to protect them from being depleted by others.

3. Cultivate a Supportive Community

Surrounding yourself with a supportive community is vital for your self-esteem and overall happiness. Seek out relationships that uplift and inspire you.

  1. Find Like-Minded Women: Join groups or organizations that align with your interests and values. Connecting with other Black women who share similar experiences can be incredibly affirming.
  2. Seek Mentorship: Look for mentors who can provide guidance, support, and encouragement. A mentor can help you navigate challenges and celebrate your achievements.
  3. Engage in Open Conversations: Create spaces where you can have honest and open conversations about your experiences, struggles, and triumphs. Sharing your story can be therapeutic and empowering.

4. Invest in Personal Growth

Personal growth is a lifelong journey that involves continuously seeking ways to improve yourself and your life. Investing in personal growth can significantly boost your self-esteem.

  1. Pursue Education and Skills: Enroll in courses or workshops that interest you. Learning new skills or gaining knowledge can increase your confidence and open new opportunities.
  2. Set and Achieve Goals: Set realistic and achievable goals for yourself. Celebrate your progress and accomplishments, no matter how small they may seem.
  3. Practice Self-Reflection: Regularly take time to reflect on your thoughts, feelings, and behaviors. Self-reflection helps you understand yourself better and fosters personal growth.

5. Engage in Self-Care Practices

Self-care is about taking deliberate actions to care for your mental, emotional, and physical health. It’s an essential part of self-love.

  1. Physical Self-Care: Exercise regularly, eat a balanced diet, and get enough sleep. Physical health is closely linked to mental well-being.
  2. Mental Self-Care: Engage in activities that stimulate your mind, such as reading, puzzles, or learning a new hobby. Practice mindfulness and meditation to reduce stress and improve mental clarity.
  3. Emotional Self-Care: Allow yourself to feel and express your emotions. Journaling, talking to a trusted friend, or seeking therapy can help you process your feelings.

Practicing self-love and boosting self-esteem is a journey that requires intentional effort and commitment. By embracing your natural beauty, setting healthy boundaries, cultivating a supportive community, investing in personal growth, and engaging in self-care practices, Black women can empower themselves and lead more fulfilling lives. Remember, self-love is not a destination but an ongoing process that enhances your overall well-being and happiness.

This story was originally published on Word In Black on January 7th, 2026

Tags: , , , , , ,
Best oLive
Privacy Overview

This website uses cookies so that we can provide you with the best user experience possible. Cookie information is stored in your browser and performs functions such as recognising you when you return to our website and helping our team to understand which sections of the website you find most interesting and useful.