CNA938 Rewind - Mind Your Money - Can our beauty routines generate less waste?

CNA938 Rewind – The Wellness Hour – How Auolive is creating skincare for Singapore’s climate

Natural skincare is becoming part of the wider wellness conversation, as consumers look for simple, mindful routines and products suited to Singapore’s hot, humid climate. Cheryl Goh looks at how homegrown brand Auolive is developing locally made skincare, and why caring for the skin can also be part of caring for overall wellbeing with Claire Au, founder of Auolive.

Tags: , , , , , , , ,
Homestead Blog Hop - Homestead tips, ideas, animal care, and recipes every Wednesday

Homestead Blog Hop 616 Fall Crafting and Baked Beans

Welcome to the Homestead Blog Hop. A weekly gathering for homesteaders and simple living enthusiasts. We all share DIY projects, from-scratch recipes, and creative inspiration from our homes to yours.

This week’s hop features yummy foods. It also offers practical ideas that celebrate handmade living and self-sufficiency. Explore ideas that fit a thoughtful, sustainable lifestyle.

Whether you’re looking for seasonal crafts, homemade treats, or encouragement on your homesteading journey, you’ll find plenty of inspiration to carry into the upcoming seasons.

Grab a cup of tea, explore the featured posts, and join us in sharing your own homestead creations.

Meet Your Homesteading Hosts

We’re Kelly from Simple Life Mom, Liz from The Cape Coop, Natasha from Houseful of Nicholes, and Laurie from Ridgehaven Homestead. We’re about from-scratch living, simple ingredients, frugal habits, and intentional, sustainable living. We share recipes, tips, and ideas to support home cooks and makers.

We’re delighted to host the Homestead Blog Hop. You can find fresh inspiration each week for DIY projects, homemade recipes, and practical living ideas. Join us for new ideas and a growing community. Together, we celebrate everyday craftsmanship and thoughtful living.

Follow Us for More Homestead Inspiration

Natasha – Houseful of Nicholes
Facebook | Pinterest | X | Instagram

Laurie – Ridge Haven Homestead
Facebook | Pinterest | Instagram

Liz – The Cape Coop
Facebook | Pinterest | X | Instagram

Kelly – Simple Life Mom
Facebook | Pinterest | X | Instagram

FEATURED POSTS from the Last Homestead Blog Hop

Each week, we take turns selecting three featured posts from the Homestead Blog Hop. These features are shared across all of our social media platforms. They spotlight the creativity and hard work of our fellow homesteaders.

Here are the featured posts from last week’s hop:

1. Mason Jar Crafts for Fall from Mason Jar Crafts

2. Mama’s Southern Baked Beans from Cooking with Kay

3. Three Simple Ways to Welcome Fall into Your Home from Thrifting Wonderland

Congrats! Feel free to grab the featured on button for your post.

Just right click and ‘save image as…‘

Guidelines for the Homestead Blog Hop

  1. Click the “Add Your Link” button below and upload a clear, eye-catching image from your project or recipe. Please link directly to the family-friendly post itself, not your blog’s homepage.
  2. You may link up up to three posts each week.
  3. Take time to visit a few other blogs in the hop and leave a thoughtful comment to let them know you stopped by. Community support makes this hop special!
  4. Please include a link back to the Homestead Blog Hop in your post. Posts without a back link are not eligible to be featured. All featured posts are shared across all hosts’ social media channels.
  5. Share posts that haven’t been linked to the hop before. Older posts are welcome as long as they are new to the hop.
  6. By joining the Homestead Blog Hop, you grant the hosts permission to use one image from your post, with a link back to your site, if your post is selected as a feature next week.
  7. This is a family-friendly link-up designed to encourage, inspire, and support the homesteader in all of us.

Let the Party Begin!

Which project are you excited to try this week? Leave a comment below.

Join Our Homestead Blog Hop Pinterest Board

Follow all of your hosts on Pinterest and send a message if you’d like to be added to our Homestead Blog Hop group board. This board is a great place to share your DIY projects, crafts, and from-scratch recipes with the homesteading community.

Guideline: Only pin posts that you’ve linked up to the Homestead Blog Hop.

Tags: , , , , , ,
TruSkin Launches Nutrient-Rich Skincare Line Featuring Top-Rated Vitamin C Serum

TruSkin Launches Nutrient-Rich Skincare Line Featuring Top-Rated Vitamin C Serum

TruSkin is making waves in the skincare industry with its innovative, plant-powered formulas designed for a variety of skin types. Each product in the lineup is meticulously crafted using high-quality and effective ingredients, catering to the diverse needs of consumers seeking healthier skin.

Among their standout offerings is the Vitamin C Serum, which holds the title of the #1 online-rated serum, backed by over 156,000 positive reviews. This dynamic serum is known for its ability to brighten skin tone, combat free radicals, and support collagen production, resulting in a more youthful appearance. Customers have praised its effectiveness in softening fine lines and wrinkles, contributing to a radiant and healthy complexion.

Expanding on the benefits of Vitamin C, the Vitamin C Super Serum+ is another popular choice. This powerful formula combines Vitamin C with Retinol, enhancing its anti-aging properties. The addition of Vitamin B3 (niacinamide) and Salicylic Acid strengthens its ability to rejuvenate and nourish the skin while addressing issues like uneven skin tone. This serum is further enriched with Organic Aloe Vera, Squalane, Hyaluronic Acid, MSM, and Rose Hip Oil, making it a comprehensive solution for those looking to enhance their skin’s texture and brightness.

TruSkin’s Longevity Eye Cream stands out with its special formulation featuring Green Coffee Bean, which targets puffiness and dark circles effectively. The inclusion of Lingonberry Stem Cells is designed to combat visible damage caused by blue light exposure and oxidative stress, making it a timely addition to anyone’s skincare routine in our digital age.

In addition to these concentrated serums and creams, TruSkin offers a variety of other products, including a Vitamin C Moisturizer, Retinol Serum, and Hyaluronic Acid Serum, among others. For customers looking to streamline their skincare regimen with quality products, there is a limit of five items per order, coupled with the convenience of free shipping.

With a commitment to delivering effective and safe skincare solutions, TruSkin continues to attract a loyal customer base excited about achieving glowing and healthy skin.

Tags: , , , , , , , ,
Horoscope icon

How often to clean makeup brushes and what to use: Experts verdict on TikTok washing machine hack

They get swiped all over our faces and dipped time and again into product and back onto our skin, and yet, makeup brushes rarely get cleaned as often as they should. But it’s worth finding the time to clean them because they are collecting a lot more than just your blush and eyeshadow. 

Cindy Gunawan, Associate Professor at the Australian Institute for Microbiology and Infection, University of Technology Sydney, told nine.com.au that, at the very least, not cleaning makeup brushes leads to “patchy uneven makeup application”.

Your makeup brushes are collecting a lot more than just your blush and eyeshadow. iStockphoto

“Makeup brushes can collect bacteria and fungi, as well as dead skin cells, skin oil (sebum) and dirt,” she said. 

“Using dirty brushes transfers this build-up to our face. This can lead to skin irritation, bacterial infections (staph), acne, as well as eye infections (for eye brushes), in particular in individuals with sensitive skin.”

So how often do we need to clean them? Gunawan’s recommendation differs depending on the brush and where it’s used.

“Lip brushes [should be cleaned] after every use; these readily collect dead cells, saliva, and are therefore a potential breeding ground for bacteria in moist environments. Cream/liquid products (foundation, cream blush) [need cleaning] once a week or more often for sensitive skin,” she said.

“Powder products (setting powder, blush) [should be cleaned] once a fortnight/month. Makeup sponges [need cleaning] once a week at minimum and need to be replaced after one to three months. Eye brushes [should be cleaned] ideally every one to two weeks; eyes are prone to infections (pink eye).”

Former makeup artist and beauty content creator Amelia Singson gave a blanket recommendation depending on whether they’re used for business or pleasure.

“Professionals who use them on clients should clean them between clients. For personal use, in a perfect world you’d clean them with a brush cleaner after every use but realistically, they should be cleaned at least once a week,” she said.

Since makeup brushes need regular cleaning many are resorting to a TikTok-famous hack that cleans all your brushes in one go and can be done while you wash your clothes. But this trick may be too good to be true with experts warning it could ruin the brushes, and it can’t be good for the washing machine either.

“I’ve seen this, and I wouldn’t recommend it,” Amelia Singson, former makeup artist and beauty expert, told nine.com.au. 

“It seems like the easier option, but it’s a fast way to shorten the life of your brushes. Long-wear makeup can get really embedded into the bristles, and a washing machine may not actually remove all of it.

“You don’t want to be soaking brushes all the way up to the ferrule (handle), as this can loosen the glue and eventually cause shedding.”

As for the washing machine, the makeup that does come off could leave your clothes stained and your appliance filthy.

“The impact on washing machines is more the makeup residue, oil, dyes that may not fully leave the drum, causing colour and oil transfer on the next load, getting caught up in the day to day build up of pipes, waste drains and drum,” Nicole Gibson, laundry expert from Soka Australia, told nine.com.au.

“The issue is you [shouldn’t] use an enzymatic laundry detergent to clean these, so it’s not going to clean and wash away during the cycle very effectively, leaving build up and residue which can then be transferred onto clothing. Team that up with a hot water load, and you are facilitating a stain that is going to be difficult to remove.”

Be careful not to soak the handle, as water can loosen the glue. iStockphoto

So the best way is still cleaning makeup brushes one by one with water and shampoo, dishwashing liquid or a specially designed brush cleaning product. For a budget-friendly option, Singson is a fan of Sunlight soap, which is $4.80 for a 500g pack at Woolworths.

Alcohol-based sprays are easy to use on the go and to clean brushes quickly, but Singson doesn’t recommend it as your sole brush cleaner because “over time they can be drying on delicate bristles”.

To clean brushes, Gunawan recommended these steps:

  1. “Under warm running water, rinse the bristle tips – be careful not to soak the handle, as water can loosen the glue.
  2. Put a small amount of mild soap on our palm, then gently swirl the bristle on our palm to make lather, this should loosen the debris in the bristle. 
  3. Rinse under running water, until the water is clear.
  4. Squeeze out excess water with a clean paper towel.
  5. Lay flat to air dry completely; be careful not to put them upright, as water can go into the handle.”

As for makeup sponges, Singson said they are “designed to absorb liquid so they get really filthy, but they’re so easy to clean”.

Here are the steps she recommended:

  1. “Soak your sponge in warm water, add a little cleanser and gently squeeze and massage the sponge until the makeup comes out. 
  2. Rinse and squeeze underwater until it runs clear.
  3. Leave it somewhere clean and well-ventilated to dry.”
Tags: , , , , , , , ,
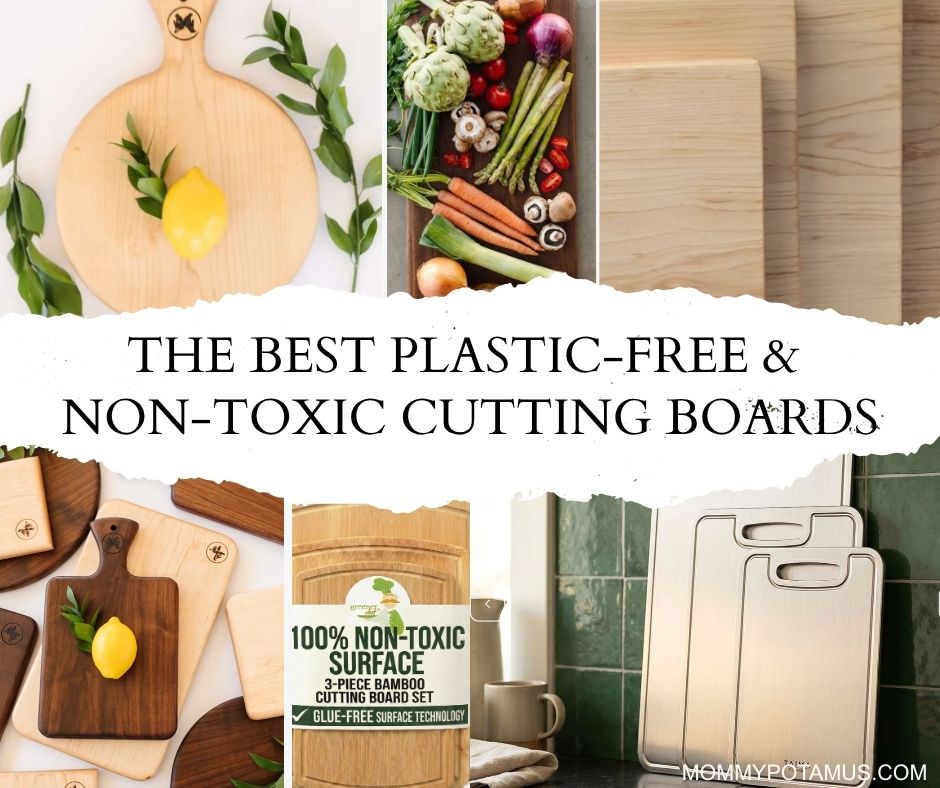
The Best Plastic-Free & Non-Toxic Cutting Boards

The Best Plastic-Free & Non-Toxic Cutting Boards

My last plastic cutting board perished 18+ years ago in an accident that was entirely my fault – one involving a matchbox-size kitchen with very little counter space, a spiral cooktop burner that hadn’t cooled completely, and the nauseating smell of melting plastic.

I replaced it with what I thought was a healthier option.

And then I replaced that a few years later.

So while a lot of articles about non-toxic cutting boards assume you’re finally ditching plastic, I’m guessing at least some of you already have. If so, you already know that’s the easy part.

Figuring out what to use instead is the hard part.

Maybe, like me, you started with a bamboo board that seemed like a natural, sustainable choice, but didn’t pass muster when you started looking into formaldehyde resin glues. Or maybe you tried a different material that didn’t hold up over time . . . or didn’t live up to its non-toxic claims.

That’s why I’ve put together this guide – we’ll cover the pros and cons of different materials, what’s worth buying, what I would avoid, and specific product recommendations for each category.

Quick Picks

If you’re short on time and want to skip to my top recommendations, here are the options I’d look at first.

  • Best handcrafted value: Adirondack Kitchen – Solid maple, cherry, or walnut with no glue, finished with organic coconut oil and beeswax. The styles are beautiful enough to leave out on the counter, and the prices are surprisingly approachable for handmade, one-piece boards.
  • Best modern heirloom: Mamma Mangia – Another excellent one-piece option, with maple or black walnut, no glue or synthetic sealers, and a fractionated coconut oil + beeswax finish. The styling is a little more modern and substantial.
  • Best budget-friendly option: Greener Chef Bamboo – A good choice if solid hardwood isn’t in the budget. The cutting surface is glue-free and the boards arrive raw and untreated, so you can season it with the food-grade oil of your choice (they recommend walnut).

I’ve included additional recommendations- including hinoki and a dishwasher-safe option – later in the article.

The Problem With Plastic: Microplastics & Bacteria

Plastic cutting boards have always been convenient. They’re lightweight and inexpensive, and for a long time they were treated as the hygienic default.

The problem is that every time a knife cuts into one, it can also cut away tiny pieces of the board itself.

That’s where microplastics come in.

A 2023 study found that chopping on polyethylene and polypropylene cutting boards can release hundreds – or even more than a thousand -microplastic particles during a single food-prep session. Based on how much plastic was released in their experiments, the researchers estimated that regular use could expose someone to as much as about 50 grams of cutting-board microplastics per year. (1)

That’s roughly the weight of 10 credit cards. (2)

To be clear, that’s an estimate based on the researchers’ assumptions about how often people use their cutting boards – not a measurement showing that everyone with a plastic board actually eats 10 credit cards’ worth of plastic every year. But the underlying finding is pretty hard to argue with: when a knife repeatedly cuts into plastic, some of that plastic comes off.

And somewhat ironically, the more fresh food you chop at home, the more opportunities there are for that exposure.

I’ve written more about what we currently know – and don’t know – about microplastics and health here, along with some of the research on ways our bodies may eliminate them here.

That’s not the only issue, though. For decades, we were told plastic was the most hygienic choice because it’s non-porous and can be sanitized in the dishwasher.

But plastic is soft enough to accumulate knife scars, and once those grooves get deep, they can become harder to clean. One well-known study found that bacteria placed on wood quickly became undetectable, while bacteria on plastic remained detectable much longer. (3)

Wood: My First Choice For Cutting Boards

Wood is durable, easy on knives, renewable, repairable, and available in several constructions. But “wood cutting board” can mean several very different things.

Here’s what I look for:

1. Solid wood construction

When it comes to cutting boards, simple is a selling point.

A board made from one solid piece of wood has one obvious advantage: there’s no glue to research, no manufacturer to email, and no question about whether the adhesive is exposed at the cutting surface. That matters because many common food-safe wood glues are synthetic polymers, so if the goal is to avoid plastic-like materials entirely, one-piece construction makes the selection process easier.

That doesn’t automatically mean every glued board is unsafe – some boards use glue in ways that don’t come into contact with the cutting surface – but it does mean there’s one more material to factor in.

2. The Best Woods for Cutting Boards

Hardwoods strike a good balance between durability and “forgiveness” – they’re hard enough to resist deep gouging but soft enough to keep your knife edge sharp. I’ll start with three North American classics – maple, walnut and cherry – plus a few more worth considering.

Maple

Maple is popular for good reason: It’s hard enough to hold up well to daily chopping, but still relatively gentle on knives. Its fine, tight grain gives it a smooth cutting surface, and its light color makes it easy to see when the board needs cleaning.

Walnut

A favorite for its rich chocolate tones, walnut is slightly softer than maple. Its darker color hides stains and wears beautifully, and it’s another relatively knife-friendly hardwood.

Cherry

Cherry is also softer than maple and typically a little softer than walnut too, so it’s another knife-friendly option.

It starts out lighter and develops a deep reddish-brown color with age and exposure to light, which gives it a really warm, lived-in look over time. It will show wear more than maple, but for many people that’s part of its charm.

Beech

Beech is another solid option for cutting boards – it’s hard, fine-grained, relatively affordable, and has a long history of use in kitchen tools and butcher blocks.

There’s also some interesting research behind it. In a 2023 study comparing four cutting-board woods, unfinished European beech generally had the lowest amount of detectable bacteria remaining on the surface. The study didn’t include American beech, so I wouldn’t assume the results apply perfectly to both species, but the two are closely related and structurally similar enough that I consider the findings encouraging. (4)

Its main downside is that American beech tends to shrink and swell quite a bit as its moisture content changes, which can make it more prone to warping if it’s soaked or allowed to dry unevenly.

Acacia

Acacia has become incredibly popular because it’s beautiful, affordable, and naturally rich in oils that help it resist moisture.

However, it’s often harvested at a young age, so planks tend to be smaller. Cutting boards are usually made by joining lots of planks or blocks together. Joining means using glue, which may mean emailing the manufacturer to find out exactly what they use.

Titebond III Ultimate Wood Glue is one of the better options I’ve come across so far – it’s waterproof once cured and compliant for indirect food contact, which is why the company recommends it for cutting boards. Still, “indirect food contact” is not the same thing as approval for use as a direct cutting surface, which is one reason I still prefer a solid piece of wood when I can find one.

Hinoki

Hinoki is the outlier here, in the best possible way.

It’s actually a softwood -Japanese cypress – not a hardwood. Normally “soft” is considered a drawback in a cutting board, but hinoki is prized precisely because it has a little more give under the knife.

That makes it exceptionally gentle on fine blades, like those used to prepare sushi.

It’s also lightweight, aromatic, and naturally resistant to decay and fungal growth.

A few things to know:

  • It can “self-heal” a bit: The soft wood fibers swell slightly when washed, which can help shallow knife marks close back up.
  • It can warp if it stays wet unevenly: Don’t leave it sitting flat on a wet counter or towel. Let it dry upright so air can circulate around both sides.
  • Heavy chopping can leave deeper marks: Cleavers and serrated knives are more likely to gouge the soft surface.
  • Traditional unfinished boards are often wetted before use: This helps reduce absorption of food odors and stains.
  • Care varies: Most traditional hinoki boards are not oiled, but some are, so follow the manufacturer’s instructions.

3. Simple, Food-Safe Finishes

Most cutting board makers use food-grade mineral oil because it’s inexpensive and easy to apply. Occasionally, though, you’ll find boards finished with beeswax, carnauba wax, fractionated coconut oil, pure tung oil, linseed oil, or blends of several of these.

I prefer natural oils and waxes when they’re available because:

  • Mineral oil is petroleum-derived. Food-grade mineral oil (sometimes called liquid paraffin) is different from technical grade because it’s refined to remove carcinogenic polycyclic aromatic hydrocarbons. Still, it’s not my first choice for a surface that comes into direct contact with food.
  • It doesn’t cure or harden in the wood. Mineral oil stays liquid, gradually washes out with use, and needs to be reapplied fairly often.
  • Some plant oils offer more durable protection. Pure tung oil, for example, polymerizes as it cures, helping cutting boards resist water much better over time.

That difference shows up pretty clearly in real-world testing, too. In one comparison of common food-safe wood finishes, mineral oil provided the least durable protection under repeated water exposure, while pure tung oil held up much better. (5)

With that said, if budget and aesthetics are a consideration and I find a beautiful or affordable cutting board that checks every other box, mineral oil wouldn’t stop me from buying it.

It washes away relatively easily anyway, so my personal approach has been to wash the board thoroughly, use it, and then maintain it going forward with a natural oil or wax I prefer.

4. The Maintenance Factor: Oils & Waxes

Even a great wooden cutting board needs a little maintenance. Periodically conditioning the wood helps slow moisture absorption, reduces drying and cracking, and can help prevent warping over time.

The good news is that this part doesn’t need to be complicated. A few options I like are:

  • Fractionated coconut oil: Soaks into the wood and helps keep it from drying out. It’s also much more oxidation-resistant than regular coconut oil and many other cooking oils, so it’s less likely to go rancid.
  • Beeswax: Stays closer to the surface, where it adds a little more water resistance and helps slow down how quickly the oil washes out.
  • Carnauba wax: A harder plant wax that can be added to beeswax/oil blends for a firmer, more durable surface finish.

That’s why you’ll often see cutting board conditioners made from a blend of oil + wax rather than just one or the other.

Tung oil and linseed oil work a little differently. Unlike fractionated coconut oil, they’re drying oils, which means they react with oxygen and gradually polymerize as they cure. Instead of remaining liquid in the wood, they harden and create a more durable, water-resistant finish.

  • Pure tung oil is one of my favorite options for that reason, although it needs adequate curing time between coats and before the board is used. Just make sure it really is pure tung oil – products labeled “tung oil finish” can contain other oils, solvents, or additives.
  • Linseed oil can work similarly, but the label matters. Raw linseed oil is very different from conventional hardware-store “boiled linseed oil,” which often contains added metallic drying agents to speed up curing.

I generally avoid using regular kitchen oils like olive, avocado, or unrefined coconut oil because they can oxidize and eventually develop off odors.

How often a board needs conditioning depends on the wood, how often you wash it, and what it was originally finished with. I usually go by feel: if the surface starts looking pale, dry, or rough, it’s probably ready for a little attention.

And if a solid wood board gets really worn, that doesn’t necessarily mean it’s finished. Many can be lightly sanded to remove shallow knife marks and roughness, then reconditioned with oil or wax to give the surface a fresh start.

Eventually, of course, every cutting board reaches the end of its useful life. USDA recommends replacing boards once they become excessively worn or develop grooves that are difficult to clean.

Is Wood Safe For Raw Meat?

Yes. USDA says both wood and nonporous cutting boards can be used for raw meat and poultry, although it recommends keeping a separate board for raw proteins when possible to reduce cross-contamination. (6)

Part of the confusion around wood comes from the assumption that porous = unhygienic. But research suggests it’s not that simple.

In a well-known experiment comparing wood and plastic, bacteria placed on wooden boards quickly became difficult to detect at the surface, while bacteria on plastic remained detectable much longer. (3) More recently, a 2025 study comparing sugar maple with HDPE plastic found a similar pattern: E. coli on maple dropped to the study’s detection limit within two hours, while significantly more remained detectable on plastic. (7)

That doesn’t mean wooden boards don’t need to be washed, dried well, and refreshed or replaced when they become excessively worn. It does mean that wood isn’t automatically the less hygienic choice just because it’s porous.

A Quick Note About Edge Grain & End Grain

When you shop for wood cutting boards, you’ll run into terms like face grain, edge grain, and end grain. They sound complicated, but they’re really just describing which direction the wood fibers are facing.

Imagine a plank of wood as a bundle of long straws:

  • Face grain: You’re cutting on the broad side of the bundle.
  • Edge grain: Turn that bundle onto its narrow edge.
  • End grain: Cut the bundle into short sections, stand them upright, and look down into the ends of the “straws.”

End-grain boards are usually the most knife-friendly because the blade can slip slightly between the fibers rather than repeatedly cutting across them. They also tend to hide knife marks well and hold up well under heavy chopping.

The tradeoff is construction: end-grain boards have to be made from lots of smaller blocks glued together.

Edge-grain boards are generally simpler and more affordable, but many are made from glued strips too.

That’s separate from one-piece or solid-slab construction, which simply means the board is made from one continuous piece of wood with no glued seams.

So, very broadly:

  • Simplest construction: one-piece solid wood
  • Most knife-friendly: end grain
  • Middle ground: edge grain

For me, the no-glue advantage of a one-piece board usually wins, but there are some beautifully made edge- and end-grain boards worth considering too.

Bamboo: A Good Option With A Few Caveats

Bamboo is technically a grass, not a wood. It grows incredibly fast, which is one reason it’s often described as a sustainable material. It’s lightweight, resists water better than many hardwoods and – probably most importantly for families on a budget – is often one of the most affordable plastic-free cutting board options.

However, a lot of bamboo products – including cutting boards and clothing – come with “eco-friendly” and “non-toxic” marketing claims that don’t always hold up under scrutiny. That’s not to say there aren’t good options – there are – but it’s important to know what to watch out for, and what to look for instead.

Because bamboo grows in hollow stalks rather than thick slabs of lumber, cutting boards usually have to be built from multiple pieces or layers.

With conventional bamboo boards, that often means lots of narrow strips joined together, with glue lines running right through the cutting surface.

That’s where “mystery glue” becomes an issue for me. Manufacturers don’t always disclose exactly what adhesive they use, but we do know that some engineered bamboo products are made with formaldehyde-based resins. Even when an adhesive is considered food-safe, it’s typically a synthetic polymer – another consideration if the goal is to minimize plastic-like materials in direct contact with food.

A board constructed with a glue-free cutting surface is different. Some newer bamboo boards use broad, flattened sections of bamboo for the outer layers, so there are no adhesive seams where your knife and food make contact. There may still be adhesive inside the board, but for me that’s less of a concern.

Bamboo also tends to be fairly hard. That makes it durable, but generally less forgiving on knife edges than woods like walnut, cherry, or hinoki.

Titanium and Stainless Steel: Simple, Nonporous Options

Metal cutting boards are gaining traction, especially for messy jobs like handling raw meat or fish.

Both stainless steel and titanium have some obvious advantages: they’re nonporous, plastic-free, don’t absorb odors or food juices, and are very easy to clean. Many are dishwasher-safe, too.

The biggest tradeoff with either one is knife wear.

Some titanium cutting-board manufacturers argue that titanium should be gentler on knives because it’s softer than the hardened steel used in most kitchen blades.

But real-world testing doesn’t necessarily support that conclusion. In at least one direct comparison, both stainless steel and titanium dulled knives significantly faster than wood or rubber, and titanium actually caused more loss of sharpness than stainless steel under the conditions tested. (8) Serious Eats also found substantial dulling after testing a titanium board. (9)

Titanium does have a few other advantages that may matter on a cutting surface. It’s much lighter than stainless steel and exceptionally resistant to corrosion, including in many chloride-rich environments. That could be useful on a board that regularly comes into contact with salt and acidic foods.

I haven’t personally used either type of metal cutting board, so I can’t speak from experience about how they feel in everyday use.

For now, I see both as more of a specialty cutting surface than an everyday board – something I might use for breaking down a chicken or other messy prep, then switch back to wood for most of my chopping.

If you choose titanium, there’s one additional thing to check: make sure it’s actually titanium. Some products marketed as “titanium” are stainless steel, layered materials, or metal with a titanium coating. I’d look for a company that clearly discloses the grade or purity rather than relying on the word “titanium” in the product name.

I’ve included a verified titanium option later in the article.

Glass: Easy To Clean, Hard On Knives

Glass is non-toxic, affordable, nonporous, and easy to sanitize . . . but I don’t recommend it for everyday chopping.

The biggest issue is your knives. Glass is much harder than wood, so every chop puts more stress on the blade edge and can dull or roll it surprisingly quickly. It’s also loud and can be slippery, which makes prep less comfortable and potentially less safe.

For serving, rolling dough, or other prep that doesn’t involve much cutting, glass can be very useful. As an everyday cutting surface, though, I’d choose something else.

Rubber Boards: Not As Natural As They Sound

At first, rubber seems like an ideal choice for cutting boards – it’s soft enough to protect knives and easy to clean. Unfortunately, what manufacturers are calling “rubber” is not natural latex made from the milky white sap of the Hevea brasiliensis tree.

Instead, these boards are made from a variety of engineered materials. Some are described simply as proprietary “synthetic rubber” or high-density rubber compounds, while others use synthetic elastomers or materials such as polyvinyl acetate (PVAc). Some incorporate polyethylene or other additives, and some are reinforced with wood pulp or built around a wood core.

In other words, “rubber cutting board” doesn’t really tell you very much about what the cutting surface is actually made from – and many manufacturers don’t disclose the full formulation.

So, while they are far gentler on knives than standard plastic, they still shed mystery polymers into food. And one more thing to be aware of is that some manufacturers blend antimicrobial compounds including MicroStop® directly into the rubber matrix. MicroStop® is considered proprietary, so we don’t actually know what’s in it.

I’ve looked around for cutting boards made with natural rubber, and as far as I can tell they don’t exist. So despite the fact that synthetic rubber boards are famously gentle on knives, this is one category I personally skip.

Marble & Granite: Better For Serving Than Chopping

Marble and granite boards are gorgeous for serving things like charcuterie, but I wouldn’t use them as everyday cutting boards.

They’re extremely hard, which means they’re tough on knife edges, and they’re also heavy and awkward to move around.

Marble has another downside: acidic foods like lemon juice, tomatoes, and vinegar can etch the surface, leaving dull spots and tiny imperfections over time. Granite is generally more resistant, but it can still absorb moisture or stain if it isn’t properly sealed.

So while stone is a non-toxic option, I think it makes much more sense for serving, rolling dough, or other prep that doesn’t involve much chopping.

Paper Composite: Not Just Paper

Paper composite boards are typically made from layers of paper or wood fiber that are saturated with resin, then fused together under heat and pressure to create a dense, nonporous surface.

People like them because they’re thin, durable, dishwasher-safe, and easy to sanitize. But from a materials standpoint, they’re not as simple as they sound.

The cutting surface isn’t just paper – it’s paper held together and hardened with resin. So, you’re not really cutting on paper – you’re cutting on a resin-bound composite.

In some cases, that resin is proprietary, which means there’s only so much you can learn about what’s actually in the material.

I prefer cutting surfaces made from materials that are fully disclosed, so I’m willing to reconsider this category if more information becomes available. For now, if I’m choosing between a solid piece of wood and a paper composite held together with an undisclosed resin system, I’m going with the wood.

Top Recommendations

After sorting through a lot of materials, construction methods, finishes, and price points, these are the boards I think are most worth considering.

🌲 Adirondack Kitchen: Best Handcrafted Value

Materials: Maple, cherry, or black walnut
Construction: One solid piece; no glue
Finish: Organic coconut oil + beeswax
Made in: Adirondack Mountains, New York
Price: About $25-$75+

Why It Made The Cut

Adirondack Kitchen cutting boards have a gorgeous, warm design that adds beauty and character alongside functionality. They are definitely the kind of boards you’ll want to display on your counter instead of tucking away after dinner prep.

They’re made from one solid piece of maple, cherry, or walnut, finished with organic coconut oil and beeswax, and available in a wide range of shapes and styles. Some have juice grooves, some have looped handles, and many can be personalized or engraved.

This large maple board is about an inch thick and can be ordered with or without a juice groove. This cottage-style board has looped handles and feels a little more special, and this round board is unlike almost anything else I came across – it’s so pretty.

Each one would make a beautiful wedding, housewarming, or holiday gift, especially with the engraving option.

Also for handmade, solid-wood boards with this much character, many of the options from this shop are much more affordable than I expected.

🍋 Mamma Mangia: Best Modern Heirloom

Materials: Maple or black walnut
Construction: One solid piece; no glue
Finish: Organic fractionated coconut oil + beeswax
Made in: USA
Price: $99-$289

Why It Made The Cut

Mamma Mangia also comes in a range of styles and options that feel a little more modern.

The boards are made from one solid piece of maple or black walnut with no glue or synthetic sealers, then conditioned with coconut oil and beeswax.

They offer a different handle style than Adirondack Kitchen, which may appeal more if you prefer an integrated grip rather than a looped or farmhouse-style handle. Like most boards made from one solid piece of hardwood, they can also be lightly sanded and refinished as they wear, which gives them the potential to last for many years – or even be passed down.

🪵 Sten Wood Lab: Best Basic Solid-Wood Board

Materials: Hard maple, black walnut, or white oak
Construction: One solid piece; no glue
Finish: Mineral oil/beeswax
Made in: Wisconsin, USA
Price: About $37+

Why It Made The Cut

Remember when I said “basic” is a selling point when it comes to cutting boards? Sten Wood Lab is a good example.

Their boards are simple, solid slabs of wood with no glue or laminations, handmade in Wisconsin. They’re also available in several smaller sizes, which is useful if you don’t need a giant board taking up half the counter every time you want to slice an apple.

The standard maple boards and walnut options are finished with food-grade mineral oil and beeswax, which isn’t my first-choice finish, but it wouldn’t stop me from buying an otherwise good solid-wood board.

They also offer white oak. It’s durable and naturally resistant to moisture, but it has a coarser grain and tends to shrink and swell more as its moisture content changes, which may make it more prone to warping than other options.

If you want a straightforward, no-frills solid hardwood board at a relatively affordable price, this is a good one to look at.

🔪 Shun Hinoki Boards: Best For Knife Lovers

Materials: Hinoki wood
Construction: One solid piece; no glue
Finish: Unfinished
Handmade in: Japan
Price: $35+

If protecting your knife edges is a top priority, hinoki is one of my favorite options.

Unlike the hardwood boards above, hinoki is a Japanese cypress softwood, so it has a little more give under the blade. That’s one reason it has traditionally been paired with fine Japanese knives.

It’s also lightweight, naturally aromatic, and easy to move around the kitchen – especially compared with a thick hardwood board.

The tradeoff is that it needs a little more thoughtful care. Because the wood is soft, heavy chopping can leave deeper marks, and it’s important to let the board dry evenly so it doesn’t warp.

If you own good knives and want a cutting surface that’s especially gentle on them, though, hinoki is hard to beat.

The cutting board below is made from one solid piece of hinoki cypress – no joints, no glue.

🎋 Greener Chef: Best Budget-Friendly Bamboo

Best for: Families who want to get away from plastic for around $20.

Material: FSC-certified bamboo
Construction: Glue-free cutting surface
Adhesive:
Price: Under $20

Why It Made The Cut

Wood is easier on knives, but bamboo is easier on the budget.

What I like about Greener Chef is the way they’ve addressed one of my biggest concerns with bamboo boards: glue at the cutting surface.

Instead of making the board from lots of narrow strips with exposed glue lines, the outer surfaces are made from flattened bamboo cylinders that create a continuous cutting surface. Greener Chef says the board has three layers, with any adhesive confined to the inner construction where it doesn’t come into contact with food.

The boards also arrive raw and untreated, so there’s no mineral oil or synthetic sealer to work around. The company recommends seasoning them at home with walnut oil or another food-grade oil.

I’ve reached out to ask for more information on the internal construction of the board, and will update when I hear back. Overall, this design makes me much more comfortable recommending it than a conventional laminated bamboo board.

Material: 304 stainless steel
Construction: Solid stainless steel cutting surface
Non-slip: Silicone edging/pads
Dishwasher-safe: Yes
Price: About $25+

Why It Made The Cut

If you like the idea of a nonporous metal cutting board but don’t want to spend titanium prices, 304 stainless steel is the more practical option.

It’s widely used for food-contact applications, won’t absorb odors or food juices, and is easy to clean. This style also comes with a silicone mat to help keep the board from sliding around on the counter.

The tradeoff is the same one I mentioned earlier: metal is much harder on knife edges than wood. I haven’t personally used a stainless steel cutting board, so I can’t speak to how this particular one feels in everyday use, but I’d view it as a specialty board for messy prep rather than my main chopping surface.

💧 Taima: Best Dishwasher Safe Option

Material: Grade 1 titanium
Purity: 99.89% titanium (per SGS testing reported by Taima)
Construction: Solid titanium cutting surface
Dishwasher-safe: Yes
Price: From about $99

If dishwasher-safe cleanup is a priority, I think titanium has a slight advantage over stainless steel because it’s exceptionally resistant to corrosion – even with repeated exposure to water, salt, and acids.

Taima is one of the few titanium boards I found that clearly identifies the grade and purity of the metal, which is especially helpful in a category where some products labeled “titanium” are actually coated or made from other metals.

It’s also much lighter than stainless steel.

The challenge with this category is knowing whether you’re actually getting titanium. Taima is one of the few companies I found that clearly discloses the material used in its cutting boards. They say an SGS test found 99.89% titanium, and their certification page says readers can request the full report by email. They have a pretty enthusiastic customer following for all their products (including cookware).

The tradeoff is knife wear. Metal is less forgiving than wood, so I personally prefer wood as my main everyday chopping surface.

How to Care for Your Non-Toxic Cutting Board

First, check the manufacturer’s care instructions, because hinoki, hardwood, bamboo, and titanium all have slightly different needs.

For most wood and bamboo boards, the basics are pretty simple: wash with warm water, a mild dish soap, and a natural fiber scrubbing sponge. Avoid soaking them, and let them dry thoroughly after washing.

For stubborn odors or stains – garlic, I’m looking at you – coarse salt and half a lemon can help scrub and deodorize the surface.

Wood boards also have one advantage I really love: when they start looking worn, they can often be restored instead of replaced.

A solid board can be sanded to remove knife marks and rough spots by working from medium- to fine-grit sandpaper until the surface is smooth again. After that, just condition it with your preferred oil or wax and put it right back to work.

That’s part of why wood cutting boards are my favorite. A good one can pick up scratches, stains, and a little character over the years, but with basic care it can last a very long time – and when the surface starts showing wear, you don’t necessarily have to throw it away and start over.

Sources

  1. Yadav, H., Khan, M. R. H., Quadir, M., Rusch, K. A., Mondal, P. P., Orr, M., Xu, E. G., & Iskander, S. M. (2023). Cutting Boards: An Overlooked Source of Microplastics in Human Food?. Environmental Science & Technology.
  2. Culpepper, J. R. (2023). Making Meals Without Microplastics: Tips for Safer Cutting Boards. Environmental Working Group.
  3. Ak, N. O., Cliver, D. O., & Kaspar, C. W. (1994). Cutting Boards of Plastic and Wood Contaminated Experimentally with Bacteria. Journal of Food Protection.
  4. Vega Gutierrez, S. M., Vega Gutierrez, P. T., Waite-Cusic, J., & Robinson, S. C. (2023). Wood Cutting Board Finishes and Their Effect on Bacterial Growth. Coatings.
  5. Spagnuolo, M. (2022). Stop Using Mineral Oil for Cutting Boards and Utensils. The Wood Whisperer.
  6. U.S. Department of Agriculture, Food Safety and Inspection Service. Cutting Boards. USDA Food Safety and Inspection Service.
  7. Kamdem, D. P., McIntosh, D., & Sinha, A. (2025). Survival of Escherichia coli on Sugar Maple and High-Density Polyethylene Cutting Boards. Journal of Food Protection.
  8. Kaminski, A. (2025). I Tested Titanium vs. Stainless Steel Cutting Boards: One Destroyed My Knife. Prudent Reviews.
  9. Murray, T. (2026). Do You Need a Titanium Cutting Board? We Reviewed One – Here’s What You Should Buy Instead. Serious Eats.

Share with a friend! 👇

Tags: , , ,
Selection of herbal powders in brown bowls with greenery, beside a man indoors

Natural Care for Skin & Hair

Men have started taking their grooming routine seriously these days. Therefore, they try to incorporate products made only from natural ingredients that do not harm their skin and hair in the long term. DIY skincare and hair care has also become quite popular among men these days. This has increased the demand for ingredients such as herbal powders that can be integrated seamlessly in your skincare and hair routines. You can make a DIY face pack, hair mask, and numerous other products from these herbal powders to make your grooming routine better. In this blog, we will look at the top 10 best herbal powders when it comes to men’s grooming requirements.

Why Should Men Consider Herbal Powders for Grooming?

Men must consider herbal powders for grooming because of these reasons:

Natural Ingredients for Everyday Grooming

Plant-based ingredients are healthy and safe for daily use. Also, they can be included for making simple DIY formulations that do not alter their skin or hair health in any way. Also, these natural herbal powders are suitable for a wide range of men’ s grooming needs.

Benefits for Skin and Hair

Herbal powders possess deep cleansing abilities due to their exfoliation properties. Due to this, they can be used for cleansing your skin and hair deeply. Their conditioning properties ensure that your hair becomes dense, soft, and manageable. These powders contain nutrients that enrich your scalp and prevent issues like dandruff. So, you can use them for supporting your hair and skin health.

10 Best Herbal Powders for Men’s Grooming

These are the 10 best herbal powders suitable for men’s grooming needs:

Neem Powder

Neem powder has natural antibacterial properties due to which it can be integrated in your skin and scalp care routines. You can integrate neem powder into these routines by using it via DIY face packs and hair masks. It is mostly recommended for people who have oily or blemish-prone skin.

Amla Powder

Amla powder is being used traditionally in hair care because of its hair rejuvenating properties. It is mostly used for hair and scalp care applications. A simple hair mask using curd, amla powder, aloe vera gel, and other soothing ingredients can be created for nourishing your scalp and hair. These properties make amla powder one of the best herbal powders for regular hair care routines.

Brahmi Powder

Brahmi powder is known for its calming properties that make it effective for reducing scalp itching or irritation. Its rejuvenating properties ensure that your hair roots become strong. You can use it in natural hair masks by blending it with ingredients such as coconut oil, aloe vera gel, etc.

Shikakai Powder

Shikakai powder is a natural hair cleanser that has been traditionally integrated in hair cleansing routines in Indian households. You can mix Shikakai powder with botanical extracts or water-based ingredients to cleanse your hair and scalp deeply.

Hibiscus Powder

Hibiscus powder is an excellent solution for hair conditioning and can be mixed with other herbal powders like amla or shikakai powder to achieve the desired benefits. It is mostly used in hair masks and is effective in maintaining the texture and strength of your hair strands.

Fenugreek Powder

Fenugreek powder is effective for scalp rejuvenation as it helps to boost the circulation of blood in the scalp. It is popularly used in scalp and hair masks because of its rejuvenating properties. You can use it regularly in your hair care and scalp care routine by mixing it with yogurt, aloe vera, and other herbal ingredients.

Turmeric Powder

Turmeric powder is known for its strong anti-inflammatory properties. It is mostly added to DIY face masks and face cleansers. Ensure that you mix it with hydrating ingredients such as aloe vera gel or coconut oil for maximising the benefits without any issues.

Licorice Root Powder

The revitalising effect of licorice root powder on your skin has made it a popular ingredient in various traditional skincare applications. It is used extensively in face masks and formulations. It blends perfectly with soothing ingredients such as honey, rose water, and glycerin.

Moringa Powder

Moringa powder is known as a powerful herbal powder because of its ability to boost the nourishment of your skin and hair. It can be mixed with raw honey and rosewater and applied on the face for rejuvenating it. You can mix it with curd and coconut oil and use it as a hair mask for nourishing dry and dull hair.

Rose Petal Powder

Rose petal powder is ideal for gentle skincare applications. It is mostly used in cleansing blends and face masks. It can also be combined with other herbal powders when using it for your regular skincare, scalp care, and hair care routines.

How to Use Herbal Powders in a Men’s Grooming Routine?

Here’s how herbal powders can be used in the grooming routines of men:

Herbal Face Masks

You can use any herbal powder that matches your skin type and concerns and mix it with plain water or rose water to create a simple yet effective face mask. Bases such as aloe vera gel or coconut oil can also be used for extra nourishment and rejuvenating the dry skin.

Natural Hair Masks

Amla powder, moringa powder, or any other herbal powder of your choice can be mixed with coconut oil, curd, or any other natural ingredient with conditioning properties. Once you apply these hair masks, you can rinse it with a mild shampoo after 10 or 12 minutes.

Herbal Scalp Treatments

Herbal powders such as shikakai powder, brahmi powder, reetha powder, etc. can be blended together to create a rich powder-based blend for your scalp. Massage this gently on your scalp after mixing it with plain water.

DIY Cleansers and Scrubs

For making DIY face cleansers and scrubs, you can select the herbal powders that suit your skin type. Rub the DIY face scrub or cleanser on your face gently and rise it afterwards with water to exfoliate dead skin cells, excess oil, dirt, and other toxins from your pores.

Best Herbal Powders for Different Grooming Needs

The below table suggests different types of herbal powders that can be chosen according to your grooming requirements:

Grooming Need

Herbal Powder Options

Oily Skin

Neem, Turmeric

Hair Care

Amla, Brahmi, Shikakai

Scalp Care

Neem, Fenugreek, Brahmi

Skin Cleansing

Neem, Turmeric

Gentle Skin Care

Rose Petal, Licorice

DIY Hair Masks

Hibiscus, Amla, Fenugreek

How to Choose the Right Herbal Powder?

Follow these insights to choose the right herbal powder for your daily grooming routines:

Consider Your Skin Type

Choose the herbal powder that suits your skin type i.e. depending upon whether it is oily, dry, sensitive, or combination skin. For instance, people with dry skin should choose rose petal or hibiscus powder that possess rejuvenating properties. Similarly, people who have oily skin can prefer neem or turmeric powder for their daily skincare routine.

Consider Your Hair Type

For haircare routines, the herbal powder should be chosen according to your hair type. If your hair is dry, use herbal powders such as moringa or brahmi that possess moisturising properties. People with oily scalp can use soapnut or shikakai powder that are known for their cleansing properties. Herbal powders with deep conditioning properties such as neem and amla are suitable for frizzy hair. Similarly, you can choose the right type of herbal powder for your normal hair.

Check Ingredient Quality

Only high-quality herbal powders will deliver the required results. So, always confirm the purity, freshness, botanical name, packaging standards, and processing methods used for producing the herbal powders before purchasing them.

Choose Powders Suitable for Your Intended Use

Different types of herbal powders can be used for different purposes. For instance, amla or hibiscus powders can be ideal for regular hair care routines. Similarly, neem and turmeric powder can be ideal for skin care routines. The reetha or soapnut powder can be ideal for making soaps. Similarly, choose the right herbal powders as per your DIY grooming and cosmetic formulation requirements.

Where to Buy Herbal Powders for Men’s Grooming?

Get herbal powders from reputed platforms that specialise in providing high-quality herbal powders at reasonable rates. The supplier must maintain the quality of the herbal powder and packaging consistently.

The ingredient information must be specified on the labels and the supplier must be able to provide the herbal powder in bulk quantities too. Also, the supplier must be able to produce product documentation and necessary product certifications if required. VedaOils UK is one such supplier of herbal powders and other organic ingredients for skincare, haircare, soap making supplies, essential oils, fragrance oils and DIY formulations..

Tips for Using Herbal Powders Safely

Follow these tips for using herbal powders safely for your skin, scalp, and hair:

  • Conduct a patch test to confirm if the herbal powder suits your skin or not.
  • Do not bring the herbal powders near your eyes as they might cause irritation.
  • Always prepare the DIY herbal powder blends in sanitised utensils.
  • Adhere to the instructions provided by the supplier on the packaging thoroughly when it comes to using and storing the herbal powders.
  • Store the herbal powders in a cool and dry place to maintain their quality for a long time.
  • Do not continue to use the herbal powders if you experience any inflammation or irritation while using them.

Conclusion

These were the top 10 herbal powders for men’s grooming needs. You can integrate these herbal powders in your grooming routines to make them more flexible. Select the ingredients according to your specific skin and hair type and concerns. Also, ensure that you get from trusted suppliers who are known for providing high-quality herbal powders in the market.

FAQs

  1. What are the best herbal powders for men’s grooming?

Amla, hibiscus, brahmi, shikakai, neem, and turmeric powder are the best herbal powders when it comes to the grooming needs of men.

  1. Which herbal powder is best for men’s hair care?

Amla, hibiscus, moringa, and shikakai powder are best for men’s hair care requirements.

  1. Can men use herbal powders on their face?

Yes, men can use herbal powders on their face via face masks and face packs.

  1. Which herbal powders are good for scalp care?

Neem, moringa, and hibiscus powder are good for scalp care purposes.

  1. How often should men use herbal powder for their face?

Men can use herbal powders daily for face and skin after ensuring that the specific herbal powder suits their skin or not.

Tags: , , ,
Naturals Beauty marks 18 years with 2 new skincare products

Naturals Beauty marks 18 years with 2 new skincare products

Local skincare brand Naturals Beauty is marking its 18th anniversary with two new locally made products, expanding its offering with a peptide-focused facial serum and a botanical body oil ahead of the summer season.

Image supplied

Founded in a South African mother’s kitchen, Naturals Beauty has grown into a local skincare business built around naturally inspired ingredients, local manufacturing and uncomplicated formulations.

The latest launches — the Re-Gen Peptide Power Serum and Botanical Body Oil — extend the brand’s offering from targeted facial care to everyday body care.

“Eighteen years ago, Naturals Beauty started because I wanted products I felt comfortable using on my own family,” says founder Tanya du Bois. “That belief in effective, uncomplicated skincare has never changed.”

A science-led addition to the range

The Re-Gen Peptide Power Serum introduces a more targeted approach to facial skincare, centred on a 2% biotechnology-derived peptide active produced using plant-based biotechnology.

Image supplied

The formula also contains Copper Tripeptide-1 and Malachite Extract, combining peptide technology with antioxidant and skin-conditioning ingredients. Designed for all skin types, including sensitive skin, the lightweight, fragrance-free serum can be incorporated into morning or evening skincare routines.

The product is positioned around smoother, firmer-looking and more resilient skin, while keeping application relatively simple — applied after cleansing and before moisturiser and sunscreen.

Botanical body care for summer

The Botanical Body Oil takes the brand’s approach into body care, combining Sweet Almond, Jojoba and Baobab oils with Neroli, Rose Geranium and Sweet Orange essential oils.

Image supplied

The fast-absorbing formulation is designed to nourish dry skin without leaving a heavy residue. The brand is positioning it as a summer-friendly addition to daily routines, particularly following activities such as swimming and shaving or exposure to sun and air conditioning.

The oil can be applied to slightly damp skin after bathing or showering to help retain moisture.

From kitchen beginnings to local skincare brand

Naturals Beauty was established 18 years ago after founder du Bois began making skincare products at home for her family.

That focus on accessible, locally produced skincare remains central to the business as it expands its product portfolio.

“We’ve learnt so much over 18 years, but I still come back to the same question when we develop something new: does this product have a genuine place in someone’s routine?” says du Bois.

“Beauty can become incredibly complicated. We want Naturals Beauty to be the opposite of that. Good ingredients, considered formulations and products that people actually enjoy using.”

Both new products launched on 23 August 2026 and are available through the Naturals Beauty online store and selected stockists nationwide.

The launches give the brand an opportunity to mark its anniversary while responding to two established areas of consumer skincare demand: more targeted facial treatments and simplified body-care routines.

Tags: , , , , ,
Skincare products arranged in the order they should be applied during a skincare routine

What order should products go in?

Choosing the right skincare products is only half the story. How you layer them matters too.

From applying lightweight actives before richer creams to knowing when skin should be damp or dry, the correct order helps every step of your routine work more effectively.

You’ve got the cleanser, the clever serum, the moisturiser your skin loves and an SPF you actually remember to wear.

But there’s one detail that might be quietly undoing all that good work: skincare layering.

Because using the right products is only half the story. Using them in the right order matters too.

The skincare layering rule that makes everything easier

As a general rule, skincare should move from the thinnest texture to the thickest, while also considering what each product is designed to do.

The basic order is:

  1. Cleanser
  2. Corrective or active serums
  3. Hydrating serums
  4. Moisturiser or barrier support
  5. Sunscreen in the morning

Why the pecking order?

Lightweight actives need direct access to the skin, while richer creams help create a protective layer.

Apply those heavier products too early and they can reduce the penetration of whatever comes next.

Think of it less as adding more steps and more as putting the ones you already have in the right order.

How long should you wait between skincare products?

Here’s where skincare layering gets surprisingly easy.

For most products, there’s no need to wait 10, 20 or 30 minutes between steps.

Once a product has been spread evenly and is no longer wet on the surface, you can generally move on. This is usually within 30 seconds to two minutes.

After applying a more active product, such as a retinoid, waiting one to two minutes before following with ceramides or a barrier-repair product can be particularly useful.

Should you apply skincare to damp or dry skin?

Not every product wants the same starting point.

Hyaluronic acid, hydrating peptide serums, moisturisers and barrier-repair products work well when applied to slightly damp skin.

Corrective actives require a little more thought.

Layering retinoids with strong exfoliating acids, or combining multiple exfoliating acids too aggressively, can compromise the skin barrier and increase irritation.

Don’t overcomplicate your skincare routine

Skin cycling can be useful when juggling multiple actives, particularly for sensitive skin, beginners or anyone with an impaired skin barrier.

But your foundational routine, including cleanser, antioxidants, actives, moisturiser or barrier support and sunscreen, should remain consistent.

Stronger corrective ingredients, such as retinoids and exfoliating acids, can then be adjusted according to your skin’s tolerance or the time of day.

Because great skincare isn’t about owning the most products.

It’s about using the right products, in the right order, consistently.

Read Inbound SA online

Tags: ,
Instagram/Tilly Whitfield

Skin barrier repair: the complete guide

Skin barrier repair has become a trending topic in skincare lately. The good thing about this awareness is that knowing your skin barrier helps you make informed choices for your skincare routine.

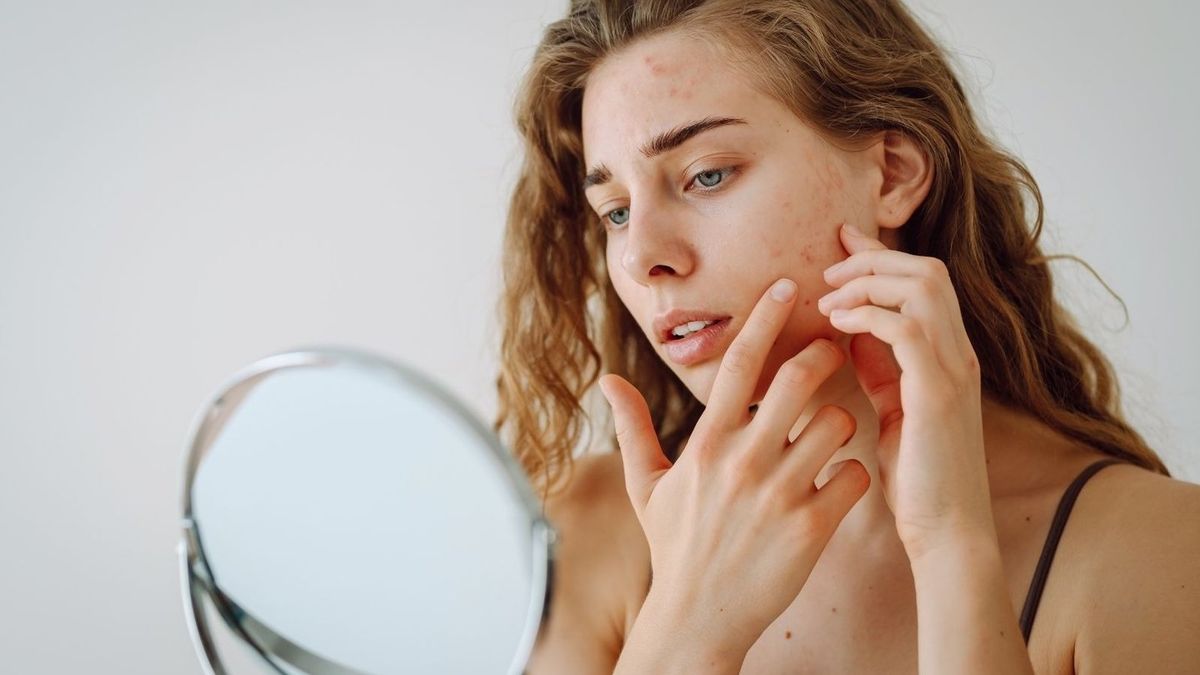
If something’s off with your skin, it’ll show you. Reactive, irritable skin. Dry, flaky patches. Breakouts, redness or acne. These can all be signs of a damaged skin barrier.

But, what causes a damaged skin barrier, and how exactly do you repair it?

This guide explains what your skin barrier is, how to tell when it is damaged, and the steps you can take to repair and restore it.

We’ve enlisted some advice from skincare expert, Fiona Brackenbury, as well as from founder of Skin Medical, Dr Sabika Karim.

Your skin barrier requires care and maintenance (Aleksandar Nakic/Getty Images)

What is the skin barrier?

Your skin barrier is the outer layer of skin, and it’s there to protect you from pollutants, bacteria and irritants.

Its job is also to retain moisture to stop your skin from drying out.

Read more: Skin barrier repair on a budget: affordable skin barrier repair under £15

The structure of the barrier is made up of cells, as well as lipids such as ceramides, cholesterol and fatty acids.

Dr Sabika Karim explains further: “‘The skin barrier is the outermost layer of the epidermis, called the stratum corneum. I often describe it as being like bricks and mortar: the corneocytes, or dead skin cells, are the bricks and the lipids surrounding them are the mortar. Together they help keep water in and irritants, allergens and microorganisms out.”

How do you know it’s damaged?

One of the clearest signs of a damaged skin barrier is increased sensitivity.

This can show up as redness and inflammation, or you might even notice a stinging, burning or itching sensation when applying your normal skincare.

It can also show up as tightness, dryness or flaky texture, as well as acne or breakouts that don’t seem to go away.

Cleveland Clinic outlines that the symptoms of a damaged skin barrier include:

  • Acne.
  • Dry, scaly and/or flaky skin
  • Infection
  • Inflammation and irritation
  • Itchiness
  • Rough patches
  • Stinging, especially when you apply skincare products
  • Tenderness or sensitivity

A compromised skin barrier can show up as sensitivity and redness, (Nuttawan Jayawan/Getty Images)

How to actually repair it

Repairing your skin barrier requires a targeted moisturiser, much like the barrier repair cream.

They’re formulated with ingredients that specifically help restore and repair any damage to your skin.

Fiona reveals: “Using a good barrier-supporting moisturiser consistently every evening can make a huge difference to how the skin feels and behaves.”

Glowery Butter Balm Barrier Restore Balm, £40 on Sephora

Glowery Butter Balm Barrier Cream, Sephora

Restoring plumpness and bounce to dry, dehydrated skin, this buttery balm from Glowery practically melts on application.

It’s supercharged with biomimetic pro-collagen tech, which allows a compromised barrier to lock in long-lasting moisture and get to work on restoring the skin. It might be rich, but it absorbs pretty fast.

Kiehl’s Ultra Facial Advanced Repair Barrier Cream, £30.40 reduced from £38

Kiehl’s Ultra Facial Advanced Repair Barrier Cream, Boots

This fast-absorbing, breathable and lightweight repair cream from Kiehl’s is a brilliant moisturiser as part of your daily routine.

Formulated with Advanced Barrier Technology, this moisturiser mimics the skin’s lipid structure to help support barrier recovery. The hard-working barrier cream makes the skin feel calm and smooth after use, making short work of dry skin.

CeraVe Advanced Repair Ointment for Very Dry and Chapped Skin, £15

CeraVe Advanced Repair Ointment, Boots

Recommended by dermatologists, this ointment from CeraVe is made from a unique gel texture, coating the skin in hyaluronic acid and three essential ceramides, in order to repair a compromised skin barrier.

The multi-purpose balm can be used on the face, body and lips, creating lasting hydration on dry, cracked or damaged skin. Best used when the skin is in need of an extra shot of moisture.

La Roche-Posay Cicaplast Balm B5 Multi-Purpose Repairing Balm, £8.80 reduced from £11

La Roche-Posay Cicaplast Balm, Lookfantastic

Containing Vitamin B5, glycerin and prebiotics, this repairing balm is jam-packed with skin-loving ingredients.

This cream even went viral on TikTok, where beauty reviewers swore by slugging their face in the product before bed to heal a damaged skin barrier.

Affiliates Writer, Danielle Fowler is a big fan: “It helped to calm my dry skin while giving my compromised barrier the extra support it needed.”

Embryolisse Lait-Crème Concentré Multi-Purpose Moisturiser, £12.24 reduced from £13.99

Embryolisse Lait-Crème Concentré, Lookfantastic

A rich, nourishing cream which repairs the skin while giving it a glass-like shine, this barrier cream has been used by countless make-up artists and celebrities – including Michelle Keegan. It can be used as a primer, moisturiser, make-up remover or as a repairing mask.

Containing essential fatty acids, vitamins and nutrients, its simple ingredients work to leave your skin satin soft and free from dryness.

Aestura ATOBARRIER365 Cream, £26

Aestura ATOBARRIER365 Cream, Sephora

Trending on social media right now, this barrier support cream from Aestura has been formulated with some targeted ingredients in mind.

Its patented barrier-boosting ceramides retain within the skin barrier for up to 18 hours, and its Triple Lipid Complex of ceramides, fatty acids, and cholesterol mimic the skin’s natural lipids. An incredibly effective formula for skin barrier repair.

The ingredients that matter: ceramides and beyond

It’s important to use the correct products to restore your skin barrier, (Supersizer/Getty Images)

Ceramides

Dr Sabika Karim says: “Ceramides are one of the most important ingredients to look for when your skin barrier is compromised. They’re vital for maintaining the skin’s barrier function and keeping skin hydrated and supple. Research shows that topical application of ceramides can improve skin barrier function, enhance moisture retention and support the repair of a damaged skin barrier.

Read more: Adult acne: why it happens and what actually helps

Applying well-formulated ceramides topically can help replenish these essential lipids, reduce water loss and restore a healthier skin barrier.”

Skincare expert, Fiona Brackenbury adds: “Ceramides are naturally occurring lipids, so the skin can produce them, but UV exposure and age, amongst many things, can deplete production. Alongside cholesterol and free fatty acids, they form the organised lipid layers that reduce water loss and help prevent irritants and other external substances from penetrating the skin.

Without ceramides, the barrier cannot function properly.”

Cholesterol and fatty acids

“Ceramides don’t work alone.” Dr Karim reveals.

“Cholesterol and free fatty acids are also naturally present in the skin barrier and together these three groups of lipids form the protective matrix surrounding our skin cells.

I particularly like formulations that combine ceramides with cholesterol and fatty acids because they more closely replicate the lipids naturally found within healthy skin.”

Fiona says: “Cholesterol accounts for 25% of the lipids and works together to create the organised structure responsible for an effective barrier.

When the skin feels tight this is often a sign that cholesterol levels are low. Topical cholesterol used in skincare is skin-identical and safe. It does not affect blood cholesterol levels.”

She went on to say: “Essential fatty acids and non-essential acids makeup around 10–15% of the skin barrier lipids. Cleansing the skin can often remove some of these lipids, and the skin can be particularly susceptible to strong surfactants. Fatty acids are vital for maintaining barrier flexibility and supporting repair.”

Glycerin and Hyaluronic Acid

“Humectants attract and hold water within the outer layers of the skin,” explains Dr Karim.

“Glycerin is one of my favourites for a compromised barrier because it is an excellent humectant and helps improve hydration. Hyaluronic acid can also increase skin hydration, but remember that hydration and barrier repair aren’t quite the same thing: humectants provide the water, while your skin barrier helps keep it there.”

Fiona reveals: “Hyaluronic Acid is an ingredient that is naturally found in the skin and declines from the age of 30, its role is to help attract and retain hydration.

A compromised barrier is like a leaky bucket, and unless the skin barrier is repaired, the skin will continue to lose water; so whilst Hyaluronic Acid won’t repair it, it can help bring temporary hydration while the skin barrier is repaired. Unfortunately, Hyaluronic Acid won’t rebuild the intercellular matrix like ceramides, cholesterol, and fatty acids.

“Glycerin, like Hyaluronic Acid, is an excellent humectant. This is particularly good for skin barrier recovery after cleansers that leave the skin feeling stripped.”

Peptides

Skincare expert, Fiona, explains: “Think of these as barrier-supporting ingredients; however, there are hundreds of different peptides, each with different functions depending on their amino-acid sequence.

Some peptides may support epidermal signalling for collagen production, skin renewal, or other processes relevant to healthy skin, but they’re not structural components of the intercellular lipid matrix, so they don’t really make the A-list barrier-supporting and strengthening ingredients for a compromised skin barrier.

Dr Karim supports this, by saying: “Peptides are signalling molecules that can support processes such as skin repair, hydration and extracellular matrix production.

They can be a useful addition to a barrier-supporting routine, but if my priority is specifically repairing a damaged barrier, I would reach for ceramides, cholesterol and fatty acids first.”

Your age can effect your skincare needs drastically, (Ekaterina Demidova/Getty Images)

Niacinamide

Dr Karim says: “Niacinamide, or vitamin B3, is a great multitasker for barrier-compromised skin. It can support the skin’s own production of ceramides and other barrier lipids, reduce transepidermal water loss and also has anti-inflammatory properties, making it particularly useful for dry, sensitive or irritated skin.”

While, Fiona refers to niacinamide as a ‘barrier-supporting ingredient’. She reveals: “Niacinamide is really clever as it can support the skin’s own synthesis of ceramides.”

SPF

Many experts agree that SPF is incredibly important in protecting the skin. In fact, Dr Karim told us: “For me, SPF is non-negotiable at every age, whether your barrier is damaged or not.”

She went on to say, “SPF doesn’t rebuild your skin barrier, but it protects it while it repairs. UV radiation causes oxidative stress and inflammation and can disrupt normal skin function, so daily broad-spectrum sun protection helps prevent further damage.”

Fiona offered her expert advice, saying: “While you are trying to repair your compromised barrier, you can’t leave the skin exposed to more stressors. SPF will help protect the skin whilst the barrier is repaired, however, depending on the level of damage to the skin barrier, some sunscreens will irritate and sting the skin, so mineral filters may be best.”

Collagen

As for collagen, its effects on a compromised skin barrier are not nearly as important as we assumed. Fiona reveals that collagen is simply a ‘hydrating ingredient’ and one that ‘creates a film of hydration over the skin’. However, she also told us that: “Collagen isn’t a major component when it comes to the role of the skin barrier.”

Therefore, when you have a damaged skin barrier, this might be an ingredient that you can comfortably skip.

Does your age or life stage change what you need?

Dr Karim says: “Absolutely. Our skin changes throughout our lives, so our skincare should change with it. Younger skin tends to produce more sebum, so the focus may be on managing oil and breakouts without damaging the skin barrier.”

“As we age, collagen declines, skin renewal slows and changes in ceramides and other barrier lipids mean the skin becomes less able to retain moisture. During perimenopause and menopause, falling oestrogen can accelerate these changes, making skin drier, thinner and more sensitive.”

“Skincare should therefore evolve with your age, hormones and skin needs, but antioxidants and daily broad-spectrum SPF remain important at every life stage.”

Fiona agrees, also adding: “Changes in our skin barrier can also come from UV exposure. We often think about UV in relation to collagen, pigmentation and premature skin ageing, but prolonged UV exposure can also disrupt barrier function and affect important barrier lipids, including ceramides. It’s worth remembering that whilst away on holiday or during the summer months, you may have exposed your skin to prolonged sun exposure, which can leave the skin barrier more vulnerable.”

Common mistakes that make it worse

When skin feels dry, rough and flaky, that’s when we’re most tempted to use scrubs, exfoliants and peels. However, this is likely causing your skin more harm than good.

Harsh and perfumed products can strip the skin of moisture, which is what keeps the barrier healthy and hydrated.

If you feel as though your skin barrier is damaged, hold off using actives such as retinoids or harsh exfoliants.

It can take up to two weeks to repair your skin barrier (Ridofranz/Getty Images)

Maintain a simple routine rather than ‘skin cycling’, and reach for a barrier-supporting cream instead.

Fiona reveals, “The biggest mistake I see people make is assuming that because their skin feels better after a day or two, their barrier is completely repaired and they can immediately reintroduce all their active ingredients. How the skin feels and the complete repair of the barrier are linked, but not strongly aligned.”

FAQs:

How long does it take to repair your skincare barrier?

In regards to how long it takes to heal your skin barrier, experts are usually in agreement about one thing: the answer isn’t straightforward.

Dr Karim says: “How long it takes to repair, depends on the level of barrier damage. Mild barrier disruption can start to improve within a few days with the right skincare, while a more significantly damaged or chronically impaired barrier may take several weeks or longer to recover. The important thing is to remove whatever is continuing to disrupt it and give the skin what it needs to repair itself.”

Skincare expert, Fiona agrees: “When it comes to repairing your skin barrier, there isn’t an exact number of hours or days that applies to everyone. It depends heavily on how disrupted the barrier is, what caused the disruption, whether irritants or stressors are continuing to impact the skin without being identified, and, of course, the health of the skin barrier to begin with.”

“With mild skin barrier disruption, you may see signs of recovery between 24 hours and 48 hours.”

“However, if the skin has become red, inflamed, irritated, tight, flaky, or starts stinging when you apply skincare, this can indicate a more significant level of barrier disruption and inflammation. In these circumstances, I would expect recovery to take at least seven to 14 days. I have seen it take up to a month; however, this depends on the severity.”

Most experts agree that the best course of action when repairing a damaged skin barrier is simplifying your routine, being consistent and refraining from changing your skincare products.

Quiz: Is my skincare barrier damaged?

Answer the questions below, then add up how many A, B and C answers you choose. This quiz is a guide, not a diagnosis, but it can help you understand whether your skin barrier might need a bit of extra attention and care.

1. How does your skin feel after cleansing?

A) Comfortable and balanced

B) Slightly tight or dry

C) Tight, itchy, stinging or uncomfortable

2. How does your skin react to products it usually tolerates?

A) It reacts as normal

B) It feels a little more sensitive than usual

C) Products sting, burn or cause redness more often

3. What does your skin look like at the moment?

A) Clear, calm and even

B) A little dull, dry or uneven in places

C) Red, flaky, inflamed, rough or irritated

4. How often do you experience dryness or flaking?

A) Rarely

B) Sometimes, especially after cleansing or active ingredients

C) Often, even when I moisturise

5. Have you recently used strong exfoliants, retinoids or multiple active ingredients?

A) No, my routine is simple and consistent

B) Yes, but only occasionally

C) Yes, and my skin has felt more sensitive since

6. How quickly does your skin feel dry again after moisturising?

A) It stays comfortable for most of the day

B) It feels dry again after a few hours

C) It still feels tight or dry soon after applying moisturiser

Your results:

Mostly A answers: Your skin barrier is likely in good condition. Keep your routine consistent and avoid using too many active ingredients at once.

Mostly B answers: Your skin barrier might be under a bit of stress. Think about simplifying your routine and focusing on gentle, hydrating and barrier-supporting products.

Mostly C answers: Your skin barrier may be compromised. Strip your routine back to the basics, prioritise moisturiser and SPF, and pause strong active ingredients until your skin feels calm again.

Tags: , , , ,
Innisfree Introduces Vitamin C Brightening Mask-to-Foam, A 2-in-1 Cleanser That Melts, Cleanses and Refines in One Step

Innisfree Introduces Vitamin C Brightening Mask-to-Foam, A 2-in-1 Cleanser That Melts, Cleanses and Refines in One Step

[National, 1st September 2026] Double cleansing can often feel like one more step in an already lengthy skincare routine, while traditional foaming cleansers can leave skin feeling dry or stripped. Recognising the growing need for skincare that is both easy and effective, Innisfree introduces its Vitamin C Brightening Mask-to-Foam, an innovative 2-in-1 brightening cleanser that combines the benefits of a wash-off mask and daily cleanser in one effortless ritual.

Designed for consumers looking to simplify their routines without compromising on cleansing or skincare benefits, the Vitamin C Brightening Mask-to-Foam transforms the way skin is cleansed. The formula begins as a rich, stretchy, gelato-like mask that grips onto impurities, excess sebum, sunscreen and everyday makeup. When massaged with warm water, it melts into a rich, gentle foam that lifts away residue, leaving skin feeling clean, smooth and refreshed.

At the heart of the formula is 30% oil-based cleansing agents, which help dissolve sunscreen, everyday makeup and impurities while providing a cushiony, low-friction cleansing experience. Vitamin C, Tangerine Water, Green Tea Enzyme, AHA and PHA work together to brighten the appearance of skin, refine texture and support a smoother, more radiant-looking complexion. Coconut-derived surfactants further support effective yet gentle cleansing. The formula is finished with a fresh citrus sensory experience featuring orange, lemon and bergamot oils. 

This unique mask-to-foam experience combines the melting action of a cleansing balm with the rinsing experience of a cleanser, creating a single-step alternative to a conventional double-cleansing routine. 

The Mask-to-Foam format offers two ways to use the product. As a daily cleanser, apply it to dry skin, massage to melt away sunscreen and makeup, add water to transform it into a soft foam and rinse. For a quick brightening reset, apply it to dry skin, leave it on for one minute, then add water, foam and rinse. 

Available in two sizes, the Innisfree Vitamin C Brightening Mask-to-Foam is priced at INR 380 for 30g and INR 1,300 for 120g, offering consumers the flexibility to choose a size suited to their skincare routine.

Shop Vitamin C Brightening Mask-to-Foam Facial Cleanser – https://www.nykaa.com/innisfree-vitamin-c-mask-to-foam-cleanser/p/26482819?productId=26482819&skuId=26482817&pps=1

The Vitamin C Brightening Mask-to-Foam is available online across Nykaa, Tira, Myntra and Amazon, making the innovative cleansing ritual easily accessible to consumers across India.

With its mask-to-foam transformation, cleansing efficacy and brightening skincare benefits, Innisfree Vitamin C Brightening Mask-to-Foam brings together what consumers increasingly seek from their routines: easy, effective and gentle skincare. By combining makeup and sunscreen removal with skin-refining and brightening benefits, the new cleanser is designed to make the everyday cleansing step feel less like a chore and more like a moment of skincare.

Tags: , , , , , , , , , ,
Best oLive
Privacy Overview

This website uses cookies so that we can provide you with the best user experience possible. Cookie information is stored in your browser and performs functions such as recognising you when you return to our website and helping our team to understand which sections of the website you find most interesting and useful.